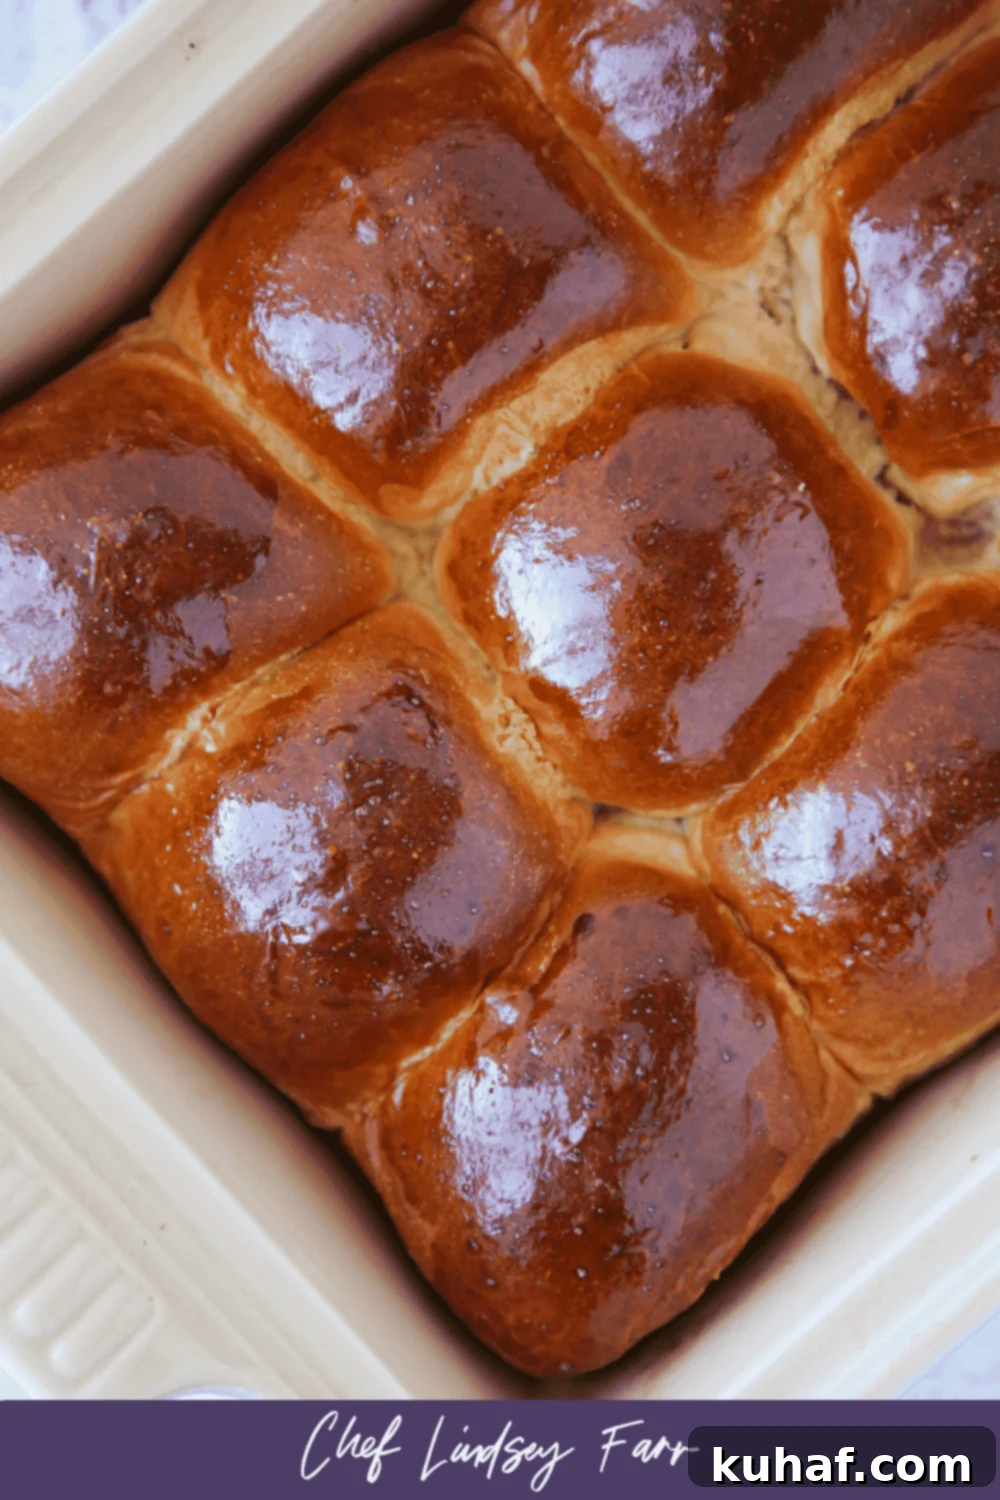
Easy Homemade Dinner Rolls: Soft, Fluffy, and Buttery Perfection
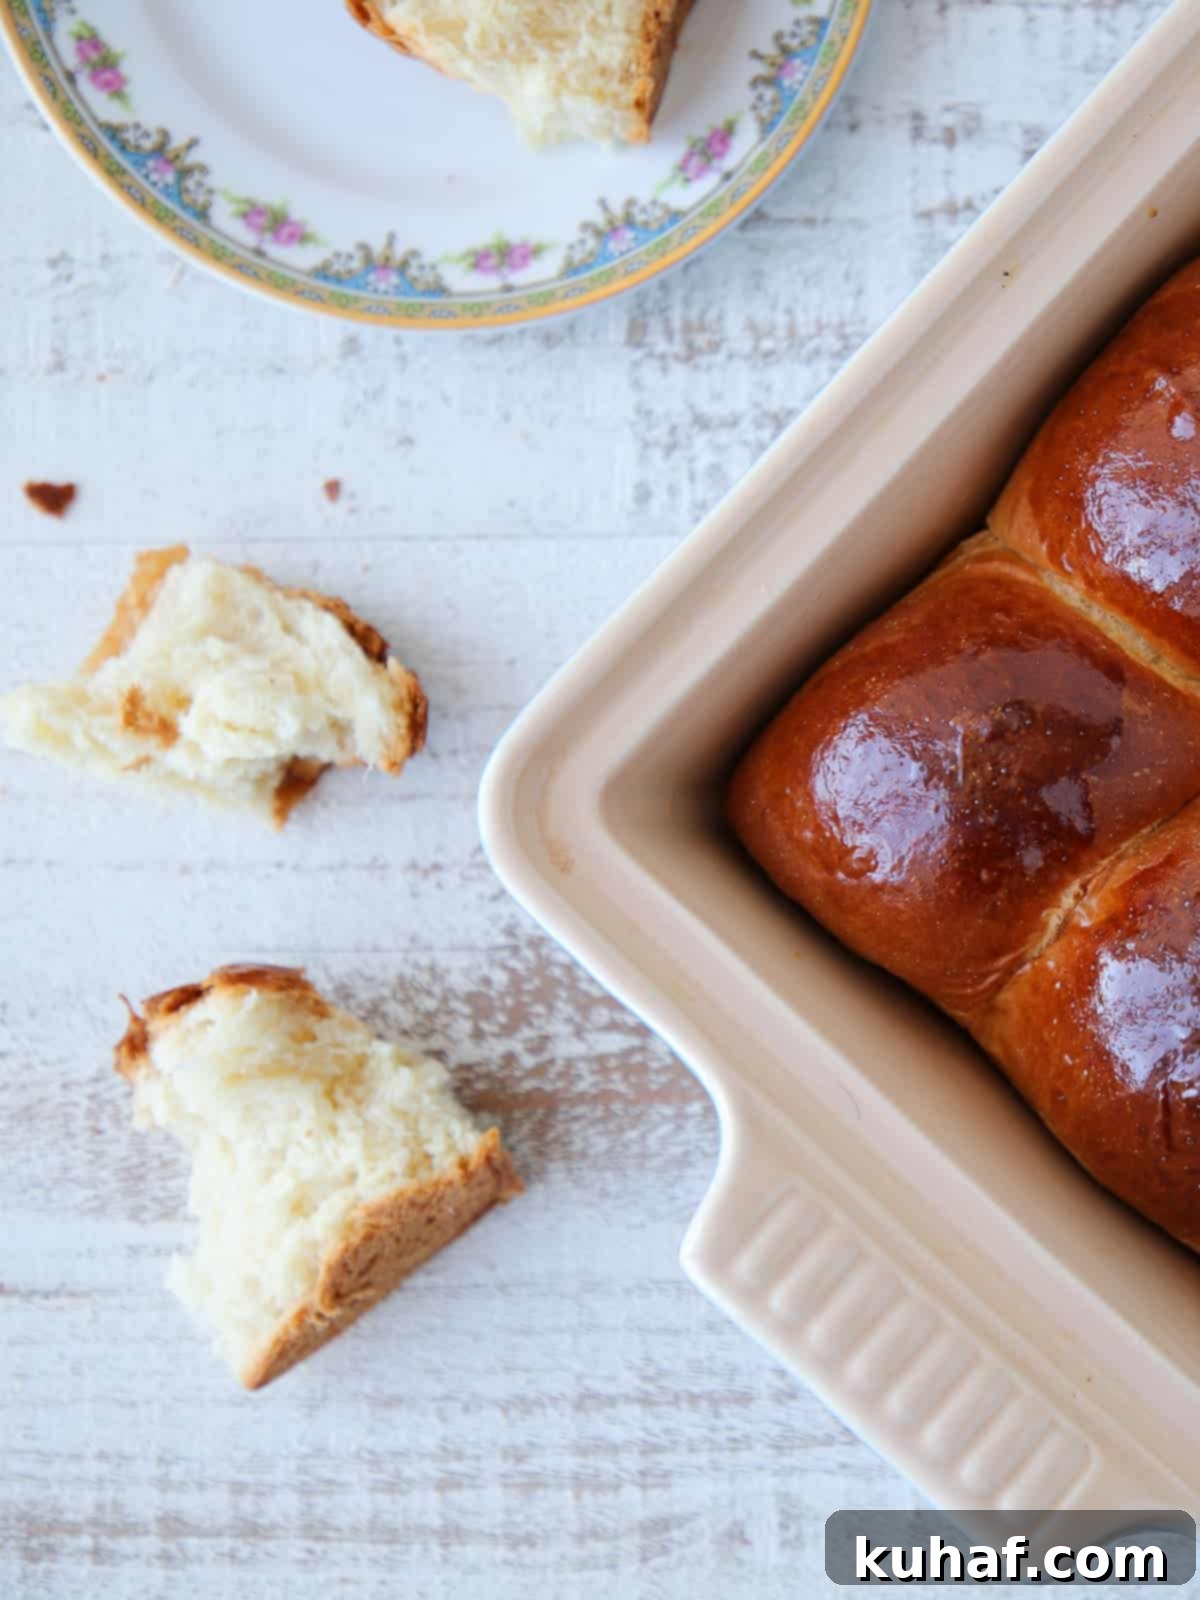
There’s nothing quite like the comforting aroma and melt-in-your-mouth taste of freshly baked, homemade dinner rolls. This easy dinner roll recipe promises to deliver just that: incredibly soft, irresistibly fluffy, and deliciously buttery rolls with minimal effort. Whether you’re a seasoned baker or just starting your journey into the world of bread making, our step-by-step instructions ensure perfect results every single time. Get ready to impress your family and friends with these golden-brown beauties that are far superior to anything store-bought!
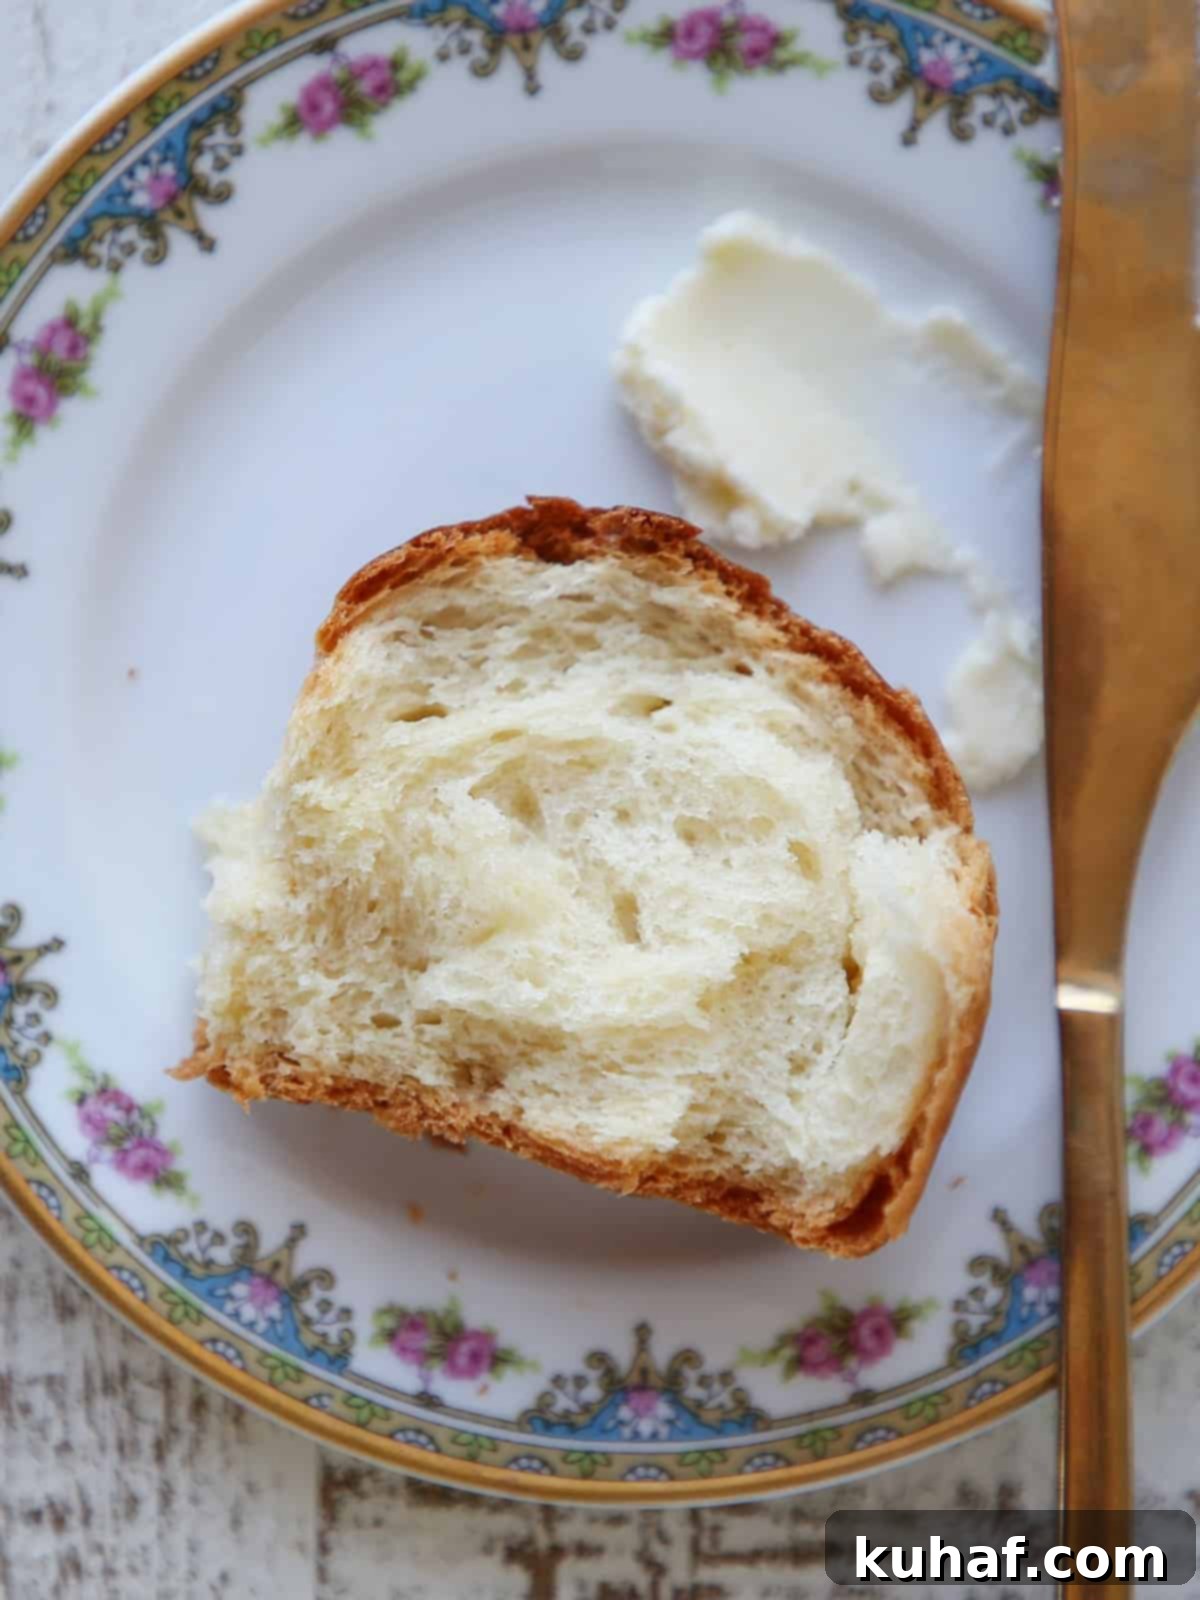
These incredibly light and delightful rolls are inspired by my popular potato rolls, sharing a similar forgiving dough that results in that coveted light, fluffy, and buttery texture. Don’t let the “dinner roll” name limit you; these homemade restaurant-quality rolls are truly versatile. They’re perfect for breakfast alongside scrambled eggs, as a hearty accompaniment to lunch, a delightful addition to any dinner spread, or simply as a comforting snack slathered with extra butter. Fair warning: you might just find yourself craving them every single night!
The ultimate baker’s reward is, of course, enjoying a warm roll straight from the oven. Once you’ve savored that moment, serve the rest of these delectable rolls with a comforting bowl of vegan chili, tender ricotta meatballs, this irresistible brown sugar glazed meatloaf recipe, or even a flavorful mustard-crusted pork. Their versatility knows no bounds, making them a staple for any meal.
Why You Will Love This Easy Dinner Roll Recipe
This recipe isn’t just about making bread; it’s about creating a moment of pure culinary delight with surprising ease. Here’s why these easy homemade dinner rolls will quickly become your new favorite:
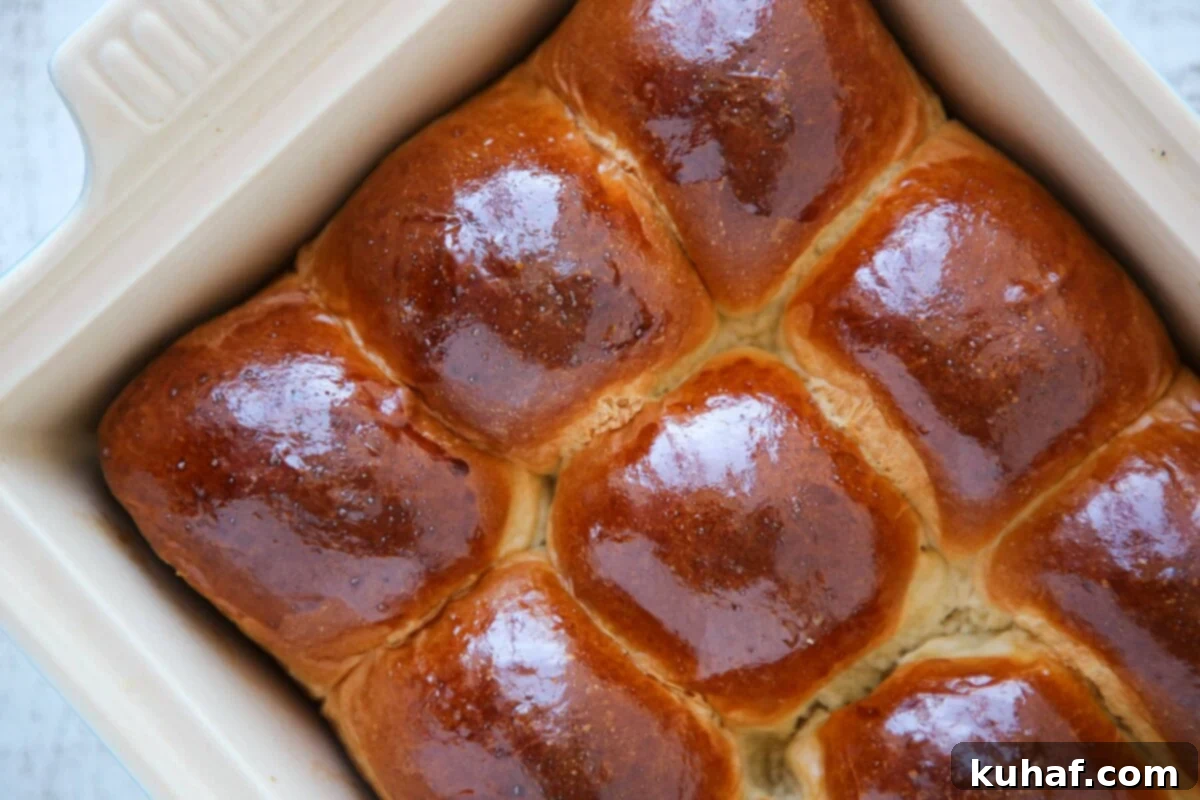
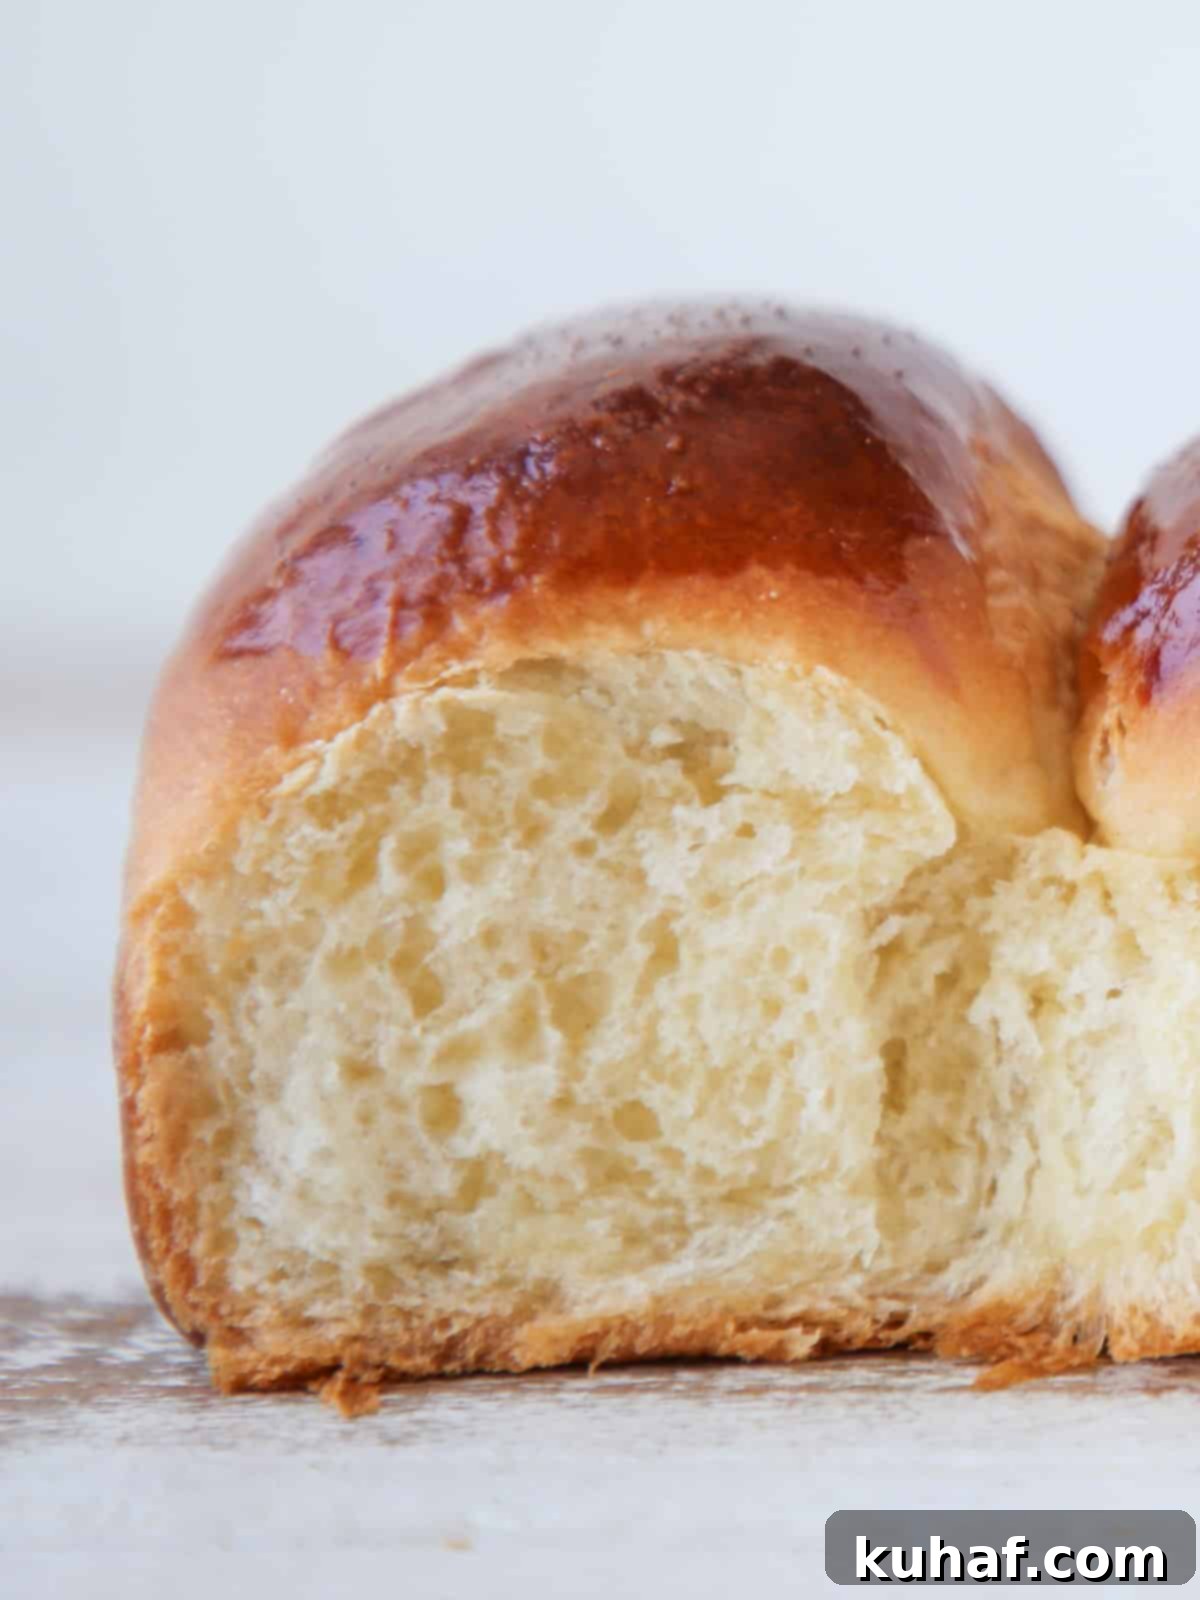
- Unbelievably Light, Fluffy, and Buttery Rolls: Each bite of these dinner rolls is a testament to perfect texture. They are incredibly soft, airy, and rich with a wonderful buttery flavor. The secret lies in using a “sponge” at the beginning, a technique that significantly contributes to their light crumb structure. And for an extra touch of indulgence, more melted butter is brushed on after baking, making them utterly irresistible!
- Effortlessly Easy to Make at Home: Say goodbye to complicated bread recipes! You can have these phenomenal homemade rolls ready in about 2 hours, from start to finish. The dough is what we call “enriched,” meaning it contains fats (like butter and milk) and sugar, which makes it wonderfully forgiving and easy to handle. This makes it a truly foolproof recipe, even for those new to yeast baking.
- Perfect for Make-Ahead Preparations: Planning a holiday feast or a busy weeknight meal? This recipe is your culinary superhero! You have the option to prepare the dough, shape the rolls, and then refrigerate them overnight. This means you can bake them fresh the next day, taking the stress out of last-minute preparations. They are absolutely perfect for Thanksgiving, Christmas, or any special occasion where fresh rolls are a must. (Though, for Easter, I might gently nudge you towards my delightful sourdough hot cross buns!)
Table of Contents
- Why You Will Love This Easy Dinner Roll Recipe
- Ingredients & Substitutions
- Variations
- Professional Tips
- How to Make Homemade Easy Dinner Rolls
- Chef Lindsey’s Recipe Tip
- Recipe FAQs
- Recommended Dinner Roll Recipes
- Easy Dinner Rolls Recipe
- Before You Go
Ingredients & Substitutions for the Best Dinner Rolls
Creating these incredible dinner rolls starts with a few simple, high-quality ingredients. Each component plays a crucial role in achieving that perfect fluffy texture and rich, buttery flavor.
- All-Purpose Flour: This is the backbone of our easy dinner rolls. All-purpose flour strikes the perfect balance, containing just the right amount of gluten to develop a strong, elastic network for a good rise, while still yielding a wonderfully tender and soft roll. If you only have bread flour on hand, you can certainly use it, but be aware that it has a higher protein content. This means gluten will develop faster, so you might need to mix for a slightly shorter time, and your final rolls might be a bit chewier than tender. Avoid cake flour as its low protein content won’t provide the necessary structure.
- Water & Milk: For optimal hydration and flavor, this recipe utilizes a thoughtful combination of water and whole milk. The water helps create a lighter crumb, while the milk contributes essential fat and a delicate richness, enhancing both the flavor and tenderness of the rolls. I prefer baking with whole milk for its full-bodied flavor and fat content, but you can successfully use skim milk or even your favorite alternative milks like almond or soy. For a truly dairy-free version, using all water is an option, though the rolls will be slightly less rich. For a tangy twist, consider using buttermilk, much like in my delicious honey whole wheat rolls!
- Kosher Salt: Don’t underestimate the power of salt in baking! Kosher salt not only enhances the overall flavor of the rolls, preventing them from tasting bland, but it also plays a vital role in regulating yeast activity and strengthening the gluten structure.
- Active Dry Yeast: Active dry yeast is my choice here because it’s reliable and provides a good balance of activity and control. It requires an initial hydration step, often called “proofing,” which gives you a visual confirmation that your yeast is alive and ready to work its magic. If you happen to have fresh yeast, you can substitute double the weight of active dry yeast (e.g., 4.5 teaspoons instead of 2.25). For instant yeast, use half the weight (e.g., about 1.125 teaspoons). While fresh or instant yeast can often be added directly to the dry ingredients, incorporating them into the initial sponge still offers the benefit of kickstarting fermentation and gluten development, which leads to a faster and more efficient dough process.
- Granulated Sugar: A touch of granulated sugar in the recipe serves multiple purposes. Firstly, it adds a subtle sweetness and promotes beautiful caramelization, giving the crust a lovely golden hue. More importantly, it acts as a readily accessible food source for the yeast, ensuring a vigorous and consistent fermentation process. For a deeper flavor profile, you could substitute dark brown sugar, honey, or maple syrup. Just note that using honey or syrup might make the dough slightly stickier due to their liquid content, requiring a bit more flour for handling.
- Unsalted Butter: Butter is key to achieving that signature rich flavor and tender crumb in our easy dinner rolls. Using unsalted butter allows you to control the overall salt content of the recipe. Ensure your butter is softened to room temperature for easier incorporation into the dough, leading to a smoother, more evenly mixed final product.
For precise measurements and quantities, please refer to the full recipe card below.
Exciting Variations for Your Easy Dinner Rolls
While these classic easy dinner rolls are perfect on their own, don’t hesitate to get creative! This versatile dough provides an excellent base for a myriad of delicious variations:
- Transform into a Loaf: Craving a soft, pull-apart loaf instead of individual rolls? This recipe can easily be adapted! Simply divide the entire dough into two equal portions and shape them into loaves. For detailed guidance on dividing, shaping, and baking a beautiful loaf, follow the instructions in my popular brioche bread recipe. The rich, tender crumb will make an excellent sandwich bread or accompaniment to any meal.
- Sweet Additions: Nuts and Dried Fruit: Elevate your rolls by incorporating sweet and textural elements. You can add classic raisins, just like in my delightful sourdough raisin bread, or draw inspiration from this vibrant cherry pecan sourdough bread. Feel free to experiment with any combination of dried fruits (like cranberries, apricots, or chopped dates) and nuts (such as walnuts, pecans, or almonds). You can add up to one pound of total mix-ins without significantly altering the dough’s structure. Add them during the last few minutes of mixing, after the window pane test is achieved.
- Savory Indulgence: Add Cheese! For a truly decadent savory roll, mix in some hard, flavorful cheeses. After the dough has passed the window pane test, incorporate about 1 to 1.5 cups of shredded cheddar, Parmesan, or Gruyère cheese. The cheese will melt into gooey pockets, adding incredible flavor. For an extra cheesy crust, sprinkle a bit more on top before baking! These savory rolls would be absolutely divine served with a hearty tomato soup or as a side to a rich stew.
- Spice Up Your Bread! Infuse your rolls with aromatic spices for a comforting twist. My pumpkin spice recipe is a fantastic choice, transforming these into seasonal pumpkin dinner rolls. You can add up to a tablespoon of your favorite spice blend – be it pumpkin spice, cinnamon, cardamom, or even a savory herb blend – without needing to adjust the core recipe. Mix the spices in with the dry ingredients for even distribution.
Professional Tips for Flawless Dinner Rolls
Even with an “easy” recipe, a few professional insights can elevate your baking from good to absolutely outstanding. Pay attention to these tips for consistently perfect, fluffy, and buttery homemade dinner rolls:
- Always Verify Your Yeast is Active: This is arguably the most critical step for any yeast bread. When you prepare the sponge, keep a close eye on it. If, after setting for 15-20 minutes in a warm spot, you don’t see any visible bubbles or foam forming on the surface, it’s a clear sign that your yeast is likely dead or inactive. Do not proceed with the recipe using dead yeast; you’ll end up with dense, heavy “rolls” rather than light, airy ones. It’s best to discard the sponge, get fresh yeast, and start over. A lively, bubbly sponge ensures a successful rise and a tender crumb.
- Utilize Room Temperature Butter and Milk: The temperature of your ingredients significantly impacts the dough’s development and proofing time. Using room temperature (softened) butter and milk allows for much easier and more consistent mixing. Cold ingredients can stiffen the dough and significantly slow down the fermentation process, leading to longer proofing times. Soft butter will cream into the other ingredients more smoothly, creating a uniform, pliable dough that proofs efficiently and yields a superior texture.
- Never Skimp on the Proofing Stages: Patience is a virtue in bread making, especially when it comes to proofing. While it might be tempting to rush or skip the initial “bulk proofing” (the first rise after mixing), this stage is paramount for developing both the flavor and the delicate, airy structure of your bread. During this time, the yeast ferments, producing gases that expand the dough and create those desirable air pockets. It also allows time for gluten to relax and flavors to deepen. A properly bulk-proofed dough will be light, airy, and full of character. Rushing this step results in dense, less flavorful rolls. The second proof, after shaping, is also crucial for the final lift and tenderness.
How to Make Homemade Easy Dinner Rolls: A Step-by-Step Guide
Follow these detailed instructions to create the most pillowy, soft, and utterly delicious dinner rolls you’ve ever tasted. Remember, baking is a joyful process, so take your time and enjoy each step! Further precise details and measurements can be found in the comprehensive recipe card below.
Make the Sponge: The Foundation of Fluffy Rolls
The sponge is a crucial step that kickstarts the yeast and gluten development, leading to an incredibly light texture.
- Step 1: Mix the sponge. In a medium-sized bowl, combine all the listed ingredients for the sponge: active dry yeast, warm whole milk (around 100°F), warm water (also 100°F), a tablespoon of sugar, and 1 ¼ cups of all-purpose flour. While you can use a spoon, mixing with your hands is often easier and more effective for this wet mixture, ensuring everything is well combined and the yeast is fully incorporated.
- Step 2: Let it rest and activate. Once thoroughly mixed, cover the bowl tightly with plastic wrap or a clean kitchen towel. Place it in a warm spot in your kitchen (like near a sunny window or in a slightly warm, turned-off oven). Allow it to rest until it becomes visibly bubbly and foamy, which typically takes about 20 minutes. This bubbling indicates your yeast is active and ready to work!
Mix the Dough: Creating the Perfect Base
Chef’s Note: I find it incredibly efficient to measure (or “scale,” as we chefs say) the remaining ingredients for the final dough while the sponge is happily bubbling away. This saves time and keeps your baking process flowing smoothly.
- Step 3: Combine the final dough ingredients. Into the bowl of a stand mixer fitted with the paddle attachment, add the remaining all-purpose flour, sugar, kosher salt, softened unsalted butter, one egg, and the activated sponge. Mix on low speed until all the ingredients are just combined and form a shaggy, cohesive dough.
- Step 4: Knead to perfection with the dough hook. Switch from the paddle attachment to the dough hook. Increase the mixer speed to medium and continue mixing for 10-15 minutes, or until a “rough window pane” can be achieved. Since this is an enriched dough (containing fats and sugar), gluten development will naturally take a bit longer than lean doughs. Be patient; this kneading is crucial for a tender, elastic crumb.
Understanding the ‘Window Pane’ Test: This test is your best friend for knowing when your dough is perfectly kneaded. To perform it, pinch off a small piece of dough (about the size of a golf ball). Gently pull and stretch the sides apart, rotating the dough as you stretch. The goal is for the dough to become thin enough that you can almost see light through it, like a translucent “window pane,” without tearing. While it might still have some rough spots, the overall structure should be elastic and stretchable. If it tears easily, the gluten network isn’t fully developed, and it needs more mixing time. This test ensures your rolls will have that desirable light, open crumb.
Proofing and Shaping: Bringing Your Rolls to Life
- Step 5: First proof (bulk fermentation). Once the dough passes the window pane test, scrape it into a clean, well-oiled bowl. Cover the bowl tightly with plastic wrap or a damp kitchen towel to prevent it from drying out. Place it in a warm, draft-free spot and allow it to proof for approximately 30 minutes. This initial rise builds flavor and structure.
- Step 6: Fold the dough for strength and texture. After the first 30-minute proof, gently “fold” the dough. To do this, grab one side of the dough, pull it upwards and outwards from the bowl, then fold it over approximately one-third of the dough. Rotate the bowl 180 degrees and repeat this folding motion with the opposite side. Then, rotate the bowl a quarter turn and repeat the same folding technique. Finally, rotate 180 degrees for the last fold. You should now have a nice, tight, somewhat square packet of dough. Recover the bowl with plastic wrap and return it to your warm spot. Allow the dough to double in size. For me, this typically takes an additional 30 minutes, but ambient temperature can affect this, so watch the dough, not just the clock.
- Step 7: Prepare your baking pan. While your dough is completing its bulk proofing and doubling in size, take a moment to prepare your baking dish. Thoroughly grease a 9 x 13-inch baking dish with cooking spray or butter. This will prevent the rolls from sticking and ensure easy removal.
- Step 8: Turn out the dough. When your dough has visibly doubled in size and feels wonderfully light and airy to the touch, gently turn it out onto a clean, unfloured surface. You’ll notice the dough is incredibly soft, supple, and surprisingly not sticky, making it a joy to work with!
- Step 9: Divide into equal portions. For consistently sized rolls that bake evenly, divide the dough into 12 equal portions. While you can eyeball it, using a kitchen scale is highly recommended for precision. Each portion should weigh approximately 87 grams for perfectly uniform buns.
- Step 10: Shape the rolls into perfect boules. Take one portion of dough. First, fold it in half, then place the seam side down on your counter. Using the palm of your hand and a gentle circular motion, roll it into a tight, smooth ball (a boule). Your thumb can act as a helpful guide to tuck the edges under, creating surface tension. Arrange each perfectly shaped roll equidistant apart in your prepared baking pan.
- Step 11: Final proof and preheat. Cover the pan loosely with plastic wrap or a kitchen towel. Return it to your warm spot for the final proof, allowing the rolls to double in size again. This usually takes about 30 minutes. Towards the end of this proofing time, preheat your oven to 350°F (175°C).
Time to Bake: Achieving Golden Perfection
The moment you’ve been waiting for! Watch your easy dinner rolls transform into golden, irresistible treats.
- Step 12: Egg wash for a golden sheen. Once the buns have doubled in size and feel light and airy, gently brush their tops with a beaten egg. This egg wash is the secret to achieving that beautiful, shiny, golden-brown crust we all adore.
- Step 13: Bake until golden. Place the pan in your preheated oven and bake for 20-22 minutes. The rolls should emerge gloriously golden brown. For absolute certainty of doneness, use an instant-read thermometer inserted into the center of one of the middle buns; it should read 185°F (85°C). If you don’t have a thermometer, a simple cake tester or toothpick inserted into the center should come out with clinging crumbs, but no wet streaks of raw dough.
- Step 14: The final buttery touch. As soon as the buns come out of the oven, while still hot, generously brush their enticing tops with melted butter. This not only enhances their rich flavor but also gives them that irresistible glossy, soft finish. Technically, they should cool slightly before serving, but honestly, who has the patience when they smell and look this good? I say, dig right in and enjoy your warm, homemade masterpieces!
Chef Lindsey’s Recipe Tip: Precision in Baking
When it comes to baking, especially bread, I cannot stress enough the importance of weighing your ingredients. While volume measurements (cups, tablespoons) can vary wildly, weighing ensures consistent, accurate results every single time. This is my favorite kitchen scale, a tool I consider essential for success in the kitchen. Conveniently, since this particular easy dinner roll recipe begins with a sponge, I typically use that waiting time to precisely measure out all my remaining ingredients. It’s an efficient use of time that guarantees the best possible outcome for your dough. Precision for the win!
Recipe FAQs: Your Questions About Easy Dinner Rolls Answered
These homemade dinner rolls are truly at their best consumed fresh, ideally on the day they are baked. However, if you find yourself with leftovers (a rare but happy occurrence!), ensure they are stored in an airtight container at room temperature to prevent them from drying out. For optimal freshness and to preserve their soft texture, aim to consume or freeze them within two days. For longer storage, wrap them tightly in plastic wrap and then aluminum foil, or place them in a freezer-safe bag, and freeze for up to 2-3 months. Thaw at room temperature and reheat gently in a warm oven for a fresh-baked experience. Leftover rolls are also phenomenal repurposed into delicious desserts like this easy bread pudding recipe! You can also make this seasonal pumpkin bread pudding with bourbon sauce for the Fall or a refreshing lemon bread pudding in the Summer!
A ‘sponge’ is an age-old bread-making technique where a portion of the flour, all of the yeast, and all of the liquid (in this recipe, warm milk and water) are combined and allowed to ferment before the remaining ingredients are added. There are several benefits to using a sponge, particularly for these easy dinner rolls. Firstly, it allows you to verify the activity of your yeast, ensuring it’s alive and ready to leaven your bread. Secondly, the pre-fermentation period gives the yeast a head start, initiating the development of the gluten network. This means less mixing or kneading time for the final dough, making the overall process faster and more efficient. Lastly, the sponge contributes to a more complex flavor profile and an incredibly light, airy texture, characteristic of these delicious rolls.
Dense dinner rolls are a common issue that can usually be attributed to one of three culprits: under-proofing, over-proofing, or inactive/dead yeast. If you under-proof the bread, the yeast hasn’t had enough time to fully activate and produce sufficient gas, meaning the rolls won’t rise properly in the oven, resulting in a compact texture. Conversely, if you over-proof the bread, it will rise rapidly initially, exhaust its food supply, and then deflate in the oven, leading to a collapsed, dense structure. Finally, if your yeast is dead or inactive from the start, it won’t produce any leavening, and your dough will remain flat, resulting in dense, hockey-puck-like rolls. Using a sponge, as this recipe instructs, is an excellent preventative measure for the latter, as it allows you to confirm your yeast’s activity before committing to the full dough. Always ensure your yeast is fresh and your proofing environment is warm and consistent.
Yes, you can absolutely use a bread machine for the mixing and kneading stages of this easy dinner roll recipe! Simply add the sponge ingredients first, then layer the remaining ‘Final Dough’ ingredients into your bread machine’s pan according to your manufacturer’s instructions (usually liquids first, then dry ingredients, then yeast). Use the “Dough” cycle. Once the cycle is complete, proceed with the shaping, final proofing, and baking steps as outlined in the recipe. This can save you hands-on time and effort, making homemade rolls even easier.
To bring leftover dinner rolls back to their warm, fluffy glory, reheating them gently is key. Preheat your oven to a low temperature, around 275-300°F (135-150°C). Place the rolls in a single layer on a baking sheet, or wrap them loosely in aluminum foil to retain moisture. Heat for about 5-10 minutes, or until warmed through and soft. Be careful not to overheat, as this can dry them out. You can also lightly brush them with a tiny bit of melted butter before reheating for an extra touch of freshness.
More Recommended Dinner Roll Recipes to Explore
Loved these easy homemade dinner rolls? If you’re eager to try more delicious bread recipes, especially variations of our beloved dinner rolls, here are some fantastic recommendations from my collection. Each recipe offers a unique twist while maintaining that comforting homemade quality:
Dinner Roll Recipes
Potato Rolls: Extra Soft & Moist
Experience an even softer, moister crumb with these delightful potato dinner rolls, a true crowd-pleaser.
Dinner Roll Recipes
Pumpkin Spice Dinner Rolls: A Seasonal Treat
Infused with warm spices, these pumpkin dinner rolls are perfect for autumn gatherings and holiday meals.
Dinner Roll Recipes
Rosemary Sourdough Rolls: Tangy & Aromatic
For those who love a bit of tang, these sourdough rolls with fresh rosemary are incredibly flavorful and satisfying.
Dinner Roll Recipes
Brioche Bun Recipe: The Ultimate Burger Upgrade
While not strictly dinner rolls, these rich brioche buns share a similar DNA and are perfect for burgers or sandwiches.
If you tried this recipe and loved it, please leave a 🌟 star rating and let me know how it goes in the comments below. I love hearing from you; your comments make my day!
Easy Dinner Rolls
Chef Lindsey
30 minutes
22 minutes
1 hour
20 minutes
2 hours
12 minutes
12
rolls
Saved
Pin Recipe
Comment
Print Recipe
Ingredients
Sponge:
-
2 ¼
teaspoons
dry active yeast
-
14
tablespoons
whole milk
100°F -
⅓
cup
water
100°F -
1
tablespoon
sugar
-
1 ¼
cups
all-purpose flour
Final Dough:
-
3
cups
all-purpose flour
-
4 ½
tablespoons
sugar
-
1
teaspoon
kosher salt
-
6 ½
tablespoons
unsalted butter
softened -
1
egg
Total Dough (Combined for Reference):
-
2 ¼
teaspoons
active dry yeast
-
14
tablespoons
whole milk
100°F -
⅓
cup
water
100°F -
5 ½
tablespoons
sugar
-
4 ⅓
cups
all-purpose flour
-
1
teaspoon
kosher salt
-
6 ½
tablespoons
unsalted butter
softened -
1
egg
Instructions
Make the Sponge:
-
Combine all the ingredients for the sponge in a medium bowl and mix with your hands. You can mix with a spoon, but it will be more difficult because the mixture is so wet.
-
Cover with plastic wrap and set in a warm spot until visibly bubbly, about 20 minutes.
Mix the Dough:
-
Add the flour, remaining sugar, salt, butter, egg, and sponge to the bowl of a stand mixer. Mix on low speed with the paddle attachment until combined.
-
Switch to the dough hook and mix on medium speed until a rough window pane can be pulled. This can take 10- 15 minutes. It is an enriched dough, meaning the gluten will develop slower.
Proofing and Shaping:
-
Scrape the dough into a well-oiled bowl, cover with plastic wrap or a kitchen towel, and allow it to proof for 30 minutes in a warm place.
-
Fold the dough by grabbing one side, pulling it upwards out of the bowl, and then folding it over ⅓ of the dough. Rotate the bowl 180 degrees and repeat with the opposite side. Rotate a quarter turn and repeat the same folding technique. Rotate the bowl 180 degrees and make the final fold. You should have a nice, tight square packet of dough. Cover with plastic wrap and allow to double in a warm place. Mine took about an additional 30 minutes.
-
While the dough is finishing its bulk proofing, grease a 9 x 13-inch baking dish with cooking spray or butter.
-
When the dough has doubled and feels light and airy when touched, turn it out onto an unfloured surface. The dough is soft, supple, and not sticky!
-
Divide into 12 equal portions. You can eyeball or weigh them.
-
Take a portion and fold it in half, and then place the seam side down on the counter. Roll in the palm of your hand into a ball and shape each into boules, using your thumb as a guide. Place each roll equidistant apart in the prepared baking pan.
-
Cover and place back in the warm spot to double. This took about 30 minutes for me. Preheat the oven to 350°F.
Time to bake:
-
When the buns are ready to bake (doubled and light and airy), brush with beaten egg.
-
Bake in the preheated oven for 20-22 minutes until golden brown or until an instant-read thermometer reads 185°F when inserted into the center of one of the middle buns. If you don’t have a thermometer, you can insert a cake tester or toothpick into the center, and it should come out with clinging crumbs but no streaks of dough!
-
Brush the hot buns with melted butter to emulate my shiny, enticing tops! Technically, they should cool, but who has the patience? I say dig right in.
Video
Notes
Yield
– This recipe consistently yields 12 perfectly sized, fluffy rolls.
Presentation Tips
: To achieve that irresistible, professional-looking shiny finish on your homemade dinner rolls, make sure to brush them generously with a beaten egg before they go into the oven. Immediately after baking, while still hot, give them another brush with melted butter. This creates a beautiful, glossy crust and adds another layer of buttery flavor!
Mastering the “Window Pane” Test
– This crucial technique helps you determine if your dough has been adequately kneaded. Take a small portion of the dough (about the size of a gumball). Gently stretch it thin between your fingers. You should be able to stretch it so thin that you can see light through it without it tearing – this is your “window pane.” If the dough tears easily, it means the gluten network isn’t fully developed, and it needs more mixing time in the stand mixer. Remember, trying to pull a window pane from a piece of dough that is too small or pulling too aggressively can also cause it to tear prematurely, so be gentle and take a slightly larger piece if needed.
Flavorful Variations
– Feel free to customize your rolls with various herbs or spices. Finely chop and mix in some of your favorite fresh herbs like thyme, sage, or basil during the last few minutes of kneading. You can even add a touch of aromatic rosemary, similar to these delicious sourdough rolls, or create a complex blend with a mixture of herbs, as I do in my popular pumpkin herb dinner rolls.
Storage Best Practices
– These easy dinner rolls are truly best enjoyed the day they are made, while still warm and fresh. However, if you have leftovers, they can be reheated in a warm oven the next day for a delightful refresh. For optimal freshness beyond a day or two, it is recommended to consume them promptly or freeze them. Wrap individual rolls tightly in plastic wrap, then place them in a freezer bag for up to two months. Thaw at room temperature and warm gently before serving.
Nutrition
Serving:
1
roll
|
Calories:
525
kcal
|
Carbohydrates:
84
g
|
Protein:
12
g
|
Fat:
16
g
|
Saturated Fat:
9
g
|
Polyunsaturated Fat:
1
g
|
Monounsaturated Fat:
4
g
|
Trans Fat:
1
g
|
Cholesterol:
65
mg
|
Sodium:
516
mg
|
Potassium:
178
mg
|
Fiber:
3
g
|
Sugar:
15
g
|
Vitamin A:
492
IU
|
Vitamin C:
0.003
mg
|
Calcium:
69
mg
|
Iron:
4
mg
Bread, Side Dish
American
525
Like this? Leave a comment below!
Before You Go: Explore More Homemade Bread Delights
I genuinely hope you enjoyed baking and savoring this recipe for buttery, soft, and easy homemade dinner rolls. There’s truly nothing more satisfying than pulling a fresh batch of warm bread from your own oven. If you’re inspired to continue your baking adventure, I encourage you to check out our other delicious yeasted bread recipes. From savory delights to comforting classics, you’ll find plenty to love, such as these incredibly flavorful parmesan garlic knots or the wholesome goodness of this potato bread. Happy baking!
