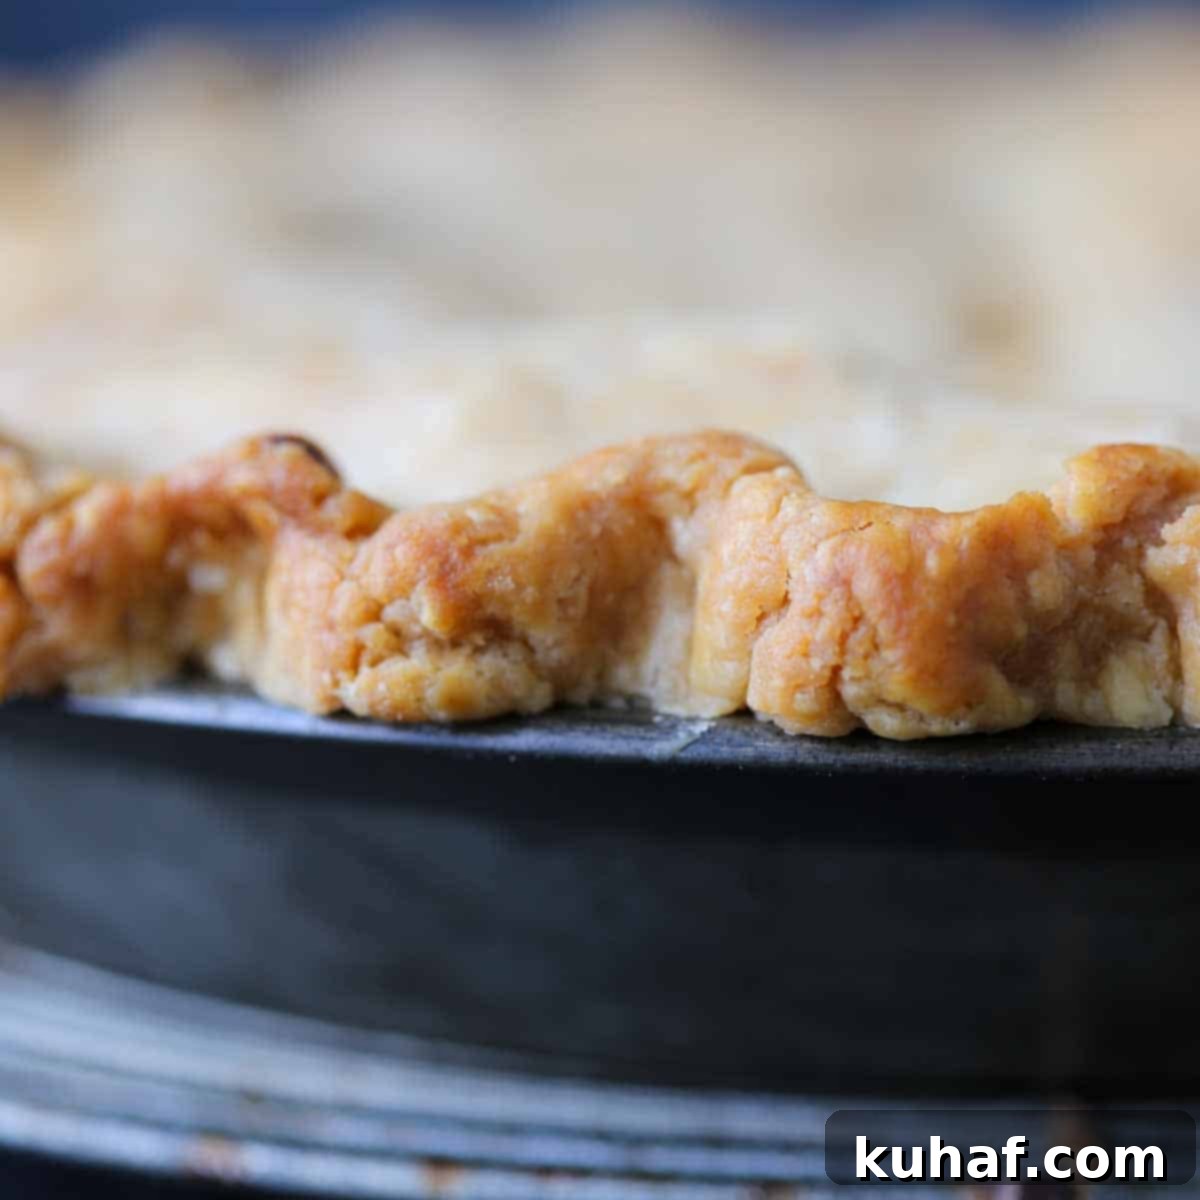
Foolproof Crisco Pie Crust: The Ultimate Recipe for Tender, Flaky Perfection
Discover the secret to a truly perfect pie with this **Crisco Pie Crust Recipe** – a professional pastry chef’s guide to achieving the most tender, flaky, and effortlessly easy pie crust. This foolproof recipe, featuring just three essential ingredients plus water, promises a crust that will never shrink, toughen, or disappoint. It’s designed to give you beautiful results every time, making it ideal for both seasoned bakers and complete novices.
This remarkable easy Crisco pie crust recipe first appeared on my blog in 2013, paired with a classic peach pie, and has since become one of my absolute favorites. Its unique texture is both tender and wonderfully flaky, offering a delicate crumb that truly melts in your mouth. The use of shortening in this recipe makes the dough incredibly easy to handle, providing a smooth and forgiving experience that novice bakers will particularly appreciate. You’ll achieve a consistently beautiful and delicious crust without the common pitfalls of other recipes.
The versatility of this Crisco pie crust means it can elevate any of your favorite pie creations. Consider using it as a fantastic alternative to a vodka pie crust in a vibrant mixed berry pie, a succulent blueberry pie, or a comforting easy pumpkin pie. It also makes a delightful substitute for an almond flour pie crust in a fresh strawberry rhubarb pie. For ultimate convenience, prepare a large batch of this dough and store it in your freezer. This way, you’ll always be ready to bake, making every baking session truly **easy as pie**!
Table of Contents
- Why You Will Love This Crisco Pie Crust Recipe
- Professional Tips for Mastering Crisco Pie Crust
- Essential Ingredients for Your Crisco Pie Crust
- How to Make the Perfect Crisco Pie Crust
- Chef Lindsey’s Expert Baking Tip
- Frequently Asked Questions About Crisco Pie Crust
- Crisco Pie Crust Recipe Card
- Before You Go: More Baking Inspiration
Why You Will Love This Crisco Pie Crust Recipe
There are countless reasons why this Crisco pie crust recipe consistently receives rave reviews. It delivers on all the promises of a truly exceptional pie, making your baking experience both enjoyable and rewarding. Here’s why it will quickly become your go-to recipe:
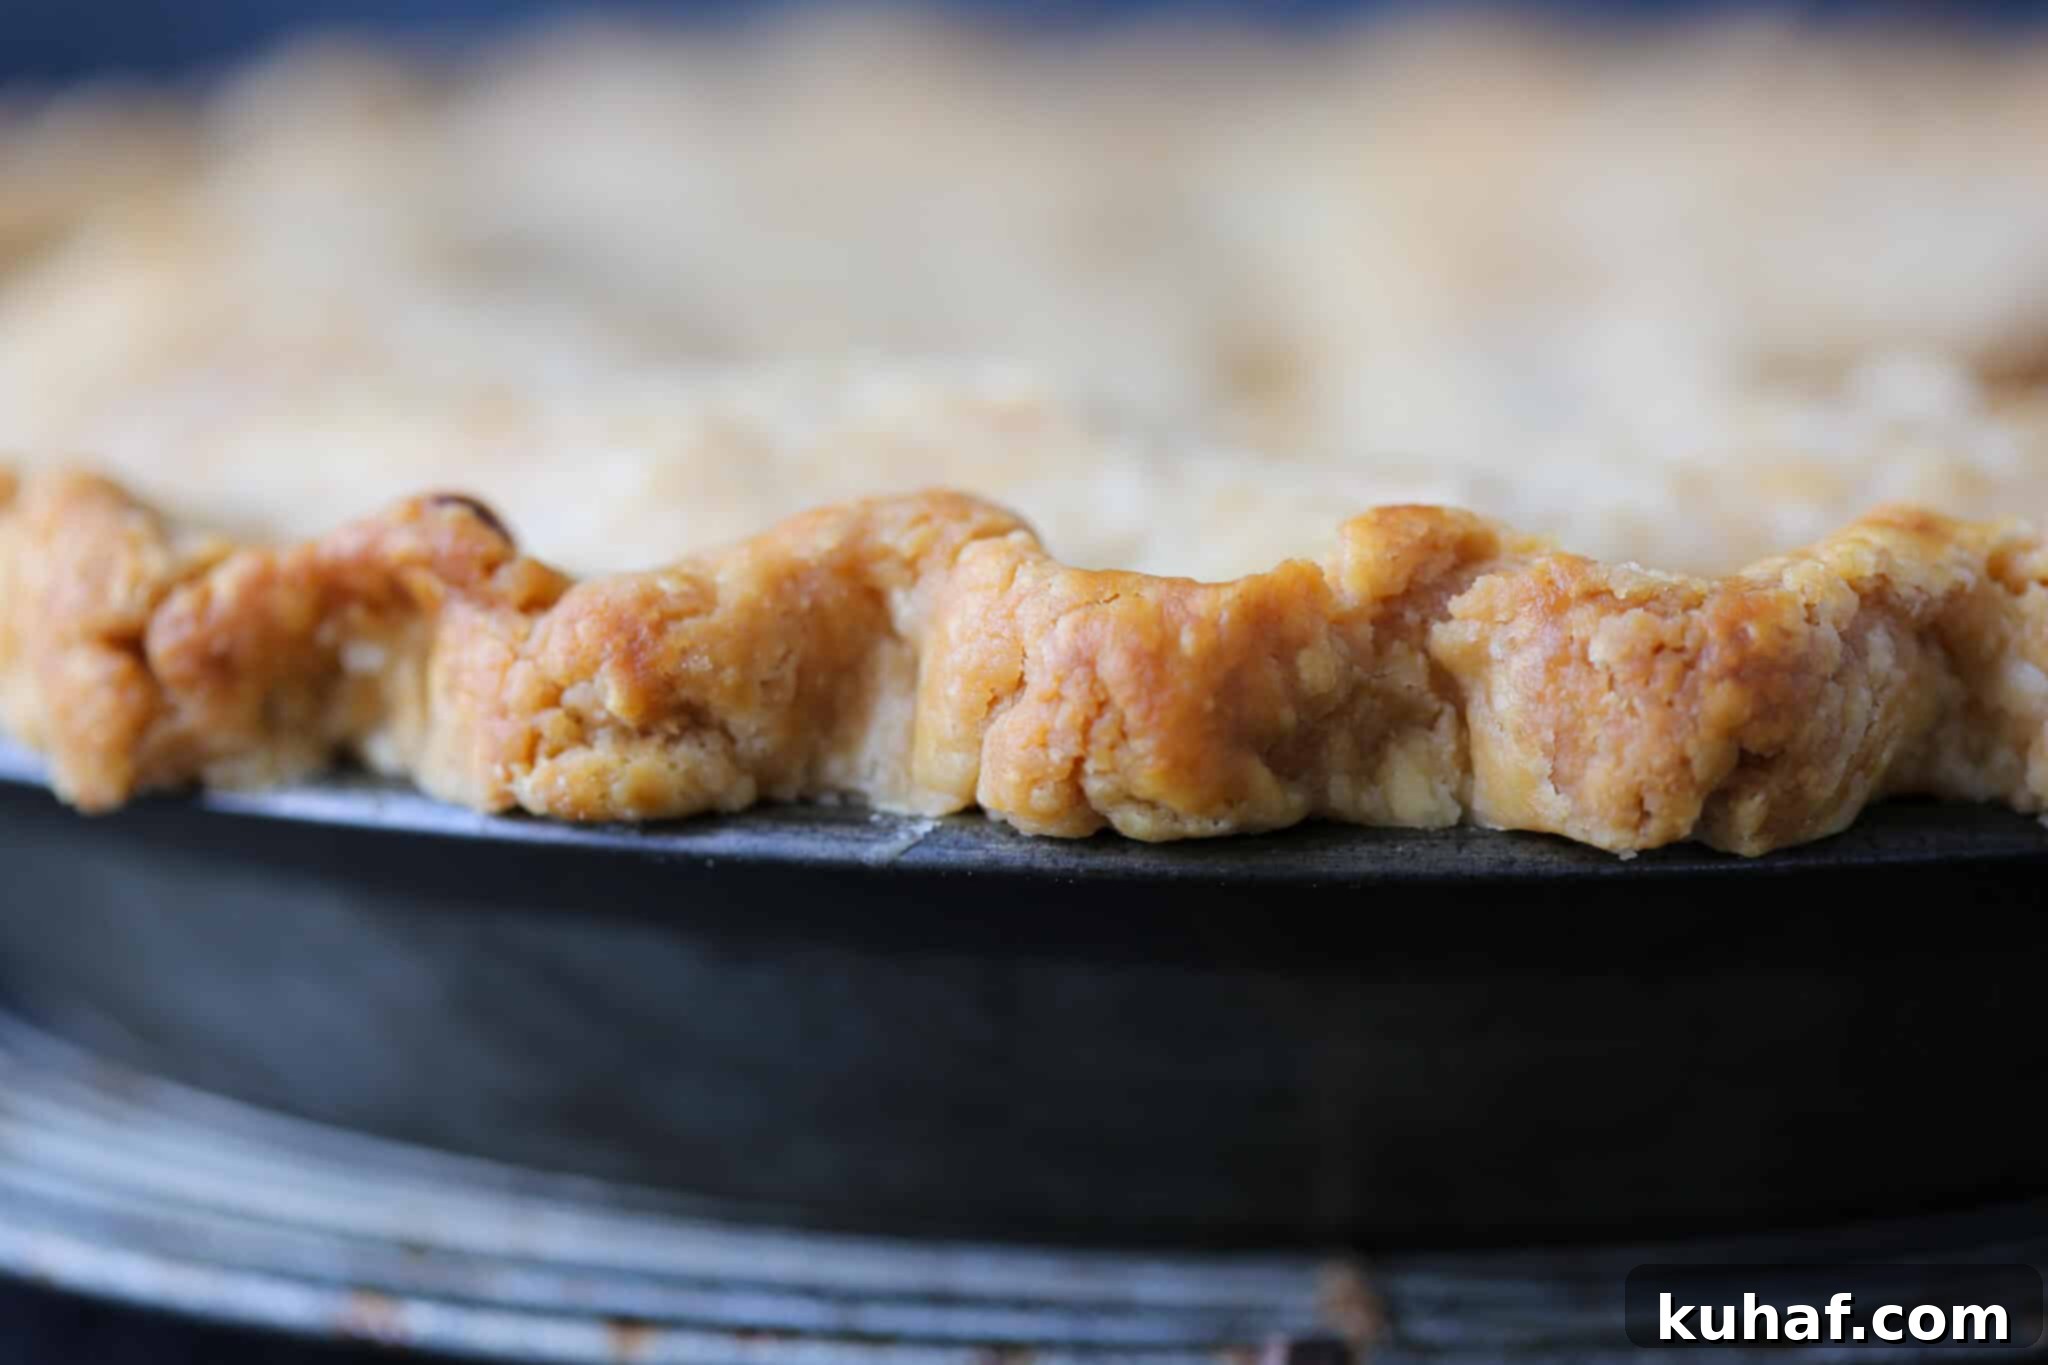
- Unrivaled Tender, Flaky Pie Crust: Prepare for a pie crust that literally melts in your mouth! This recipe yields a crust that is incredibly tender, yet boasts a delightful crispness with a delicate, almost crumbly texture. Unlike butter-based crusts, shortening creates a different kind of tenderness, resulting in a less structured, more delicate bite that truly stands out. It’s the perfect canvas for any filling.
- Easy to Make, No Shrinking, Foolproof Shortening Crust: Say goodbye to pie failures and frustrating shrunken crusts! This recipe is designed for ease and reliability. Shortening provides excellent structural integrity, ensuring your crust holds its shape beautifully during baking, virtually eliminating shrinkage. With just three simple ingredients plus water, even beginner bakers can achieve professional-level results without stress. Its forgiving nature makes it a joy to work with.
- Delicate Flavor That Lets the Pie Filling Shine: One of the greatest advantages of a shortening-based crust is its neutral flavor profile. This allows the vibrant tastes and aromas of your pie filling to truly take center stage. There’s no competing butter flavor; instead, the crust acts as a perfect complement, enhancing and bringing forward the natural deliciousness of your chosen filling. This is particularly crucial for pies where the filling is the star, such as a juicy peach pie or a tart cherry pie, ensuring every bite is a harmonious blend of textures and tastes.
Professional Tips for Mastering Crisco Pie Crust
Achieving a truly exceptional pie crust often comes down to mastering a few key techniques. As a professional pastry chef, I’m sharing my top tips to ensure your Crisco pie crust is tender, flaky, and a complete success every single time. Follow these guidelines for a foolproof baking experience:
- Keep the Crisco Frozen or Very Cold: This is arguably the most crucial tip for any shortening-based pie crust. While butter needs to be *cold* to create flaky layers, frozen Crisco ensures optimal integration into the flour without melting prematurely. I make it a habit to store my Crisco shortening in the freezer. Don’t worry, it remains surprisingly soft and pliable even when frozen, which actually makes it easier to measure and cut into the flour mixture. The cold temperature prevents the shortening from fully blending with the flour too quickly, creating tiny pockets that contribute to a tender texture once baked.
- Precise Measuring of Crisco (Two Ways):
- From a Tub: If you’re using a tub of Crisco, simply use a silicone spatula to press the shortening firmly into your measuring cup, eliminating any air pockets. Once measured, scoop it out directly onto your prepared flour mixture.
- From Sticks: Crisco sticks are convenient as they’re already pre-portioned. You can easily measure and then cube the shortening directly from the stick. While precision is always good, don’t stress too much over perfectly uniform cubes. The goal is to have cold pieces ready to be cut into the flour.
- Avoid Overworking the Dough & Handle Delicately: Even though shortening crusts are generally more forgiving and less prone to shrinking than all-butter pie crusts, it’s still vital to handle the dough gently. Overworking the dough develops gluten, which can lead to a tough crust. Mix just until the ingredients come together and the dough is no longer crumbly. A light touch will ensure the most tender and flaky result possible.
- Embrace Cold Water: Just like with cold shortening, cold water is essential. It prevents the shortening from softening too much and inhibits gluten development. I recommend measuring out a bit more water than you think you’ll need, adding ice cubes to it, and then chilling it in the refrigerator. This ensures the water is absolutely ice-cold when you’re ready to mix, contributing significantly to a tender crust.
- Don’t Be Afraid to Use Your Hands (Briefly): While tools like pastry blenders or food processors are great, sometimes a brief, gentle touch with your hands can help bring the dough together. Just remember to work quickly to avoid transferring too much body heat, which can melt the shortening.
Essential Ingredients for Your Crisco Pie Crust
Crafting the perfect Crisco pie crust requires only a few fundamental ingredients. The beauty of this recipe lies in its simplicity and the quality of these basic components. Here’s a detailed look at what you’ll need and why each plays a vital role in creating that wonderfully tender and flaky crust:
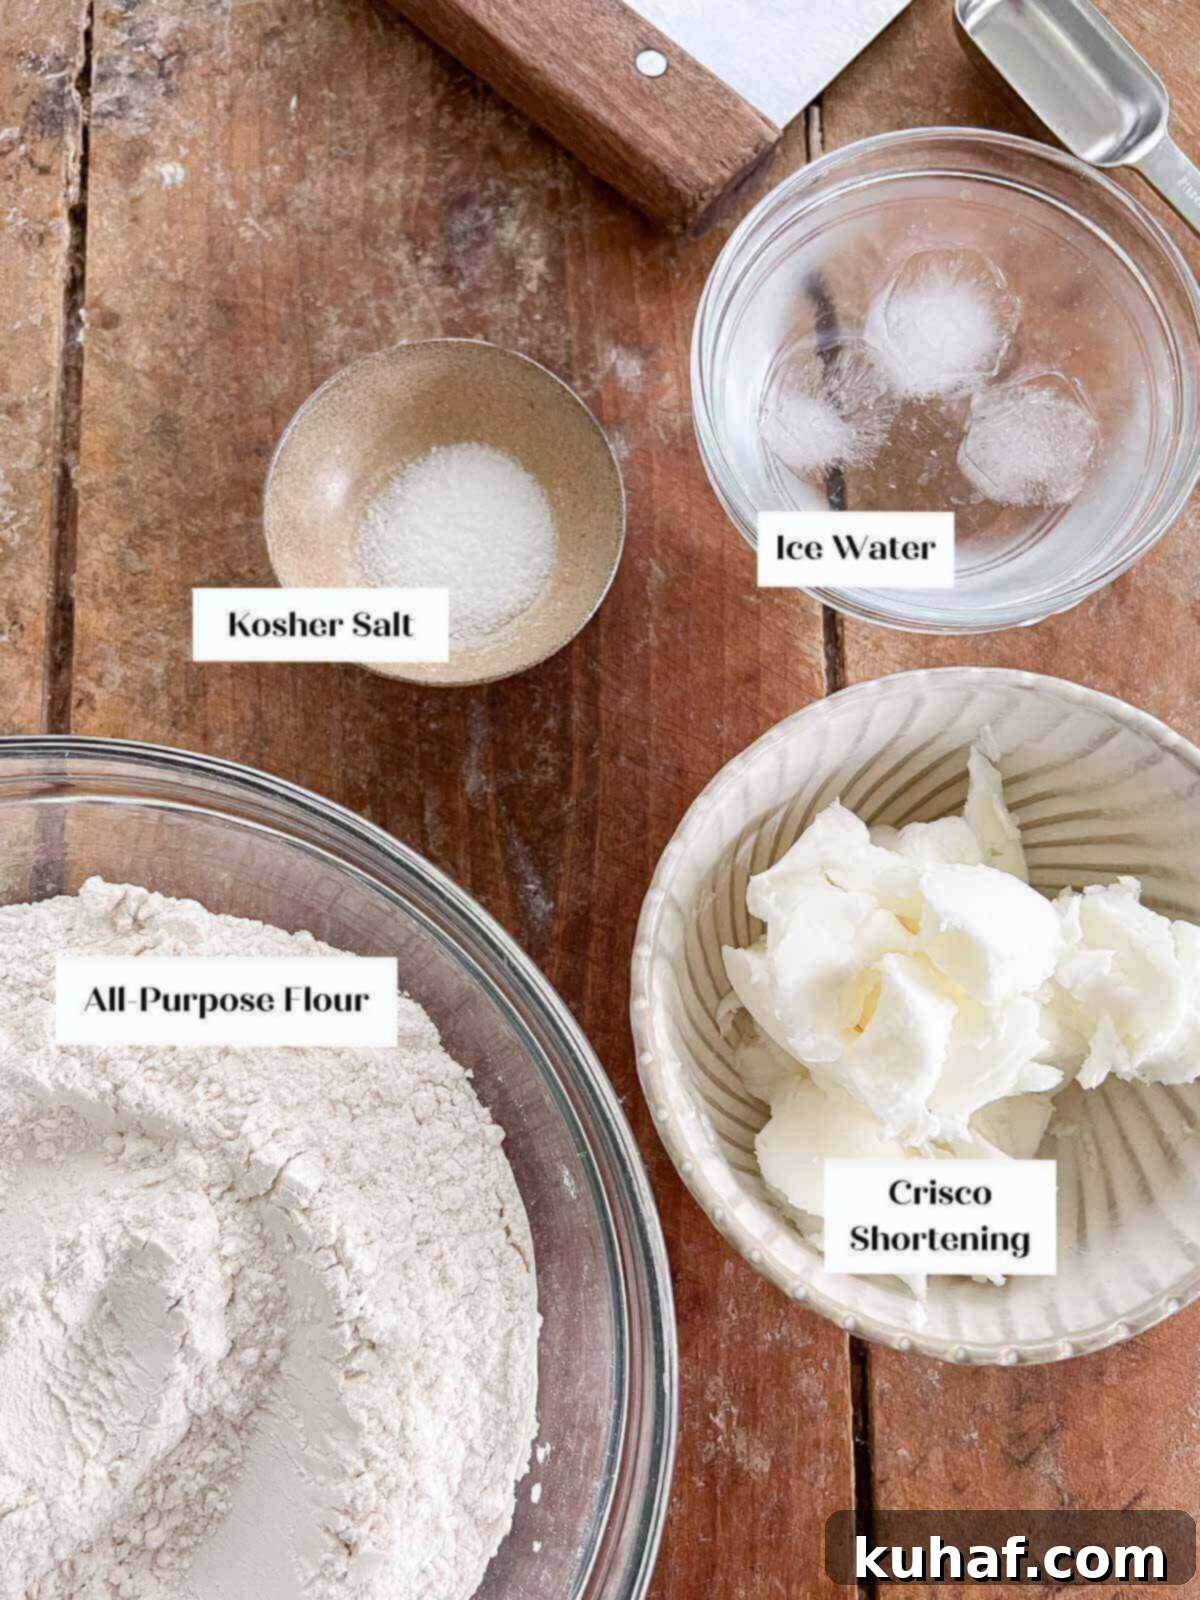
- All-purpose Flour: This is the backbone of your pie crust. I typically use high-quality all-purpose flour because its moderate protein content provides just enough structure without making the crust tough. For an even more tender and delicate pie crust, you could experiment with pastry flour, which has a lower protein content, yielding a softer crumb. Ensure your flour is fresh for optimal results.
- Kosher Salt: Don’t underestimate the power of salt in baking! I always use kosher salt. It plays a crucial role not only in seasoning the crust itself but also in heightening the overall flavor profile of your finished pie. Without it, your pastries can taste dull or flat, failing to bring out the best in your fillings. It balances the sweetness of fruit pies and adds depth to savory ones.
- Shortening (Crisco Vegetable Shortening): The star of this recipe! Shortening is what gives this pie crust its signature tenderness and prevents shrinkage. I highly recommend freezing your Crisco vegetable shortening before using it in pie crusts. Unlike butter, shortening remains pliable even when frozen, allowing it to cut beautifully into the flour. It also warms up faster than butter, meaning you have to work a bit quicker, but its unique fat composition contributes to a superior, melt-in-your-mouth texture that is distinctly different from butter-based crusts.
- Water (Ice Cold): Temperature is key here. I always measure out a little extra water than the recipe calls for, add a few ice cubes, and then chill it in the refrigerator until I’m absolutely ready to mix. Using ice-cold water is vital for preventing the shortening from melting too quickly and for inhibiting excessive gluten development in the flour. This cold shock ensures a tender and flaky crust that holds its shape.
For precise measurements and additional details, refer to the complete recipe card below.
How to Make the Perfect Crisco Pie Crust
Follow these step-by-step instructions carefully to create a consistently perfect Crisco Pie Crust every single time. These detailed guidelines will ensure you achieve that desired tender, flaky texture without any hassle. Further details, precise measurements, and a printable version can be found in the recipe card at the bottom of this article.
Step 1: Combine Dry Ingredients and Prepare Shortening.
In a medium-sized mixing bowl, thoroughly whisk together your all-purpose flour and kosher salt. This ensures the salt is evenly distributed throughout the flour, contributing to a balanced flavor in every bite. Take your frozen Crisco shortening and cut it into small cubes, or spoon it into manageable chunks. Add these cold pieces directly to your flour mixture.
Step 2: Cut the Shortening into the Flour.
The goal here is to evenly distribute the shortening throughout the flour. You can achieve this using a pastry blender, a bench scraper (using a chopping motion), or by employing the paddle attachment in the bowl of a stand mixer. Work the shortening into the flour until the mixture resembles coarse crumbs. Unlike butter pie crusts, where larger pea-sized pieces of butter are often desired, with shortening, you want it to be more finely incorporated. There should be no large, visible chunks of shortening remaining; aim for a consistent, sandy-like texture with some slightly larger, flattened pieces.
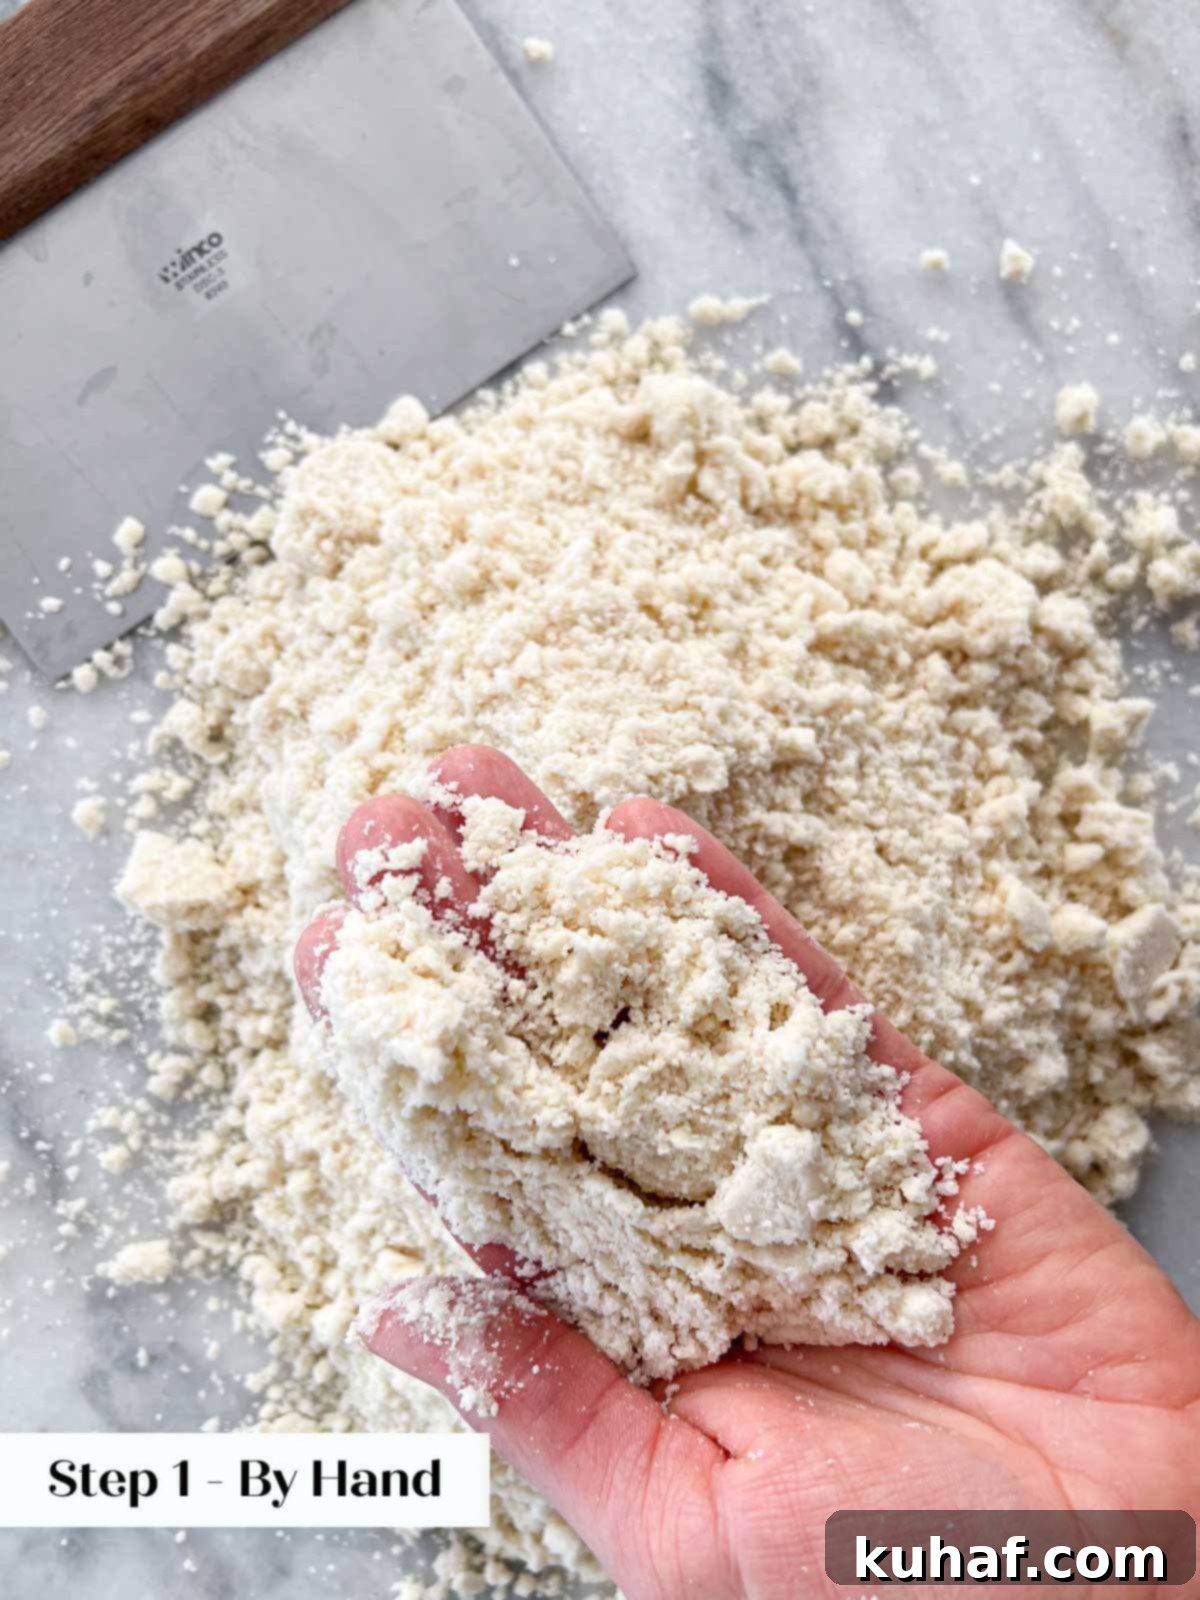
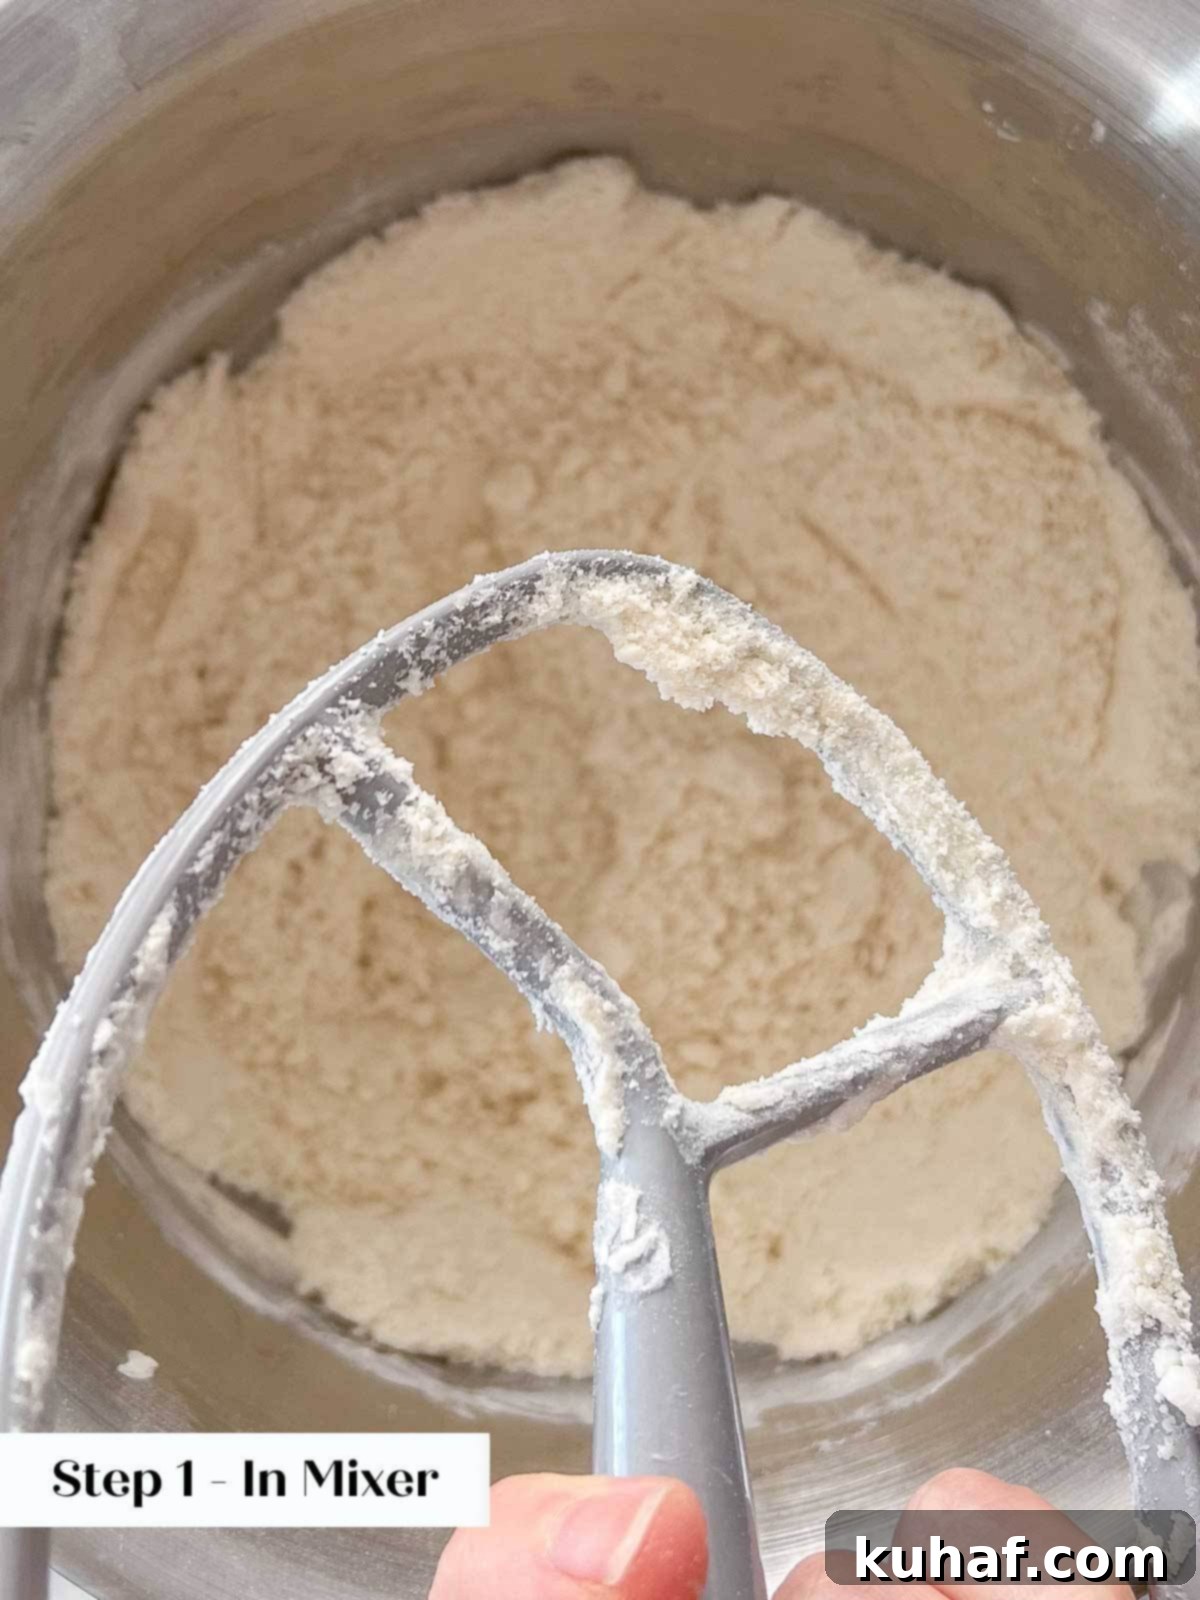
This is a critical distinction from butter pie crusts. For shortening crusts, you generally don’t want unincorporated chunks of shortening. Shortening behaves differently than butter in a hot oven – it doesn’t create steam pockets in the same way. Cutting it in completely ensures the most tender and uniform crust texture.
Step 3: Gradually Add Ice Cold Water.
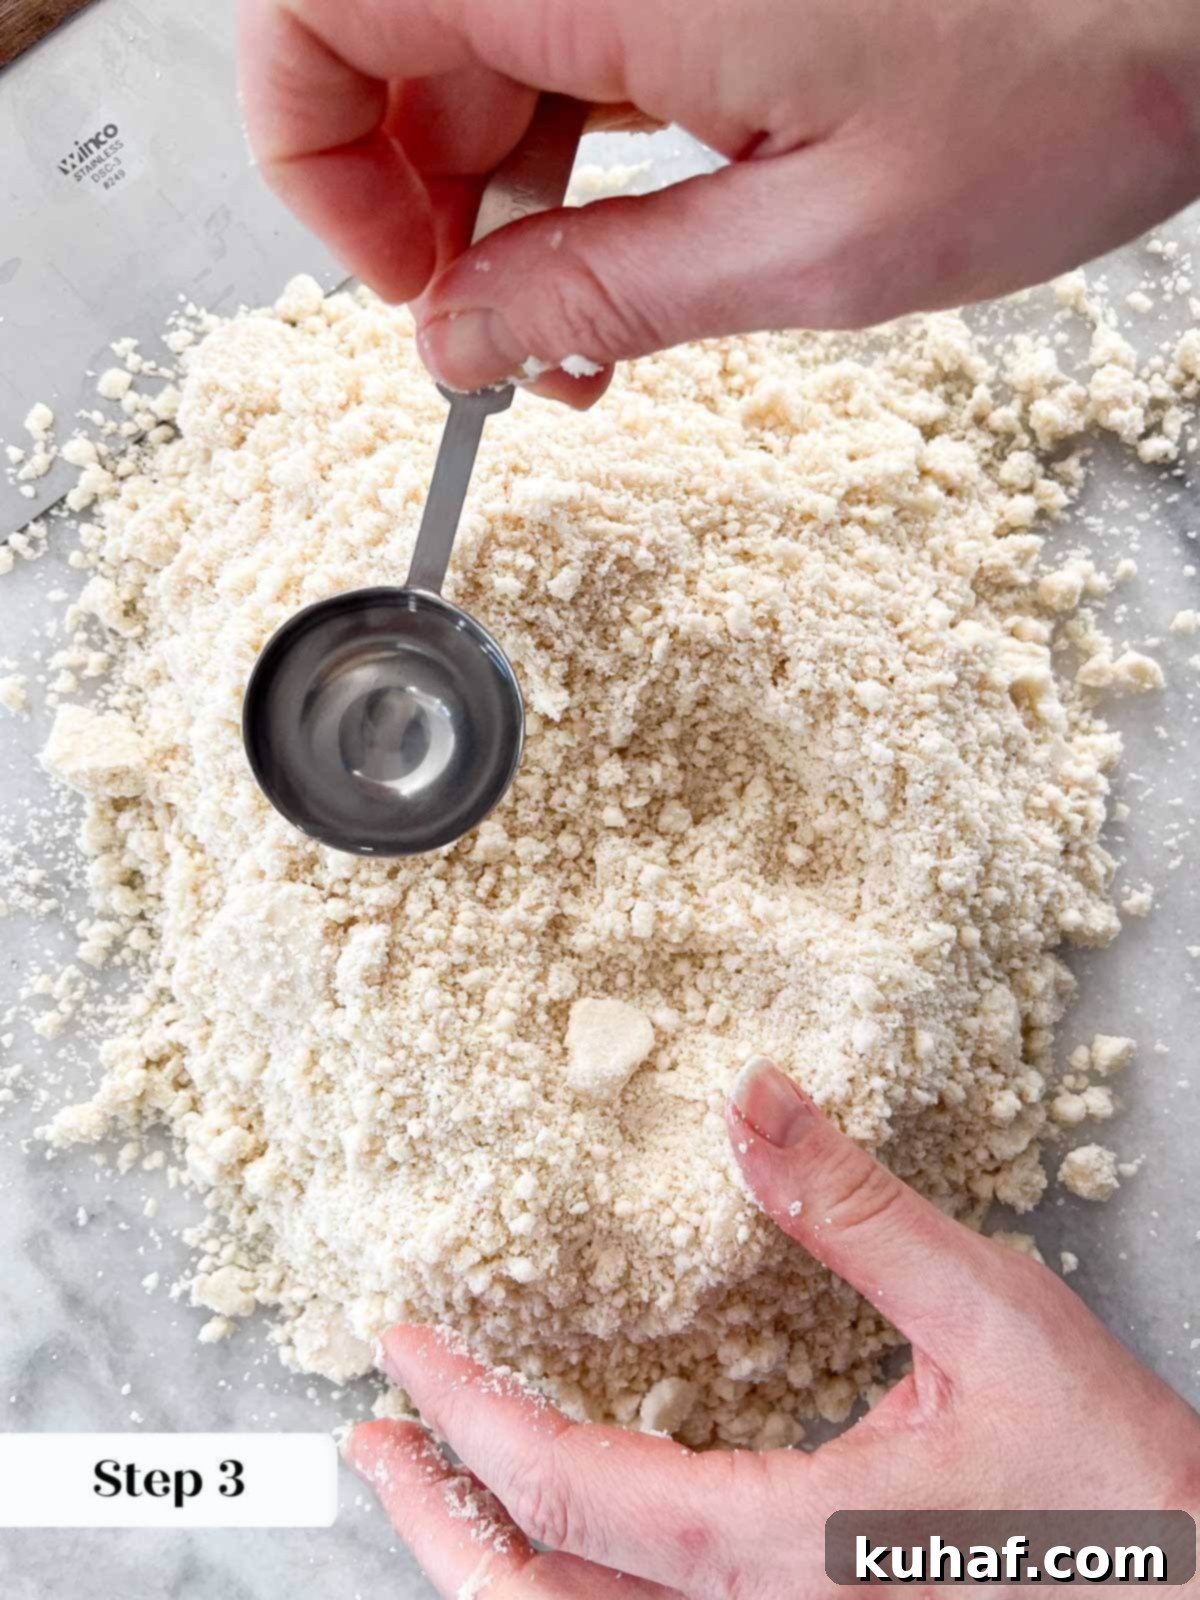
If you used a stand mixer, transfer the crumbly mixture into a large bowl or onto a clean, smooth surface (like a pastry board or counter). Begin adding your ice-cold water, one tablespoon at a time. This gradual addition is important because the exact amount of water can vary based on flour type, humidity, and other factors. Start with the suggested amount and add more only if needed.
Step 4: Bring the Dough Together.
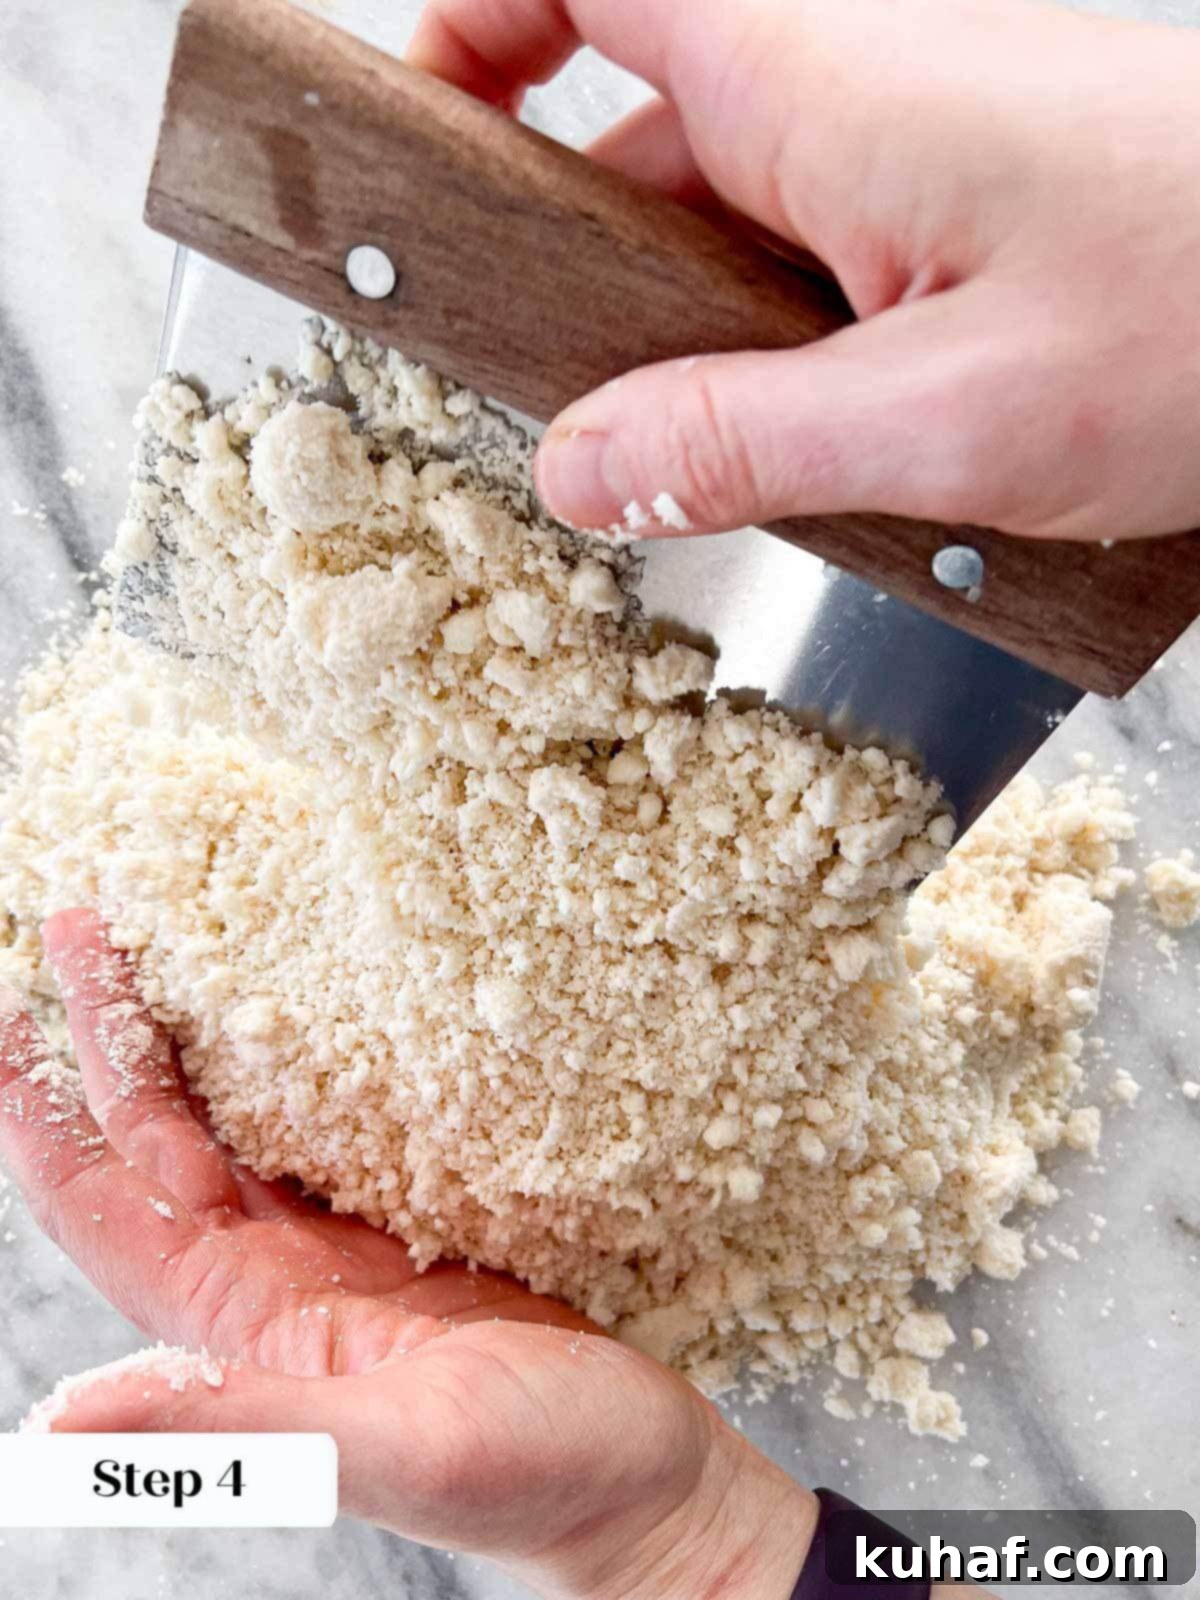
Using a bench scraper or a fork, gently toss and mix the dough. The goal is for the dough to just hold together when pressed, without being wet or sticky. It should no longer appear crumbly. Be careful not to knead or overwork the dough; excessive handling will develop gluten, leading to a tough pie crust. Mix just until it forms a cohesive ball.
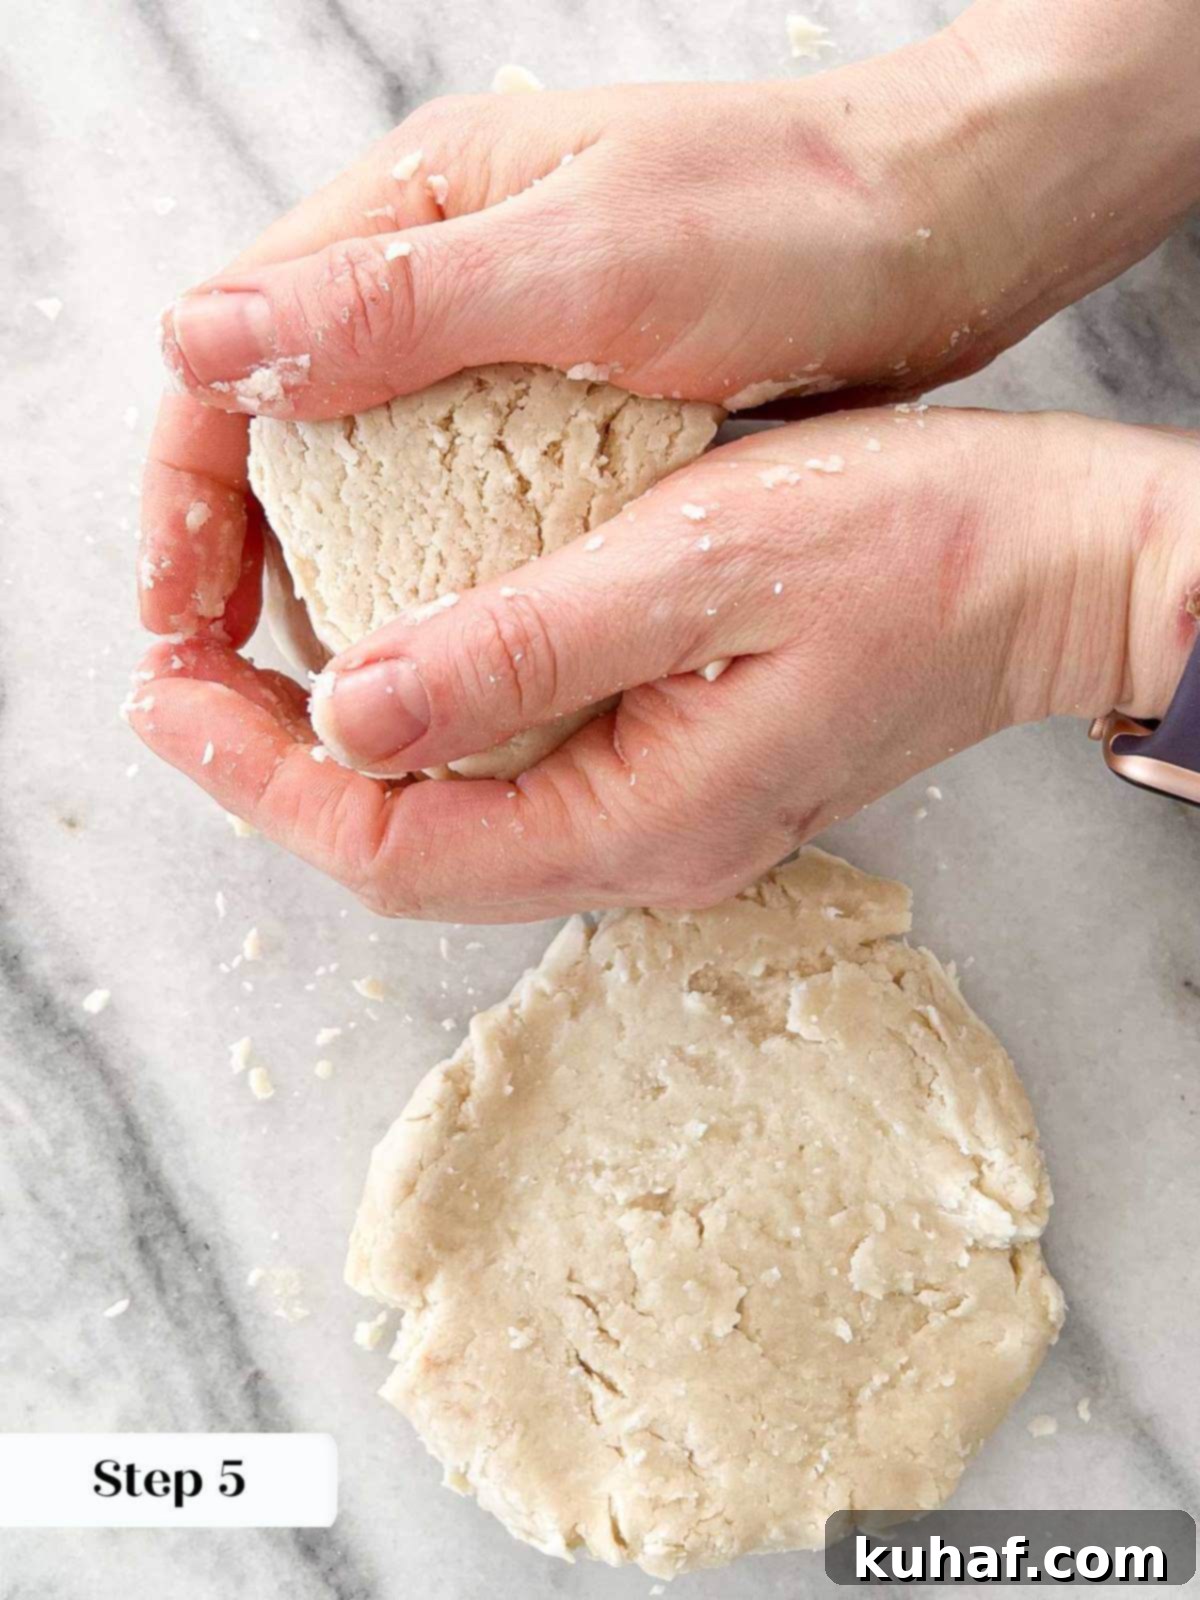
Step 5: Divide and Chill the Dough.
Once your dough has just come together, decide how you’ll be using it. If you’re making two single-crust pies, divide the dough exactly in half. For double-crust pies (especially those without a lattice top), I find it beneficial to split the dough into a 2/3 portion for the bottom crust and a 1/3 portion for the top crust. This allows for a more substantial base and a thinner, elegant top. Gently press each portion flat into a disk shape, then wrap tightly with plastic wrap. Refrigerate the dough for at least 30 minutes before rolling. Chilling allows the gluten to relax and the shortening to firm up, making the dough much easier to roll out and preventing shrinkage.
For double-crust pies (those that are not latticed), a 2/3 to 1/3 split for the bottom and top crusts respectively often provides the best structural integrity and aesthetic.
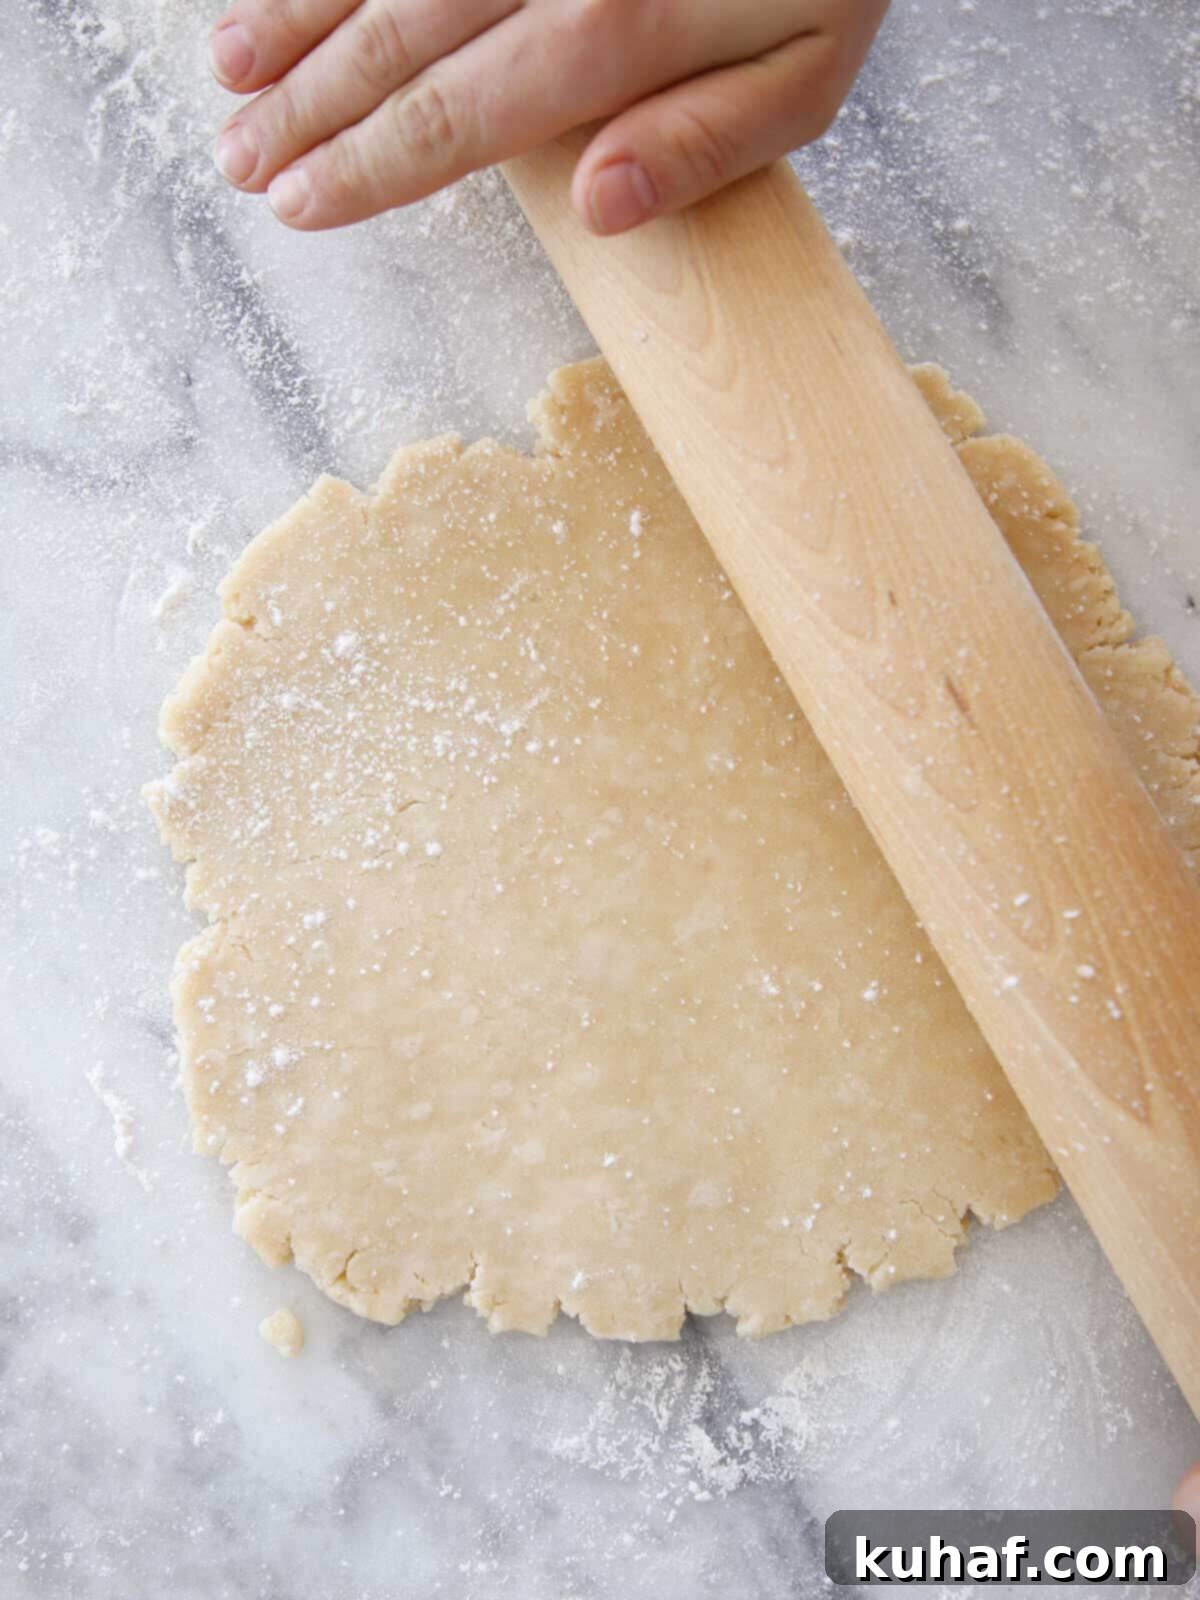
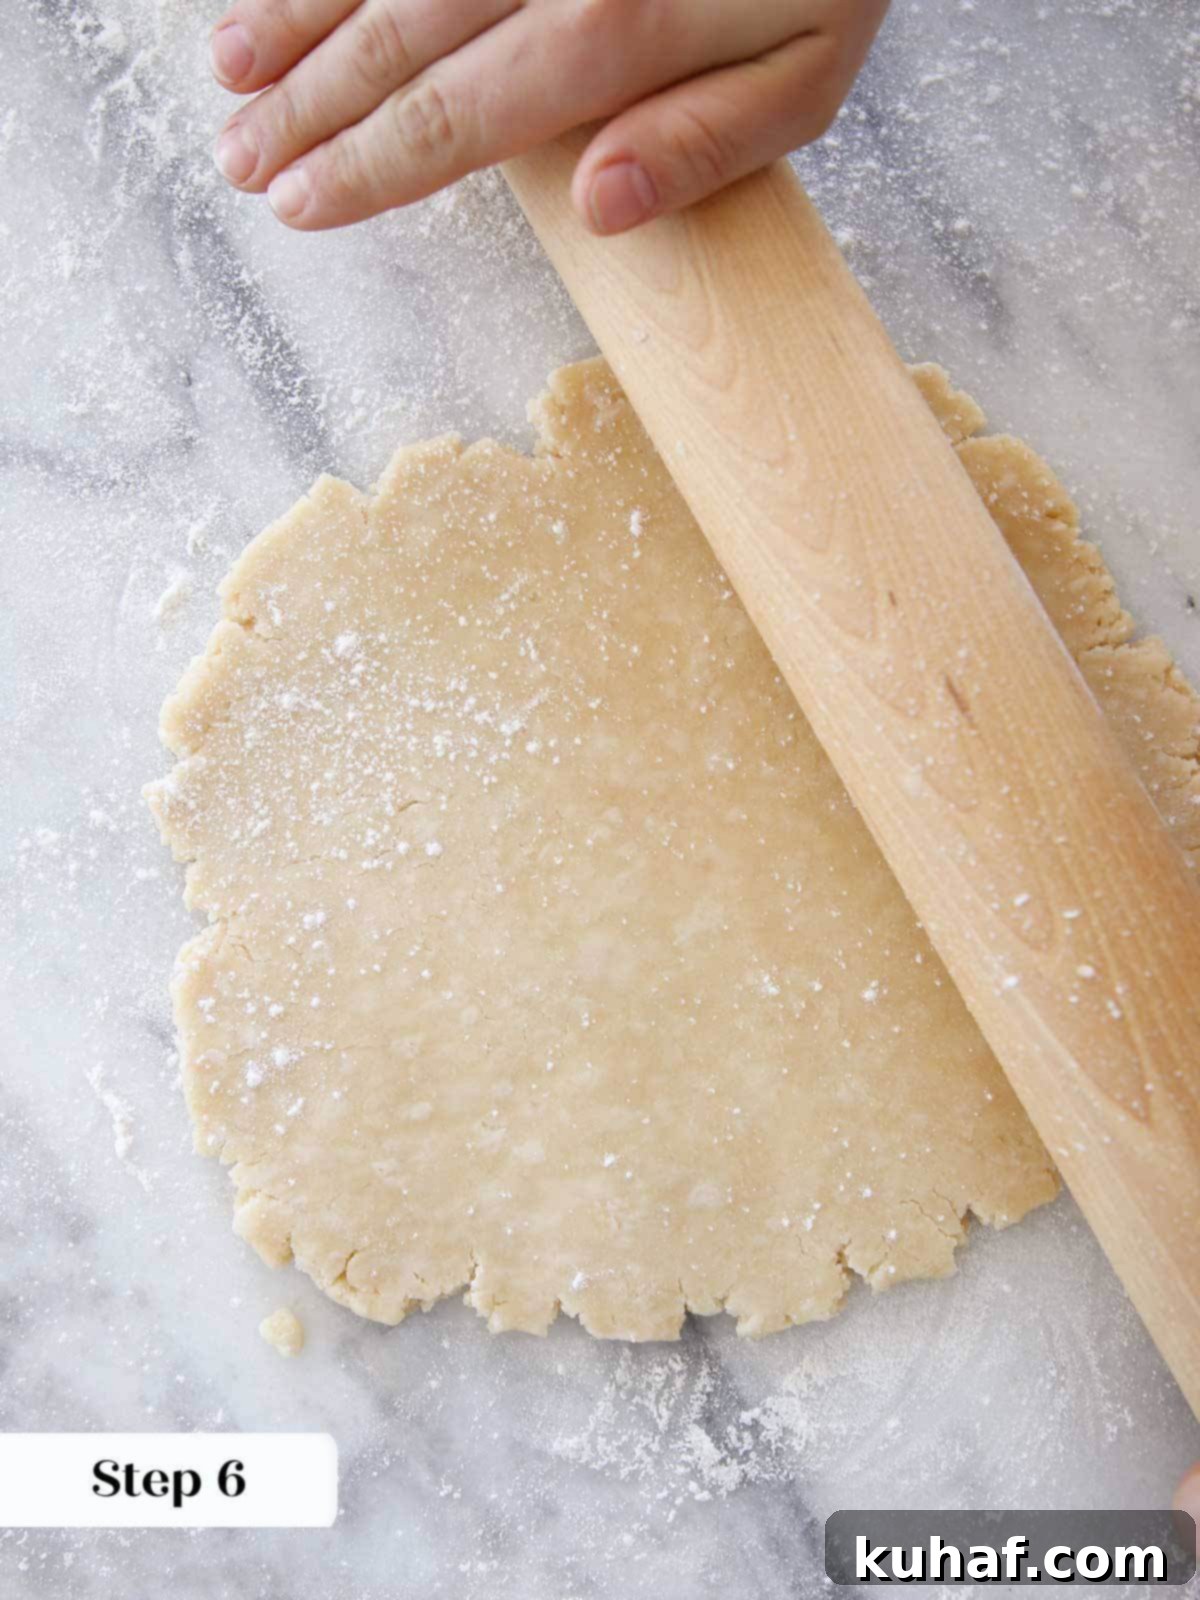
Step 6: Roll Out and Line the Pie Dish.
On a lightly floured surface, roll out one chilled dough disk to an even 1/8th-inch thickness. Ensure your surface and rolling pin are adequately floured to prevent sticking, but avoid using too much flour, which can make the crust tough. Carefully transfer the rolled dough into your pie dish. I typically find it easier to line the pie dish immediately after rolling with Crisco crusts, rather than chilling the dough again beforehand, as I might with all-butter crusts. Shortening dough tends to be more pliable and less prone to cracking.
Step 7: Finish the Edges and Prepare for Baking.
At this stage, you have two main options depending on your pie. If you’re making a double-crust pie, chill the lined pie tin while you prepare your filling and the second dough disk. If you’re creating a single-crust pie, trim any excess dough, roll the edges under, and then crimp them decoratively using your fingers or a fork. For intricate designs or if you’re feeling adventurous, you can follow my detailed how to lattice pie crust tutorial for various methods to create beautiful latticed tops!
Chef Lindsey’s Expert Baking Tip
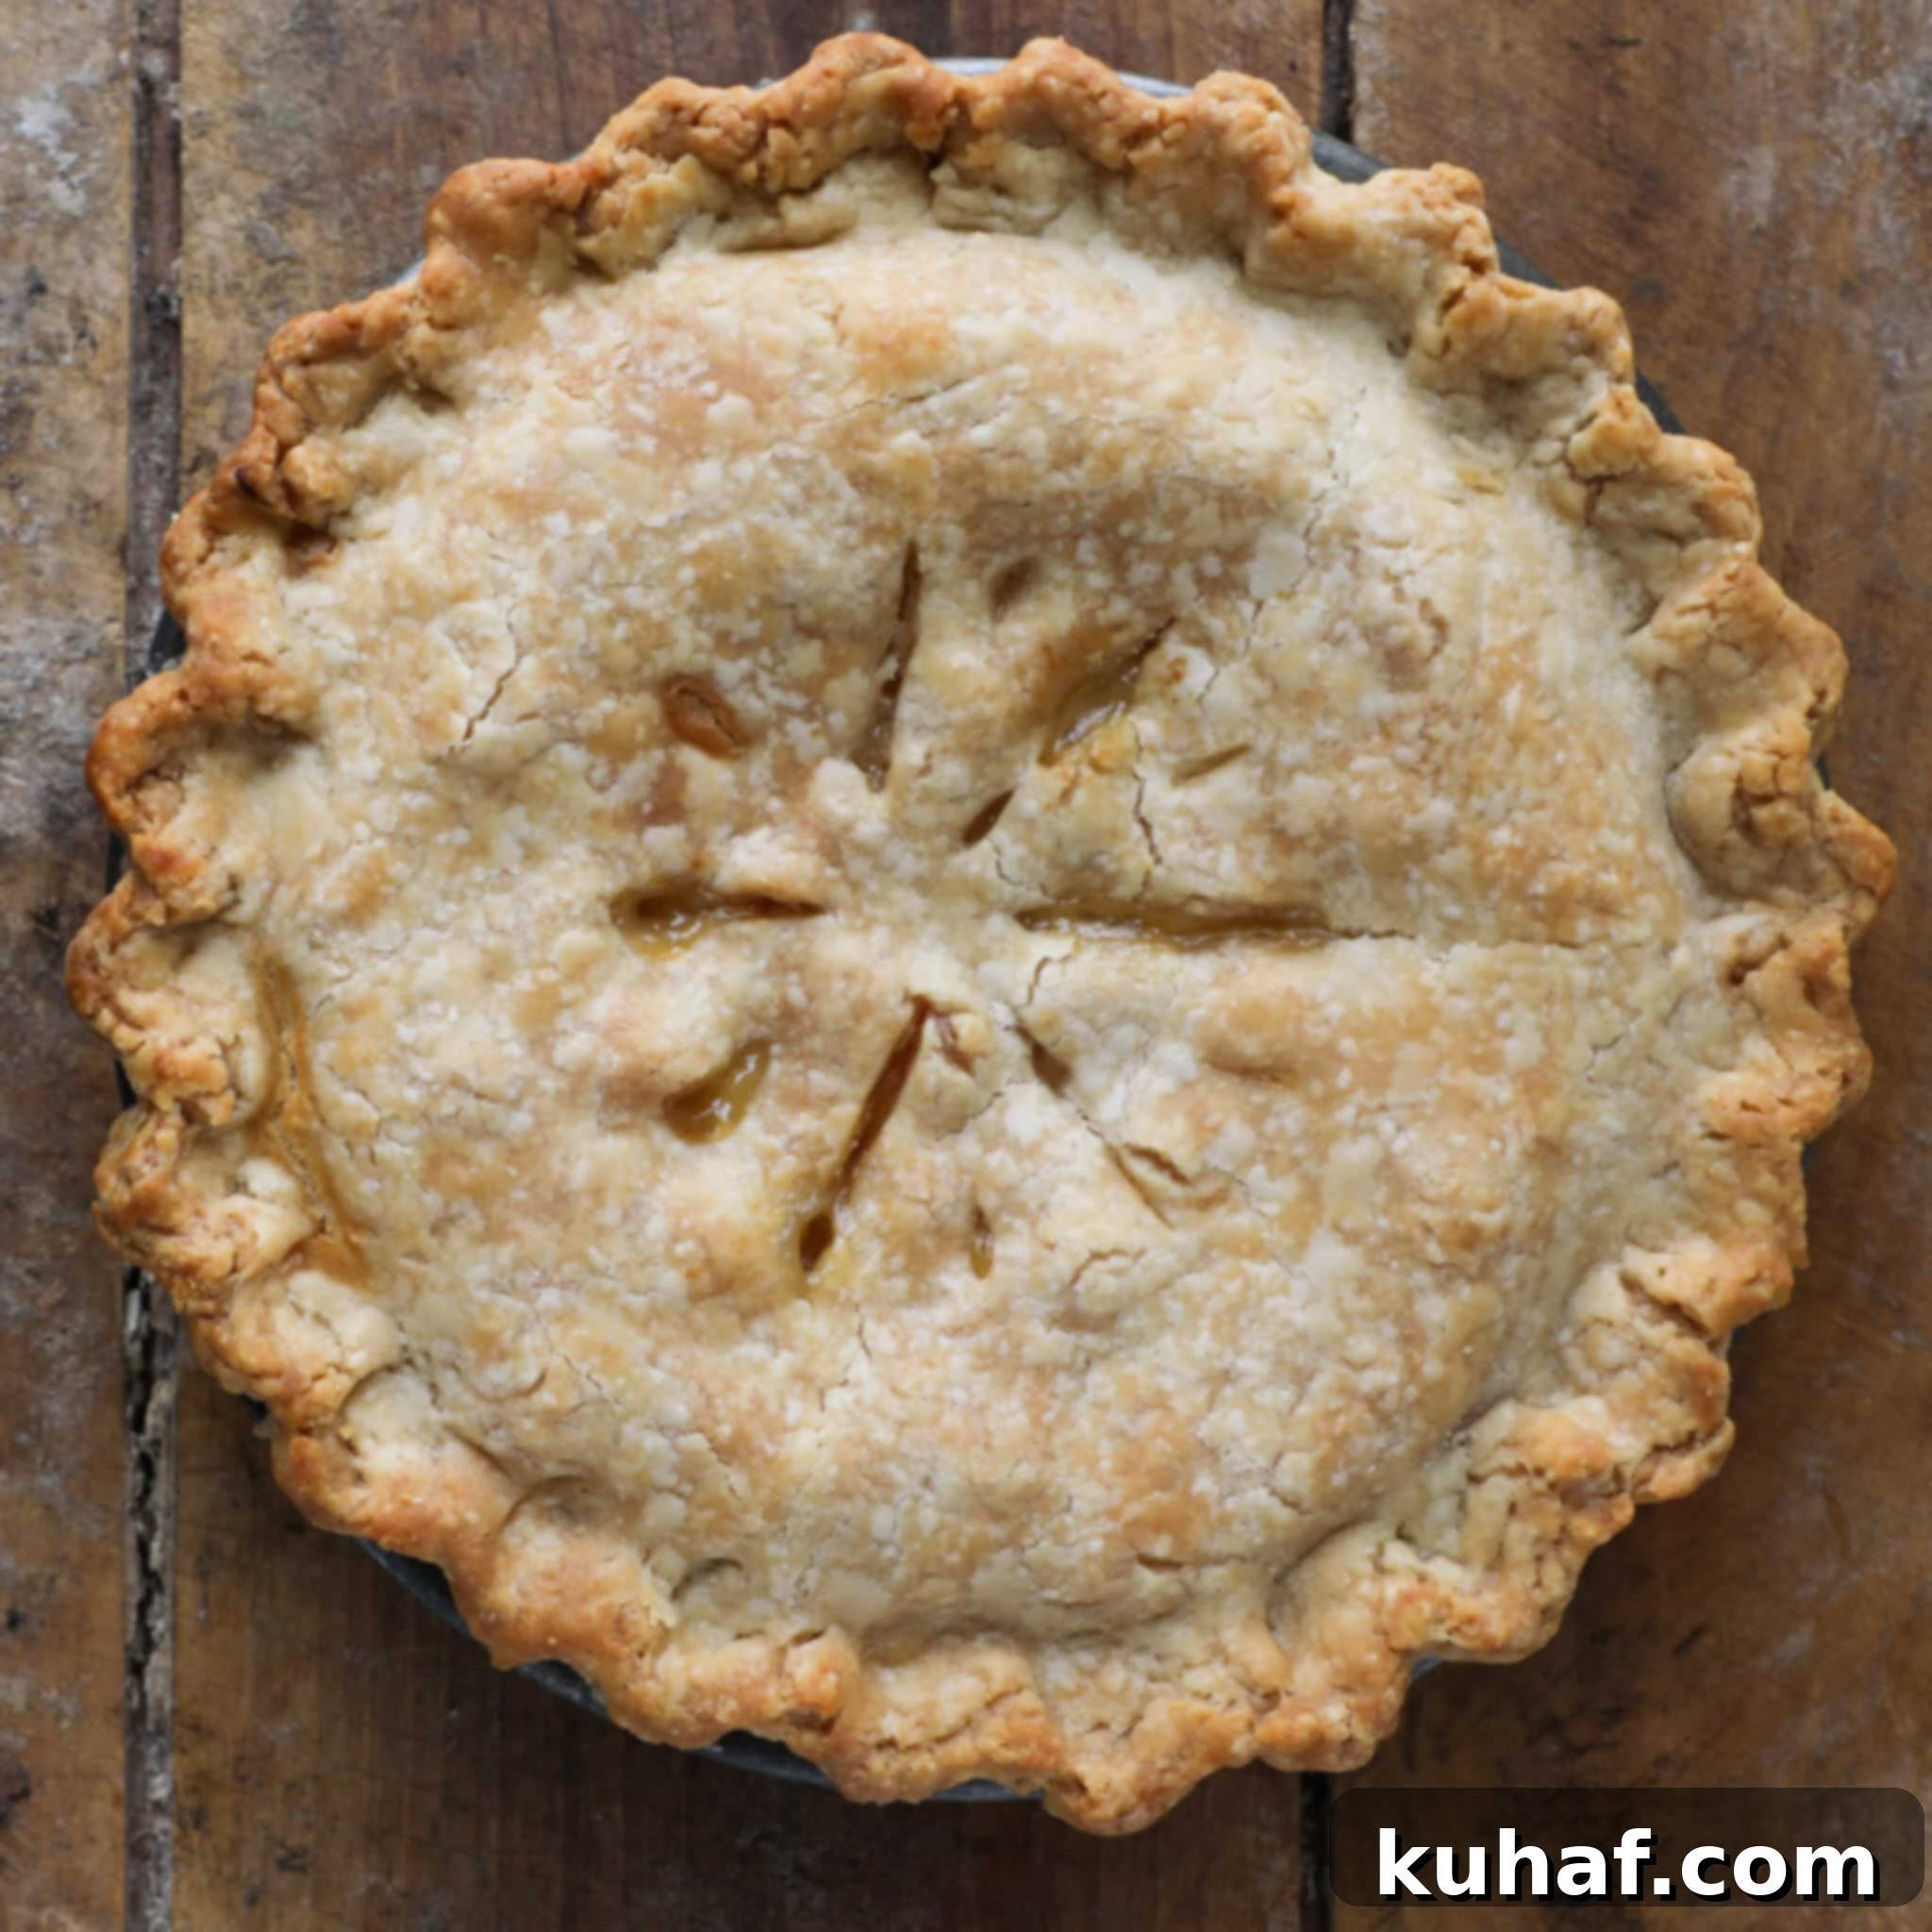
It’s important to understand the textural difference between shortening and butter crusts. While butter crusts are known for their distinct flaky layers due to butter’s water content steaming in the oven, shortening crusts achieve a unique tenderness and a more delicate, crumbly texture. They are incredibly rich and melt-in-your-mouth. To ensure this tender, crispy quality, always bake your Crisco pie crust at a sufficiently hot temperature, typically around 400-425°F (200-220°C), especially during the initial baking phase, to set the crust and achieve a beautiful golden-brown finish.
Frequently Asked Questions About Crisco Pie Crust
Proper storage is key to making your pie baking experience truly convenient. Unbaked Crisco pie crust, whether as a disk or already lined in a pie tin, can be stored in the refrigerator for up to 3 days. For longer-term storage, which I highly recommend for make-ahead baking, wrap it tightly in plastic wrap and then foil, and freeze for up to 2 months. Thaw in the refrigerator overnight before rolling. Once baked, any leftover pie crust (or pie with crust) should be stored at room temperature if it contains fruit filling, or refrigerated if it has dairy or egg-based fillings. Baked crusts can also be frozen for up to 2 months, though the texture might be slightly different upon thawing.
Neither is inherently “better” or “worse”; they simply offer different qualities, and the choice often comes down to personal preference and the desired outcome. A well-made **all-butter pie crust** will be distinctly flaky and carry a rich, buttery flavor, offering a more robust structure. A **Crisco pie crust**, on the other hand, is renowned for its exceptional tenderness and slightly crumbly texture. It truly melts in your mouth and has a more delicate, neutral flavor, allowing the pie filling to be the undisputed star. Crisco crusts are also less prone to shrinking and are easier to handle for beginners.
It is generally not a good idea to directly substitute shortening for butter (or vice versa) in a pie crust recipe on a 1:1 basis, as they have different fat contents and moisture levels. Butter contains about 80% fat and 20% water, while shortening is 100% fat. This difference affects the dough’s hydration, elasticity, and how it behaves during baking. To achieve the best results, it’s always recommended to use a recipe specifically formulated for the fat you intend to use. If you prefer an all-butter crust, I suggest following a dedicated recipe like my all-butter pie crust recipe instead.
While the raw Crisco pie dough might technically not spoil in the refrigerator for several weeks due to its high-fat content, its quality will diminish significantly. After about 3 days, you may notice the flour starting to grey or spot, and the overall flavor and freshness will be compromised. For optimal taste and texture, it’s best to use refrigerated dough within 3 days. For any storage beyond this timeframe, I strongly recommend wrapping the Crisco pie crust securely and storing it in the freezer to maintain its quality for up to 2 months.
Absolutely! A food processor can be a fantastic tool for making pie crust quickly, especially if you have cold ingredients. Pulse the flour and salt together a few times. Then, add the cubed frozen Crisco and pulse until the mixture resembles coarse crumbs, being careful not to over-process. Finally, add the ice water a tablespoon at a time, pulsing briefly after each addition, until the dough just comes together. This method is incredibly fast, minimizing the risk of warming the shortening with your hands.
Preventing a soggy bottom is a common concern for pie bakers. With a Crisco crust, there are a few key strategies. First, ensure your pie crust is adequately chilled before baking. Second, for very wet fillings, consider blind baking (pre-baking) your crust. To blind bake, prick the bottom and sides of the lined crust with a fork, line with parchment paper, fill with pie weights or dried beans, and bake until lightly golden. Remove weights and parchment and continue baking for a few more minutes until the bottom is dry. Another tip is to bake your pie at a higher temperature initially (e.g., 400-425°F/200-220°C) for 15-20 minutes before reducing the heat, which helps set the bottom crust quickly.
If you tried this recipe and absolutely loved it, please take a moment to leave a 🌟 star rating and let me know how it went in the comments below. Your feedback truly brightens my day, and I love hearing about your baking successes!
Crisco Pie Crust
Chef Lindsey
15
minutes
15
minutes
1
(9-inch double crust pie)
Saved
Pin Recipe
Comment
Print Recipe
Ingredients
-
2 ¼
cup
all-purpose flour
or pastry flour -
1
teaspoon
kosher salt
-
14
tablespoons
Crisco vegetable shortening
frozen (14 T = ¾ cup + 2 Tbsp) -
⅓
cup
water
Ice cold
Instructions
-
In a medium bowl, thoroughly whisk the all-purpose flour and kosher salt. Cut the frozen Crisco shortening into small cubes or spoon into chunks, then add these to the flour mixture.
-
Cut the shortening into the flour using a pastry blender, a bench scraper (chopping motion), or in the bowl of a stand mixer fitted with the paddle attachment. Continue until the mixture resembles coarse crumbs, ensuring no visible large chunks of shortening remain.
-
Add the ice-cold water, one tablespoon at a time, and blend with a fork or bench scraper until the dough just barely holds together when pressed and is no longer crumbly. Avoid overworking.
-
If making two single-crust pies, divide the dough in half. For a double-crust pie, I recommend splitting the dough into a 2/3 portion (for the bottom) and a 1/3 portion (for the top). Press each half flat into a disk, wrap tightly with plastic wrap, and refrigerate for at least 30 minutes before rolling.
-
On a lightly floured surface, roll out one chilled dough disk to an even 1/8th-inch thickness. Carefully transfer the rolled dough and line a pie dish. I find it easier to line immediately with Crisco crusts rather than chilling first, as I might with all-butter crusts.
-
If making a double-crust pie, chill the lined pie tin while you prepare the filling and the second dough. For a single-crust pie, trim any excess dough, roll the edges under, and crimp decoratively.
Notes
Technique Tip – Always use frozen Crisco shortening to ensure the most tender and manageable crust. The cold temperature is vital.
Variations – Customize your pie crust by adding a pinch of cinnamon, nutmeg, or citrus zest (like orange or lemon) to the flour mixture for an easy and delicious flavor variation that complements your filling.
Storage – Unbaked pie crust dough can be stored tightly wrapped in plastic in the refrigerator for up to 3 days, or frozen for up to 2 months. Baked pie crusts can be kept at room temperature for up to a week (for fruit pies) or frozen for up to 2 months.
Nutrition
Calories:
217
kcal
|
Carbohydrates:
18
g
|
Protein:
2
g
|
Fat:
15
g
|
Saturated Fat:
4
g
|
Polyunsaturated Fat:
4
g
|
Monounsaturated Fat:
6
g
|
Trans Fat:
2
g
|
Sodium:
195
mg
|
Potassium:
25
mg
|
Fiber:
1
g
|
Sugar:
0.1
g
|
Calcium:
4
mg
|
Iron:
1
mg
Dessert, Pie Base
American
217
Like this? Leave a comment below!
Before You Go: More Baking Inspiration
I sincerely hope you enjoyed crafting and baking with this professional chef-tested Crisco pie crust recipe. It’s a truly reliable foundation for countless delicious desserts and savory pies. Baking homemade pies doesn’t have to be intimidating, and with this recipe in your repertoire, you’re well on your way to becoming a pie master!
Don’t stop here! Continue your culinary journey by exploring our other delicious, chef-developed pie crust recipes for every occasion and preference, including various butter-based and specialty options. Or, if you’re looking for inspiration for what to fill your perfect crusts with, dive into our extensive collection of mouth-watering pie recipes. Happy baking, and enjoy every tender, flaky bite!
