Unlock the Secret to The Best Soft Sugar Cookies: A No-Spread Recipe Perfect for Decorating
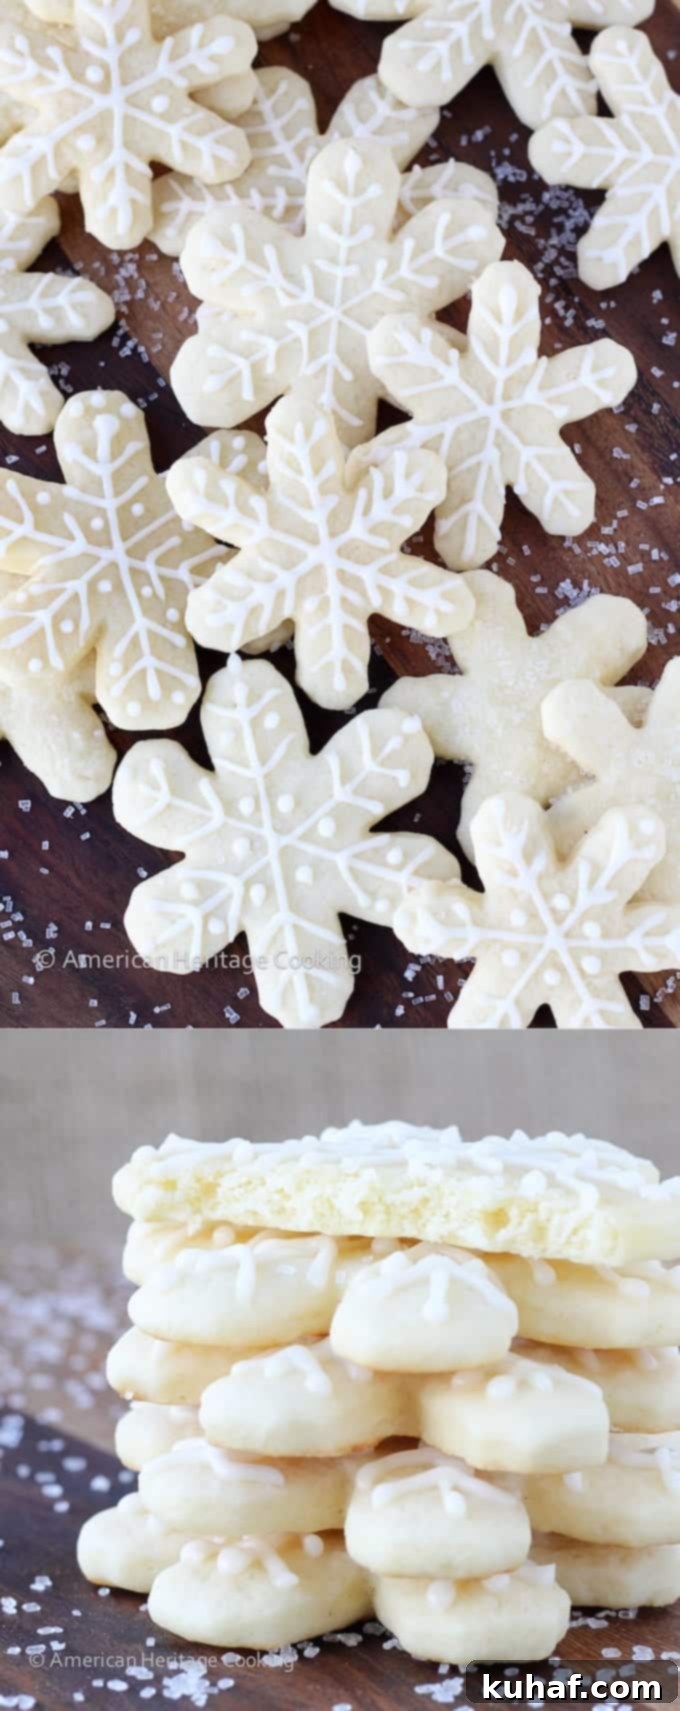
Welcome to the ultimate guide for creating the most delightful, perfectly soft, and effortlessly easy cut-out sugar cookies you’ll ever bake! This exceptional soft sugar cookie recipe is a true game-changer. Crafted in a single bowl with a mere six ingredients, it simplifies the baking process without compromising on flavor or texture. The dough is a dream to work with – incredibly easy to roll, reliably holds its intricate shapes without spreading in the oven, and bakes into a cookie that is wonderfully soft, subtly chewy, and infused with a rich, inviting vanilla flavor. Get ready to transform your baking experience and impress everyone with these truly perfect homemade sugar cookies.

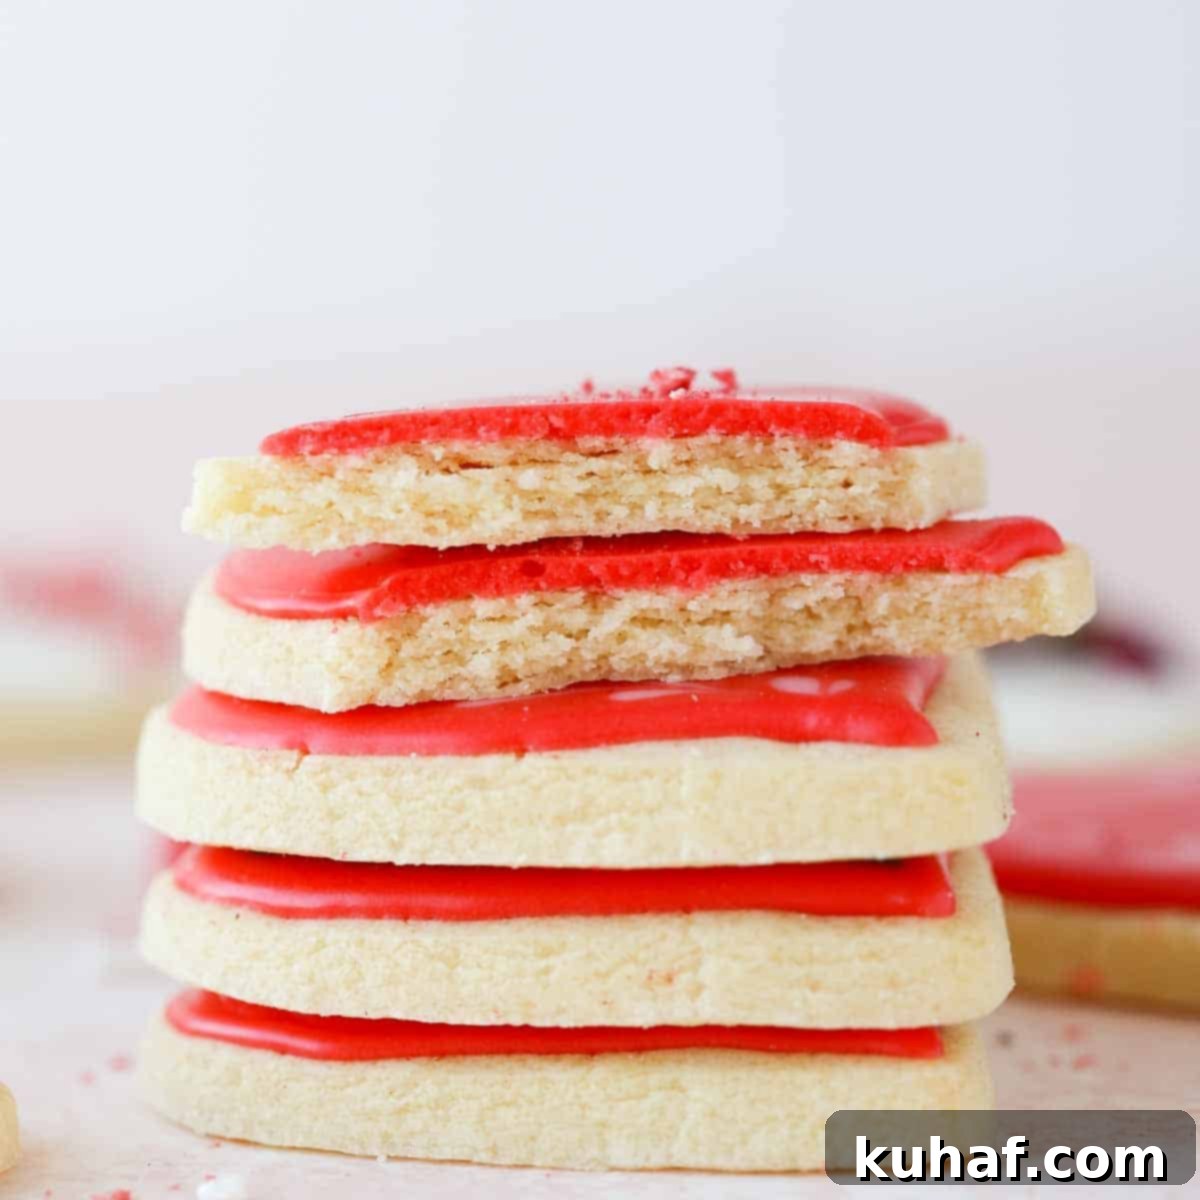
This revised and thoroughly updated rolled sugar cookie recipe has been perfected to emulate the soft, slightly chewy texture and rich flavor found in the finest bakeries. Unlike many recipes that yield beautiful but bland cookies, this one ensures a consistently delicious result, even before any icing is applied! It bakes perfectly flat, providing an ideal canvas for effortless cookie decorating, and precisely maintains its shape with no spreading. You’ll be amazed at the wonderful flavor profile that shines through, making these cookies a treat on their own.
While the photos showcase these beauties adorned with my highly recommended royal icing recipe, their versatility knows no bounds. Feel free to opt for a quicker easy cookie icing, a festive dusting of sanding sugar, or simply leave them unadorned to let their natural deliciousness speak for itself. These are truly the perfect cut-out sugar cookies to elevate any occasion, whether it’s for a holiday dessert platter alongside chewy molasses cookies, peanut butter blossoms, snowball cookies, and pfeffernusse, or as a charming treat for birthdays and celebrations.
For those returning bakers who loved our original 2014 recipe, which yielded a soft but slightly cakey rolled sugar cookie, rest assured! That phenomenal recipe remains available in the Notes section of the Recipe Card below. This ensures that loyal followers can still create the beloved cookies they originally came for, while new enthusiasts can enjoy this refined, bakery-style version.
Table of Contents
- Why This is the Best Soft Sugar Cookie Recipe
- Professional Tips for Making Perfect Cut-Out Sugar Cookies
- Essential Ingredients for Soft Sugar Cookies
- Creative Variations & Easy Substitutions
- Step-by-Step: How to Make Soft Cut-Out Sugar Cookies
- Chef Lindsey’s Expert Rolling Technique
- Frequently Asked Questions
- Soft Cut-Out Sugar Cookies Recipe
- Before You Go
Why This is the Best Soft Sugar Cookie Recipe
What sets this recipe apart, making it truly the best soft sugar cookie recipe you’ll encounter? It’s a combination of simplicity, incredible flavor, and exceptional versatility:
- Effortlessly Easy to Make & Roll: Say goodbye to complicated baking processes! This cookie dough comes together in a single bowl, using readily available pantry ingredients like melted butter. The use of melted butter not only streamlines the mixing process but also contributes to the cookie’s tender texture. The dough itself is incredibly pliable, making it easy to roll out. Plus, with our clever parchment paper technique, you won’t even need extra flour, ensuring a mess-free experience and preventing dry cookies.
- Delicious Even Undecorated: Many beautiful rolled sugar cookies often fall short on taste, serving merely as a vehicle for icing. Not these! This recipe delivers cookies that are perfectly sweetened, with a delightful, rich vanilla flavor that truly stands out. They possess an ideal soft texture with just the right amount of chewiness, making them utterly irresistible straight from the cooling rack. You’ll find yourself reaching for them even before the frosting comes out.
- The Ultimate Decorating Cookie: For anyone who loves to decorate, these are your new best friends. This recipe consistently yields no-spread sugar cookies that meticulously hold even the most intricate cut-out shapes during baking. Furthermore, they bake remarkably flat, creating a flawlessly smooth surface that’s perfect for detailed decorating with royal icing or any other frosting. This flat surface prevents icing from pooling or running, making it easier to achieve crisp, professional-looking designs every single time.

Professional Tips for Making Perfect Cut-Out Sugar Cookies
Achieving bakery-quality cut-out sugar cookies at home is entirely possible with these expert tips:
- Roll Out Dough Between Two Pieces of Parchment Paper: This technique is a game-changer! Rolling the dough between two sheets of parchment paper completely eliminates the need for additional flour, which can dry out your cookies and dull their flavor. It also makes for a cleaner workspace and an incredibly easy transfer of cut shapes to the baking sheet. No more sticky messes or tough cookies!
- Roll at Room Temperature for Best Results: While it might seem counterintuitive for a cookie dough, this specific dough rolls best when it’s at room temperature. The melted butter in the recipe allows for this flexibility. You can mix the dough and roll it out immediately, or if you’ve refrigerated it, allow it to sit out for about 15-20 minutes until it becomes pliable again before rolling. This ensures smooth, crack-free rolling.
- Never Skip the Chilling Step (Twice!): Chilling is paramount for tender, no-spread sugar cookies. While you can roll, cut, and freeze for 15 minutes before baking to get decent-looking cookies, for truly soft and tender results, follow this golden rule:
- Chill the dough after mixing and rolling: This allows the gluten to relax, preventing tough cookies, and gives the butter time to solidify, which is key to preventing spreading. Aim for at least 2 hours, or even overnight, for the most superior texture.
- Chill the cut-out cookies before baking: Even after the initial chill, a quick 15-20 minute chill of your cut-out shapes on the baking sheet right before they go into the oven provides an extra layer of protection against spreading. The cold butter in the dough takes longer to melt, allowing the cookie to set its shape before it can expand too much.
- Uniform Thickness is Key: To ensure all your cookies bake evenly and have a consistent texture, aim for a uniform thickness of approximately ¼ inch when rolling. Using a rolling pin with adjustable guides can be incredibly helpful for this!
Essential Ingredients for Soft Sugar Cookies
Simplicity is key to this recipe, utilizing common pantry staples to create extraordinary homemade sugar cookies. Here’s what you’ll need and why each ingredient plays a crucial role:
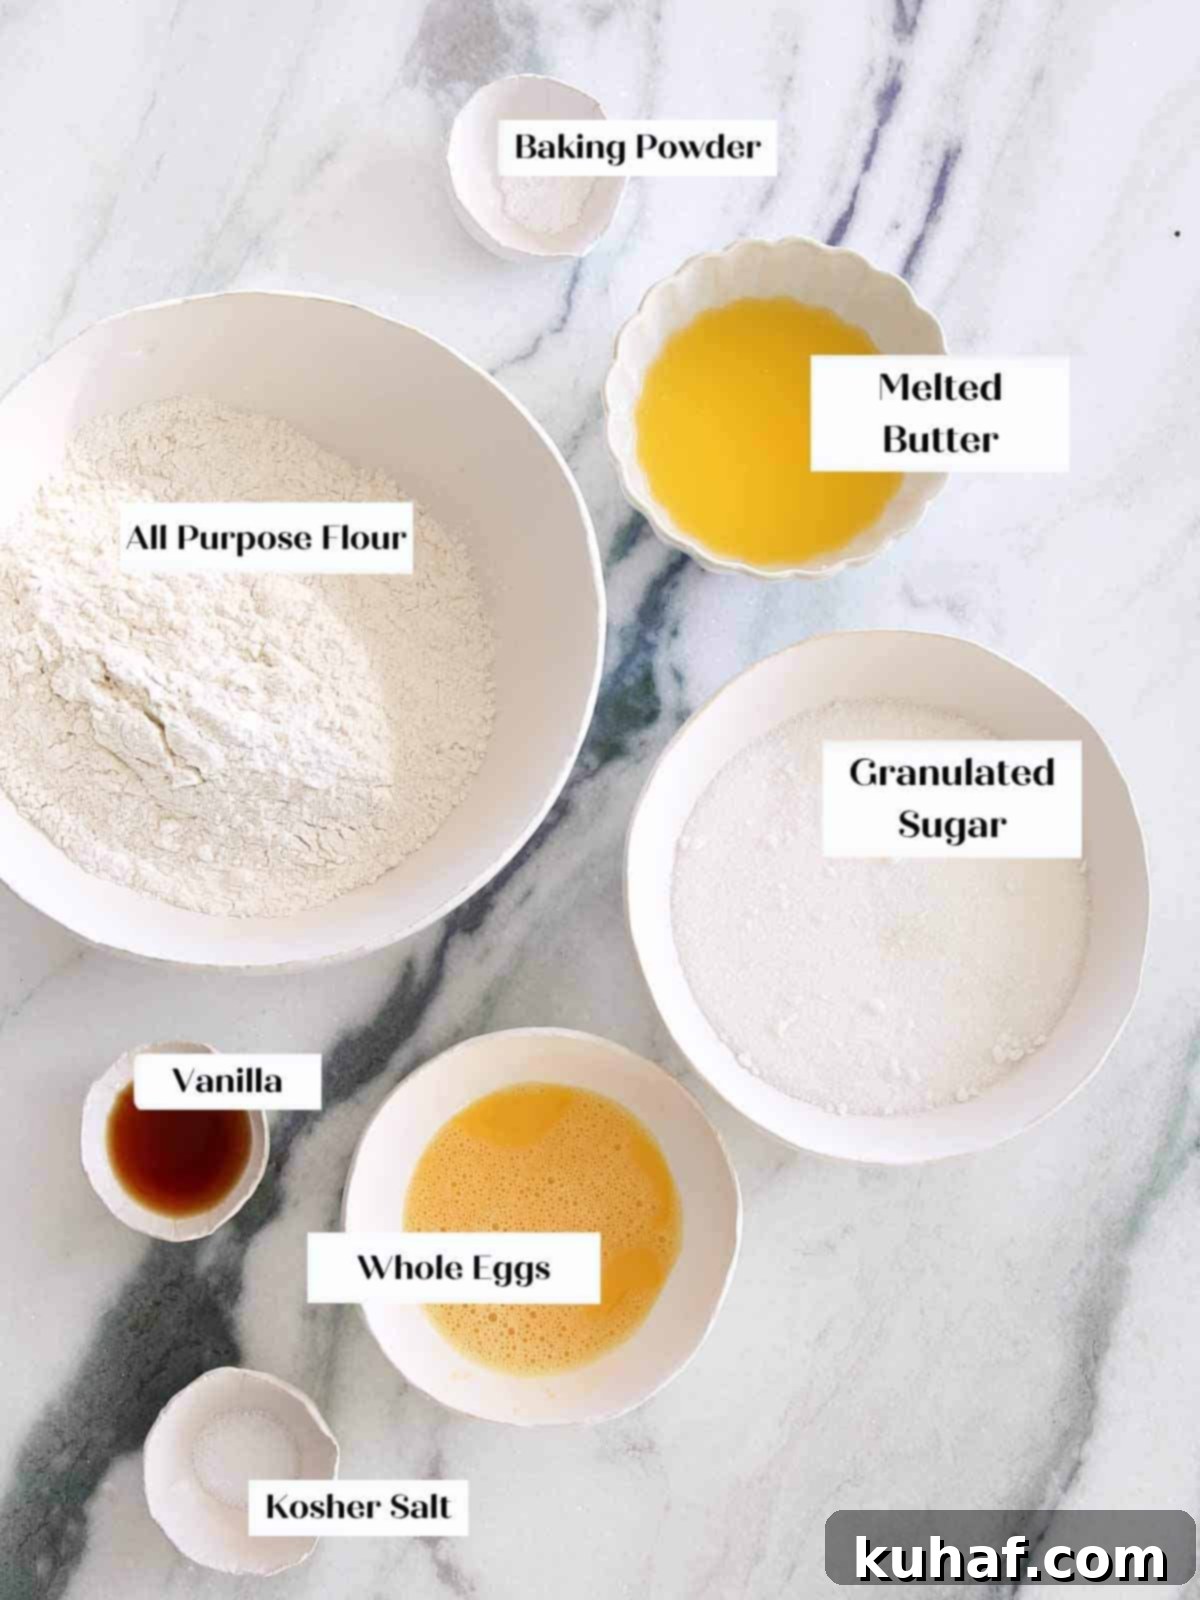
- All-Purpose Flour: This is the backbone of our cookies. Both all-purpose flour or pastry flour will yield fantastic results. It provides just enough gluten to create a stable structure, ensuring your cookies hold their shape, but not so much that they become tough. Absolutely avoid bread flour for this recipe, as its high protein content would lead to a very chewy, almost bread-like cookie – not what we’re aiming for here!
- Baking Powder: Our gentle leavening agent. A precise amount of baking powder lifts the cookies ever so slightly, creating a tender crumb without making them excessively puffy. Too much can cause an undesirable dome on top, making decorating challenging, so measure carefully.
- Kosher Salt: Don’t underestimate the power of salt in sweet baking! Kosher salt balances the sweetness and enhances all the other flavors, making the vanilla and butter notes sing.
- Unsalted Butter (Melted): We use unsalted butter to give you full control over the salt content. Melting the butter, rather than creaming it, is a secret to the incredible ease of this one-bowl recipe and contributes significantly to the cookie’s soft, slightly chewy texture by adding essential fat and moisture.
- Granulated Sugar: Beyond sweetness, sugar plays a vital role in texture. There’s just enough granulated sugar to achieve the perfect flavor profile without causing the cookies to spread excessively in the oven. This is crucial for maintaining those crisp cut-out edges, a key characteristic distinguishing these no-spread sugar cookies from other chewy sugar cookie recipes designed to spread.
- Whole Egg: The egg is a multitasker, contributing fat for richness, moisture for a tender bite, and acting as an emulsifier to bind the dough together smoothly. The yolk’s fat content is especially important for that desirable chewy quality.
- Vanilla Extract: For that classic, comforting vanilla sugar cookies flavor. Use a good quality pure vanilla extract for the best aromatic and taste results.
Refer to the recipe card below for precise measurements and quantities of these ingredients.
Creative Variations & Easy Substitutions
While these soft sugar cookies are perfect as is, they also serve as a fantastic base for endless creativity. Here are some ideas to customize them to your liking:
- Experiment with Icing Styles: Beyond traditional royal icing, consider a creamy and tangy cream cheese icing for cookies for a softer bite. For a quick and shiny finish, brush the unbaked cookies with a beaten egg white and then dip them in colorful sanding sugar or sprinkles before baking. These cookies are also ideal for themed Valentine’s Day Cookies or any holiday, simply by changing your cutter and decorating colors.
- Flavor the Dough Beyond Vanilla: If you’re looking to branch out from classic vanilla, the possibilities are vast! Substitute a portion of the vanilla extract with almond, peppermint, or even a touch of coffee extract for unique flavor profiles. For a bright, zesty twist, finely grate lemon, orange, or lime zest directly into the granulated sugar before mixing the wet ingredients – the sugar crystals will help release the oils for maximum aroma and taste. You can also explore richer flavors like making these into soft chocolate sugar cookies or a cozy cinnamon sugar cookie version.
- Incorporate Fun Add-ins: Give your cookies an extra layer of texture and flavor by mixing in small additions to the dough. Think finely chopped nuts (pecans or walnuts work beautifully), mini chocolate chips (milk, dark, or white), or colorful sprinkles. The key is to use small enough pieces that won’t interfere with the rolling and cutting process, ensuring your shapes remain intact.
Step-by-Step: How to Make Soft Cut-Out Sugar Cookies
Follow these detailed instructions to achieve perfectly soft, beautiful cut-out sugar cookies every time. I’ve also included a comprehensive guide for creating impressive royal icing, making your cookie decorating journey a breeze. For an even deeper dive into royal icing mastery, my dedicated royal icing with meringue powder post covers everything you need to know about preparing and applying this versatile frosting.
Make the Cookie Dough:
Step 1: Prepare Dry Ingredients. In a large mixing bowl, thoroughly whisk together the all-purpose flour, baking powder, and kosher salt. Whisking ensures that the leavening agent and salt are evenly distributed throughout the flour, which is crucial for uniform texture and flavor in your cookies. Set this bowl aside.
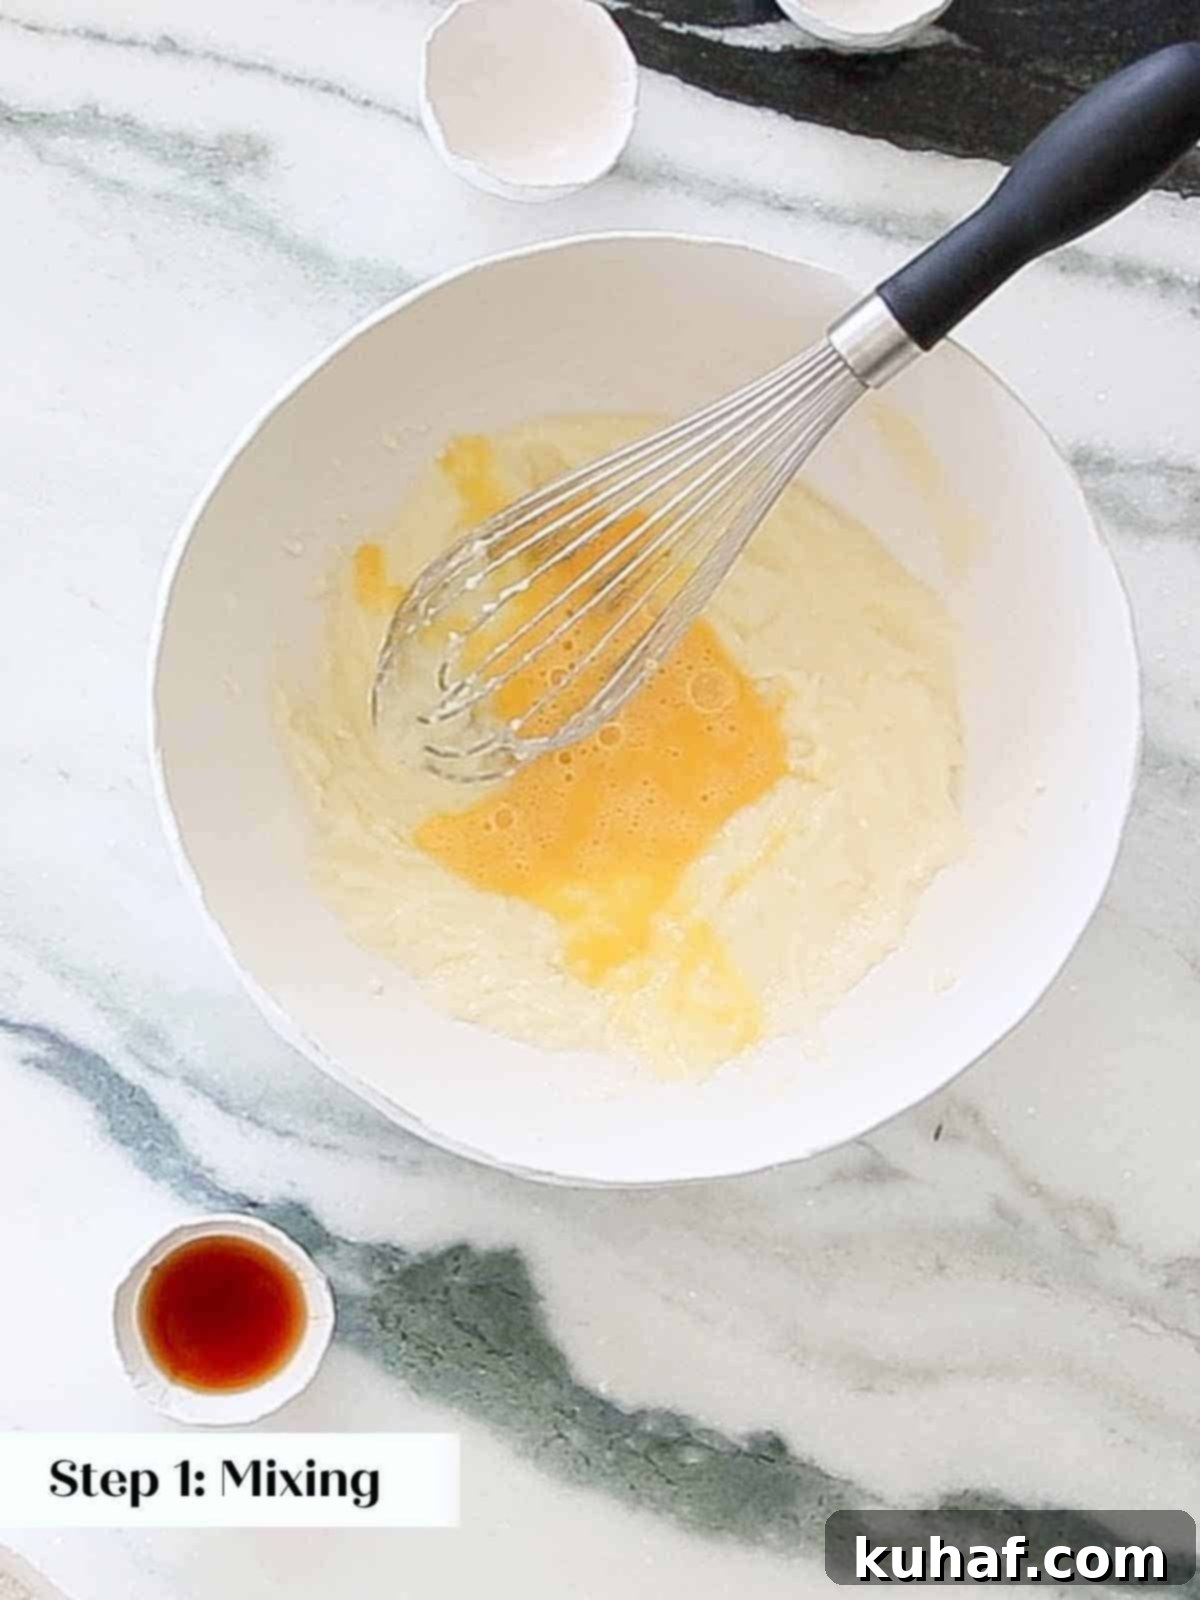
Steps 2: Combine Wet Ingredients. In a separate large bowl, gently melt the unsalted butter. You can do this in the microwave, heating it just until it’s liquid but not hot or sizzling. Immediately whisk in the granulated sugar until well combined. Next, add the whole egg and vanilla extract. Whisk this mixture vigorously for about 1-2 minutes until it becomes beautifully emulsified – you should see no visible streaks of butter or egg, and the mixture will appear smooth and slightly thickened. This emulsification is key to the cookie’s texture.
Step 3: Gradually Add Flour Mixture. Slowly incorporate the reserved flour mixture into the wet ingredients, stirring gently with a spatula or wooden spoon until just combined. Be careful not to overmix, as this can develop too much gluten and result in tougher cookies.
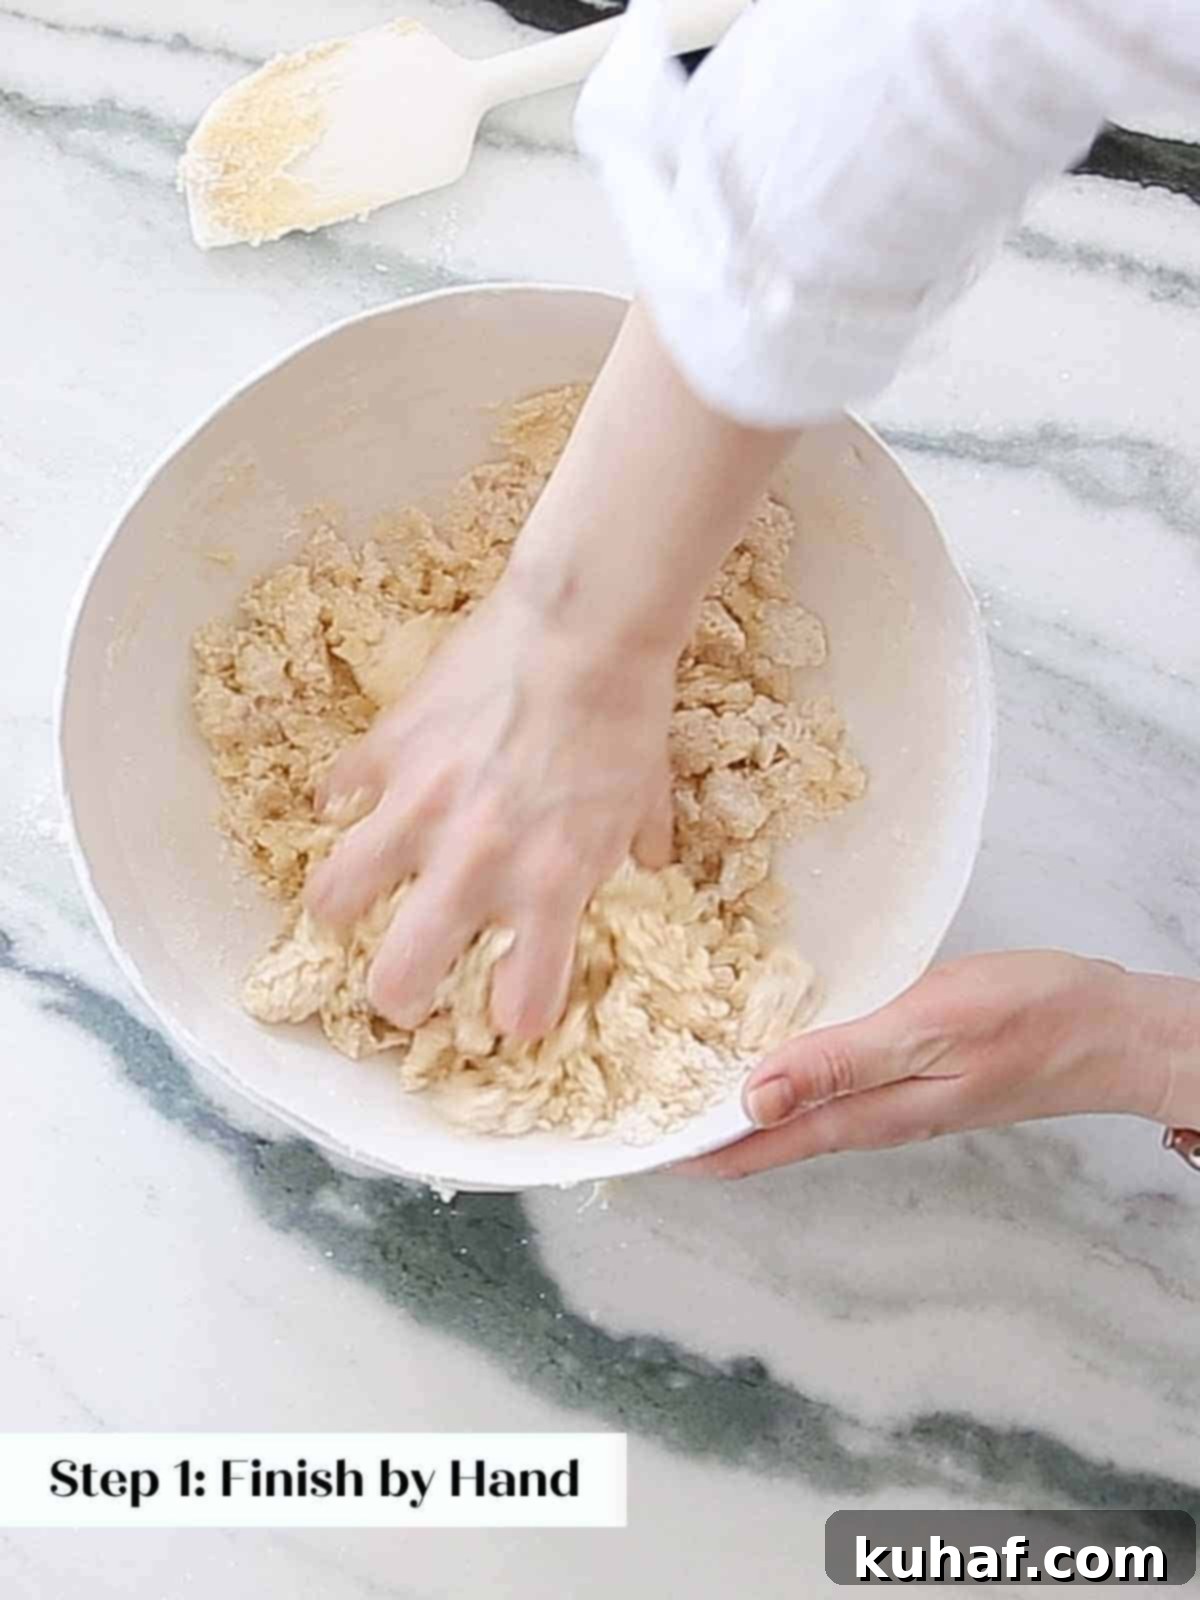
Chef’s Tip for Dough Consistency: The dough may initially appear quite dry. To ensure all the flour is incorporated without overmixing, I recommend finishing this step by hand. Gently squeeze the dough together with your hands until it forms a cohesive ball. This method quickly brings the dough together and prevents excessive gluten development, ensuring your cookies remain tender.
Step 4: Roll the Dough. Roll your dough while it is still at room temperature – its pliability at this stage makes rolling much easier. Aim for a consistent thickness of approximately ¼ inch. For the absolute best results and a mess-free experience, roll the dough between two pieces of parchment paper. Alternatively, you can roll it out on a lightly floured surface, but be cautious not to incorporate too much extra flour.
Chef Lindsey’s Expert Rolling Technique
Chef Lindsey’s Dough Pressing Technique: To achieve a perfectly smooth and even thickness when rolling cookie dough between parchment paper, I recommend a unique method. Hold both pieces of parchment securely with one hand, then use your other hand to press the dough away from you with a rolling pin. This motion effectively creates a manual dough sheeter, ensuring uniform flatness. While a flat rolling pin works best, you can achieve excellent results with a tapered French pin, as demonstrated in the photos.
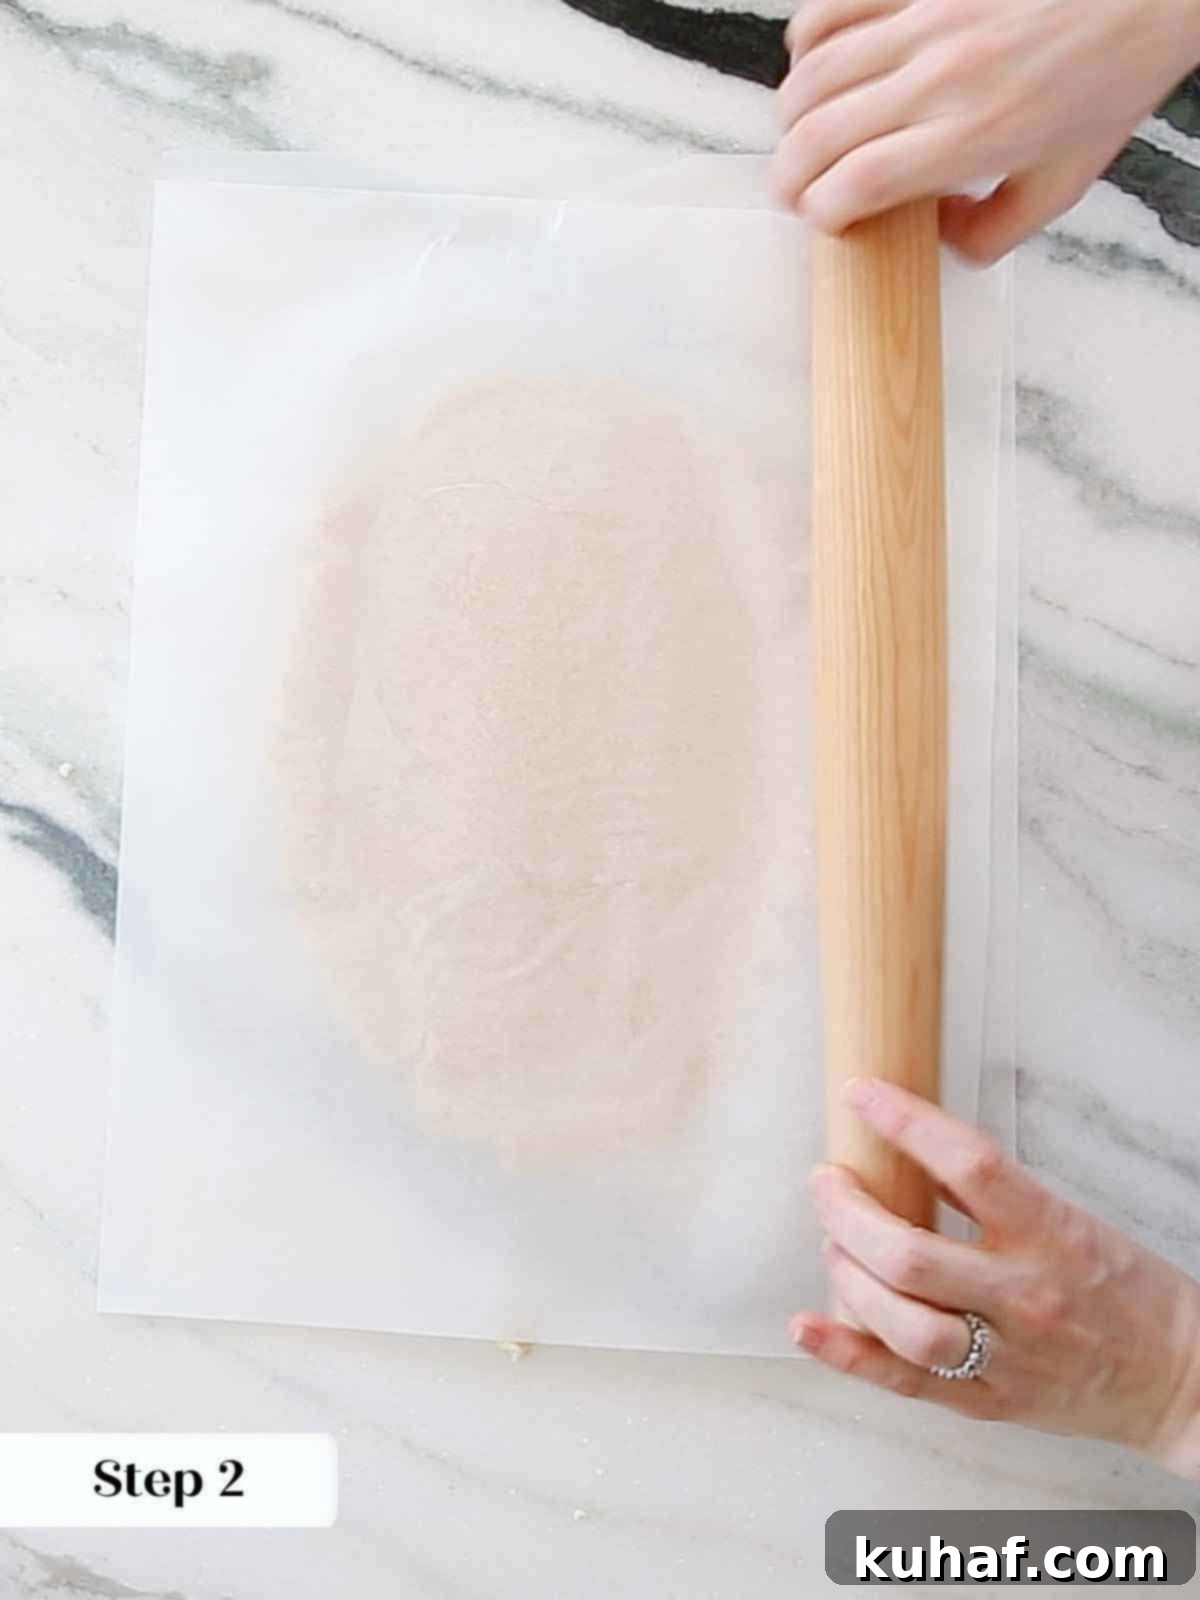
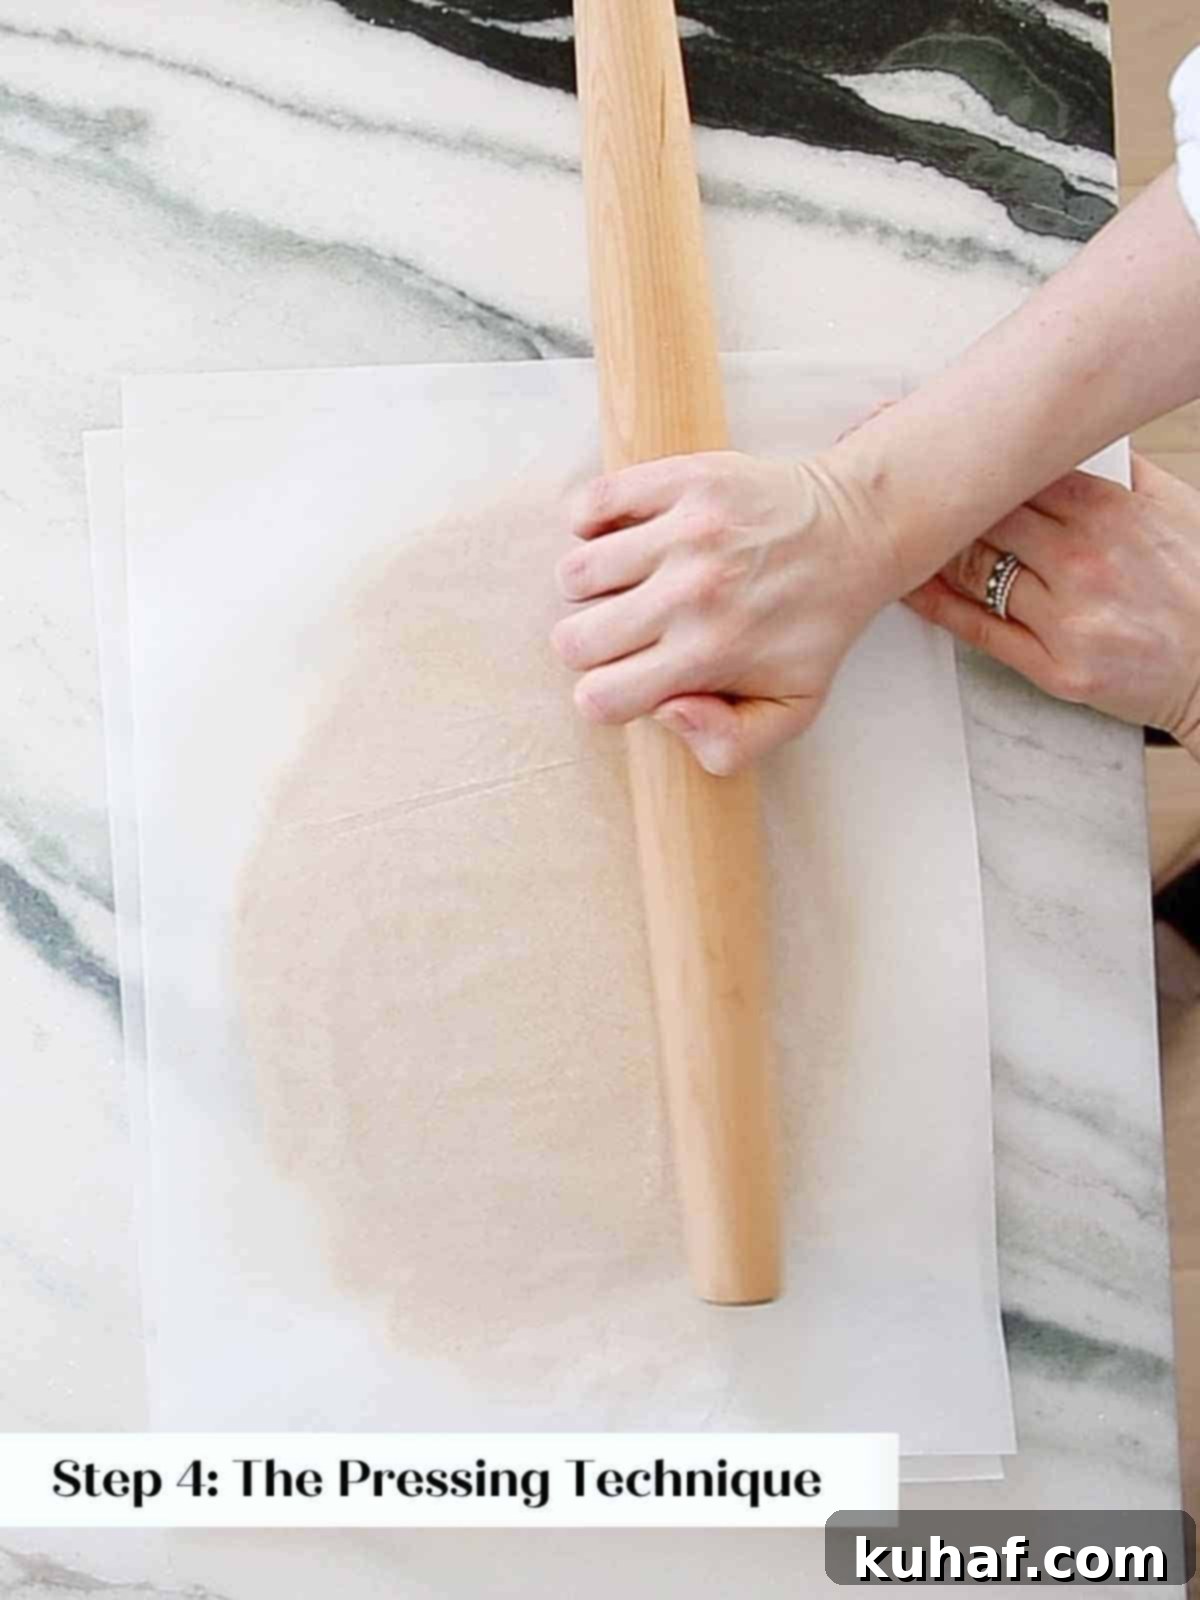
Step 5: Chill the Dough. After rolling, transfer the dough (still between parchment sheets) to a baking sheet and refrigerate until thoroughly chilled. While it will firm up in about 30 minutes, I highly recommend chilling the dough for a full 2 hours, or even overnight. This extended chilling time allows the gluten in the flour to fully relax, resulting in the most tender and soft sugar cookies, and ensures the butter is completely firm, which is critical for preventing spreading during baking.
The Importance of Extended Chilling: A longer chill (2+ hours or overnight) significantly improves the texture of your cookies. It allows flavors to meld, ensures optimal dough handling, and creates that desirable melt-in-your-mouth tenderness.
Cut & Bake Cookies:
Step 6: Preheat Oven & Prepare Baking Sheets. When you’re ready to bake, preheat your oven to 325°F (160°C) for convection baking or 350°F (175°C) for conventional ovens. Line two large baking sheets with fresh parchment paper. This prevents sticking and ensures even baking.
Eco-Friendly Tip: If you rolled your dough out between sheets of parchment paper, you can simply reuse those very same sheets to line your baking pans, reducing waste!
Step 7: Cut Shapes & Final Chill. Gently peel the parchment paper from both sides of your chilled dough. Using a lightly floured cookie cutter (dip the cutter in flour before each cut to prevent sticking), cut out your desired shapes. Carefully transfer the cut cookies to your prepared baking sheets. Now, here’s another crucial chilling step: Place the baking sheets with the cut cookies back into the refrigerator for at least 20 minutes before baking. This final chill is essential for the cookies to maintain their perfect shape and prevent spreading.
Step 8: Bake to Perfection. Bake the cookies in your preheated oven for 7-9 minutes. Baking time may vary depending on your oven and cookie size. Look for signs that they are done: the centers should appear matte and set, with a few small, hairline cracks visible, and the very edges might just begin to show a hint of golden brown. Avoid overbaking, as this can lead to a dry cookie.
For Consistent Baking: To ensure all cookies bake evenly, it’s a good practice to bake only cookies of the same shape and size on a single baking sheet. This prevents smaller, thinner cookies from overbaking while larger, thicker ones are still cooking.
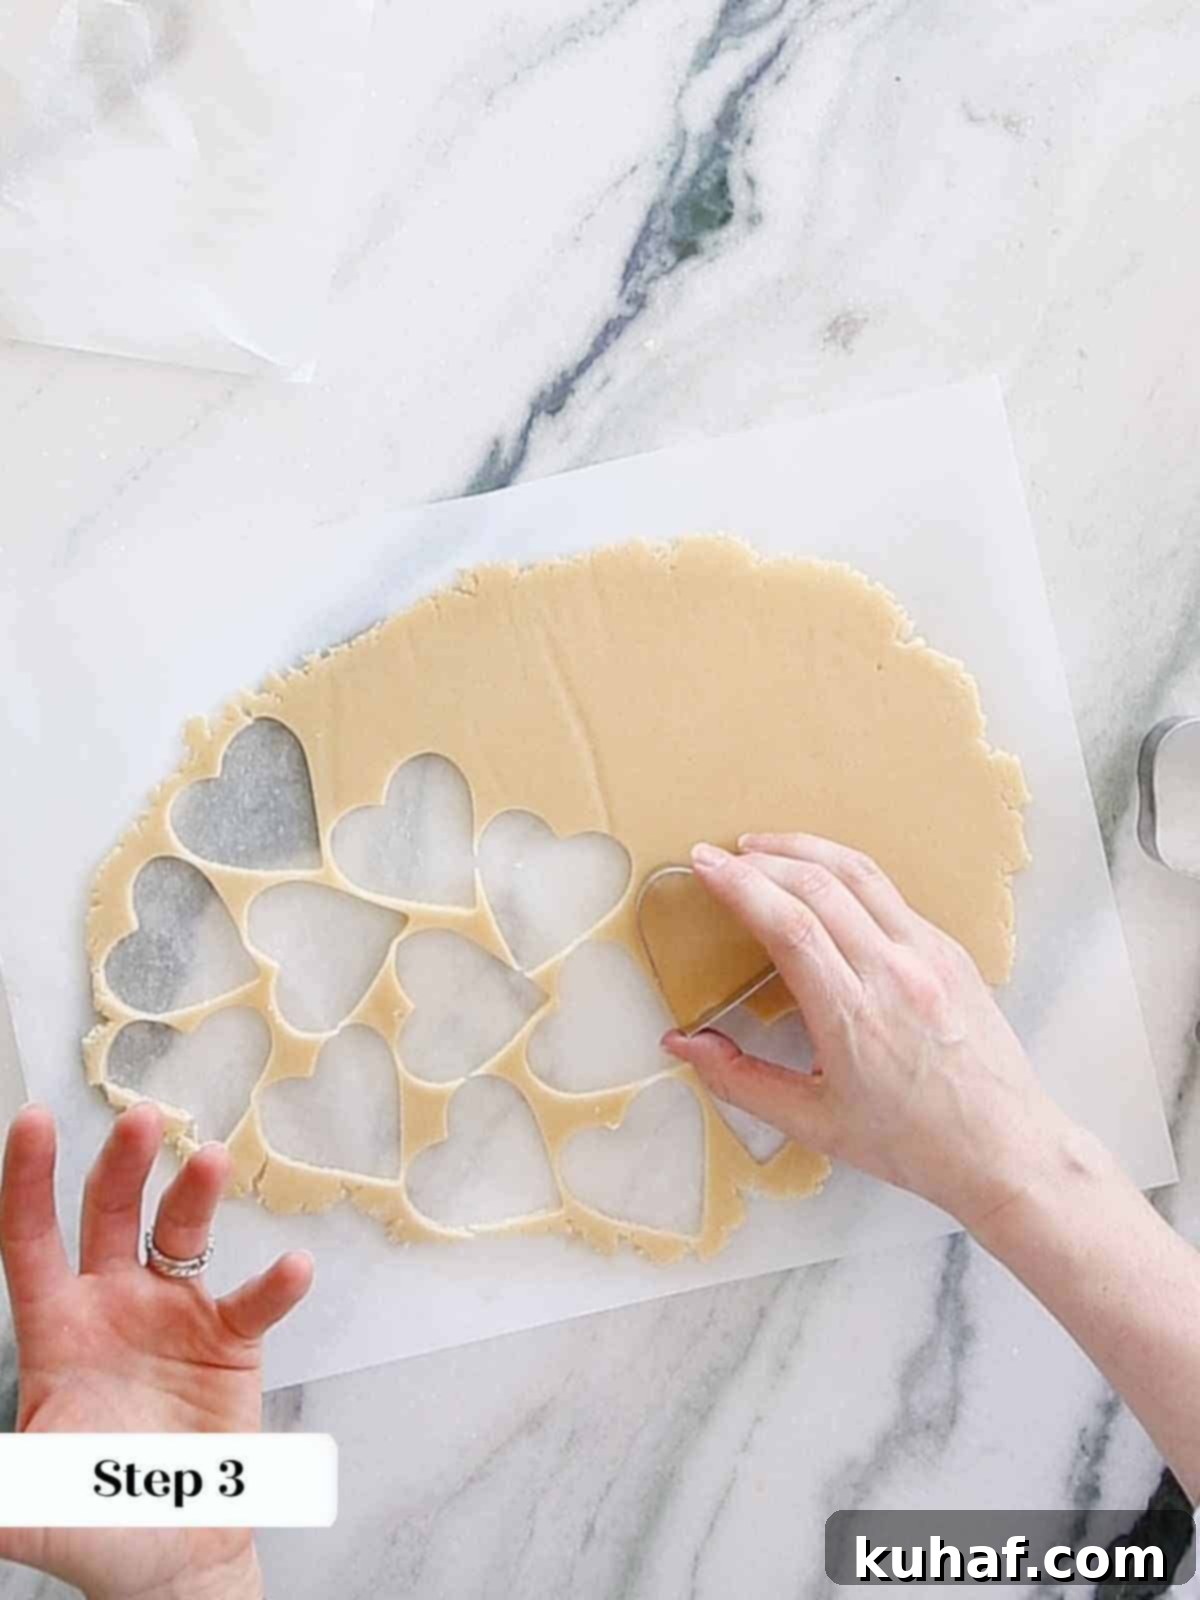
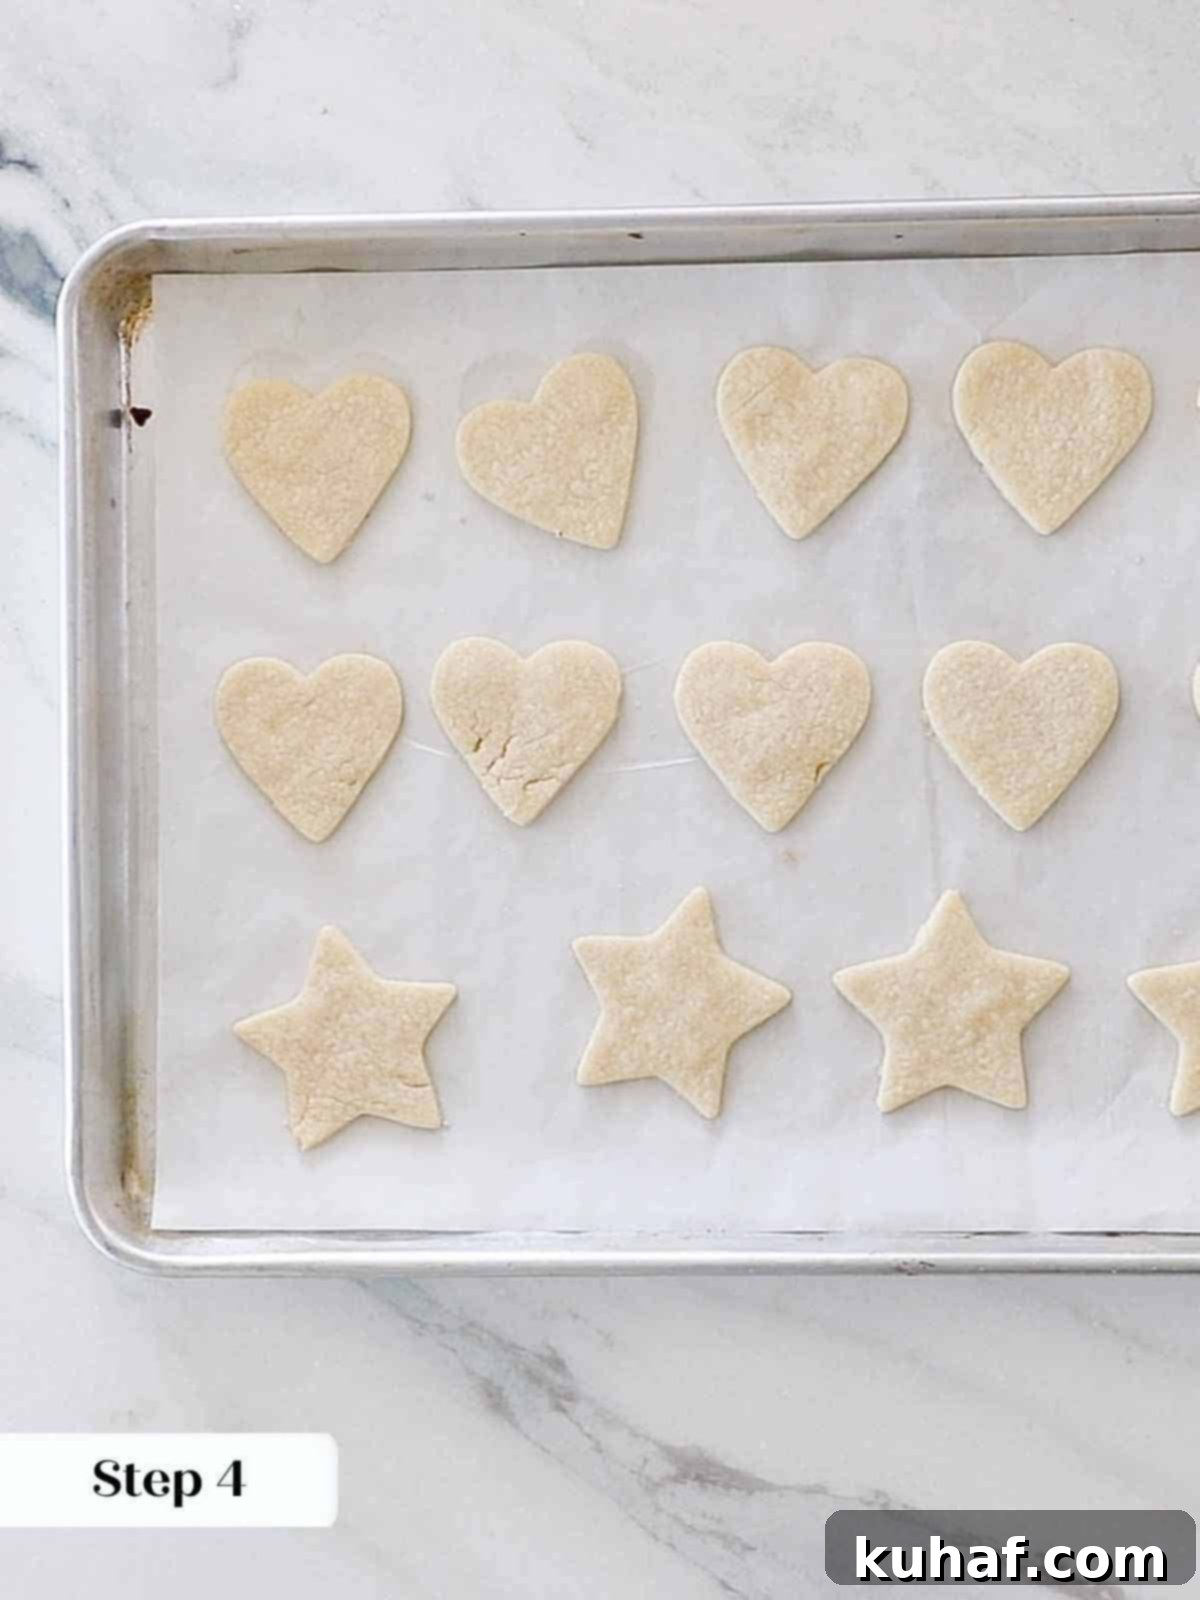
Step 9: Cool Completely. Once baked, remove the cookies from the oven and let them cool on the baking sheets for a few minutes before transferring them to a wire rack to cool completely. It’s absolutely vital that the cookies are cooled down entirely before you even think about applying any icing. Warm cookies will melt your beautiful frosting!
Make Royal Icing:
Step 1: Whisk Egg Whites & Lemon Juice. In a large bowl (or the bowl of a stand mixer fitted with the whisk attachment), combine the dried egg whites (or meringue powder) and lemon juice. Whisk on medium-high speed until soft peaks begin to form. This aerates the mixture, creating the structure for your royal icing.
Step 2: Add Powdered Sugar. With the mixer on low speed, gradually add all of the powdered sugar. Once it’s all in, increase the speed and whisk until the mixture is fully combined and smooth. The icing should be thick and glossy.
Step 3: Color and Adjust Consistency. Divide the prepared royal icing into separate bowls, one for each color you plan to use. Add food dye to each bowl, mixing until you achieve your desired hues. As you add dye, be mindful of the consistency – liquids can thin the icing. If needed, add a tiny bit more powdered sugar to thicken, or a few drops of milk to thin, until you reach the desired consistency for outlining or flooding.
Step 4: Test for Outlining Consistency (Ribbon Test). For outlining, the icing needs to be firm enough to hold a crisp line but fluid enough to flow smoothly. To test, lift your spatula or whisk from the icing; the icing should cascade off slowly, creating a ribbon that remains clearly visible on the surface for about 5-6 seconds before slowly disappearing back into the main batch. This is the perfect consistency for creating borders and fine details.
Step 5: Test for Flooding Consistency (Ribbon Test). For flooding (filling in the outlined areas), the icing needs to be thinner and more free-flowing. Perform the same ribbon test: when you lift your spatula, the icing should cascade off and almost instantly disappear back into the rest of the icing within 1-2 seconds. This ensures a smooth, even, and seamless fill without being too watery.
Mastering Icing Consistency: Achieving the perfect royal icing consistency takes a little practice. The goal is an icing that’s thin enough to spread easily without needing excessive force, but not so thin that it becomes transparent, bleeds into other colors, or fails to set hard. Don’t be discouraged if it takes a few tries to get it just right!
Step 6: Prepare Piping Bags. Transfer your outlining consistency icing and flooding consistency icing into separate piping bags. You can use disposable bags or reusable ones fitted with a small round tip (like a PME #1.5 or Wilton #2 for outlining, and a Wilton #3 or #4 for flooding).
A Quick Royal Icing Tutorial:
This is a simplified guide to decorating your cut-out sugar cookies with royal icing.
Step 1: Snip Piping Bag Tips. Start by cutting a very tiny tip off your outlining piping bag – smaller than you think you need. Test a line on a spare surface. If it wiggles or breaks, snip the tip just a hair larger and test again, repeating until you achieve a thin, smooth, and straight line. For the flooding bag, cut a larger opening that allows a steady, effortless flow of icing without needing to squeeze too hard.
Step 2: Outline the Cookie. Working with 1 to 3 cookies at a time, use your outlining bag to carefully trace a border around the edge of each cookie. Leave a small 1/16th-inch gap from the very edge of the cookie to prevent the icing from running off. This border acts as a dam for your flooding icing.
Step 3: Flood the Cookie. Immediately switch to your flooding bag. Squeeze a zigzag or squiggle pattern of flooding icing inside the outlined border of the cookie you are decorating. Use a cake tester, a wooden skewer, or even the tip of your flooding piping bag (my lazy but effective method!) to gently spread the icing evenly across the entire surface, making sure it reaches the outline. You want a smooth, opaque layer where you can’t see the cookie underneath, but not so thick that it overflows the outline. Ideally, the outline should blend seamlessly with the filling; if you see a distinct line, try outlining fewer cookies before flooding next time to give the outline less time to set.

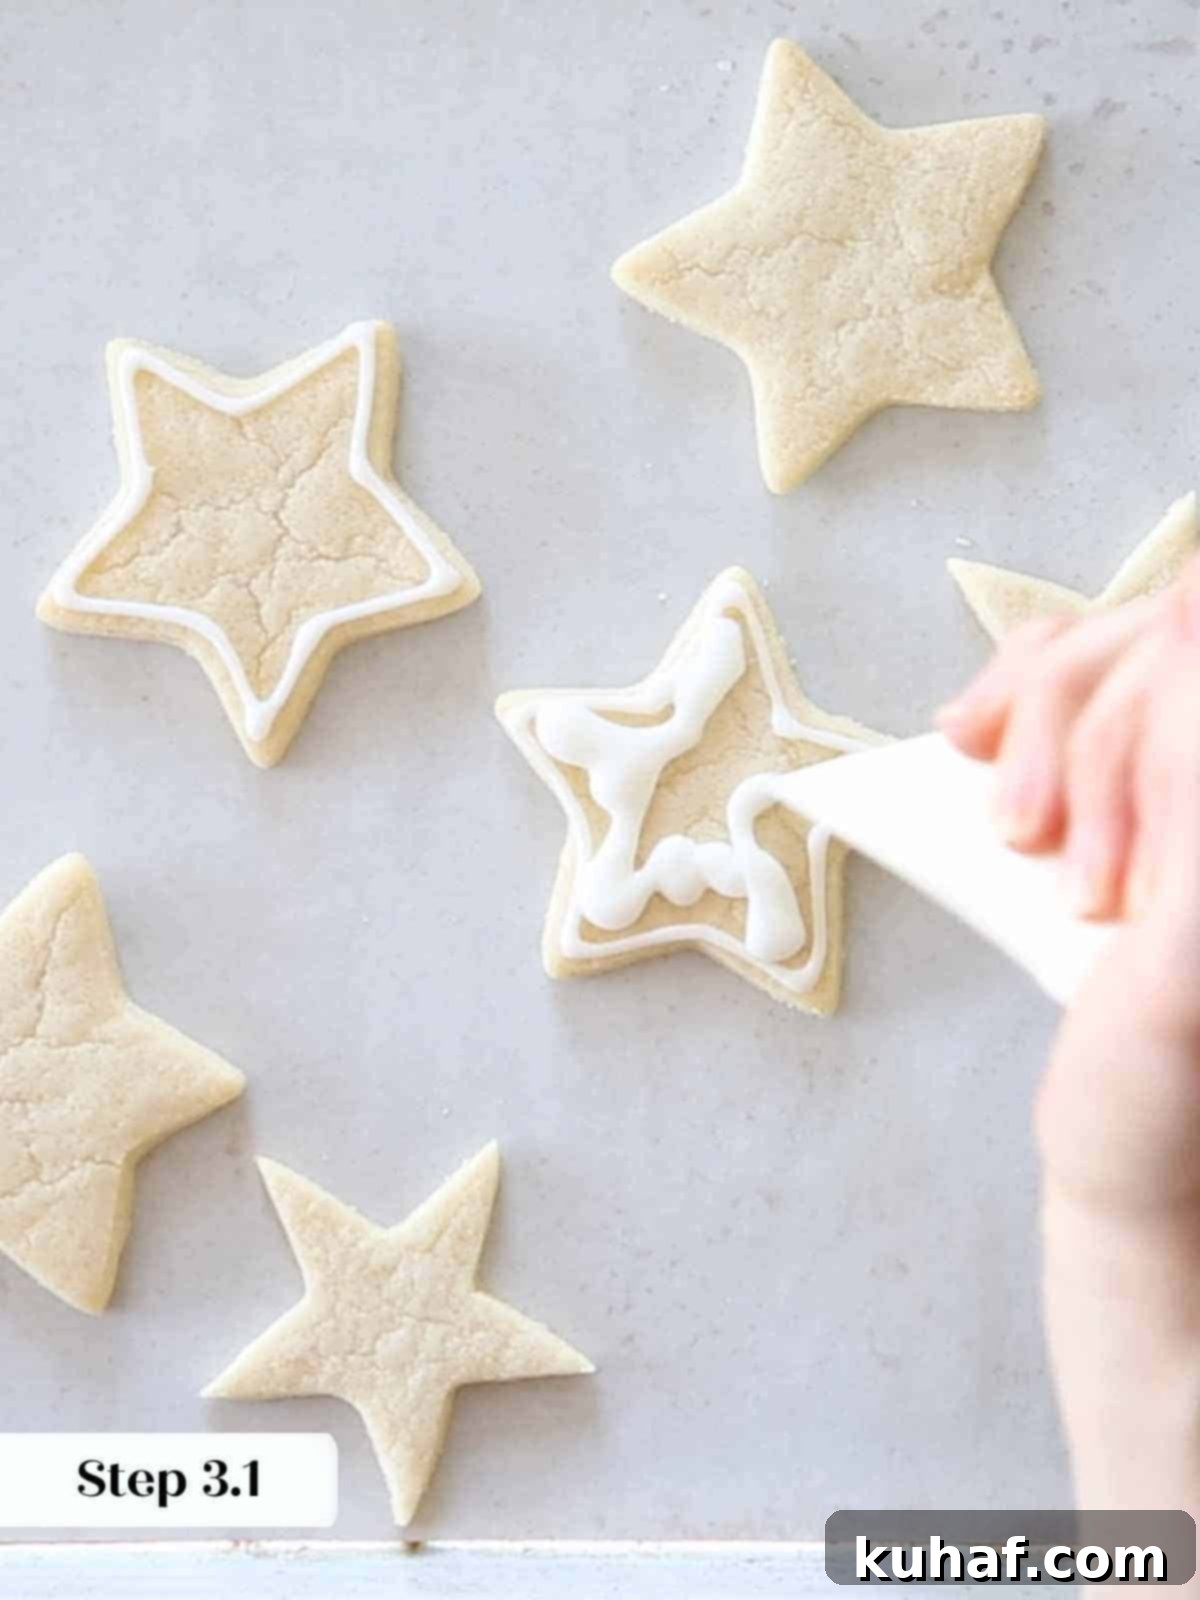
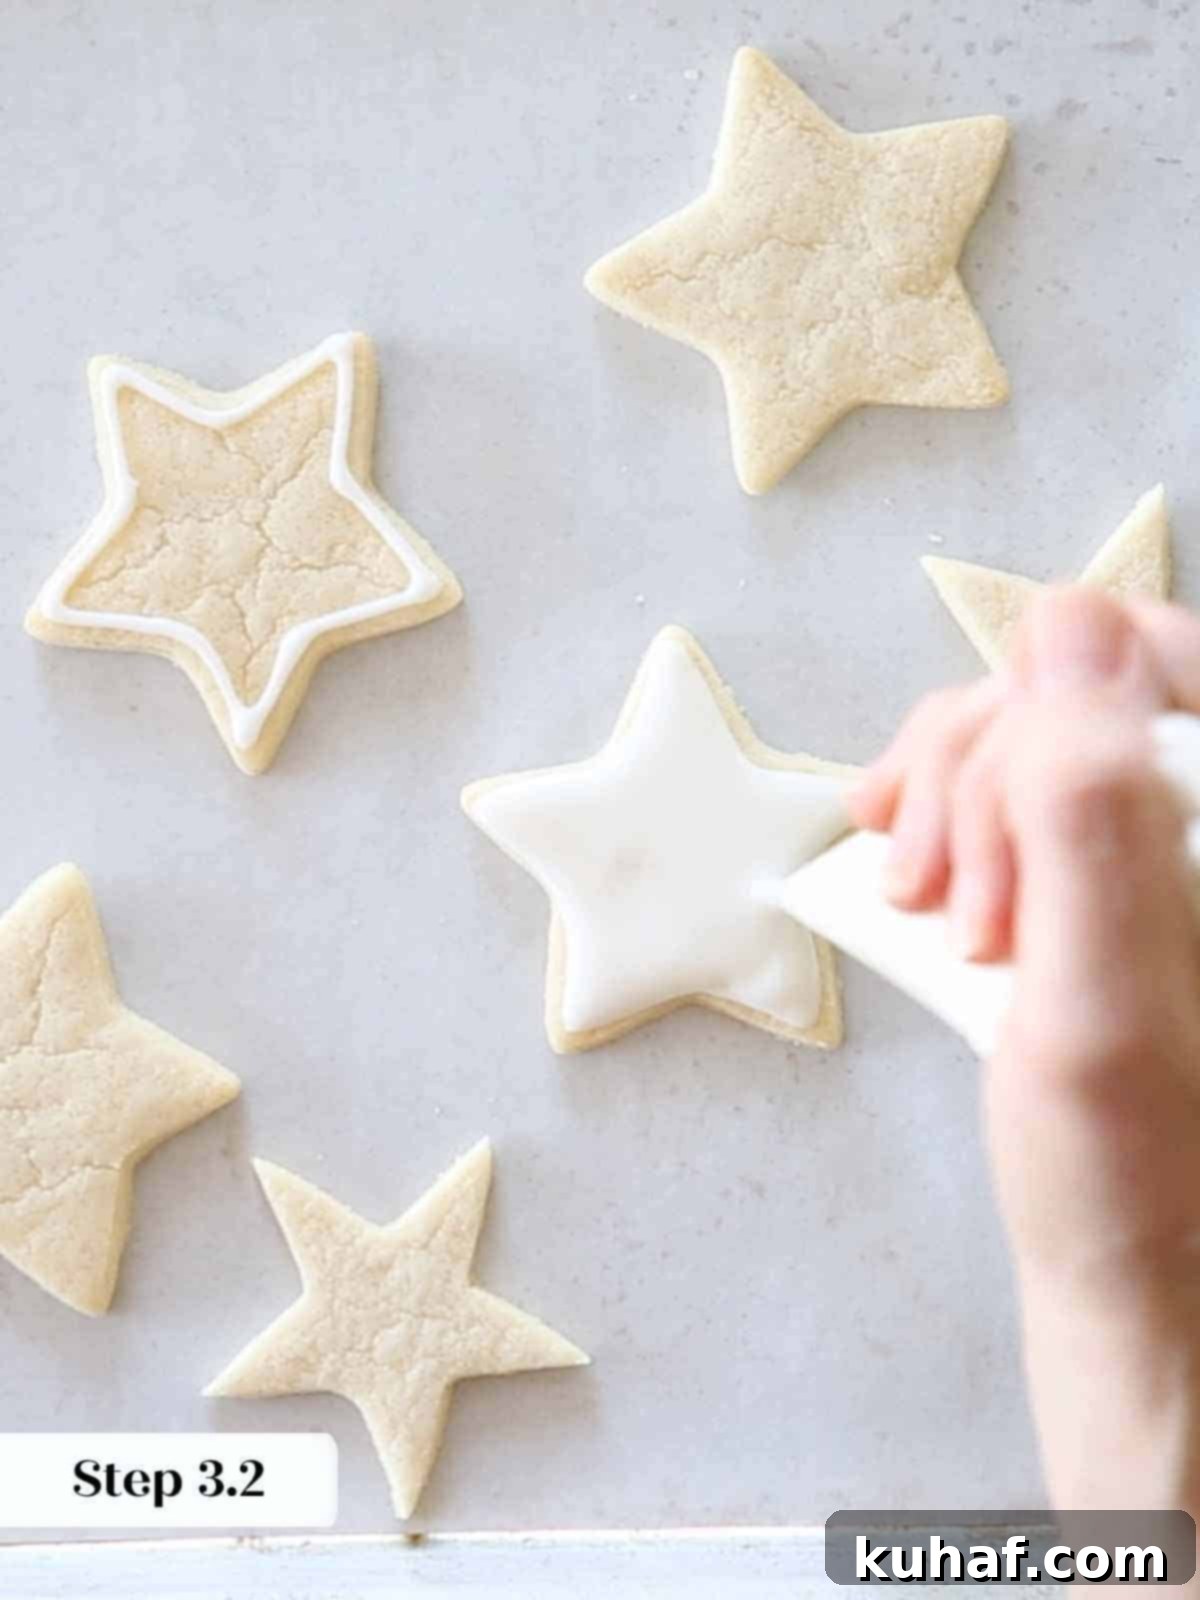
Efficiency in Flooding: One significant advantage of using the piping bag tip to spread the icing during flooding is that it allows you to easily add more icing as you go, ensuring full coverage without having to switch tools or scrape from a bowl.
Step 4: Layering Icing & Setting Time. If your design involves multiple layers or adjacent colors, patience is key. Allow each layer of icing to set for at least 30 minutes before adding another. For example, if you’re piping buttons on Santa’s coat, let the base red layer set completely before adding the black buttons; otherwise, they will sink into the wet red icing and lose their crisp definition. The same rule applies to different colors that touch each other – allow one color to fully set before outlining and flooding the adjacent section.
Step 5: Adding Sprinkles & Decorative Elements. To fully cover a cookie with sprinkles or rainbow jimmies, wait about 3 minutes after flooding (roughly the time it takes to outline and flood two or three more cookies). The icing will be slightly tacky but not fully set. Then, quickly and confidently flip the cookie face-down into a bowl of sprinkles, gently pressing, and immediately flip it back over. The key is swiftness before the icing has a chance to run. Alternatively, for more controlled placement, you can simply sprinkle jimmies or add other decorative elements like sugar pearls or gold balls using tweezers – yes, I admit, I can’t help but be precise! Do what feels most comfortable for you.
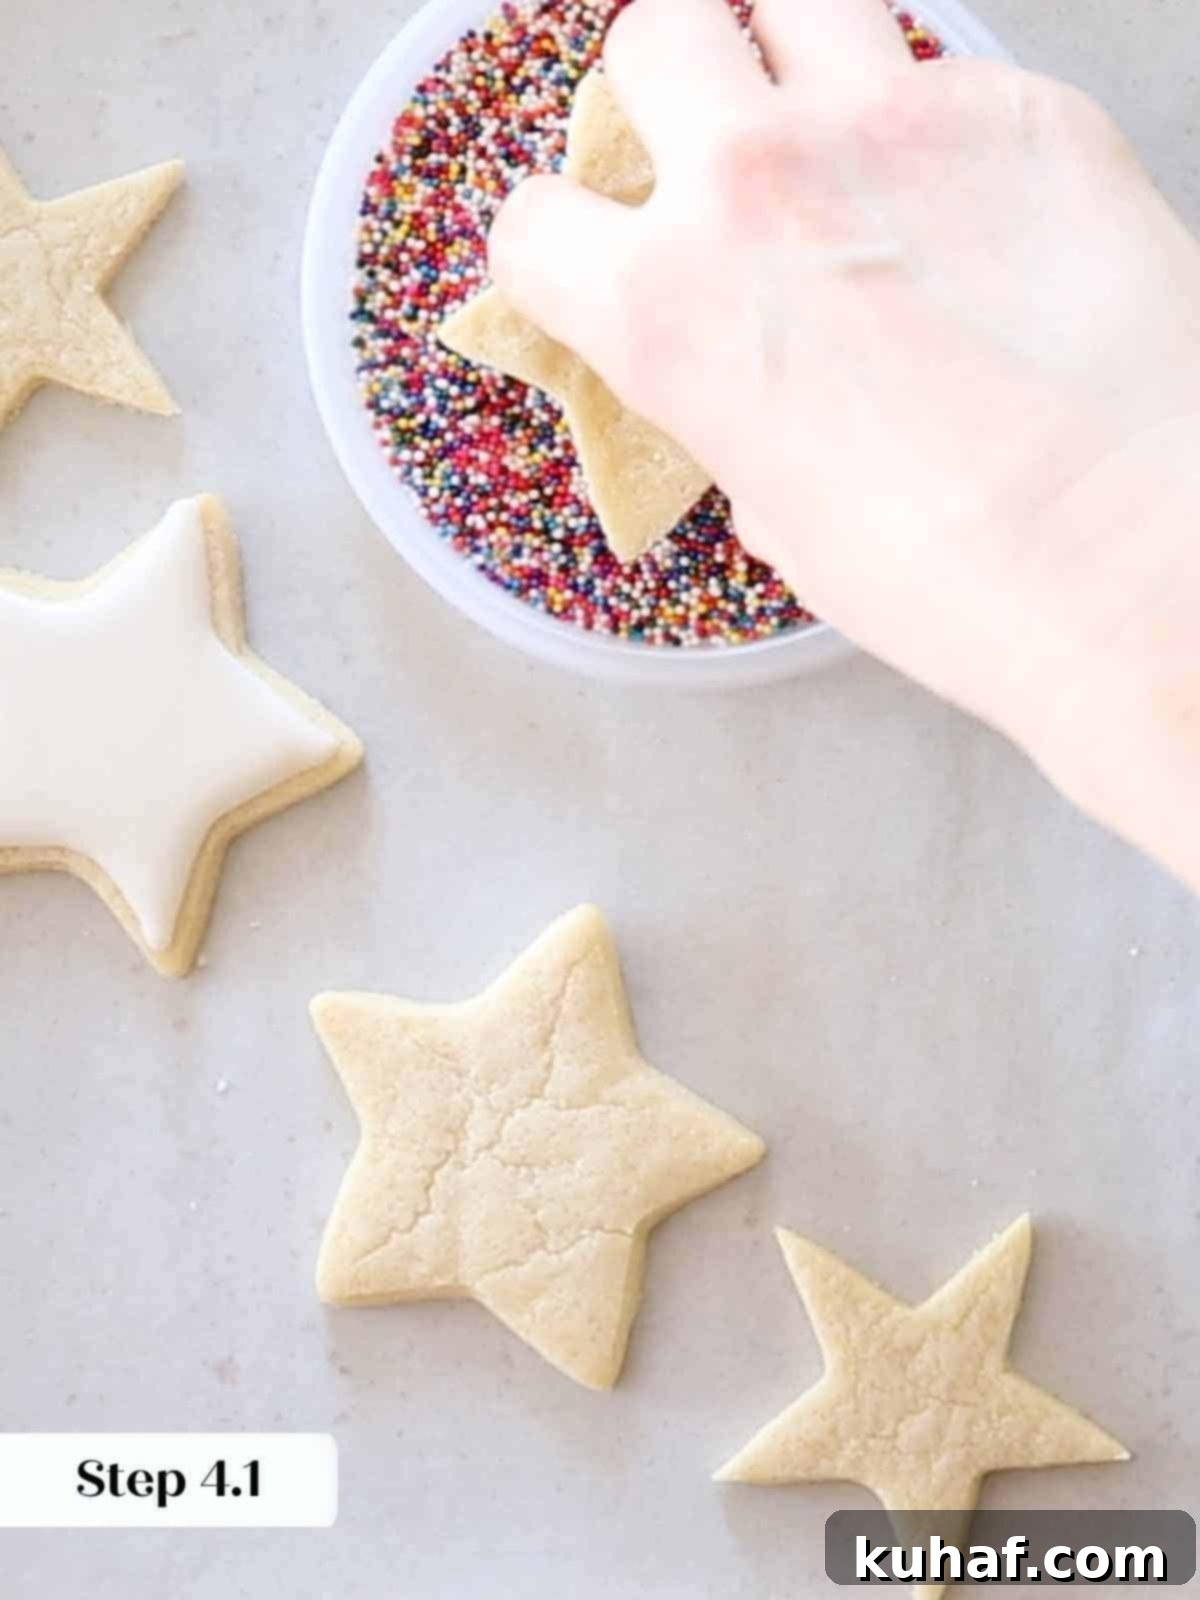
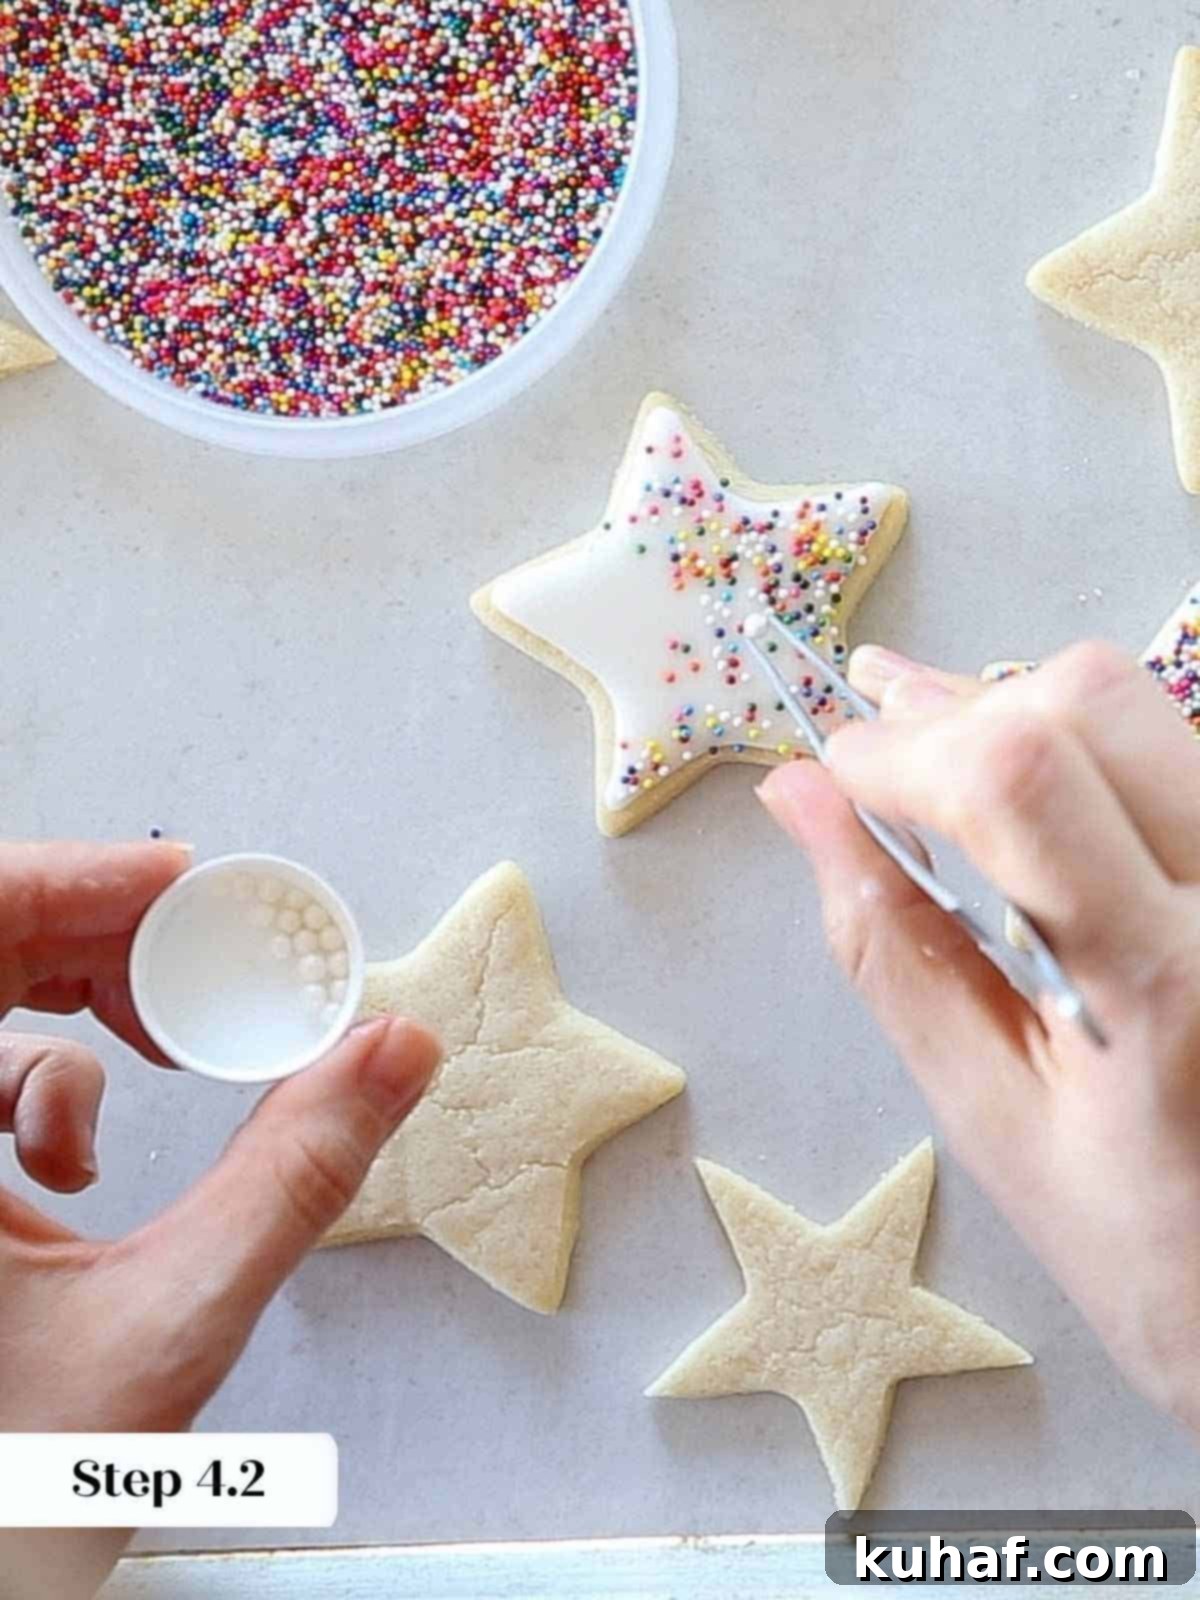
Crucial Drying for Royal Icing: Royal icing requires ample time to dry and harden completely. Always allow your iced cookies to dry at room temperature overnight, uncovered. This is non-negotiable! Do not, under any circumstances, place them in the refrigerator or freezer. The moisture and condensation in these environments will be absorbed by the icing, causing it to soften, become sticky, and potentially bleed its colors. You’ve put in too much effort for that to happen! If you must wrap them, ensure the plastic wrap does not touch the icing surface, and ideally, wait at least 3 hours before wrapping.

Frequently Asked Questions
To maintain the deliciousness and beauty of your soft sugar cookies with royal icing, store them at room temperature in an airtight container for up to 10 days. Ensure the royal icing has completely set for a full 24 hours before attempting to stack them. If wrapping with plastic wrap, wait at least 3 hours after icing and ensure the wrap does not directly touch the icing surface to prevent smudging or stickiness. Avoid refrigeration, as humidity can cause the icing to soften and colors to bleed.
Absolutely! These homemade sugar cookies perform exceptionally well when baked from a frozen state. There’s no need to adjust your oven temperature, but you may need to add an additional 1-2 minutes to the baking time, depending on the size and thickness of your cookies. Baking from frozen helps maintain their shape even better.
Yes, this recipe is incredibly flexible for make-ahead preparation! You can pause at several points:
- Dough Preparation: Make the dough, form it into a disk (rolled or unrolled), wrap it tightly, and freeze for up to 3 months. Thaw in the refrigerator before rolling.
- Rolled & Cut Dough: Even better, prepare the dough through the rolling and cutting stages. Stack the raw, cut cookies between layers of parchment paper in an airtight container and freeze. When you’re ready to bake, transfer directly from the freezer to your preheated oven – no thawing required!
I’ve personally scaled this recipe up significantly, even making it in an 80-quart stand mixer with great success! When multiplying for a very large batch, you might find adding a tiny bit of milk helpful to bring the dough together more easily without needing to finish by hand. Crucially, for larger batches, always weigh your ingredients (especially flour) for accuracy, as even a slight excess of flour will be difficult to incorporate and can alter the final texture.
Absolutely, these make for excellent shipping cookies, making them a perfect thoughtful gift! Once iced and properly dried (following the storage instructions), they remain delicious for up to 10 days. Their sturdy, no-spread nature means they stack beautifully without breaking, and they aren’t overly fragile, standing up well to transit. For an extra special gift box, consider including our best snickerdoodle cookies too, as they also ship wonderfully!
If you tried this recipe and absolutely loved it, please take a moment to leave a 🌟 star rating and share your thoughts in the comments below. Your feedback truly brightens my day and helps other bakers discover this wonderful recipe!

Soft Cut-Out Sugar Cookies
Chef Lindsey
15 minutes
8 minutes
30 minutes
23 minutes
40
Cookies
Saved
Pin Recipe
Comment
Print Recipe
Ingredients
For the Cookies:
-
2 ½
cups
all-purpose flour
*see note -
½
teaspoon
baking powder
-
½
teaspoon
kosher salt
-
½
cup
melted unsalted butter -
1
cup
granulated sugar
-
1
large whole egg
-
2
teaspoons
vanilla extract
For Royal Icing:
-
1
box powdered sugar
1 lb (454g) -
6 ½
tablespoons
fresh lemon juice
juice from approximately 2 medium lemons, 85 g -
¼
cup
dried egg whites
or meringue powder (22g) -
milk
as needed, approximately 20 g (for adjusting consistency)
For a Simple Cookie Icing (Alternative):
-
¾
cup
powdered sugar
-
¼
teaspoon
vanilla extract
-
3-5
teaspoons
milk
Instructions
Make the cookie dough:
-
In a large bowl whisk together flour, baking powder, and kosher salt. Set aside.
-
In another large bowl, melt the butter (I used the microwave) just until melted but not hot. Whisk in the sugar followed by the egg and vanilla. Whisk vigorously until the mixture is emulsified. You shouldn’t see any streaks of butter or egg.
-
Slowly stir in the flour mixture.
-
It does look like a dry dough, so I like to finish by hand, squeezing the dough together. This incorporates the flour faster without developing too much gluten.
-
Roll your dough while it is at room temperature. Roll the dough to approximately ¼ inch. You will have the best results if rolled between two pieces of parchment, but you can also roll out on a lightly floured surface.
-
Refrigerate the dough until chilled. This will only take 30 minutes, but I like to give it a full 2 hours or overnight to let the gluten relax.
Cut & bake cookies:
-
When you are ready to bake, preheat your oven to 325° F convection or 350° F conventional, and line two baking sheets with parchment paper.
-
Unstick the parchment from both sides of the dough, then cut shapes with a lightly floured cookie cutter. Chill the cookies before baking. It will only take about 20 minutes.
-
Bake in preheated oven for 7-9 minutes or until the cookies look matte in the center and have a few small cracks. Some of the edges might have begun to brown. I bake all the same shapes on one sheet to ensure even baking.
-
Cool completely before icing.
Make Royal Icing:
-
In a large bowl or in the bowl of a stand mixer fitted with the whisk attachment, combine the dried egg whites and lemon juice. Whisk until soft peaks form.
-
Add all the powdered sugar and whisk to combine.
-
Separate the icing into different bowls and add food dye. Be sure to keep an eye on the consistency and stop adding if it gets too thin.
-
For outlining using the ribbon test. The icing should cascade slowly off your spatula and remaining clearly visible on the surface for a few moments (about 5-6 seconds) before slowly disappearing.
-
For flooding using the same ribbon test, the icing should cascade off your spatula and almost disappear instantly into the rest of the icing.
For the simple icing:
-
Simply whisk all the ingredients together, adding a little milk at a time until it flows from the whisk but briefly holds a line on top of the icing in the bowl.
Video
Notes
Yield – Approximately 40 cookies when rolled ¼ inch thick using 2-inch cookie cutters.
Technique – Rolling between parchment paper is highly recommended for mess-free, consistently flat cookies without added flour.
Variations – Customize with different extracts (almond, peppermint), citrus zests, or small mix-ins like mini chocolate chips or sprinkles directly into the dough before rolling.
Storage – Store iced soft sugar cookies at room temperature in an airtight container for up to 10 days. Ensure royal icing is fully set (24 hours for stacking, 3 hours before covering loosely with plastic wrap) to prevent damage.
The Original 2014 Recipe (for returning bakers): To recreate the earlier, softer but cakey version, follow the main recipe but add an additional ½ teaspoon of baking powder to the dry ingredients. During Step 3 (slowly stirring in the flour mixture), incorporate ½ cup of buttermilk (or regular milk) by alternating additions with the dry mixture, starting and ending with flour. This original version requires the dough to be chilled before rolling, and a generously floured surface should be used for rolling and cutting.
Nutrition
Calories:
121
kcal
|
Carbohydrates:
23
g
|
Protein:
2
g
|
Fat:
3
g
|
Saturated Fat:
2
g
|
Polyunsaturated Fat:
0.1
g
|
Monounsaturated Fat:
1
g
|
Trans Fat:
0.1
g
|
Cholesterol:
10
mg
|
Sodium:
74
mg
|
Potassium:
30
mg
|
Fiber:
0.2
g
|
Sugar:
16
g
|
Vitamin A:
77
IU
|
Vitamin C:
1
mg
|
Calcium:
7
mg
|
Iron:
0.4
mg
Dessert
American
121
Like this? Leave a comment below!
Before You Go
Thank you for exploring this professional chef-tested recipe for the best soft sugar cookies. I hope you found it insightful and that your baking endeavors are met with delicious success! Don’t forget to check out our other fantastic cookie recipes for more sweet inspiration.
