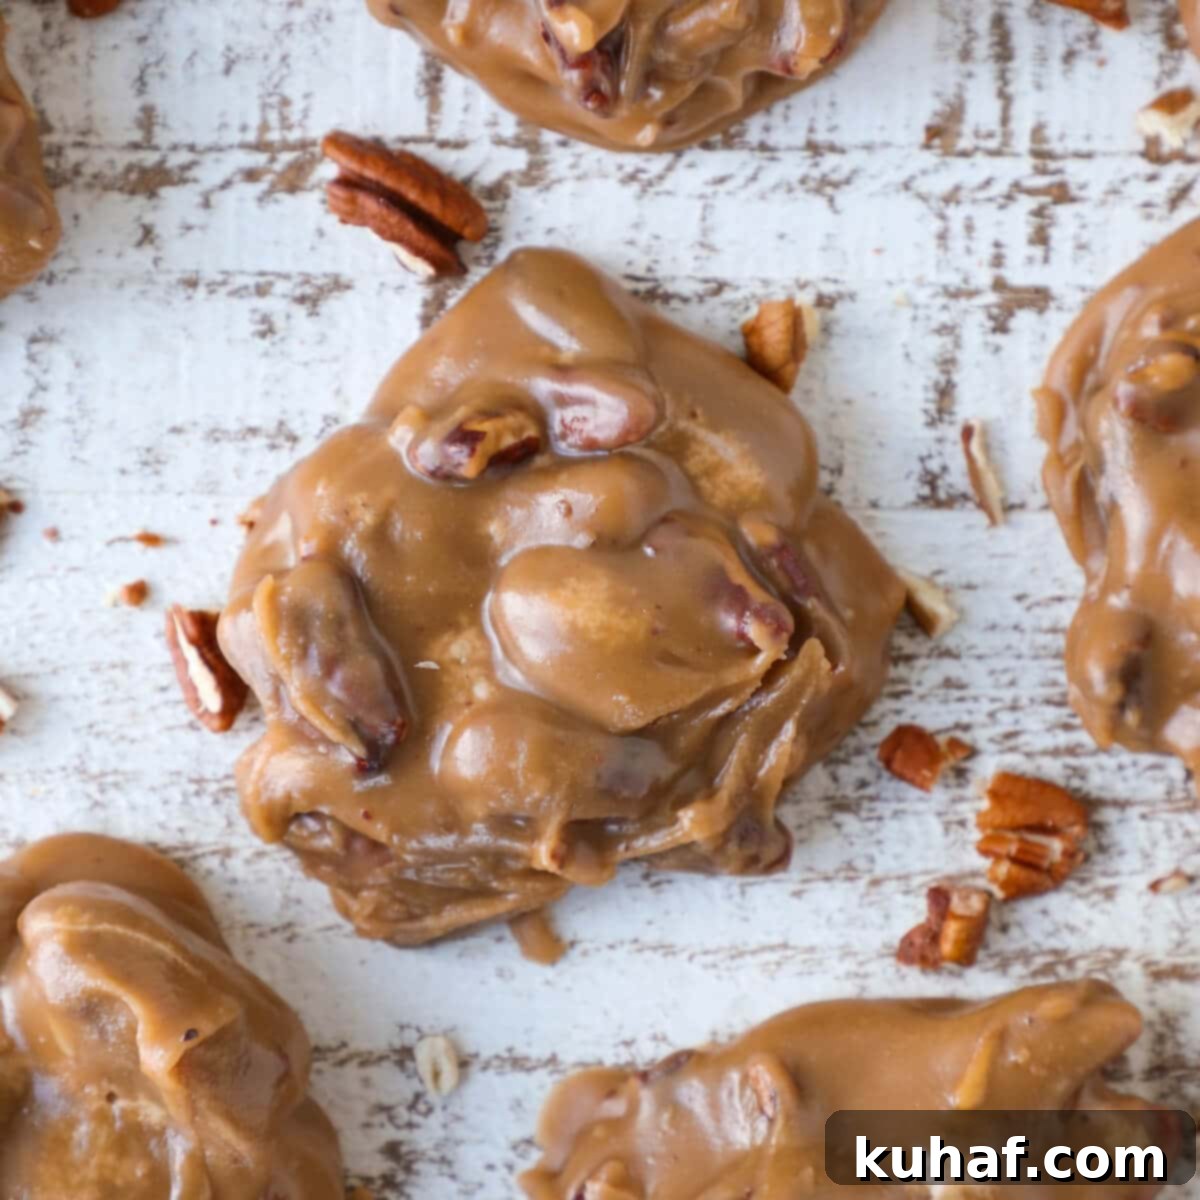
Easy Southern Pecan Praline Recipe: Achieve Perfect, Glossy Candy Every Time
Unlock the secrets to crafting exquisite, melt-in-your-mouth Southern Pecan Pralines with this easy-to-follow recipe. Designed for home cooks, these flavorful, thick candy delights are studded with perfectly toasted pecans and boast a rich, caramelized brown sugar essence. I’ll share all my professional pastry chef tips to ensure your pralines turn out beautifully shiny, never crystallized, and are ready to enjoy in under 30 minutes!
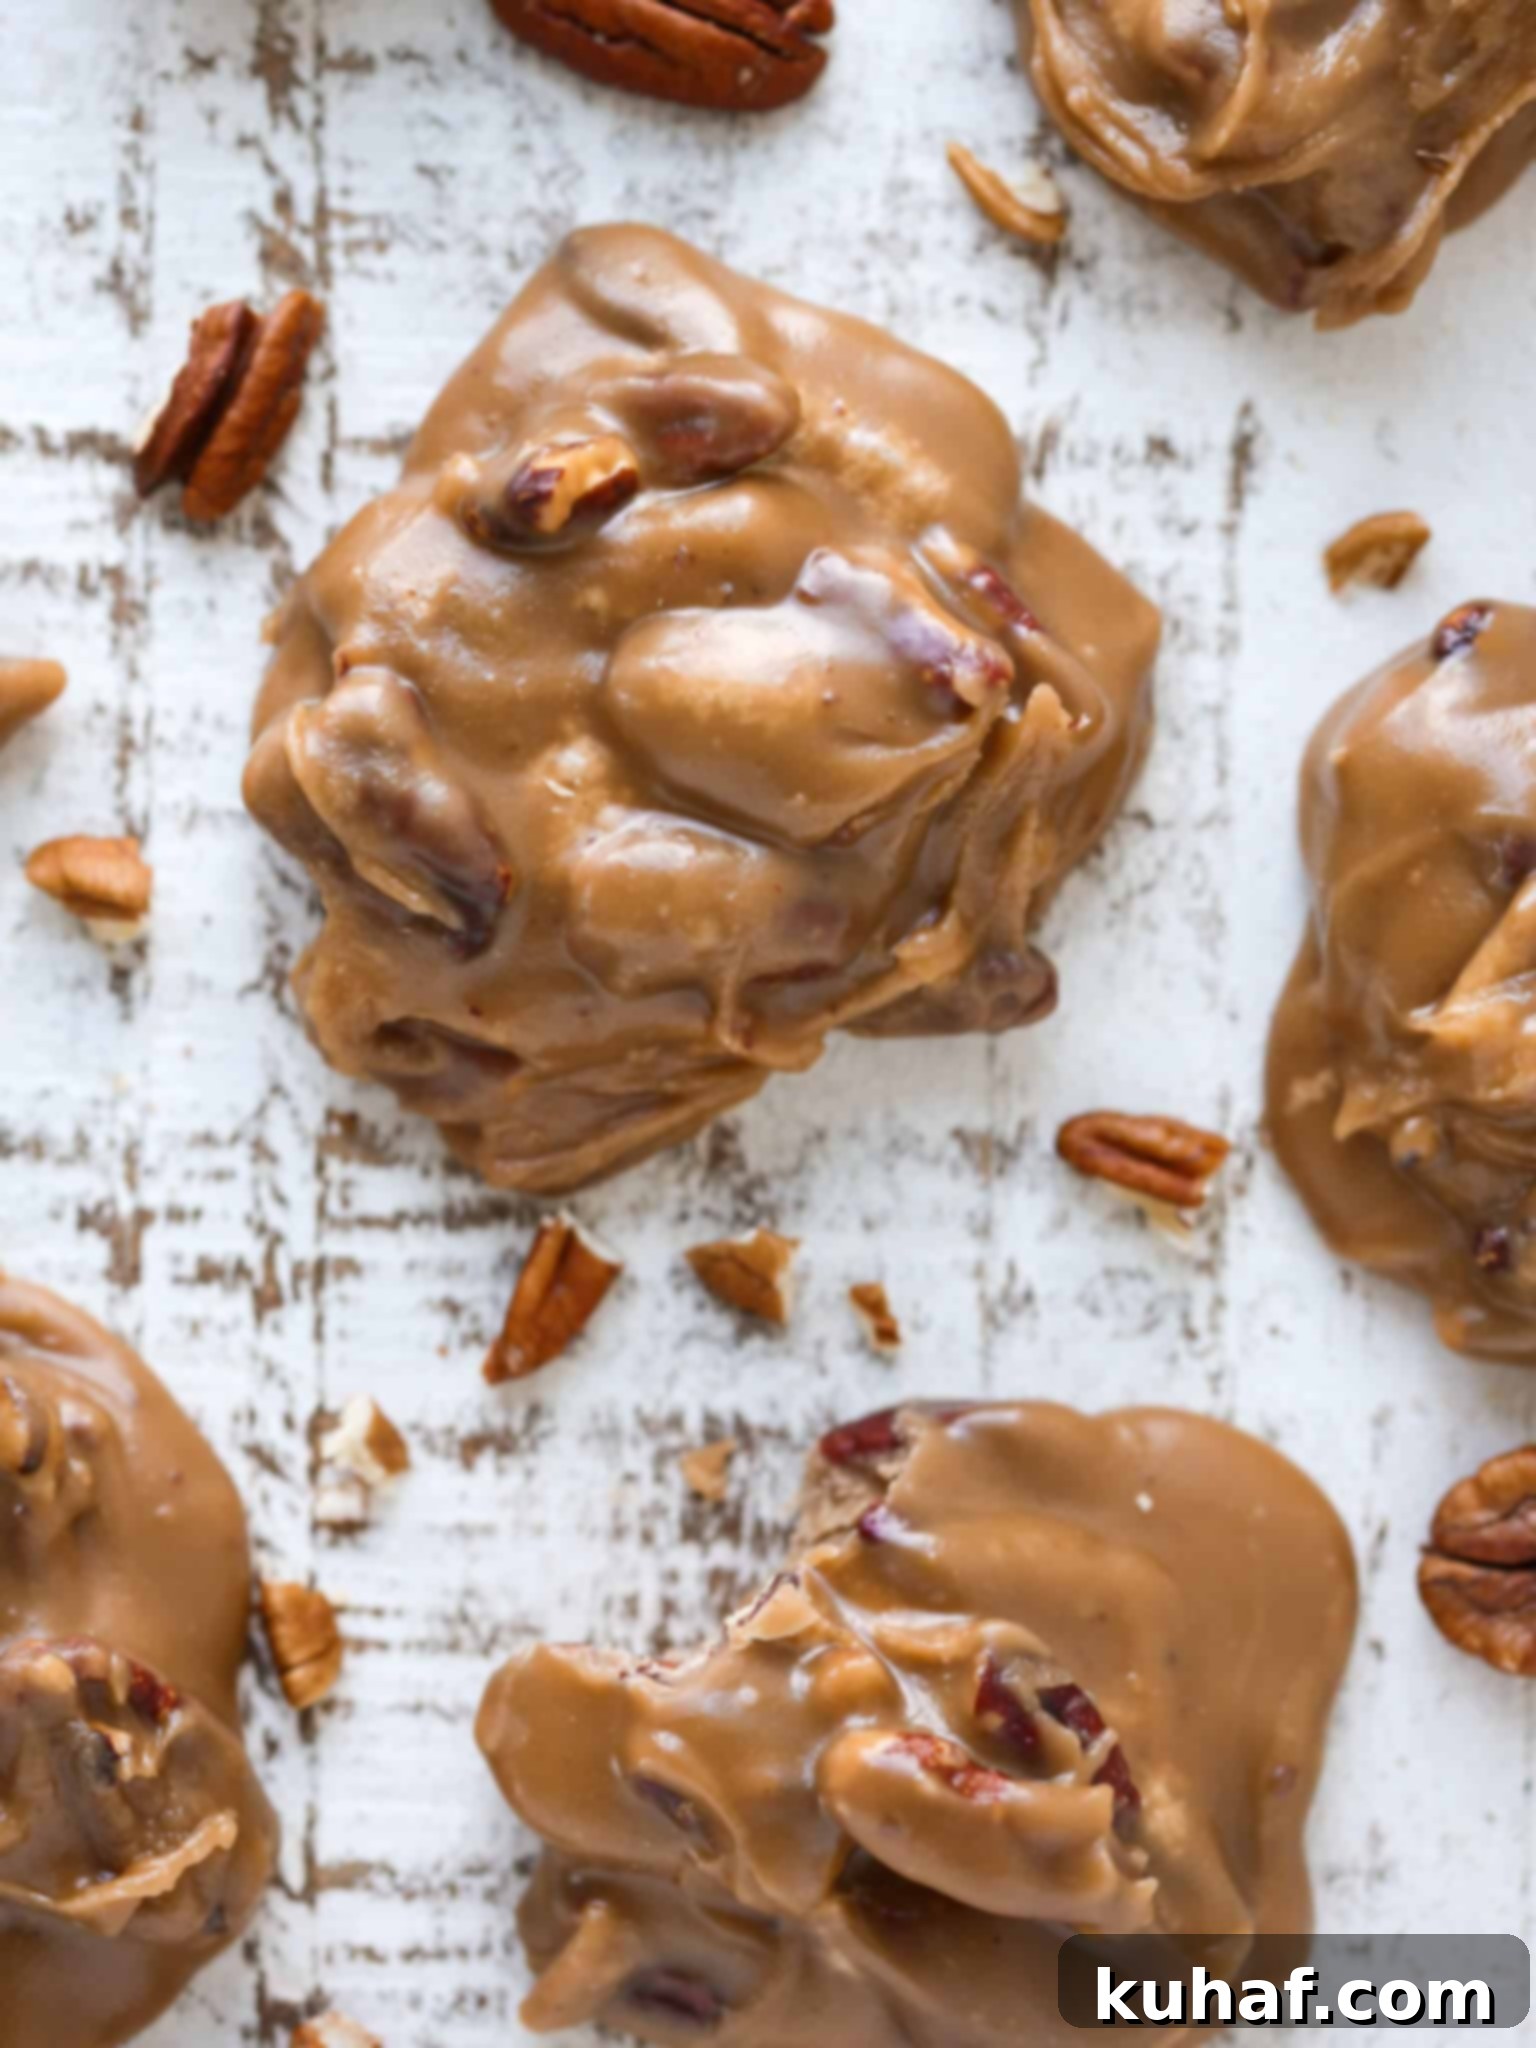
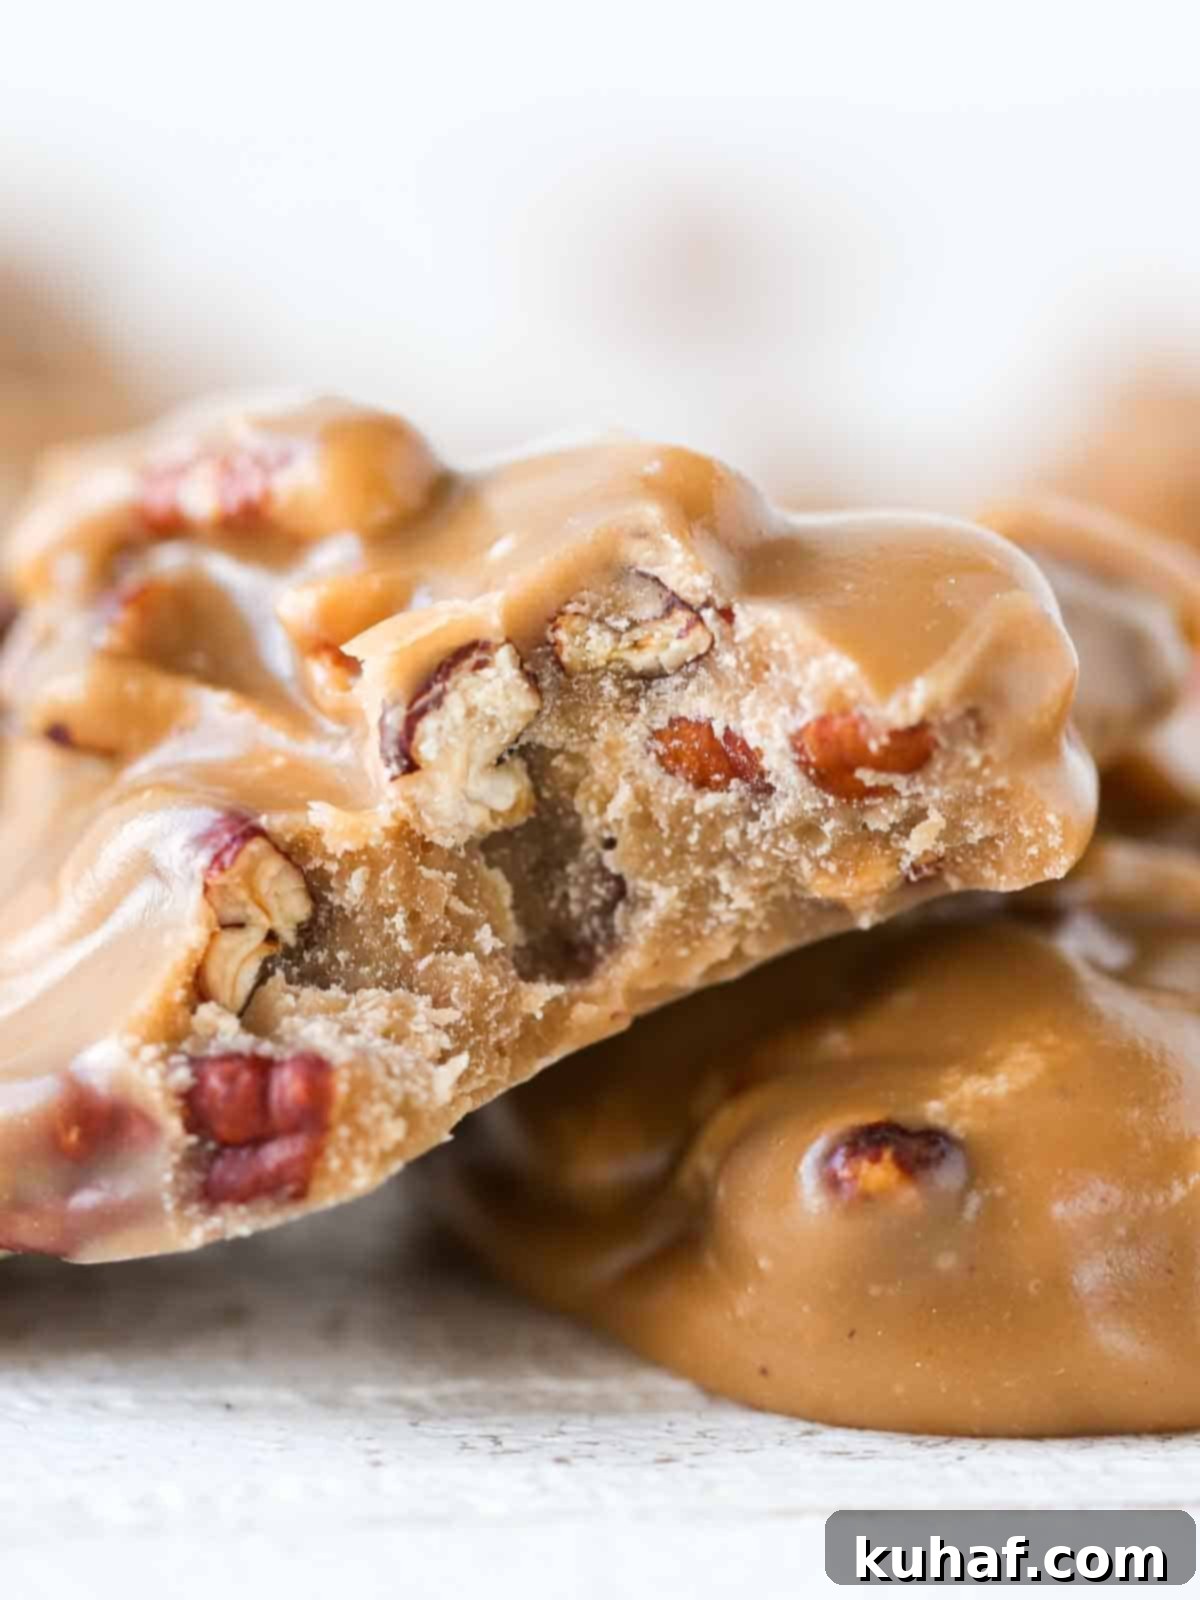
This classic recipe for Southern pecan pralines consistently yields stunning results: thick, luscious candies bursting with the robust flavor of toasted pecans and a distinctive caramelized brown sugar depth. As a professional pastry chef, I’ve honed the techniques to guarantee your pralines achieve that coveted glossy finish without succumbing to crystallization. The texture is soft and delicately crumbly, melting in your mouth much like a rich, old-fashioned fudge.
While an absolute delight year-round, these homemade pralines, much like homemade toffee or sticky toffee pudding, are especially cherished during the holidays. They make perfect homemade gifts for friends, family, coworkers, and teachers, aligning perfectly with many of my Great Gifts for Home Cooks suggestions. Present them elegantly in a decorative tin or a simple clear gift bag tied with a festive ribbon for a thoughtful touch.
Table of Contents
- Why You Will Love this Pecan Praline Recipe
- Professional Tips for Making Perfect Pralines
- What are Pralines?
- Key Ingredients for Pecan Pralines
- Possible Ingredient Substitutions
- Step-by-Step: How to Make Pecan Pralines
- Chef Lindsey’s Essential Recipe Tip
- Frequently Asked Questions About Pralines
- Pecan Pralines Recipe Card
- Before You Go: More Sweet Treats
Why You Will Love this Easy Pecan Praline Recipe
- Irresistibly Rich, Caramelized Flavor: These pralines capture the essence of a classic pecan pie, but in a delightful candy form. The interplay of caramelized brown sugar with the nutty pecans creates a depth of flavor that is truly unique and utterly addictive. Every bite is a journey through sweet, buttery, and nutty notes, perfectly balanced for maximum enjoyment.
- Achieve the Perfect, Signature Texture: My recipe is specifically designed to deliver pralines with that iconic soft, slightly crumbly texture that dissolves on your tongue. To elevate the experience, I always toast the pecans beforehand, adding a wonderful contrasting crunch that complements the smooth candy beautifully. This combination of textures is what makes a praline truly special.
- Quick and Efficient: Made in Under 30 Minutes: Don’t let the elegance of pralines fool you – they’re surprisingly fast to make! This recipe can be completed from start to finish in less than half an hour. To ensure a seamless process, I recommend having all your ingredients measured and ready (mise en place) before you begin. This allows you to move smoothly from one step to the next without any delays.
- Expert Guidance from a Pastry Chef: You’re not just getting a recipe; you’re getting a masterclass! Chef Lindsey shares all her professional secrets for achieving perfect, glossy, non-crystallized pralines. Whether you prefer a detailed step-by-step tutorial or a visual guide, you’ll find everything you need to succeed, including an instructional video.
Professional Tips for Making Perfect Pecan Pralines
Creating flawless pralines requires a bit of precision and patience, but with these expert tips, you’ll master the art:
- Embrace Patience for Optimal Results: This is perhaps the most crucial tip in candy making. Ensuring the sugar fully dissolves before boiling, allowing the candy mixture to reach precisely 235°F (the softball stage), letting it cool undisturbed for the specified time, and beating it just long enough are all non-negotiable steps. Each contributes significantly to preventing crystallization and achieving that smooth, perfect praline texture. Rushing any of these steps can lead to grainy, less appealing results.
- Do Not Skip the 10-Minute Cooling Period: This cooling step is vital for the structure of your pralines. By allowing the candy to cool off the heat without agitation, you prevent the sugar molecules from forming crystals prematurely. Stirring too early or too much during this phase is a common cause of grainy pralines. Let nature take its course for those first crucial 10 minutes.
- Reviving Seized or Overly Thick Mixtures: Sometimes, during the final beating stage, the mixture can seize up or become too thick to portion properly. Don’t despair! You can often salvage it by adding a small amount (about a teaspoon) of hot water and stirring vigorously. While the texture might be slightly more granulated than a perfectly smooth batch, it will still be delicious and salvageable. This trick is a lifesaver when you’re working quickly.
- Always Pre-toast Your Pecans: This simple step makes a world of difference. Toasting the pecans intensifies their natural nutty flavor, making them truly shine in the pralines. It also adds a delightful crunch that contrasts beautifully with the soft, creamy candy. You can toast them lightly in a dry skillet over medium heat or spread them on a baking sheet and bake at 350°F (175°C) for 5-7 minutes, until fragrant.
- Work Quickly During Portioning: Once the praline mixture reaches the perfect consistency (losing its gloss but still pliable), you need to work fast. As it cools, it will continue to thicken and set. Have your prepared baking sheets ready and portion the pralines efficiently to ensure consistent size and texture before the mixture becomes too hard to handle.
What are Pecan Pralines?
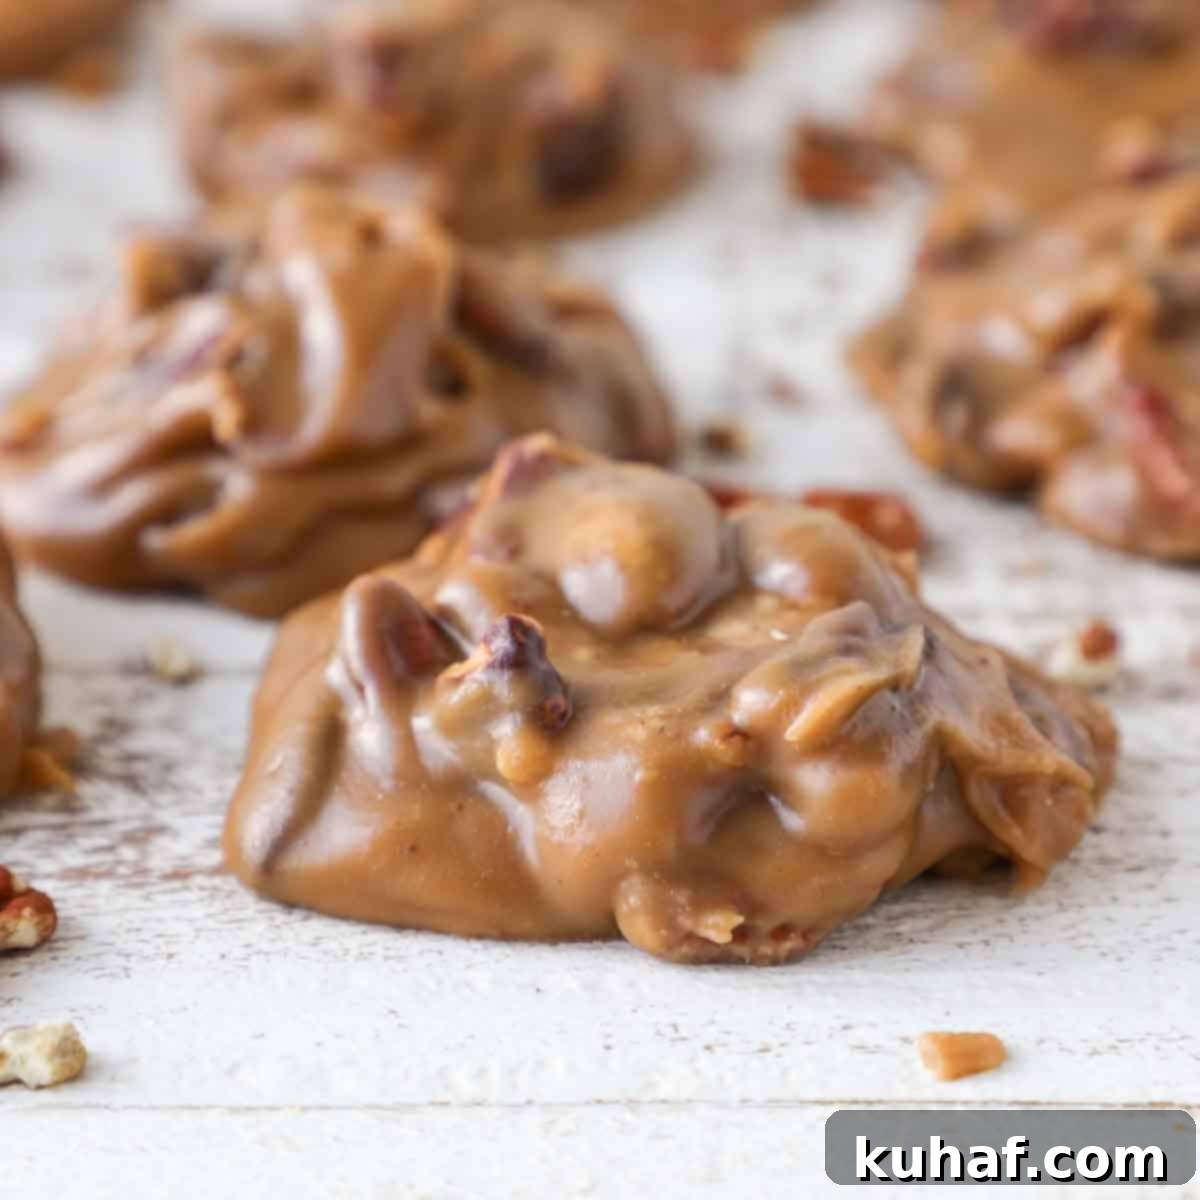
Pralines are a beloved traditional confection, particularly famous in the Southern United States, with roots tracing back to French culinary influences and popularized in places like New Orleans. At their heart, pralines are a stove-top candy made by carefully cooking a mixture of brown sugar, butter, milk, and flavorings (most notably vanilla and pecans) until it reaches a specific temperature known as the softball stage (235°F or 113°C). Once this temperature is achieved, the mixture is removed from the heat, allowed to cool slightly, and then beaten with a spoon until it becomes smooth, glossy, and thickens enough to be portioned.
This unique beating technique, similar to how old-fashioned fudge is made, is what gives pralines their distinctive soft, slightly crumbly, and wonderfully chewy texture. The dominant flavors are a rich, caramelized brown sugar, creamy vanilla, and, of course, the robust nuttiness of pecans. Many liken the taste of a good pecan praline to a classic pecan pie in a convenient, handheld candy form. They are a true Southern comfort food, embodying warmth, richness, and sweet indulgence.
Key Ingredients for Decadent Pecan Pralines
Each ingredient in this pecan praline recipe plays a crucial role in achieving the perfect flavor, texture, and appearance. Here’s a closer look at what you’ll need and why:
- Light Brown Sugar: This is the heart of the praline’s signature flavor. The molasses content in light brown sugar provides that deep, caramelized, and slightly complex sweetness that differentiates pralines from other sugar candies. It’s essential for achieving both the unique flavor profile and the soft, chewy texture.
- Butter: I always opt for unsalted butter in baking and candy making to have complete control over the salt content. In pralines, butter is indispensable. It contributes a luxurious richness and a silky smoothness to the candy base, ensuring a melt-in-your-mouth experience similar to fine caramels, toffees, and brittles. It also helps prevent crystallization.
- Kosher Salt: A pinch of kosher salt is vital here, not just for seasoning, but for balance. Its coarser grain and milder salinity (compared to table salt) allow it to enhance and brighten the rich flavors of brown sugar and pecans without making the pralines taste overtly salty. Without it, the sweet flavors can fall flat or seem dull.
- Vanilla Extract: Vanilla extract is a classic complement to caramelized flavors. It doesn’t just add its own beautiful, aromatic notes; it also acts as a flavor enhancer, boosting the warmth and complexity of the brown sugar and pecans, tying all the ingredients together harmoniously.
- Granulated Sugar: Alongside brown sugar, granulated sugar is fundamental to the candy’s structure. I prefer using extra-fine granulated sugar as it dissolves more readily and evenly, which is crucial for preventing crystallization. However, any standard granulated sugar will work perfectly fine, so don’t feel pressured to buy a special kind.
- Dark Corn Syrup: This ingredient is a secret weapon against crystallization. Dark corn syrup contains glucose, which interferes with the formation of large sugar crystals, ensuring your pralines remain smooth and glossy. It also adds a subtle depth of flavor. While you can substitute it with light corn syrup or glucose, omitting it entirely significantly increases the risk of grainy, crystalized pralines.
- Whole Milk: Using whole milk for candy making is a deliberate choice. The higher fat content in whole milk helps to further stabilize the sugar mixture, acting as a barrier against crystallization. Beyond its practical benefits, it imparts a creamy richness and a smooth mouthfeel to the finished pralines, contributing significantly to their indulgent flavor and texture.
- Pecans: As the star of the show, the quality of your pecans matters. I have a strong preference for fresh, plump Southern pecans (you can often find them in my pecan pie in my shop for proof!). Their natural oils and distinct flavor are unparalleled, especially when they are the primary flavor. Any good quality pecan halves will do, but always consider toasting them for enhanced flavor and crunch. To maintain their freshness, store pecans in the freezer if you plan to keep them for more than a month or if your kitchen is consistently warm. And if you have extra, why not make some delicious pecan sticky buns?
Possible Ingredient Substitutions for Your Pecan Pralines
While this recipe is carefully balanced for optimal results, sometimes you might need to make a substitution. Here’s what you can consider and how it might affect your pralines:
- Brown Sugar: This pecan praline recipe specifies light brown sugar for its balanced flavor. However, if you prefer a more intense, deep molasses flavor, or if dark brown sugar is all you have on hand, it can be used. Be aware that this will result in a praline with a darker color and a more robust, slightly less sweet, and richer caramel profile.
- Corn Syrup: Dark corn syrup is used in this recipe for its dual role as a crystallization inhibitor and for a slightly more complex flavor than its lighter counterpart. You can absolutely substitute light corn syrup or pure glucose for the dark corn syrup. These alternatives will still help prevent crystallization effectively. While it is possible to omit corn syrup entirely, doing so significantly increases the risk of your pralines developing a grainy, crystalized texture. The corn syrup is a small but mighty ingredient for achieving that smooth, glossy finish.
- Nuts: While pecan pralines are traditional, feel free to get creative with your nuts! You can experiment with different types of nuts, such as walnuts, almonds, or even a blend of several. Ensure any substituted nuts are also toasted to bring out their best flavor and add a satisfying crunch. The cooking method for the praline base remains the same regardless of the nut choice.
- Milk: For the best fudge-like texture and rich flavor, I highly recommend sticking with whole milk. Its fat content is crucial for both preventing crystallization and contributing to the creamy mouthfeel. I would advise against substituting non-dairy milk (like almond or oat milk), evaporated milk, or low-fat milk in this recipe, as their differing fat and protein compositions can lead to a less desirable texture and a higher chance of crystallization.
Step-by-Step: How to Make Perfect Pecan Pralines
Follow these detailed instructions to create flawless pecan pralines every single time. For precise measurements and additional details, please refer to the comprehensive recipe card below!
Prepare Your Pans and Pot:
Step 1: Begin by lining two sturdy baking sheets with waxed paper or parchment paper. If you only have aluminum foil, lightly spray it with cooking spray to prevent sticking. Next, butter the sides of a 3-quart (or larger) heavy-bottomed saucepot. This butter layer helps prevent sugar crystals from clinging to the sides as the mixture cooks, a common cause of crystallization in the final product.
Chef’s Note: Using a heavy-bottomed pot is crucial. It distributes heat more evenly, preventing scorching and ensuring the sugar cooks consistently, which is key for the best pralines.
Prepare and Cook Your Praline Mixture:
Step 2: Into your prepared pot, combine the light brown sugar, granulated sugar, kosher salt, dark corn syrup, and whole milk. Stir these ingredients carefully but thoroughly to ensure all the sugars are completely wet. Try to avoid splashing sugar crystals onto the sides of the pot during this initial stirring phase.
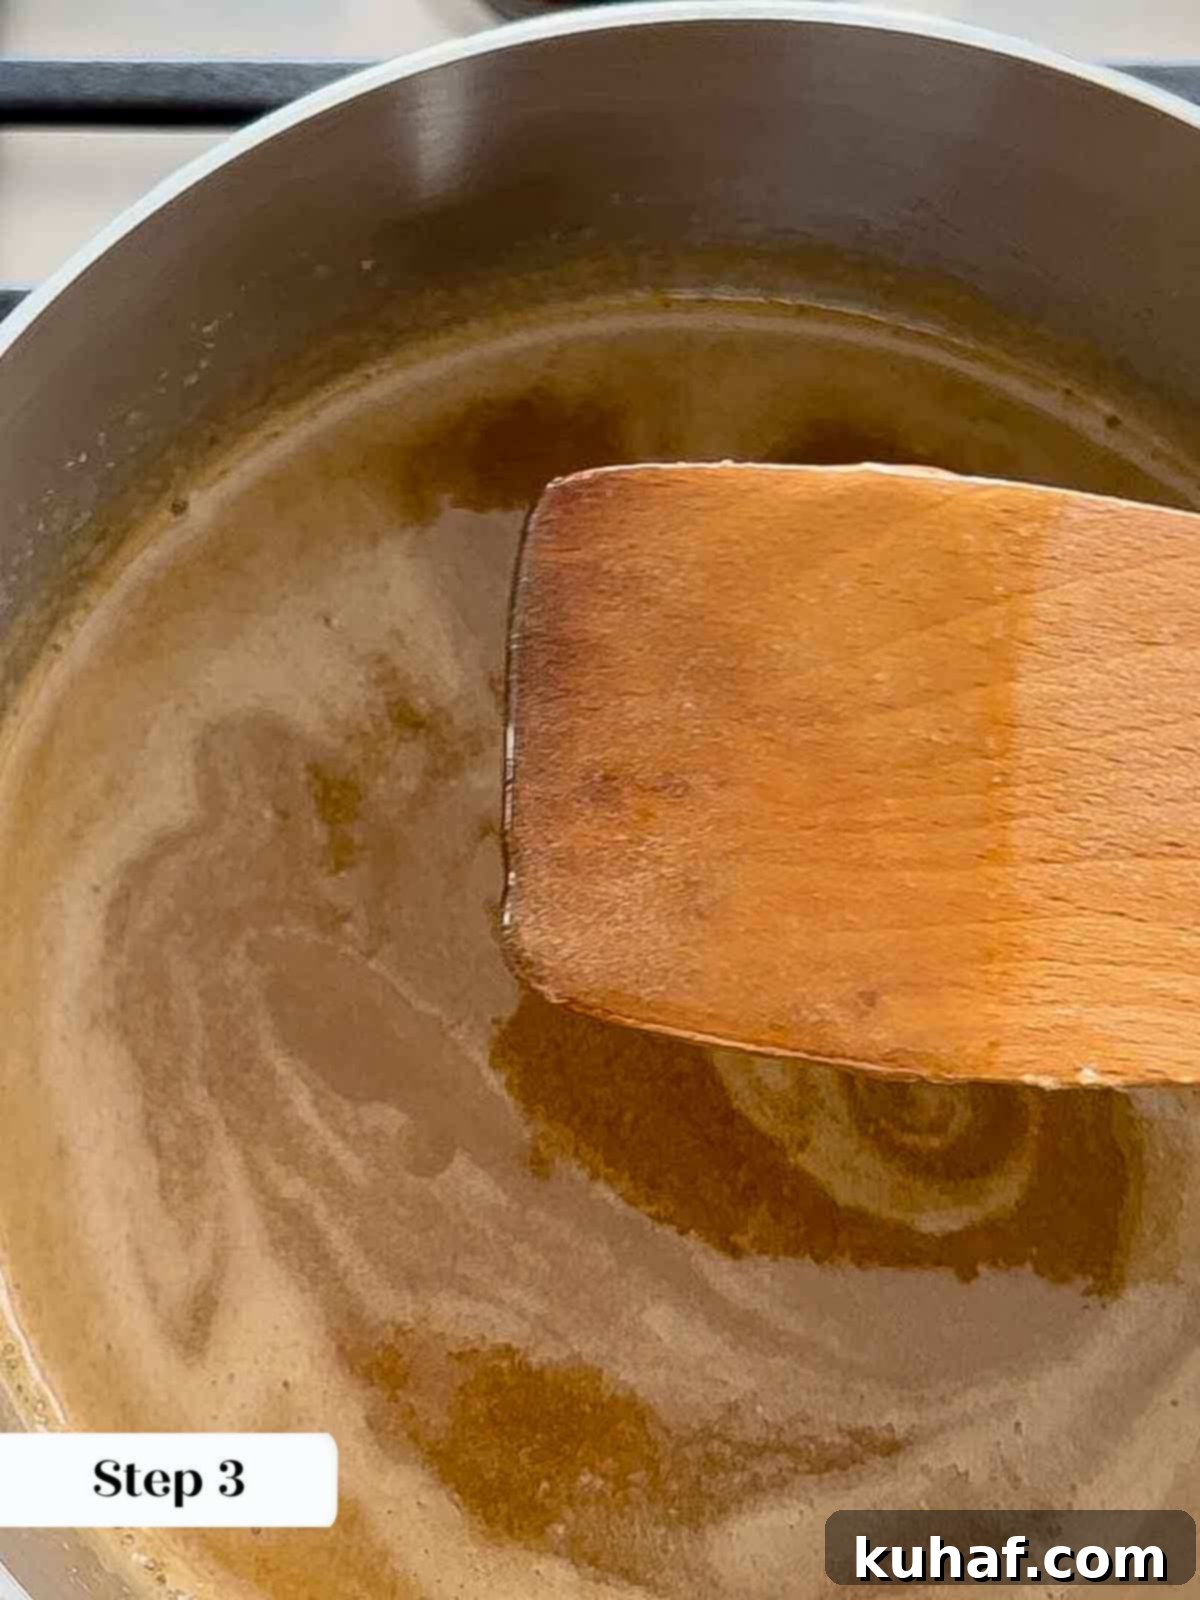
Step 3: Place the pot over medium heat. Stir the mixture frequently until all the sugar crystals have completely dissolved. You can test this by rubbing a small amount of the mixture between your fingers; it should feel smooth, not gritty.
Expert Insight: It is ideal for the sugar to fully dissolve before the mixture reaches a rolling boil. This significantly reduces the chances of sugar crystallization later, leading to smoother, glossier pralines.
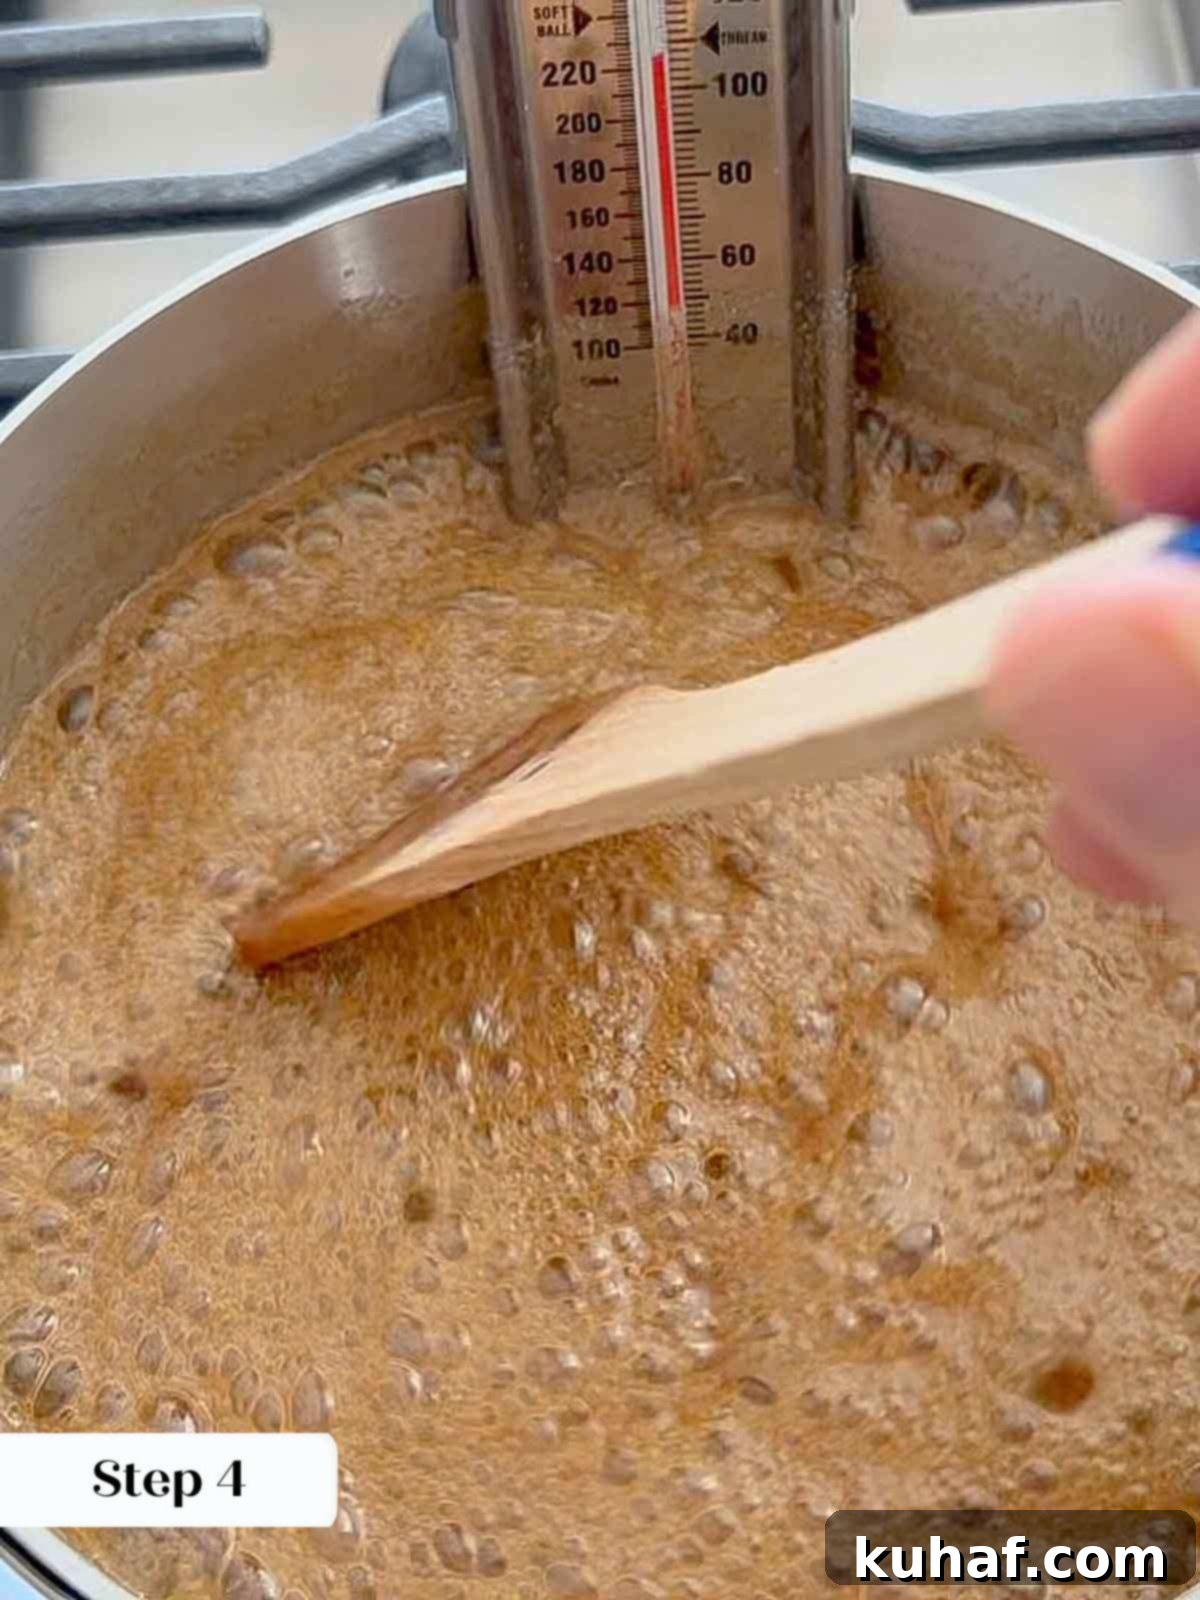
Step 4: Once the sugar is dissolved, bring the mixture to a full boil. Carefully attach a reliable candy thermometer to the side of the pot, ensuring its tip is submerged in the mixture but not touching the bottom. Continue to cook, stirring only occasionally to prevent sticking, until the thermometer registers the softball stage, which is precisely 235°F (113°C). Reaching this exact temperature is critical for the correct praline consistency.
Cool, Beat, and Portion:
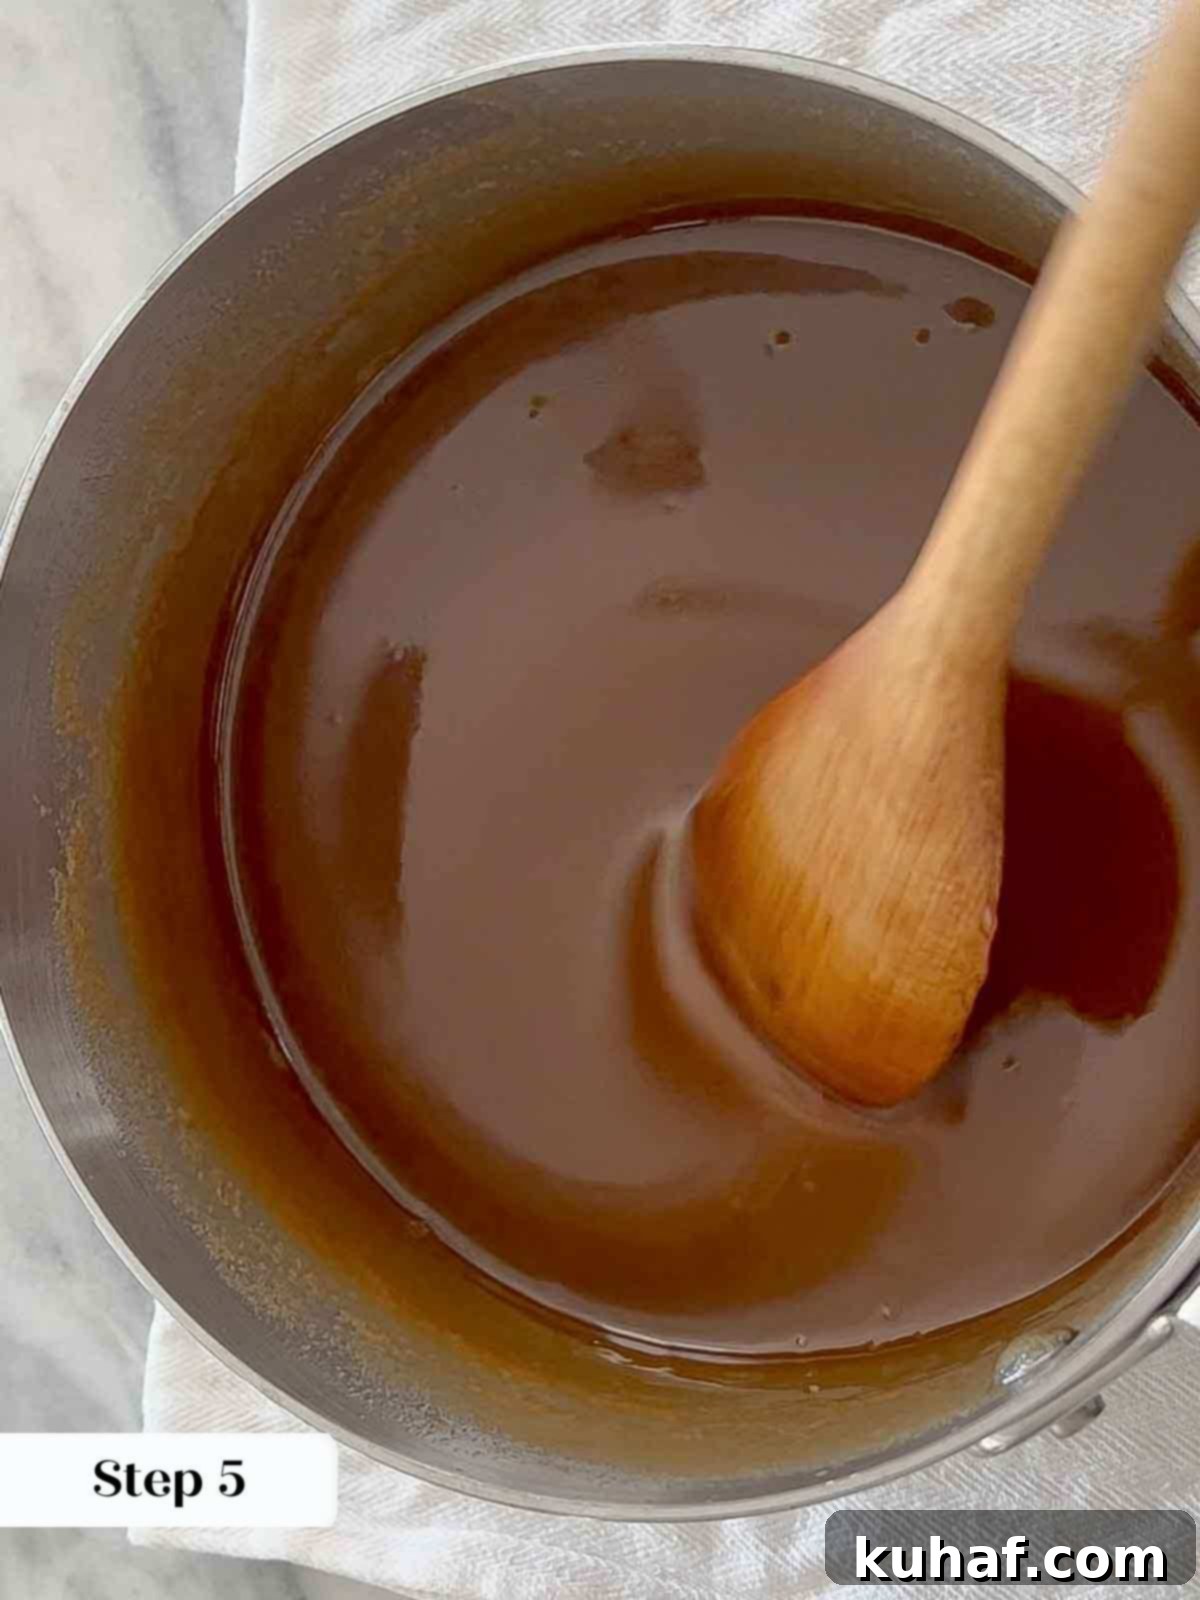
Step 5: Once the softball stage temperature is reached, immediately remove the pot from the heat. This is a crucial step: allow the mixture to cool undisturbed for exactly 10 minutes. Do not stir or agitate it during this time. This passive cooling allows the temperature to drop without disturbing the fragile sugar crystal structure, promoting a smooth final texture.
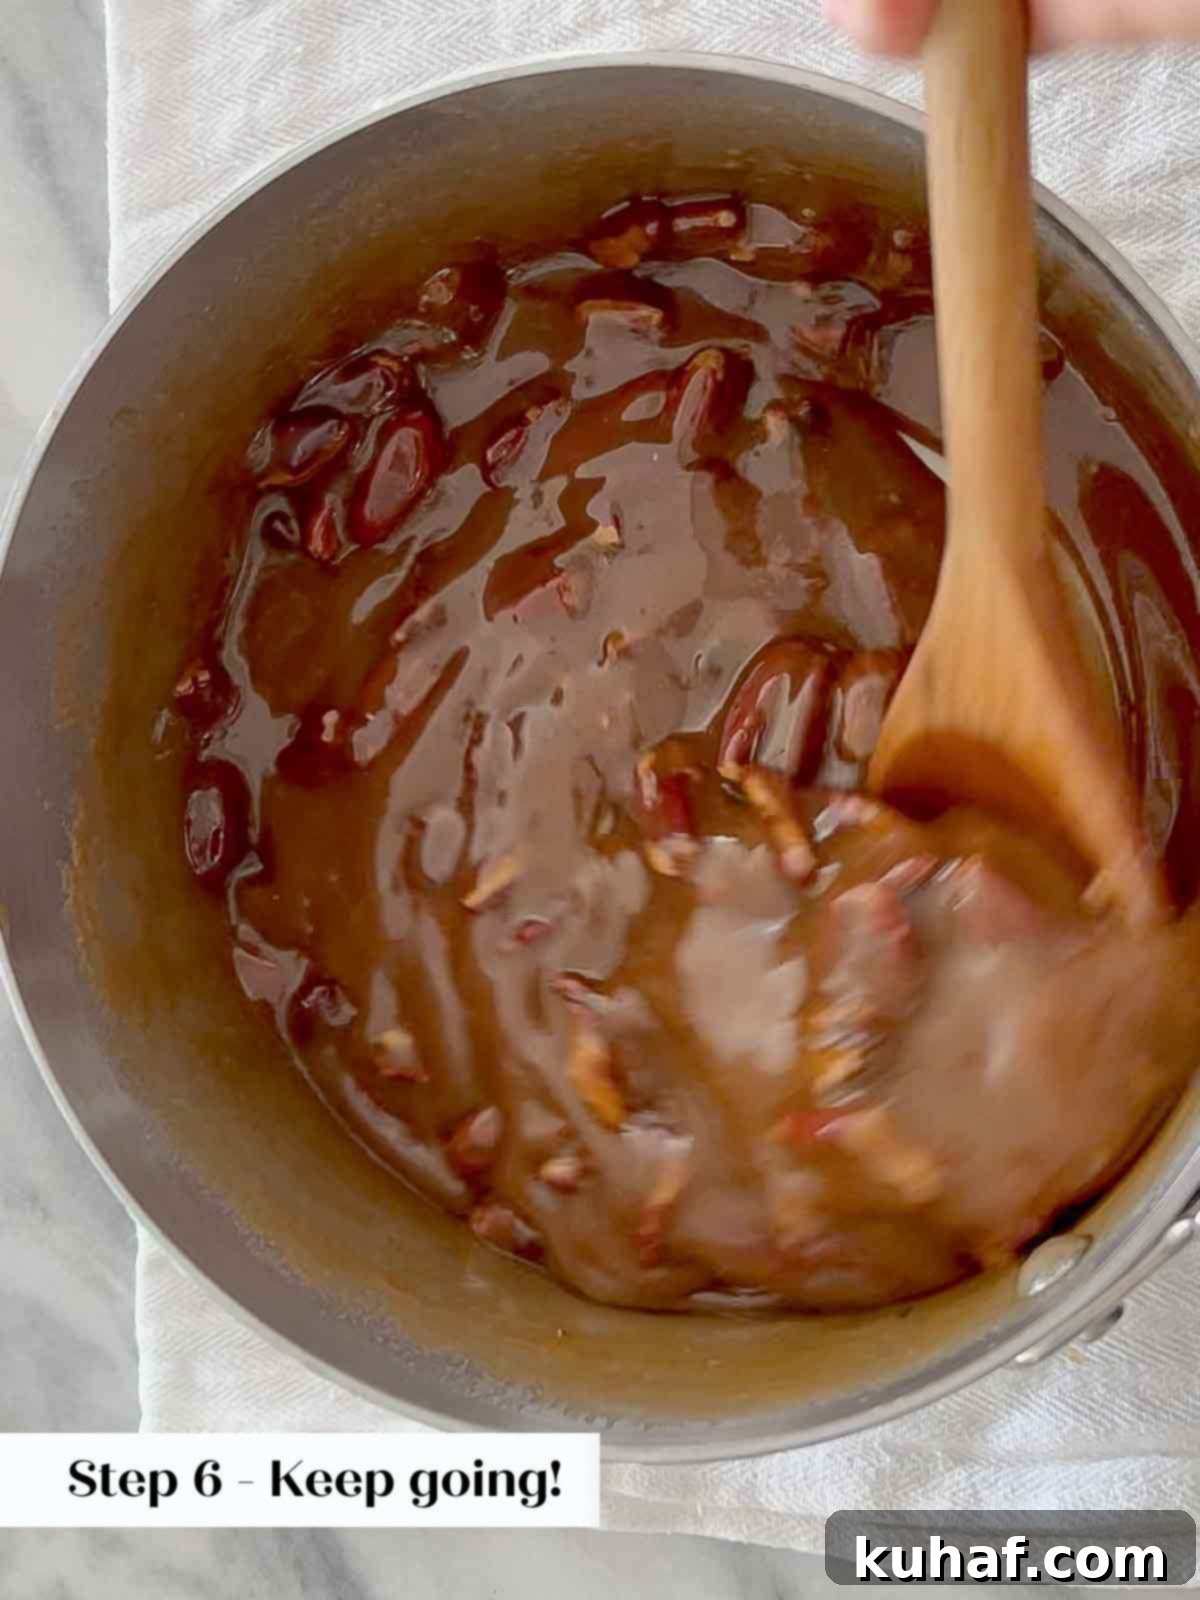
Step 6: After 10 minutes, add the vanilla extract to the mixture. Using a sturdy wooden spoon, begin to beat the mixture vigorously by hand for about 2 minutes. Then, incorporate the toasted pecans. Continue beating by hand with the wooden spoon. Watch the mixture carefully: it will gradually lose its initial glossy sheen and begin to thicken and appear more opaque. This change in appearance signals it’s almost ready.
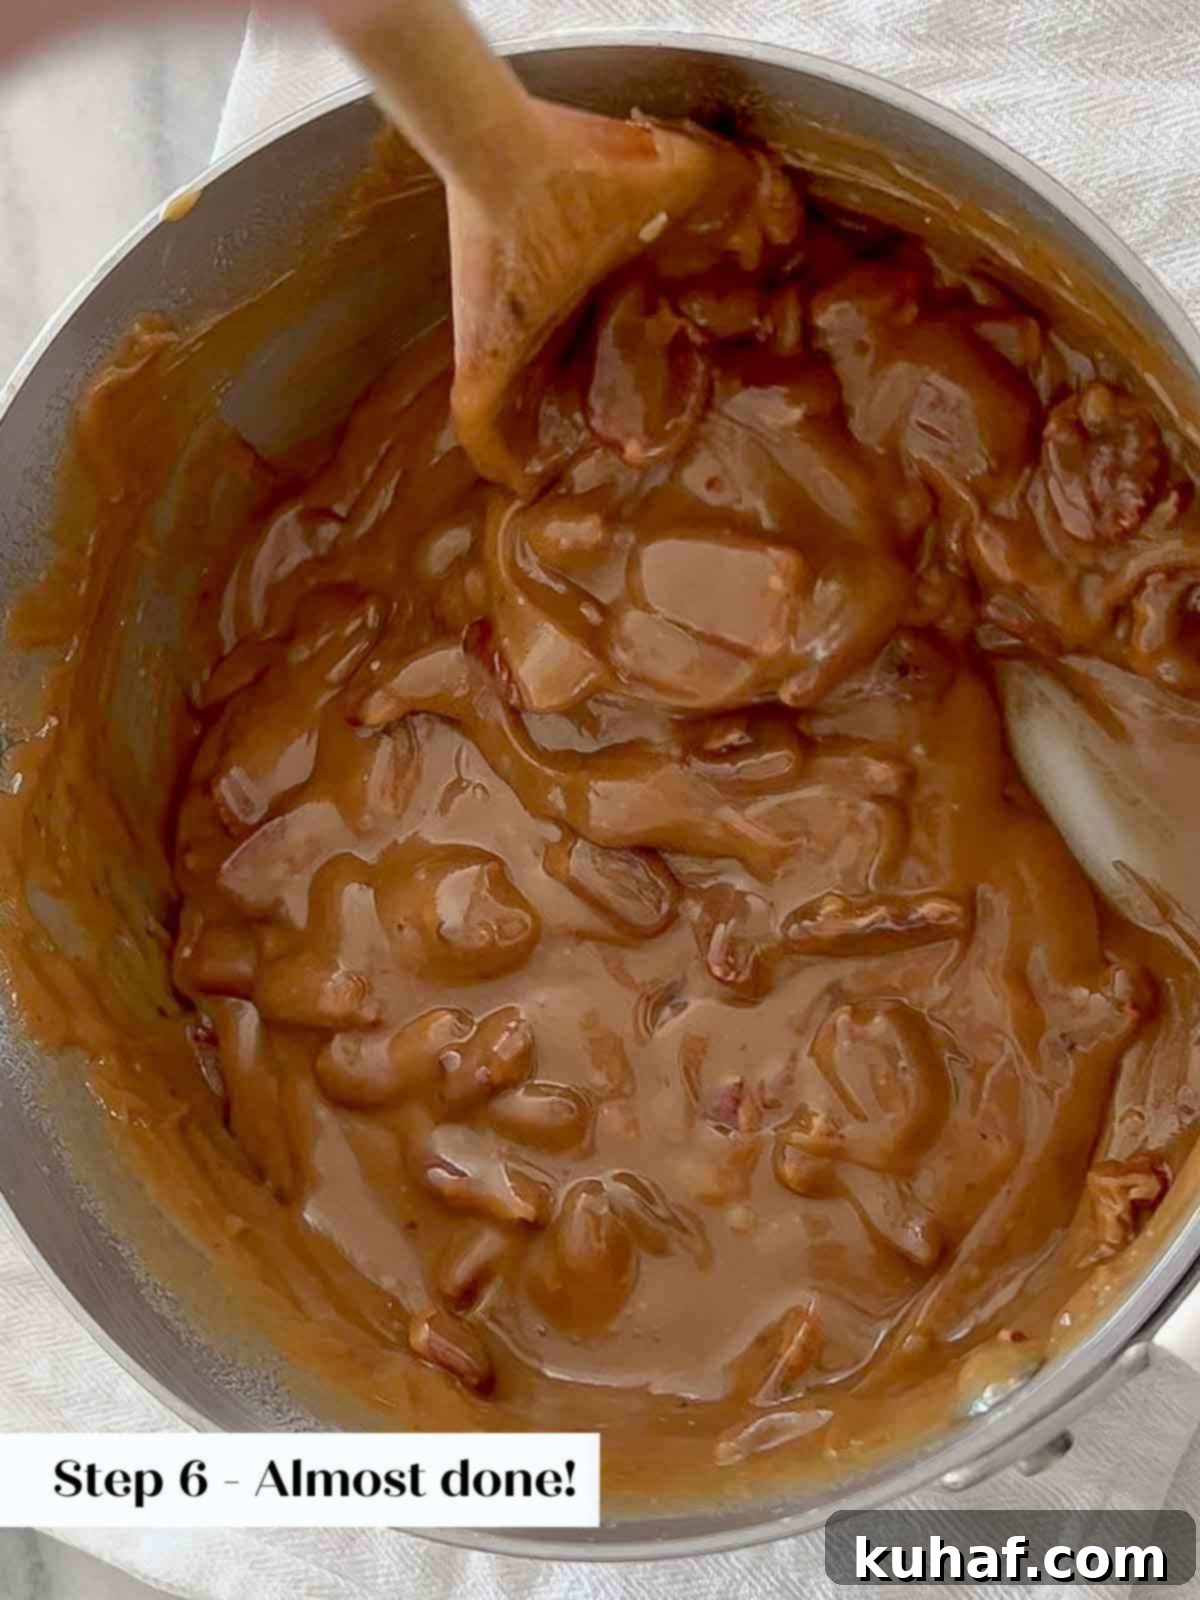
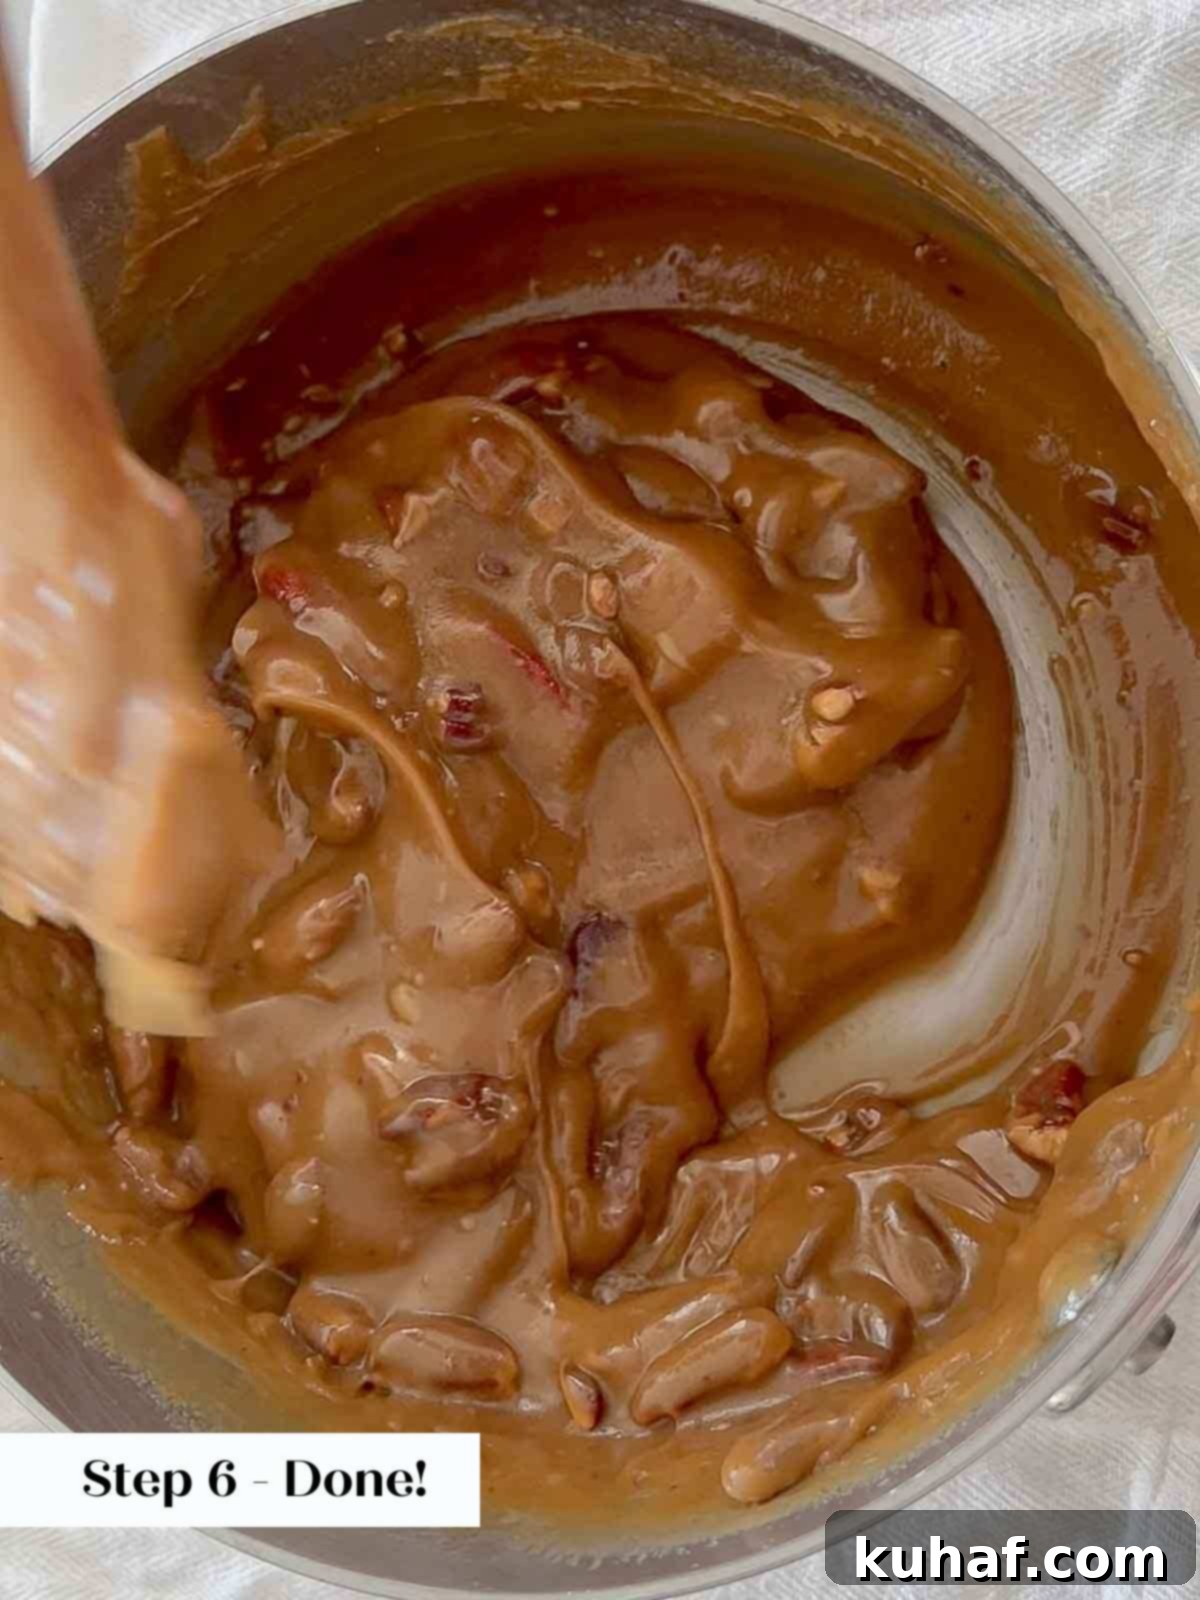
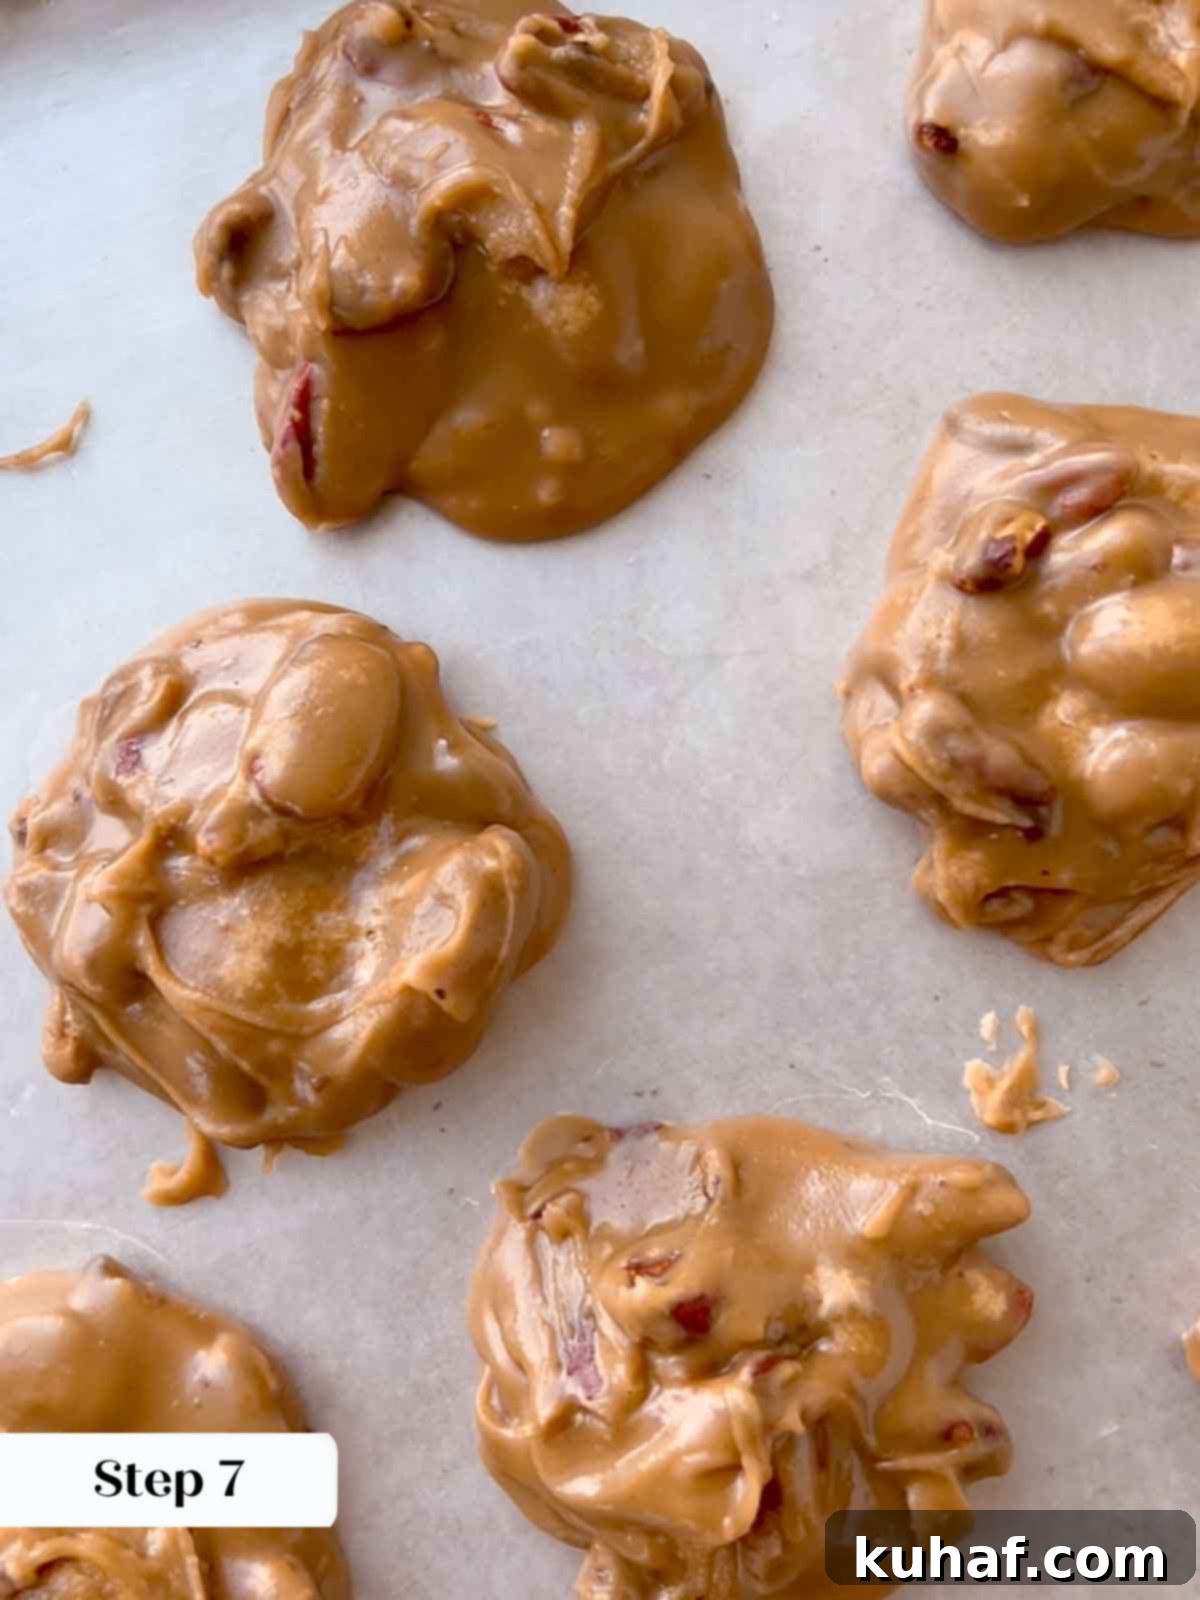
Step 7: This is where speed and precision come into play! Once the mixture has lost its gloss and thickened to a consistency similar to thick honey or soft peanut butter, immediately begin dropping spoonfuls onto your prepared waxed paper-lined baking sheets. Work as quickly as possible, as the mixture will continue to stiffen rapidly as it cools. Critically, do not scrape the sides or bottom of the pot; this outermost layer of candy is often more crystallized and can introduce graininess into your otherwise smooth pralines.
Timing is Everything: Pralines dropped while still too warm will spread out thinly, while those dropped when too cool will be overly crystallized and stiff. The perfect window is fleeting – it’s right after the candy mixture loses its glossy sheen and starts to thicken, but before it becomes too hard to spoon. I’ve learned from experience that getting all 16 pralines portioned perfectly within this short window is a delightful challenge! Even when filming for perfect consistency, it’s a race against the clock.
Step 8: Allow the freshly portioned pralines to set completely at room temperature. This usually takes about 30-60 minutes, depending on your kitchen’s temperature and humidity. Once fully set and firm, peel them off the waxed paper and enjoy your perfectly crafted Southern pecan pralines!
Chef Lindsey’s Essential Recipe Tip for Candy Making
A high-quality candy thermometer is not just recommended, it’s absolutely mission-critical for success in this praline recipe and most candy-making endeavors! I strongly prefer a thermometer that clips securely to the side of the pot, allowing for constant and accurate temperature regulation without needing to hold it. Before you begin, always test your thermometer’s calibration. Simply place it in a pot of vigorously boiling water. It should read precisely 212°F (100°C) at sea level. If it reads higher or lower, make a mental note of the difference and adjust your target temperatures accordingly. This simple check ensures accuracy and prevents under or overcooking, which can ruin your candy.
Frequently Asked Questions About Pecan Pralines
To maintain their freshness and perfect texture, store your pecan pralines at room temperature in an airtight container. Arrange them between sheets of parchment paper or waxed paper to prevent sticking. They will stay fresh for up to a month. However, it’s important to note that high humidity is a praline’s worst enemy; even an airtight container may struggle on a very humid day. For best results, consider making this recipe during drier months and always keep your stored candies away from heat sources like the stove or oven.
The hardness and setting of sugar-based candies like pralines are directly dependent on two key factors: the precise combination of ingredients and, most importantly, the exact temperature to which the sugar syrup is cooked. Pecan pralines specifically need to reach 235°F (113°C), which is known as the softball stage. If your pralines aren’t setting, it’s highly likely that the mixture didn’t reach this critical temperature. When cooking, remove the pot from the heat at the lower end of the target temperature range to account for carry-over cooking. Always ensure your candy thermometer is accurately calibrated by testing it in boiling water (it should read 212°F / 100°C); an inaccurate thermometer is a common culprit for unset candies.
While a tiny amount of crystallization can be inherent in pralines, several professional techniques can help minimize it significantly. First, adding a small amount of corn syrup (as included in this recipe) is a powerful tool to inhibit crystal formation. Second, buttering the sides of your pot helps prevent sugar crystals from clinging to the edges and dropping back into the mixture, which can seed new crystals. Crucially, stir the mixture only until the sugar dissolves before it comes to a boil. After the candy reaches the softball stage, the 10-minute cooling period without any agitation is essential. This allows the temperature to drop and the sugar structure to stabilize without promoting unwanted crystal growth through stirring.
Yes, it is possible to make pecan pralines without a candy thermometer, but it requires diligent attention and a classic method known as the ice bath test. To do this, fill a small bowl with ice water. Throughout the cooking process, periodically drop a tiny teaspoon of the hot sugar syrup into the ice water. If the syrup immediately dissolves, it’s not ready. As it cooks further, it will eventually form a small, soft, pliable ball that you can pick up and gently squish between your fingers. This indicates it has reached the softball stage (235°F), and you can remove it from the heat. While effective, a thermometer offers greater precision and confidence.
It’s a common challenge: when beating the praline mixture during the final stages until it loses its gloss, it’s easy to over-beat slightly, causing the mixture to seize or become too stiff to portion. If this happens, don’t worry! You can often remedy it by adding a teaspoon of hot water to the mixture and beating it in vigorously. This should help loosen it up enough to make it pliable and allow you to quickly drop it onto your baking sheets. This trick is also useful if the mixture stiffens too rapidly before you’ve had a chance to portion all the candy.
Absolutely! Pecan pralines made using this recipe are excellent candidates for homemade gifts and travel surprisingly well. Their robust nature makes them suitable for shipping. When packaging, simply ensure you pad them generously with tissue paper or bubble wrap within the decorative tin or box. This extra cushioning will help prevent them from shifting around and getting damaged or broken during transit, ensuring they arrive in perfect condition for your lucky recipient.
If you tried this recipe and loved it, please take a moment to leave a 🌟 star rating and share your experience in the comments below. I genuinely love hearing from you; your feedback makes my day!
Southern Pecan Pralines
Chef Lindsey
10 minutes
20 minutes
30 minutes
16
pralines
Saved
Pin Recipe
Comment
Print Recipe
Ingredients
- 1 tablespoon unsalted butter
- 1 ½ cups light brown sugar
- 1 ½ cups granulated sugar
- ¼ teaspoon kosher salt
- 3 tablespoons dark corn syrup
- 1 cup whole milk
- 1 teaspoon vanilla extract
- 1 ½ cups pecan halves toasted
Instructions
-
Line 2 baking sheets with waxed paper or parchment paper. Alternatively, use aluminum foil lightly sprayed with cooking spray.
-
Butter the sides of a 3-quart heavy-bottomed saucepot. This type of pot ensures even heating and prevents scorching, which is ideal for pralines.
-
In the prepared pot, combine all sugars, salt, corn syrup, and milk. Stir carefully to ensure all sugars are thoroughly wet, trying to avoid splashing any sugar onto the pot’s sides.
-
Cook the mixture over medium heat, stirring frequently until all sugar crystals have completely dissolved. It’s crucial for the sugar to dissolve before the mixture boils to prevent crystallization.
-
Once dissolved, bring the mixture to a boil. Attach a candy thermometer to the side of the pot and cook, stirring occasionally, until it reaches the softball stage (235°F / 113°C).
-
Remove the pot from the heat and allow the mixture to cool undisturbed for 10 minutes. Do not stir during this crucial cooling period.
-
Add vanilla extract and beat vigorously by hand with a wooden spoon for 2 minutes. Then, add the toasted pecans and continue beating until the mixture loses its glossy appearance and thickens significantly.
-
Working quickly, drop the mixture by spoonfuls onto the waxed paper-lined baking sheets. Avoid scraping the sides of the pot, as this part of the candy tends to be crystalized.
-
The ideal moment for dropping is right after the mixture loses its gloss but before it hardens completely. If dropped too warm, pralines will spread; too cool, they’ll be overly crystallized. Be quick to achieve the best texture for all pralines.
-
Allow the pralines to set completely at room temperature, then peel them off the paper and enjoy!
Video Tutorial
Recipe Notes
Presentation Perfection: The optimal moment to drop the praline mixture is when it has just lost its high gloss and thickened to a honey-like consistency. Working swiftly ensures shiny, beautiful pralines.
Crucial Technique: Do not underestimate the importance of the 10-minute cooling step. It’s absolutely essential for preventing crystallization that can result from over-stirring.
Storage Tips: Store your finished pralines at room temperature for up to one month. For best results, layer them between sheets of waxed paper or parchment paper in an airtight container to prevent sticking and maintain freshness.
This cherished recipe is adapted from the Better Homes & Gardens Cookies and Candies, 1971 Edition.
Nutrition Facts (per serving)
Carbohydrates: 44g |
Protein: 1g |
Fat: 9g |
Saturated Fat: 1g |
Polyunsaturated Fat: 2g |
Monounsaturated Fat: 4g |
Trans Fat: 0.03g |
Cholesterol: 4mg |
Sodium: 60mg |
Potassium: 95mg |
Fiber: 1g |
Sugar: 43g |
Vitamin A: 52IU |
Vitamin C: 0.1mg |
Calcium: 44mg |
Iron: 0.4mg
Candy & Chocolate
American, Southern
249
Enjoyed this recipe? Share your thoughts below!
Before You Go: More Delicious Treats & Gift Ideas
I truly hope you enjoyed preparing and tasting this professional chef-tested recipe for Southern Pecan Pralines. It’s a classic for a reason, and with these tips, you’re sure to impress! If you’re looking to expand your confectionery repertoire, be sure to check out our other delicious homemade candy recipes. Or, if you’re still on the hunt for thoughtful, handcrafted presents, explore these wonderful homemade gift ideas, including our decadent bourbon chocolate truffles! Happy baking and gifting!
