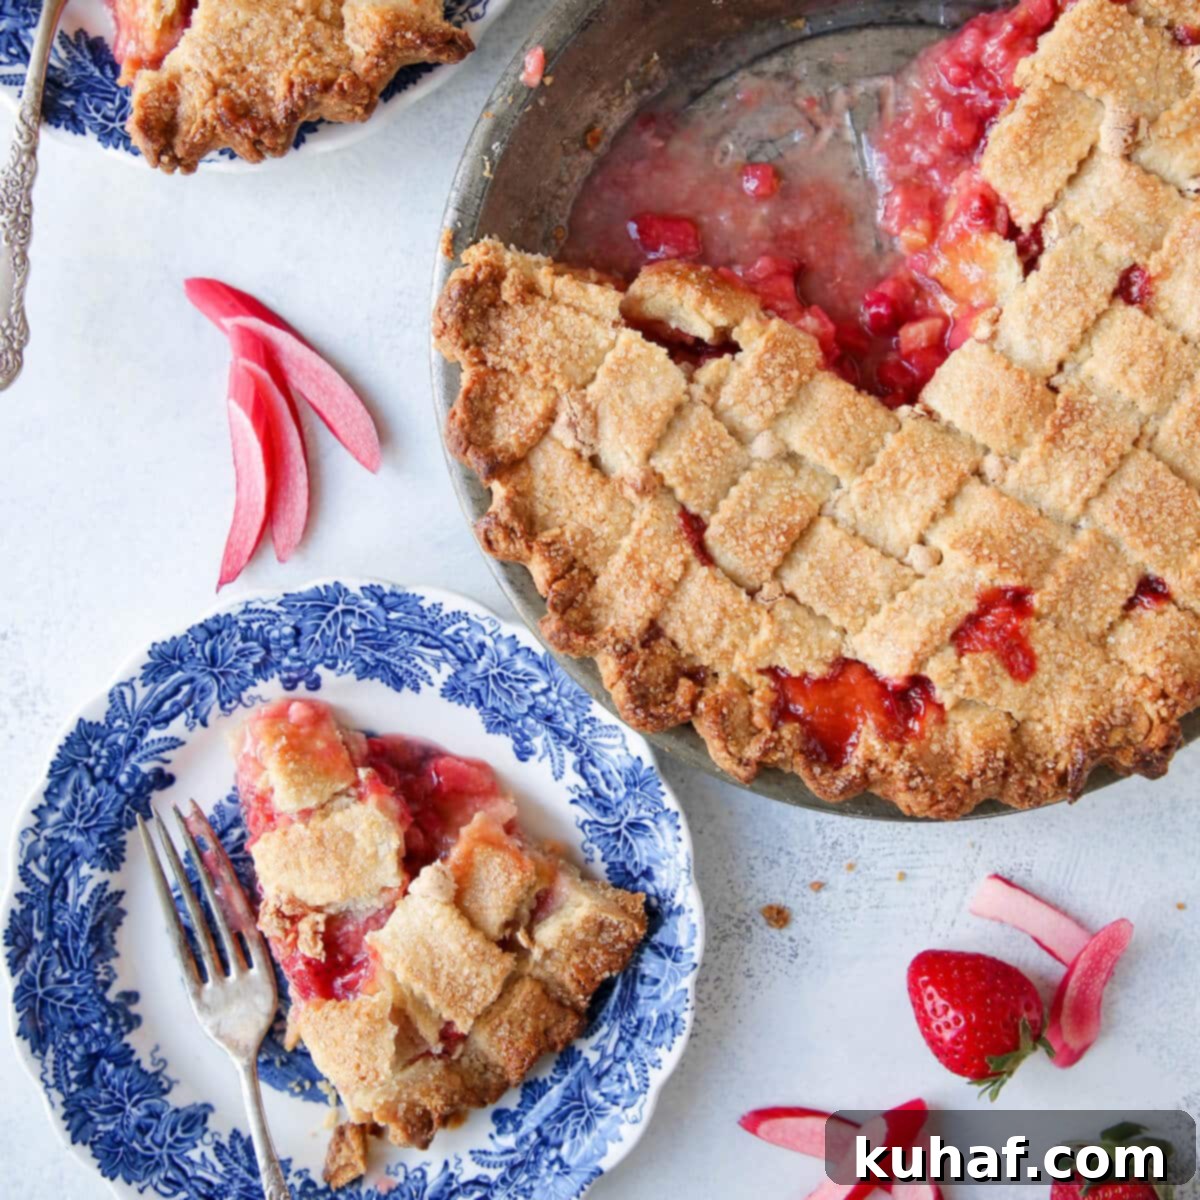
The Best Old-Fashioned Strawberry Rhubarb Pie with a Perfectly Thick Filling & Almond Crust
There’s nothing quite like the harmonious blend of sweet strawberries and tart rhubarb, especially when nestled within a buttery, crumbly crust. This Strawberry Rhubarb Pie recipe is a time-honored classic, delivering a winning combination of flavors and textures that will transport you straight to grandma’s kitchen. With its perfectly balanced sweet and tart profile and a uniquely delicious almond flour pie crust, this dessert is designed for pure enjoyment. The robust fruit filling ensures every slice is firm, flavorful, and absolutely irresistible, making it a staple for spring and summer gatherings.
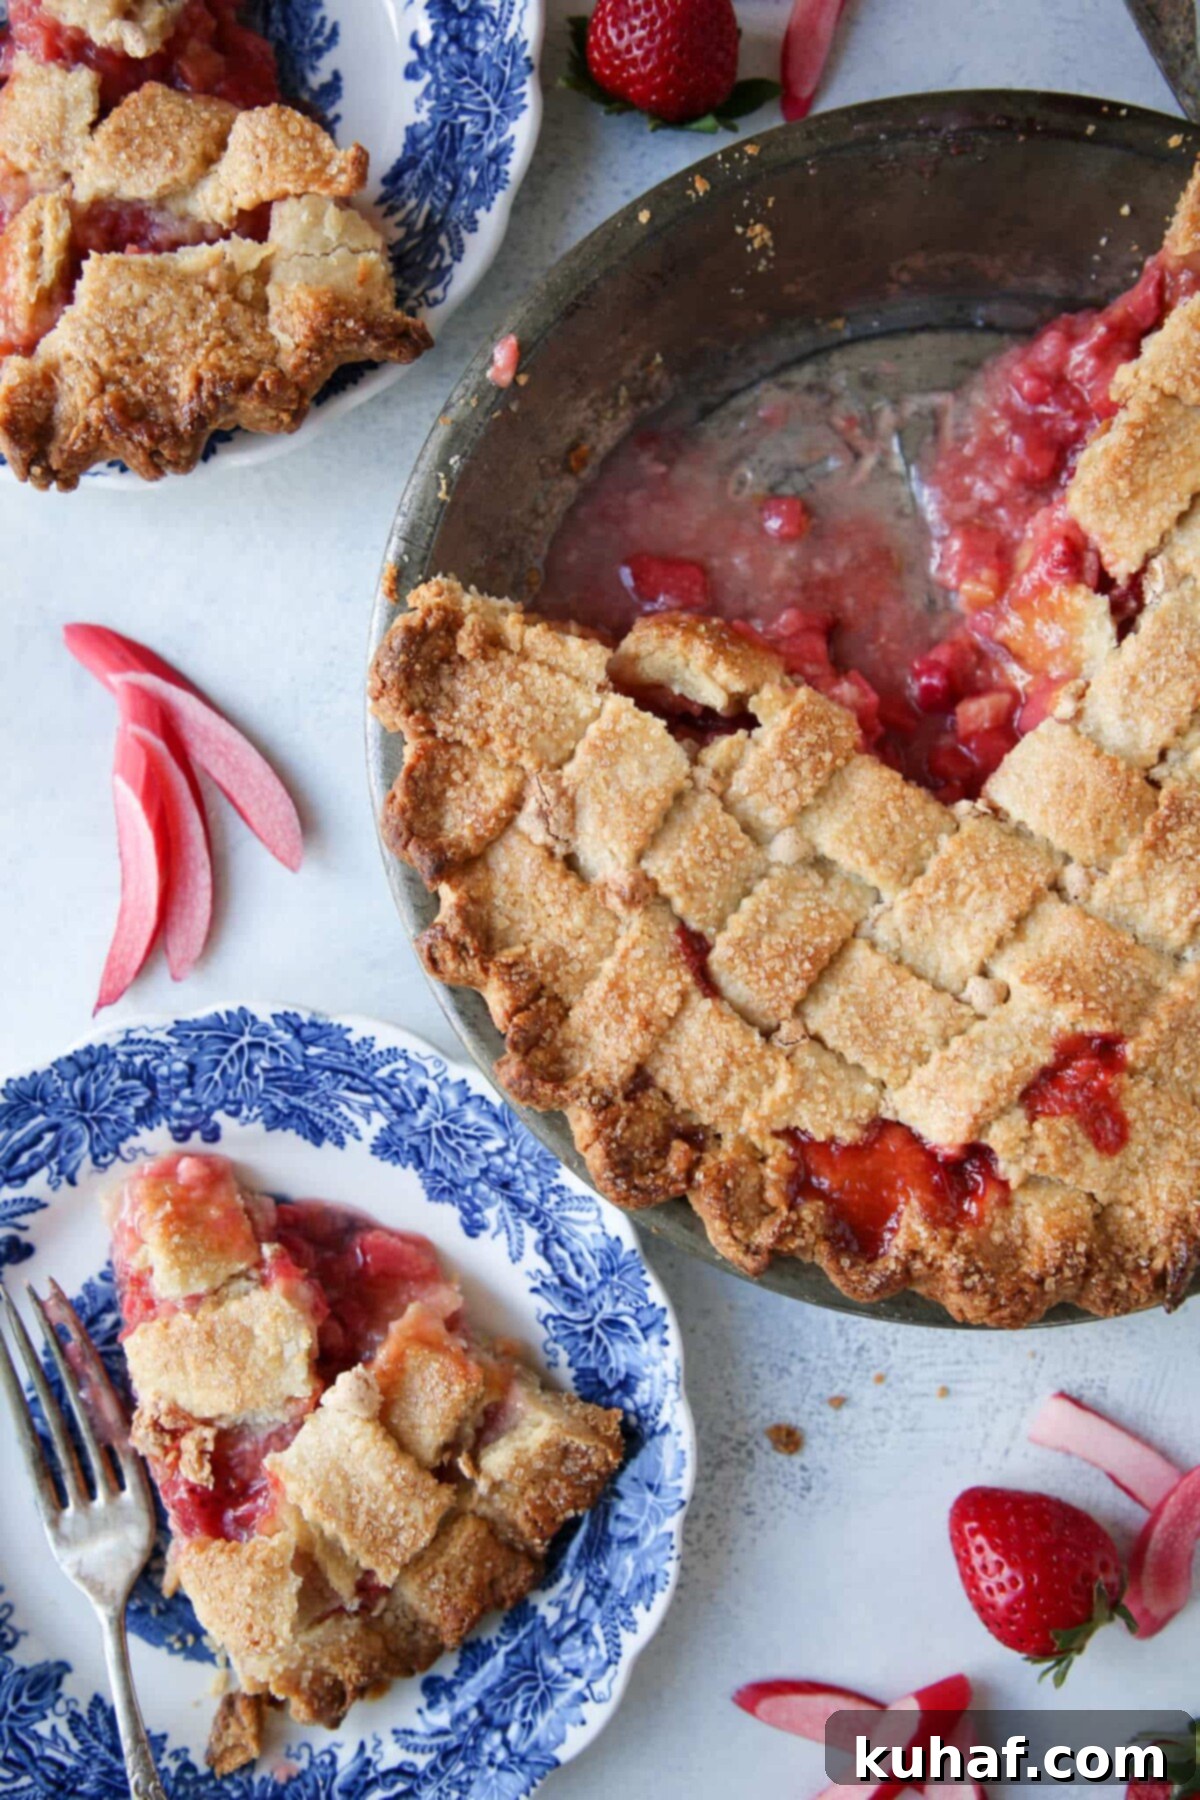
This exquisite recipe for strawberry rhubarb pie hails from the revered 1903 edition of The Settlement Cookbook. It features a generous filling, equally divided between tart rhubarb and sweet strawberries, sweetened with just the right amount of sugar to highlight, rather than overpower, the natural fruit flavors. To achieve the best taste, I always recommend using produce that is in peak season. This ensures the strawberries are at their sweetest, beautifully balancing the characteristic tartness of the rhubarb, much like in this delightful strawberry rhubarb crumble.
What truly sets this pie apart is its exceptionally thick and rich filling, achieved through an ingenious combination of cornstarch and an egg. While this might seem like an unexpected pairing in contemporary baking, it works magnificently to create a perfectly set, sliceable filling that holds its shape. The key to its success lies in allowing the filling to boil during baking, which activates the cornstarch and ensures a smooth, delicious consistency. This traditional thickening method is also used to great effect in our old-fashioned peach pie recipe, delivering consistently impressive results.
Table of Contents
- Why This is the Best Strawberry Rhubarb Pie Recipe
- Professional Baking Tips for Perfect Pie
- Essential Ingredients for Your Pie
- Creative Variations & Substitutions
- Step-by-Step: How to Make Strawberry Rhubarb Pie
- Chef Lindsey’s Expert Pie-Making Tip
- Serving Suggestions for Your Pie
- Frequently Asked Questions About Strawberry Rhubarb Pie
- Strawberry Rhubarb Pie Recipe Card
- More Delicious Pie Recipes & Desserts
Why This is the Best Strawberry Rhubarb Pie Recipe
Our commitment to classic techniques combined with a few modern insights makes this the definitive strawberry rhubarb pie you’ll want to bake year after year. Here’s why it stands out:
- Unbelievably Thick, Rich, and Flavorful Filling: The magical combination of cornstarch and a whole egg creates an incredibly stable and thick filling that truly shines. Unlike fillings that rely solely on cornstarch, the egg adds a depth of richness and body that elevates the overall taste and texture. This method ensures your pie slices beautifully without being runny, allowing the vibrant, sweet-tart flavors of strawberry and rhubarb to be the star.
- Surprisingly Easy to Make: Despite its impressive results, this pie is remarkably simple to prepare. The fruit filling comes together quickly with a gentle stir, and once poured into your prepared pie crust, an egg and sugar mixture is simply poured over the top. The rest is left to your oven, making this a rewarding project for bakers of all skill levels.
- Versatile with Fresh or Frozen Fruit: Enjoy this pie any time of year! It performs beautifully whether you’re using luscious fresh strawberries and rhubarb from the farmers’ market or convenient frozen alternatives. If opting for frozen fruit, there’s no need to thaw it beforehand; simply use sliced frozen strawberries and rhubarb directly, which helps maintain the filling’s integrity during baking. This flexibility means you can always have a taste of spring, regardless of the season.
Professional Baking Tips for Perfect Pie
Achieving a bakery-quality pie at home is easier than you think with these expert tips:
- Always Taste the Filling Before Adding the Egg: The sweetness of strawberries and the tartness of rhubarb can vary significantly depending on the ripeness and variety. Before incorporating the egg into your sugar mixture, always taste a small amount of the fruit and cornstarch mixture. This allows you to adjust the sugar level to your preference. If you desire a sweeter pie, add a little more granulated sugar. For an extra bright, tangy note that enhances the fruit’s flavor, a squeeze of fresh lemon juice can make a world of difference.
- Ensure the Filling Boils Vigorously in the Center: This is a critical step for a perfectly set pie. For the thickest, most stable filling, it’s essential to allow the pie filling to come to a full, rolling boil in the very center of the pie. This high heat fully activates the cornstarch, ensuring it thickens properly and cooks out any starchy flavor. If your pie looks bubbly around the edges but not in the center, it needs more time in the oven. A wobbly center after cooling indicates insufficient boiling.
- Tent the Crust to Prevent Over-Browning: Pie crusts often bake faster than the filling needs to cook through, especially when aiming for a bubbly center. To prevent the edges of your beautiful crust from becoming too dark or even burnt, “tent” the pie. This involves gently placing aluminum foil around the crust edges or creating three strips of foil to fold over the perimeter. This simple technique shields the crust from direct heat, allowing the filling ample time to thicken without compromising the crust’s golden perfection.
- Bake in a Metal Tin or Glass Pie Dish: The material of your pie dish plays a significant role in heat distribution and baking consistency. Both metal pie tins and glass pie dishes are excellent choices because they conduct heat evenly, promoting a perfectly cooked crust and a thoroughly thickened filling. Ceramic or stoneware dishes, while beautiful, can sometimes bake unevenly, potentially leading to a pale bottom crust or an overcooked top. Using the right dish ensures your pie bakes uniformly from edge to center.
Essential Ingredients for Your Pie
Crafting the perfect Strawberry Rhubarb Pie begins with selecting the finest ingredients. Here’s what you’ll need, along with some insights for best results:
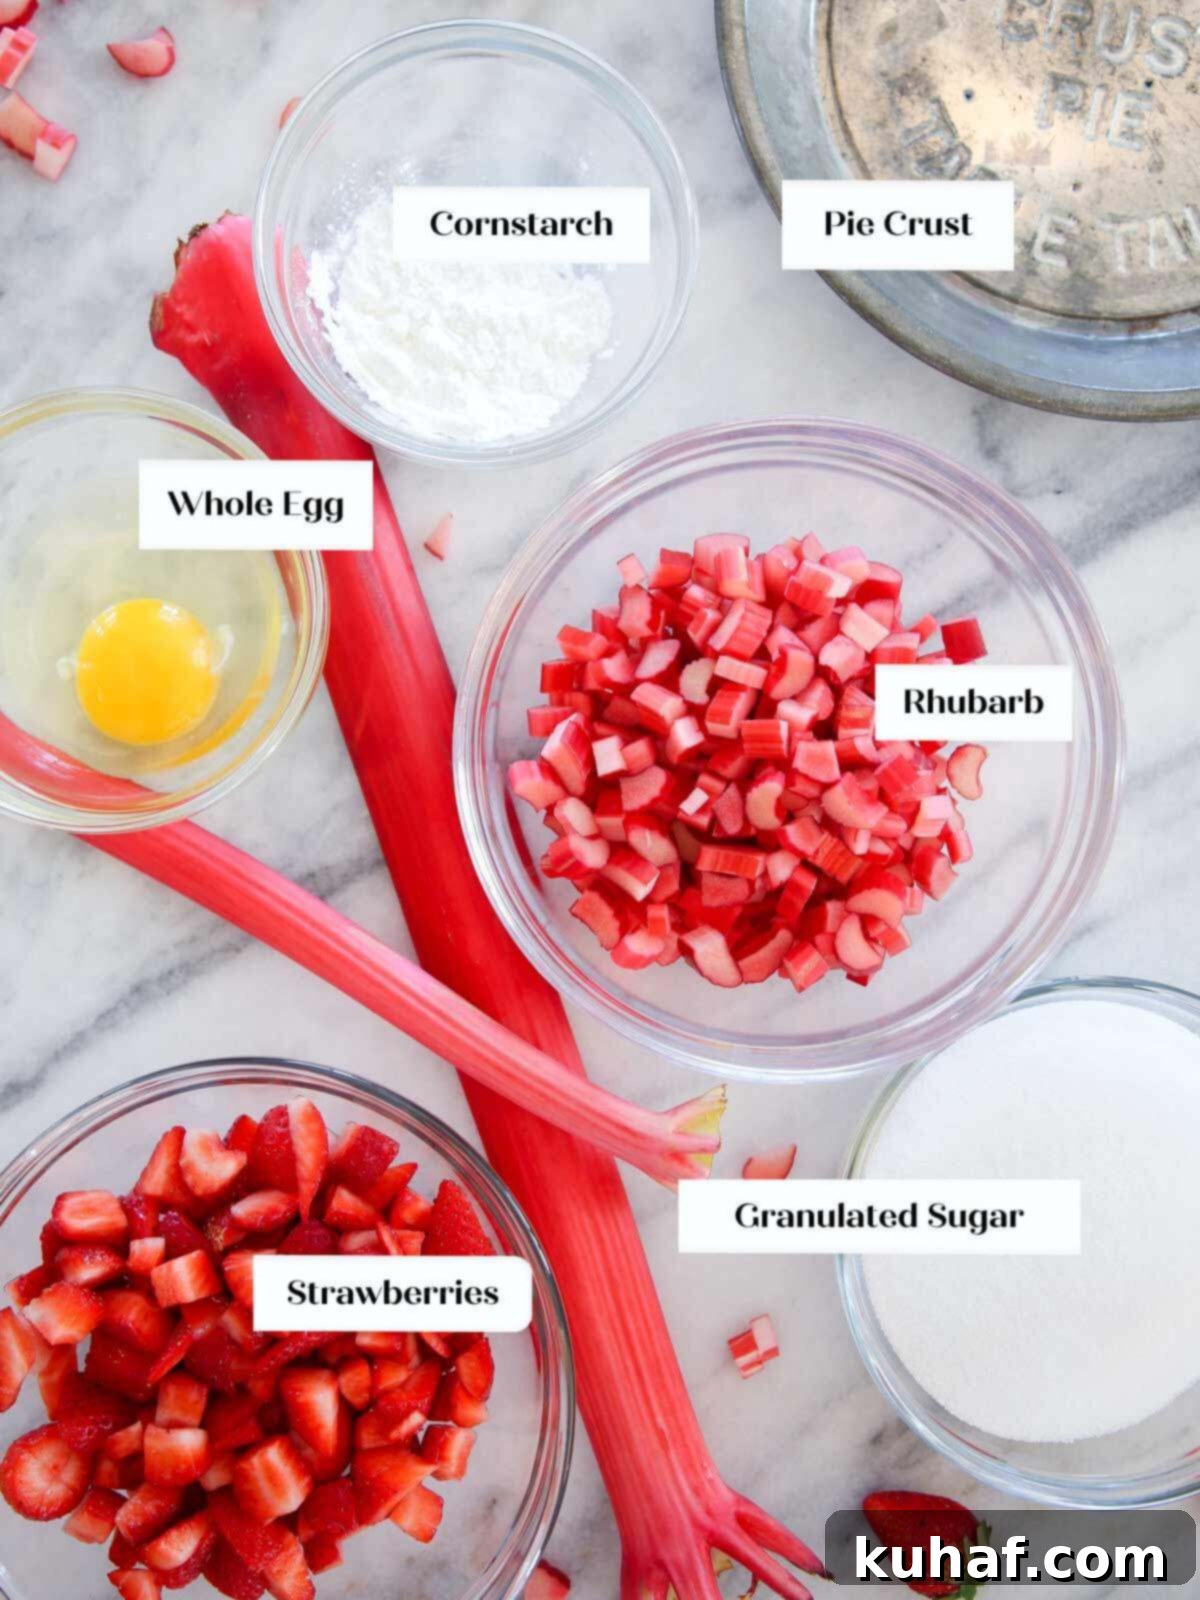
- Almond Pie Crust: For this recipe, I highly recommend my distinctive almond flour pie crust. Its tender, slightly crumbly texture and subtle nutty flavor pair exceptionally well with the sweet-tart filling. However, this pie would also be fantastic with a classic flaky all-butter pie crust or even a Crisco pie crust, which offers a similar tender, crumbly texture to the almond version. Short on time? A high-quality store-bought pie crust can be a convenient substitute!
- Strawberries: The quality of your strawberries truly makes a difference. Seek out in-season berries that are deeply red, plump, and incredibly fragrant. A trip to your local farmers’ market is often the best way to find these gems! Out-of-season strawberries tend to be less flavorful and contain more water, which can dilute your pie’s taste and texture.
- Rhubarb: Look for rhubarb stalks that are firm and crisp, avoiding any that appear limp or rubbery. Ideally, choose stalks with a deep pink to vibrant red color, as these indicate peak ripeness and flavor. While green rhubarb is still edible, the best in-season rhubarb boasts an almost magenta hue. Frozen rhubarb is a perfectly acceptable alternative; its tartness remains intense, ensuring that signature sweet-tart balance. Remember to trim off any leaves, as they are poisonous.
- Cornstarch: Cornstarch serves as the primary thickening agent in this pie, yielding a crystal-clear and flavorless filling once properly cooked. The key is to allow the filling to boil for at least a minute in the center, which fully activates the cornstarch and eliminates any starchy taste. If preferred, you can substitute with tapioca flour, as I do in this delightful mixed berry pie, for a similar thickening effect.
- Granulated Sugar: Beyond providing essential sweetness, granulated sugar also plays a crucial role in the thickening process. As the pie bakes, the sugar draws out moisture from the fruit and then reabsorbs it, contributing to a wonderfully thick and cohesive filling.
- Large Egg: An additional thickener, the large egg gives this pie filling an extra layer of body and richness that cornstarch alone cannot provide. It ensures a firmer, more substantial filling. For a beautifully golden-brown top crust, you can also use an egg wash instead of heavy cream.
- Heavy Cream (Optional): Used for brushing the top crust, heavy cream helps achieve a rich, golden sheen and encourages a beautifully crisp texture.
- Turbinado Sugar (Optional): A sprinkle of coarse turbinado sugar on the top crust adds a delightful sparkle and a pleasant crunch, enhancing the pie’s visual appeal and texture.
For precise quantities and a complete breakdown, please refer to the recipe card below.
Creative Variations & Substitutions to Try
While the classic strawberry rhubarb combination is divine, don’t hesitate to get creative in the kitchen:
- Experiment with Different Fruits! Rhubarb’s tartness pairs wonderfully with a variety of other naturally sweet fruits. Consider combining it with raspberries, as I did in this delicious raspberry rhubarb crumble, or with blueberries, cherries, or even thinly sliced apples. Depending on the sweetness of the fruit you choose, you might want to add a splash of lemon juice to maintain that desirable bright, tart balance.
- Opt for a Streusel-Topped Pie: For an even easier, yet equally delicious, alternative to a traditional double crust, consider a streusel topping! Our scrumptious brown sugar streusel topping (or any crumble topping) adds a delightful crunchy texture and rich flavor. Simply prepare your bottom crust, fill it with the fruit mixture, then generously crumble the streusel on top before baking according to the instructions. It’s a fantastic shortcut that doesn’t compromise on taste.
- Make it Vegetarian & Vegan-Friendly: Adapting this pie for vegetarian and vegan diets is straightforward. The primary non-vegan ingredient is the egg in the filling. To make the pie vegan, simply omit the egg. Instead, mix the granulated sugar directly with the fruit and cornstarch, ensuring everything is thoroughly coated, before pouring the mixture into your pie crust. For the crust itself, ensure you use a shortening-based crust (like our Crisco pie crust) or a vegan butter-based crust, and skip the heavy cream brush and turbinado sugar on top.
Step-by-Step: How to Make Strawberry Rhubarb Pie
Crafting this classic pie is a rewarding experience. Follow these detailed steps for a perfect result:
Further details and measurements can be found in the recipe card below.
Rolling & Latticing the Dough: Your Guide to a Beautiful Crust
A well-prepared crust is the foundation of an exceptional pie. Here’s how to handle your dough:
Step 1: Begin by rolling out both your top and bottom pie crusts. Aim for a thickness of approximately ¼ inch. If you notice the dough cracking excessively, it’s likely too cold. Allow it to sit at room temperature for 5-8 minutes to soften slightly before continuing. If you’re working with a more pliable dough, such as an all-butter pie crust or this vodka pie crust, you can roll it even thinner, to about 1/8th inch, for a delicate finish.
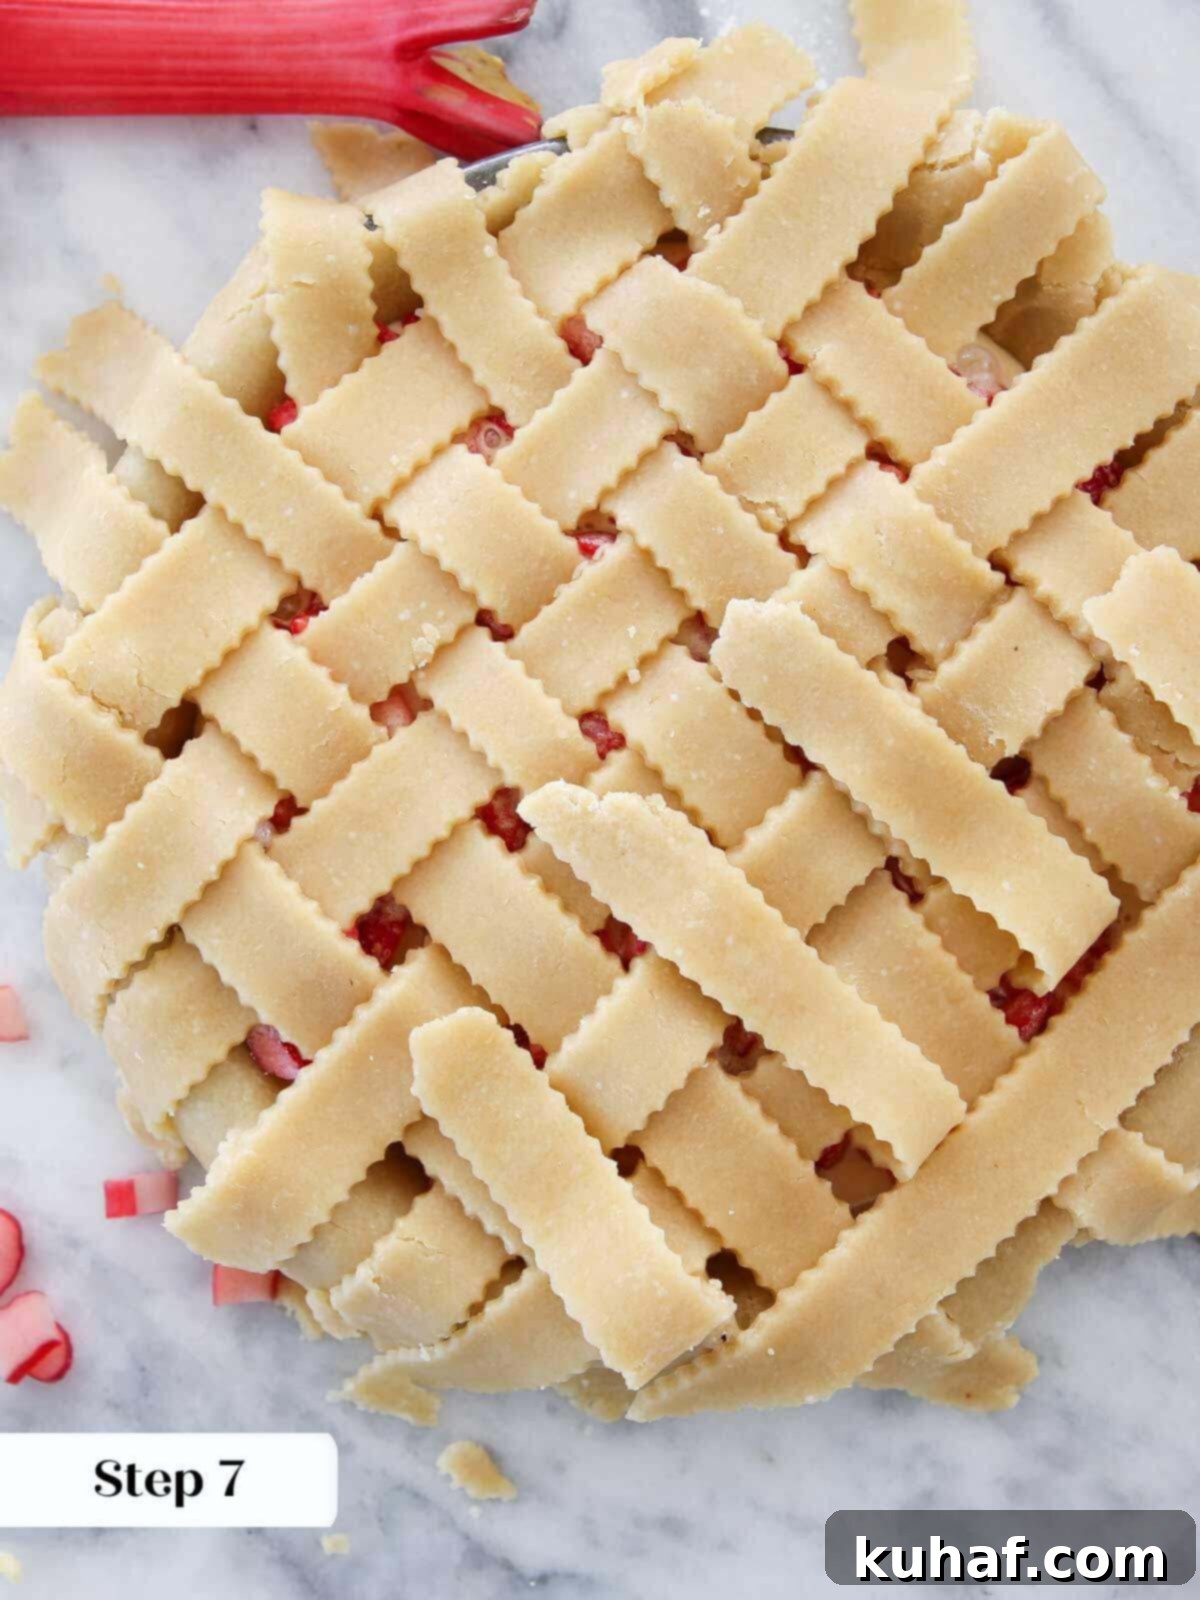
Step 2: For the top crust, you have several options. You can create an elegant lattice design, as shown in the images, which not only looks beautiful but also allows steam to escape efficiently. Alternatively, you can opt for a simpler approach by cutting a few vent holes in a solid top crust, similar to what’s done for this peach pie. Even simply laying strips of dough over the filling without weaving will still yield a delicious pie. Don’t be intimidated by latticing; even a rustic look is charming.
Pro Tip for Almond Flour Pie Crust: If you are using the more tender almond flour pie crust, I strongly suggest latticing the dough directly on top of the filled bottom crust. This particular dough is more delicate and doesn’t handle being pre-woven on parchment paper and then transferred as easily as other crusts might, for example, in this blueberry pie recipe. Working directly on the pie ensures minimal breakage and a smoother process.
Crafting the Filling & Assembling Your Pie:
Now, let’s bring the delicious filling together and assemble your pie:
Step 3: Preheat your oven to a robust 425°F (220°C). This initial high heat helps set the crust and begins the thickening process effectively.
Step 4: Carefully chop both the fresh rhubarb and strawberries into uniform ¼ inch pieces. This ensures even cooking and a consistent texture throughout the filling. There’s no need to peel rhubarb unless the stalks are particularly green or tough; ripe, pink rhubarb typically doesn’t require peeling.
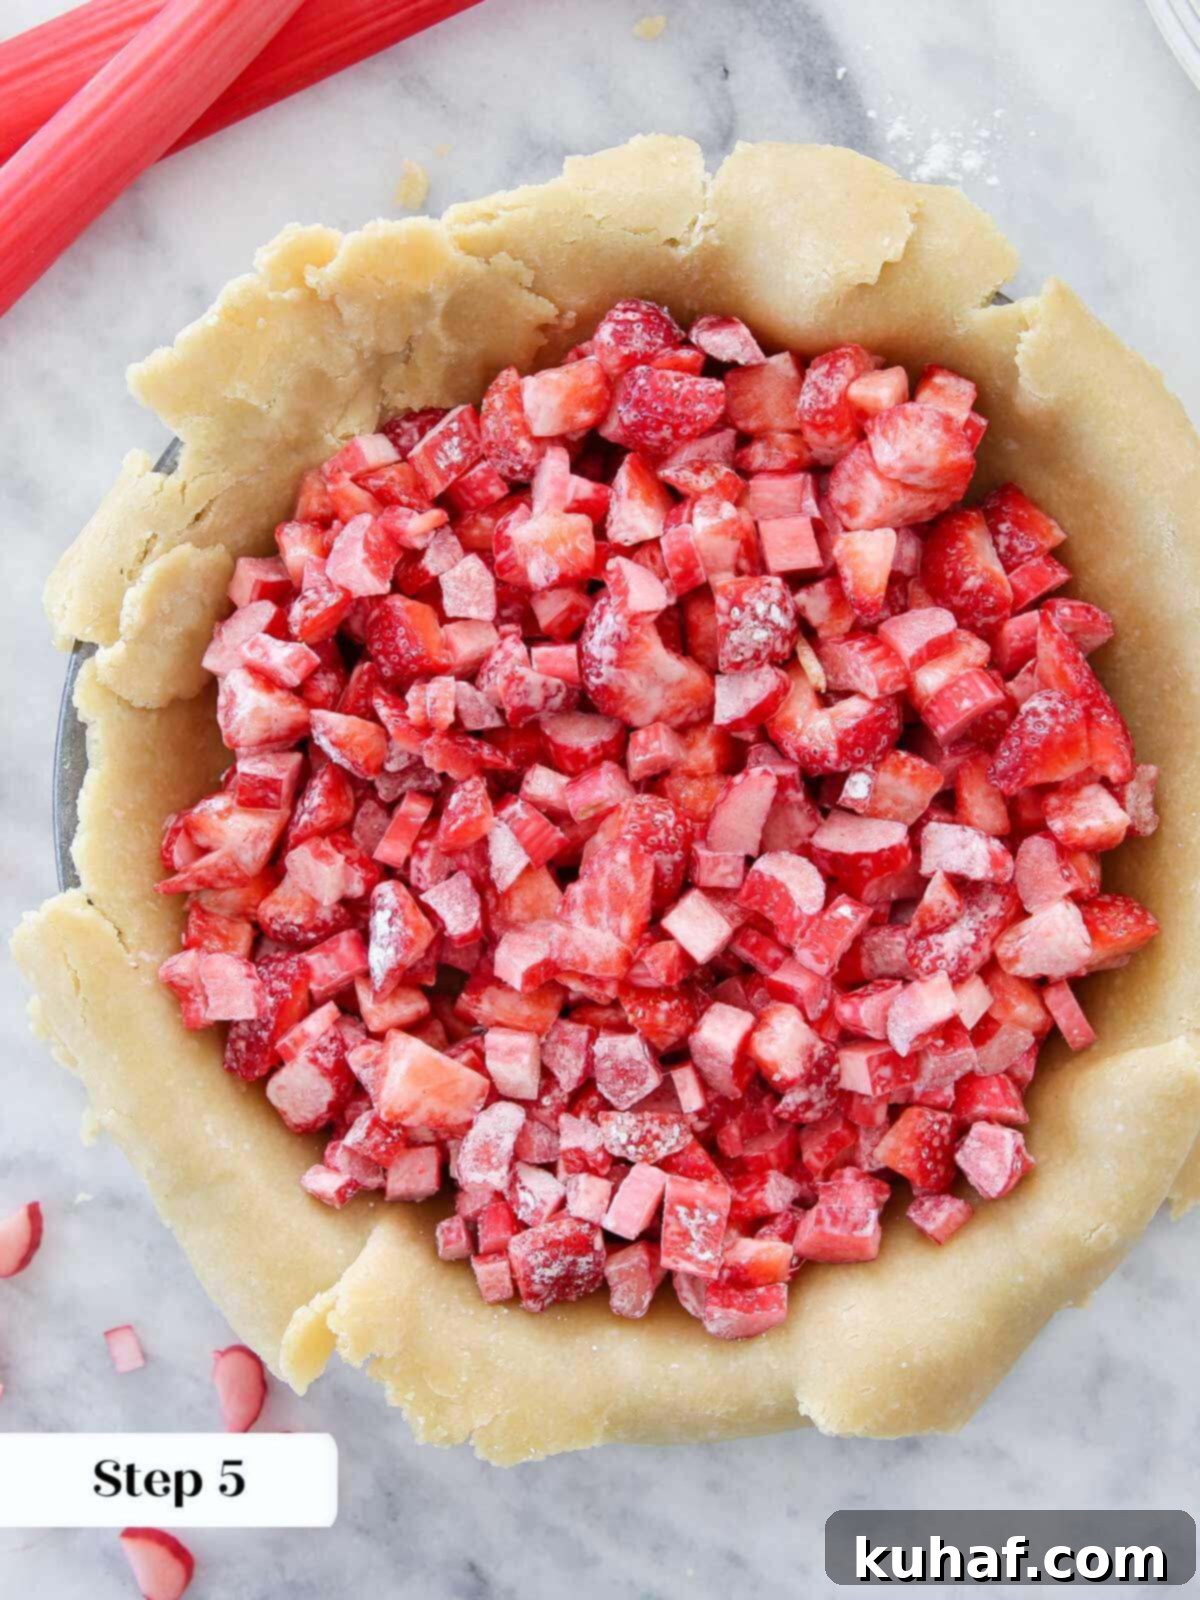
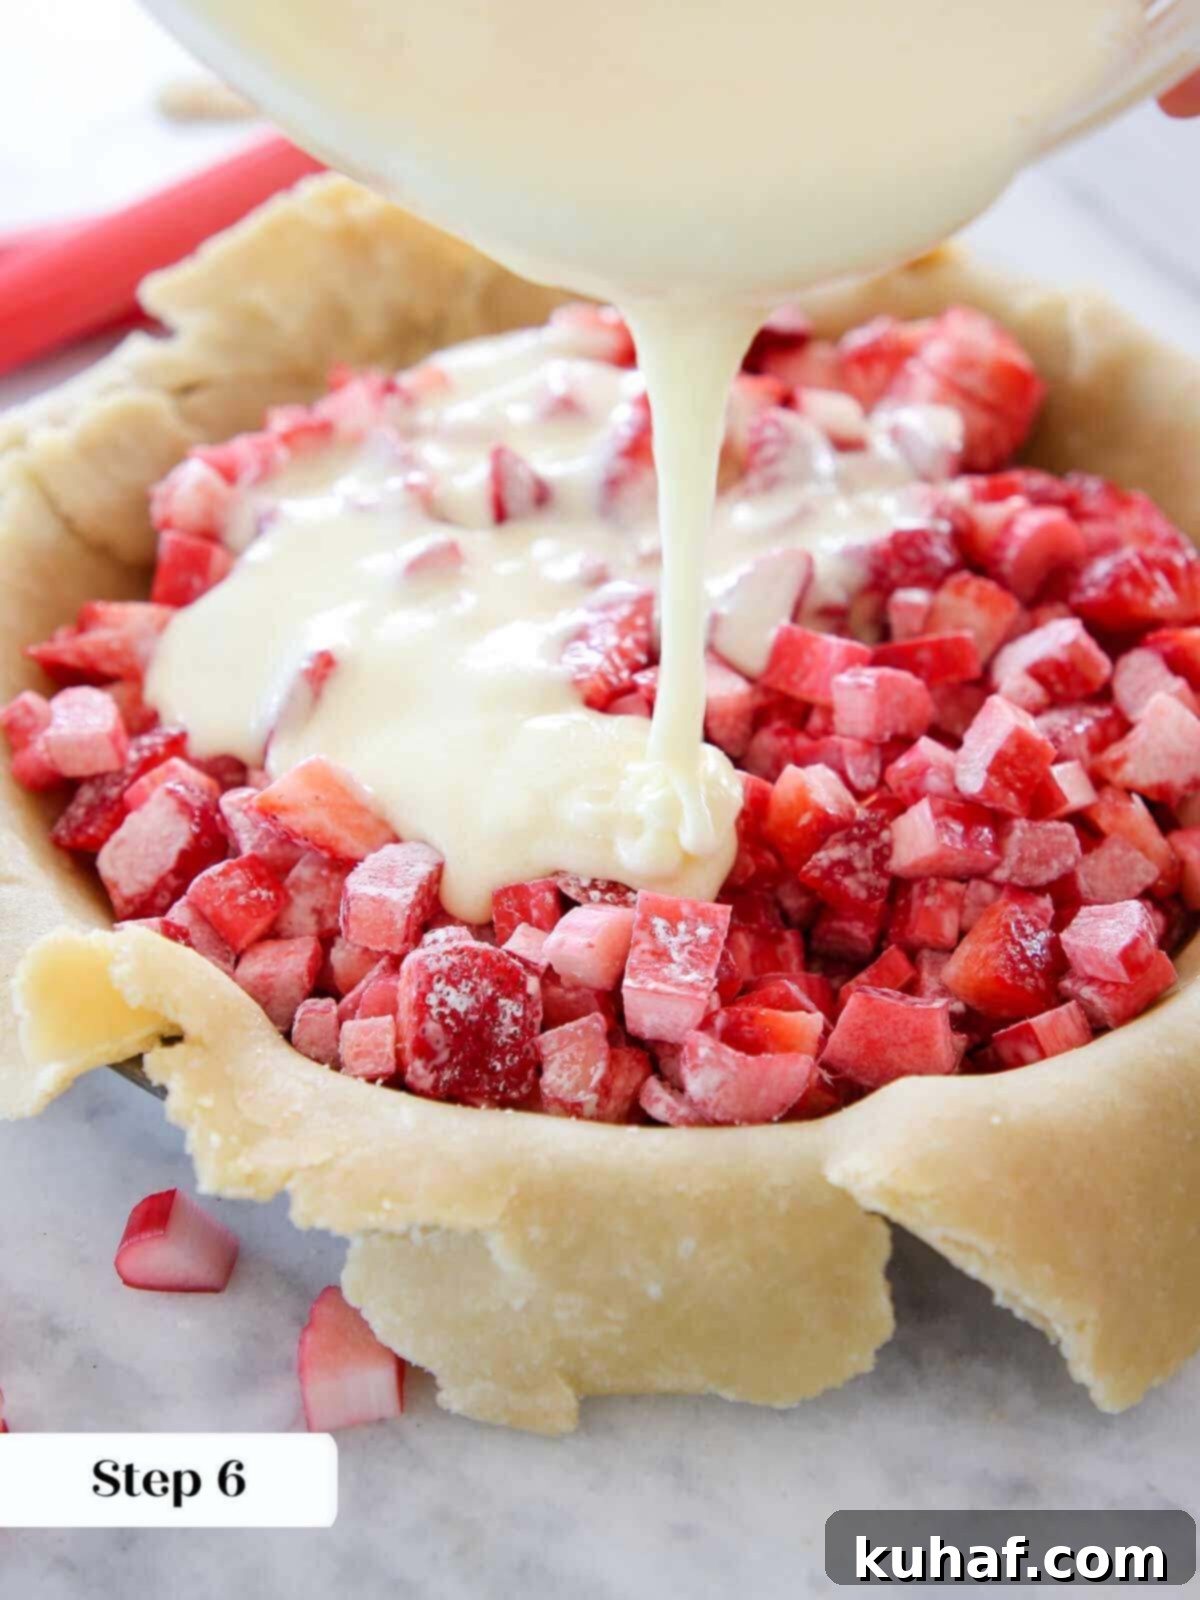
Step 5: In a large mixing bowl, combine the chopped fruit. Sprinkle the cornstarch over the fruit and gently toss to ensure every piece is thoroughly coated. This even distribution of cornstarch is vital for a uniformly thick filling. Once coated, pour the fruit mixture into your bottom pie crust, which should already be lined in a 9-inch pie plate. Spread the fruit out into an even layer, avoiding any large mounds.
Important Filling Note: Unlike some fruit pies, such as apple pie, where mounding the filling is common, avoid doing so with this strawberry rhubarb pie. The filling will not significantly cook down, and any excess liquid or juice will simply spill over the edges during baking, creating a mess and potentially an under-filled pie. Ensuring the fruit is spread in an even layer also guarantees that all the fruit is fully immersed in the sugar and egg mixture, allowing it to bake and thicken properly.
Step 6: In a separate bowl, whisk together the egg and granulated sugar vigorously until the mixture becomes light in color and slightly fluffy. This aerates the egg and sugar, contributing to the filling’s final texture. Gently pour this whisked egg and sugar mixture evenly over the top of the fruit in the pie crust, making sure it permeates throughout the fruit layer.
Step 7: Carefully cover your pie with the top crust. This can be a solid piece of pastry with vent holes, or you can create a decorative lattice top. For detailed instructions on creating a beautiful lattice, consult our how to lattice pie crust tutorial. Once the top crust is in place, trim any excess overhang (leaving about ½ inch beyond the pie plate’s edge), pinch the top and bottom crusts together, roll them under, and crimp decoratively to seal the pie. For a golden, sparkling finish, brush the top crust with a tablespoon of heavy cream and generously sprinkle with turbinado or coarse sugar. This step is optional but highly recommended for an extra layer of flavor and visual appeal. If you’re using a crumb topping, you can skip this step entirely.
Step 8: Place the assembled pie (still in its pan or dish) onto a rimmed baking sheet. This catches any potential drips and makes transferring the hot pie safer. Bake in your pre-heated 425°F (220°C) oven for an initial 30 minutes. After this time, reduce the oven temperature to 325°F (160°C) and continue baking until the filling is visibly bubbling vigorously in the center. The total baking time will vary depending on your oven, but expect an additional 30-45 minutes at the lower temperature. Keep an eye on the crust!
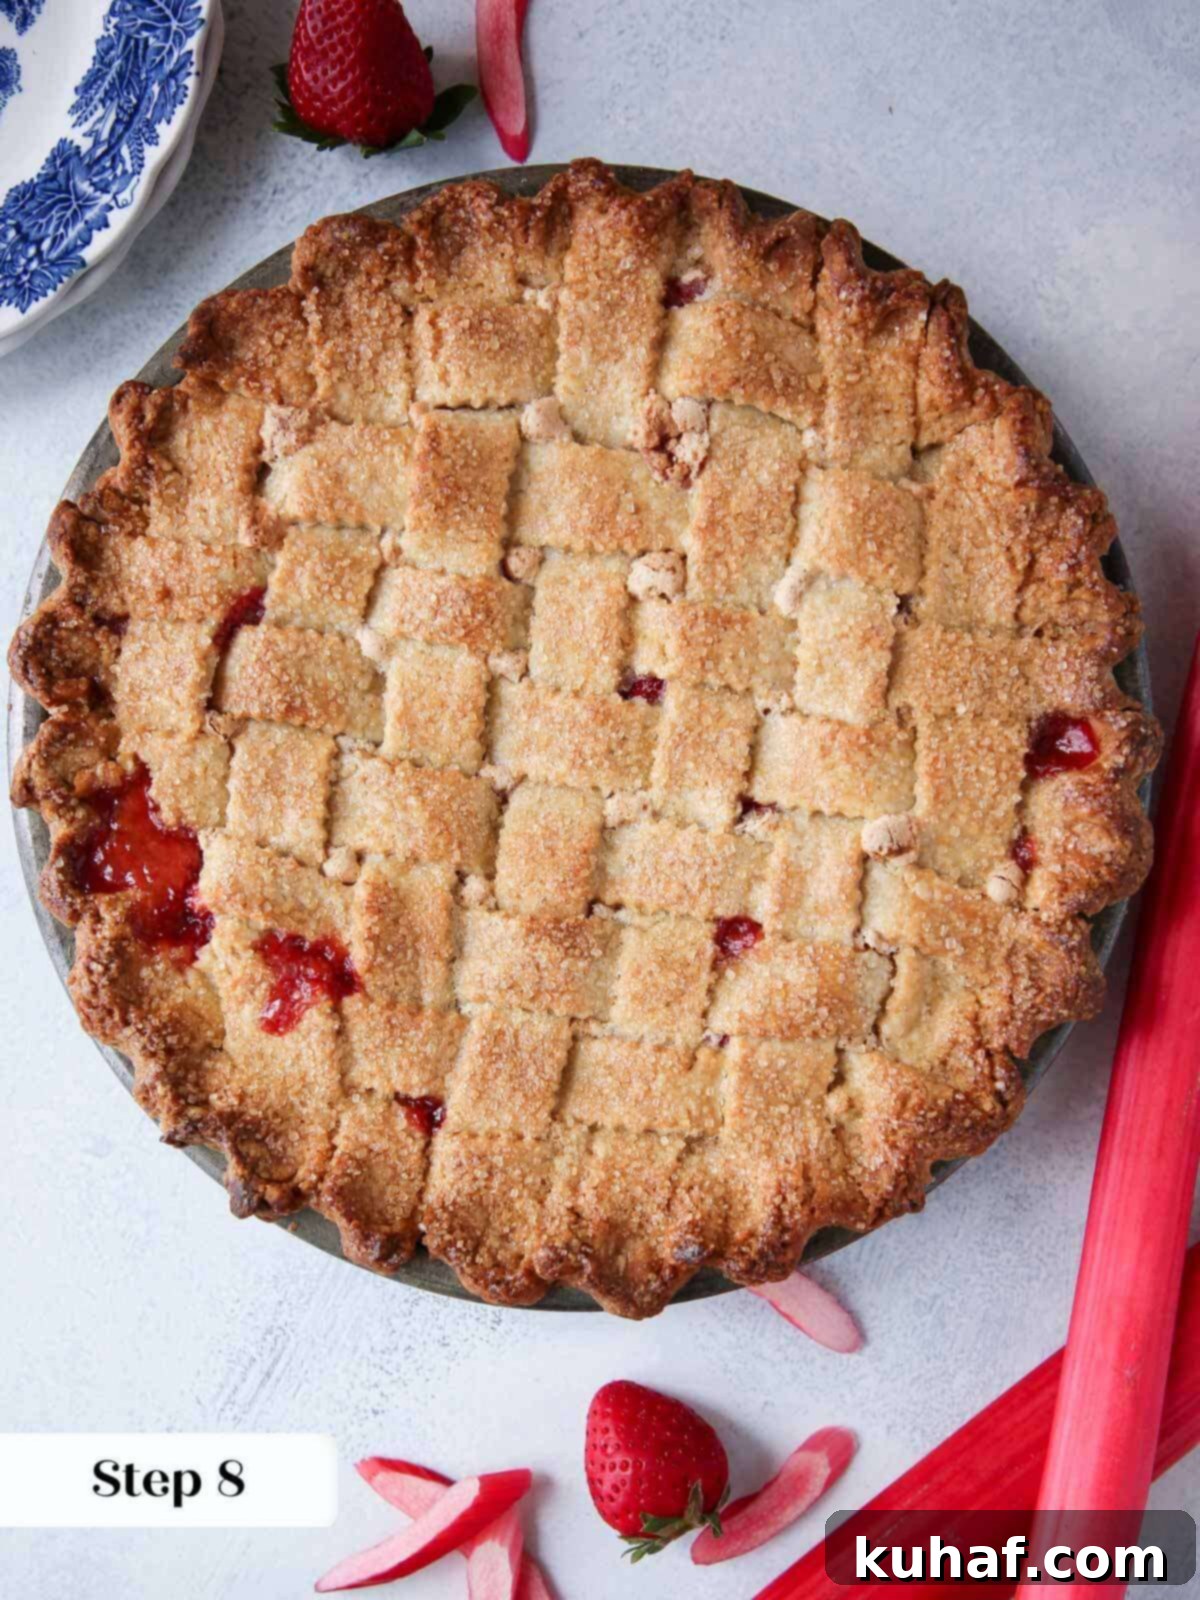
Shielding Your Crust: If you notice the pie crust browning too quickly during the longer bake time, don’t hesitate to tent the entire top of the pie with a sheet of aluminum foil. Alternatively, you can fashion three strips of foil and carefully fold them around just the edges of the crust. This prevents over-browning while allowing the filling to reach its perfect, bubbly consistency.
Chef Lindsey’s Expert Pie-Making Tip
When working with rhubarb, it’s helpful to think of it as celery’s baking-friendly cousin. Just like celery, rhubarb stalks contain fibrous strings, which can be undesirable in a smooth pie filling. To prevent this, always cut your rhubarb stalks across the middle (perpendicular to the stalk’s length), rather than slicing them lengthwise. Aim for pieces no thicker than ¼ inch. This cutting method minimizes the prominence of those pesky strings, ensuring a perfectly tender and enjoyable texture in every bite of your pie.
Serving Suggestions for Your Perfectly Baked Pie
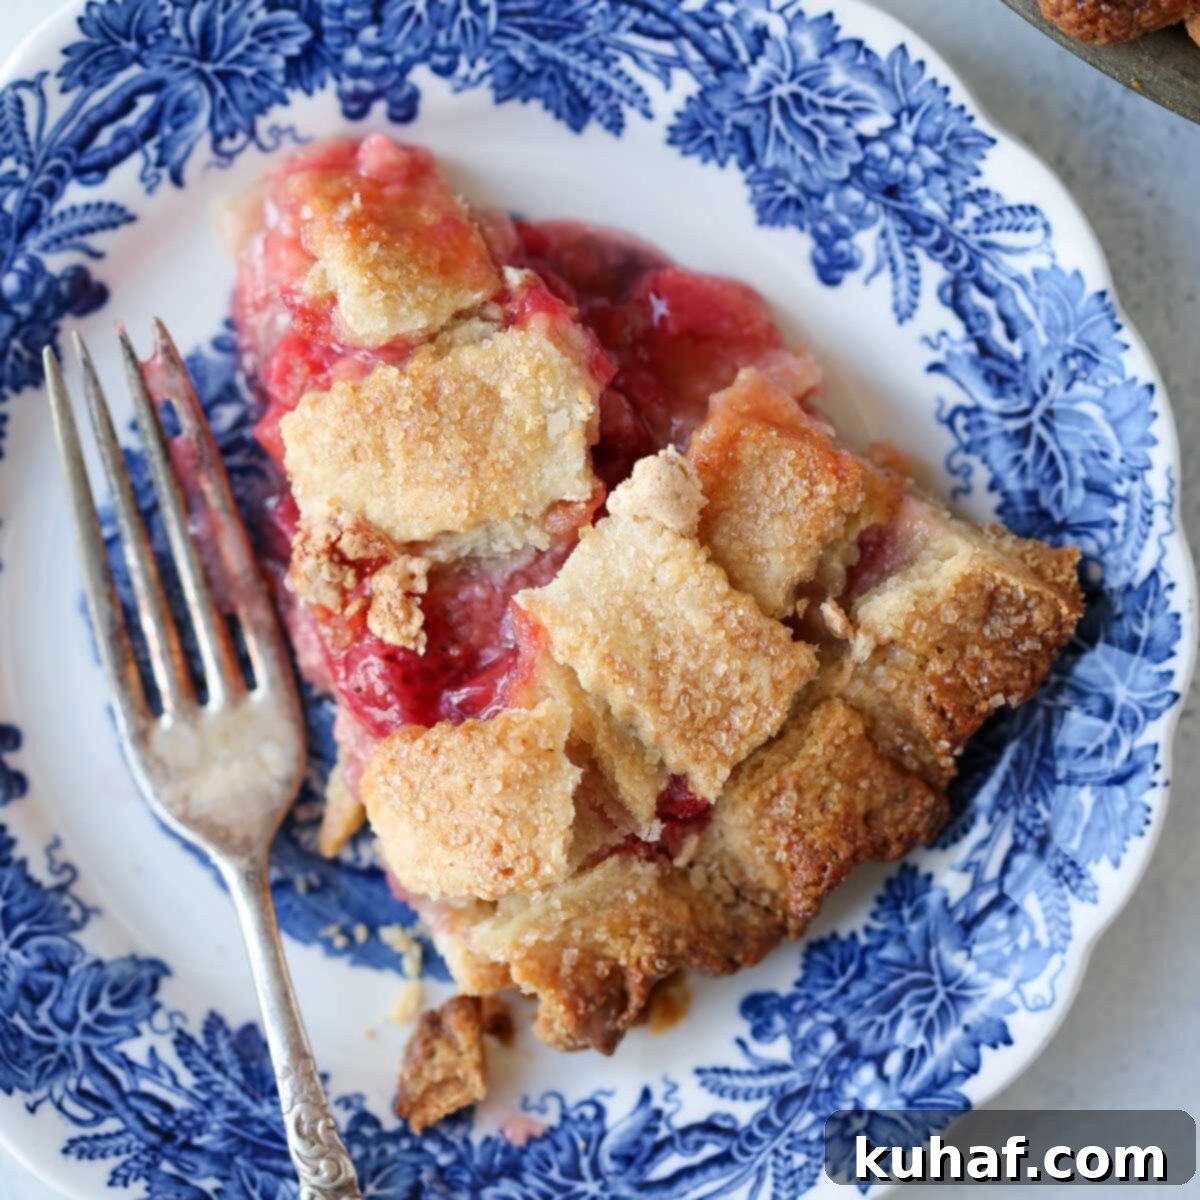
Once your Strawberry Rhubarb Pie has cooled sufficiently to set (usually at least 2-3 hours), it’s ready to be enjoyed! While delicious at room temperature, I believe this pie reaches its peak when served warm. The warmth gently coaxes out the fruit’s aromas and flavors, making each bite even more comforting and delightful.
For an elevated dessert experience, serve a generous slice with a scoop of creamy vanilla ice cream. The cool, luscious vanilla creates a stunning contrast with the warm, fruity pie, and the creaminess beautifully mellows the rhubarb’s tartness while enhancing the strawberries’ sweetness. Alternatively, a delicate vanilla bean crème anglaise (custard sauce) poured over the top offers a sophisticated touch. Both vanilla and cream heighten the natural strawberry flavor, bringing a wonderful roundness and complexity to the entire dish.
Frequently Asked Questions About Strawberry Rhubarb Pie
To maintain optimal freshness and flavor, store your strawberry rhubarb pie covered tightly with plastic wrap at room temperature for up to 4 days. If you need to keep it longer, it can be refrigerated for up to a week. For extended storage, the pie freezes beautifully for up to 2 months. When ready to enjoy a frozen pie, thaw it completely at room temperature and then refresh (gently warm) in a moderate oven to restore its delicious texture.
It is crucial that you do NOT dock (prick with a fork) the bottom pie crust for this particular pie. The fruit filling is naturally quite liquid, and docking the crust would create small holes through which the filling could leak out. This would not only make a sticky mess in your pie dish but could also result in a soggy bottom crust, which nobody wants in their pie!
The combination of strawberry and rhubarb is a culinary match made in heaven due to their complementary flavors. Rhubarb is intensely tart and has a distinct astringent quality. An all-strawberry pie, especially when made with peak-season berries, can be excessively sweet. Conversely, an all-rhubarb pie would require a considerable amount of sugar to become palatable. By mixing them, the sweet, juicy strawberries perfectly balance the sharp, tangy rhubarb, creating a complex, well-rounded flavor profile that is both refreshing and comforting.
A soupy strawberry rhubarb pie is a common issue, primarily because both strawberries and rhubarb release a significant amount of moisture when they bake or come into contact with sugar. The most frequent culprits for a runny pie are an insufficient amount of thickening agent (like cornstarch or tapioca flour) or not baking the pie long enough. It’s essential that the filling reaches a full boil in the center of the pie to properly activate the thickener, ensuring a firm, sliceable consistency.
Generally, you only need to peel rhubarb if the stalks are notably green, tough, or very thick. If you’re using tender, ripe rhubarb (which is typically vibrant pink or red), peeling is usually unnecessary. I always prefer to bake with peak-season rhubarb, which often doesn’t require peeling. Always remember to cut off and discard any leaves, as they contain oxalic acid and are poisonous.
If you tried this recipe and loved it, please leave a 🌟 star rating and let me know how it goes in the comments below. I love hearing from you; your comments make my day!
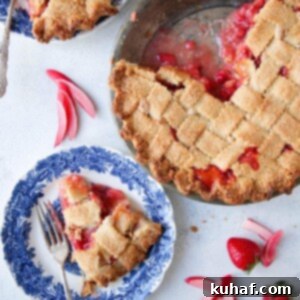
Strawberry Rhubarb Pie
Pin Recipe
Comment
Print Recipe
Ingredients
For the Double Almond Pie Crust:
- 3 cups all-purpose flour
- 6 tablespoons almond flour almond meal
- 6 tablespoons sugar
- 1 teaspoon kosher salt
- 1 cup shortening cut in small pieces, cold
- 2 eggs well-beaten
- cold water
For the Pie:
- 1 ½ cups rhubarb
- 1 ½ cups strawberries
- 2 tablespoons cornstarch
- 1 ½ cups sugar
- 1 egg
- 1 tablespoon heavy cream optional
- 2 tablespoons turbinado sugar optional
Instructions
To prepare the pie crust:
-
Make sure all ingredients for the crust are either frozen or very, very cold. In a large bowl, mix the dry ingredients (flour, almond flour, sugar, salt) thoroughly. Cut in the cold shortening with a pastry blender until it is fully incorporated into the dry ingredients and resembles coarse crumbs.
-
Add the well-beaten eggs to the mixture and gently combine with a fork, mixing just until incorporated. Begin adding cold water, one tablespoon at a time, until the dough just comes together. I typically use about 4 tablespoons, but the exact amount will vary based on humidity and flour. The goal is for the dough to form a cohesive ball; if chunks are falling out, add a tiny bit more water. Remember, it doesn’t take as much as you might think! Divide the dough into two equal halves.
-
Roll each half of the dough into a ball, then flatten each ball into a disk. Wrap each disk tightly in plastic wrap and refrigerate for several hours, or ideally, overnight. This chilling period is crucial for developing flavor and making the dough easier to work with.
-
Once chilled, roll out both dough disks to approximately ¼ inch thick. This almond flour dough is more fragile than some other crusts, so I recommend using the rolling pin method for transferring: gently roll one disk onto your rolling pin and then unroll it over your 9-inch pie dish, carefully easing it into place.
-
Decoratively crimp the edges of the bottom crust. Once the bottom crust is in place, return the pie dish to the refrigerator for an additional 20-30 minutes to ensure it remains cold and firm before filling.
To prepare the pie:
-
Preheat your oven to 425°F (220°C). Ensure your pie plate with the prepared bottom crust is chilled on a cookie sheet in the refrigerator, ready for filling.
-
If your rhubarb stalks are still green or particularly fibrous, carefully peel them with a vegetable peeler. This step is generally unnecessary if you have ripe, vibrant pink rhubarb, which is usually tender enough.
-
Slice both the rhubarb and strawberries into uniform ¼ inch pieces. This consistency ensures even cooking and a balanced texture throughout the pie.
-
Place the sliced fruit into a large bowl. Sprinkle the cornstarch over the fruit mixture and toss gently but thoroughly to ensure every piece is coated. This is critical for achieving a thick, well-set filling.
-
In a separate bowl, whisk together the egg and granulated sugar vigorously until the mixture is light, fluffy, and well combined. This step incorporates air, contributing to the filling’s final texture.
-
Pour the strawberry rhubarb mixture into the prepared and chilled pie crust, spreading it out in an even layer. Do not mound the filling high, as it won’t cook down as much as other pie fillings and could spill over. Carefully pour the whisked egg and sugar mixture evenly over the top of the fruit, ensuring it covers all the fruit.
-
Cover the pie with your chosen top pastry. This can be a solid top crust (with vent holes cut) or a decorative lattice top. For a lattice, refer to our specific tutorial. Trim any excess overhang from the crust (anything more than ½ inch over the edge) using kitchen scissors. Pinch the top and bottom crusts together firmly, then roll the joined edges under to create a neat rim. Crimp decoratively to seal the pie completely.
-
For a beautiful golden-brown and slightly crunchy finish, brush the top crust with heavy cream and generously sprinkle with turbinado sugar. This step is optional but truly elevates the pie’s appearance and texture – I wouldn’t skip it! Chill the assembled pie for another 30 minutes before baking; this helps the crust maintain its shape.
-
Bake the pie on a rimmed baking sheet in the pre-heated 425°F (220°C) oven for 30 minutes. After 30 minutes, reduce the oven temperature to 325°F (160°C) and continue baking until the filling is visibly bubbling and thick in the center. To prevent the crust from over-browning, cover the edges of the crust with aluminum foil after about 20 minutes (or as soon as you notice them getting too dark) at the lower temperature. Total bake time at 325°F should be approximately 30-45 minutes, but rely on the filling being actively bubbly in the center to ensure it’s cooked through!
Notes
Critical Technique – The most important step for a perfectly set and delicious pie is to ensure the filling boils vigorously in the very center. This intense heat fully activates the cornstarch, guaranteeing a thick, luscious filling without any starchy aftertaste. Don’t pull the pie until you see those bubbles!
Variations – Feel free to customize this recipe by experimenting with different fruit combinations that pair well with rhubarb, or by using your preferred pie crust recipe (such as an all-butter or shortening crust). A streusel topping also makes a wonderful alternative to a full top crust.
Storage – Store your baked pie covered at room temperature for up to 4 days. For longer freshness, refrigerate for up to a week. This pie also freezes beautifully for up to 2 months; simply thaw at room temperature and gently warm in an oven before serving.
Pie Filling adapted for modern day use from The Settlement Cookbook, 1941 Edition.
Nutrition
More Delicious Pie Recipes & Desserts to Explore
Thank you for exploring this professional chef-tested recipe. I hope you found it inspiring and delicious! For more culinary adventures, be sure to check out our other carefully developed and delicious pie recipes, covering a wide range of flavors and styles perfect for any season or occasion. If you’re planning a holiday feast, peruse this curated list of the 20 Best Thanksgiving Pies for abundant pie inspiration. Or, if you’re craving something light and refreshing, try another one of these delightful Easy Summer Dessert Recipes. Happy baking!
