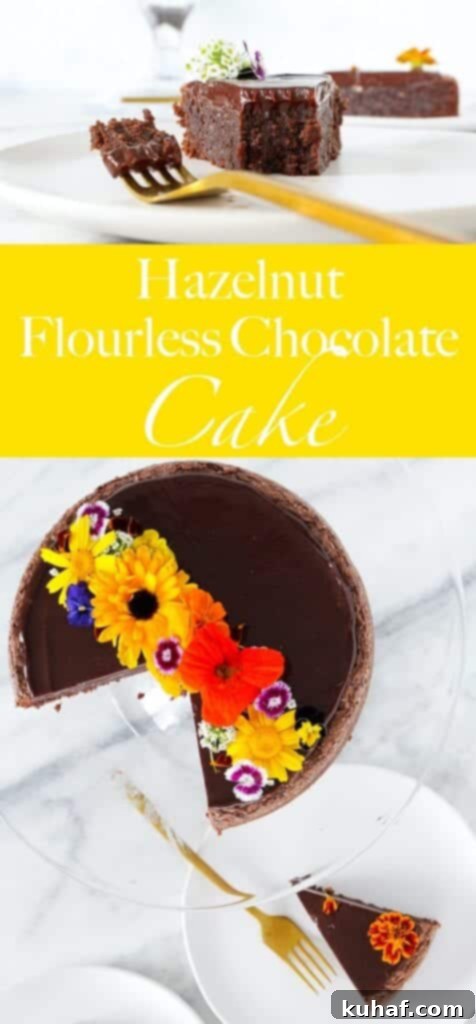
Indulge in the Ultimate Gluten-Free Flourless Chocolate Hazelnut Torte Recipe
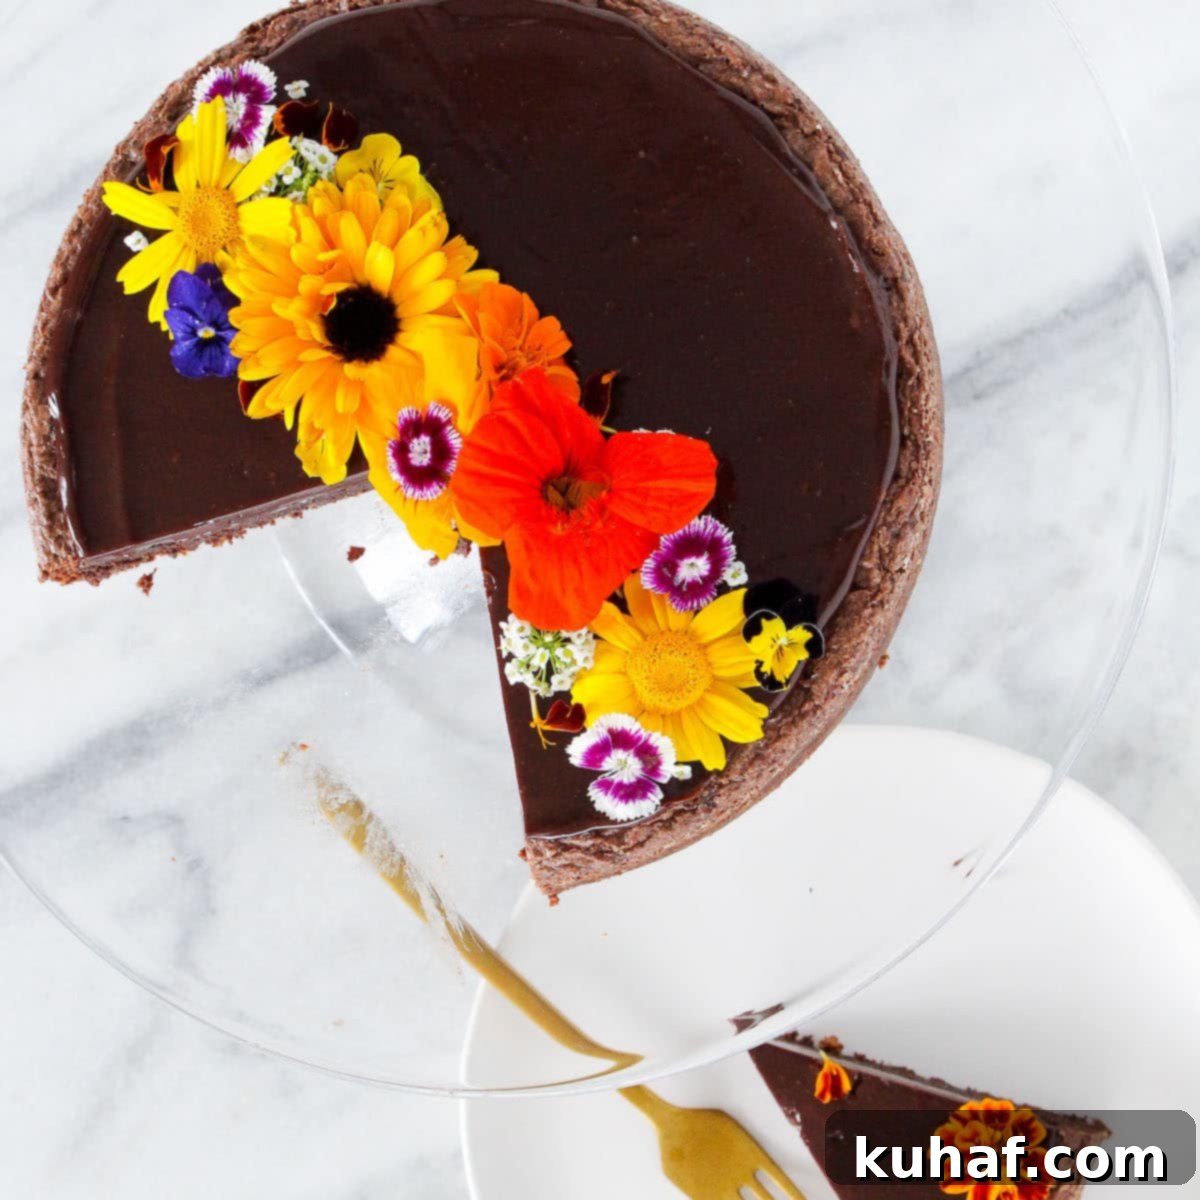
Prepare to be enchanted by this truly remarkable dessert: a **Silky Smooth Flourless Chocolate Hazelnut Torte**. This recipe delivers an experience of pure indulgence, boasting a profound chocolate richness perfectly balanced by the subtle nuttiness of hazelnuts and a delicate hint of bright lemon zest. To crown this masterpiece, a luscious, glossy ganache takes it to an extraordinary level of decadence. Whether you’re a seasoned baker or looking for an impressive yet accessible gluten-free treat, this decadent torte is designed to captivate your taste buds and become a cherished recipe in your repertoire.
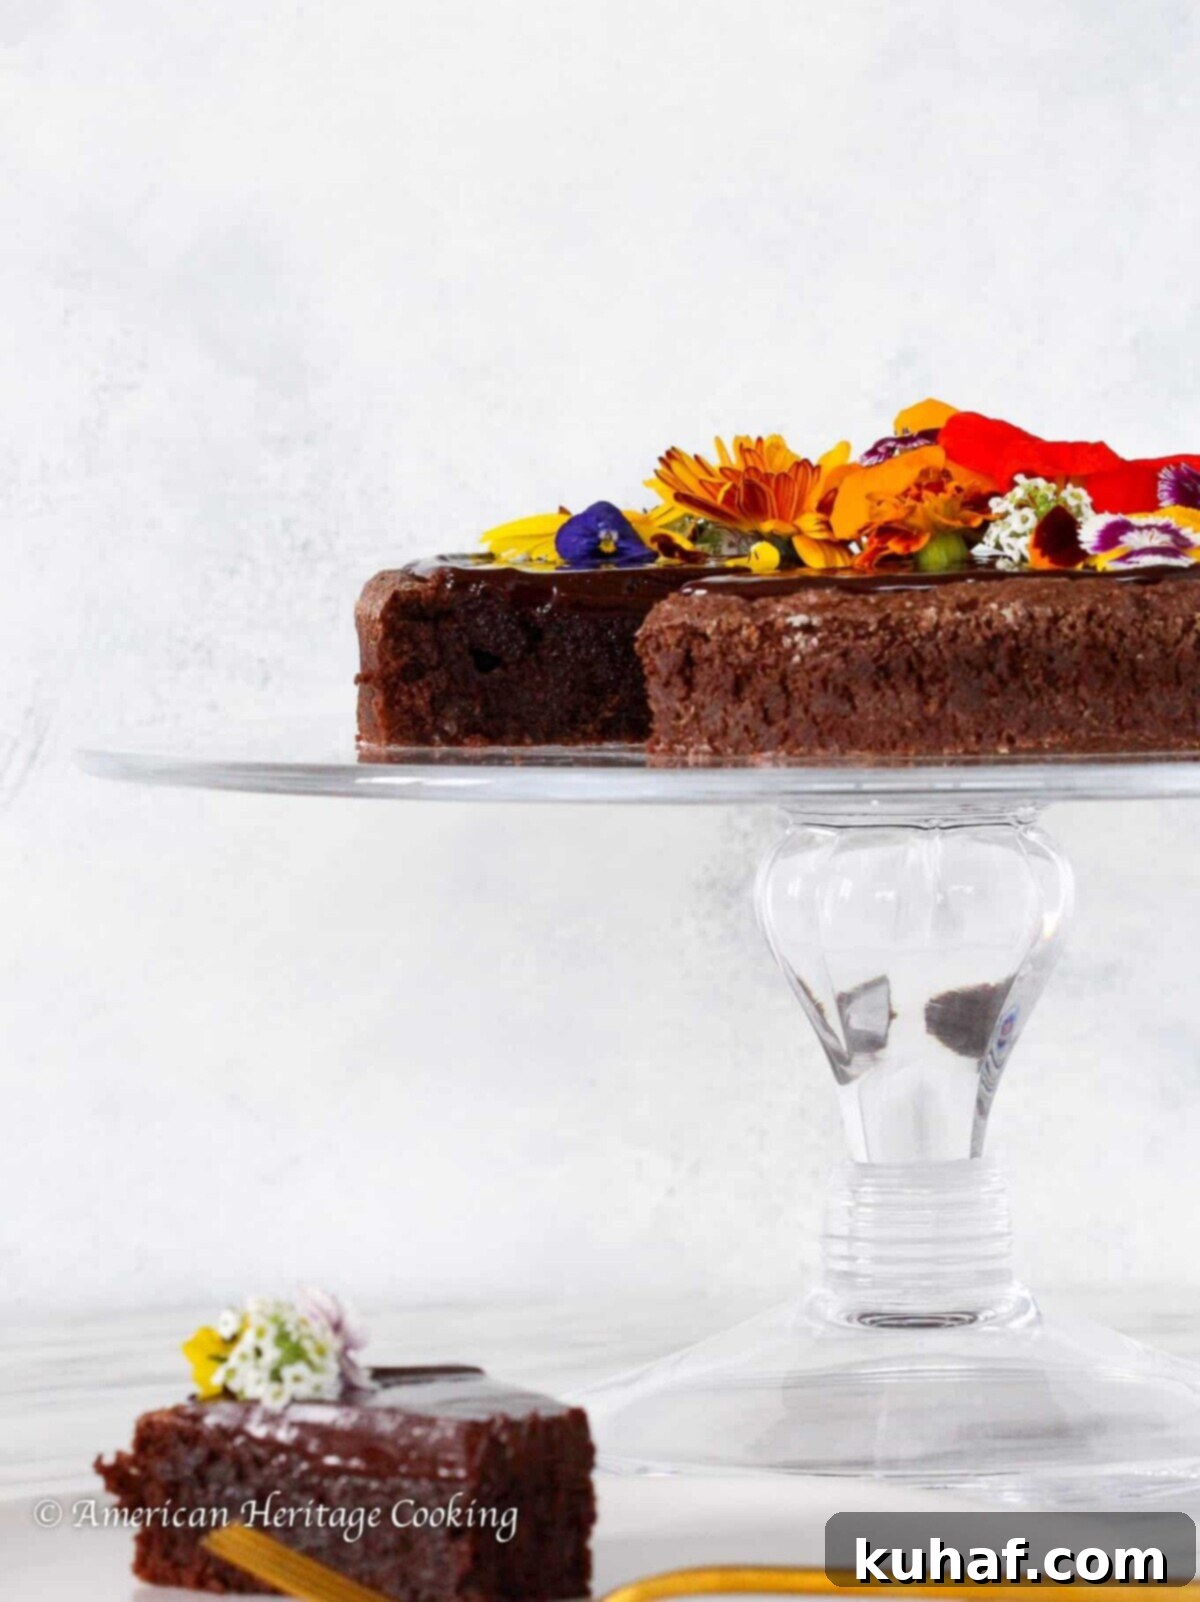
This exquisite gluten-free chocolate cake is a culinary journey, meticulously flavored with rich melted dark chocolate, finely ground hazelnuts, and the vibrant zest of fresh lemon. It’s all impeccably finished with a smooth, subtly boozy Frangelico ganache. What truly distinguishes this particular recipe is its adoption of an elegant Italian baking technique known as separated egg foam. This method ensures that the chocolate torte achieves a remarkably light and airy yet profoundly moist texture – a delicate balance that is often challenging to attain in flourless cakes. It encapsulates everything you adore about the deep, chocolatey essence found in beloved treats like my brown butter brownies, but with the added, invaluable benefit of being completely gluten-free and suitable for those with gluten sensitivities.
Often referred to as Torta Caprese, this traditional Italian chocolate cake is typically crafted with almond flour. However, my special adaptation embraces the rich, distinctive flavor of hazelnuts, introducing an entirely new dimension of taste and texture. The robust, earthy notes of hazelnuts stand up beautifully to the intense dark chocolate, creating a captivating duality that I also cherish in other favorite hazelnut-infused delights, such as my popular Nutella cookies, luxurious Nutella truffles, and of course, my comforting Nutella banana bread. This hazelnut chocolate torte isn’t just a dessert; it’s a gourmet experience designed to be shared and savored, making any occasion feel special.
Table of Contents
- Why This is the Best Gluten-Free Hazelnut Chocolate Torte Recipe
- Professional Chef’s Tips for Success
- Essential Ingredients for Your Decadent Torte
- Creative Variations & Substitutions
- How to Make This Flourless Chocolate Hazelnut Torte
- Chef Lindsey’s Expert Recipe Tip
- Frequently Asked Questions About Flourless Chocolate Torte
- Full Flourless Chocolate Torte Recipe Card
- Before You Go: More Chef-Developed Desserts
Why This is the Best Gluten-Free Hazelnut Chocolate Torte Recipe: Unveiling the Secrets
- Separated Egg Foams for a Delicate, Airy Texture: The heart of this torte’s uniquely light and delicate texture lies in an authentic Italian baking technique: the separated egg foam. By independently whipping the egg yolks to a pale, voluminous ribbon stage and the egg whites to stiff, cloud-like peaks, we harness the natural leavening power of eggs alone. This meticulous process ensures a delicate structure that is surprisingly airy yet profoundly moist, setting it apart from many other flourless cakes that can sometimes be overly dense. It’s a method cherished in Italian torta-making for its superior results, delivering a melt-in-your-mouth experience without any gluten or heavy flours.
- Hazelnut & Chocolate Heaven: A Perfect Flavor Pairing: While traditional Torta Caprese often features almonds, this recipe intentionally embraces the rich, distinctive flavor of finely ground hazelnut flour. Hazelnuts don’t just act as a gluten-free base; they actively deepen the decadent dark chocolate profile, introducing an aromatic, earthy complexity that truly elevates the torte. This thoughtful substitution ensures the cake remains 100% gluten-free while offering a gourmet taste that is both familiar and exciting. The synergy between intense dark chocolate and the subtle, toasted notes of hazelnuts is simply irresistible, creating a harmonious and unforgettable flavor combination that will leave you craving more.
- Developed for a High-End Manhattan Italian Restaurant: This isn’t just any home recipe; it’s a professional-grade dessert born from my time as the Executive Pastry Chef for one of Chef Marc Forgione’s acclaimed establishments in Manhattan. Every detail, from the precise ingredient ratios to the specific techniques, was meticulously refined, tested, and re-tested to meet the high standards of a fine dining menu. Now, you can bring that same level of culinary excellence and sophisticated flavor right into your own kitchen, enjoying all the benefits of a chef-tested, perfected recipe that promises restaurant-quality results every single time.
Professional Chef’s Tips for Success: Elevate Your Torte from Good to Great
- Zest Your Lemon Directly into the Sugar for Maximum Flavor Infusion: This simple yet incredibly powerful technique ensures you extract every bit of aromatic citrus oil from your lemon zest. By “massaging” the freshly zested lemon directly into the granulated sugar with your fingertips, the sugar crystals physically absorb these potent fragrant oils. This action intensifies the lemon’s bright hint, allowing it to subtly yet significantly permeate throughout the torte. It’s not just about adding zest; it’s about infusing the sugar itself with vibrant citrus essence, making a noticeable difference to the overall flavor profile that a simple addition wouldn’t achieve.
- “Sacrifice” a Small Amount of Egg Whites for Batter Stability: When you reach the crucial step of folding your beautifully whipped egg whites into the dense chocolate batter, don’t just dump them all in at once. Instead, put just a small amount (about a quarter) of the whipped whites into the thick batter first and gently fold it in. This initial addition, often called ‘sacrificing’ the whites, helps to lighten the dense batter considerably, making it much easier to smoothly incorporate the remaining, delicate whipped whites without deflating them. This thoughtful step is absolutely key to maintaining the delicate airiness, volume, and stability of the overall mixture, preventing a heavy or sunken torte.
- Whisk Your Ganache from the Center Out for a Flawless, Glossy Finish: Achieving a perfectly glossy, smooth, and emulsified ganache requires a specific whisking technique that prevents it from breaking or becoming grainy. Begin whisking gently from the very center of the bowl, gradually expanding your circles outwards as the chocolate melts and combines with the cream. This method allows the heated cream to smoothly and gradually melt the chocolate from the inside out, encouraging proper emulsification. This prevents the ganache from seizing, separating, or becoming clumpy, ensuring a luxurious, shiny texture that truly elevates the visual appeal and taste of your torte. For a deeper dive into ganache perfection, explore my comprehensive professional chocolate ganache recipe!
Essential Ingredients for Your Decadent Flourless Chocolate Hazelnut Torte
Crafting this exceptional flourless chocolate hazelnut torte begins with selecting high-quality ingredients. Each component plays a vital role in achieving the perfect texture, profound flavor, and exquisite richness. Here’s a closer look at what you’ll need and why the right choice makes all the difference:
- Unsalted Butter: I consistently use unsalted butter for all my baking endeavors, as it provides precise control over the overall salt content in your recipe. The fat and dairy in butter are indispensable for rounding out the torte’s rich flavor and imparting that signature silky smoothness and melt-in-your-mouth quality that makes this dessert so irresistible.
- Dark Chocolate: The choice of chocolate is paramount for both the torte itself and the accompanying luscious ganache glaze. I recommend a high-quality dark chocolate with a cocoa solid percentage between 54% and 65%. This range strikes the ideal balance between an intense chocolate flavor and just the right amount of sweetness, preventing the torte from being overly bitter or cloyingly sweet. Always opt for chopping a bar of chocolate over chocolate chips; chips often contain stabilizers that prevent smooth melting and incorporation, which is crucial for the velvety consistency reminiscent of my acclaimed Old Fashioned Chocolate Fudge Recipe.
- Kosher Salt: A measured amount of kosher salt is absolutely essential. It doesn’t make the torte taste salty, but rather brilliantly enhances and brightens the deep chocolate and hazelnut flavors, preventing them from tasting flat and adding essential depth and complexity to the overall taste profile.
- Granulated Sugar: This provides the necessary sweetness and also plays a crucial structural role, particularly when vigorously whipped with the egg yolks and lemon zest. It helps create the voluminous base for our delicate torte.
- Egg Whites: These are integral to the unique, light, and airy texture of this flourless torte. When properly whipped to stiff peaks, they act as a powerful natural leavening agent, providing remarkable lift and tenderness without the need for any traditional flour. The freshness of your eggs will directly impact how well your whites whip, so choose wisely.
- Egg Yolks: The egg yolks are rich in fat, contributing significantly to the torte’s decadent richness, vibrant color, and acting as crucial emulsifiers and thickeners. They add a luxurious density and moistness to the cake without introducing excess moisture from the whites, which is key for the torte’s ideal consistency. Maintaining a careful balance is important; too many yolks can result in an undesirable “eggy” flavor.
- Dutch Processed Cocoa Powder: I opt for Dutch processed cocoa powder because it has undergone an alkaline treatment. This process reduces its acidity, resulting in a darker, more appealing color and a milder, less bitter, yet profoundly rich and deep chocolate flavor that beautifully complements the chosen dark chocolate in our recipe.
- Lemon Zest: Fresh lemon zest is a subtle but potent secret weapon in this torte. Its purpose is not to make the torte taste overtly lemony, but rather to provide a subtle, bright, and refreshing counterpoint to the intense richness of the chocolate and hazelnut. This unexpected hint of citrus prevents the flavors from becoming heavy, adding a delightful lift and complexity.
- Hazelnut Flour: This is the star of our gluten-free base and a key flavor component. I prefer using untoasted hazelnut flour for this recipe because it will naturally toast to perfection as the cake bakes, releasing its full aromatic potential and deepening its nutty flavor. You can buy it pre-ground for convenience, or for an even fresher flavor, grind your own toasted or untoasted hazelnuts. Its rich, buttery, and distinctive nutty profile is a perfect partner to the dark chocolate.
- Vanilla Extract: A good quality vanilla extract is indispensable. It enhances both the chocolate and hazelnut flavors, adding a layer of warmth, complexity, and aromatic depth without ever overpowering them. Use pure vanilla extract for the best results.
- Light Corn Syrup (for Ganache): The light corn syrup included in the ganache serves a vital technical purpose: it acts as a stabilizer. It prevents sugar crystallization, which can lead to a grainy texture, and significantly helps in achieving that beautifully glossy, smooth, and pourable ganache. While you can substitute it with glucose or even omit it, it contributes significantly to the ganache’s professional, unblemished finish.
- Heavy Cream (for Ganache): For the most stable and luxurious ganache, I highly recommend using full-fat (40%) heavy cream. Its higher fat content makes it less prone to breaking or separating compared to lighter whipping creams, ensuring a consistently smooth, rich, and velvety ganache every time.
- Frangelico (for Ganache): This delightful hazelnut liqueur is an exquisite addition to the ganache. It beautifully echoes the hazelnut flavor of the torte itself, adding a sophisticated, slightly boozy, and aromatic note that ties the whole dessert together. If you prefer to omit alcohol, or want a different flavor profile, it can be substituted with other liqueurs like Amaretto (for almond notes), a good quality whiskey, Chambord (for berry notes), or simply an extra splash of vanilla extract for a non-alcoholic option.
For precise measurements and a full comprehensive list of ingredients, please refer to the detailed recipe card conveniently located below.
Creative Variations & Substitutions to Customize Your Flourless Chocolate Torte
While this Flourless Chocolate Hazelnut Torte recipe is a stand-alone masterpiece, there are several wonderful ways to adapt it to your unique taste preferences, explore different flavor combinations, or accommodate dietary needs. Feel free to get creative with these delicious and chef-approved variations:
- Almond Flour for a More Traditional Torta Caprese: If you’re seeking a more classic interpretation of the Italian Torta Caprese, a delightful substitution is to replace the hazelnut flour with an equal amount of finely ground almond flour. Almonds typically offer a milder, slightly sweeter flavor profile compared to the robust, earthy notes of hazelnuts. This swap will yield a subtly different but equally delicious and authentically classic gluten-free chocolate cake, perfect for those who prefer the almond nuance.
- Introduce a Layer of Homemade Jam for Fruity Brightness: For an exquisite burst of fruity brightness and an additional layer of complexity, consider adding a thin layer of homemade jam. My recipes for a vibrant mixed berry jam or an easy strawberry jam would be absolutely fantastic choices for this torte. Here’s how to perfectly incorporate it: Once your torte has cooled completely to room temperature, spread a thin, even layer of your chosen jam over the top surface. Ensure the jam is well-set and not overly runny. Then, allow your ganache to cool slightly (it should still be pourable but not piping hot, which could melt the jam layer) before carefully layering it on top of the jam. This creates a delightful hidden burst of flavor and a lovely textural contrast.
- Boost the Chocolate Flavor with a Touch of Espresso Powder: This is one of my favorite secret ingredients for intensifying chocolate, as expertly demonstrated in my Glazed Chocolate Donuts recipe. Adding just a ¼ teaspoon of high-quality, finely ground espresso powder to the chocolate batter will remarkably deepen and amplify the chocolate flavor without making the torte taste overtly like coffee. It simply enhances the profound cocoa notes, adding a sophisticated edge and richness that truly makes the chocolate sing.
- Explore Other Liqueurs for the Ganache: While Frangelico is a perfect match for the hazelnut torte, don’t hesitate to experiment with other liqueurs in your ganache to tailor it to your palate. Grand Marnier or Cointreau would impart a lovely orange zest, while Amaretto would beautifully complement the almond notes if you opted for almond flour. A good quality bourbon would introduce a warm, oaky depth, or a raspberry liqueur like Chambord could add a fruity counterpoint.
- Citrus Swap for a Different Aroma: While lemon zest offers a bright, refreshing counterpoint that works wonderfully, orange zest can also be used for a slightly sweeter, warmer citrus note. Orange pairs exceptionally well with chocolate and hazelnut, providing a different yet equally harmonious aroma.
How to Make This Decadent Flourless Chocolate Hazelnut Torte: A Step-by-Step Guide
Follow these detailed, chef-approved steps to create a show-stopping gluten-free chocolate hazelnut torte that will impress everyone. Further precise measurements and comprehensive information, including a printable version, can be found in the recipe card at the very bottom of this post.
Make the Cake: Step-by-Step Instructions for the Torte Base
Step 1: Prepare Your Cake Pan for Flawless Release. Begin by preheating your oven to 325°F (160°C) to ensure it’s ready for baking. Take a 10-inch round cake pan (or an 8-inch for a slightly thicker torte, adjusting baking time accordingly) and meticulously line the bottom with a circle of parchment paper. Lightly spray both the pan and the parchment with a reliable nonstick cooking spray, then generously dust the entire interior with cornstarch. Tap out any excess cornstarch to ensure a thin, even coating. This meticulous preparation is absolutely crucial for the effortless release of your delicate torte once it’s perfectly baked and cooled, preventing any sticking or tearing.
Chef’s Note on Pan Size: You have excellent flexibility with your pan size for this recipe! Any round cake pan between 8 inches and 10 inches will work beautifully. Just be aware that opting for an 8-inch pan will result in a thicker torte, which will inherently require a slightly longer baking time to cook through evenly. In the stunning photos shared here, an 8-inch pan was expertly utilized to achieve that impressive, elegant height.
Step 2: Infuse Sugar with Bright Lemon Zest. Carefully zest the entire lemon directly into approximately half of the granulated sugar specified in the recipe. Using your clean fingertips, gently massage the vibrant lemon zest into the sugar. This simple yet powerful action works wonders: it actively releases the aromatic citrus oils from the zest, allowing the sugar crystals to effectively absorb and carry these fragrant essences, thereby intensifying the lemon’s subtle, bright aroma and flavor that will delicately permeate the entire torte. This infusion makes a significant difference compared to merely adding zest to the batter.
Step 3: Melt Chocolate and Butter to a Silky Smooth Consistency. In a clean, heatproof bowl, combine the finely chopped dark chocolate, softened unsalted butter, Dutch processed cocoa powder, and kosher salt. Place this bowl over a simmering pot of water, ensuring that the bottom of the bowl does not directly touch the water – this creates a classic “bain-marie” or double boiler. Stir the mixture occasionally with a spatula or whisk until all ingredients are completely melted and the mixture is smooth, glossy, and uniform. Once fully melted, remove the bowl from the heat and allow the rich chocolate mixture to cool slightly. This cooling step is crucial to prevent the hot chocolate from cooking the eggs when combined later.
Mastering the Bain-Marie (Double Boiler): This classic French technique is your absolute best friend when melting chocolate for delicate desserts. It provides gentle, indirect heat, which is essential for preventing the chocolate from scorching, seizing (becoming stiff and grainy), or clumping. Always ensure the water in the pot is simmering gently, not boiling vigorously, and critically, never let the water physically touch the bottom of your chocolate bowl, as direct, intense heat can quickly ruin the chocolate’s texture and temper.
Step 4: Whip Egg Whites to Stiff, Voluminous Peaks. In a scrupulously clean stand mixer bowl fitted with the whisk attachment (ensure no grease or fat residue is present, which can prevent whites from whipping), whip the egg whites on medium-high speed until they form stiff, glossy peaks. The whites should hold their shape firmly when the whisk is lifted, creating distinct, firm points. It’s vital to be careful not to over-whip your egg whites, as excessively stiff or dry whites can become brittle and difficult to fold into the batter, potentially leading to a denser cake or one that unfortunately sinks after baking. Once achieved, carefully remove the whipped whites from the mixer and set them aside in a separate bowl.
The Art of Whipping Egg Whites: Avoid Over-Whipping! Over-whipped egg whites lose their delicate elasticity and become dry and crumbly, making them incredibly hard to incorporate evenly into the batter. This often results in a dense, heavy, or even collapsed torte because the trapped air is lost. Aim for firm but still slightly pliable peaks – they should look shiny and smooth, not dull and granular.
Step 5: Combine Yolks, Infused Sugar, and Chocolate Mixture. Without needing to clean the stand mixer bowl (after removing the whites), add the egg yolks and the lemon-infused granulated sugar. Whip on medium-high speed until the mixture becomes considerably lightened in color, pale yellow, and triples in volume, achieving a thick, voluminous, ribbon-like consistency that slowly falls from the whisk. With the mixer still running on low speed, slowly stream in the slightly cooled chocolate mixture, beating only until thoroughly combined and smooth. Finally, add the remaining granulated sugar, hazelnut flour, and vanilla extract, and continue to beat just until fully incorporated and no visible streaks of flour remain. Be careful not to overmix at this stage.
Step 6: Gently Fold in Whipped Egg Whites for Airiness. Now for the most delicate and crucial step: the folding process. As per the “sacrificing” professional tip, take approximately one-quarter of the whipped egg whites and gently fold them into the dense chocolate batter until mostly combined. This initial step effectively lightens the batter, making the subsequent folding much easier and preserving the precious air. Then, carefully add the remaining whipped egg whites and continue to fold gently using a broad spatula, employing a cutting motion down through the center of the batter and then folding it up and over itself. Systematically rotate the bowl counterclockwise as you fold to ensure even distribution without deflating the precious air you’ve incorporated. Stop folding as soon as no white streaks are visible; overmixing at this stage will inevitably lead to a dense, heavy torte. Once perfectly combined, pour the aerated batter evenly into your meticulously prepared cake pan.
Mastering the Fold: Precision is Key! The ultimate key to a light and airy torte is meticulously preserving the air you’ve carefully incorporated into the egg whites. Always use a light hand and a broad, flexible spatula. The motion should be a gentle cut down through the center of the batter, then a scoop and fold upwards and over. Consistent, gentle bowl rotation helps integrate ingredients efficiently and minimizes the risk of overmixing, which would compromise the torte’s delicate texture.
Step 7: Bake to Golden Perfection. Carefully place the cake pan in the preheated 325°F (160°C) oven and bake for 30-35 minutes. The torte is perfectly done when a cake tester or a wooden skewer inserted into the very center comes out clean or with just a few moist crumbs attached. It’s crucial not to overbake, as this can lead to a dry torte; the center should still be moist and fudgy.
Step 8: Cool and Unmold with Utmost Care. Allow the torte to cool completely in its pan, set on a wire rack. Proper cooling is absolutely vital for its structural integrity. For extra assurance and to achieve a cleaner, more professional release, I often recommend refrigerating the torte for at least an hour or two once it’s completely cooled to room temperature. To carefully unmold, run a small offset spatula or a very thin knife around the entire inner perimeter of the pan to loosen any stuck edges. Then, invert the pan onto a cutting board or a clean wire rack. Gently remove the parchment paper from the bottom, and then carefully transfer the torte to your desired elegant serving plate or cake stand.
The Unmolding Trick: A Chef’s Secret for Flawless Presentation! Refrigerating the torte briefly before attempting to unmold truly does wonders! The slight chill firms up the delicate cake, making it significantly less prone to breaking, crumbling, or sticking. Once adequately chilled and the sides have been loosened, a quick, confident tap on a hard surface (after inverting) often helps it slide right out of the pan beautifully and intact.
Make the Luscious Ganache and Assemble Your Decadent Torte:
Alternative Finishes for a Simple Yet Elegant Torte: If you choose to opt out of preparing the ganache, fear not – this flourless chocolate torte is still an absolute delight on its own! You can elegantly finish your cooled cake with a simple dusting of confectioner’s sugar, artfully arrange fresh raspberries or other berries on top, or serve it alongside a generous scoop of creamy vanilla bean ice cream for a classic, crowd-pleasing pairing.
Step 9: Prepare the Ganache Base for Smooth Melting. In a separate heatproof bowl, combine the finely chopped dark chocolate designated for the ganache, the light corn syrup, and the remaining ½ teaspoon of kosher salt. Ensure the chocolate is finely chopped to facilitate even and quick melting.
Step 10: Create the Luscious, Glossy Ganache. In a small saucepan, heat the heavy cream over medium heat until it reaches a gentle simmer, just before it comes to a full boil. As soon as you see small bubbles forming around the edges, immediately pour the hot cream over the chocolate mixture in the bowl. Let it sit undisturbed for exactly 2 minutes; this crucial resting period allows the residual heat from the cream to thoroughly melt the chocolate without stirring. After 2 minutes, begin whisking from the very center of the bowl, gradually working your way outwards, until the mixture beautifully emulsifies into a smooth, uniformly glossy, and rich ganache. Finally, whisk in the Frangelico (or your chosen substitute liqueur or extract) until it is fully incorporated and the ganache is perfectly homogeneous.
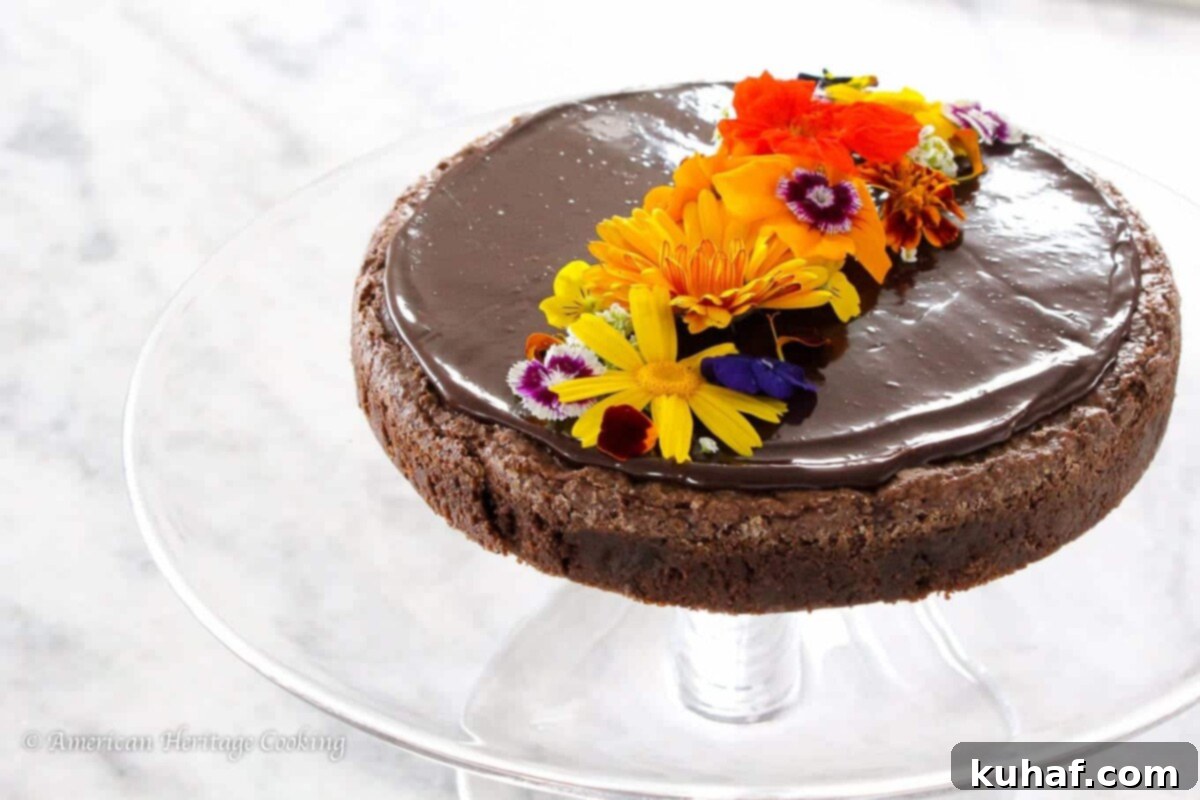
Step 11: Glaze and Set for a Stunning Finish. Carefully pour the still-warm (but not hot) ganache onto the very center of your completely cooled torte. Using an offset spatula or the back of a spoon, gently spread the ganache evenly over the entire top surface, allowing some of it to elegantly drip down the sides for a rustic yet sophisticated look, if desired. Once coated, refrigerate the torte for at least 30 minutes, or until the ganache is fully set and firm to the touch. This crucial setting time ensures a clean, smooth slice and a beautiful, stable presentation.
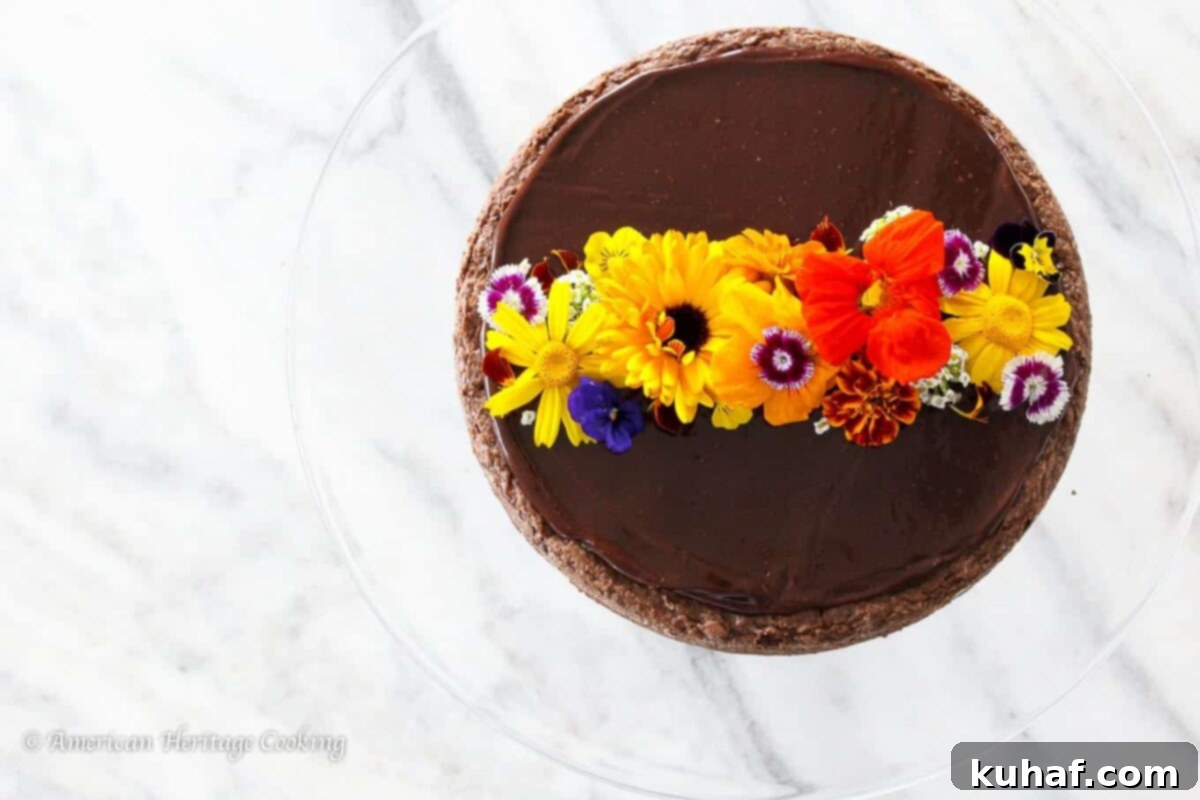
Elevate Your Presentation: Garnish with Edible Blooms! For an extra touch of exquisite beauty and sophisticated elegance, consider garnishing your set torte with some fresh, vibrant edible flowers. Their delicate petals and striking colors provide a stunning visual contrast against the dark chocolate, instantly elevating your dessert to a truly artisanal masterpiece and making it even more appealing for special occasions.
Chef Lindsey’s Expert Recipe Tip: For the Perfect, Clean Slice Every Time
Achieving clean, professional-looking slices of your rich and delicate Flourless Chocolate Hazelnut Torte is actually much easier than you might think! For each individual cut, dip a sharp, thin-bladed knife into a tall glass of hot water, then carefully wipe the blade completely clean and dry with a towel. The warmth and cleanliness of the blade will allow it to glide effortlessly through the firm ganache and dense, moist torte without sticking, dragging, or tearing, creating perfectly neat and elegant portions every single time. This simple trick makes serving a breeze and elevates your presentation!
Frequently Asked Questions About This Decadent Flourless Chocolate Hazelnut Torte
To ensure your baked Flourless Chocolate Torte stays fresh, moist, and delicious, it’s essential to store it correctly. Keep it securely wrapped in plastic wrap or placed inside an airtight container. At comfortable room temperature, this torte will happily maintain its exceptional quality for up to 3 days. If you need to extend its freshness beyond that, it can be kept in the refrigerator for up to a week. For even longer preservation, this torte freezes beautifully for up to 2 months! When thawing from the freezer, make sure to do so uncovered in the refrigerator overnight to prevent any unwanted condensation from forming on its surface, which could affect its texture.
While the terms “torte” and “cake” are often used interchangeably, especially in modern baking, they do have distinct characteristics. Tortes, such as this delightful recipe, are generally renowned for being significantly denser, richer, and possessing a more intensely concentrated flavor than typical sponge or butter cakes. They frequently incorporate finely ground nuts (like hazelnuts or almonds) into their batter, either instead of or in addition to a small amount of flour, which contributes to their unique, substantial texture and profound flavor profile. While this particular torte is simply adorned with a luscious ganache, many tortes are also known for their elaborate, multi-layered constructions. It’s an important distinction to remember that most tortes are indeed flourless cakes, but crucially, not all flourless cakes automatically qualify as tortes, primarily due to the specific characteristics of richness, density, and often the inclusion of ground nuts that define a true torte.
Absolutely, this Flourless Chocolate Torte is an outstanding dessert to prepare in advance, making it an ideal choice for stress-free dinner parties, holidays, or any special occasion. You can confidently bake the torte up to one week before you plan to serve it, storing it securely in the refrigerator. For even longer-term preparation, it can be perfectly stored in the freezer for up to an impressive 2 months! While it is undeniably delightful served at any temperature, I highly recommend allowing the cake to come to room temperature for at least an hour (or longer if frozen) before serving. This crucial step allows its complex flavors to fully blossom and ensures the ideal, melt-in-your-mouth texture. This goes double if you’ve stored it in the freezer, as it needs ample time to gently thaw and soften.
This rich and sophisticated Flourless Chocolate Hazelnut Torte is a showstopper on its own, but you can certainly enhance the serving experience with a few thoughtful accompaniments. A dollop of freshly whipped cream, a scoop of premium vanilla bean ice cream (to contrast the richness), or even a delicate drizzle of raspberry coulis or fresh berry sauce makes for an exquisite pairing. For a visually stunning presentation, consider garnishing individual slices or the entire torte with fresh berries (like raspberries or red currants), elegant chocolate shavings, or delicate edible flowers. A light dusting of high-quality cocoa powder or powdered sugar before serving can also add a touch of simple yet profound elegance.
If you tried this amazing recipe and absolutely loved it, please take a moment to leave a 🌟 star rating and share your thoughts in the comments below. Your feedback truly makes my day and helps others discover this delightful, gluten-free torte masterpiece!
Flourless Chocolate Hazelnut Torte
Pin Recipe
Comment
Print Recipe
Ingredients
For the Cake:
- 10 tablespoons unsalted butter
- 5 ounces dark chocolate
- ½ teaspoon kosher salt
- 1 tablespoon Dutch processed cocoa powder
- 3 egg yolks
- ¾ cup granulated sugar divided
- 1 lemon zested
- 1 ¼ cups hazelnut flour
- 1 tablespoon vanilla extract
- 3 egg whites
For the Frangelico Ganache:
- 3 ¾ ounces dark chocolate
- 1 tablespoon light corn syrup
- ½ teaspoon kosher salt
- ¾ cup heavy cream (40% fat)
- ⅓ ounce Frangelico You can use Bourbon, Amaretto, Grand Marnier, or extra vanilla extract to taste instead.
Instructions
Make the Cake:
-
Preheat the oven to 325°F (160°C). Line a 10” round cake pan with parchment paper, spray with nonstick cooking spray, and coat with cornstarch. Tap out excess cornstarch for a clean release.
-
Zest the lemon directly into approximately half the granulated sugar and gently massage to infuse the sugar with citrus oils.
-
Melt chopped dark chocolate, unsalted butter, Dutch processed cocoa powder, and kosher salt in a heatproof bowl over a simmering pot of water (bain-marie), stirring occasionally until smooth and fully melted. Ensure the bowl does not touch the water. Cool slightly.
-
In a stand mixer fitted with the whisk attachment, whip the egg whites to stiff, glossy peaks. Remove from the mixer and set aside gently.
-
In the same stand mixer, whip the egg yolks and lemon-infused sugar until considerably lightened in color and tripled in volume. With the mixer running on low, gradually add the cooled chocolate mixture in a steady stream and beat until combined. Add the remaining granulated sugar, hazelnut flour, and vanilla extract, beating until just incorporated.
-
Gently fold in about a quarter of the whipped egg whites into the batter to lighten it, then carefully fold in the remaining egg whites until no white streaks remain, being careful not to deflate the mixture. Distribute evenly into the prepared pan.
-
Bake at 325°F (160°C) for 30-35 minutes, or until a cake tester inserted into the center comes out clean or with moist crumbs attached.
-
Cool the torte completely in the pan on a wire rack. For easier unmolding, refrigerate for an hour. Unmold by running a small offset spatula around the sides, then invert onto a cutting board or wire rack. Remove the parchment from the bottom and place on your desired plate or cake stand.
Make the Ganache and Assemble:
-
Combine chopped dark chocolate, light corn syrup, and kosher salt in a heatproof bowl for the ganache.
-
In a saucepan, heat heavy cream to a gentle simmer. Pour the hot cream over the chocolate mixture and let it sit for 2 minutes. Whisk from the center outwards to emulsify into a glossy ganache. Whisk in the Frangelico (or chosen substitute).
-
Pour the warm ganache onto the center of the cooled torte, spreading it evenly with an offset spatula or the back of a spoon. Refrigerate to allow the ganache to set firmly.
Video
Notes
Technique – When you make it to the step of folding your whipped egg whites into a thick batter, put just a small amount of whites first. This is called ‘sacrificing’ and helps to maintain the stability of the overall mixture.
Variations – You can substitute the Frangelico with Grand Marnier, Amaretto, bourbon, or vanilla extract, or you can omit it completely. You can also swap hazelnut flour for almond flour for a more traditional Torta Caprese, or add a thin layer of berry jam under the ganache for a fruity twist. Consider adding ¼ tsp espresso powder to the cake for an intensified chocolate flavor.
Storage – Store baked cake well-wrapped in plastic wrap or an air-tight container. This cake will keep 3 days at room temperature, a week in the refrigerator or 2 months in the freezer. Thaw uncovered in the fridge. For best flavor and texture, always serve at room temperature.
Nutrition
Before You Go: Explore More Chef-Developed Dessert Recipes!
I sincerely hope you thoroughly enjoyed the rewarding experience of crafting and savoring this professional chef-tested Flourless Chocolate Hazelnut Torte recipe. It’s truly a labor of love designed to bring gourmet, restaurant-quality baking into your very own home kitchen, proving that gluten-free desserts can be utterly spectacular. Don’t let your culinary adventure end here! I encourage you to explore our extensive and growing collection of other delicious, chef-developed cake recipes and an array of other exquisite desserts. Each recipe is meticulously crafted and rigorously tested to ensure spectacular, consistent results every single time you bake. Happy baking, and enjoy creating more sweet masterpieces!
