The Ultimate Chewy Funfetti Cookies: Easy Recipe & Pro Baking Tips
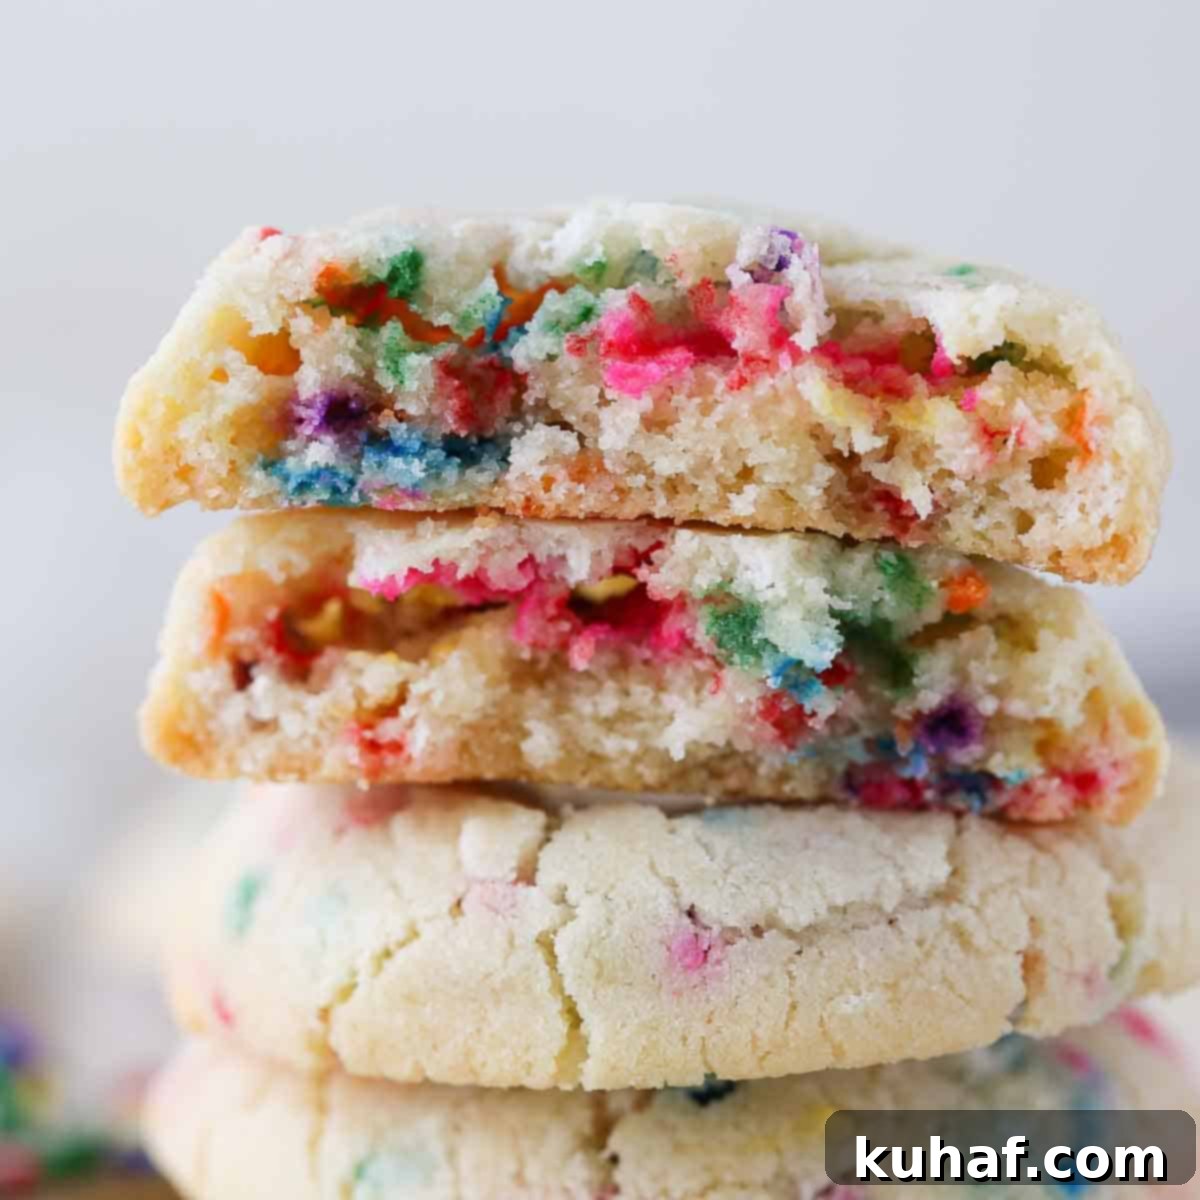
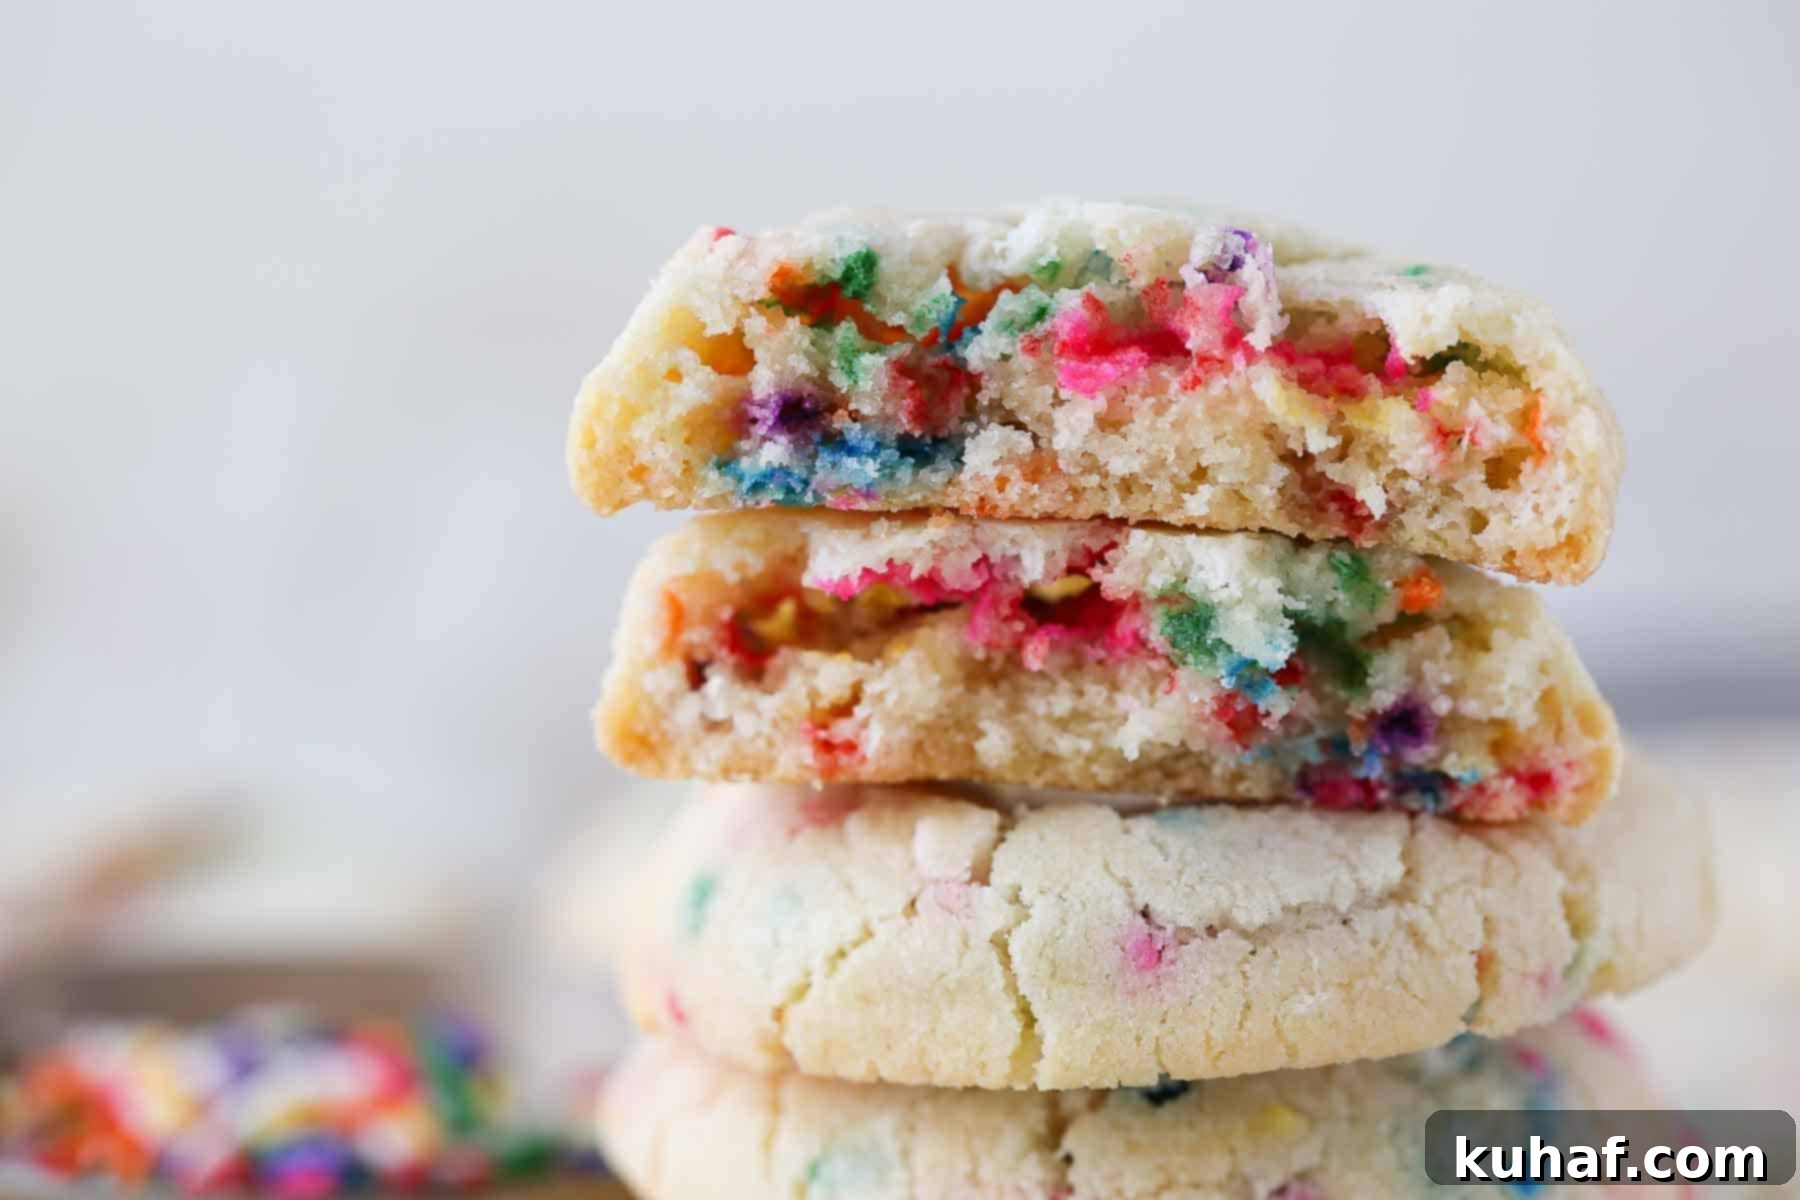
These Funfetti Cookies are a true celebration in every bite! Perfectly sweet and generously loaded with a cascade of rainbow sprinkles, they are an absolute show-stopper. Crafted from common pantry ingredients, this recipe consistently delivers cookies with those irresistible crispy edges and a wonderfully soft, delightfully chewy center that everyone adores.
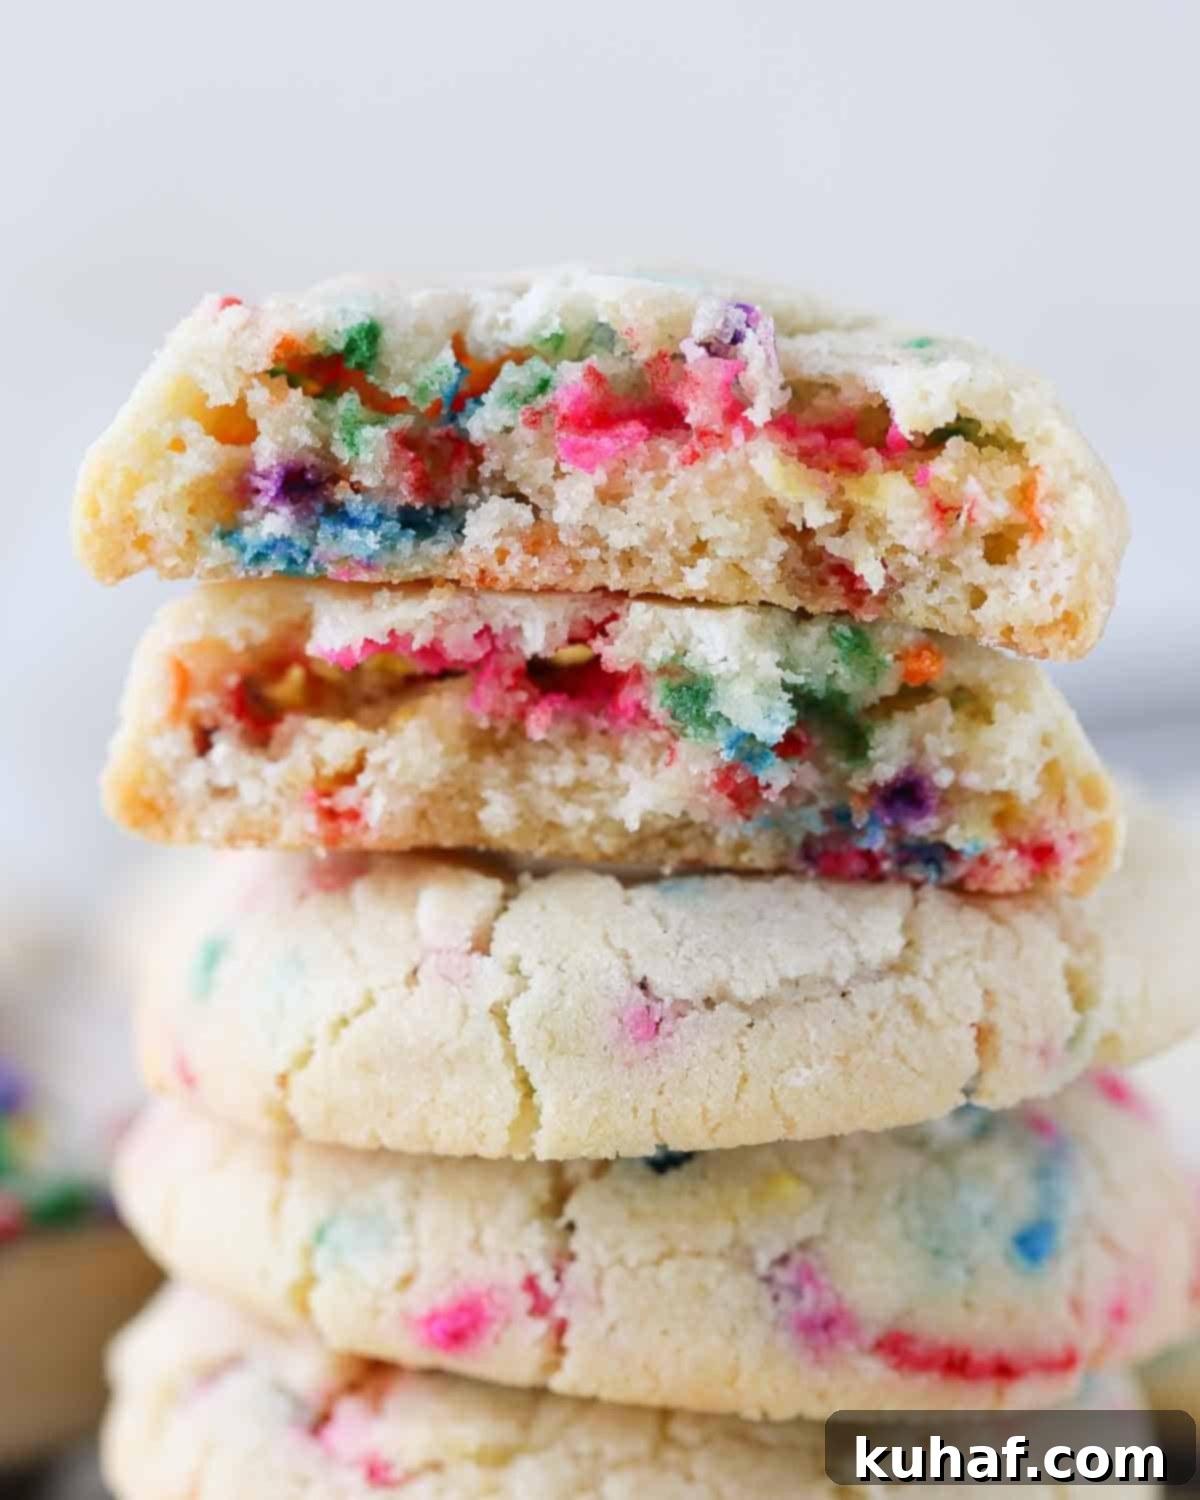
Get ready to create a cookie that’s both deceptively simple to make and astonishingly delicious to eat! Our funfetti cookie recipe is built upon a perfected sugar cookie base, meticulously developed in a professional kitchen, then generously infused with a cheerful burst of rainbow sprinkles. The result is a treat that’s perfectly balanced in sweetness, boasting a tender chewiness that’s truly addictive. This versatile recipe is incredibly easy to scale up or down, making these delightful cookies an ideal choice for any occasion – from vibrant birthday parties and bustling bake sales to festive holiday gatherings. Imagine a platter of these colorful cookies bringing smiles to every face!
In my bakery, Les Filles, this funfetti cookie holds a special place as one of the six classic cookies featured in our renowned cookie tin. The best part? You don’t need to visit a bakery to enjoy a gourmet cookie experience. You can effortlessly assemble your very own classic cookie platter right at home! Feel free to mix and match these Funfetti delights with other beloved recipes like our best chewy oatmeal raisin cookies, the quintessential Snickerdoodle, rich peanut butter chocolate chip cookies, decadent double chocolate chip cookies, and my signature thick and chewy chocolate chip cookies. Crafting your perfect, personalized cookie assortment has never been easier or more rewarding!
Table of Contents
- Why You Will Love These Funfetti Cookies
- Professional Tips for Making Perfect Funfetti Cookies
- Key Ingredients for Funfetti Cookies
- Funfetti Cookie Variations and Customizations
- How to Make Homemade Funfetti Cookies
- Chef Lindsey’s Expert Recipe Tip
- Frequently Asked Questions About Funfetti Cookies
- Funfetti Cookies Recipe Card
- Before You Go: Explore More Cookie Recipes
Why You Will Love These Funfetti Cookies
These delightful Funfetti cookies are more than just a sweet treat; they’re an experience designed to bring joy and ease to your baking. Here’s why they’ll quickly become your new favorite:
- A Perfectly Balanced Sugar Cookie Base! Our foundation is a chewy sugar cookie recipe that has been meticulously crafted to achieve culinary perfection. It strikes an exquisite balance of butter, sugar, and flour, resulting in a cookie that boasts wonderfully crispy, golden edges and a lusciously chewy interior. What truly sets it apart is its flavor profile – it’s not overly sweet, instead offering a comforting taste reminiscent of classic birthday cake batter. This makes it a universally appealing dessert, enjoyable for all ages and palates.
- Generously Loaded with Vibrant Rainbow Sprinkles. As a chef, I always enjoy pushing the boundaries of how many delightful mix-ins a cookie can handle. In this recipe, the cookies are absolutely brimming with a generous amount of rainbow sprinkles. Despite their abundance, these colorful jimmies harmoniously blend with the dough, adding a fun visual appeal and a subtle textural crunch without ever overpowering the delicate flavor of the cookie itself. Each bite is a miniature party!
- Incredibly Easy and Quick to Make. Don’t let their sophisticated taste fool you; these Funfetti cookies are remarkably simple to whip up. You can have the dough prepared and ready to bake in less than 30 minutes, making them a fantastic option for impromptu cravings or when you need a crowd-pleasing dessert in a hurry. The straightforward steps ensure a stress-free baking experience, even for novice bakers.
- Conveniently Bake from Frozen. Planning ahead has never been easier! This recipe is incredibly freezer-friendly, allowing you to prepare the cookie dough days, weeks, or even months in advance. Simply freeze the portioned dough balls, and when a craving strikes or guests arrive, bake them straight from frozen. They emerge from the oven perfectly baked, maintaining their ideal texture and flavor, offering ultimate convenience without compromising on quality.
Professional Tips for Making Perfect Funfetti Cookies
Achieving bakery-quality funfetti cookies at home is entirely possible with a few expert tips. These insights, honed in a professional kitchen, will elevate your baking and ensure consistently delightful results:
- Always Chill Your Cookie Dough Before Baking. This step is non-negotiable for achieving the ideal cookie texture and preventing excessive spreading. Chilling the dough allows the butter to re-solidify, which helps the cookies hold their shape better in the oven, leading to those coveted crispy edges and chewy centers. For the absolute best results, chill the dough until it is firm to the touch. You can even bake them directly from a frozen state, which often yields an even better texture.
- Avoid Over-Creaming the Butter and Sugar. The foundation of a great cookie often lies in how you cream your butter and sugar. For this funfetti recipe, your butter should be cold, yet pliable – meaning you can easily indent it with your finger without it melting or breaking apart. Over-creaming butter and sugar incorporates too much air, which can cause the cookies to spread excessively thin in the oven and result in a less chewy, more crumbly texture. Cream just until the mixture is light and fluffy, usually 2-3 minutes.
- Exercise Caution to Prevent Overbaking. Overbaking is the arch-nemesis of a perfectly chewy cookie. For these funfetti cookies, keep a close eye on them. Bake until the centers have visibly puffed up and taken on a matte appearance, losing their raw, shiny look. The edges should exhibit a delicate light golden-brown hue. Remember, cookies continue to cook slightly from residual heat after being removed from the oven. The exact bake time will vary depending on the size of your cookies, so trust your eyes more than the clock.
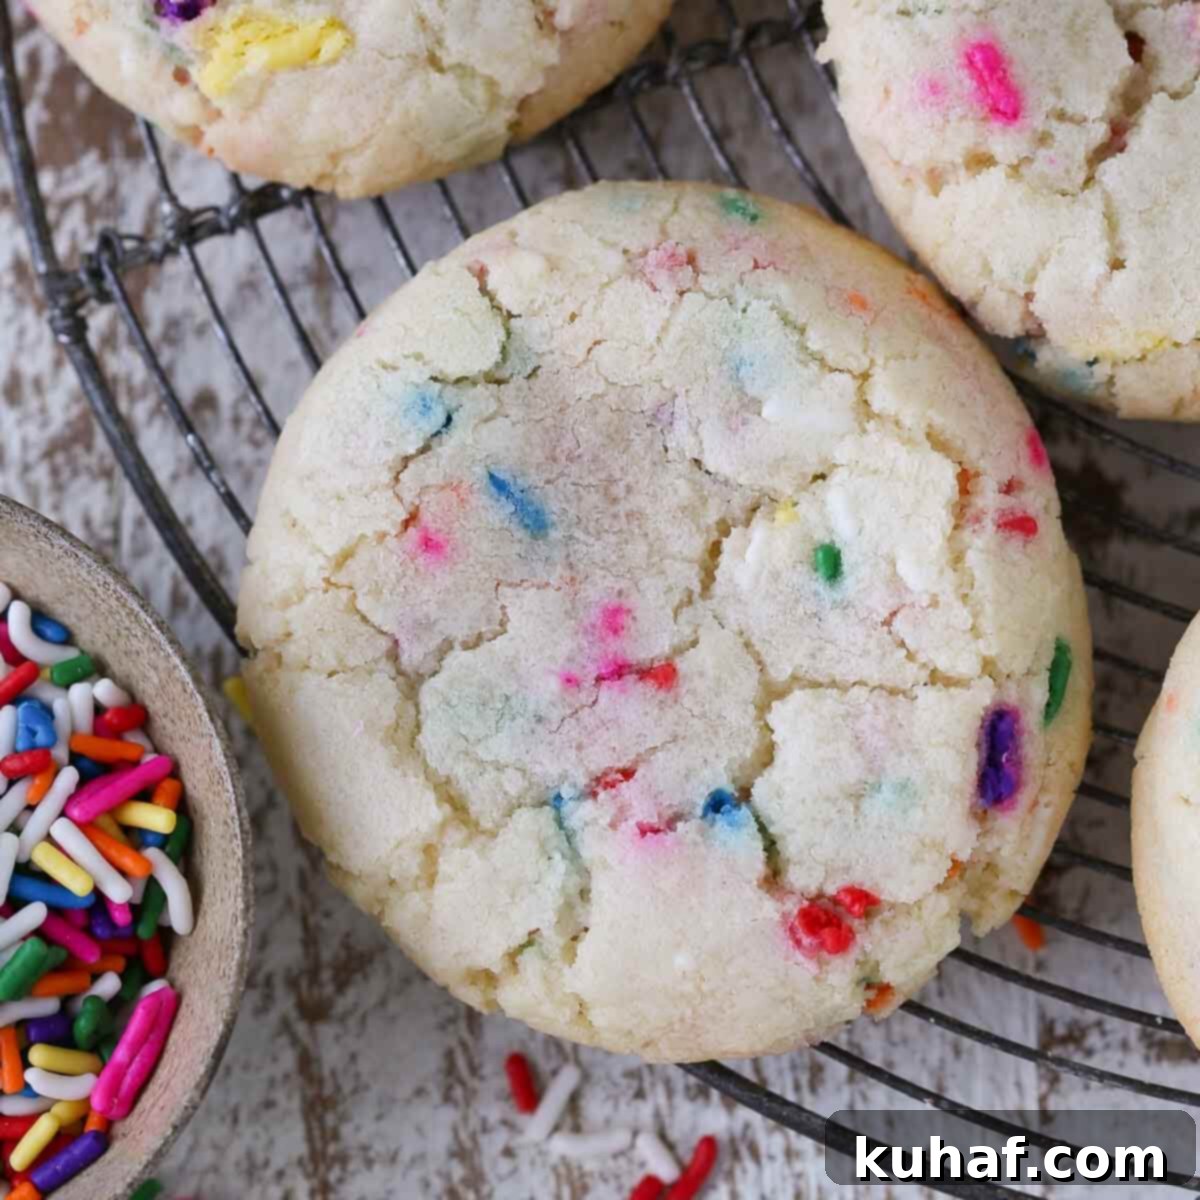
- Gently Flatten Dough Balls for a More Even Bake and Perfect Circle. After scooping your dough, a little professional secret to ensure uniformly baked, perfectly round cookies is to gently flatten the top of each dough ball slightly. This small action provides the cookie with a more defined starting shape as it bakes, encouraging an even rise and preventing irregular spreading. This simple technique is what we use in our bakery for our classic cookie tins, guaranteeing beautiful, consistent results every time.
Key Ingredients for Funfetti Cookies
Creating these delightful funfetti cookies requires a handful of basic, high-quality ingredients that work in harmony to produce their signature taste and texture. Each component plays a vital role:
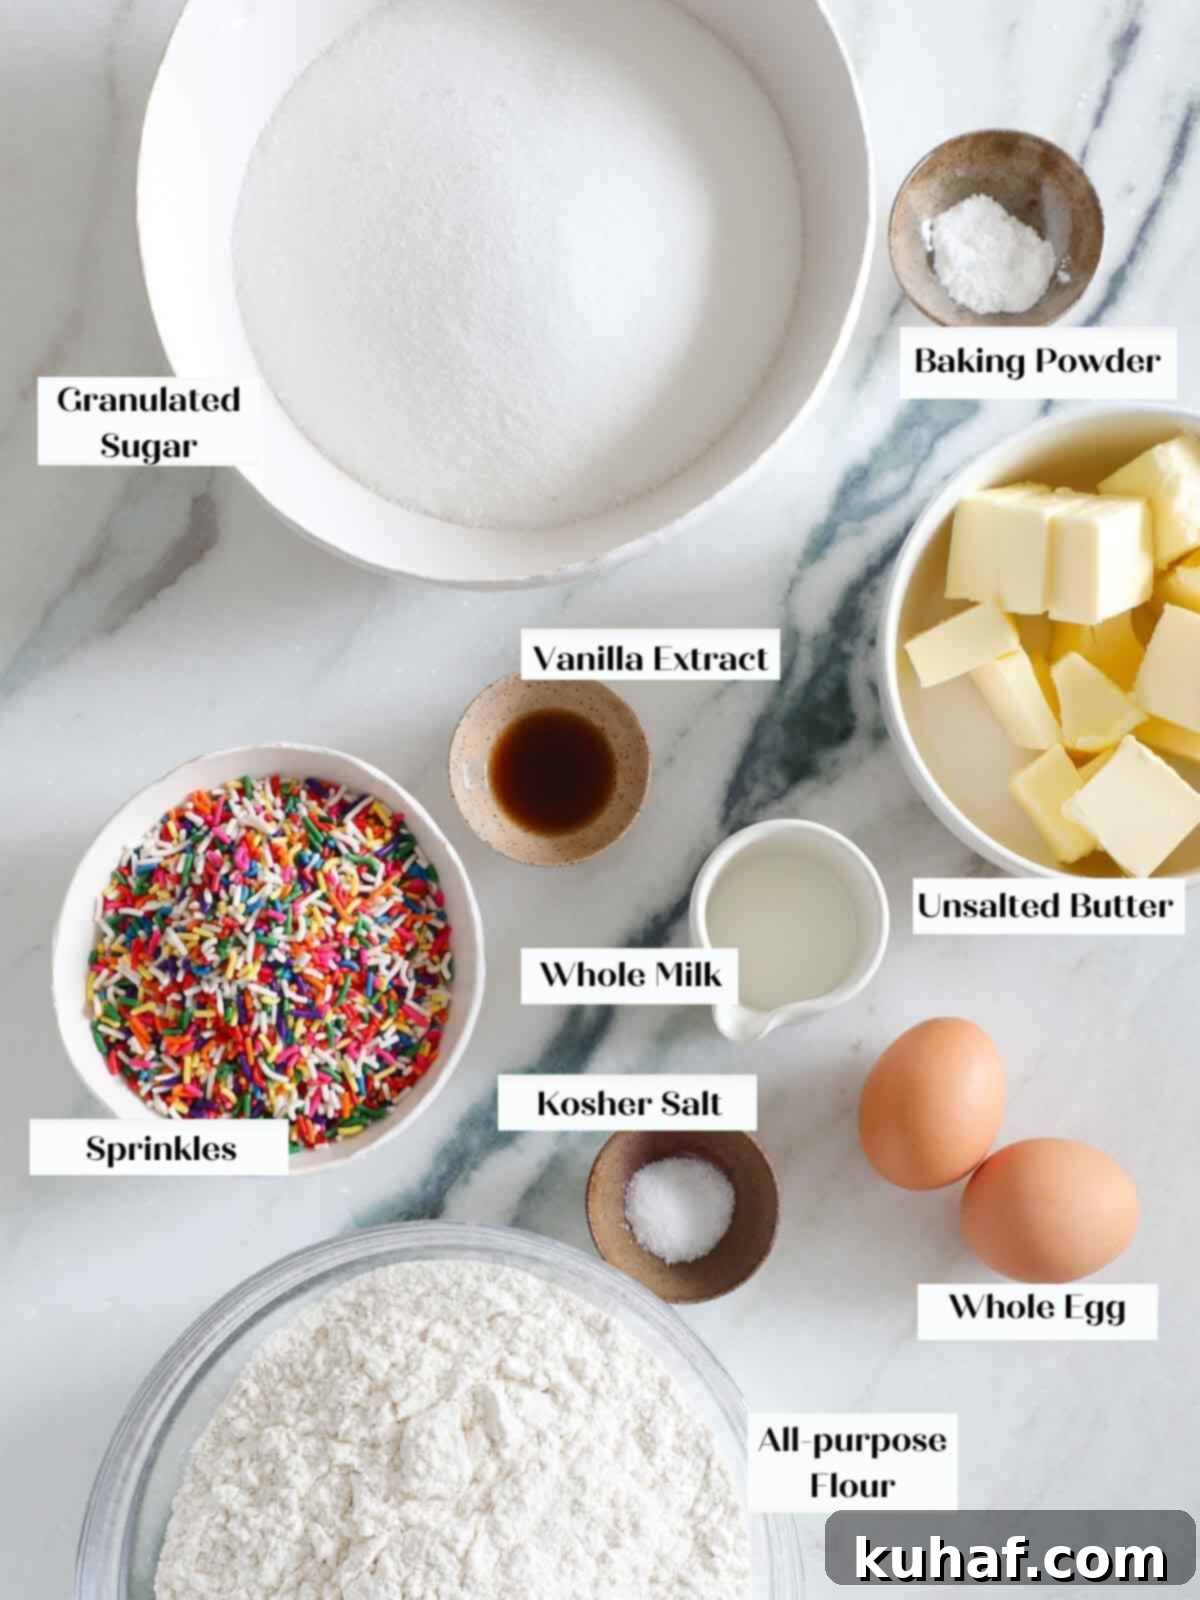
- Granulated Sugar: Granulated sugar is not just for sweetness; it also plays a crucial role in achieving that desirable crispy edge and chewy texture. It caramelizes slightly during baking, contributing to the golden-brown color and a delightful crunch.
- Unsalted Butter: Using unsalted butter allows for precise control over the overall salt content of the cookie, ensuring a perfectly balanced flavor. The butter should be cold but pliable – meaning it should yield slightly when pressed with a finger, but not be mushy or melted. This specific temperature is key for proper creaming and preventing over-spreading.
- Whole Egg: The large whole egg is a powerhouse ingredient, providing essential fat for richness, moisture for tenderness, and leavening properties for a slight lift. It also acts as an emulsifier, binding the ingredients together to create a smooth, cohesive dough and ensuring a consistently perfect cookie texture.
- Whole Milk: Just a touch of whole milk is incorporated to bring the dough together, achieving the ideal consistency without making the cookies tough. It adds just enough liquid to create a workable dough that spreads beautifully.
- Vanilla Extract: A classic and indispensable flavoring, pure vanilla extract enhances all the other flavors, giving these funfetti cookies their comforting, cake-like aroma and taste.
- All-purpose Flour: All-purpose flour is the backbone of these cookies. It contains just the right amount of gluten to create cookies that are both soft and satisfyingly chewy, holding their shape without becoming overly dense.
- Baking Powder: We opt for double-acting baking powder as our leavening agent. Unlike baking soda, double-acting baking powder provides a more gradual and even rise, which contributes significantly to the chewy texture we’re aiming for in these funfetti cookies.
- Kosher Salt: A pinch of kosher salt is vital for balancing the sweetness and enhancing all the other flavors, making the cookies taste more complex and delicious.
- Rainbow Sprinkles: For the most vibrant and visually appealing results, I highly recommend using rainbow jimmies. These cylindrical sprinkles hold their color and shape better during baking. Avoid nonpareil sprinkles, as their color tends to bleed into the dough, resulting in a streaky, less defined look. While rainbow confetti sprinkles can work, jimmies generally bake the best for funfetti cookies. Save your confetti sprinkles for other treats like our sprinkles copycat vanilla cupcakes!
For precise measurements and detailed quantities, please refer to the comprehensive recipe card located further down this page.
Funfetti Cookie Variations and Customizations
While classic rainbow funfetti cookies are undeniably wonderful, this recipe provides an excellent canvas for creative variations. Feel free to experiment and tailor these cookies to your taste or occasion:
- Get Creative with Other Sprinkles! The beauty of funfetti lies in its festive nature. You can easily adapt these cookies to suit any holiday or special event by simply swapping out the rainbow jimmies for themed sprinkles. Think vibrant red and green sprinkles for Christmas, patriotic red, white, and blue for national holidays, or charming pink or blue sprinkles for a baby shower. If you’re feeling extra indulgent and want to add an elegant touch, take inspiration from my soft sugar cookie recipe for fantastic ideas on delicious icings and glazes!
- Experiment with Different Flavor Extracts. Vanilla is a timeless choice, but don’t hesitate to explore other extracts to introduce exciting new flavor dimensions. A hint of almond extract can add a sophisticated nutty undertone, a dash of peppermint extract can make them festive for winter, or a touch of coffee extract could provide a rich, unexpected twist to these classic cookies. Start with a small amount and adjust to your preference.
- Utilize Milk Alternatives for Dietary Needs. The whole milk in this recipe primarily functions to provide liquid, bringing the dough to a perfect consistency and ensuring proper spread during baking. If you have dietary restrictions or preferences, you can confidently try the recipe with various milk alternatives such as almond milk, coconut milk (the beverage type, not canned), or fat-free milk. The subtle flavor differences will be minor, and the texture should remain largely consistent.
- Craft Decadent Funfetti Cookie Sandwiches. Elevate your funfetti experience by transforming these cookies into irresistible sandwiches. Imagine two soft funfetti cookies embracing a generous scoop of creamy vanilla ice cream, a swirl of silky Italian meringue buttercream, or a rich dollop of chocolate ice cream. For an extra festive touch, roll the edges of the filled sandwiches in even more sprinkles – because you can never have too many sprinkles!
How to Make Homemade Funfetti Cookies
Follow these step-by-step instructions carefully to ensure you bake perfectly chewy funfetti cookies with delightful crispy edges every single time. More precise details and exact measurements can be found in the comprehensive recipe card below.
Summary of Key Steps:
Making these vibrant funfetti cookies is a straightforward process. First, you’ll combine your dry ingredients in one bowl to ensure even distribution. Next, the butter and sugar are creamed until light and airy, creating the base for our soft and chewy texture. An egg is then incorporated to bind the mixture, followed by milk and vanilla for flavor and moisture. Finally, the dry ingredients are gradually mixed in, with the star of the show – the rainbow sprinkles – added last to maintain their vibrant color and shape. The dough is then chilled, portioned, and baked to golden perfection.
Step 1: Prepare Dry Ingredients. In a medium-sized bowl, thoroughly whisk together the all-purpose flour, baking powder, and kosher salt. Whisking ensures these dry leavening and seasoning agents are evenly distributed throughout the flour, leading to a consistent cookie texture and rise. Set this mixture aside for later.
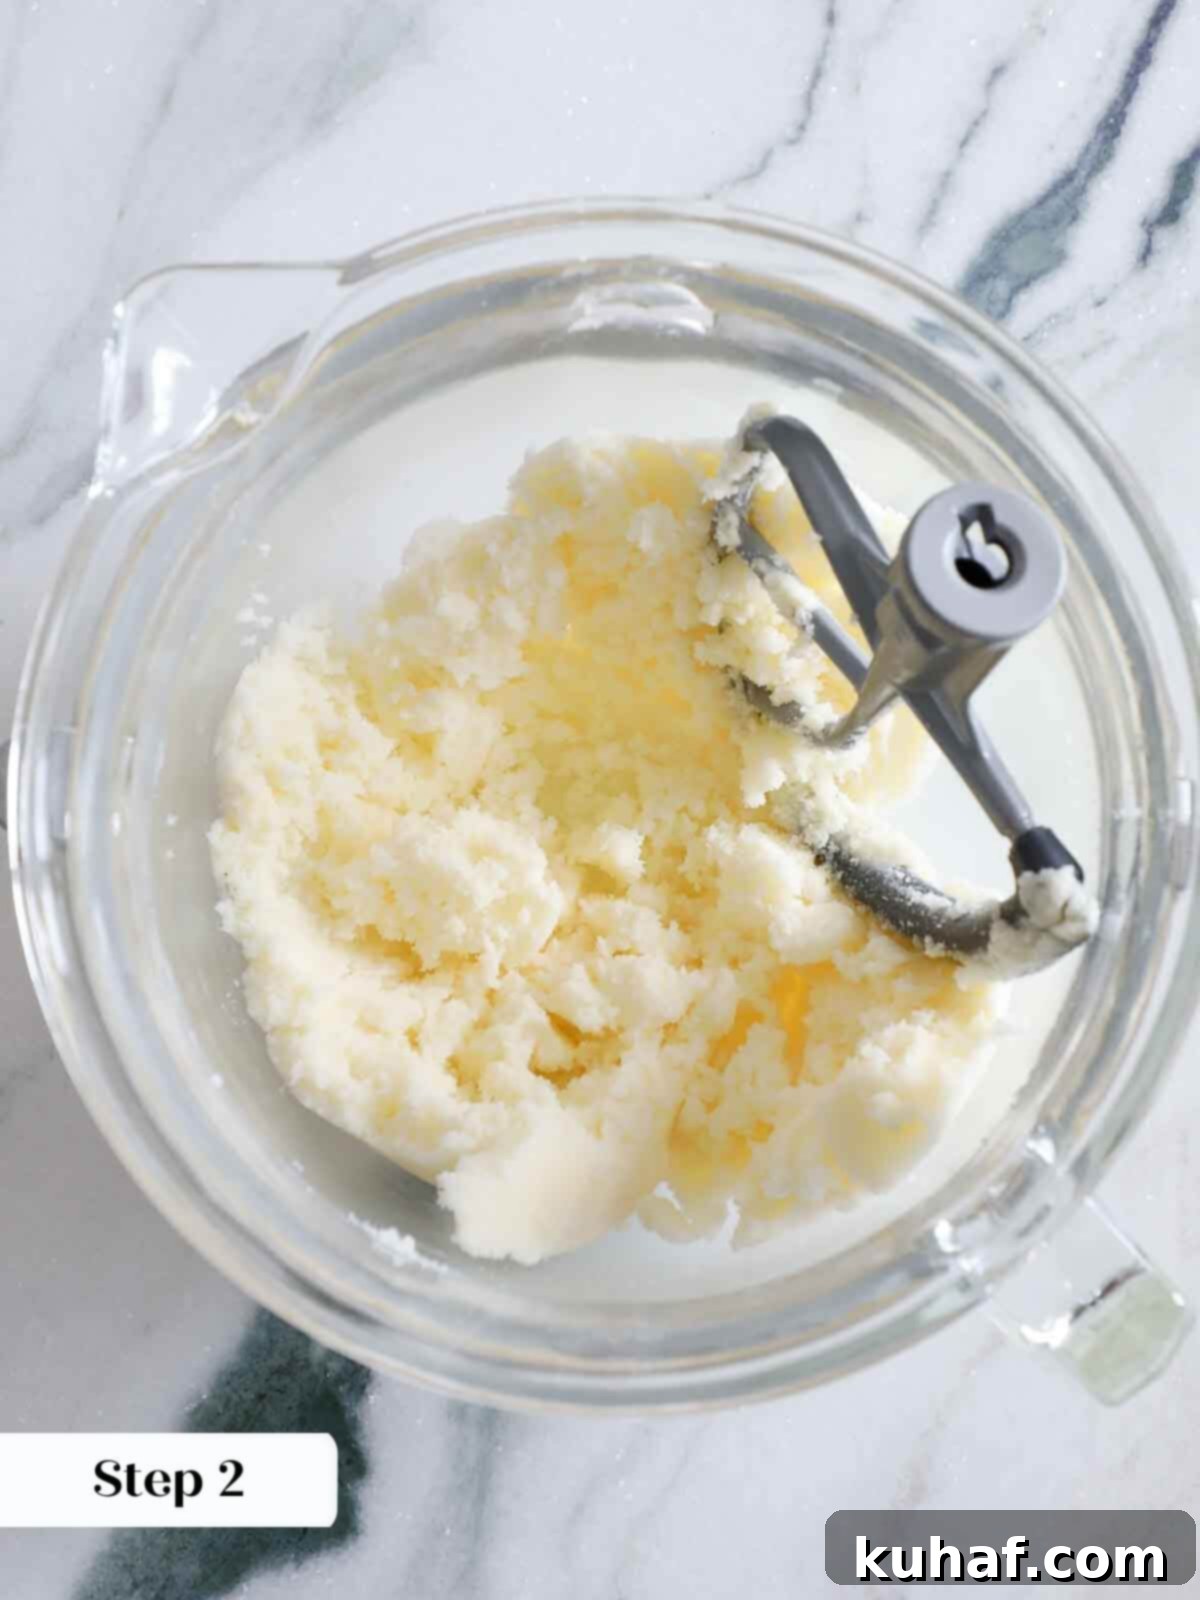
Step 2: Cream Butter and Sugar. In the bowl of a stand mixer fitted with a paddle attachment, add your cold but pliable unsalted butter and granulated sugar. Cream these two ingredients together on medium speed until the mixture becomes visibly light in color and fluffy in texture. This process can take 2-3 minutes. Properly creaming creates tiny air pockets, which contribute to the cookie’s texture.
Chef’s Pro Tip for Butter Temperature: When you begin creaming, the butter should be cool but pliable – firm enough to hold its shape, but soft enough to leave an imprint when pressed. If your butter is too cold and hard, you can gently soften it. Place the cold butter in your stand mixer bowl, turn the mixer to medium speed, and, very carefully and briefly, use a kitchen torch to lightly warm the sides of the bowl or directly on the butter while it’s mixing. This helps achieve that perfect pliable consistency without melting the butter, preventing a greasy dough and excessive spreading.
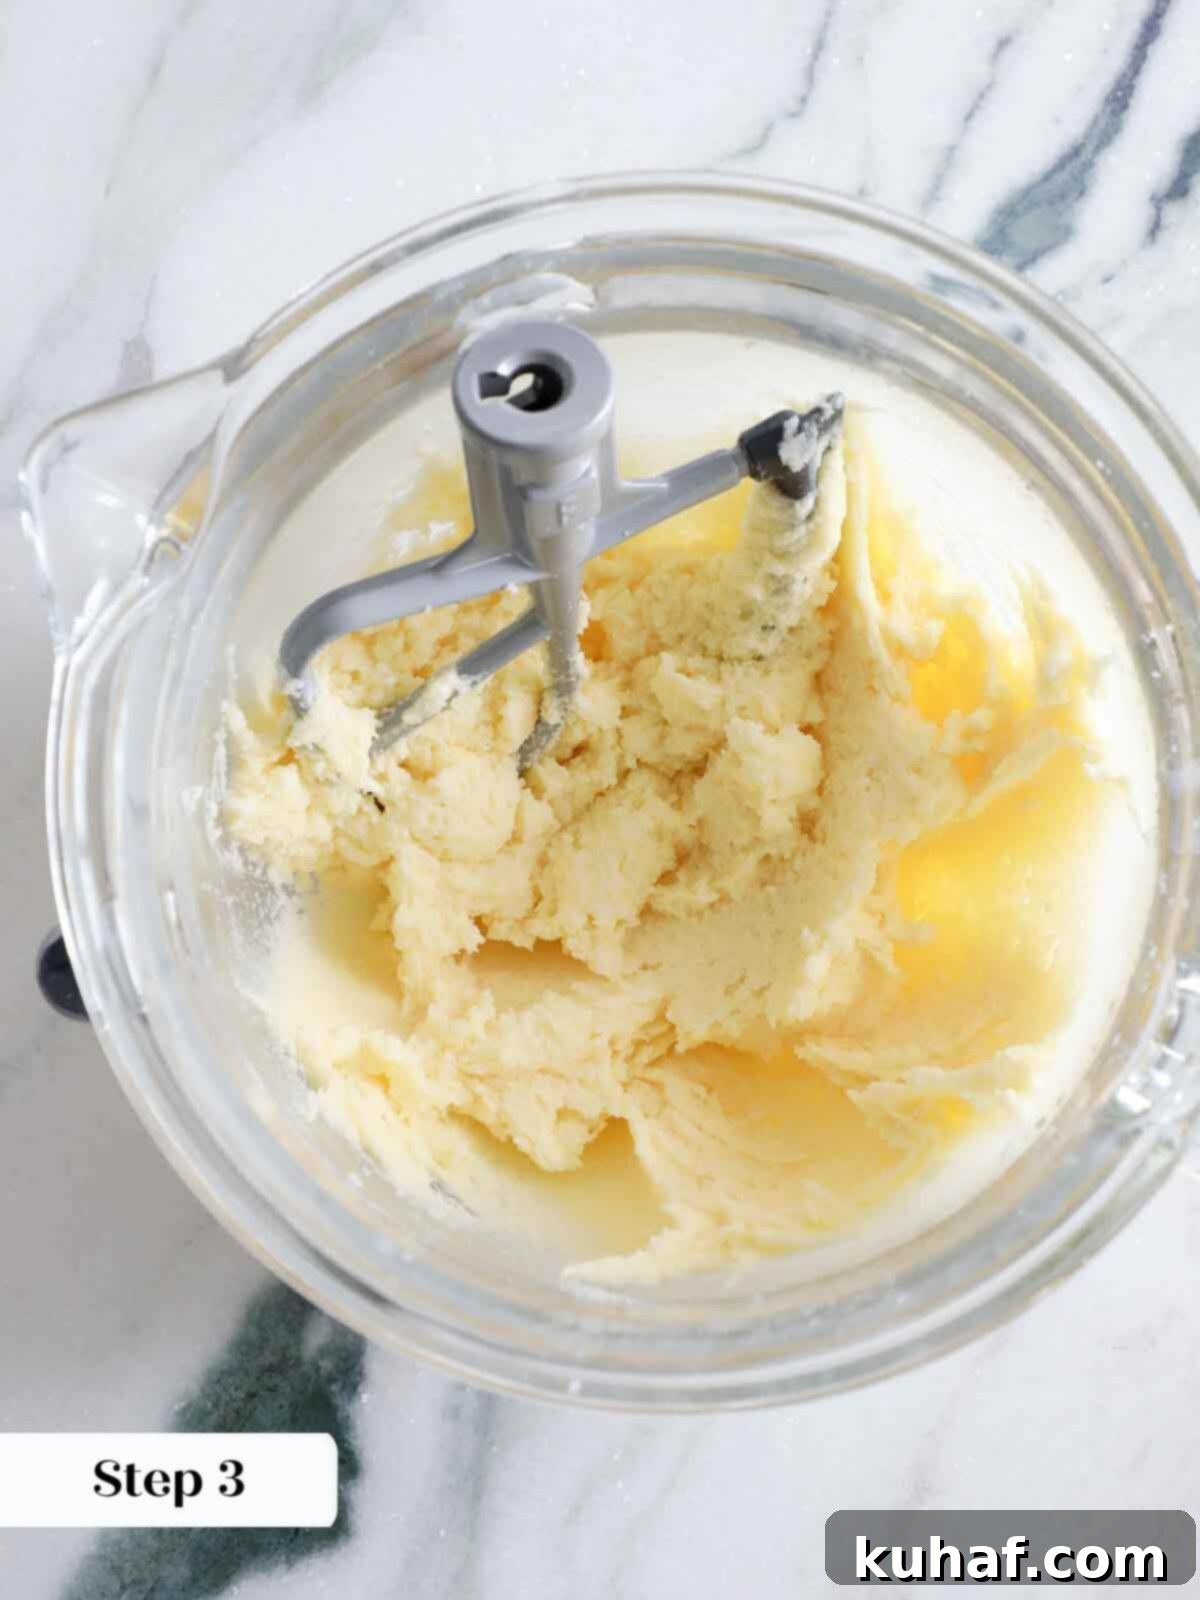
Step 3: Incorporate the Egg. Add the large whole egg to the creamed butter and sugar mixture. Beat on medium speed until the egg is fully incorporated and there are no visible streaks of egg yolk or white remaining. The mixture should appear smooth and homogenous. The egg helps to emulsify the batter, binding the fats and liquids together.
Step 4: Add Liquids. Pour in the whole milk and vanilla extract. Mix on low speed until they are just combined into the batter. Be careful not to overmix at this stage.
Why Order Matters: Adding the milk and vanilla extract before the dry ingredients helps to properly emulsify the fats and liquids in the dough. This strategic order minimizes the amount of gluten development that occurs once the flour is added and mixed, ensuring your cookies remain tender and chewy rather than tough.
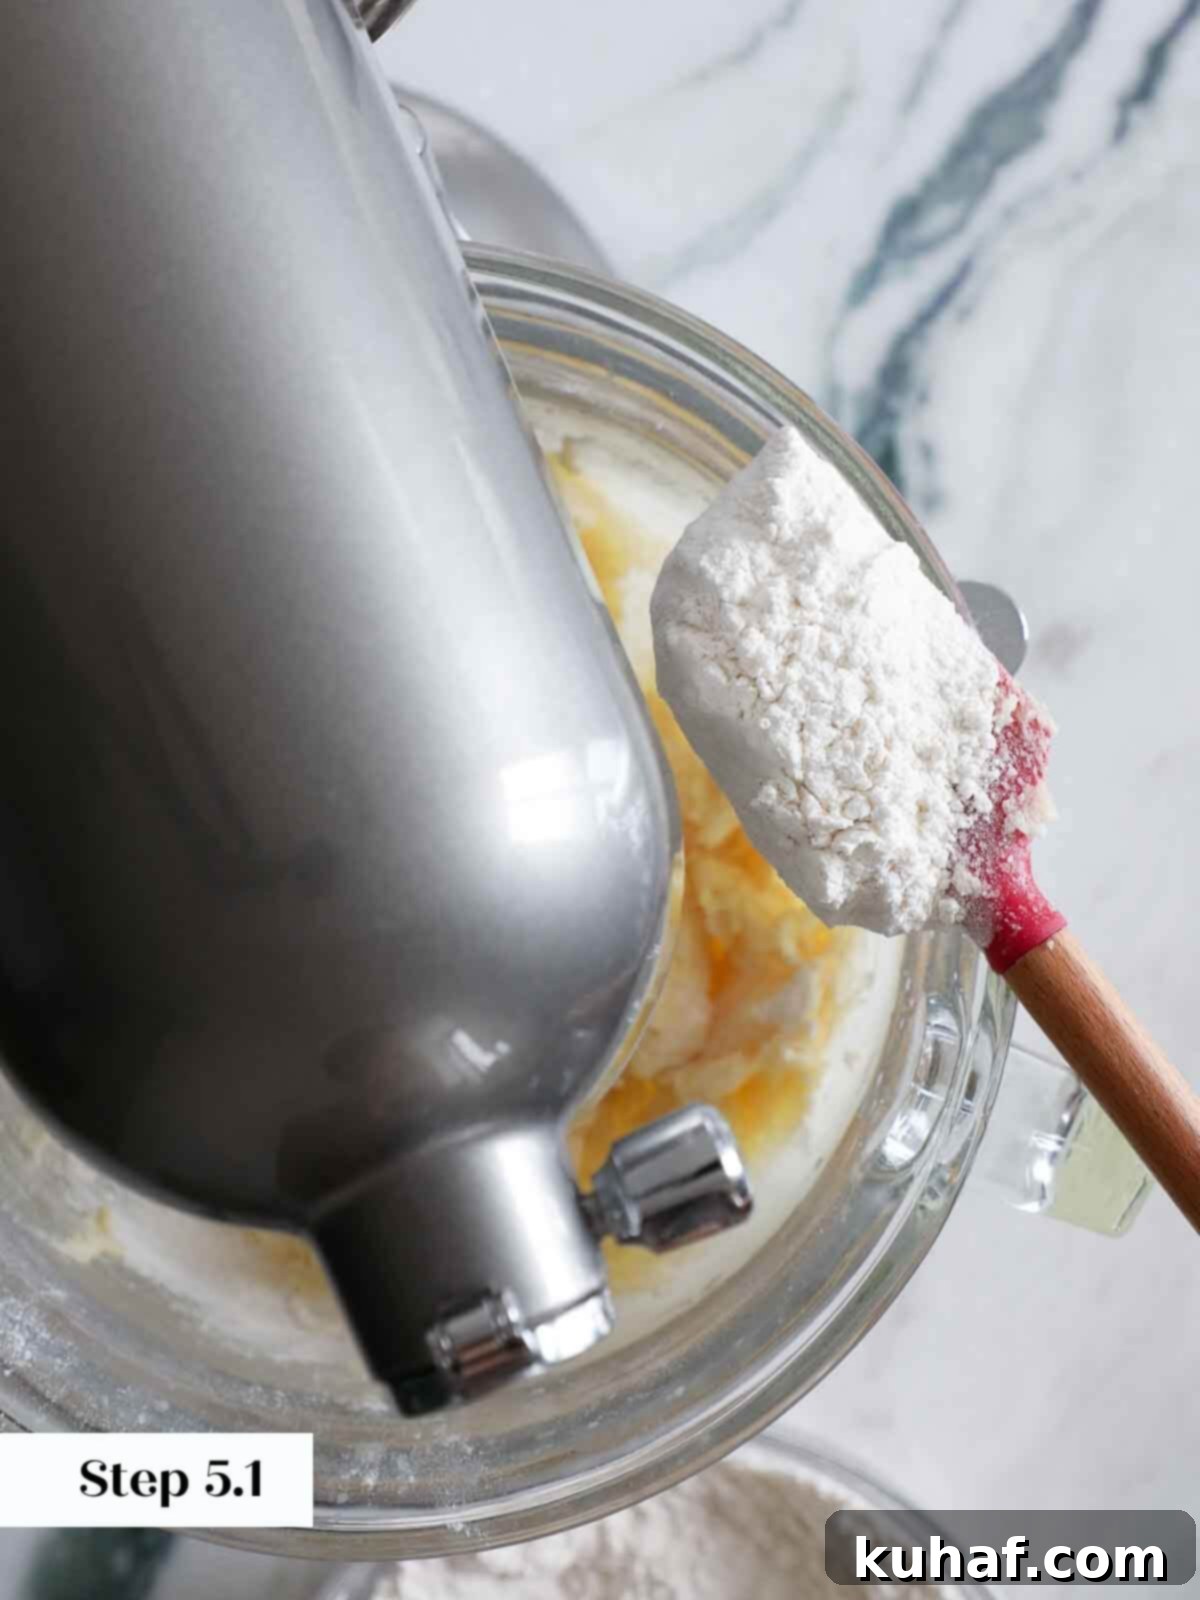
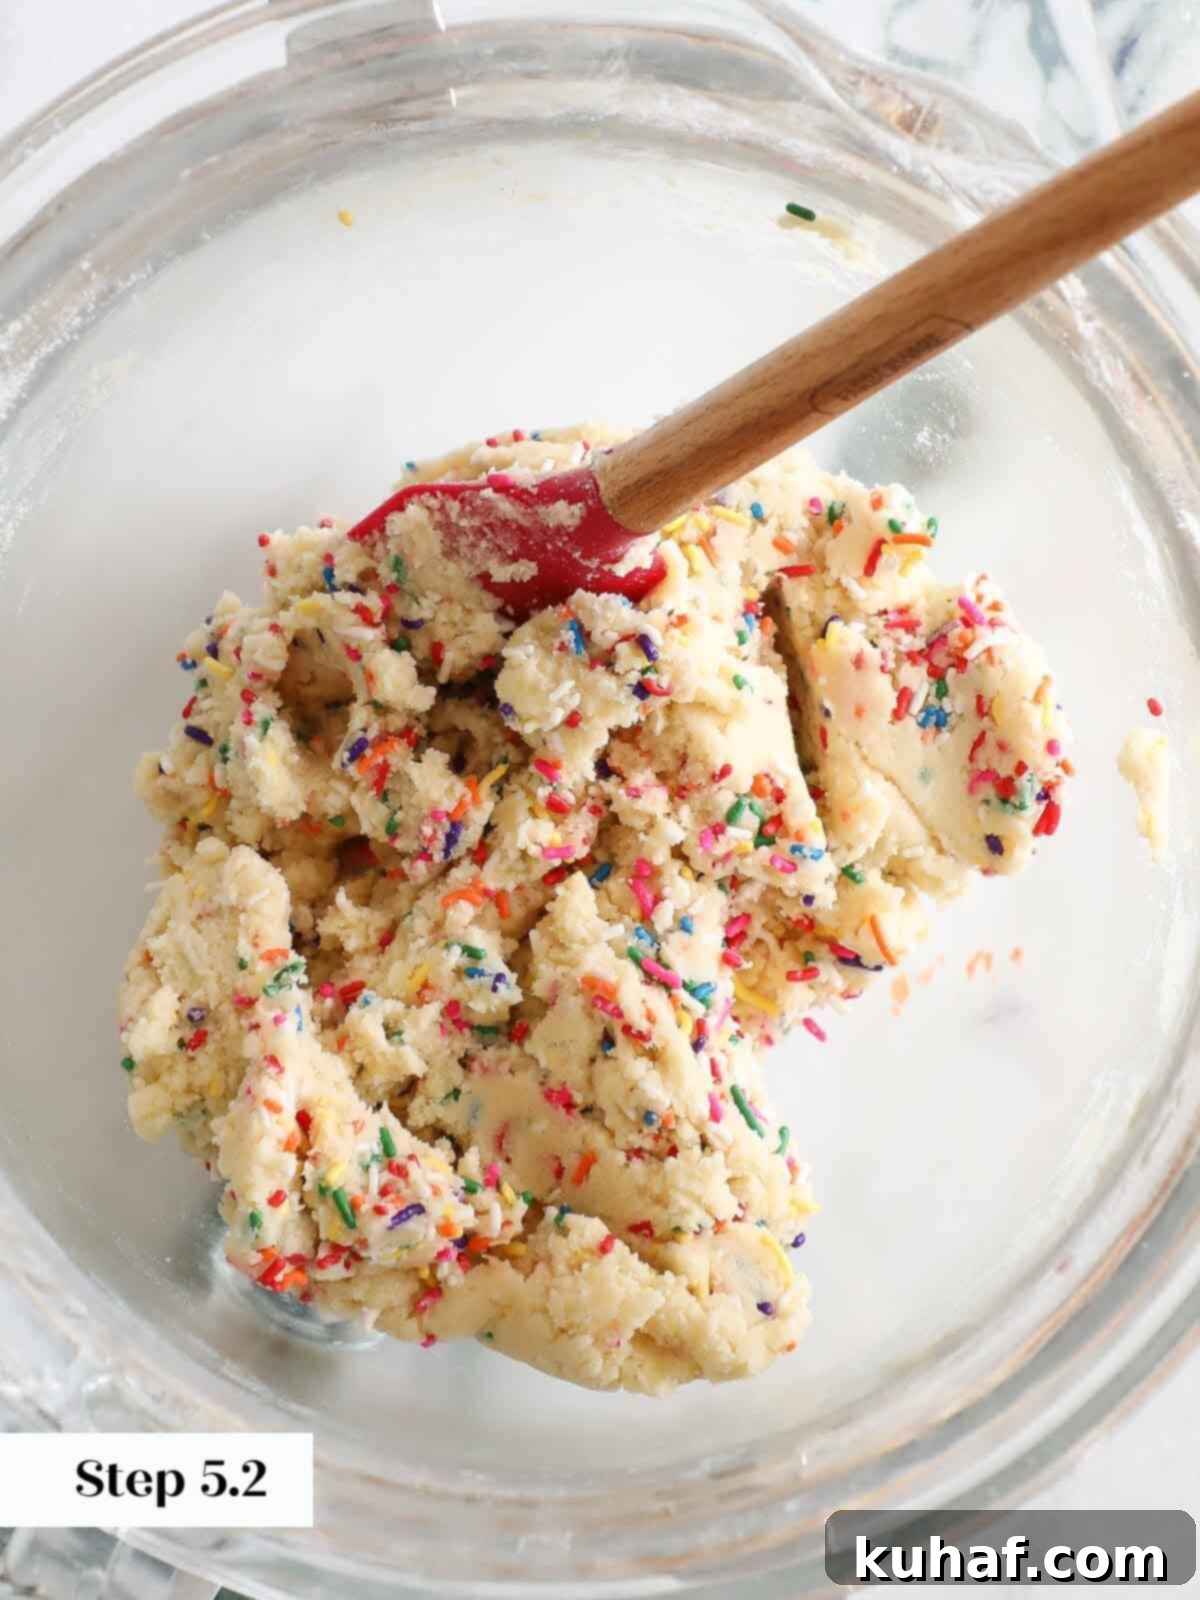
Step 5: Gradually Add Dry Ingredients and Sprinkles. Reduce your stand mixer speed to low. Add the whisked dry ingredients (flour, baking powder, salt) in three separate additions. After each addition, wait until almost all of the flour mixture has been incorporated into the wet ingredients before adding the next batch. This gradual process helps prevent overmixing the gluten in the flour. Once the final portion of the flour mixture is almost fully incorporated – meaning just a few streaks of flour remain – gently fold in the rainbow sprinkles. Mix only until the sprinkles are evenly distributed and no dry flour spots are visible. Overmixing at this stage can cause the sprinkles to bleed their color into the dough, and can also lead to tough cookies.
Dough Handling Tip: For easier handling and rolling, especially if your dough feels a bit soft, it is highly recommended to chill the dough in the refrigerator for at least 30 minutes before proceeding to the next step.
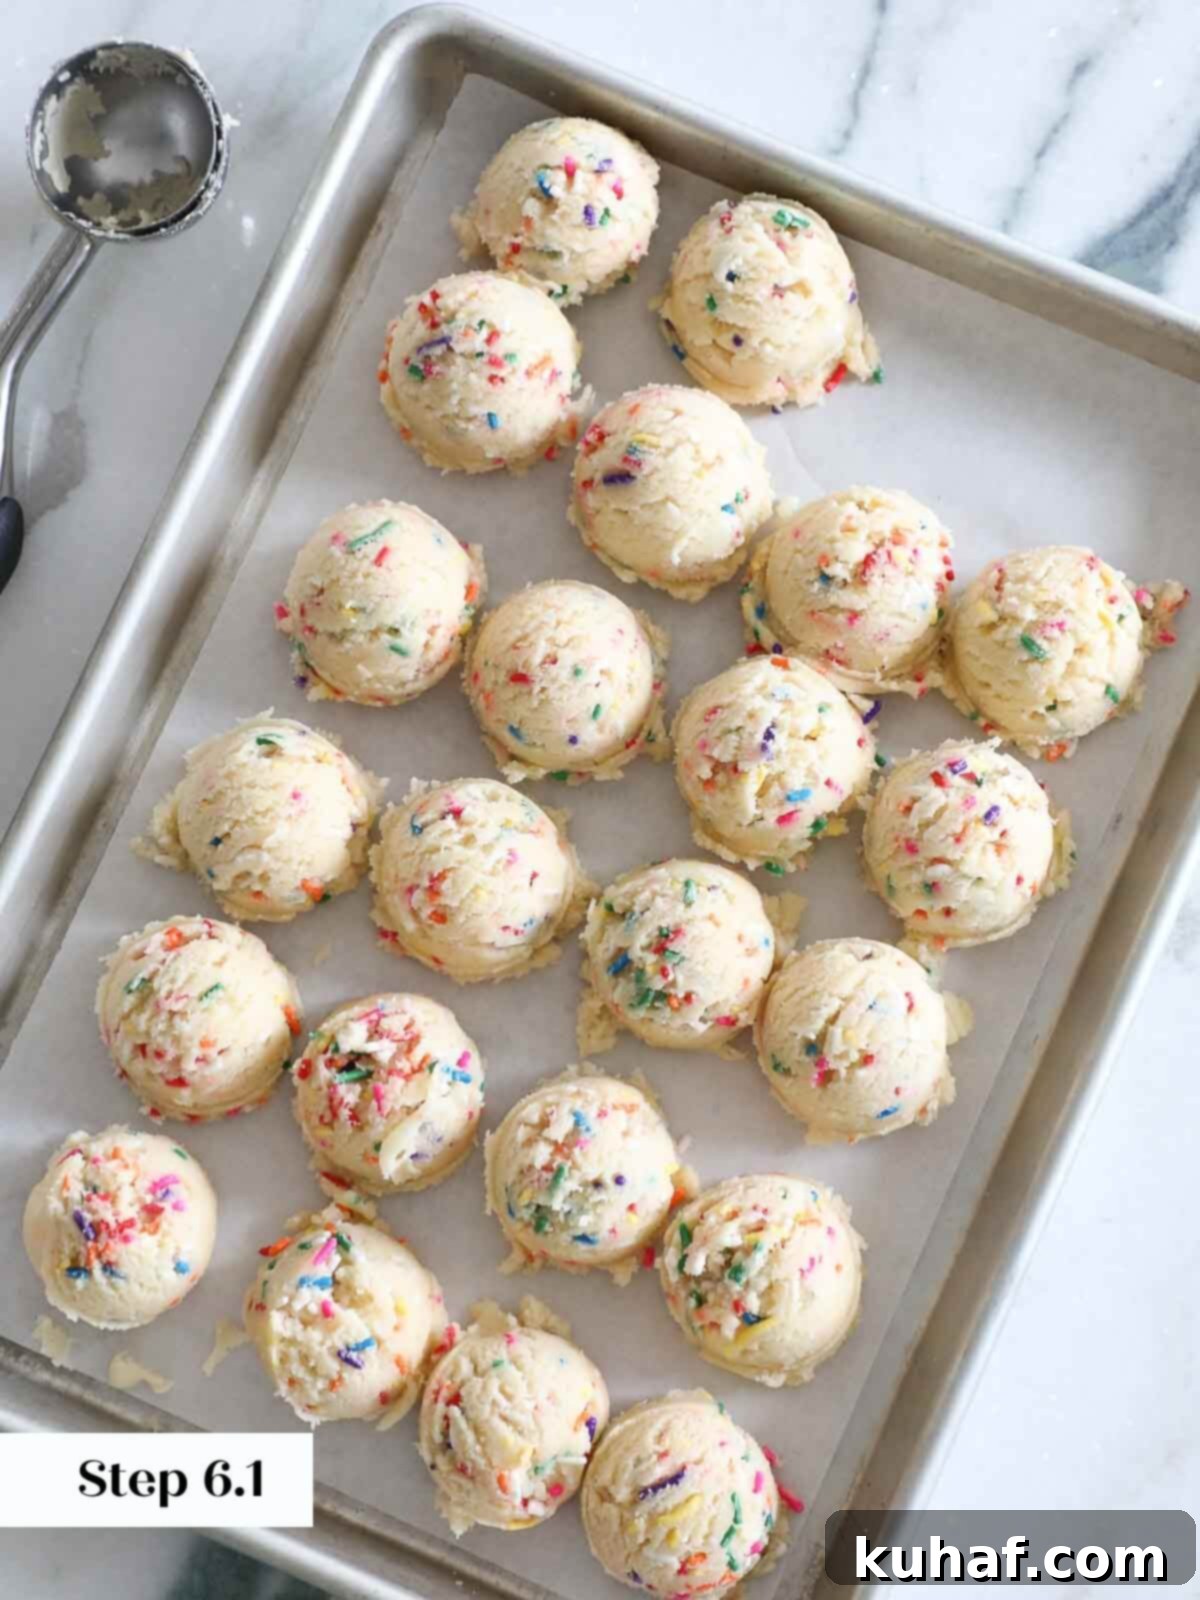
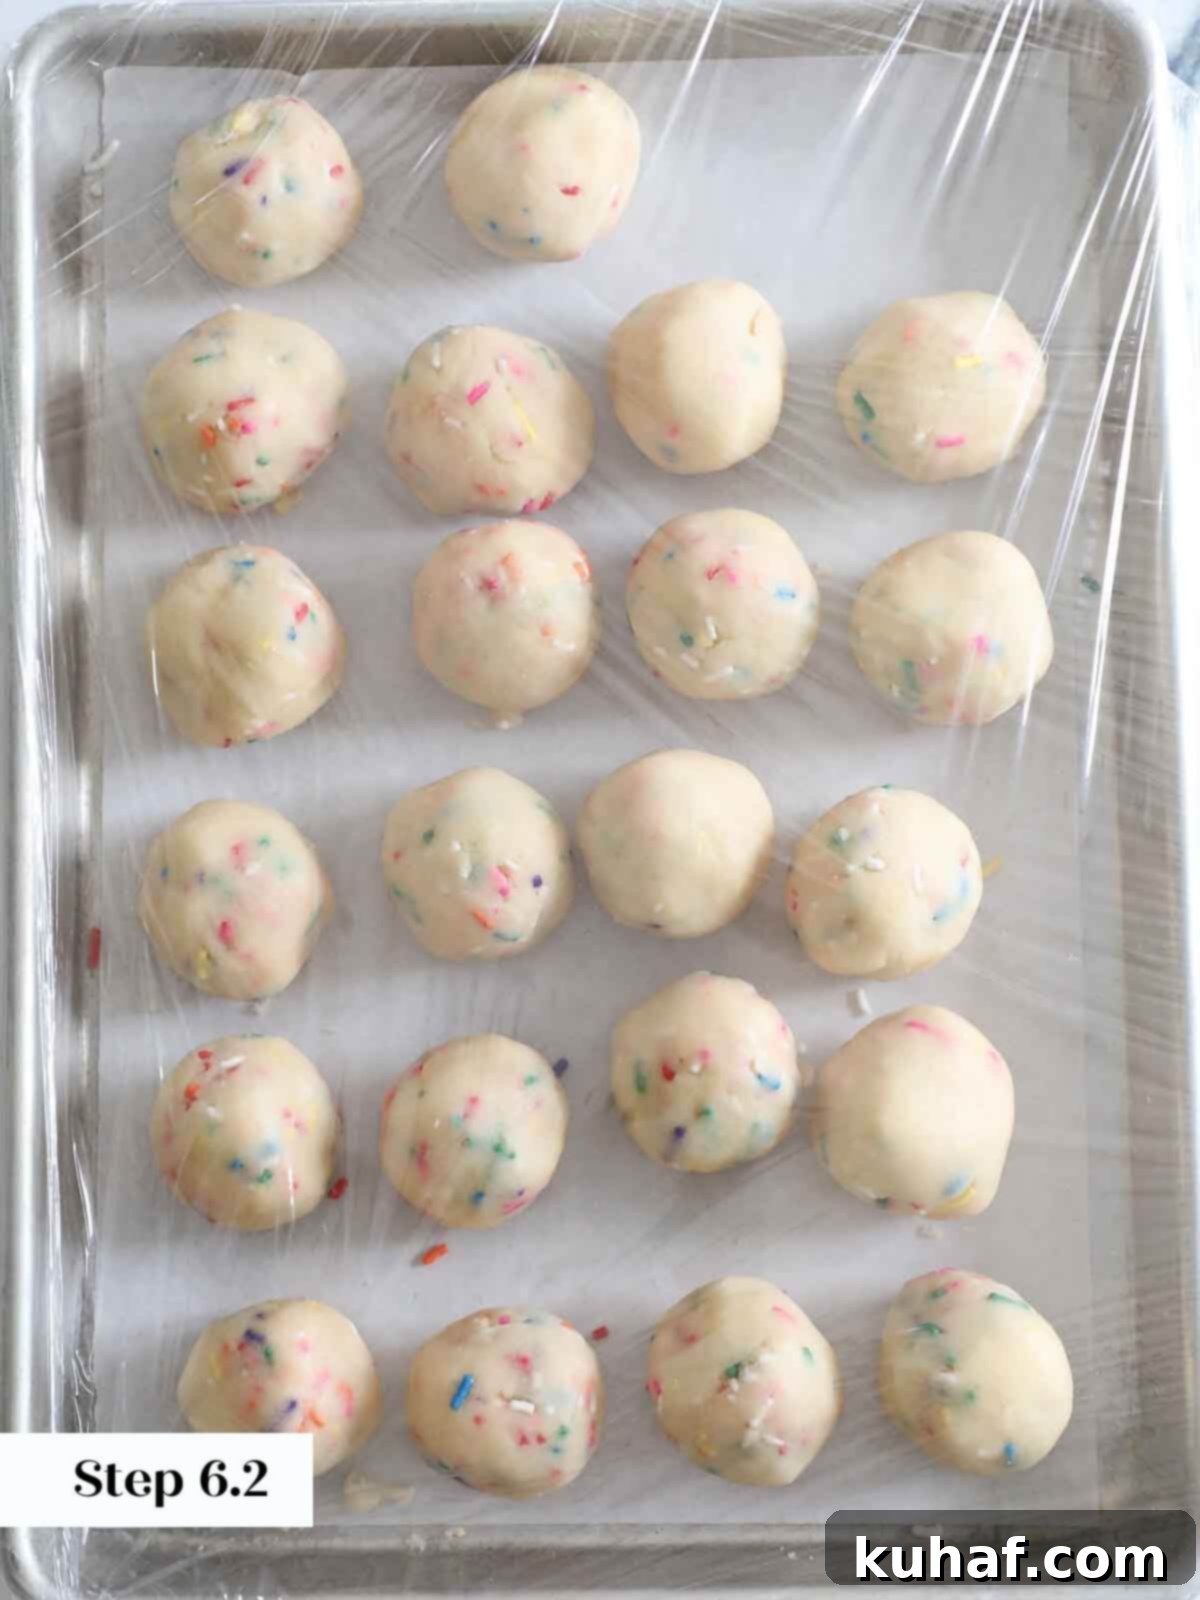
Step 6: Portion and Chill the Dough. Use a 2-tablespoon cookie scoop to portion out uniform balls of dough, or simply roll them by hand to about the size of a golf ball. Uniform sizing ensures even baking. After portioning, it is crucial to chill the dough thoroughly before baking. Place the scooped cookie dough balls on a baking sheet lined with parchment paper and refrigerate them for at least 30 minutes, or until firm. For even greater convenience and a slightly improved texture, freeze the dough balls for at least an hour or until solid. Frozen dough can be transferred to an airtight container or freezer bag for longer storage.
Dispelling a Common Cookie Myth: Many baking bloggers claim that “bigger is better” or that “more dough automatically leads to chewier cookies.” However, I’m here to tell you that with a meticulously developed recipe like this one, cookie size doesn’t dictate chewiness. In our bakery, we successfully sell two different sizes of this very same funfetti cookie. Our smaller version, weighing just 30g (less than an inch across), still bakes up perfectly chewy and delicious. The key is to closely monitor your bake time, adjusting it for smaller cookies to prevent overbaking and ensure that ideal chewy center.
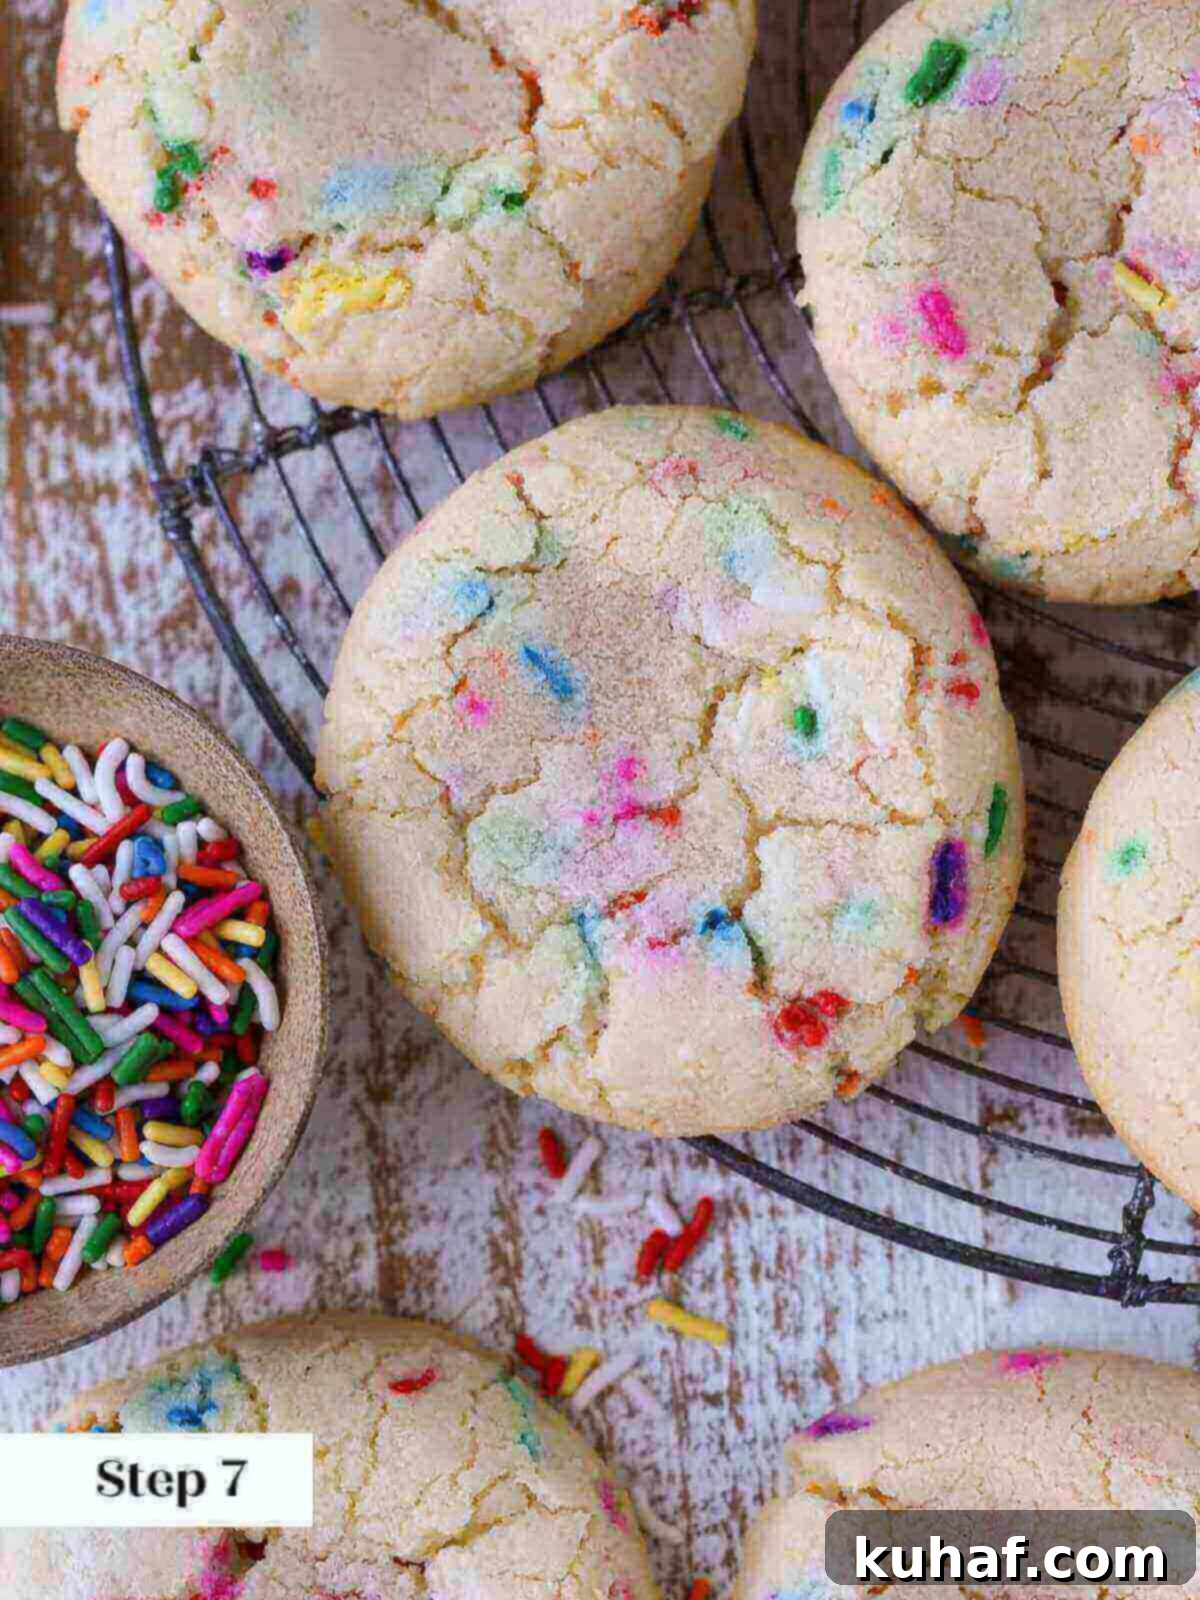
Step 7: Bake to Golden Perfection. Preheat your oven to 325°F (160°C) convection (or 350°F / 175°C standard bake if you don’t have convection). Arrange the chilled or frozen cookie dough balls on a baking sheet lined with parchment paper, leaving enough space between them for spreading. Bake in the preheated oven for approximately 10-12 minutes. You’ll know they’re ready when the edges achieve a beautiful light golden brown, the centers have puffed up slightly, and the surface appears matte rather than shiny. The cookies might look slightly underdone in the very center, but this is exactly what contributes to their perfect chewy texture once cooled. Remove from the oven and allow them to cool completely either on the baking sheet or transfer them to a wire cooling rack. Cooling completely is essential for the cookies to set and firm up properly.
The Golden Rule: Don’t Overbake! This is perhaps the most critical tip for achieving truly chewy cookies. While this recipe is designed for chewiness, even the best formula cannot salvage a cookie that has been overbaked. Dryness is the inevitable outcome of leaving them in the oven for too long, sacrificing that delightful soft, tender center. Keep a close watch and pull them out as soon as they meet the visual cues!
Chef Lindsey’s Expert Recipe Tip
For an added layer of texture and visual appeal, consider rolling your funfetti cookie dough balls in granulated sugar before baking. This simple step creates a beautiful crackled crust and a delightful sugary crunch on the outside of the cookie, perfectly complementing its soft, chewy interior. You can take this a step further by using colored sugar sprinkles for an extra festive flair, matching the color of your funfetti sprinkles or coordinating with a specific holiday theme!
Frequently Asked Questions About Funfetti Cookies
Absolutely! This funfetti cookie dough is perfectly suited for advance preparation, making your baking day much smoother. The dough will maintain its quality for up to two days when stored properly in an airtight container in the refrigerator. For longer storage, you can freeze the dough for up to two months. Simply thaw slightly in the fridge before portioning, or bake directly from frozen, adjusting the baking time as needed.
For optimal results, I highly recommend using rainbow jimmies. These are the small, rod-shaped sprinkles that hold their color and shape beautifully during the baking process, ensuring vibrant, distinct specks of color in your cookies. Avoid nonpareil sprinkles (the tiny, round, ball-shaped ones) as their colors tend to bleed into the cookie dough, resulting in a muted, streaky, or muddied appearance. While rainbow confetti sprinkles can work as an alternative, jimmies consistently bake the best for that classic funfetti look and feel.
Yes, chilling the funfetti cookie dough before baking is a crucial step that significantly impacts the final texture and appearance of your cookies. When the dough is thoroughly chilled – ideally to the point where it feels firm to the touch – the butter within it solidifies. This prevents the cookies from spreading too rapidly and excessively in the oven, leading to a more even bake, those coveted crispy edges, and a wonderfully chewy interior. For truly superior results, baking the cookies from a frozen state often yields the best texture and shape.
Once baked, these delicious funfetti cookies will remain fresh and delightful for up to 10 days when stored properly. Make sure to keep them in an airtight container at room temperature or in the refrigerator. For longer preservation, baked cookies can be frozen for up to 2 months. To prevent freezer burn and ensure they retain their fresh flavor, wrap them well in plastic wrap or foil before placing them in an airtight freezer-safe container. This helps protect them from absorbing unwanted flavors from the freezer environment.
If you tried this wonderful funfetti cookie recipe and absolutely loved it, please take a moment to leave a 🌟 star rating and share your thoughts in the comments below. I genuinely love hearing from you, and your feedback truly makes my day!

Funfetti Cookies
Chef Lindsey
15 minutes
10 minutes
30 minutes
55 minutes
22
cookies
Saved
Pin Recipe
Comment
Print Recipe
Ingredients
-
1 ⅓
cups
granulated sugar
-
½
cup
unsalted butter
cool but pliable -
1
large egg
-
1
tablespoon
whole milk
-
½
teaspoon
vanilla extract
-
2
cups
all-purpose flour
-
¼
teaspoon
baking powder
-
¼
teaspoon
kosher salt
-
½
cup
sprinkles
Instructions
-
Whisk together flour, baking powder, and salt in a medium bowl. Set aside.
-
In a stand mixer bowl fitted with a paddle attachment, cream the butter and sugar until light and fluffy.
-
Add the egg and beat until there are no visible streaks of egg.
-
Add the milk and vanilla extract. Mix until just combined.
-
Reduce the mixer to low and add the dry ingredients in three additions, waiting until almost all the flour has been incorporated before adding the next. Add the sprinkles after the last of the flour mixture has been incorporated.
-
Scoop with a 2-tablespoon cookie scoop or roll into balls about golf ball size. Chill the dough before baking. Bonus points for freezing!
-
Preheat the oven to 325°F convection.
-
Place the cookie dough balls on a baking sheet lined with parchment paper and bake in the preheated oven for 10-12 minutes until the edges are a nice golden brown, the centers have puffed, and the surface looks matte, not shiny. Cool completely. You can cool them on a cooling rack or on the baking sheet.
Notes
Flavor Tips – While sprinkles might seem immortal, even rainbow jimmies can lose their vibrancy and flavor over time. Old sprinkles can taste stale or have an “off” flavor, which can impact your cookies. Always ensure your sprinkles are fresh and flavorful before incorporating them into your dough for the best taste and visual appeal.
Variations – For a delightful twist on the classic vanilla funfetti, try adding ½ teaspoon of almond extract instead of, or in addition to, the vanilla. The nutty undertone pairs wonderfully with the sweetness and festive sprinkles!
Storage – Baked funfetti cookies can be stored in an airtight container at room temperature for up to 10 days, or in the refrigerator for the same duration. For longer-term storage, they freeze exceptionally well for up to 2 months. Ensure they are thoroughly wrapped to prevent freezer burn and to protect their flavor.
Nutrition
Calories:
144
kcal
|
Carbohydrates:
24
g
|
Protein:
1
g
|
Fat:
5
g
|
Saturated Fat:
3
g
|
Polyunsaturated Fat:
0.2
g
|
Monounsaturated Fat:
1
g
|
Trans Fat:
0.2
g
|
Cholesterol:
19
mg
|
Sodium:
35
mg
|
Potassium:
18
mg
|
Fiber:
0.3
g
|
Sugar:
15
g
|
Vitamin A:
141
IU
|
Calcium:
8
mg
|
Iron:
1
mg
Dessert
American
144
Like this? Leave a comment below!
Before You Go: Explore More Cookie Recipes
I sincerely hope you thoroughly enjoyed this professional chef-tested recipe for our ultimate chewy funfetti cookies. Every recipe on our site is meticulously developed and tested to ensure delicious and reliable results for your home kitchen. Don’t stop the baking adventure here! We invite you to explore our extensive collection of other delightful, chef-developed cookie recipes. Whether you’re craving classic chocolate chip, a seasonal favorite, or something entirely new, you’re sure to find your next baking obsession!
