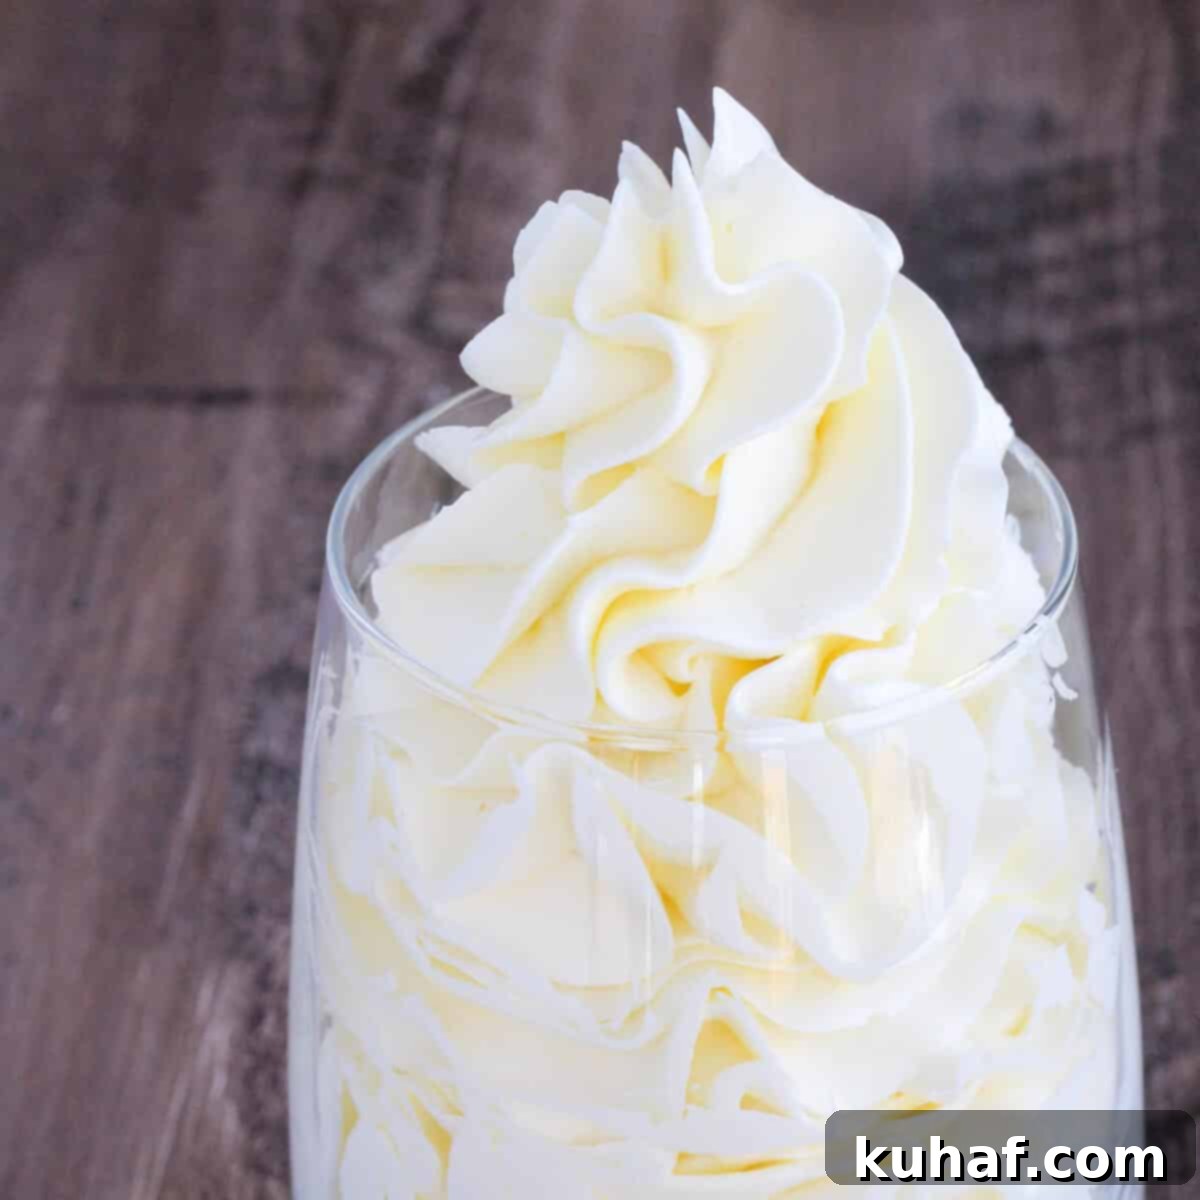
Perfect Italian Meringue Buttercream: A Chef’s Guide to Fluffy, Stable Frosting for Cakes & Cupcakes
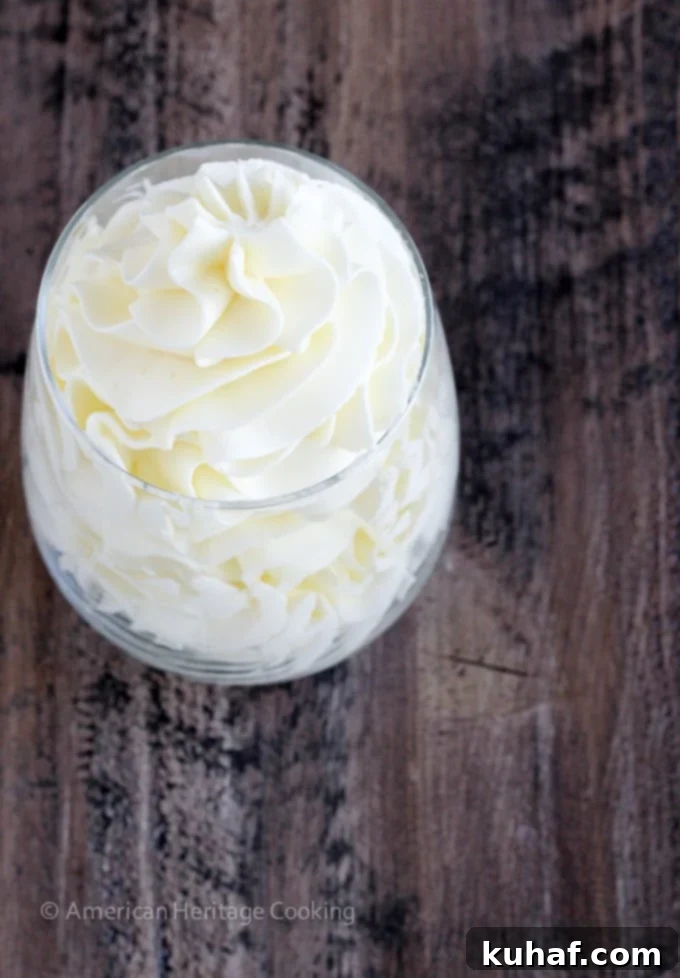
Italian Meringue Buttercream (IMB) is revered in the culinary world for its incredibly silky, smooth, and airy texture. It’s the secret to achieving those perfectly frosted, professional-looking cakes and beautifully piped cupcakes. While it might seem intimidating at first, creating this elegant buttercream is much easier than you think, especially with the right guidance. This comprehensive guide will equip you with all the professional techniques, expert insights, and essential troubleshooting tips to guarantee your success in mastering this exquisite frosting.
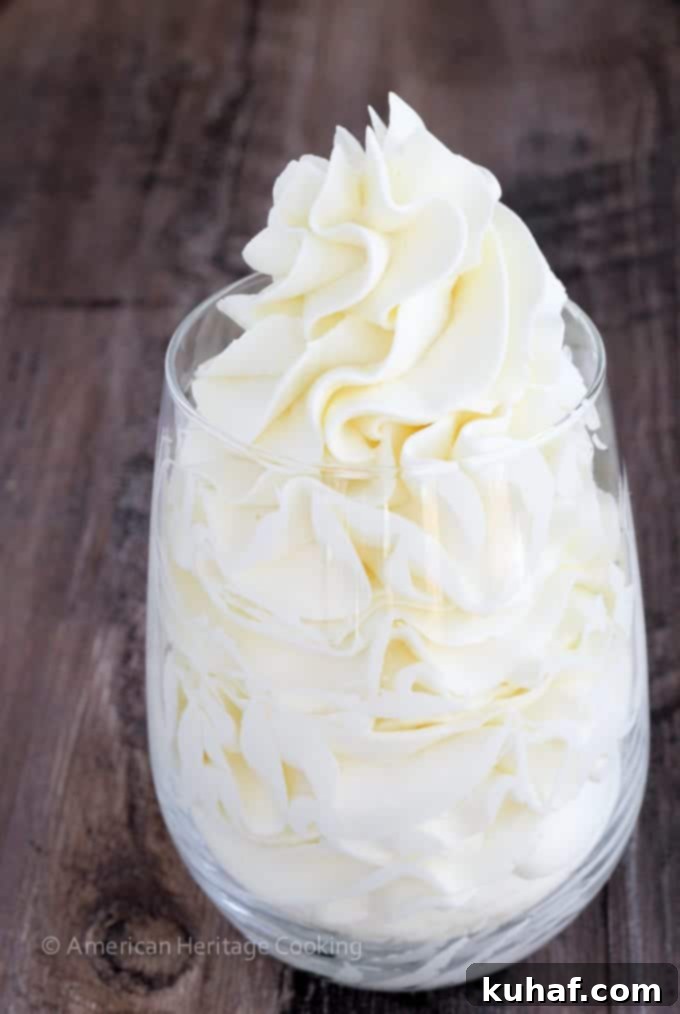
My love for Italian Meringue Buttercream runs deep because it strikes the perfect balance: it’s incredibly light and airy, yet simultaneously rich and exquisitely creamy. Beyond its delightful texture and taste, IMB boasts remarkable stability, capable of being stored for months in the freezer without losing its charm. Its robustness means that even if you encounter a few hiccups during preparation, it’s highly forgiving and almost always fixable! I’ll share all my best troubleshooting advice below to help you navigate any potential challenges.
IMB is the ideal frosting for constructing stunning professional layer cakes, as demonstrated in this layer cake assembly tutorial using a decadent devil’s food cake. It’s also perfect for piping elegant swirls on cupcakes, like these delightful lemon coconut cupcakes. Its versatility makes it a go-to choice for any baker aiming for perfection.
Table of Contents
- Why You’ll Adore This Italian Meringue Buttercream
- What Exactly is Italian Meringue Buttercream?
- How IMB Stands Apart from Other Buttercreams
- Essential Professional Tips for Success
- Key Ingredients You’ll Need
- How to Perfectly Flavor Italian Meringue Buttercream
- Adding Color to Italian Meringue Buttercream
- Step-by-Step Guide: How to Make Italian Meringue Buttercream
- Chef Lindsey’s Expert Recipe Tip
- How to Refresh Refrigerated & Frozen Italian Meringue Buttercream
- Troubleshooting: How to Fix Italian Meringue Buttercream
- Storage Guidelines for IMB
- Italian Meringue Buttercream Recipe Card
- Before You Go: More Baking Inspiration
Why You’ll Adore This Italian Meringue Buttercream: The Ultimate Frosting Choice
- Subtly Sweet & Creamy Perfection: If you find traditional American buttercream overly sweet, IMB is your dream come true. It offers a sophisticated sweetness that is perfectly balanced, allowing the rich, creamy texture of the butter and the delicate airiness of the meringue to truly shine. It’s an elegant choice for those who prefer a less sugary frosting experience.
- Your Culinary Canvas for Flavors: Consider this Italian Meringue Buttercream recipe your blank canvas, ready to transform into a masterpiece of flavor. Its neutral yet rich base is incredibly versatile, welcoming a wide array of additions. Swirl in melted dark chocolate for a luxurious ganache-like frosting, fold in salted caramel sauce for a sweet and salty delight, infuse it with vibrant lemon curd, or enrich it with creamy Nutella. The possibilities are endless, allowing you to customize your creations with ease.
- Unmatched Stability for Flawless Results: Among the various meringue buttercreams, Italian meringue stands out as the most stable. This makes it particularly resilient, offering better heat resistance than its Swiss meringue counterpart. While it will still succumb to temperatures above 70 degrees F (21 degrees C), its inherent stability provides a much-needed buffer, making it a reliable choice for decorated cakes and desserts, especially during warmer conditions or for events that require some transport.
- Expert-Tested & Proven Success: This isn’t just any recipe; it’s the exact Italian Meringue Buttercream formulation I relied upon during my tenure as an Executive Pastry Chef, and one I continue to use for bespoke cake orders. Having made it close to a thousand times, I can confidently say this recipe is meticulously tested and guaranteed to yield exceptional results every single time. You can trust that this method will work, empowering you to bake and decorate with confidence.
What Exactly is Italian Meringue Buttercream? Unveiling the Classic Frosting
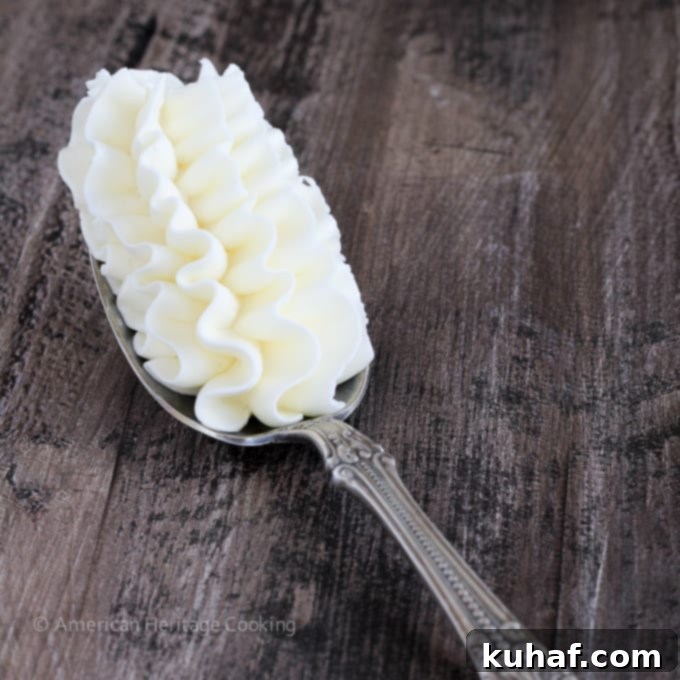
Italian Meringue Buttercream (IMB) might initially appear complex due to its multi-step preparation, yet it is arguably the most sophisticated and robust of the buttercream family. At its core, IMB is a rich, airy frosting crafted by combining a hot sugar syrup with whipped egg whites (an Italian meringue), which is then slowly emulsified with softened butter. The process begins by whipping egg whites to firm, glossy peaks. Simultaneously, granulated sugar is cooked with water to a specific temperature, reaching the “soft ball stage” (typically 235-240°F or 113-116°C). This hot syrup is then carefully poured into the whipping egg whites, essentially cooking them and creating a stable, pasteurized meringue. Once the meringue cools down to room temperature, softened butter is gradually added, transforming the airy meringue into a smooth, luxurious, and incredibly stable buttercream. This method results in a light, less sweet, and exceptionally pipeable frosting.
How IMB Stands Apart from Other Buttercreams: A Comparative Guide
As its name implies, Italian Meringue Buttercream distinguishes itself by using an Italian meringue as its foundational base. This crucial difference sets it apart from other popular buttercream varieties:
- Versus Swiss Meringue Buttercream: While both use a meringue base, Swiss meringue buttercreams are made by heating egg whites and sugar together over a bain-marie before whipping. Italian meringue, by contrast, incorporates hot sugar syrup into already whipping raw egg whites, resulting in a more stable and often lighter texture. IMB typically offers superior heat stability compared to Swiss Meringue Buttercream.
- Versus German Buttercream: German buttercream, or Crème Mousseline, is custard-based, incorporating pastry cream into butter. It has a rich, dense texture and is often less stable than meringue-based buttercreams. IMB is much lighter and less heavy on the palate.
- Versus French Buttercream: French buttercream uses egg yolks, sugar syrup, and butter, giving it a very rich, almost custard-like texture and a distinctly buttery flavor. While delicious, it can taste like pure butter and is less stable than IMB, often struggling with heat. IMB offers a lighter, more balanced flavor profile without being overwhelmingly buttery.
- Versus American Buttercream: American buttercream is the simplest, made by creaming butter with powdered sugar and milk/cream. It is notoriously sweet and dense. IMB is significantly less sweet, far smoother, and offers a more refined taste and texture, making it a preferred choice for professional pastry chefs and those who dislike overly sugary frostings.
Essential Professional Tips for Success: Mastering Italian Meringue Buttercream
- Control Your Pace, Master Your Meringue: Don’t feel pressured to race against the clock! While you’re cooking your sugar syrup, there’s no strict rule demanding your egg whites whip at maximum speed. If your egg whites reach stiff peaks prematurely while your sugar syrup is still stubbornly at 220˚F, simply reduce your mixer speed to low. The key is to keep the mixer running; *never* stop it completely once the egg whites start whipping, as this can deflate your meringue. Slowing it down maintains the meringue’s volume and allows the sugar syrup to catch up.
- Pour Hot Syrup on High Speed: To avoid a breakfast scramble on your cupcakes, ensure your mixer is on HIGH speed when you begin pouring in the hot sugar syrup. The intense whipping action quickly disperses the hot syrup into the egg whites, preventing them from cooking into scrambled eggs. This rapid incorporation is crucial for a smooth, stable meringue.
- Aim for the Bowl’s Edge, Not the Whisk: When pouring the scalding hot sugar syrup, direct the stream carefully down the side of your mixing bowl. This prevents the syrup from hitting the rapidly spinning whisk, which could splatter it dangerously and inefficiently. A correct pour will leave a single, thin “lava trail” of cooled sugar on the inner wall of the bowl, indicating precise execution and minimal sugar loss.
- Precise Sugar Temperature is Paramount: While “soft ball stage” encompasses a range, aiming for exactly 235˚F (113˚C) for your sugar syrup is ideal. By the time you transfer the syrup from the stove to the mixer, its temperature might naturally creep up a few degrees, but starting at 235˚F provides a perfect buffer. Overcooked sugar will lead to a hardened, crystallized layer at the bottom of your mixer bowl, indicating that the syrup was too hard to properly emulsify into the meringue. Precision here ensures a smooth, lump-free buttercream.
- Butter Temperature: Cool, Yet Pliable: The ideal butter for IMB should be soft enough to indent easily with your finger, but still slightly cool to the touch. If your butter feels too firm, add it in smaller pieces. A clever trick is to gently squeeze each piece of butter before adding it to further soften and temper it. This hands-on method ensures the butter integrates seamlessly into the meringue. It might feel a little fun, and yes, a tiny bit messy, but it makes a difference!
- Soupy Buttercream? Don’t Panic, Whisk On! If your buttercream unexpectedly turns soupy after adding butter, it usually means the meringue was still too warm. Don’t despair! Switch back from the paddle attachment to the whisk attachment and continue beating on high speed. The air incorporation and continued mixing will help cool the mixture and bring it back together. Trust me, it’s a common and fixable issue. More detailed troubleshooting steps are below.
- Curdled Buttercream Will Come Together: It’s common for the buttercream to look “broken” or curdled when you first start incorporating the butter. This is completely normal and temporary! Continue adding your softened butter in small increments, squeezing each piece as needed to ensure it’s pliable. If you have a kitchen torch, you can gently warm the exterior of the mixing bowl (while the mixer is running on high) for just a few seconds, keeping the torch moving constantly to prevent melting the buttercream. The goal is to slightly warm the mixture to aid emulsification, not to melt the butter. Patience is key here; it will transform into a smooth, cohesive buttercream.
Key Ingredients You’ll Need for Perfect Italian Meringue Buttercream
- Granulated Sugar: Granulated sugar plays a dual role in Italian meringue: it provides sweetness and, more critically, stability to the meringue structure. The higher the sugar content in the meringue, the more stable it becomes, though it can slightly reduce the overall volume. Ensure accurate measurement for optimal results.
- Water: Unlike caramel-making, where water evaporates entirely, the precise amount of water in an Italian meringue recipe is important. It helps dissolve the sugar evenly and controls the syrup’s temperature progression. Always measure your water carefully for the best consistency and stability of your sugar syrup.
- Egg Whites: For truly superior results, it is highly recommended to use freshly separated egg whites rather than liquid, carton egg whites. Liquid egg whites often contain stabilizers and foaming agents that can prevent them from whipping up as stably or consistently, making them more prone to curdling when the hot syrup is introduced. Don’t waste those yolks! Save them for delicious creations like lemon curd, which you can even fold into your finished buttercream for a zesty lemon twist!
- Kosher Salt: While optional, a pinch of kosher salt not only subtly balances the sweetness of the buttercream but also contributes to the stability of the meringue. It helps strengthen the egg white proteins, allowing them to hold air more effectively.
- Cream of Tartar: This acidic powder is another optional, yet highly beneficial, ingredient for enhancing meringue stability. Cream of tartar helps the egg whites whip faster, achieve greater volume, and prevents them from deflating. It’s a small addition that stacks the deck in your favor for a perfect meringue.
- Unsalted Butter: The quality of your butter directly impacts the final taste and texture of your buttercream. Always opt for a good quality unsalted butter for the most stable and delicious results. Using salted butter will result in a noticeably salty buttercream – a flavor profile typically undesired in this context. Ensure your butter is at the correct temperature (cool but pliable) before adding it.
- Vanilla Extract: Pure vanilla extract is often added at the end for classic flavor, but as discussed below, the flavor possibilities are endless!
How to Perfectly Flavor Italian Meringue Buttercream: Unleashing Creativity
- Lemon: Achieve vibrant lemon flavors using high-quality Nielson Massey lemon extract or Nielson Massey lemon paste. For a more natural and aromatic twist, incorporate finely grated lemon zest directly into the sugar for the meringue. Alternatively, fold in a generous amount of homemade lemon curd for a rich, tangy, and delightful variation.
- Strawberry: While fresh strawberry puree can sometimes destabilize buttercream due to its water content, using fruit preserves or powders is a safer bet. Incorporate a delicious strawberry jam, such as my easy strawberry jam without pectin, or opt for concentrated dehydrated strawberry powder for an intense, natural flavor and color without excess moisture.
- Other Berries: For most other berry flavors, I highly recommend using high-quality fruit jams or reductions. These provide concentrated flavor and sweetness without the liquid content that could compromise the buttercream’s smooth texture.
- Peanut Butter: For a delightful peanut butter IMB, simply add about ½ cup of smooth peanut butter to the finished buttercream. If you desire a textural contrast, you could use chunky peanut butter, but I often prefer to add crushed salted peanuts as a garnish for an elegant finish.
- Nutella: Transform your buttercream into a chocolate-hazelnut dream by folding in ½ cup of Nutella or another high-quality chocolate hazelnut spread. Ensure it’s well-mixed for an even flavor distribution.
- Chocolate: For a rich chocolate Italian Meringue Buttercream, gently fold in 200 g (approximately 7 ounces) of melted and cooled chocolate to the finished buttercream. You can choose milk chocolate for a sweeter profile, semi-sweet for a balanced flavor, or unsweetened chocolate for an intense cocoa hit, depending on your preference. Ensure the melted chocolate is not hot, as this could melt your buttercream.
- Vanilla: For a classic and fragrant vanilla IMB, add up to 2 tablespoons of high-quality vanilla extract, 1 tablespoon of aromatic vanilla bean paste, or the seeds from 2 split and scraped vanilla bean pods. Don’t discard the used pods; they can be saved to infuse sugar or milk for other recipes like vanilla bean crème anglaise or vanilla bean pastry cream!
Adding Color to Italian Meringue Buttercream: Tips for Vibrant Hues
Italian Meringue Buttercream is an excellent canvas for vibrant colors. For intense and true hues, high-quality gel food colorings are your best option as they are concentrated and won’t add excess liquid that could thin the buttercream. Alternatively, for natural and more subtle coloring, you can use powders like dehydrated strawberry powder (which also adds flavor) or beet powder. Remember to add color gradually, mixing well after each addition until you achieve your desired shade, as the color can deepen over time.
Step-by-Step Guide: How to Make Italian Meringue Buttercream Like a Pro
Prepare for Success: Your Mise en Place
Step 1: The Art of Mise en Place (Preparation is Key): This initial step is absolutely critical for success with Italian Meringue Buttercream. Before you even think about turning on your mixer or stove, ensure that all your ingredients are meticulously measured out, prepped, and within easy reach. In professional kitchens, this methodical approach is known as “mise en place,” meaning “everything in its place.” While this recipe is fundamentally simple, it truly demands seamless and focused execution. Having everything ready prevents last-minute scrambling and potential errors when dealing with hot sugar syrup and delicate egg whites.
Step 2: Ensure Impeccably Clean Tools: The success of your meringue hinges on pristine equipment. Before you begin, thoroughly clean and degrease your mixing bowl (preferably stainless steel or glass) and your whisk attachment. Any residual fat or grease, no matter how small, will prevent your egg whites from whipping up properly, leading to a flat and unstable meringue – and ultimately, a disappointing buttercream. Similarly, ensure your saucepan for the sugar syrup is spotless. Even tiny sugar crystals or residue can act as “seeds” for crystallization, causing your syrup to seize and become unusable. Cleanliness is paramount for a smooth process and perfect results.
Crafting the Italian Meringue Foundation
Step 3: Initiating the Sugar Syrup: In a medium saucepan, combine half of your measured granulated sugar with the water. Place the saucepan over medium heat and stir gently, just until the sugar completely dissolves. As the syrup begins to heat and simmer, take a clean pastry brush (or, in a pinch, a rolled-up paper towel or even a clean finger, though caution is advised with heat) dipped in water. Carefully brush down the sides of the pot to dissolve any sugar crystals that may have adhered to the walls. This crucial step prevents these rogue crystals from falling back into the syrup and initiating a chain reaction of crystallization, which would ruin your syrup’s smooth texture.
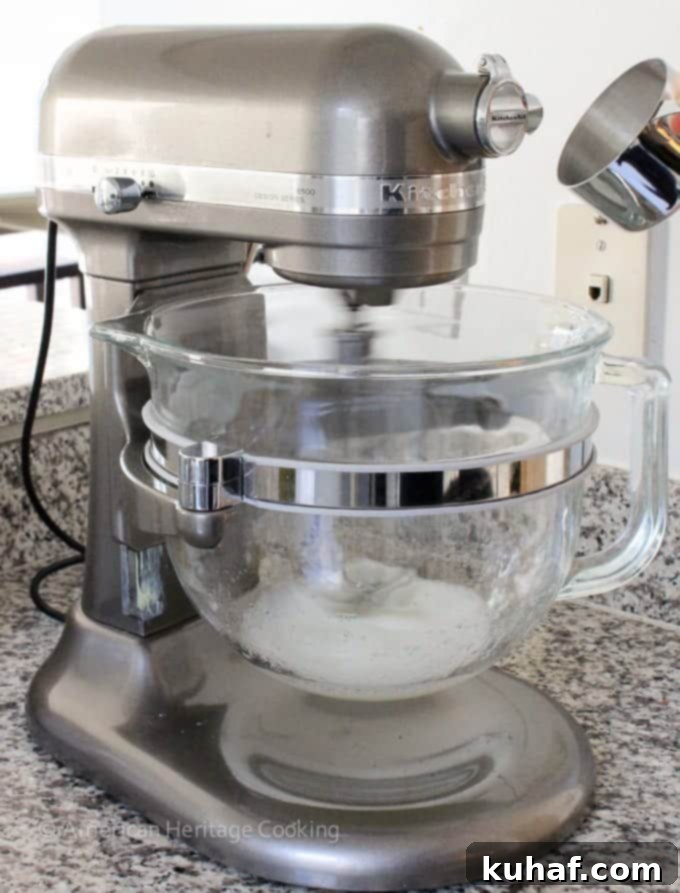
Step 4: Whipping Egg Whites to Perfection: As your sugar syrup starts to bubble gently, begin whipping your egg whites in the bowl of a stand mixer fitted with the whisk attachment. For added stability, you can incorporate a pinch of kosher salt and/or cream of tartar at this stage. Once your egg whites become frothy and start to gain some volume, gradually begin adding the remaining reserved granulated sugar, sprinkling it in slowly and continuously whipping on medium-high speed. This slow addition helps create a stable, shiny meringue.
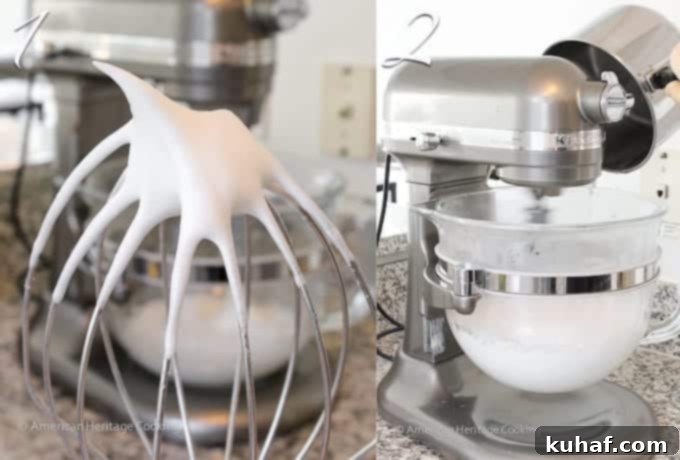
Step 5: Synchronizing Meringue and Syrup: Continue whipping your egg whites until they form stiff, glossy peaks (as shown in photo 1, depicting perfectly formed peaks). The ideal scenario is for your meringue to reach this stiff peak stage precisely when your sugar syrup reaches 235˚F (113˚C). This synchronization is key for a seamless transition.
Expert Timing Adjustment: If you find your egg whites are whipping too quickly and reach stiff peaks before your sugar syrup is ready, simply reduce the mixer speed to medium or even low. Keep them gently moving to maintain their volume. Conversely, you can adjust the heat under your sugar syrup – increasing it slightly to speed up cooking or decreasing it to slow it down. However, be cautious not to turn the heat too low for too long, as this increases the risk of the sugar syrup crystallizing. Mastering this timing is a bit of a dance, but you absolutely can do it!
Step 6: Testing the Sugar Syrup – The Soft Ball Stage: To confirm your sugar syrup has reached the perfect 235˚F (113˚C) soft ball stage, you can either rely on a precise candy thermometer or employ the traditional “cold water test.” For the latter, carefully take a tiny spoonful of the hot syrup and immediately drop it into a small bowl of ice water. Reach into the water and attempt to gather the cooled sugar. If it completely dissolves, it’s not ready. If it forms a small, soft, and pliable ball that you can easily manipulate, it’s perfect! I don’t have a photo of this precise moment because, in real-time, pausing to take a picture would mean risking overcooking the syrup.
Step 7: The Critical Syrup Pour: Immediately upon reaching the correct temperature, turn your mixer up to HIGH speed. With extreme care and precision, SLOWLY pour the hot sugar syrup in a steady, thin stream down the inner side of the mixing bowl (as illustrated in photo 2, showing a single, controlled stream). It is absolutely crucial to avoid hitting the spinning whisk directly, as this can cause hot syrup to splatter and solidify on the whisk, resulting in sugar loss and potential hazards. Aim for one continuous stream down the bowl’s edge. If you pour it in multiple spots, the syrup will solidify where it touches the cooler bowl, leading to wasted sugar and a less efficient meringue.
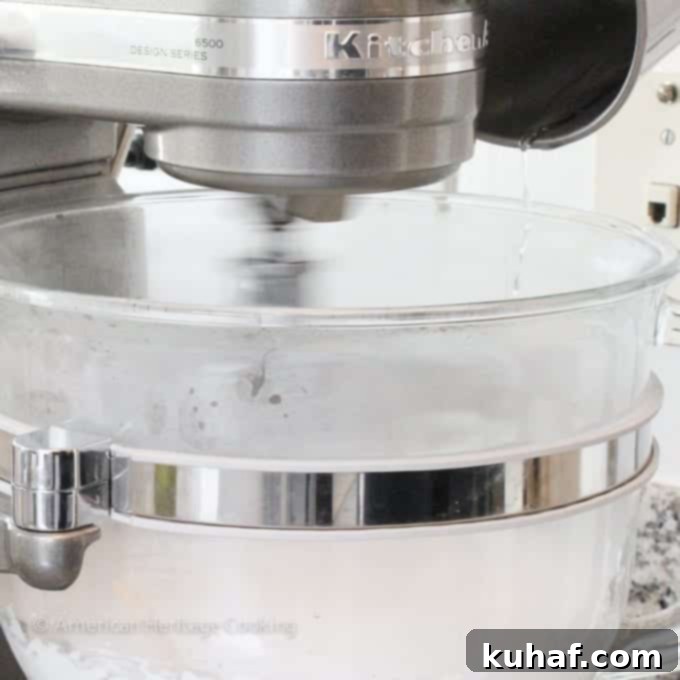
Precision in Action: If you examine the photo closely, you can clearly observe the single, focused stream of sugar syrup adhering to the side of the bowl. This is the hallmark of a perfect pour – no excess sugar lost, just efficient incorporation. This meticulous technique is indeed what perfection looks like in the world of Italian Meringue Buttercream! 😉
Finishing Your Silky Italian Meringue Buttercream
Step 8: Cooling and Strengthening the Meringue: After incorporating the hot sugar syrup, continue whipping the Italian meringue on high speed. It will quickly become very stiff, as demonstrated by the strong peaks in the first photo below. However, while stiff peaks are important, the *temperature* of the meringue is even more critical at this stage. You must continue whipping until the bottom of the mixing bowl feels barely warm, almost at room temperature. This cooling process is essential before adding the butter.
Why Cooling Matters: Due to the significant amount of sugar in Italian meringue, it is incredibly stable and highly resistant to over-whipping. Even if your meringue forms beautifully stiff peaks quickly (as seen in photo 1), it often requires several more minutes of whipping to adequately cool down. Attempting to add butter to a warm meringue will result in a soupy, unstable buttercream. Patience during this cooling phase is key to success.
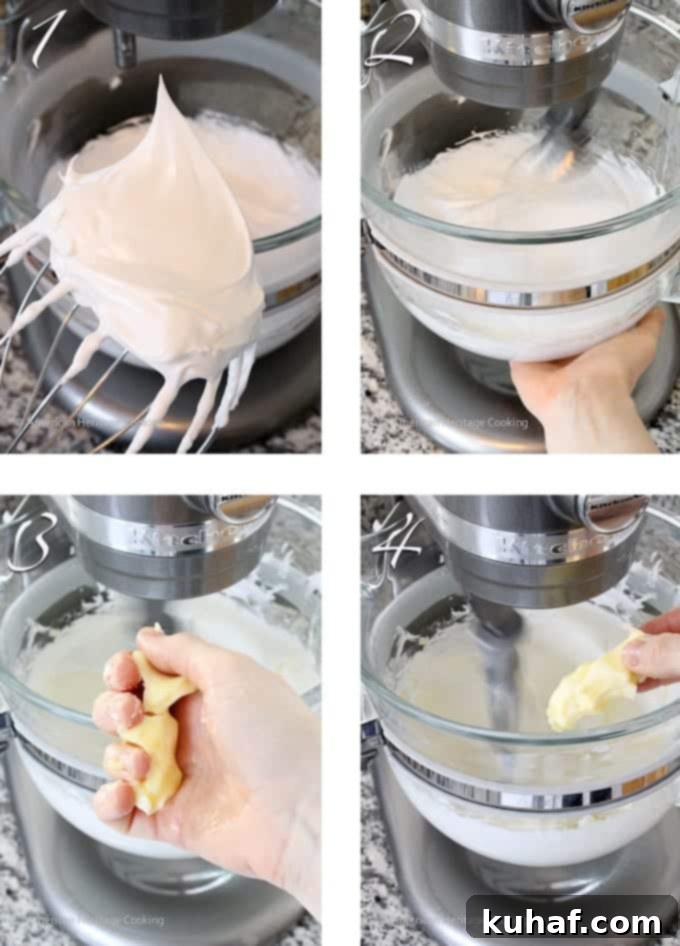
Step 9: Gradually Incorporating the Butter: Once the mixing bowl feels only slightly warm to the touch, switch from the whisk attachment to the paddle attachment. Begin adding your unsalted butter, one piece at a time, allowing each addition to fully incorporate before adding the next (as illustrated in photo 3, showing the butter being added). I typically remove my butter from the refrigerator when I start measuring all my ingredients, giving it time to soften. Before adding each piece, I like to gently squeeze it. This helps gauge its pliability and ensures it’s at the perfect cool-but-soft temperature. While I personally found this “squeeze test” helpful when I was starting out, as my comfort and experience grew, I no longer found it strictly necessary.
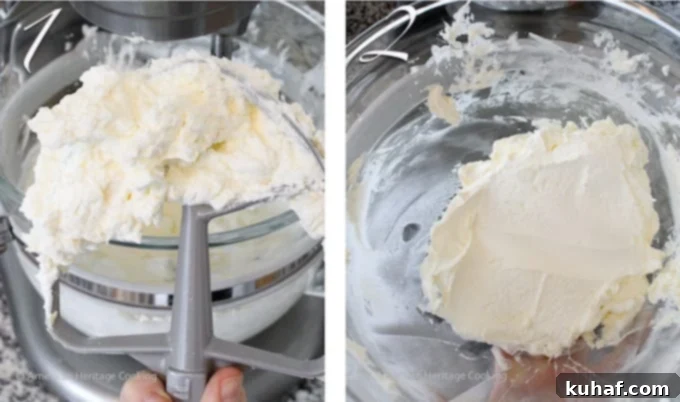
Step 10: Achieving Silky Smoothness: Continue beating the butter into the meringue on medium-high speed until the buttercream transforms into a perfectly smooth, homogenous mixture with no visible lumps or remaining pieces of butter. Initially, it might appear lumpy or curdled, resembling broken cream – this is a normal stage of the process, do not stop! Keep mixing. The buttercream should eventually come together, looking smooth, creamy, and uniform, as seen in the second referenced photo (which visually represents a smooth, creamy texture). At this point, I often switch back to the whisk attachment, add any desired flavorings (like vanilla extract), and beat for another minute or two until the buttercream becomes beautifully light, fluffy, and incredibly airy. Your Italian Meringue Buttercream is now ready for frosting, piping, and decorating!
Step 11: Infuse Your Flavors: This is where the magic happens! Once your buttercream is smooth and fluffy, incorporate any desired flavorings. This could include extracts (like vanilla, almond, or lemon), tangy lemon curd, rich salted caramel sauce, cooled melted chocolate (ensure it’s not warm), fruit jams or purees, or creamy nut pastes (such as pistachio or hazelnut). Add them gradually and mix until evenly distributed for a personalized, delicious finish.
Chef Lindsey’s Expert Recipe Tip: Take Control of Your Buttercream!
The most significant takeaway from this entire process is that YOU are always in control! Don’t let the technical steps intimidate you. You have the power to regulate the heat of your sugar syrup and its cooking speed. You can dictate how quickly your egg whites whip by adjusting your mixer. And crucially, you manage the temperature difference between your perfectly cooled meringue and your softened butter. If any part of the process seems to be getting away from you, simply adjust, adapt, and keep going! With a little practice and confidence, you’ll master this elegant buttercream every time.
How to Refresh Refrigerated & Frozen Italian Meringue Buttercream: Restore Its Glory
- Refreshing Refrigerated Buttercream: Italian Meringue Buttercream stores beautifully in the refrigerator. To bring it back to its luscious, spreadable consistency, simply place the chilled buttercream in the bowl of your stand mixer. Start by beating it with the paddle attachment on medium speed until it becomes smooth and homogenous. It might appear slightly curdled or stiff at first, but keep mixing! Once smooth, switch to the whisk attachment and whip it on medium-high speed until it’s light, airy, and fluffy again.
- Refreshing Frozen Buttercream: For frozen IMB, the process requires a bit more patience. First, transfer the frozen buttercream to the refrigerator and allow it to thaw completely overnight. Once thawed, let it sit at room temperature for a short period to soften slightly (it should still be cool but not rock-hard). Then, follow the same refreshing instructions as for refrigerated buttercream: start with the paddle attachment until smooth, then whisk until light and fluffy.
- Speed Up the Process (Carefully!): If you’re short on time, you can gently accelerate the warming process. While the buttercream is mixing with the paddle attachment, you can carefully warm the exterior of the mixing bowl. This can be done by hovering it briefly over a low gas stovetop flame or by using a kitchen torch. The key here is to keep the heat source constantly moving and apply it only for short bursts. Be extremely careful, as you want to *warm* the buttercream, not *melt* it. Excessive heat will ruin the texture.
Troubleshooting: How to Fix Italian Meringue Buttercream Like a Professional
A curdled or lumpy appearance in your Italian Meringue Buttercream is typically a sign that it is too cold. This is a very common issue, especially when trying to refresh or re-whip buttercream that has been refrigerated or is simply too cool. The most straightforward way to remedy this is to gently warm the mixing bowl while the buttercream is being beaten with the paddle attachment on medium speed. If you have a kitchen torch, carefully move the flame around the outside of the bowl for short intervals, ensuring it never stays in one spot to avoid melting the butter in sections. Alternatively, you can simply continue to mix the buttercream on medium-low speed with the paddle attachment; the friction from the mixing will gradually generate enough warmth to bring it back together. Patience is your best friend here.
Your buttercream is soupy because it is too warm. This typically occurs if your Italian meringue was still too warm when you started adding the butter, or if your butter itself was too soft (perfect room temperature butter can be too warm for a warm meringue). Adding perfectly soft, room-temperature butter to an already warm meringue is a recipe for soup! To fix soupy buttercream, remove the mixing bowl, buttercream, and mixer attachment, and place them in the refrigerator. Chill for 30 minutes to 2 hours, depending on how warm the buttercream currently is. Once thoroughly chilled and slightly firmed up, return the bowl to the mixer and continue mixing on medium speed with the paddle attachment until it comes together and achieves the desired consistency. As a last resort, if you’ve tried everything else and it’s still not coming together, sometimes it just needs time. Keep mixing on medium speed, walk away, and come back. Often, all it needed was a little more time to emulsify and cool down. We’ve all been there!
Unfortunately, butter chunks indicate that the butter was too cold when it was incorporated into the buttercream. Cold butter pieces simply won’t emulsify properly. You can attempt to fix this by gently warming the entire bowl with a kitchen torch while continuously beating the buttercream with the paddle attachment. However, in many cases, to completely get rid of all the lumps, you might need to warm the entire batch beyond ideal usage temperature. If this happens, pop the warmed buttercream into the refrigerator until it cools down, then beat it again with the paddle attachment. Alternatively, if the chunks are small and you’re short on time, you could just proceed with it. Cover your cake generously in sprinkles, and trust me, no one will even notice. That’s my professional secret!
Regrettably, this is the one mistake that is almost impossible to fully recover from. If you begin adding butter and immediately see it melting into a greasy liquid within the meringue, stop adding butter immediately. Continue beating the meringue on its own and allow it to cool down significantly. Only once the meringue is cool should you *very carefully* attempt to add small, cool pieces of butter. A small amount of melted butter might be salvageable, but if the majority or all of your butter has melted, the emulsion will have broken completely, and the buttercream will likely be ruined beyond repair. Prevention is key here: always ensure your meringue is properly cooled and your butter is at the correct cool-but-soft temperature.
Storage Guidelines for Italian Meringue Buttercream: Prep Ahead & Save for Later
Italian Meringue Buttercream is remarkably stable and stores exceptionally well, making it a fantastic frosting to prepare in advance. You can store it at room temperature for 2-3 days in an airtight container, or extend its freshness by refrigerating it for up to 2 weeks. For longer storage, IMB freezes beautifully for up to 3 months. Before using any cold buttercream, ensure you bring it back to a workable consistency. Simply place the cold buttercream in the bowl of a stand mixer fitted with the paddle attachment and beat on medium speed until it comes together. It will initially appear curdled or separated, but don’t worry – this is normal! Just keep mixing, and it will transform back into its smooth, luxurious texture.
If you tried this professional chef-tested recipe and loved it, please leave a 🌟 star rating and let me know how it goes in the comments below. I love hearing from you; your comments truly make my day!

Italian Meringue Buttercream Recipe
Pin Recipe
Comment
Print Recipe
Ingredients
- 2 cups granulated sugar divided
- ⅔ cup water
- 5 large egg whites freshly separated for best results
- pinch kosher salt optional, for stability and flavor balance
- pinch cream of tartar optional, for increased meringue stability
- 2 cups unsalted butter cubed, cool but pliable (not fully room temperature)
- 2 teaspoons vanilla extract or other desired flavorings
Instructions
-
1. Prepare Your Workspace: Begin by gathering and meticulously measuring all your ingredients. This recipe thrives on seamless execution, so having everything ready (mise en place) is vital. Crucially, ensure your stand mixer bowl and whisk attachment are impeccably clean and completely free of any residual fat. Even a tiny trace of grease can prevent your meringue from whipping properly. Similarly, ensure your saucepan is clean to avoid sugar crystallization.
-
2. Start the Sugar Syrup: In a medium saucepan, combine half of the granulated sugar with the water. Place over medium heat and stir gently, just until the sugar fully dissolves. As the syrup begins to heat and simmer, use a clean pastry brush (or a damp paper towel) dipped in water to brush down the sides of the pot. This washes away any sugar crystals adhering to the sides, preventing them from falling back in and causing the entire syrup to crystallize.
-
3. Whip Egg Whites & Add Sugar: Once the sugar syrup starts bubbling, begin whipping your egg whites in the stand mixer bowl (with whisk attachment) on medium-high speed. If desired, add a pinch of kosher salt and/or cream of tartar for enhanced stability. When the egg whites become frothy and start to gain volume, slowly and gradually begin adding the *remaining* reserved sugar, sprinkling it in while continuously whipping on medium-high.
-
4. Reach Stiff Peaks & Sync Temperatures: Continue whipping your egg whites until they form stiff, glossy peaks. Ideally, your meringue should reach this stage at the same time your sugar syrup reaches 235˚F (113˚C) on a candy thermometer. If your egg whites are whipping too quickly, reduce the mixer speed to medium to prevent over-whipping. You can also slightly adjust the heat on your sugar syrup to synchronize the timing, but avoid turning the heat too low, which can cause crystallization.
-
5. Test for Soft Ball Stage: If not using a thermometer, perform the cold water test for your syrup: drop a tiny bit of hot syrup into ice water. If it dissolves, it’s not ready. If it forms a small, pliable ball that you can roll between your fingers, it’s at the soft ball stage (235˚F).
-
6. Slowly Pour Hot Syrup: Immediately turn your mixer up to HIGH speed. With extreme caution, SLOWLY and steadily pour the hot sugar syrup down the inside wall of the mixing bowl. Be very careful not to let the stream hit the rapidly spinning whisk, as this can cause dangerous splatters and sugar loss. Aim for a single, continuous stream along the bowl’s edge for optimal incorporation.
-
7. Cool the Meringue: Continue whipping the Italian meringue on high speed until it forms very stiff peaks. More importantly, continue whipping until the bottom of the mixing bowl feels only barely warm, almost at room temperature. This cooling is crucial before adding butter; do not rush this step. The meringue will not over-whip.
-
8. Add Softened Butter: Once the bowl is cool to the touch, switch from the whisk attachment to the paddle attachment. Begin adding your unsalted butter, one cubed piece at a time. Ensure the butter is cool but pliable (soft enough to indent). You can gently squeeze each piece before adding to ensure it’s at the correct temperature for emulsification. Allow each piece to fully incorporate before adding the next.
-
9. Achieve Smooth Buttercream: Continue beating the buttercream on medium-high speed until it transforms into a perfectly smooth, silky, and homogenous mixture, with no visible butter chunks. It might appear slightly lumpy or curdled at first, which is completely normal; just keep mixing until it’s beautifully smooth and creamy. Finally, add the vanilla extract or any other desired flavorings. For an extra light and fluffy texture, switch back to the whisk attachment and beat on medium-high for another minute or two. Your exquisite Italian Meringue Buttercream is now ready to pipe or spread as desired!
Video Tutorial
Chef’s Notes
Storage Tips – Italian Meringue Buttercream can be stored at room temperature for up to 2-3 days in an airtight container, or refrigerated for a longer period of up to 2 weeks. For extended preservation, it freezes exceptionally well for up to 3 months. Always ensure to refresh cold or frozen buttercream by re-whipping it as described in the “How to Refresh” section before use.
Yield Information – This recipe yields a generous amount of buttercream, sufficient to elegantly frost a beautiful 2-3 tiered cake or approximately 24 standard-sized cupcakes, making it perfect for both elaborate celebrations and smaller batches.
Nutrition Facts (Estimated Per Serving)
Before You Go: Explore More Delicious Baking Inspiration
I truly hope you enjoyed mastering this professional chef-tested recipe for Italian Meringue Buttercream. This versatile frosting will elevate all your baking projects! Don’t stop here – explore our other delicious, chef-developed cake frosting recipes to find your next favorite. And if you’re looking for the perfect base for this glorious buttercream, I highly recommend baking up my incredibly moist vanilla cake recipe. Happy baking!
