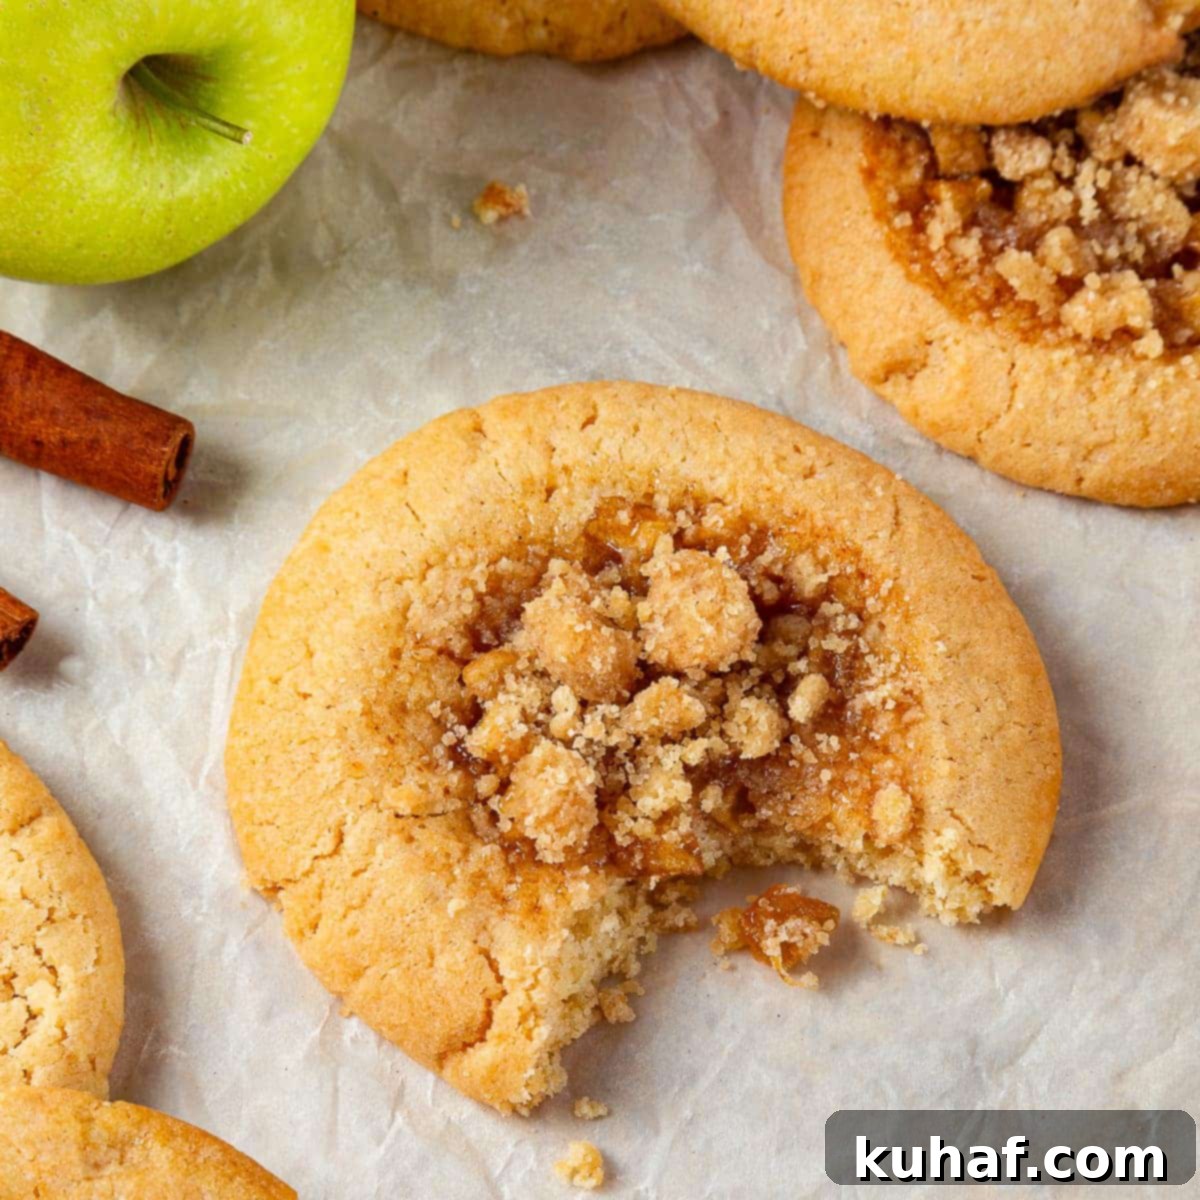
Chewy Apple Pie Cookies: Your Ultimate Guide to Homemade Fall Flavors with a Delicious Crumble Topping
Imagine all the comforting, warm spices and tender apple goodness of a classic apple pie, but in a perfectly portable, chewy cookie form. These delightful chewy apple pie cookies bring that dream to life! Featuring a soft, rich brown sugar cookie base generously filled with a delectable homemade apple pie filling and crowned with a sweet, crunchy crumble topping, they offer all the beloved flavors of apple pie in an easy, no-chill cookie recipe that’s perfect for any occasion. Whether you’re craving a taste of autumn or a simple yet impressive dessert, these cookies are sure to become a new favorite.

A Quick Look at This Irresistible Apple Pie Cookie Recipe
Before diving into the detailed instructions, here’s a concise overview of what to expect from making these fantastic apple pie cookies:
- Prep Time: Approximately 40 minutes – dedicated to preparing the apple filling and cookie dough.
- Cook Time: Around 20 minutes – for baking to golden perfection.
- Total Time: Roughly 1 hour – a surprisingly quick turnaround for such a flavorful dessert!
- Yields: 13 delicious cookies – perfect for sharing or savoring.
- Calories: ~310 kcal per cookie (estimated based on nutrition panel) – a satisfying treat.
- Technique: This recipe involves three main stages: crafting the homemade apple pie filling, preparing a soft brown sugar cookie dough, and finally, assembling the cookies with a delightful crumble topping before baking.
- Flavor Profile: Expect a harmonious blend of warm, cinnamon-spiced tender apples, nestled within a rich, buttery brown sugar cookie, all crowned with a sweet and slightly crunchy streusel crumble. It’s truly a taste of fall in every bite.
- Difficulty: Suitable for confident beginners. While it involves multiple steps, each is straightforward and easy to master with clear instructions.
Why You Will Absolutely Adore These Apple Pie Cookies
These aren’t just any cookies; they’re an experience. Here’s why these apple pie cookies will quickly become a cherished recipe in your baking repertoire:
- All the Comfort of Apple Pie, Simplified in Cookie Form! Forget the fuss of pie crusts and lengthy baking times. This innovative recipe captures everything you adore about a classic easy apple pie, but with significantly less effort and in a convenient, handheld format. They offer the perfect balance of fruit and pastry, making them ideal for gatherings or a cozy night in.
- Authentic and Easy Homemade Apple Pie Filling. The secret to these cookies lies in their exquisite filling. We specifically recommend using tart Granny Smith apples because their natural acidity beautifully balances the sweetness, preventing the filling from becoming cloyingly sweet. Furthermore, their firm texture ensures they hold their shape wonderfully when cooked, providing delightful apple chunks in every bite. The addition of cornstarch is a crucial step, acting as a thickening agent to create a luscious, gooey filling that stays contained within the cookie without making it soggy. This results in perfectly moist and flavorful cookies every time.
- A Streusel Topping That’s Pure Perfection. No apple pie is complete without a little crumble, and these cookies are no exception! Our brown sugar streusel topping is designed to complement the entire cookie perfectly. Its buttery, sugary texture adds a delightful crunch that contrasts beautifully with the soft cookie base and the tender apple filling, elevating the overall taste and texture.
- A Scrumptious, Melt-in-Your-Mouth Cookie Base! This isn’t just a vehicle for the filling; it’s a star in its own right. The cookie itself is wonderfully chewy, with edges that are just crisp enough and a soft, tender center that truly melts in your mouth. The masterful combination of butter, granulated sugar, and light brown sugar creates an incredible texture and a rich, deep flavor profile that screams “cozy fall dessert.” It’s a cookie dough that’s sturdy enough to hold the filling yet tender enough to be utterly delightful.
Table of Contents
- A Quick Look at This Irresistible Apple Pie Cookie Recipe
- Why You Will Absolutely Adore These Apple Pie Cookies
- Essential Ingredients & Smart Substitutions for Apple Pie Cookies
- Creative Variations for Your Apple Pie Cookies
- Professional Tips for Perfect Apple Pie Cookies
- Step-by-Step Guide: How to Make Apple Pie Cookies
- Chef Lindsey’s Expert Recipe Tip
- Apple Pie Cookie Recipe FAQs
- Recommended Cookie Recipes to Try Next
- Full Apple Pie Cookies Recipe Card
- Before You Go: More Delicious Treats
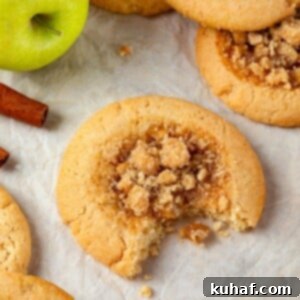
These homemade apple pie cookies are truly the epitome of cozy fall desserts, capturing the essence of the season in every bite! Each chewy and tender brown sugar cookie cradles a perfectly spiced, yet never overly sweet, homemade pie filling. This delightful core is then topped off with a wonderfully crunchy brown sugar crumble, creating a textural and flavor masterpiece. It’s everything you cherish about mini apple pies, transformed into an easy-to-handle cookie!
Beyond being a fantastic everyday treat, these apple pie cookies are the perfect addition to any holiday gathering or special event. They pair beautifully with other festive desserts: consider serving them alongside an easy pumpkin pie for Thanksgiving, or perhaps complementing some elegant Linzer cookies for Christmas. For those who love to go all out, these cookies are a wonderful accompaniment to a classic apple cobbler or a vibrant cherry pie, ensuring all your party dessert needs are deliciously met!
Essential Ingredients & Smart Substitutions for Apple Pie Cookies
Creating these incredible apple pie cookies requires a few key ingredients. Here’s a detailed look at what you’ll need and potential substitutions to ensure success:
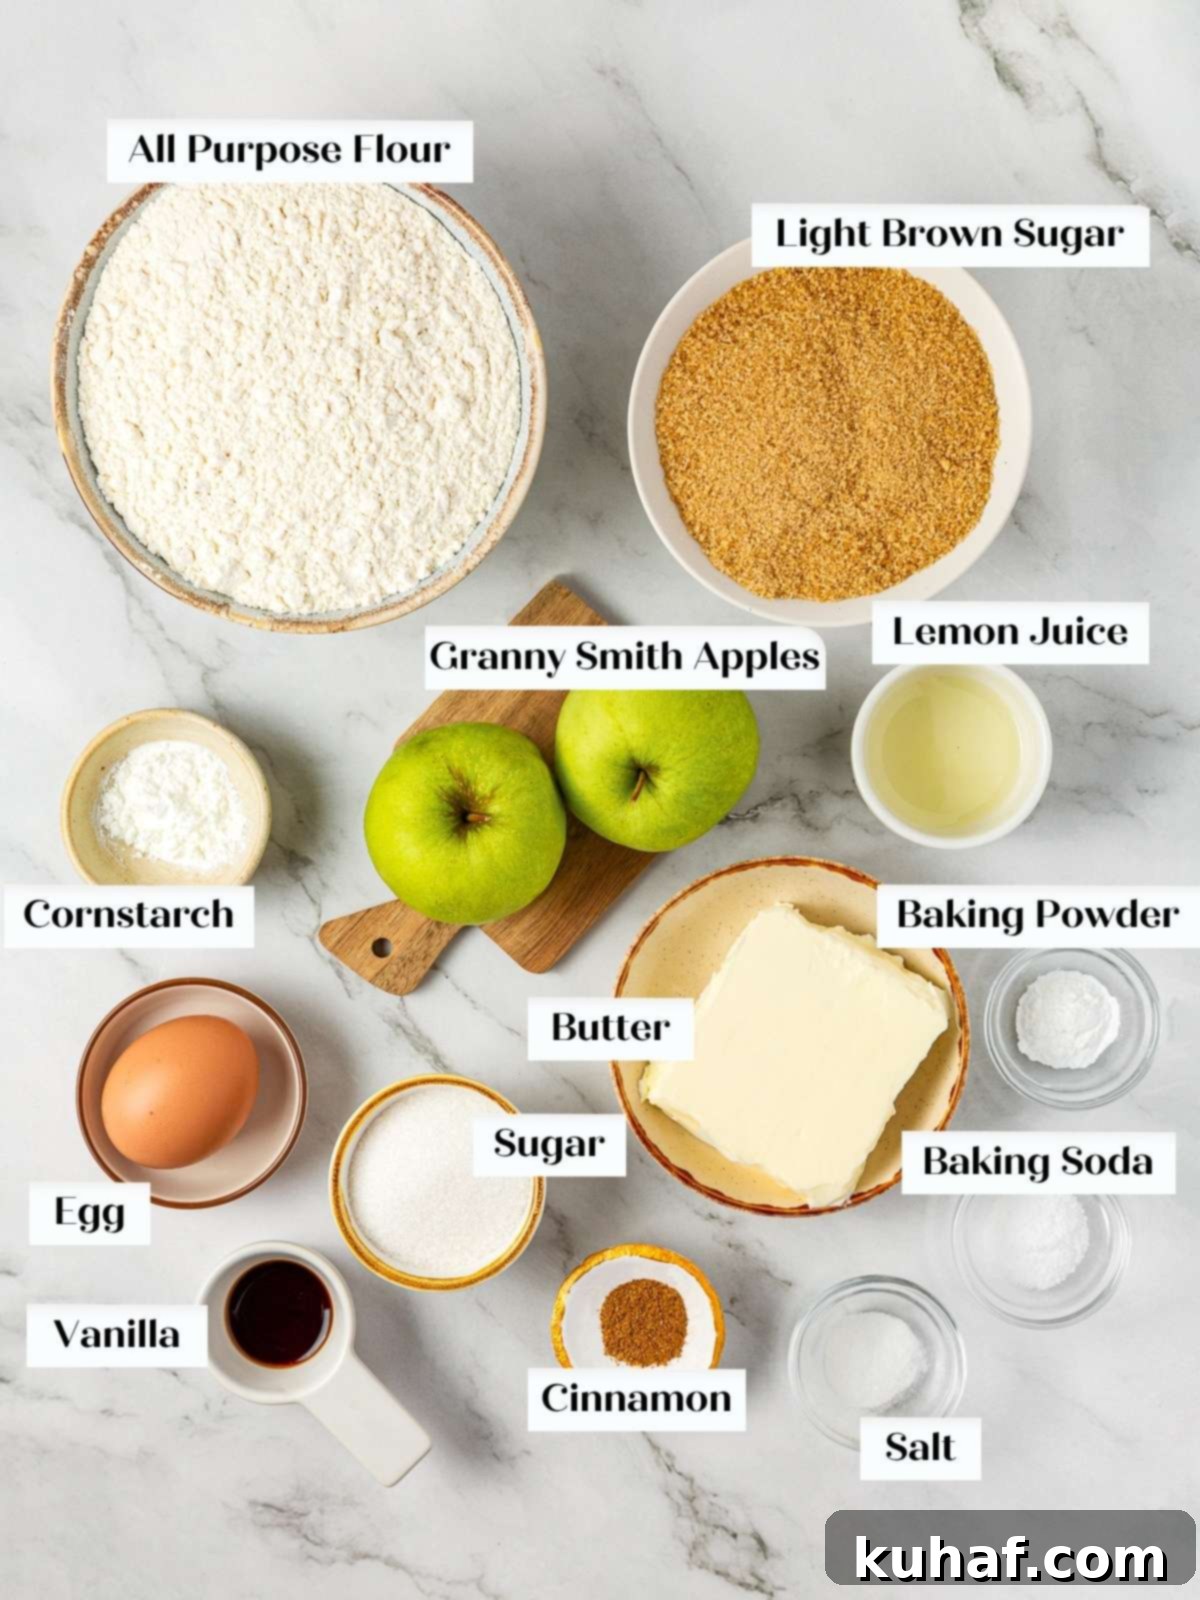
- Granny Smith Apples: These tart apples are truly the star of the filling. Their bright acidity cuts through the sweetness of the sugars, creating a balanced flavor profile, and their firm texture holds up beautifully during cooking, preventing a mushy filling. While you can certainly use other varieties like Honeycrisp, Fuji, or Braeburn, be aware that these are sweeter. If opting for a sweeter apple, I highly recommend reducing the amount of sugar in the filling to avoid an overly sweet result.
- Lemon Juice: Freshly squeezed lemon juice is always superior when it comes to citrus! It not only enhances the tartness of the apples but also prevents them from browning, keeping your filling vibrant and appealing. Bottled lemon juice can be used in a pinch, but fresh provides a much brighter flavor.
- Light Brown Sugar: This ingredient is a hero in our recipe, contributing a lovely molasses flavor and moistness to the filling, the cookie dough, and the crumble topping. If you only have dark brown sugar on hand, it makes an excellent substitute and will provide an even richer, deeper caramel note. For the apple filling specifically, granulated sugar can also be used if preferred, though brown sugar adds more depth.
- Cornstarch: Cornstarch is the crucial thickening agent for our homemade apple filling. It creates a beautifully glossy, thick sauce that encapsulates the apples perfectly. Remember to boil the filling for at least one minute after adding the cornstarch to fully activate its thickening properties. As an alternative, you can use tapioca flour (often called tapioca starch) in equal amounts for a similar effect, or a bit more all-purpose flour, which may yield a slightly less clear sauce.
- Unsalted Butter: Using unsalted butter gives you complete control over the total salt content in your baked goods, which is vital for balanced flavor. For the cookie dough, the butter should be soft enough to easily press your finger into it, but still cool to the touch and pliable. This specific temperature is key for creating a “no-chill” dough that yields chewy cookies without excessive spreading. If using salted butter, reduce the added kosher salt by ¼ teaspoon.
- Baking Powder & Baking Soda: This dynamic duo works together to give our cookies their perfect rise and chewy texture. Baking powder provides the initial lift, while baking soda reacts with the acidic components (like brown sugar and lemon juice in the filling) to further leaven the dough, resulting in a tender, well-structured cookie. Don’t skip either!
For a complete list of precise measurements and quantities, please refer to the detailed recipe card below.
Creative Variations for Your Apple Pie Cookies
While these apple pie cookies are incredible as they are, there’s always room for creativity in the kitchen! Here are some delightful variations to customize your next batch:
- Change the Fruit. Don’t limit yourself to apples! These versatile brown sugar cookies can be paired with a variety of delicious fruit fillings. Try swapping the apple filling for a vibrant homemade cherry pie filling, or use the luscious filling from our blueberry pie recipe or mixed berry pie. For a unique twist, you could even pre-cook the flavorful filling from this cranberry orange pear pie. Just remember to dice your chosen fruit small enough to fit neatly into the cookie indentations.
- Add a Decadent Drizzle. Elevate your baked cookies with a luxurious drizzle once they’ve cooled. A rich salted caramel sauce would perfectly complement the apple and brown sugar flavors. Alternatively, a salted maple caramel sauce could add an extra layer of fall warmth, or a smooth butterscotch sauce would provide a comforting, sweet finish. For a tangier option, a simple cream cheese glaze or a subtly spiced glaze (with a hint of cinnamon or nutmeg) would also be fantastic.
- Transform Them into Cookie Bars. If you’re serving a crowd or simply prefer bars, this recipe adapts beautifully! Press the cookie dough evenly into a 9×9 inch or 9×13 inch baking dish lined with parchment paper. Parbake the cookie base for about 10-15 minutes, or until it puffs up slightly and the surface looks matte. Then, spread your prepared apple filling generously over the parbaked cookie base, sprinkle the crumble topping evenly on top, and return to the oven. Bake until the filling is bubbly in the center and the crumble is golden brown. Cool completely before slicing into bars and serving.
- Experiment with Spices. Customize the aromatic profile of your cookies by changing up the spices. Instead of just cinnamon, try making the apple filling with our homemade apple pie spice mix for a more complex flavor, or even a unique speculoos spice mix for a European-inspired twist. You can also incorporate additional spices like nutmeg, allspice, or ginger directly into the cookie base or the streusel topping for an extra layer of warmth.
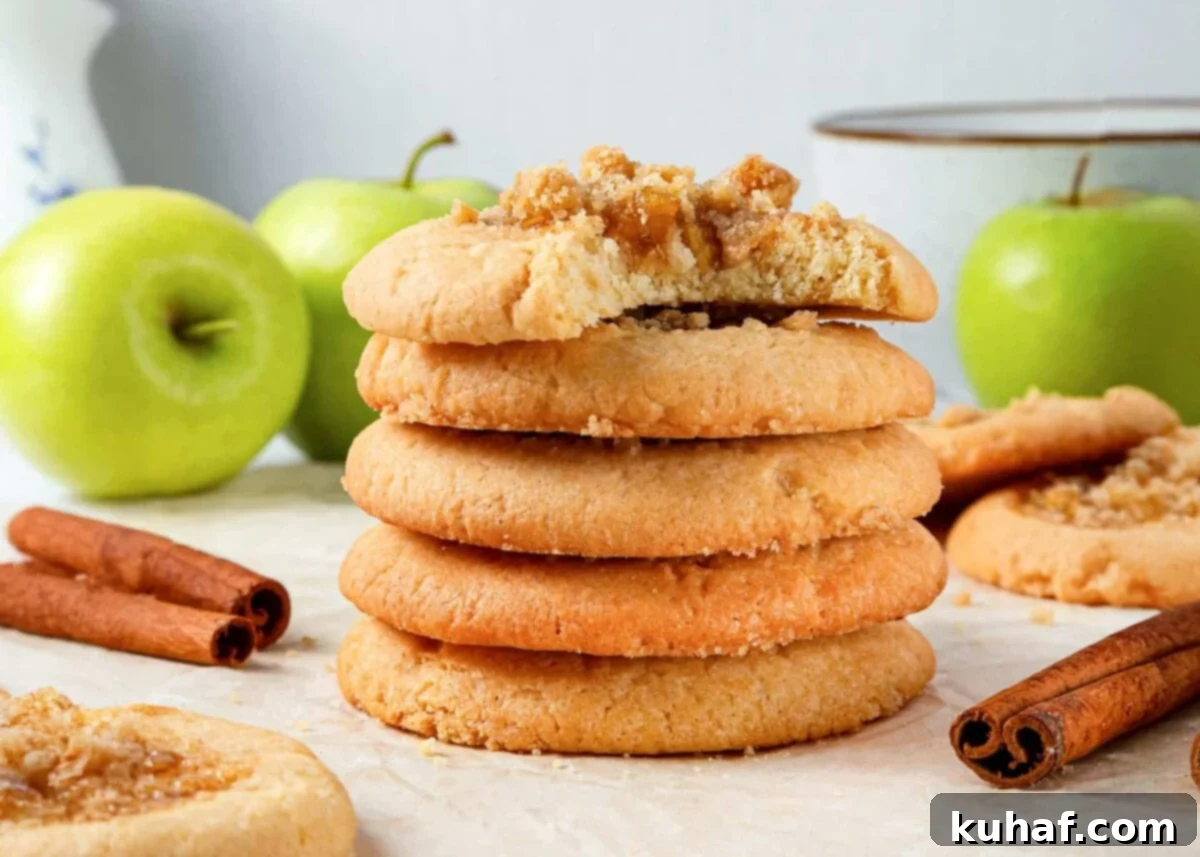
Professional Tips for Perfect Apple Pie Cookies Every Time
Achieving bakery-quality apple pie cookies is easier than you think with a few expert insights. Here are some professional tips to guide you to cookie perfection:
- Make a Large Batch of the Apple Filling! This is a game-changer for efficient baking and future deliciousness. When you’re already peeling and dicing apples, why not make extra? Grab an abundance of apples from the market and prepare a larger quantity of this versatile filling. You can store the excess filling in an airtight container in your refrigerator for up to a week, or freeze it for up to two months. Having pre-made filling on hand means you’re always ready to whip up more apple pie cookies, or use it for other treats like apple hand pies, a luscious caramel apple tart, or even as a topping for pancakes and oatmeal.
- For Optimal Freshness, Keep Components Separate Until Baking Day. While these cookies are wonderfully delicious for up to three days at room temperature, they are truly at their absolute best and most vibrant on the day they are made. If you plan to bake them ahead of time for an event or simply to spread out your baking process, I highly recommend preparing and storing the cookie dough, apple filling, and streusel topping separately. Keep the cookie dough chilled in the refrigerator, the cooled apple filling refrigerated or frozen, and the streusel topping in an airtight container at room temperature (or refrigerated if it contains very soft butter). Assemble and bake them fresh on the day you wish to serve them for the ultimate taste and texture experience.
- If Using an Electric Hand Mixer, Mind Your Butter Temperature. This cookie dough is designed to be thick and sturdy, especially when made with butter that is cool but pliable, which often works best with a stand mixer. If you’re using an electric hand mixer, you absolutely can achieve great results, but pay extra attention to your butter. I recommend ensuring your butter is softened a bit more than “cold but pliable” if you’re mixing by hand or with a hand mixer, as it will be very challenging to incorporate it when too cold. You can gently warm the butter further by holding your hands around the mixing bowl or letting it sit out for an extra 10-15 minutes. After mixing, if the dough feels too soft or sticky, scoop it into balls and freeze them briefly (about 15-20 minutes) before assembling and baking. This helps prevent excessive spreading in the oven, ensuring your cookies maintain their shape and delightful chewiness.
Step-by-Step Guide: How to Make Apple Pie Cookies
Follow these detailed instructions to create perfectly chewy and flavorful apple pie cookies every single time. More precise measurements and ingredient quantities are conveniently located in the recipe card below.
Part 1: Prepare the Homemade Apple Pie Filling
This sweet and spiced apple filling is the heart of your cookies, so take your time to get it just right!
Step 1: Prepare the Apples. Begin by peeling, coring, and carefully dicing your Granny Smith apples into small, uniform pieces, ideally about 1 cm (approximately 0.4 inches) square. This specific size is crucial for ensuring the apple chunks fit neatly and generously into the cookie indentations without causing the cookies to burst or become unwieldy. Uniformity also ensures even cooking.
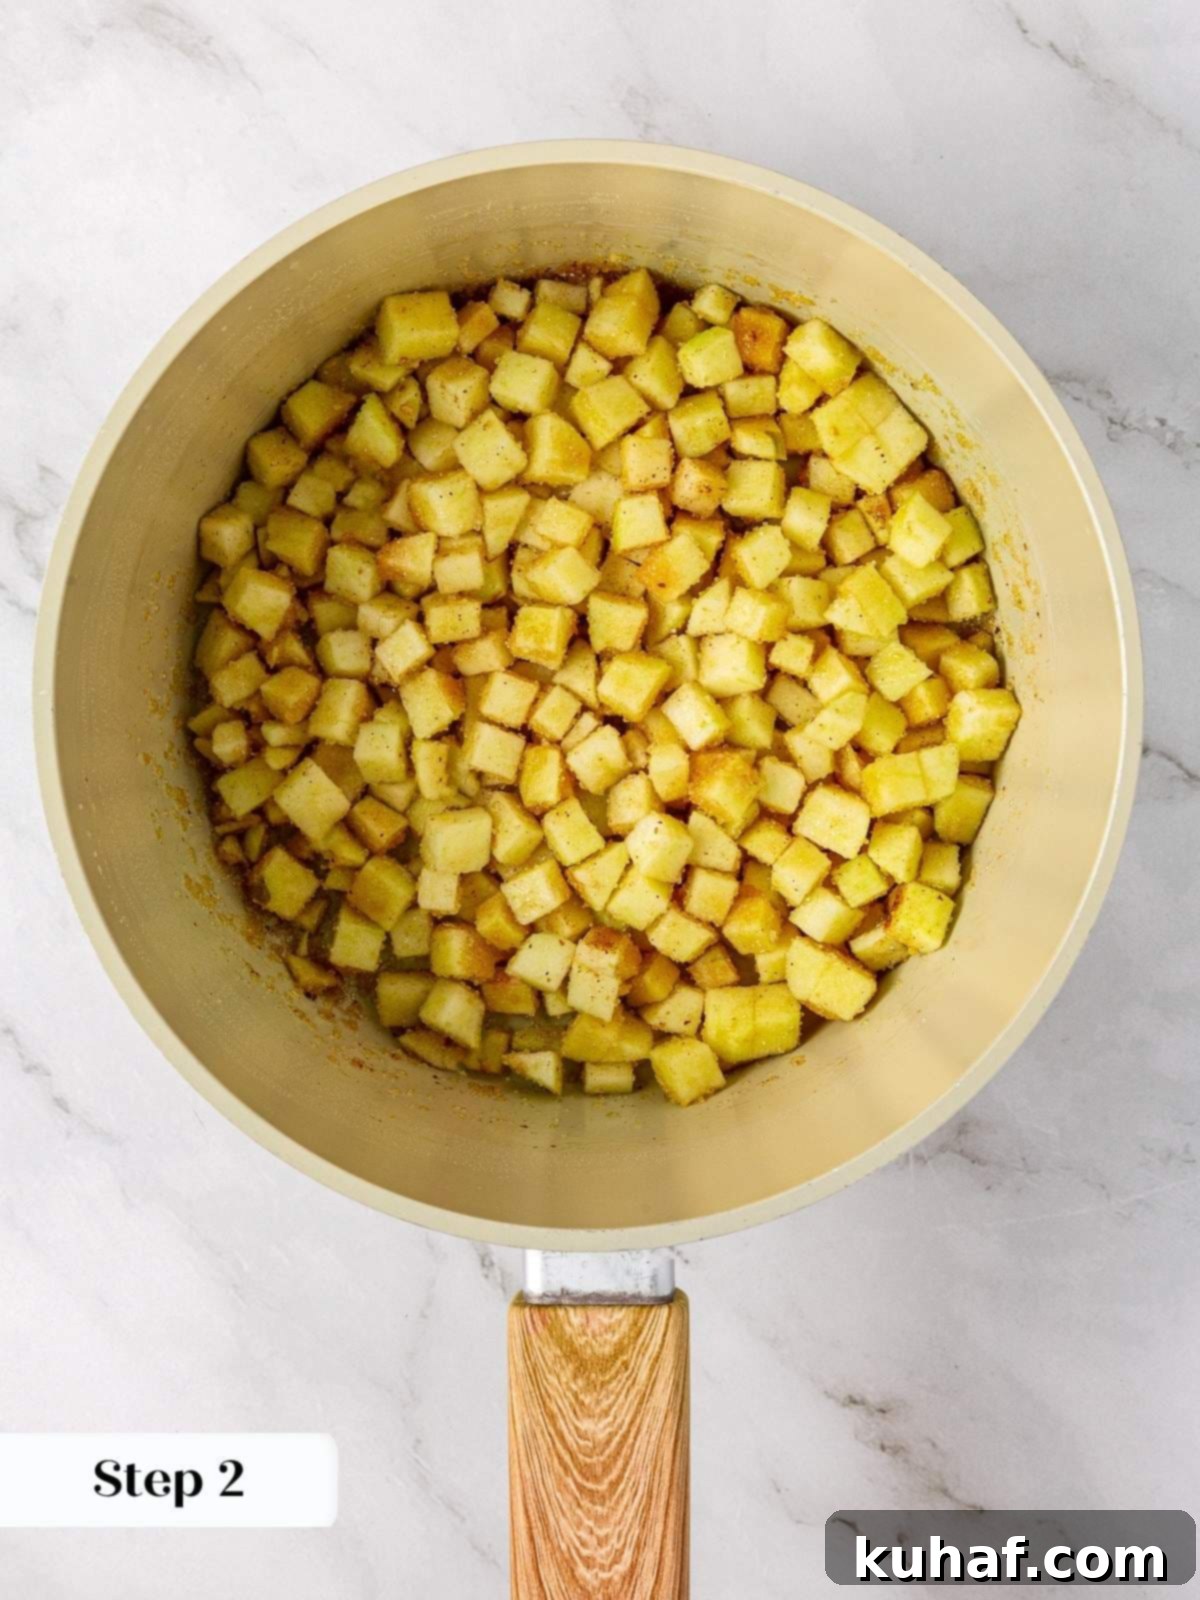


Step 2: Start the Cooking Process. In a medium saucepan, combine your diced apples, light brown sugar, fresh lemon juice, and ground cinnamon. Stir all the ingredients thoroughly to ensure the apples are evenly coated with the sugar and spices. Before proceeding, taste the mixture and adjust the sugar, lemon juice, or cinnamon to your preference; this is your chance to perfect the flavor balance (photo 1).
Step 3: Add the Thickener. Sprinkle the cornstarch over the apple mixture and stir again until all apples are uniformly coated. Place the saucepan on your stovetop and begin cooking over a low heat. Cook gently, stirring occasionally, until the apples just start to soften and begin to release their natural juices. This low heat start helps prevent the cornstarch from clumping.
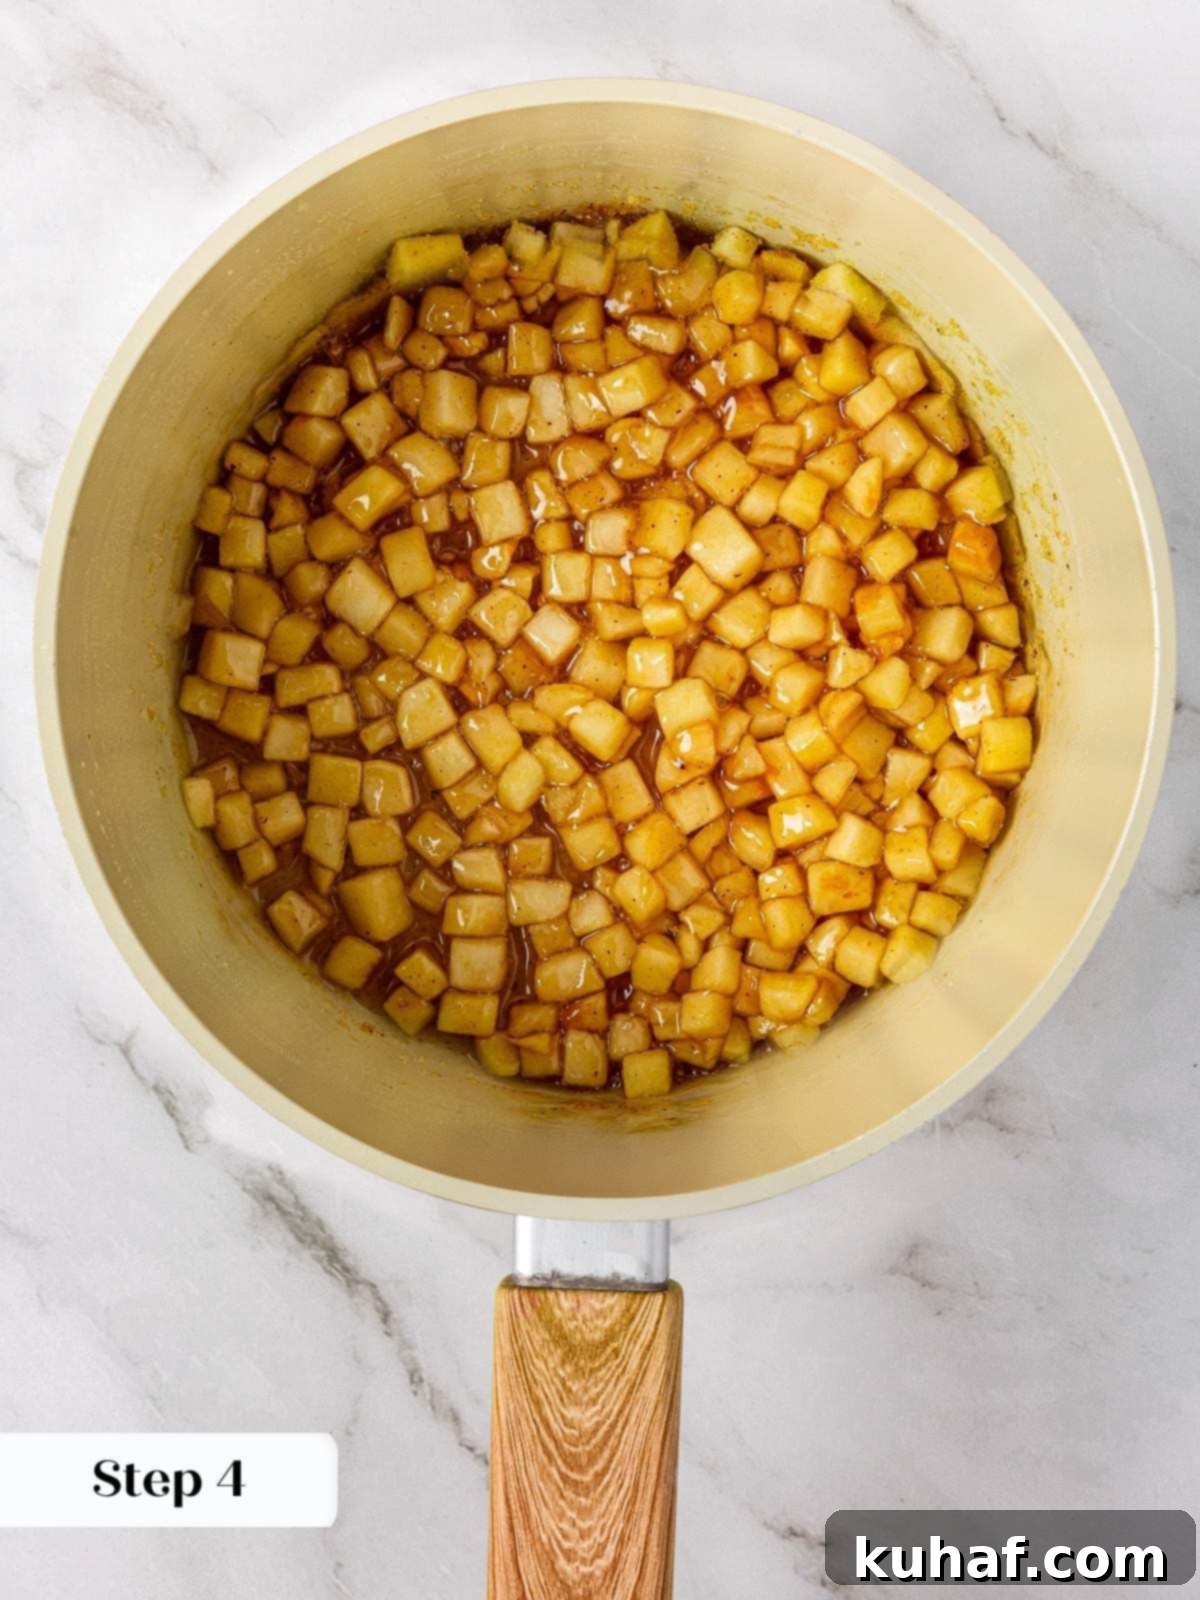
Step 4: Thicken the Filling. Once you observe the apples simmering in their own juices, increase the heat to medium. Bring the mixture to a gentle boil, stirring frequently to prevent sticking. Continue to cook over medium-low or medium heat, stirring consistently, until the apples have softened slightly to your desired tenderness, and the sauce has visibly thickened to a luscious, syrupy consistency. It should coat the back of a spoon (photo 2).
Step 5: Cool the Filling Rapidly. Promptly pour the hot apple filling mixture onto a large plate or a rimmed baking sheet. Spreading it out thinly increases the surface area, which is key to cooling the filling much more quickly. Refrigerate the spread-out filling until it is completely cool to the touch. This step is essential to prevent the filling from melting your cookie dough prematurely during assembly.
Part 2: Make the Delicious Brown Sugar Cookie Dough
This no-chill cookie dough is rich, chewy, and the perfect vessel for your apple filling.
Step 6: Prepare Your Workspace. Preheat your oven to 350°F (175°C) for conventional ovens without a fan. If you have a convection oven, you might want to reduce the temperature slightly to 325°F (160°C). Line two large baking sheets with parchment paper; this prevents sticking and makes cleanup a breeze. Set them aside.
Step 7: Whisk the Dry Ingredients. In a medium-sized mixing bowl, combine the all-purpose flour, baking powder, baking soda, and kosher salt. Use a whisk to thoroughly blend these dry ingredients together, ensuring they are evenly distributed. This step is important for consistent leavening in your cookies. Set this bowl aside (photo 3).
Step 8: Soften the Butter (If Needed). If your unsalted butter is still too firm from the refrigerator, place it in the bowl of a stand mixer fitted with the paddle attachment. Mix on low speed for a minute or two, allowing the friction to gently soften it.
I often find that just the ambient warmth of my hands placed on the outside of the mixing bowl, combined with the gentle friction of the paddle attachment, is enough to bring the butter to the perfect pliable-yet-still-cool consistency.
Step 9: Cream Butter and Sugars. To the softened butter in the stand mixer, add the granulated sugar and the light brown sugar. Mix on medium-low speed until the mixture transforms into a smooth, creamy paste. Be sure to stop the mixer and scrape down the sides of the bowl and the paddle attachment thoroughly. Mix again for another minute to ensure everything is perfectly combined and aerated (photo 4).
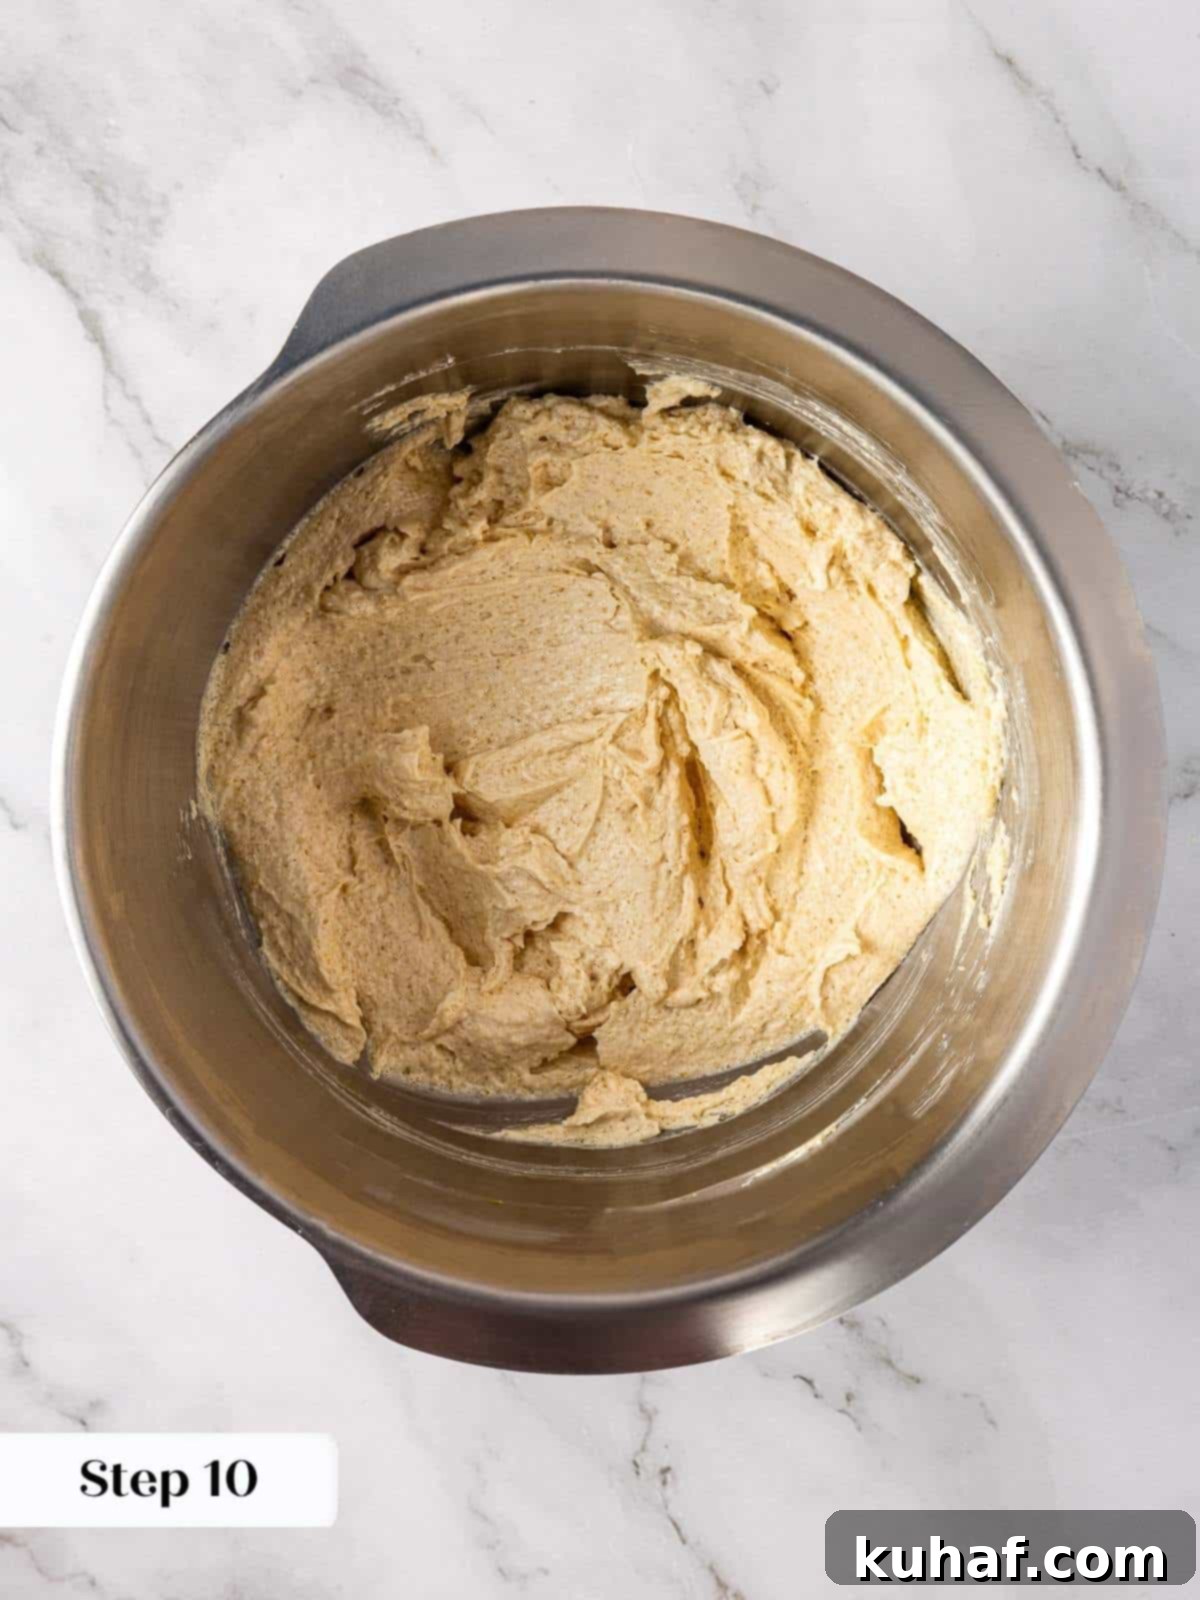
Step 10: Incorporate Wet Ingredients. Add the large egg and the vanilla extract to the creamed butter and sugar mixture. Mix on medium speed until the mixture becomes visibly lighter in color and fluffy. This indicates proper aeration (photo 5).
Since we are using cold (or pliable but cool) butter and typically a cold egg, it’s a good idea to scrape down the bowl several times during this step. This ensures that the egg and vanilla are thoroughly and evenly incorporated into the mixture.
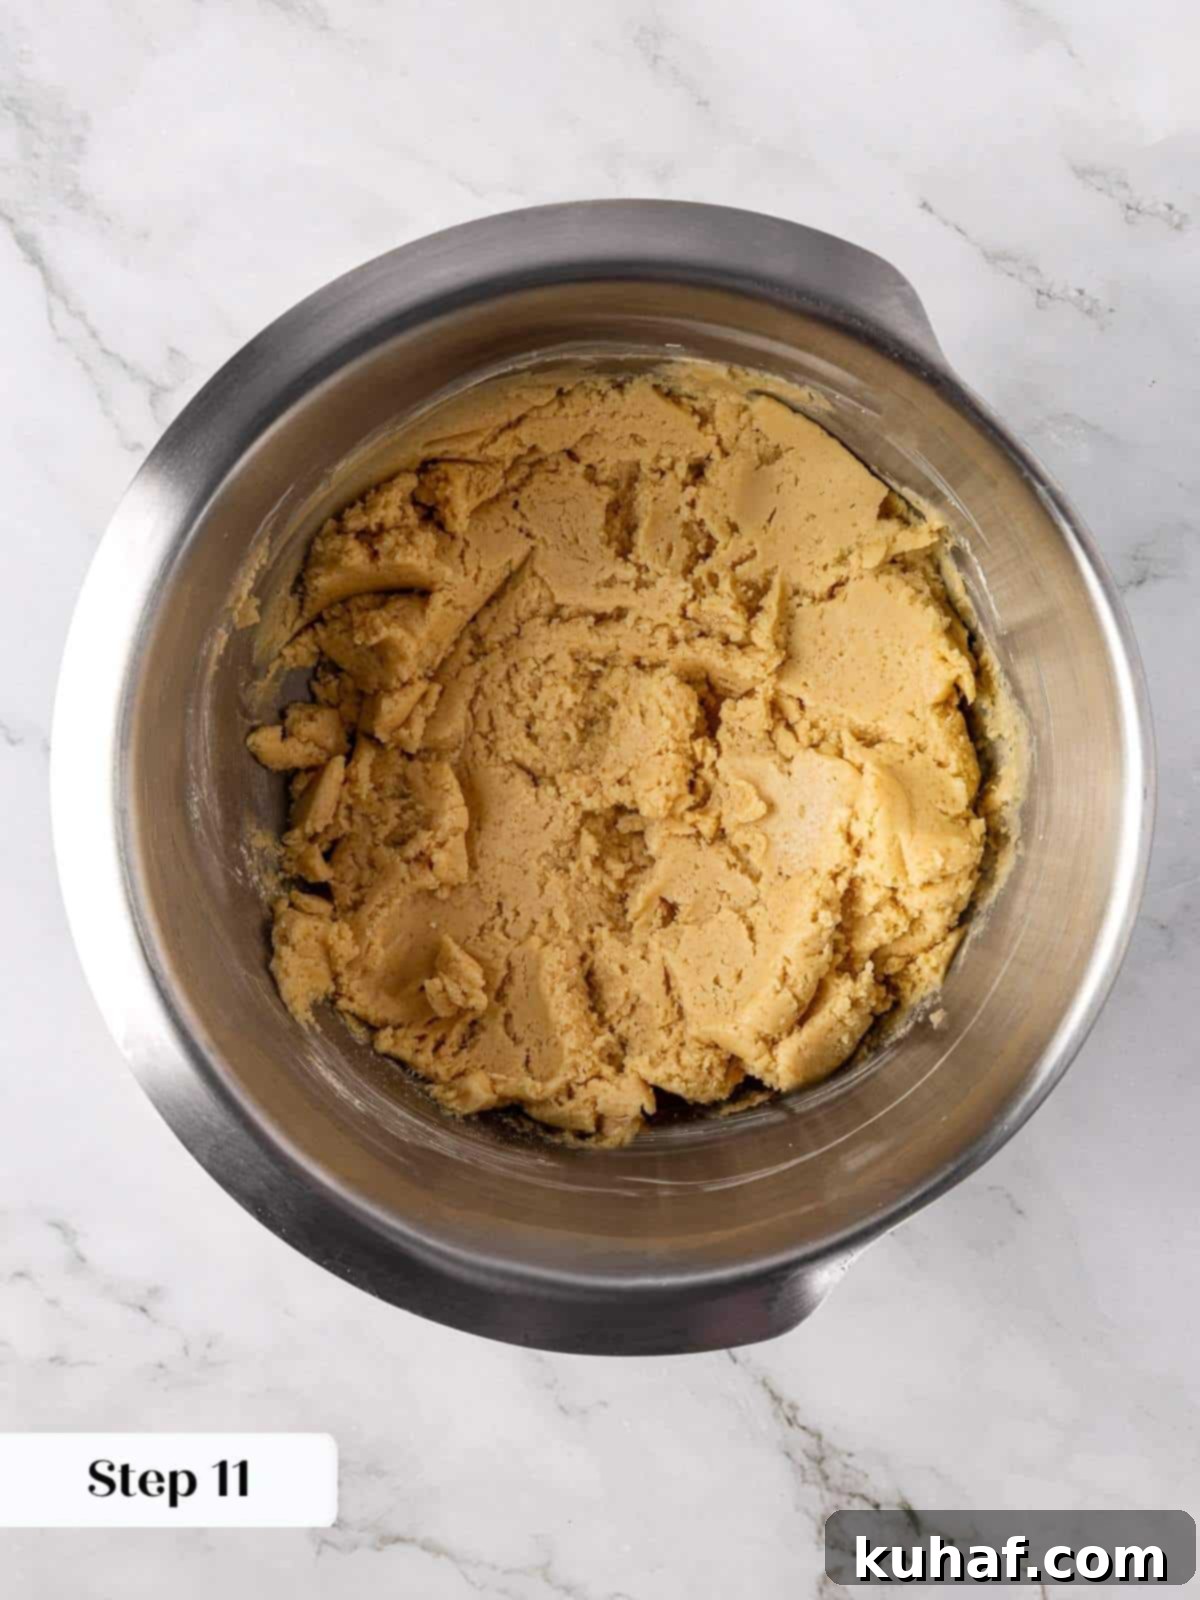
Step 11: Gently Mix in the Flour. Reduce your mixer speed to low. Begin to gradually add the whisked flour mixture to the wet ingredients, one large scoop at a time. I find it easiest to use a spatula for this. Wait until each scoop of flour is almost fully incorporated before adding the next. Overmixing at this stage can develop gluten, leading to tougher cookies (photo 6).
It’s crucial not to overwhelm the batter, as cookie doughs made with cold butter, similar to my thick chocolate chip cookies, do not incorporate flour as readily as those made with softened or room-temperature butter. Patience here ensures a tender cookie.
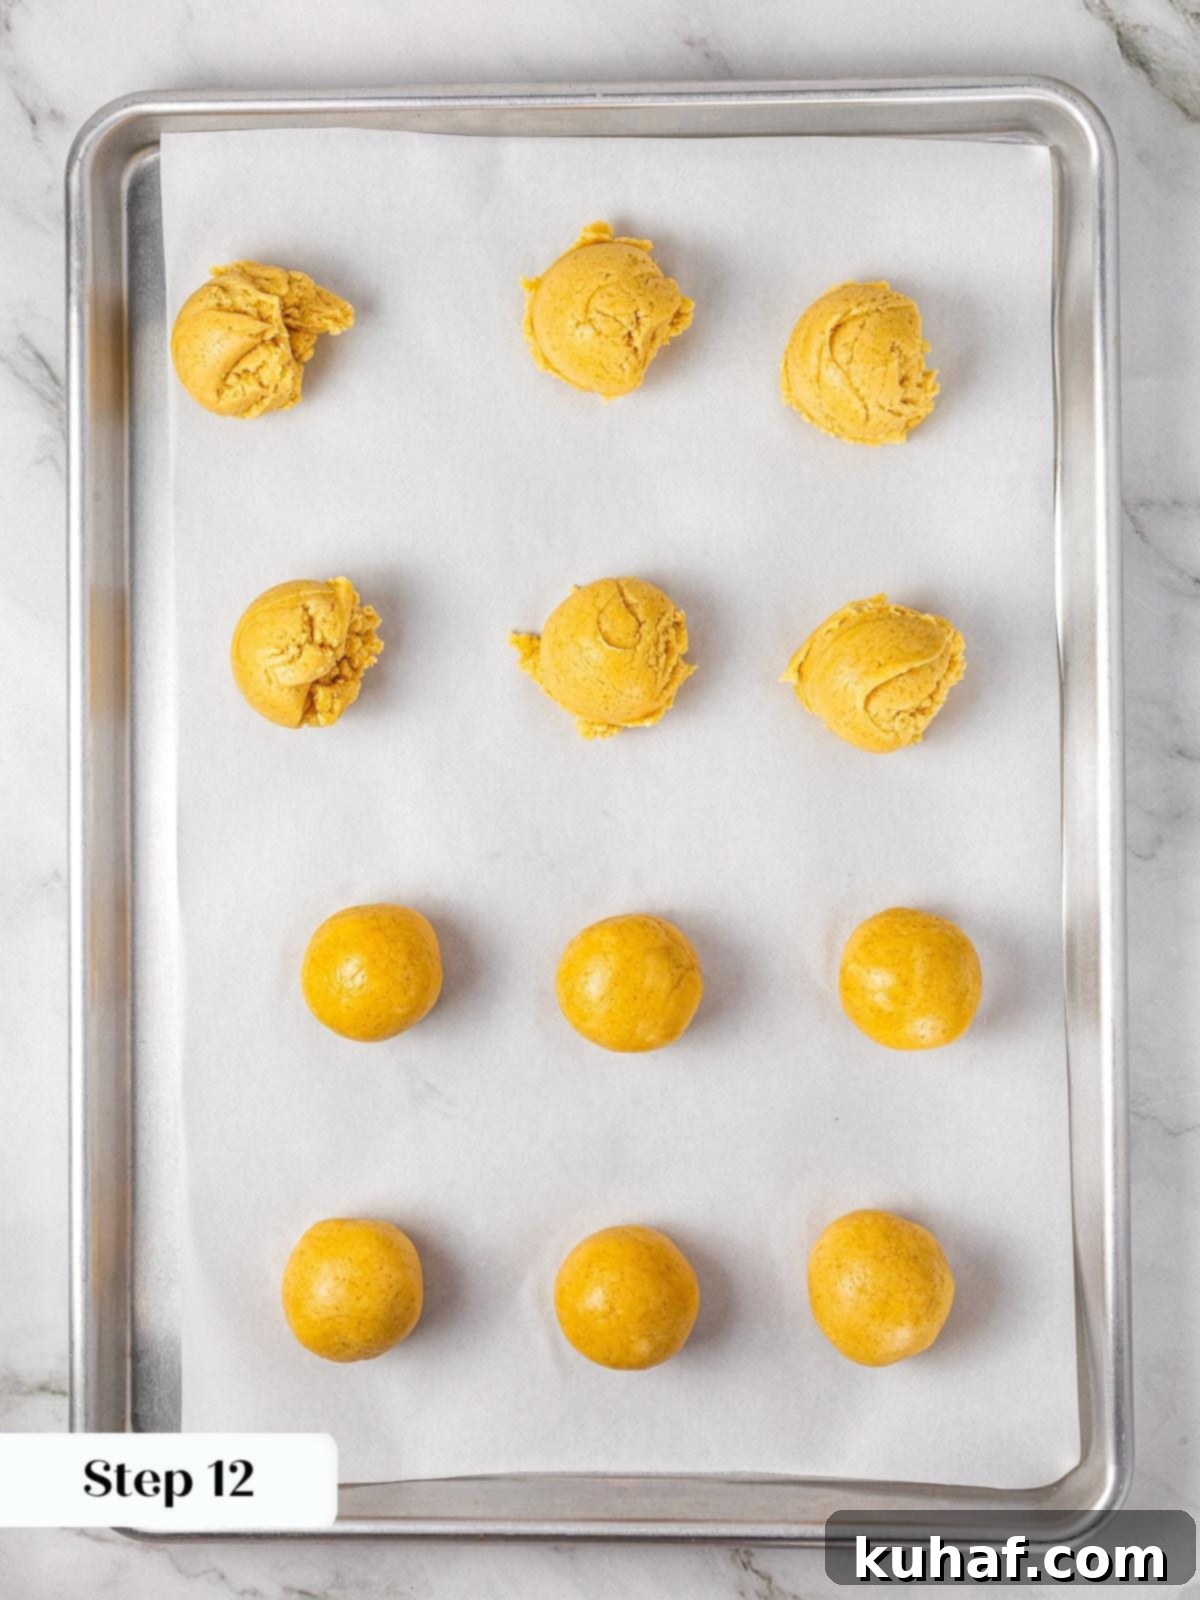
Step 12: Scoop and Create Indentations. Using a ¼ cup cookie scoop (or approximately 2 tablespoons of dough), scoop the cookie dough and place the balls onto your parchment-lined baking sheets, ensuring they are spaced about 2 inches apart. Gently roll each scooped portion into a smooth ball (photo 7). Then, use the back of a round tablespoon measure, a smaller cookie scoop, or even a melon baller (a charming throwback!) to press a deep, wide indentation into the center of each cookie dough ball.
Important: Be sure to leave at least ¼ inch of dough at the bottom of the indentation. If the base is too thin, the delicious apple filling will likely fall through or leak out during baking, leading to a less-than-perfect cookie!
Step 13: Chill the Dough (Optional but Recommended). While this is a no-chill recipe, briefly chilling the scooped and indented dough balls in the refrigerator for 10-15 minutes while you prepare the crumble can help them hold their shape better during baking, especially if your kitchen is warm or your butter softened a bit too much. Remove them from the fridge just before you’re ready to fill and bake.
Part 3: Make the Crunchy Crumble Topping
This simple topping adds a delightful texture and extra layer of sweetness.
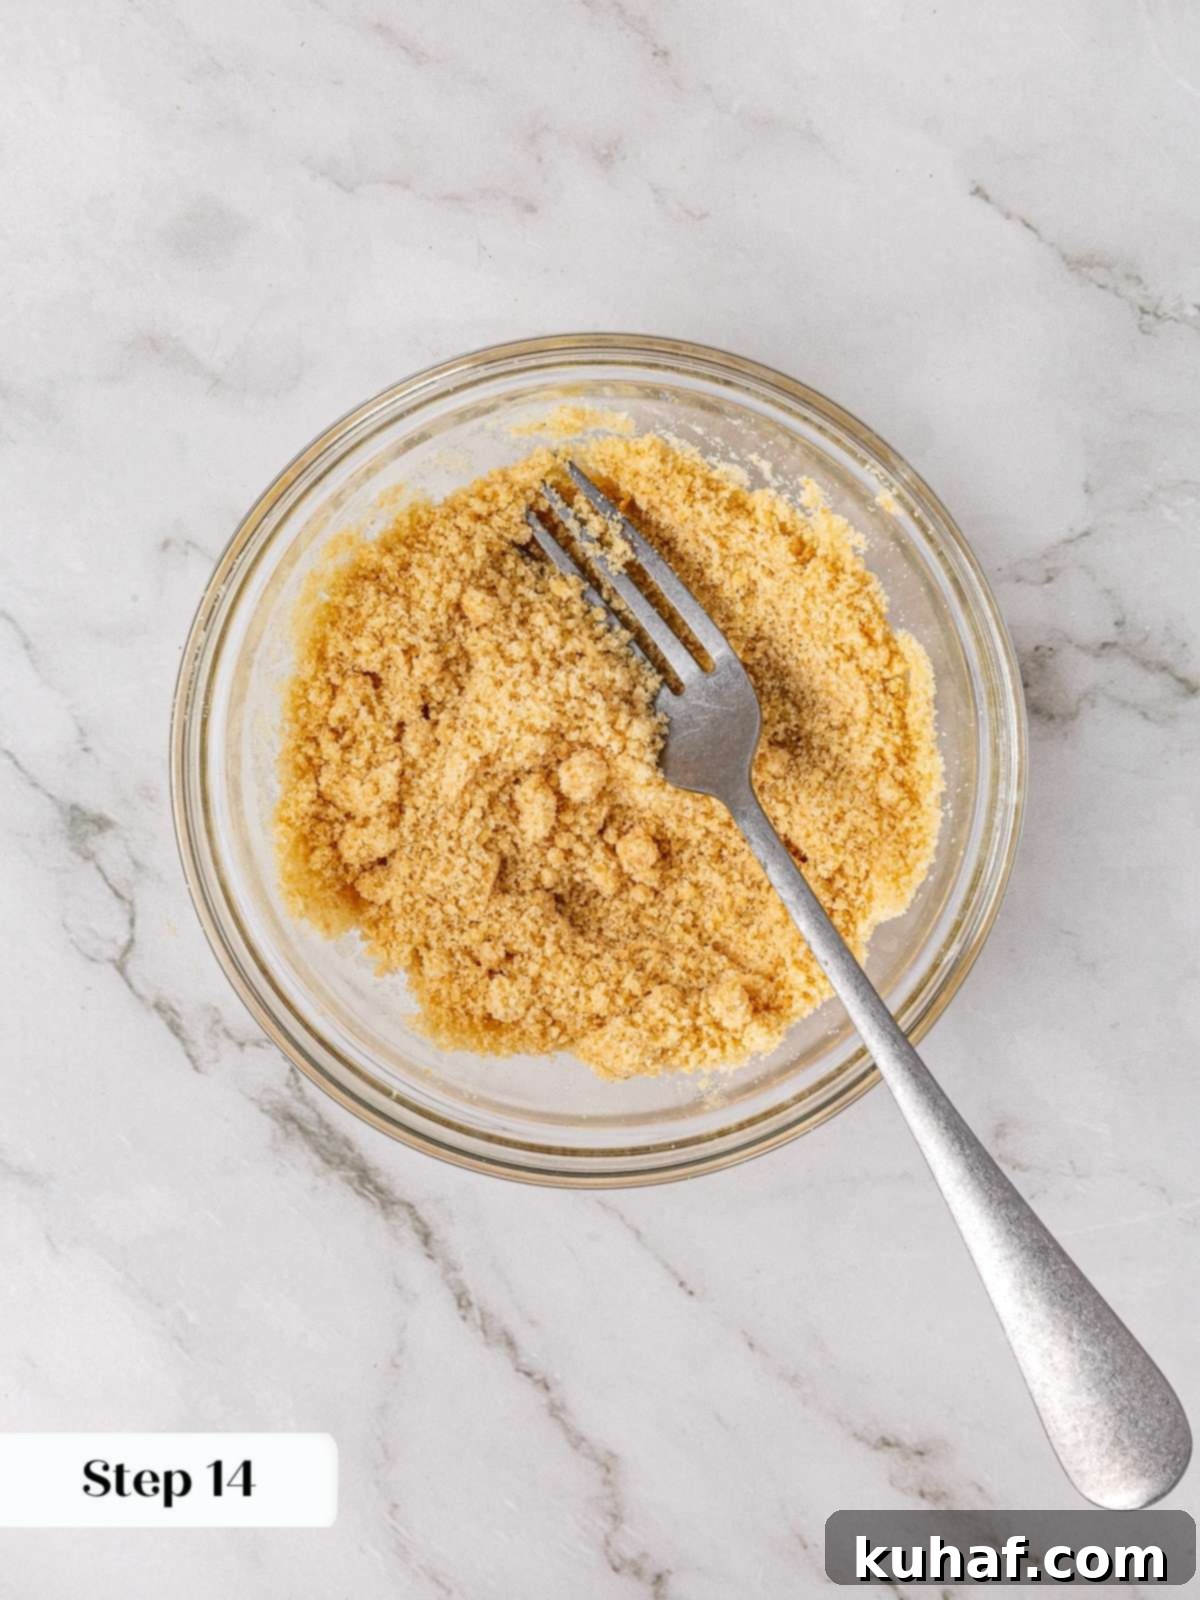
Step 14: Combine Crumble Ingredients. In a small bowl, combine the all-purpose flour, light brown sugar, vanilla extract, and melted unsalted butter. Use a fork to stir and mix all the ingredients together until they are equally moistened and form a coarse, sandy mixture. When you squeeze a handful of the mixture in your hand, it should hold together briefly before breaking apart into crumbles (photo 8).
If the mixture appears too dry and isn’t forming crumbles, you can add a tiny bit more melted butter, one teaspoon at a time. Be cautious not to add too much, as an overly moist crumble can become greasy and spread out excessively during baking instead of holding its delightful crumbly texture.
Part 4: Assemble & Bake Your Apple Pie Cookies
The moment of truth! Bringing all the components together for a truly magical cookie.
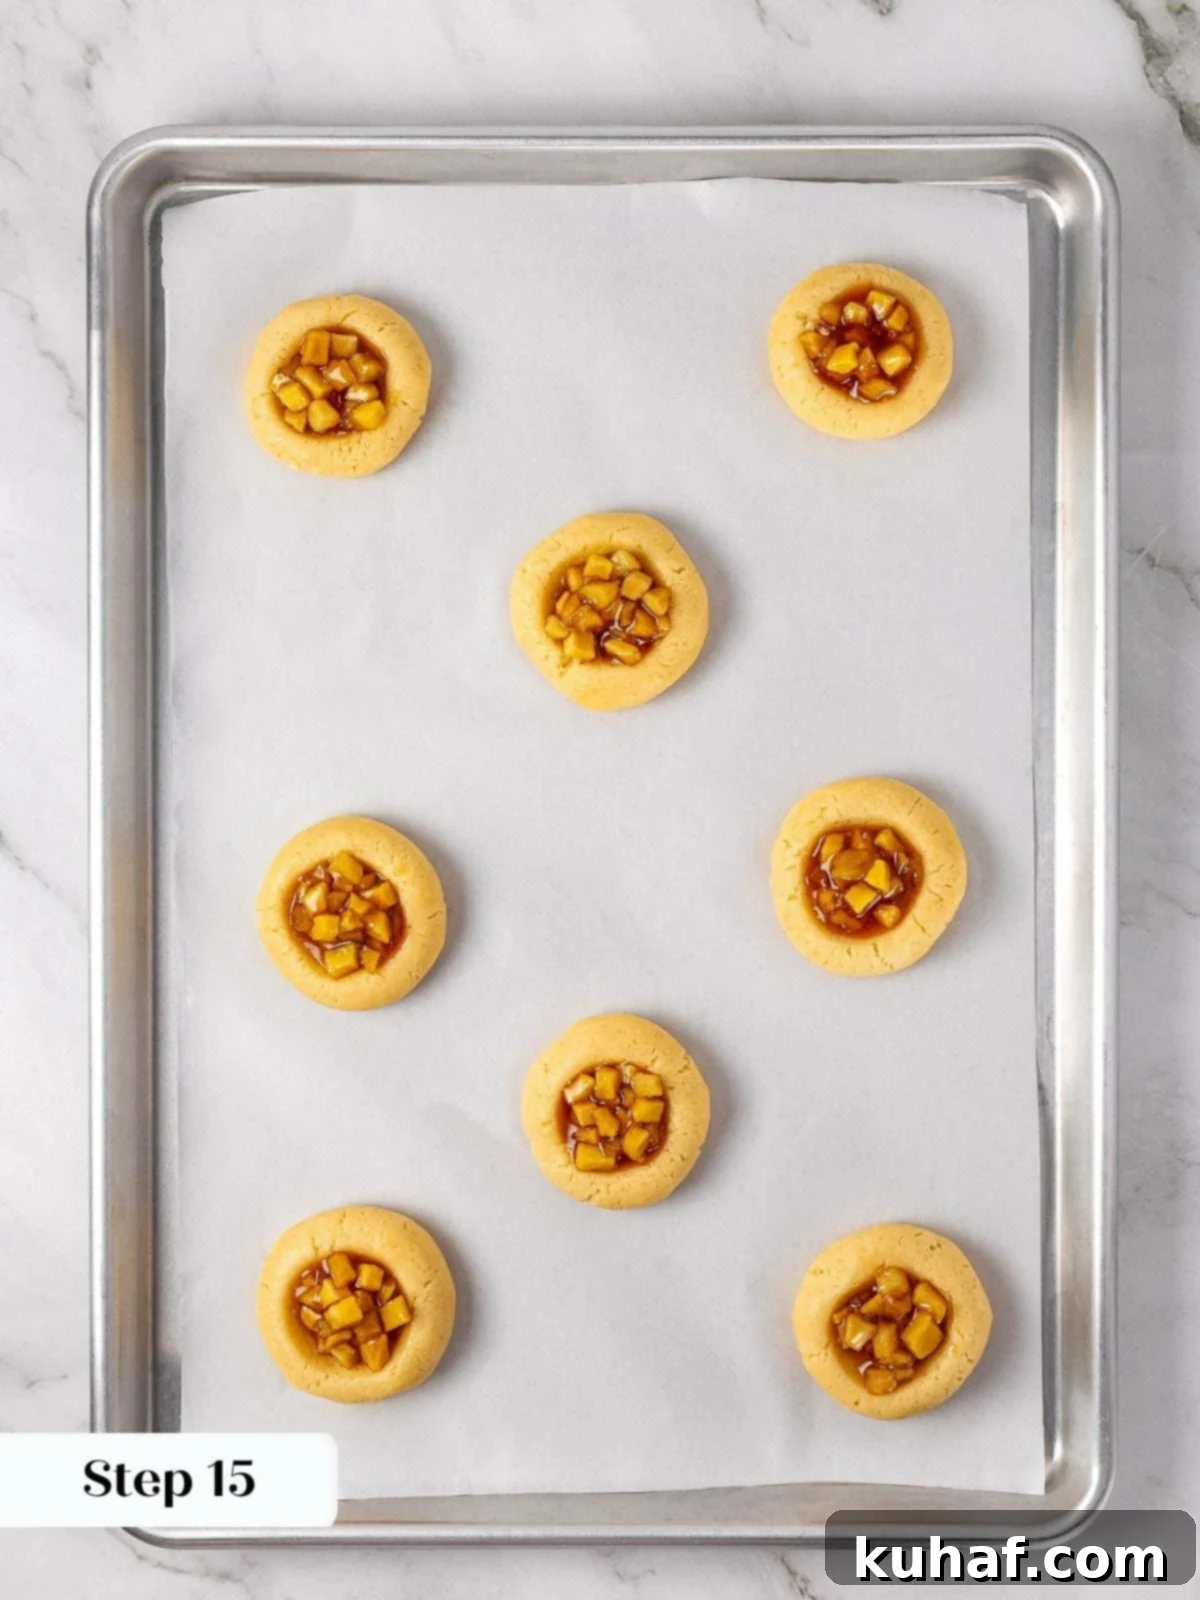


Step 15: Fill Each Cookie. Carefully spoon the cooled apple pie filling into the center indentation of each cookie dough ball. Aim to scoop mostly solid apple pieces, adding just enough of the luscious sauce to moisten them without overfilling. Overfilling with too much liquid can cause the cookies to become soggy or the filling to spill out during baking (photo 9).
Step 16: Add the Crumble Topping. Generously sprinkle a good portion of your prepared brown sugar crumble over the apple filling in each cookie. Gently press the crumble into the filling and dough slightly. The cookie dough should still be soft enough to allow for easy pressing, helping the crumble adhere during baking (photo 10).
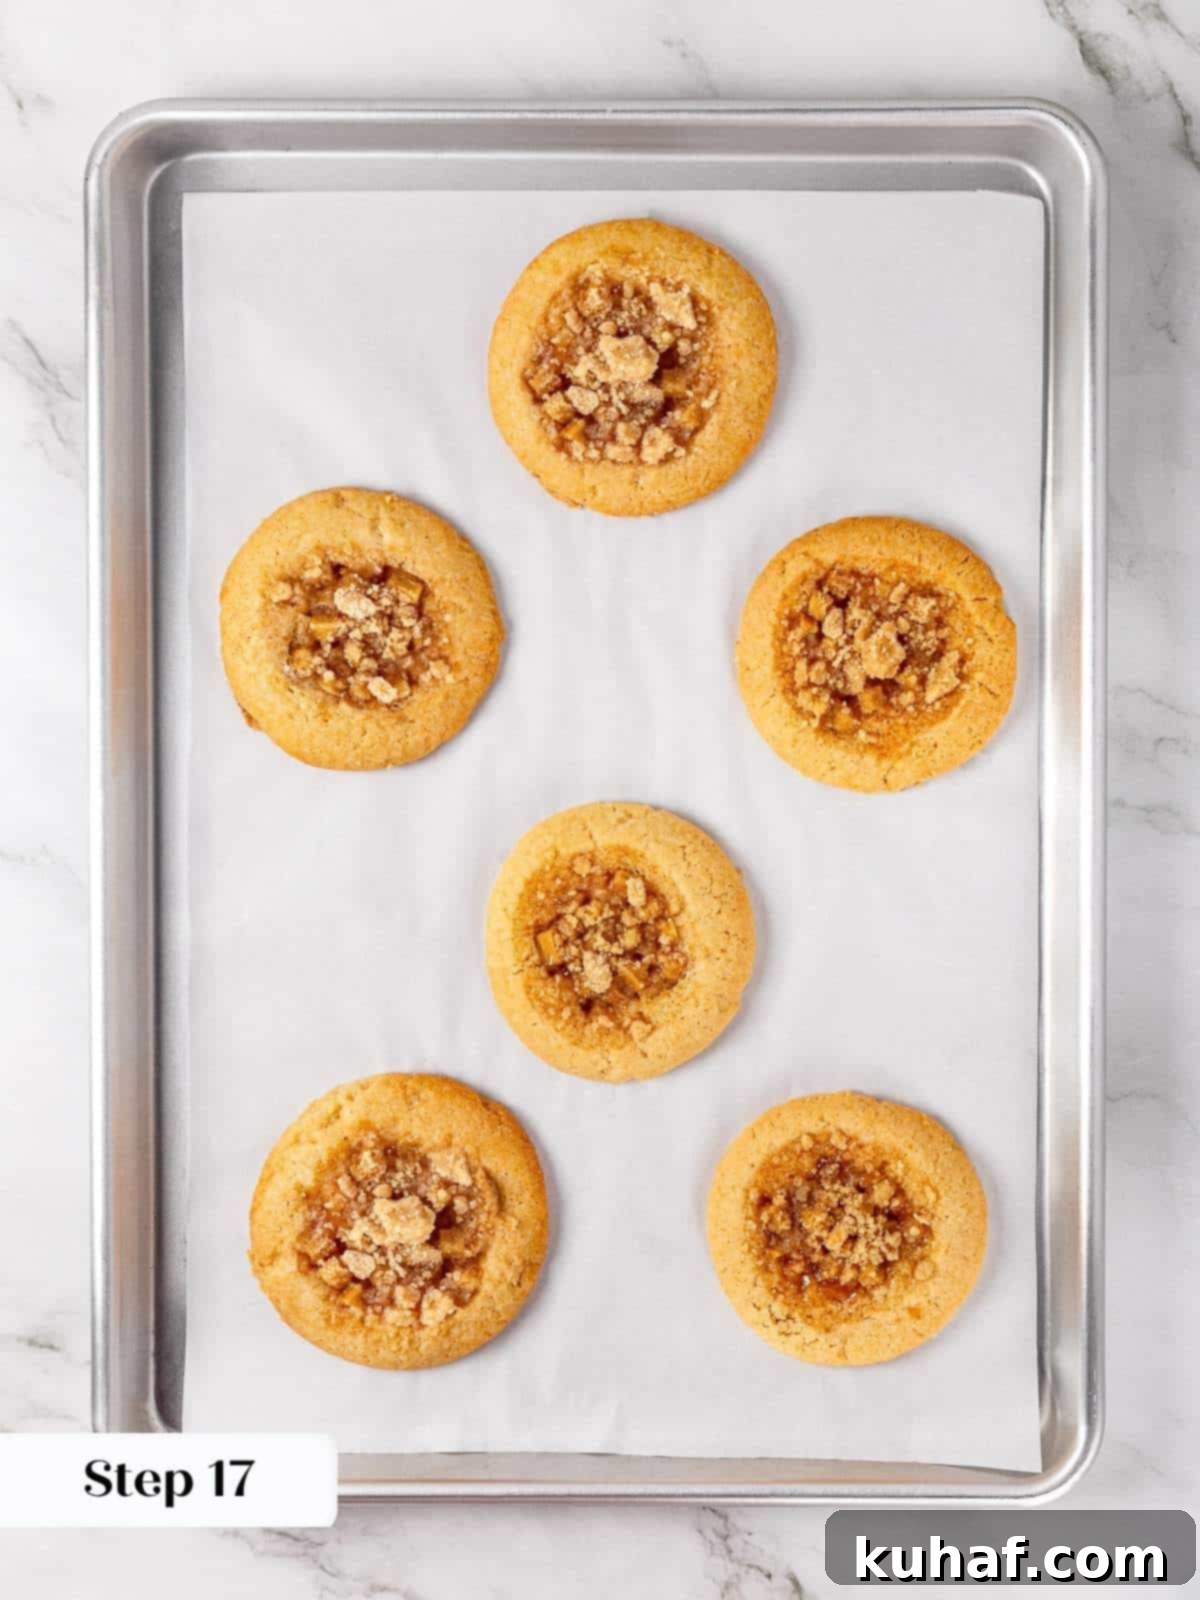
Step 17: Bake to Golden Perfection. Place your baking sheets with the assembled cookies into the preheated oven. Bake for approximately 20 minutes, or until the edges of the cookies turn a beautiful golden brown. The centers should still look slightly soft but set. Keep in mind that the warmer the cookie dough is when it goes into the oven, the more the cookies might spread. A slightly cooler dough will result in thicker cookies (photo 11).
Step 18: Cool and Enjoy. Once baked, remove the cookies from the oven and allow them to cool on the baking sheet for at least 10 minutes. This crucial resting period allows the cookies to firm up and the filling to set properly, preventing them from breaking when moved. After 10 minutes, carefully transfer the apple pie cookies to a wire rack to cool completely. This ensures even cooling and prevents the bottoms from becoming soggy (photo 12). Serve and savor!
Chef Lindsey’s Expert Recipe Tip for No-Chill Cookies
Achieving that perfect “no-chill” cookie dough texture hinges on pliable yet cold butter. The ideal consistency for your butter should be soft enough that you can easily press your finger into it, but it should still feel noticeably cold to the touch. My personal method is to cut up the butter and scale it first, then let it sit out to soften naturally while I measure out all the other ingredients. I often finish the softening process directly in the stand mixer using the paddle attachment; the friction helps. For a quicker warm-up, you can gently cup your hands around the outside of the mixing bowl. If your butter becomes too soft, your cookies will likely spread too much in the oven, and you’ll then need to chill the dough to get those beautifully thick cookies we’re aiming for.
Apple Pie Cookie Recipe FAQs
To maintain their freshness and delicious texture, store your baked apple pie cookies in an airtight container at room temperature for up to three days. For longer storage, you can freeze the baked cookies for up to two months; simply thaw them at room temperature or gently warm them for a few minutes in a low oven. It’s important to note that storing these cookies in the refrigerator is generally not recommended, as the moisture can make them soft, potentially compromising their texture and making them harder to serve. If you want to prepare ahead, you can freeze the raw cookie dough balls for up to three months, and the prepared apple filling can be stored in the refrigerator for up to 1 week or frozen for up to 2 months.
For these apple pie cookies, Granny Smith apples are unequivocally the best choice. Their distinct tartness provides a perfect counterpoint to the sweetness of the cookie and crumble, preventing the overall dessert from being overly sugary. Furthermore, their firm texture ensures that the apple pieces hold their shape beautifully through the cooking and baking process, offering a pleasant bite within the soft cookie. If you prefer to use a different baking apple, such as Honeycrisp, Fuji, Gala, or Braeburn, I strongly recommend reducing the amount of sugar specified in the filling recipe, as these varieties are naturally sweeter. You may need to taste and adjust accordingly.
While homemade filling offers the best flavor and texture control, you can use store-bought canned apple pie filling for convenience. However, it’s crucial to make a modification: you must slice the apples within the canned filling into much smaller pieces, ideally about 1 cm squares, similar to our homemade recipe. Canned filling typically contains larger slices that would be too bulky for the cookie indentations. Be aware that canned filling can also be much sweeter than homemade, so you might consider rinsing the apples slightly or adjusting the sweetness of your cookie dough if you find it too sweet. Alternatively, you could try another excellent apple pie filling recipe or even an easy apple compote, making sure to reduce the sugar and cut the apples into small, cookie-friendly pieces.
These apple pie cookies are absolutely delightful served at room temperature, allowing their flavors to fully develop. For an extra touch of warmth and comfort, you can gently warm them in the microwave for a few seconds or in a low oven. They are heavenly when accompanied by a delicate side of crème anglaise, a smooth custard sauce that adds an elegant richness. A classic pairing is a scoop of creamy vanilla bean ice cream, which melts slightly into the warm cookie for an irresistible treat. Personally, I also think they would pair beautifully with my indulgent caramel pudding, creating a truly memorable dessert experience.
Recommended Cookie Recipes to Try Next
Cookie Recipes
Old Fashioned Date Pinwheels
Cookie Recipes
Almond Crescent Cookies
Cookie Recipes
Browned Butter Cardamom Snickerdoodles
Cookie Recipes
Chai Sugar Cookies
If you tried this fantastic apple pie cookie recipe and absolutely loved it, please take a moment to leave a 🌟 star rating and share your thoughts in the comments below. Your feedback truly makes my day and helps other bakers discover these delightful treats!
Apple Pie Cookies
Saved
Pin Recipe
Comment
Print Recipe
Ingredients
For the Filling:
- 1 ¼ cups apple peeled & diced into small pieces, ~1 Granny Smith apple
- ¼ cup light brown sugar not packed
- 1 ½ teaspoons fresh lemon juice
- ¼ teaspoon ground cinnamon
- 1 teaspoon cornstarch
For the cookies:
- 2 ½ cups all-purpose flour fluffed, scooped & leveled
- ¾ teaspoon baking powder
- ¼ teaspoon baking soda
- 1 teaspoon kosher salt
- ¼ cup granulated sugar
- ¾ cup light brown sugar
- ¾ cup unsalted butter cold but pliable
- 1 large egg
- 1 teaspoon vanilla extract
For the crumble:
- 1 ½ tablespoons unsalted butter melted
- ¼ teaspoon vanilla extract
- ¼ cup light brown sugar packed
- ¼ cup all-purpose flour
Instructions
Prepare the apple pie filling:
-
Peel, core, and cut the apples into small, uniform pieces, about 1 cm square, to ensure they fit well into the cookies.
-
Combine the diced apples, light brown sugar, fresh lemon juice, and ground cinnamon in a medium saucepan. Stir well to coat the apples evenly. Taste the mixture and adjust sweetness or spice levels if desired.
-
Add the cornstarch and stir to coat all apples evenly. Place the saucepan over low heat and gently cook the apples, stirring occasionally, until they start to release their natural juices.
-
Once the apples are cooking in their own sauce, increase the heat to medium and bring the mixture to a boil. Continue to cook over medium-low or medium heat, stirring frequently, until the apples are slightly softened and the sauce has thickened to a luscious consistency.
-
Pour the hot apple filling onto a large plate or a rimmed baking sheet and spread it out thinly. Refrigerate until the filling is completely cool to the touch, ensuring it doesn’t melt the cookie dough.
Make the cookie dough:
-
Preheat your oven to 350°F (175°C) for conventional settings. Line two baking sheets with parchment paper and set them aside.
-
In a medium bowl, whisk together the all-purpose flour, baking powder, baking soda, and kosher salt until well combined. Set aside.
-
In the bowl of a stand mixer fitted with the paddle attachment, continue to soften the unsalted butter if necessary, until it’s pliable but still cool.
-
Add the granulated sugar and light brown sugar to the butter in the stand mixer. Mix on medium-low speed until a smooth, creamy paste forms. Scrape down the sides of the bowl and the paddle, then mix again for another minute.
-
Add the large egg and vanilla extract. Mix on medium speed until the mixture is lightened in color and fluffy. Remember to scrape down the bowl several times for even incorporation.
-
Reduce the mixer speed to low. Slowly add the flour mixture, one large scoop at a time, allowing each addition to almost fully incorporate before adding the next. Avoid overmixing.
-
Scoop the dough using a ¼ cup cookie scoop and place onto parchment-lined baking sheets, about 2 inches apart. Roll each scoop into a ball. Use the back of a round tablespoon or a smaller cookie scoop to press a deep indentation into the top of each ball, ensuring you leave at least ¼ inch of dough at the bottom.
-
Place the indented cookie dough balls in the refrigerator while you prepare the crumble, or until you are ready to assemble the cookies.
Make the Crumble:
-
In a small bowl, combine the all-purpose flour, light brown sugar, vanilla extract, and melted unsalted butter. Stir with a fork until all ingredients are equally moistened and form a coarse crumble that holds together when squeezed.
Assemble & bake the cookies:
-
Scoop the cooled apple filling into the center of each cookie dough ball’s indentation. Focus on adding mostly apple pieces with just enough sauce to keep them moist.
-
Generously top each filled cookie with some of the prepared crumble, gently pressing it down a little to help it adhere to the soft cookie dough and filling.
-
Bake in the preheated oven for approximately 20 minutes, or until the edges of the cookies turn a golden brown. Note that a warmer cookie dough may result in more spreading.
-
Allow the freshly baked cookies to cool on the baking sheet for 10 minutes before carefully transferring them to a wire rack to cool completely. This helps them firm up and prevents breakage.
Notes
Presentation – For the best visual appeal and ease of serving, fill each cookie indentation primarily with chopped apple pieces, using only a small amount of the filling’s liquid. Too much liquid can make the cookies overly moist and difficult to handle.
Technique – Ensure apples are cut into small, uniform pieces (approximately 1 cm square) to allow more filling to fit snugly into each cookie, providing a balanced apple-to-cookie ratio.
Storage – Store these baked apple pie cookies in an airtight container at room temperature for up to 3 days to maintain optimal texture. For longer preservation, they can be frozen for up to 2 months. Avoid storing them in the refrigerator, as the moisture can cause the cookies to become soft and less enjoyable.
Nutrition
|
Carbohydrates: 47g
|
Protein: 3g
|
Fat: 13g
|
Saturated Fat: 8g
|
Polyunsaturated Fat: 1g
|
Monounsaturated Fat: 3g
|
Trans Fat: 0.5g
|
Cholesterol: 44mg
|
Sodium: 237mg
|
Potassium: 79mg
|
Fiber: 1g
|
Sugar: 26g
|
Vitamin A: 393IU
|
Vitamin C: 1mg
|
Calcium: 42mg
|
Iron: 1mg
Like this? Leave a comment below!
Before You Go: Explore More Delicious Treats!
I genuinely hope you enjoyed baking and savoring this fun and flavorful variation on a classic apple pie recipe! These chewy apple pie cookies are a testament to how comforting flavors can be transformed into convenient, delightful treats. Don’t let your baking adventure end here; be sure to explore our other delicious cookie recipes for more inspiration. You might particularly love these soft and spiced pumpkin snickerdoodle cookies, perfect for autumn, or the rich and nostalgic taste of these chewy molasses cookies. Happy baking, and enjoy every sweet bite!
