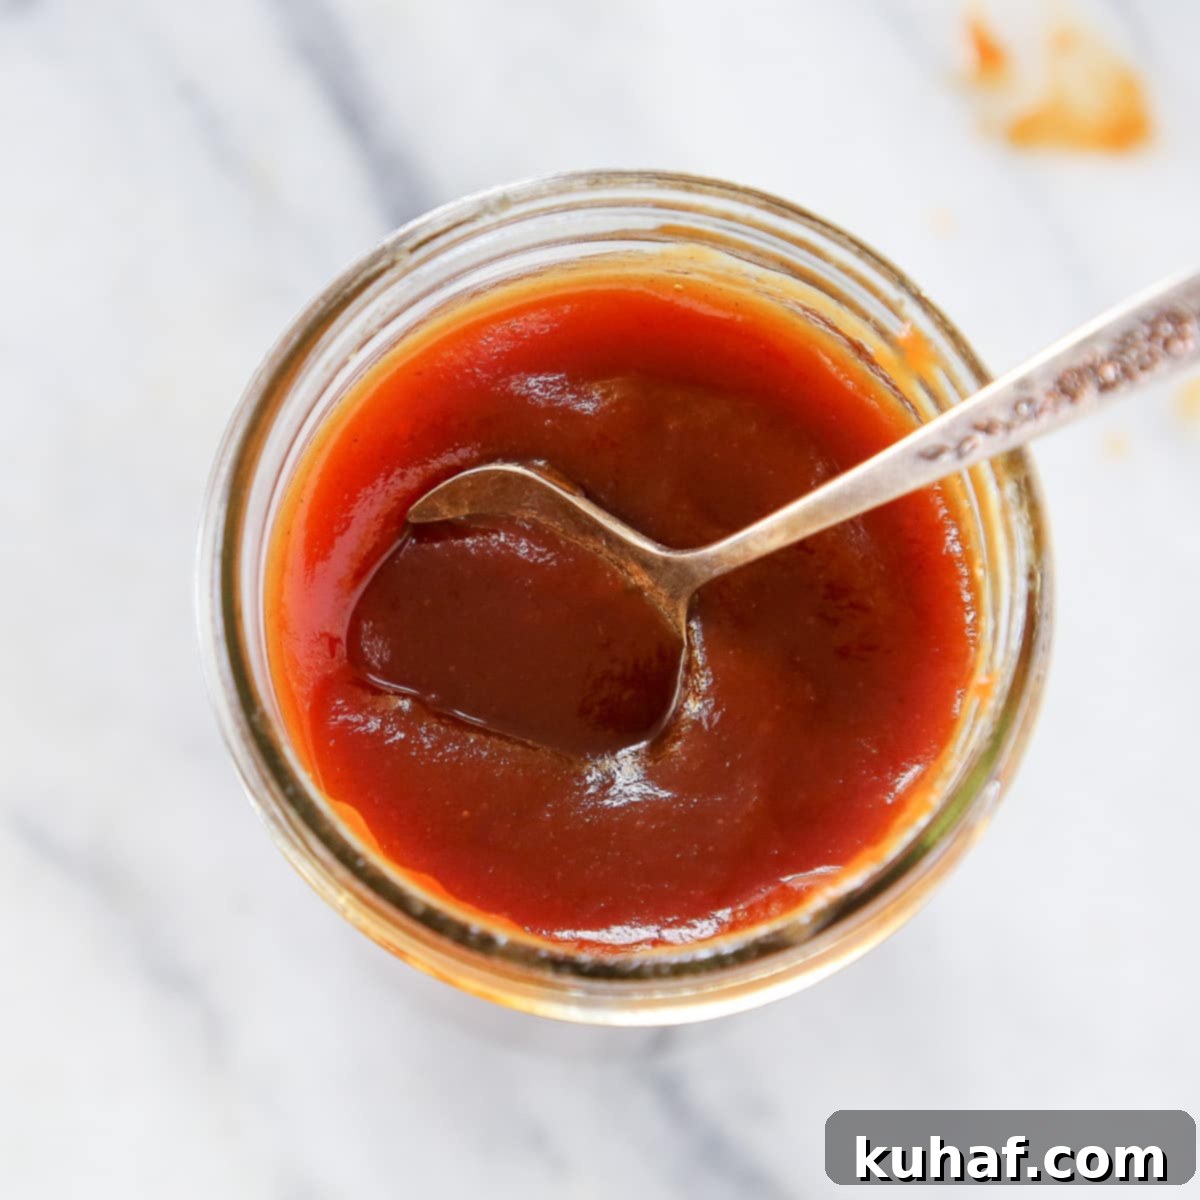
The Best Homemade Apple Butter: Silky Smooth & Caramelized Flavor (Chef’s Recipe)
Prepare to experience **apple butter** like never before. This professional chef’s recipe delivers a luxuriously silky-smooth texture and a deep, complex flavor reminiscent of caramelized apples. Unlike many other recipes, we achieve this incredible depth by starting with a unique dry caramelization of the sugar, which tempers the sweetness and infuses every bite with a rich, spiced caramel essence. With just three core ingredients, a handful of warming spices, and a little patience, you can create a truly exceptional apple butter that will become a cherished autumn tradition in your home.
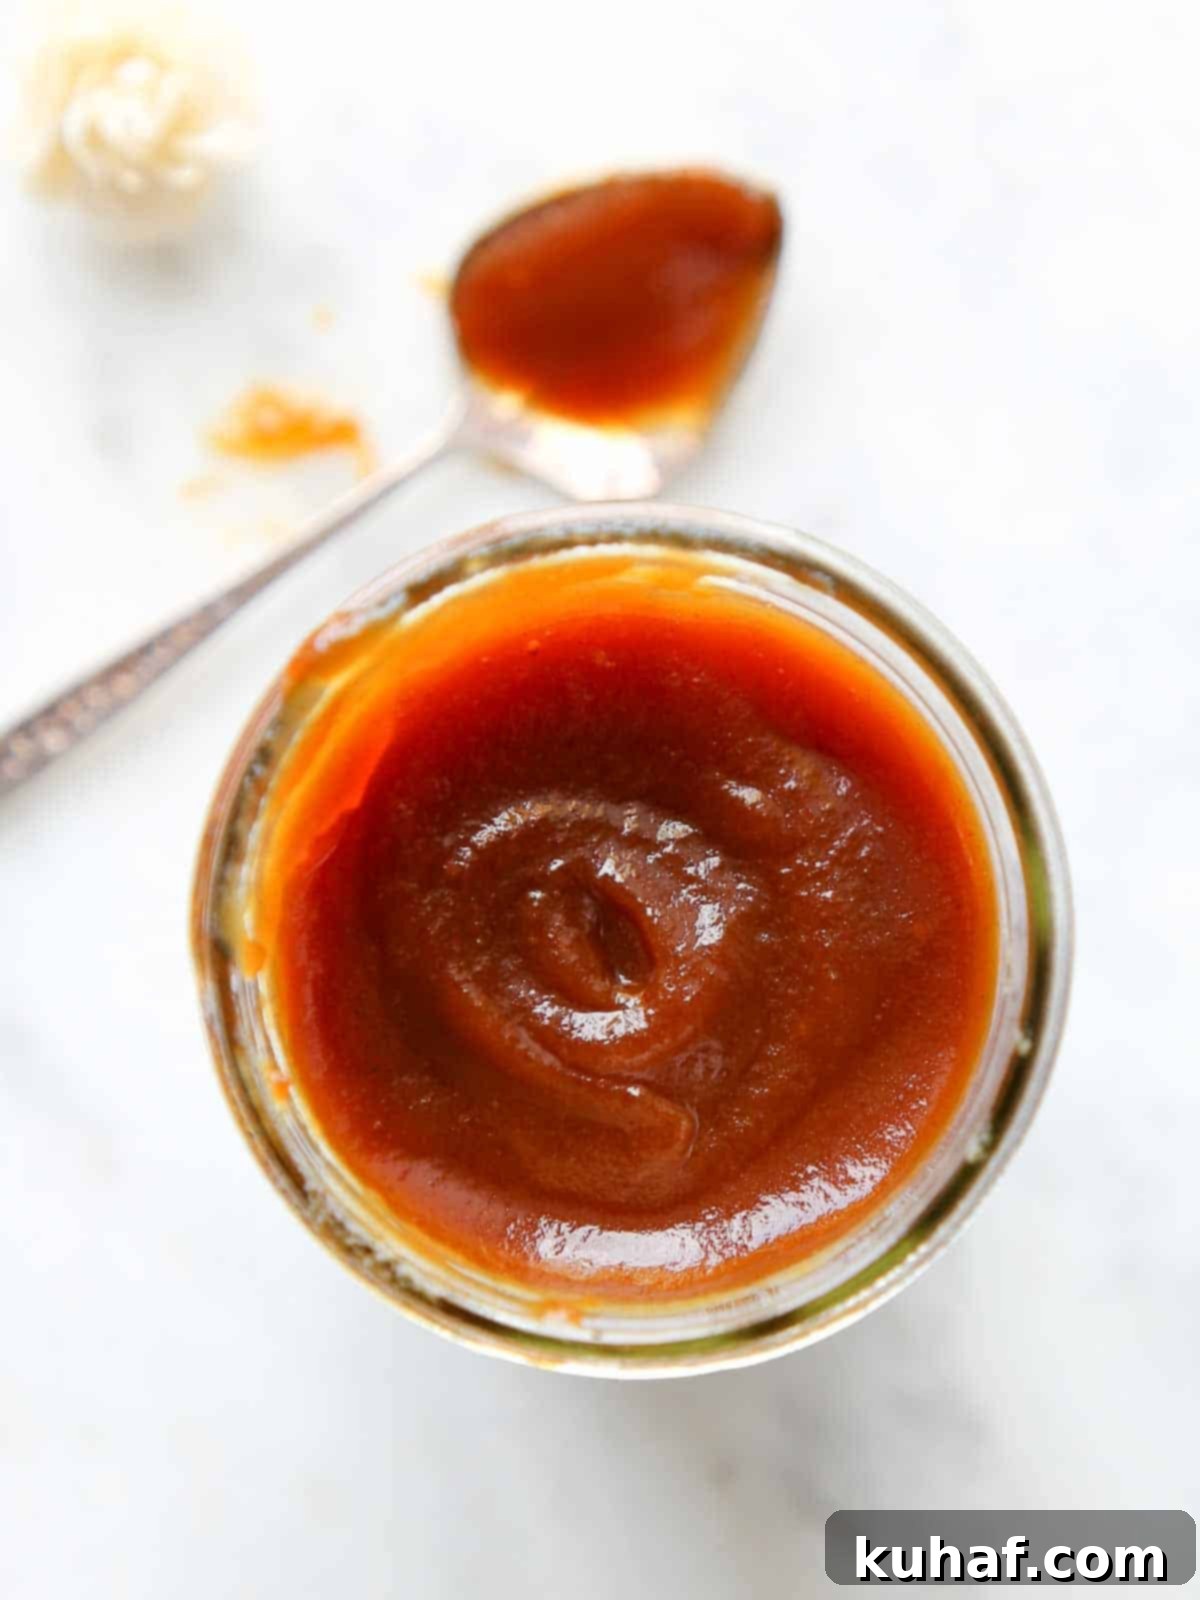
What sets this homemade apple butter recipe apart is its foundational step: crafting a dry caramel with all the sugar. This isn’t just about sweetness; it’s about building layers of flavor. The caramelization process creates new, delightful compounds that give the apple butter a distinct, spiced caramel apple taste, preventing it from tasting merely like a very thick applesauce. It’s a technique I learned from a seasoned chef, and every time I make it, I’m reminded of the wisdom passed down through culinary tradition.
At its heart, apple butter is a highly concentrated, spiced, and sweetened apple sauce, cooked down until it reaches a consistency similar to jam or a thick spread. Despite its name, it contains no actual butter. The “butter” in its name refers to its incredibly smooth, spreadable, and silky texture, which feels rich and luxurious on the palate. This versatile condiment can elevate a variety of dishes: slather it generously on banana bread with crumb topping, warm rosemary sourdough rolls, fluffy buttermilk biscuits, or stir it into your morning oatmeal. It can even be used as a flavorful substitute for plain applesauce in many baking recipes, adding a depth of flavor that is truly unmatched.
Table of Contents
- Why This is the Best Apple Butter
- Professional Tips for Making Apple Butter
- Ingredients Needed for Exceptional Apple Butter
- Variations & Substitutions to Customize Your Apple Butter
- How to Make Apple Butter (Step-by-Step Guide)
- How Do You Know When Apple Butter is Done?
- Chef Lindsey’s Expert Recipe Tip
- Creative Ways to Use Your Homemade Apple Butter
- Frequently Asked Questions About Apple Butter
- Complete Apple Butter Recipe Card
- Before You Go!
Why This Apple Butter Recipe Stands Above the Rest
- The Foundation of Flavor: A Dry Caramel Start. The secret to this apple butter’s unparalleled depth begins with caramelizing all the sugar. This isn’t just about adding sweetness; it’s a crucial step that introduces complex, toasted notes that transform the sugar into something far more intricate. This process prevents the apple butter from being overly sweet and instead creates a nuanced flavor profile that is distinct from simple applesauce. It’s the Maillard reaction in action, building a rich, slightly bitter counterpoint to the apples’ natural sugars.
- Deglazing with Pure Apple Cider for Added Complexity. As soon as the caramel reaches its peak, we deglaze the pan with apple cider – and it’s critical to use real, unfiltered cider, not apple juice (which lacks the tannic depth and tartness needed for this step). This action instantly halts the caramelization and incorporates a tangy, autumnal layer that marries perfectly with the caramel. Sourcing your apple cider from a local farmer or a high-quality brand will make a noticeable difference in the final product’s vibrancy and authenticity.
- The Art of Blending Apple Varieties. While any apple can theoretically be used, the truly best apple butter comes from a blend of varieties. There are no “wrong” choices, but aim for as many different types as you can get your hands on. When I’m preparing large batches in a professional kitchen, I’ll often select 4-5 different varieties, sometimes even up to 15, ensuring a balance of sweet, tart, and aromatic notes. This medley creates a more rounded, intriguing flavor that a single apple variety simply cannot achieve. Don’t be shy about mixing it up!
Professional Tips for Crafting Perfect Apple Butter
- Mastering the Dark Amber Caramel. The key to a balanced, deeply flavored apple butter lies in taking the caramel to a dark amber stage. If the caramel is too light, the final product can taste overly sweet and lack complexity. Watch carefully as the sugar melts and browns; it will transform from clear to a golden hue, then rapidly darken. The moment it turns a deep, rich, reddish-brown and just begins to smoke with a distinct caramel aroma, immediately remove it from the heat and add the apple cider. Don’t worry if the caramel seizes and hardens initially – this is completely normal. The prolonged cooking time with the apples and cider will ensure it melts back into the mixture, imparting its magnificent flavor.
- Puree and Pass Through a Fine Sieve for Unrivaled Smoothness. For that signature, luxurious, silky-smooth apple butter texture, pureeing is just the first step. The true secret lies in passing the blended mixture through a fine-mesh sieve or a chinoise strainer. This step removes any tiny bits of apple skin, seeds, or undissolved sugar, resulting in an incredibly refined product. While a chinoise is a chef’s preferred tool for its efficiency, a standard fine-mesh strainer will work wonders with a bit of patience and the back of a ladle.
- The Critical Reduction: Cooking After Pureeing. This is another distinguishing feature of this recipe. After pureeing and straining, the apple butter goes back into the pot for a final reduction. This phase is crucial for achieving that thick, spreadable, jam-like consistency and intensifying the flavors even further. It allows the moisture to slowly evaporate, concentrating the apple and spice notes, and ensuring the butter holds its shape beautifully. Stir frequently during this stage to prevent scorching, especially as it thickens.
Essential Ingredients for Exceptional Apple Butter
- Apples: The Heart of the Butter. The quality and variety of your apples are paramount. Aim to use as many different varieties as you can source – a minimum of five is ideal, but for larger batches, don’t hesitate to mix up to 15. This blend ensures a complex flavor profile, balancing sweetness, tartness, and aromatics. Popular choices include tart Granny Smith for a bright tang, sweet Fuji or Gala for natural sugars, Golden Delicious for a mellow sweetness, and Braeburn or Honeycrisp for good texture. Avoid only using mealy apples like McIntosh, though a few can add character. The goal is a harmonious symphony of apple flavors.
- Granulated Sugar: The Caramel Catalyst. This isn’t just a sweetener here; it’s the foundation of our unique caramelized flavor. Granulated sugar provides the necessary structure for dry caramelization, contributing both sweetness and those coveted complex, toasted notes that define this recipe.
- Apple Cider: The Tangy Deglazing Agent. Opt for unfiltered apple cider for the best results. The cloudiness indicates a richer, more robust apple flavor with a pleasant tartness that juice simply can’t replicate. It plays a vital role in deglazing the dark caramel, adding a crucial layer of autumnal depth. Choose a brand you love or, even better, seek out fresh cider from a local farm. Remember, **do not use apple cider vinegar** – that’s a completely different product! Any leftover cider can be enjoyed warm, or used in other fall favorites like pumpkin butter or our delicious apple cider donut recipe.
- Cinnamon Sticks: For Infused Warmth. Using whole cinnamon sticks allows for a slow, gentle infusion of flavor, providing a different, more nuanced warmth than ground cinnamon alone. They are removed before pureeing, leaving a subtle, sophisticated spice background. While ground cinnamon can be substituted, the sticks offer a superior aromatic quality.
- Ground Cinnamon: Classic Spice Comfort. Essential for that familiar, comforting apple butter taste. It’s the primary spice that evokes autumn and complements the apples beautifully.
- Ground Ginger: A Hint of Zesty Warmth. Ground ginger adds a subtle, peppery warmth and a touch of zesty brightness that prevents the apple butter from being one-dimensional. It provides a lovely counterpoint to the sweetness.
- Ground Cloves: Deep Aromatic Notes. Just a touch of ground cloves introduces a rich, intensely aromatic, and slightly sweet-spicy depth. It’s a powerful spice, so a little goes a long way in creating a well-rounded spice blend.
Refer to the complete recipe card below for precise measurements and quantities of all ingredients.
Creative Variations & Substitutions for Your Apple Butter
- Simplify with a Slow Cooker or Instant Pot (Optional). While the caramelization step is what makes this recipe truly special, you can adapt it for a slow cooker or Instant Pot if time is a constraint. Skip the initial caramelization, halve the sugar (as you won’t be building the same depth of flavor), and combine all ingredients directly in your appliance. Cook on low for 6-8 hours in a slow cooker, or for a shorter duration in an Instant Pot, then proceed with pureeing and the final reduction. Understand that the flavor profile will be different—less intense, but still delicious and convenient. You can also start the stovetop method and finish the reduction in a slow cooker for easier, less frequent stirring.
- Experiment with Diverse Spice Blends. The beauty of homemade apple butter lies in its customizability. Feel free to adjust the amounts of cinnamon, ginger, and cloves to suit your preference, or introduce other warming spices. This recipe would be equally delightful with a homemade apple pie spice mix, pumpkin spice blend, or even a hint of cardamom, nutmeg, or allspice. Get creative and find your perfect spice combination!
- Beyond Apples: Explore Pear or Quince Butter! Don’t limit yourself to apples! The same core method can be applied to other fruits to create equally delicious fruit butters. Try making a pear butter using ripe, flavorful pears, or even a quince butter for a more exotic, fragrant spread. The caramelized sugar and warming spices complement these fruits beautifully, offering a delightful twist on the classic.
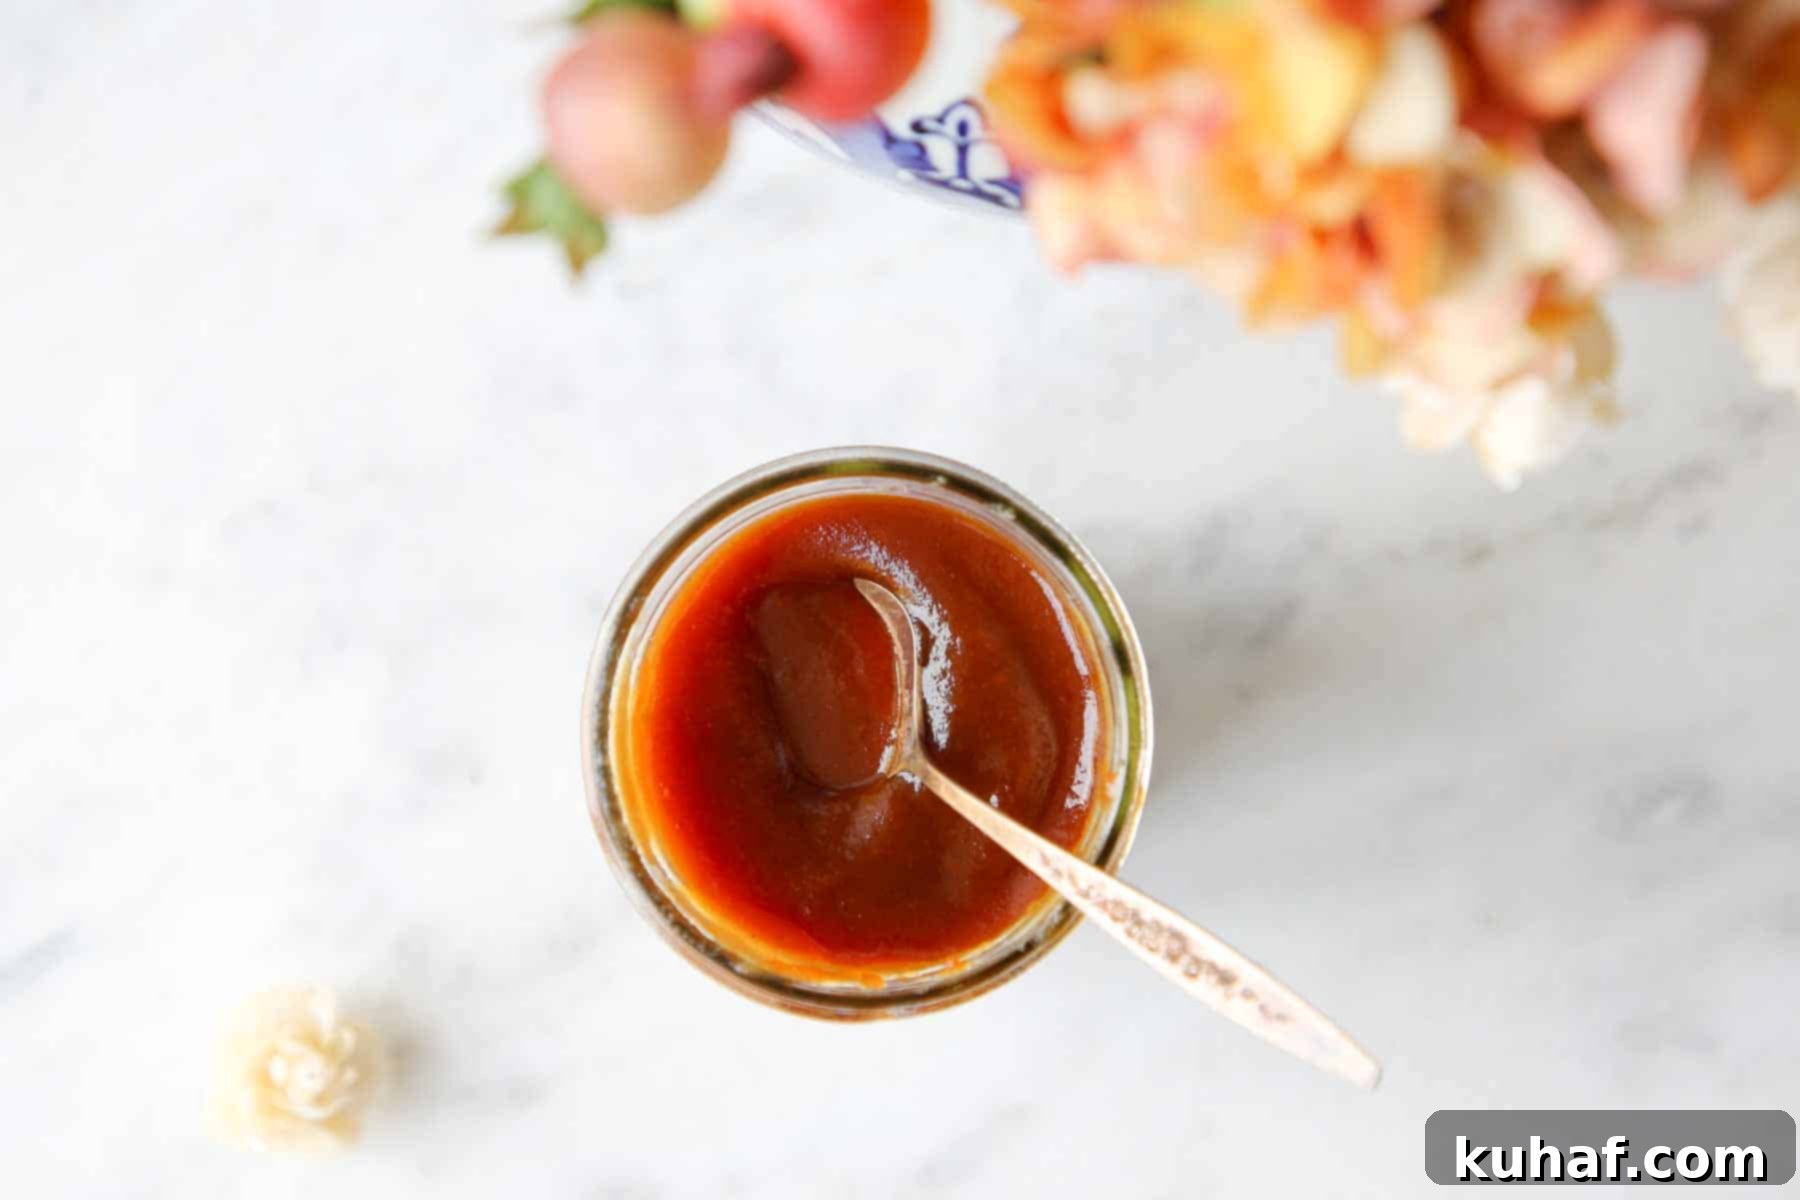
How to Make Homemade Apple Butter (Step-by-Step Guide)
Follow these detailed instructions to create the most incredible homemade apple butter every time. For precise measurements and additional notes, please consult the full recipe card provided below.
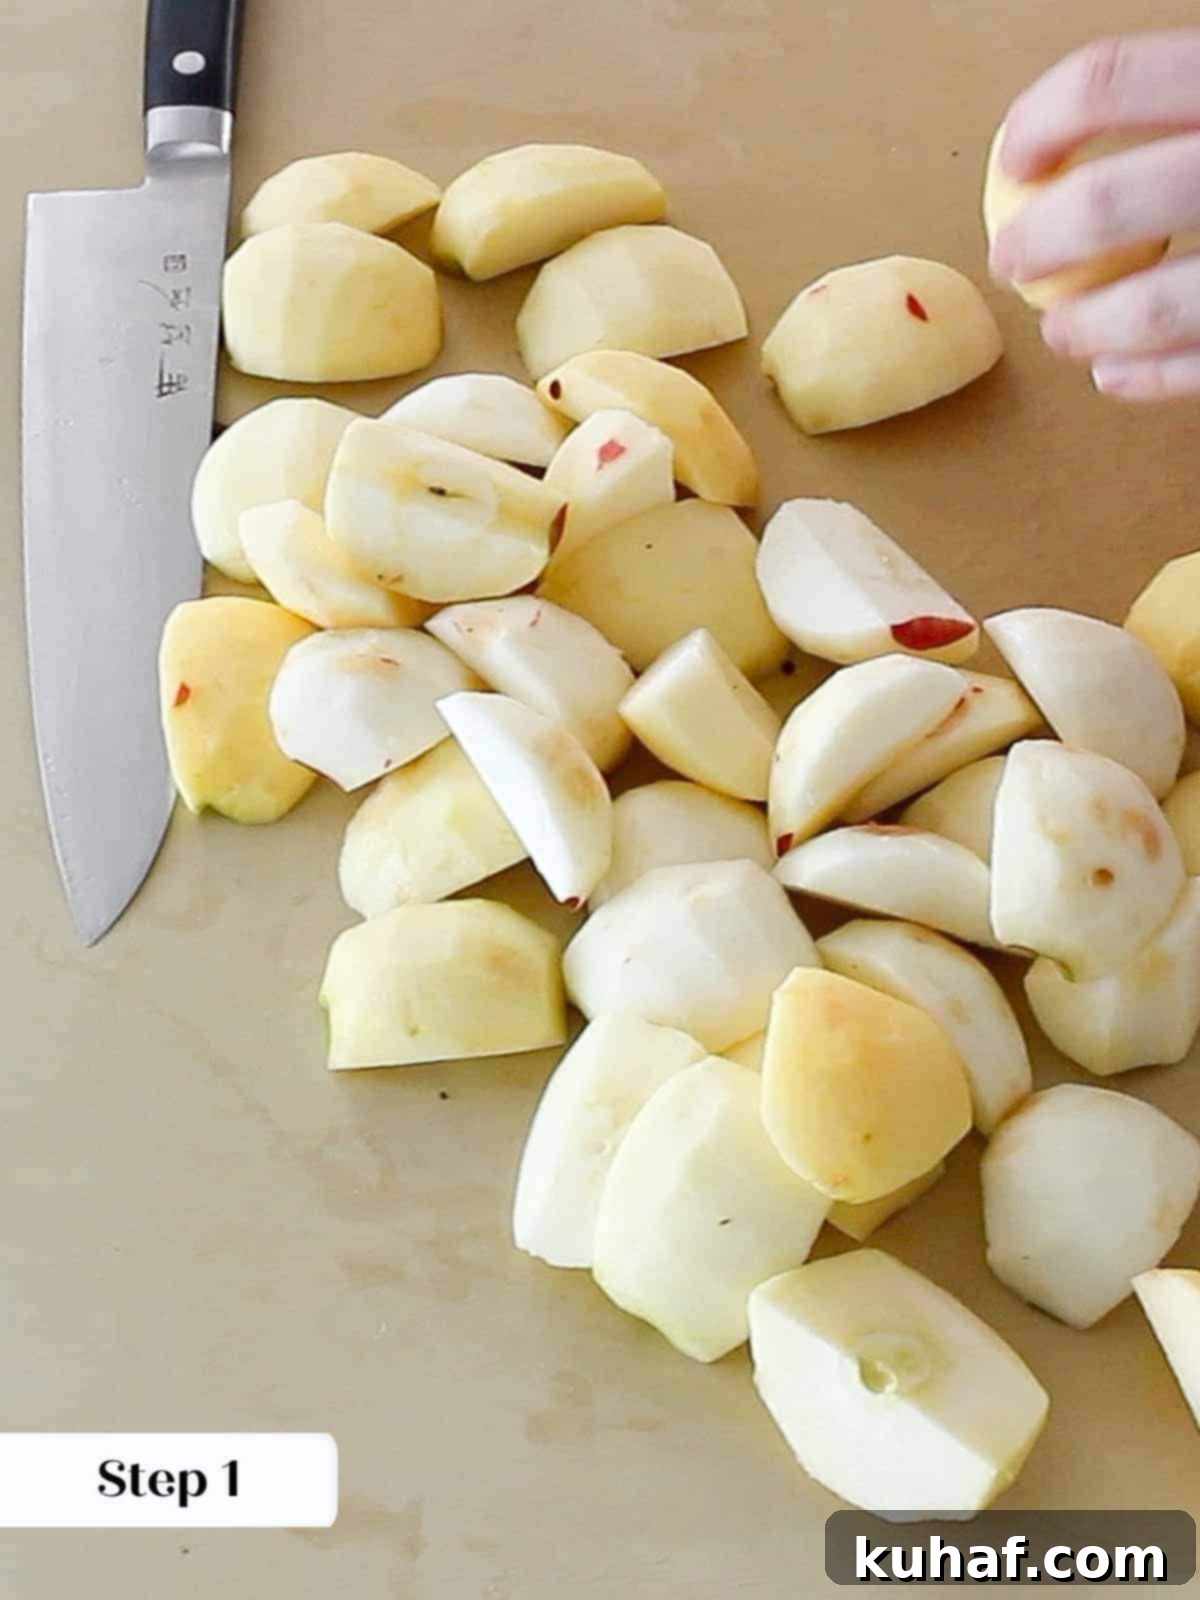
Step 1: Prepare Your Apples. Begin by peeling, coring, and quartering your chosen variety of apples. There’s no need to slice them into smaller pieces at this stage; larger chunks are perfectly fine as they will break down during cooking and be pureed later. Peeling is highly recommended for the silkiest texture, even if you plan to strain the mixture, as it makes the straining process much easier and ensures no unwanted fibrous bits remain. If you choose not to strain, peeling is absolutely essential.
Step 2: Initiate the Dry Caramel. In a large, heavy-bottomed, high-sided pot, add all the granulated sugar. Place the pot over medium-high heat. Begin to cook the sugar, stirring occasionally with a heat-proof spoon to break up any clumps. This is a dry caramel, meaning no water is added. The sugar will gradually melt, clump, and then liquify and color. You can stir a dry caramel at the beginning, but once it fully melts and begins to color evenly, it’s best to stop stirring to avoid crystallization. Watch it carefully as it progresses.
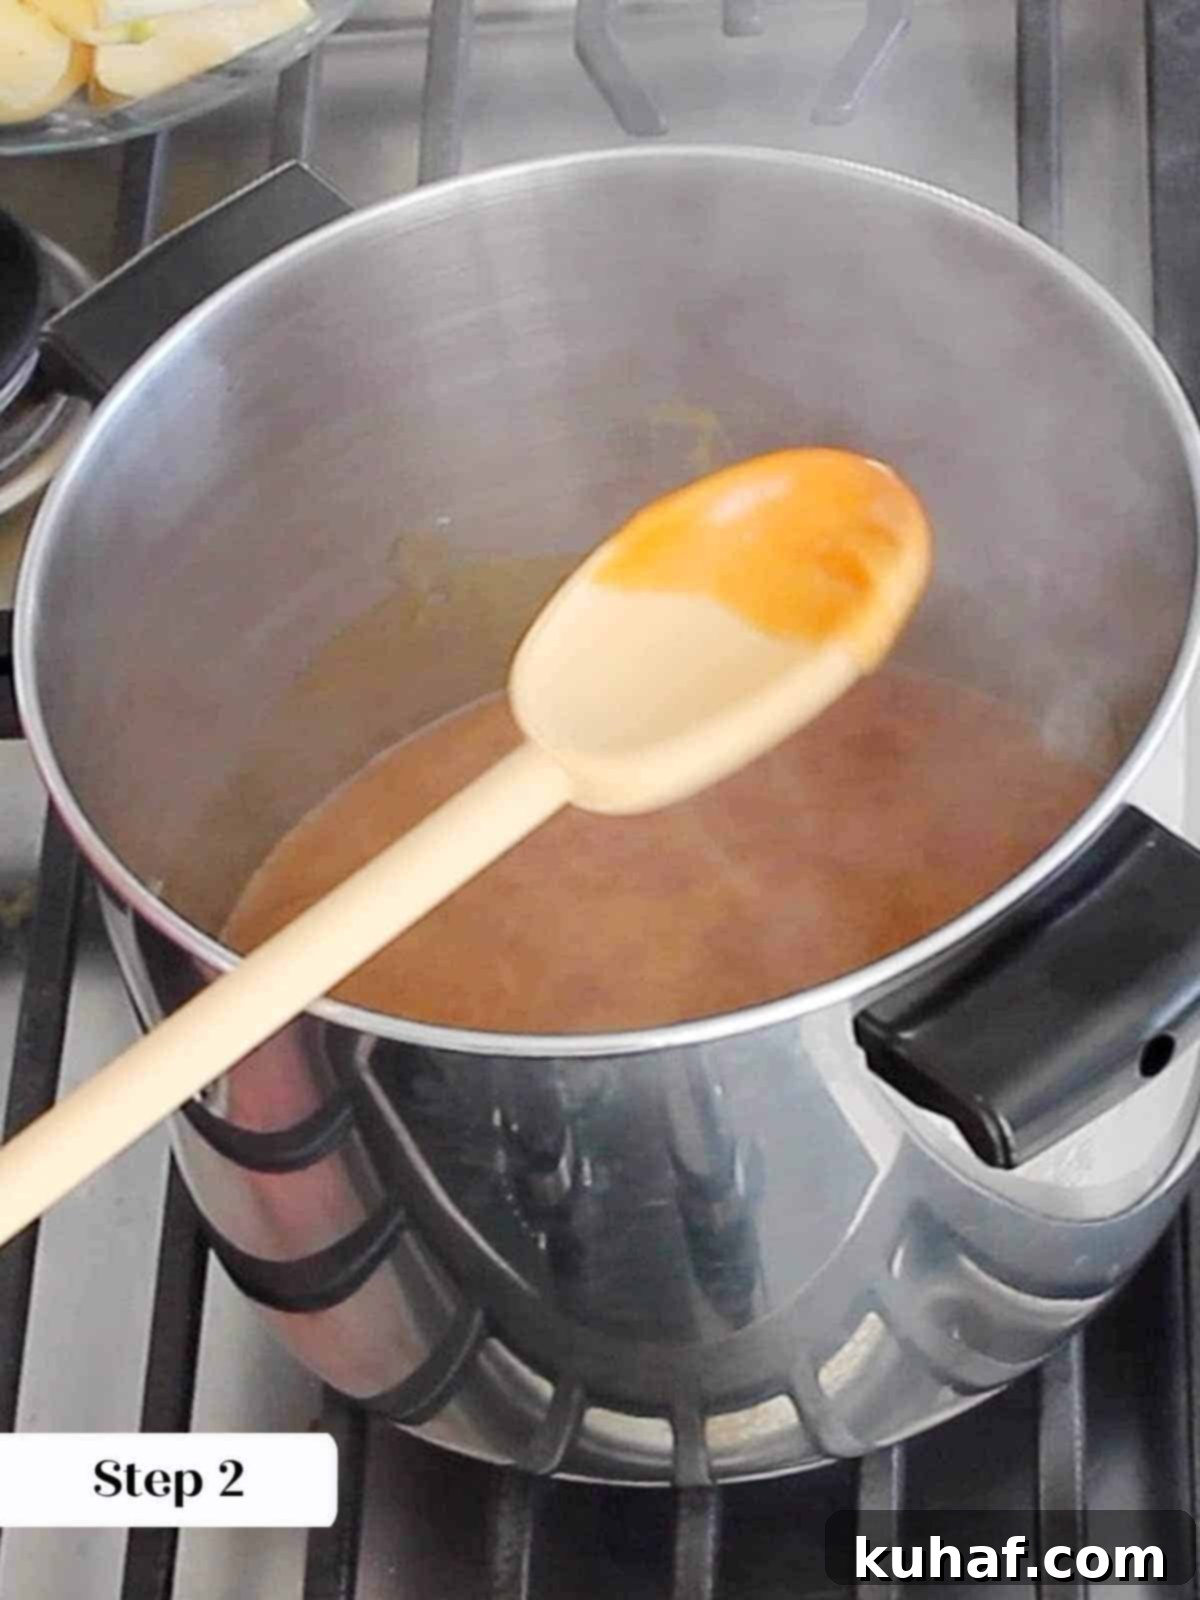
For a more advanced dry caramel technique, you can sprinkle the sugar in layers, adding the next layer only after the previous one has fully melted, similar to our salted caramel sauce recipe. However, for apple butter, this meticulous layering isn’t strictly necessary. Any small chunks of sugar that remain will dissolve during the long cooking process or be caught when you strain the mixture at the end.
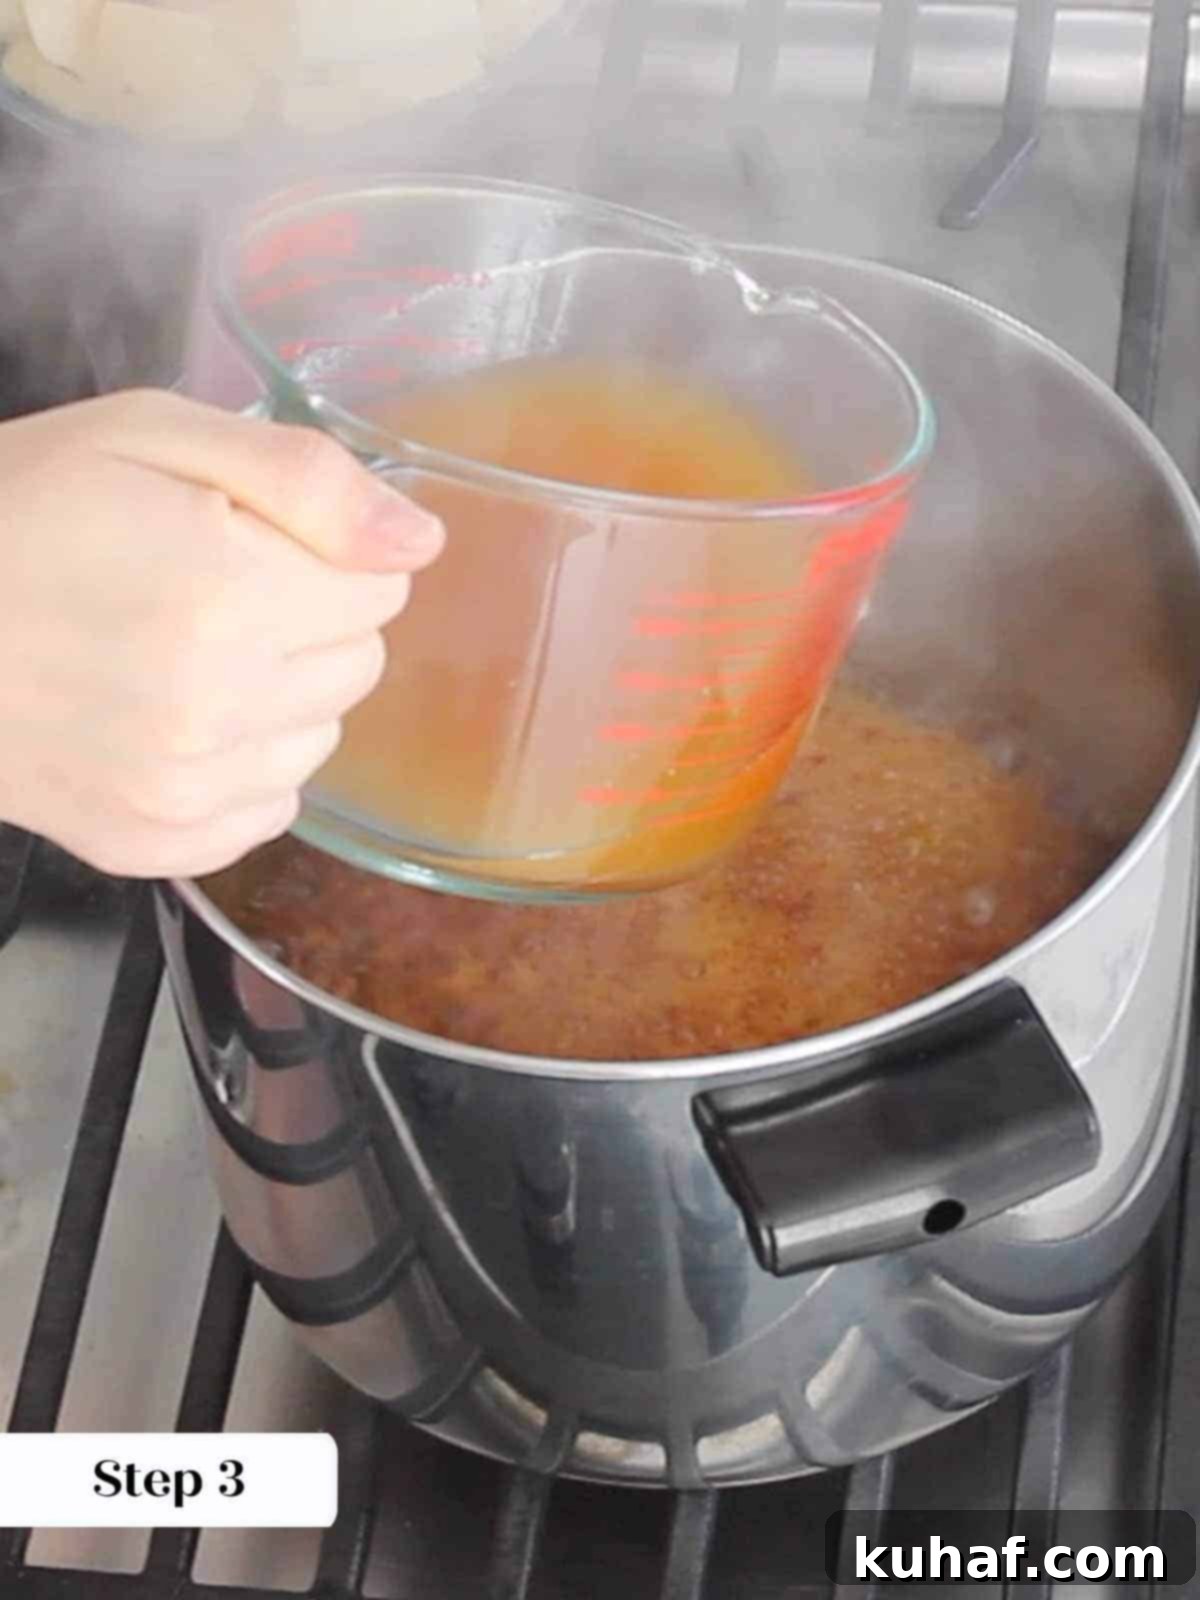
Step 3: Deglaze the Dark Caramel. The moment the caramel transforms into a dark amber color – a rich, deep brown that may just start to produce wisps of smoke and release a strong, inviting caramel aroma – immediately turn off the heat. **Have your apple cider ready beforehand, as this stage moves quickly!** Slowly and carefully, add the apple cider to the pot, a little at a time. Be prepared for a vigorous sizzle and a burst of steam as the cold liquid hits the hot caramel. The caramel may seize and harden instantly; this is perfectly normal and expected. The photo for step 3 was taken just moments before adding the cider, as the intense smoke prevented a clear shot at the exact point of addition!
Don’t be alarmed if the caramel completely hardens or seizes when the cooler cider is added. This is a common reaction. Rest assured, as the mixture heats up and cooks, the hardened caramel will slowly melt back into the liquid, infusing it with its incredible depth of flavor.
Step 4: Combine Apples and Spices. Immediately after deglazing, add your prepared apples, the cinnamon stick, and all the ground spices (ground cinnamon, ginger, and cloves) to the pot. Stir everything thoroughly to ensure the apples are coated and the spices are well distributed. The residual heat from the caramel and cider will begin to soften the apples.
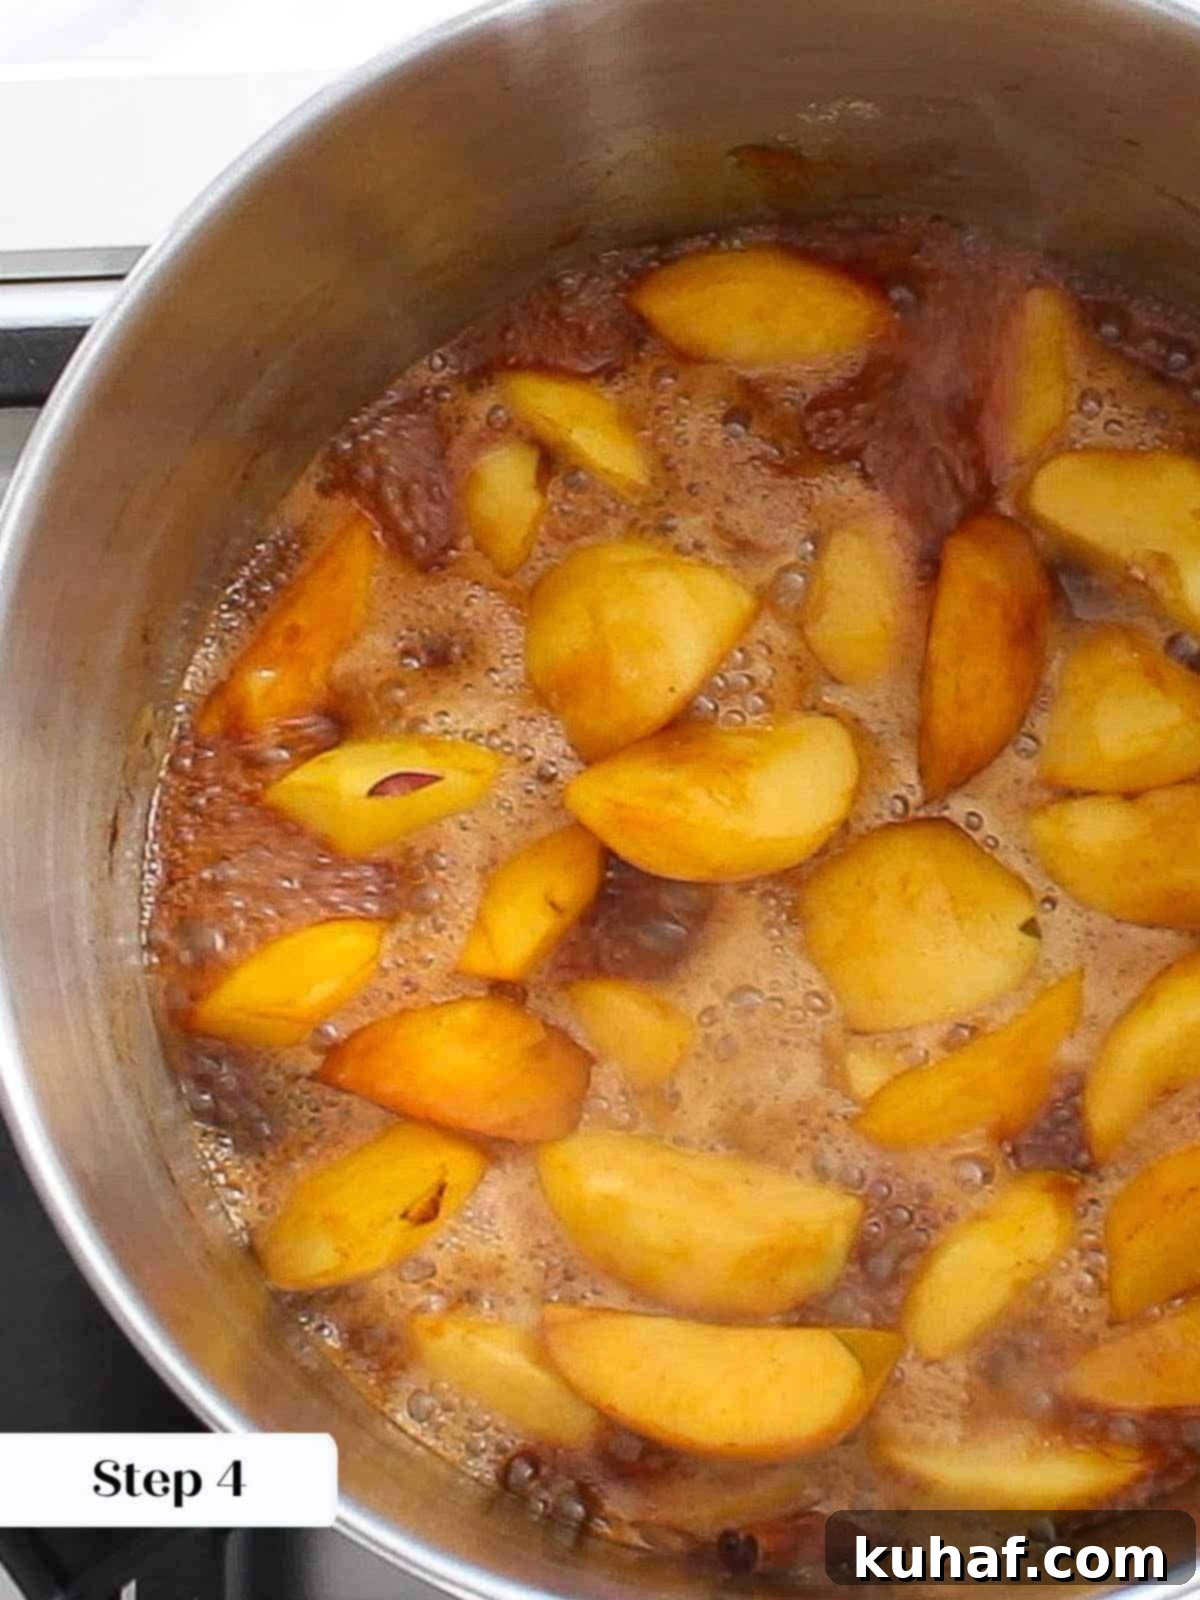
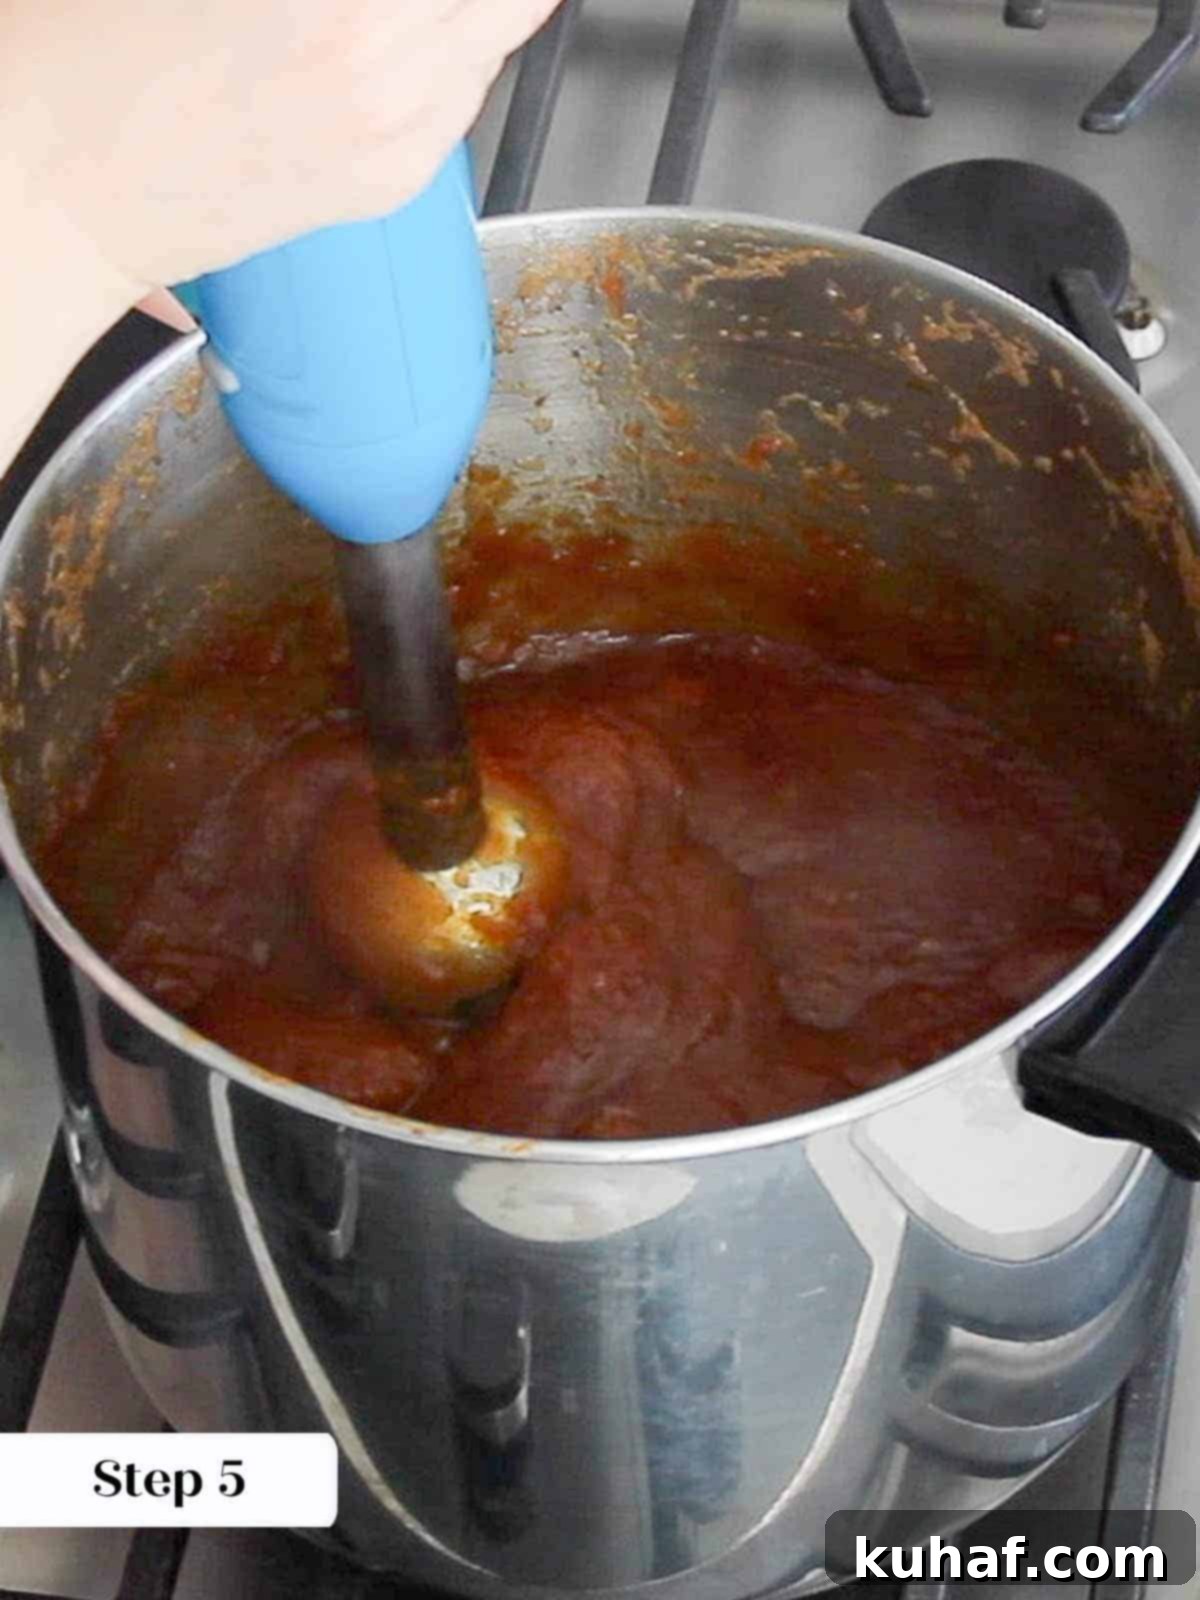
Step 5: Cook and Blend. Bring the mixture to a simmer over medium heat and cook for approximately 1 hour, or until the apples are incredibly soft and easily mashable. During this time, the caramel will fully dissolve, and the apples will break down. After 1 hour, remove the cinnamon stick from the pot. Using an immersion blender directly in the pot, blend the mixture until it is smooth. Alternatively, if you’re using a standard blender, carefully transfer the hot apple mixture in batches to your blender, being cautious not to overfill (hot liquids expand). Blend until completely smooth, then return to the pot.
Step 6: Achieve Ultimate Smoothness with Straining. For the truly professional, silky-smooth texture, this step is non-negotiable. Place a fine-mesh sieve or a chinoise over a clean, heatproof bowl or another pot. Carefully pour the blended apple puree through the sieve. Use the back of a sturdy spoon or a 2 oz ladle to press the puree through the mesh, forcing out all the smooth apple butter and leaving behind any lingering fibrous bits or tiny lumps. This extra effort is what makes all the difference in achieving that luxurious mouthfeel.
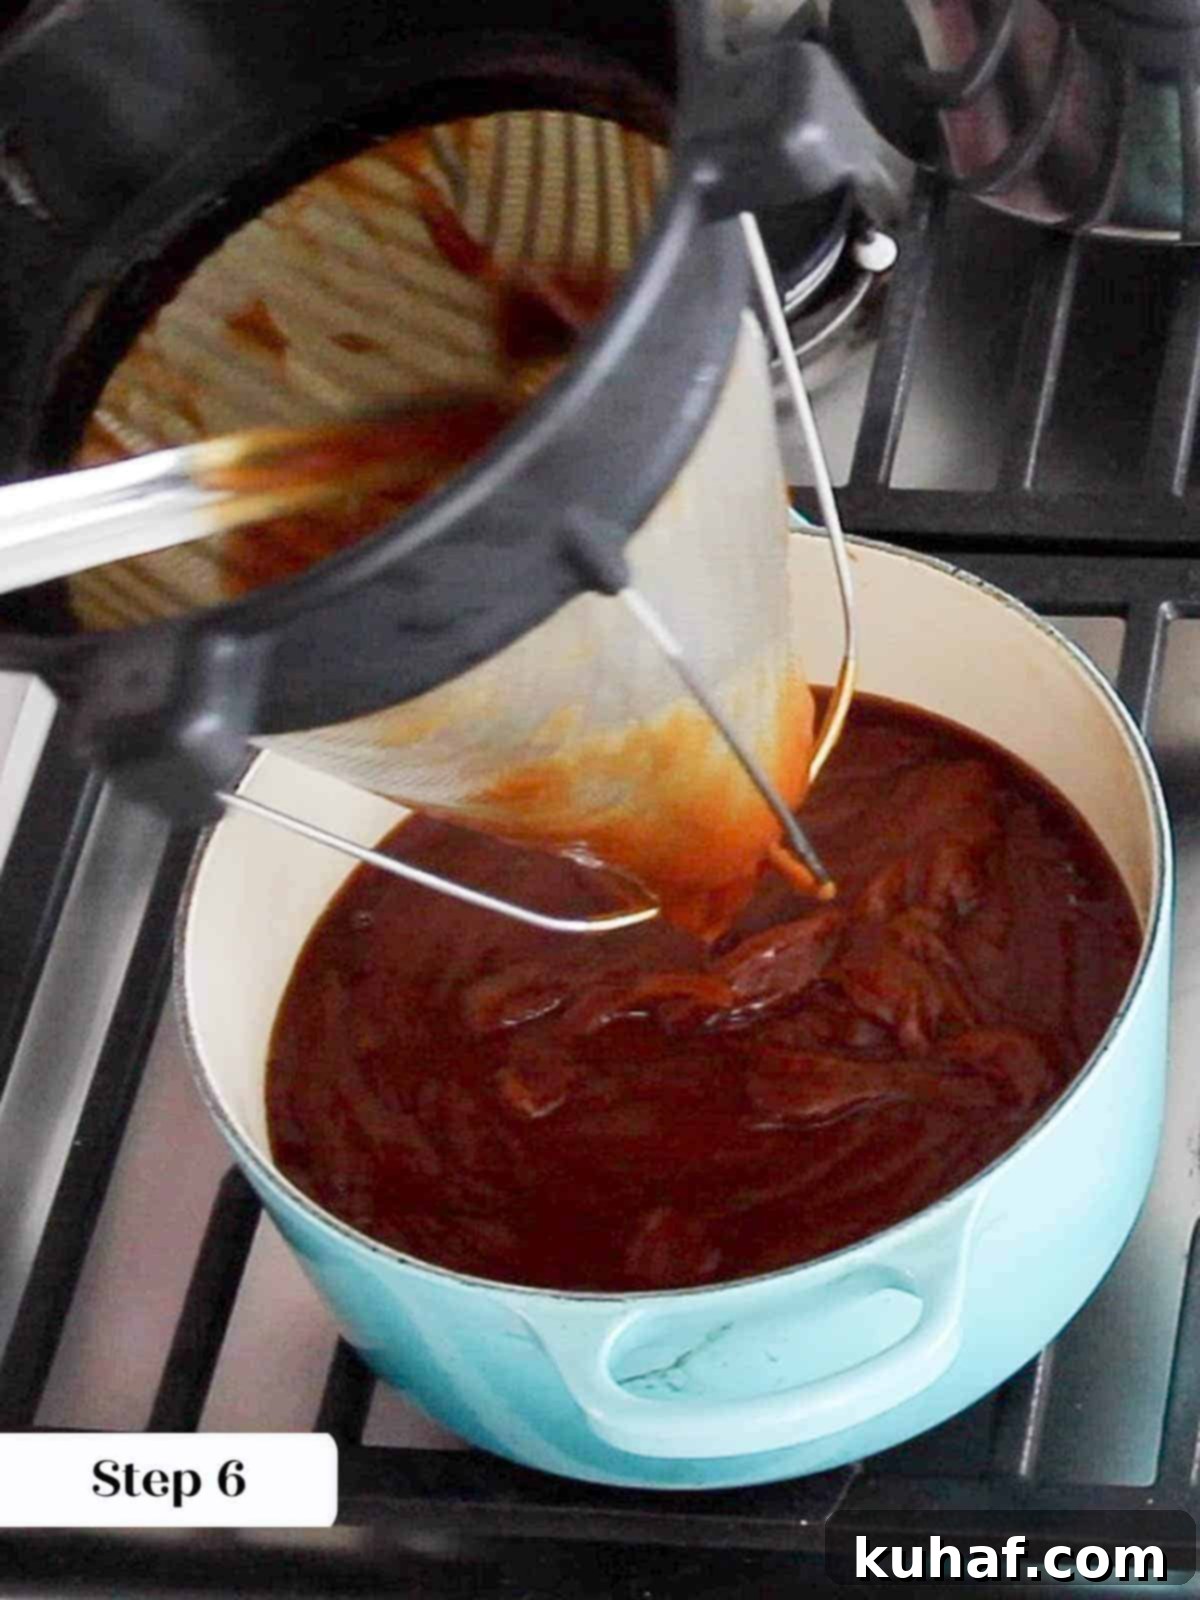
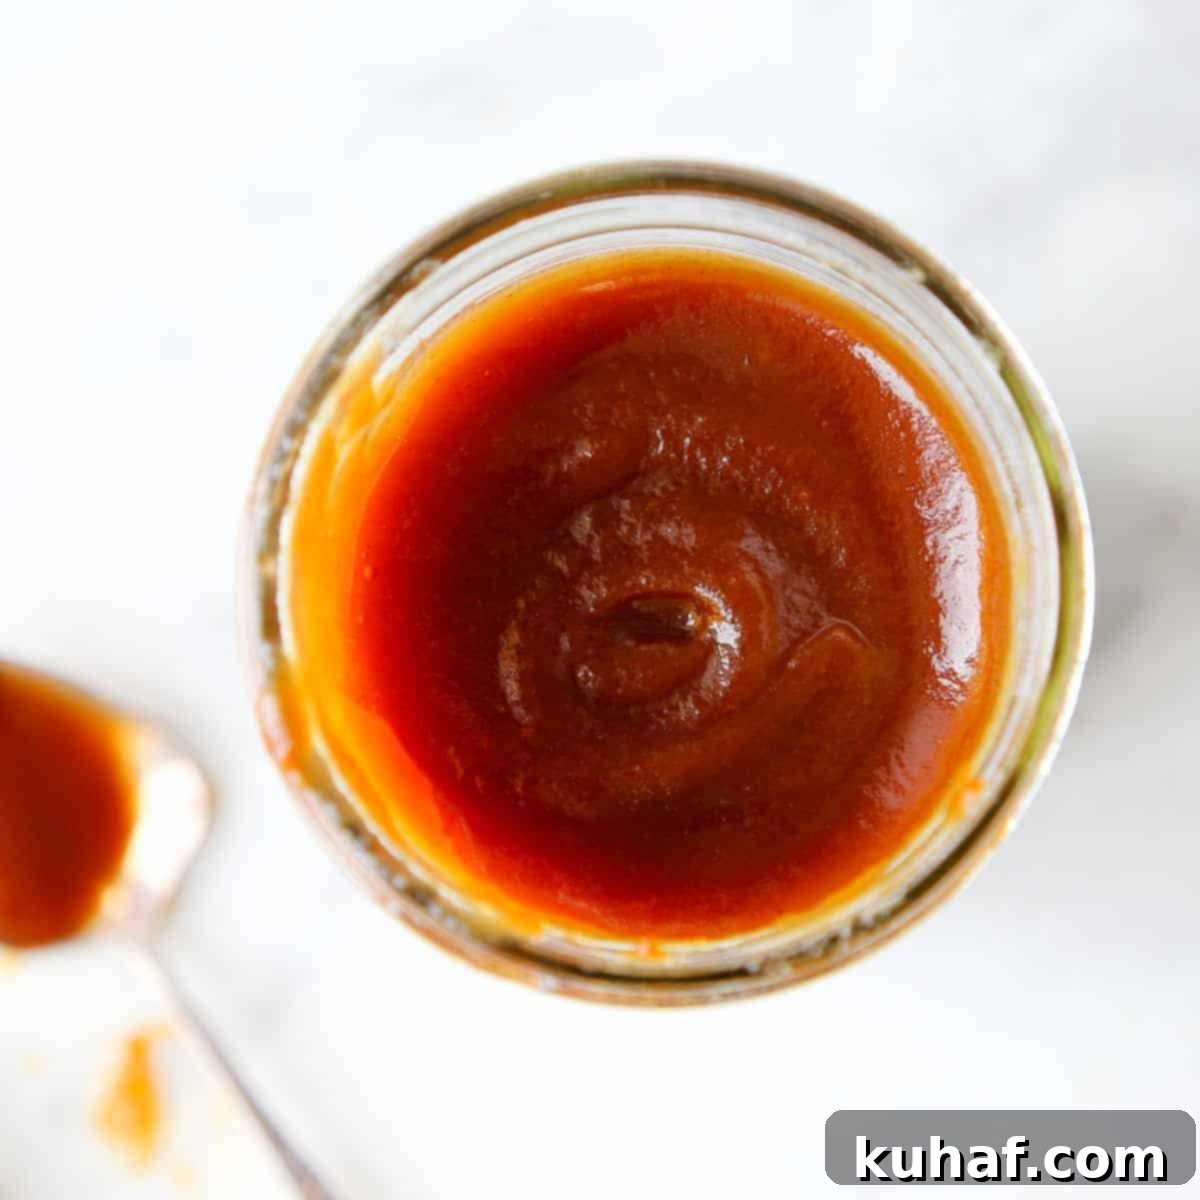
Step 7: The Final Reduction. Transfer the strained, smooth apple puree back into a clean pot (you can wash and reuse the original pot, or use a new one). Place it over low heat and continue to cook, stirring frequently, especially as it thickens. This reduction phase can take another 30-60 minutes, depending on how much moisture needs to evaporate. The apple butter is done when it runs off a spoon like cold honey – meaning it will fall in thick globs or clumps rather than a thin stream. Another test is to drag a spoon through it on a plate; if it leaves a distinct, clear line that doesn’t immediately fill in, it’s ready.
During the final stages of reduction, as the apple butter thickens significantly, switch to a silicone spatula for stirring. Its flexible nature allows you to scrape the bottom and sides of the pot effectively, preventing any delicious apple butter from scorching.
Step 8: Cool and Store. Once the apple butter reaches your desired consistency, remove it from the heat and allow it to cool completely to room temperature. Once cooled, spoon it into clean, sterilized jars. It’s now ready for refrigeration or, if you wish to preserve it for longer, you can proceed with appropriate canning safety precautions (see FAQ for more details).
How Do You Know When Apple Butter is Done? The Consistency Test
Determining when your apple butter has reached its perfect state is all about consistency. It should be thick, spreadable, and hold its shape. Here are a few ways to test it:
- The “Cold Honey” Spoon Test: Dip a spoon into the apple butter. When it’s ready, the butter will not run off the spoon in a thin stream but rather fall in thick, distinct globs or clumps, much like cold, thick honey would.
- The “Holding a Line” Plate Test: Spoon a small amount of apple butter onto a cold plate. Let it cool for a minute, then draw a line through the center of the apple butter with your finger or a spoon. If the line remains clear and doesn’t immediately fill back in, your apple butter has reached the ideal jam-like consistency.
- The Visual Test: As it thickens, the apple butter will become noticeably darker in color and lose its glossy sheen, taking on a more matte appearance. It will also offer more resistance when you stir it.
When in doubt, it’s always best to remove a spoonful or two, let it cool completely on a plate, and then test its consistency. Remember, it will thicken further as it cools.
Chef Lindsey’s Expert Recipe Tip: Embrace the Process!
Creating truly exceptional apple butter is a labor of love that requires a bit of time and might dirty a few dishes, but the unparalleled results are absolutely worth every moment. This recipe is wonderfully scalable, so don’t hesitate to make a generous big batch to enjoy throughout the year, or to share with friends and family. A word of caution when increasing the recipe: pay extra attention during the caramelization stage, especially if you’re making a large amount. Ensure you use a pot that is large enough and has high sides to accommodate the volume and prevent boilovers. If you’re tackling a massive batch, it’s safer to make several smaller pots of caramel and deglaze them individually before combining them with the apples and spices in one larger pot. Safety and patience are your best tools for success!
Creative Ways to Enjoy Your Homemade Apple Butter
Once you’ve crafted a batch of this luscious apple butter, you’ll find endless ways to incorporate its rich, spiced flavor into your culinary repertoire. Here are some inspiring ideas:
- A Delectable Spread for Breads and Pastries: Apple butter shines as a simple spread. Enjoy it on toast, bagels, or English muffins. It’s particularly exquisite on quick breads like moist pumpkin bread, classic old-fashioned banana bread, or wholesome healthy pumpkin muffins. Elevate yeasted breads such as fluffy pumpkin spice rolls or soft easy dinner rolls. Don’t forget to dollop it on warm scones like these spiced apple scones or delightful cinnamon chip scones. For an extra special breakfast, try mixing it with maple syrup and drizzling over your sourdough waffles or pancakes!
- Bake with Apple Butter for Enhanced Flavor: This rich apple butter can be substituted 1:1 for applesauce in most baking recipes, adding a phenomenal depth of caramelized apple and spice flavor. Use it to create a truly unique apple butter pie, fill delicate cupcakes, or bake a show-stopping apple spice cake. It adds moisture and an incredible taste dimension.
- An Unexpected Star on Party Platters: Surprise your guests by adding apple butter to your next cheese board, autumn butter board, or charcuterie tray. Its sweet-tart profile and spiced notes pair beautifully with a variety of cheeses, cured meats, and crusty bread, offering a delightful and gourmet touch.
- A Flavorful Topping for Savory Dishes: Don’t limit apple butter to sweet applications! Its sweet and savory balance makes it an excellent accompaniment to meats. Serve seared pork chops, roasted chicken, or this aromatic rosemary chicken recipe with a generous side of apple butter for a perfectly balanced dinner. It also makes a fantastic spread for gourmet sandwiches, adding a unexpected twist.
- Swirled into Desserts for Visual Appeal and Flavor: Incorporate apple butter directly into your desserts. Swirl it into a creamy cheesecake batter before baking for stunning marbling and incredible flavor. Use it to flavor Swiss meringue buttercream for cupcakes or cakes, creating a delicate yet distinctly autumnal frosting.
- The Perfect Homemade Gift: Much like cranberry chutney, peach preserves, or a custom pumpkin pie spice mix, homemade apple butter makes a thoughtful and cherished gift for the home cook or anyone who appreciates delicious, handcrafted treats. Package it beautifully in a jar with a charming handmade label and ribbon for the ideal hostess gift, holiday present, or a simple token of appreciation. It’s truly one of the best gifts for home cooks.
Frequently Asked Questions About Homemade Apple Butter
Once your apple butter has cooled completely to room temperature, transfer it into clean, airtight jars. It will keep beautifully in the refrigerator for up to a year, thanks to its high sugar content and thorough cooking. Ensure your jars and utensils are clean to prevent contamination. Freezing is also an option for extended storage, though I personally find the refrigerated shelf life to be more than adequate for most home batches.
While both are delicious fruit preparations made from cooked apples, apple butter and applesauce are distinctly different. Applesauce is typically a looser, less concentrated product, which can be chunky or smooth, and often unsweetened or lightly sweetened. Apple butter, on the other hand, is cooked down much longer until it reaches a thick, dense, jam-like consistency. It is always sweetened and generously spiced, and traditionally pureed until it achieves an incredibly silky-smooth texture, completely free of any chunks or visible skin fragments. Professionally speaking, true apple butter is characterized by its refined texture, deep flavor from concentrated fruit and spices, and often, a caramelized undertone.
Yes, this recipe is excellent for canning! If properly processed, canned apple butter can last for years in your pantry. To can, fill sterilized canning jars with hot apple butter, leaving appropriate headspace. Wipe jar rims clean, apply new, warm lids, and tighten bands to fingertip-tight. Process the jars in a boiling water bath canner according to USDA guidelines for your altitude (typically 10-15 minutes for pints). This ensures a safe, shelf-stable product. Always consult reliable canning resources for detailed, up-to-date safety instructions specific to your location and equipment.
Absolutely! This recipe scales up beautifully. In professional kitchens, I’ve routinely made batches yielding 8 quarts (2 gallons), requiring as much as 32 pounds of apples. When scaling up, however, it is crucial to exercise extreme caution, particularly during the caramelization step. Working with large quantities of hot caramel can be dangerous. Always use a very large, high-sided pot to prevent boilovers, or consider making the caramel in several smaller batches before combining them with the apples and cider in a single, larger cooking vessel. This approach ensures safety and maintains quality even for substantial yields.
The best apple butter is made from a diverse blend of apples, incorporating a mix of sweet, tart, and aromatic varieties. While you can technically use any apple, aiming for variety creates a more complex and balanced flavor. I recommend using a minimum of 5 different varieties, regardless of your batch size. Excellent choices include tart Granny Smith, crisp Honeycrisp, sweet Fuji or Gala, balanced Braeburn or Cortland, and aromatic Jonagold or Ginger Gold. This combination ensures a rich, multi-layered apple flavor that is both bright and deeply comforting.
If you tried this recipe and loved it, please take a moment to leave a 🌟 star rating and share your experience in the comments below. Your feedback truly makes my day and helps other cooks!
Apple Butter
Chef Lindsey
20 minutes
1 hour
30 minutes
1 hour
50 minutes
16
Servings
Saved
Pin Recipe
Comment
Print Recipe
Ingredients
-
4
lbs
apples
cored, cubed, use at least 5 varieties -
2
cups
apple cider
-
1 ½
cups
granulated sugar
-
1
cinnamon stick
-
½
teaspoon
ground cinnamon
-
½
teaspoon
ground ginger
-
¼
teaspoon
ground cloves
Instructions
-
In a large, high-sided pot, add all the sugar and cook over medium-high heat to make a dry caramel. You can stir a dry caramel to help it melt evenly. As soon as all the sugar melts and begins to turn amber, it’s best to stop stirring. Break up any stubborn clumps of sugar with your spoon early on.
-
When the caramel reaches a dark amber color and just begins to smoke with a strong caramel aroma, immediately turn off the heat. Carefully add the apple cider, apples, and all the spices. Don’t worry if the caramel seizes and hardens initially; it will have plenty of time to melt and loosen during the cooking process.
-
Bring the mixture to a simmer over medium heat and cook for 1 hour, or until the apples are very soft. Remove the cinnamon stick before proceeding.
-
Immersion blend the mixture directly in the pot with a hand blender until completely smooth. Alternatively, carefully use a standard blender, working in batches, taking care with hot liquids. Once blended, pass the apple puree through a fine-mesh sieve into a clean bowl or pot to achieve an ultra-smooth texture.
-
Return the strained puree to a clean, high-sided pot and reduce over low heat, stirring frequently, until it thickens to the consistency of cold honey (it will fall in thick globs off a spoon). This step can take 30-60 minutes.
-
Cool the apple butter completely to room temperature before transferring it into clean, sterilized jars. Store in the refrigerator, or can using appropriate safety precautions for longer shelf life.
Video
Notes
Apple Quantity: You will need about 5 pounds of whole apples to yield the 4 pounds of cored and cubed apples specified in the recipe, accounting for waste and any delicious snacking!
Flavor Tips: For the most complex and robust flavor, use a variety of apples – aim for at least 5 different types to balance sweetness, tartness, and aroma.
Technique for Perfection: For the absolute best results and the silkiest texture, always puree and then strain the apple mixture while it’s still hot. After straining, return it to the pot and continue cooking until it reaches your desired thick, spreadable consistency.
Storage Guidelines: Properly cooled apple butter, stored in clean jars, will keep wonderfully in the refrigerator for up to one year. For longer preservation, consider canning it using a safe water bath method or freezing it in freezer-safe containers.
Nutrition
Calories:
36
kcal
|
Carbohydrates:
9
g
|
Protein:
1
g
|
Fat:
1
g
|
Saturated Fat:
1
g
|
Polyunsaturated Fat:
1
g
|
Monounsaturated Fat:
1
g
|
Sodium:
1
mg
|
Potassium:
38
mg
|
Fiber:
1
g
|
Sugar:
8
g
|
Vitamin A:
16
IU
|
Vitamin C:
1
mg
|
Calcium:
3
mg
|
Iron:
1
mg
Condiments
American, Belgium, Dutch, Germany
36
Like this? Leave a comment below!
Before You Go! Explore More Chef-Tested Fall Recipes
I sincerely hope you enjoyed crafting this professional chef-tested apple butter recipe and that it brings warmth and deliciousness to your kitchen. The rich, caramelized apple flavor and silky-smooth texture are truly unmatched. Don’t stop here – be sure to check out our other delicious, chef-developed fall recipes designed to bring the best of autumn to your table!
