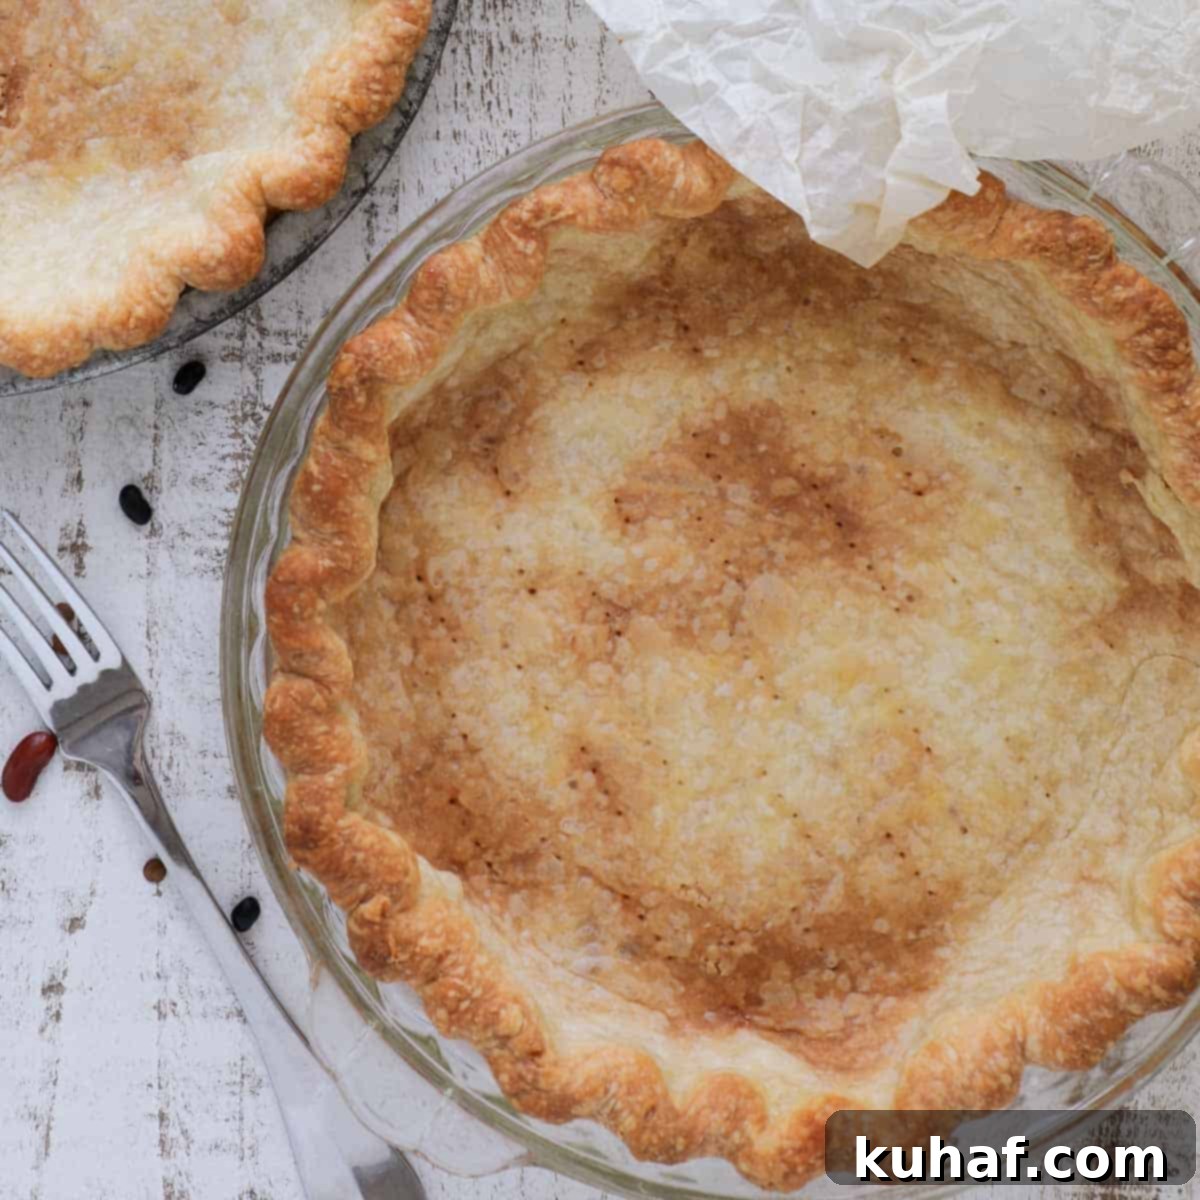
Mastering Blind Baking: Your Essential Guide to a Flaky Pie Crust
Achieving a truly flaky, golden-brown pie crust is the cornerstone of any great pie, but often, home bakers face the dreaded “soggy bottom.” This comprehensive guide, straight from a pastry chef, will demystify the art of pre-baking your pie crust, ensuring a perfect foundation for all your sweet and savory creations. You’ll learn the crucial differences between blind baking and par baking, understand when to use each technique, and master the step-by-step process to prevent a soft, uncooked base.
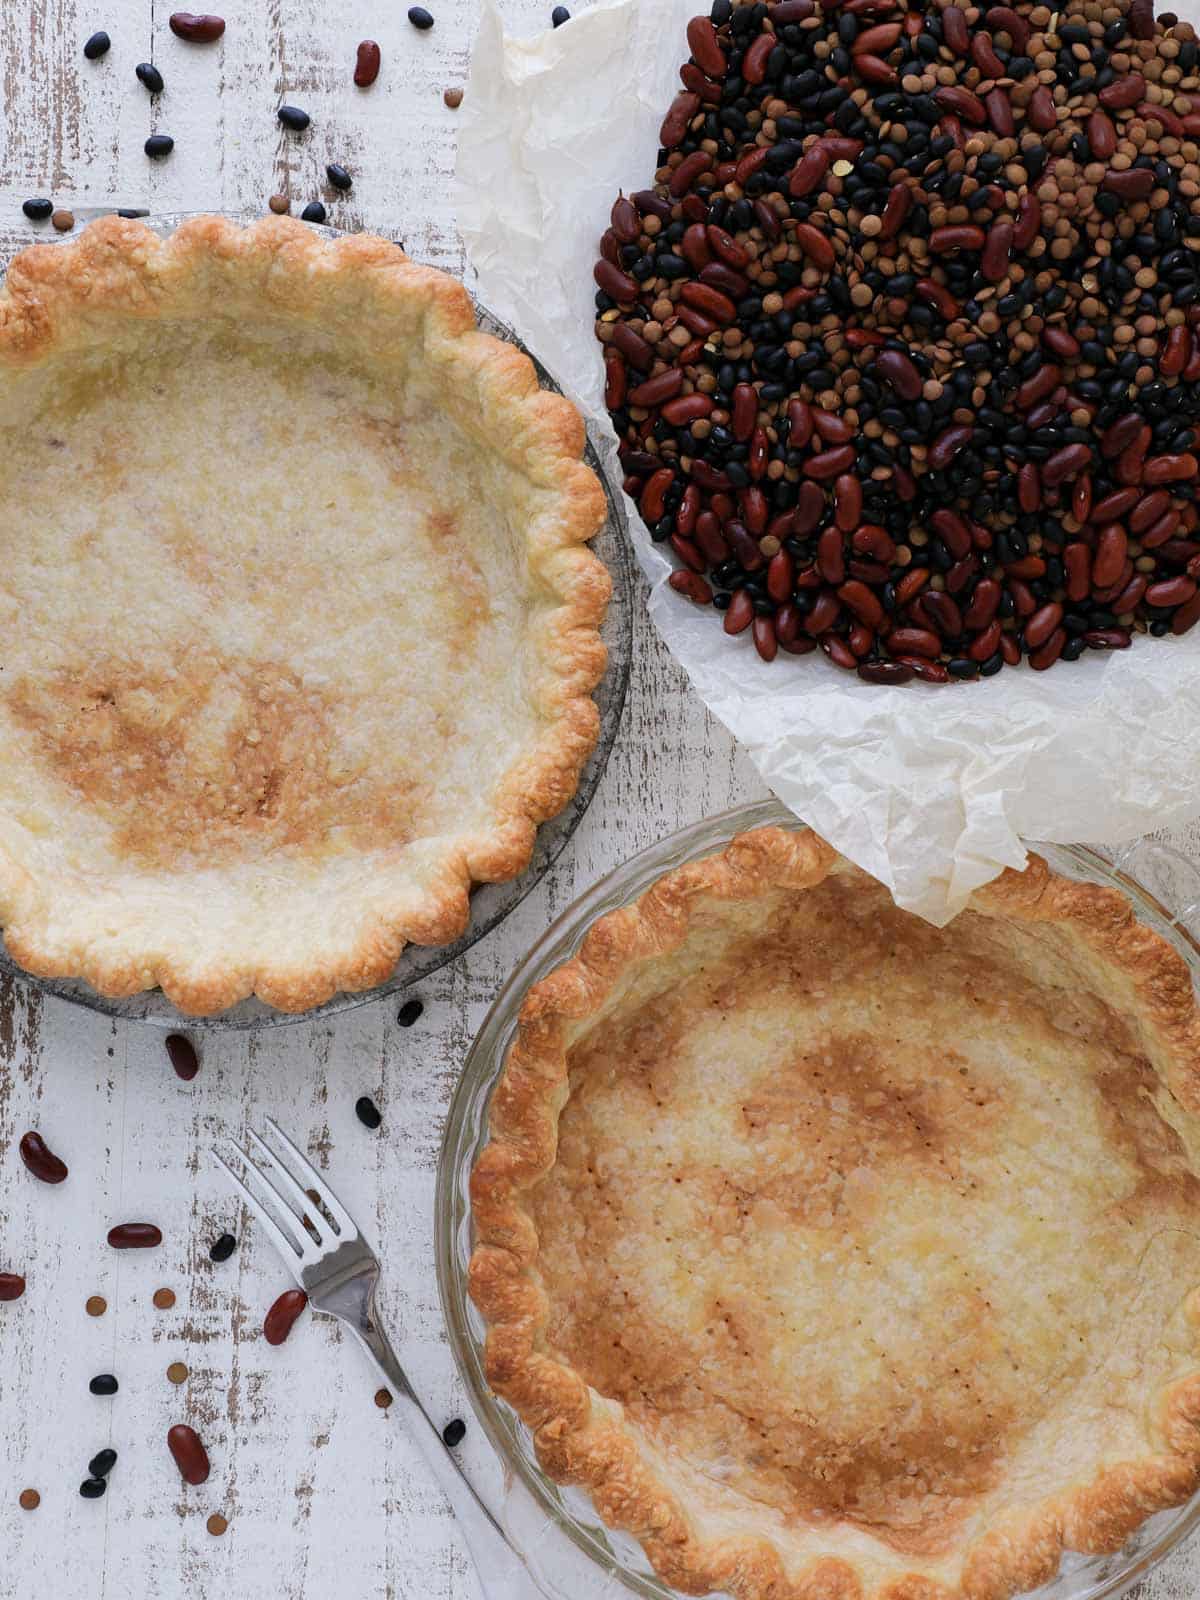
Whether you’re making a delicate custard pie or a hearty fruit tart, partially or fully blind baking your pie crust is the secret to a consistently flaky, golden-brown foundation. This essential technique ensures that your single-crust pies develop a desirable texture and color that stands up to any filling. Par-baking, or partially baking an empty pie crust, is ideal when your filling requires further baking, especially at a lower temperature or for a shorter duration than the crust needs to fully cook. This method guarantees the crust is perfectly done without becoming overbaked or, worse, soggy when combined with the filling. Classic examples include a luscious lemon meringue pie or a comforting easy pumpkin pie, where the filling and crust finish baking together in harmony.
Conversely, fully blind baking is the technique to employ for pies and tarts that feature no-bake fillings or delicate custards that require minimal oven time. This ensures the crust is completely cooked, crisp, and ready to hold rich, creamy fillings without becoming soft. Think of indulgent treats like banana cream pie, a decadent coconut cream pie, or the luxurious French silk pie. In these cases, a fully blind-baked crust provides the structural integrity and delightful crunch that perfectly complements the smooth, unbaked filling, preventing any risk of a raw or undercooked base.
Table of Contents
- Professional Bakers’ Tips for Prebaking Pie Crusts
- What is Blind Baking?
- What is Par-Baking?
- What You Will Need
- How to Blind-Bake Pie Crust
- Chef Lindsey’s Recipe Tip
- How to Keep Pie Crust from Shrinking?
- Frequently Asked Questions
- How to Blind Bake Pie Crust Recipe
- Before You Go
Professional Bakers’ Tips for Prebaking Pie Crusts
- Know when to dock the pie crust. Docking involves gently poking holes in the bottom of your pie crust before blind-baking. This crucial step allows steam to escape during baking, preventing the crust from puffing up unevenly. However, it’s essential to know when *not* to dock. For liquid-heavy fillings like pecan pie or some custard pies where any leakage could be disastrous, skipping the docking step is advisable. The filling itself can help weigh down the crust. For a deeper dive into this technique, read more about when & how to dock pie crust.
- Only remove pie weights when the crust has begun to brown on the bottom. Patience is a virtue here! Removing the pie weights too early can cause the crust to puff up or the sides to slump unattractively down the pie plate. Waiting until the bottom crust has started to set and lightly brown indicates that its structure is stable enough to hold its shape once the weights are removed, ensuring a beautifully formed pie shell.
- Prepare prebaked pie crusts ahead. Streamline your baking process by preparing pie crusts in advance. Blind-baked or par-baked pie crusts can be stored at room temperature for up to 3 days, making them perfect for busy weekends or holiday meal prep. For longer storage, freeze them for up to 2 months. Simply wrap them tightly in plastic wrap and then foil to prevent freezer burn, then thaw at room temperature before filling.
What is Blind Baking?
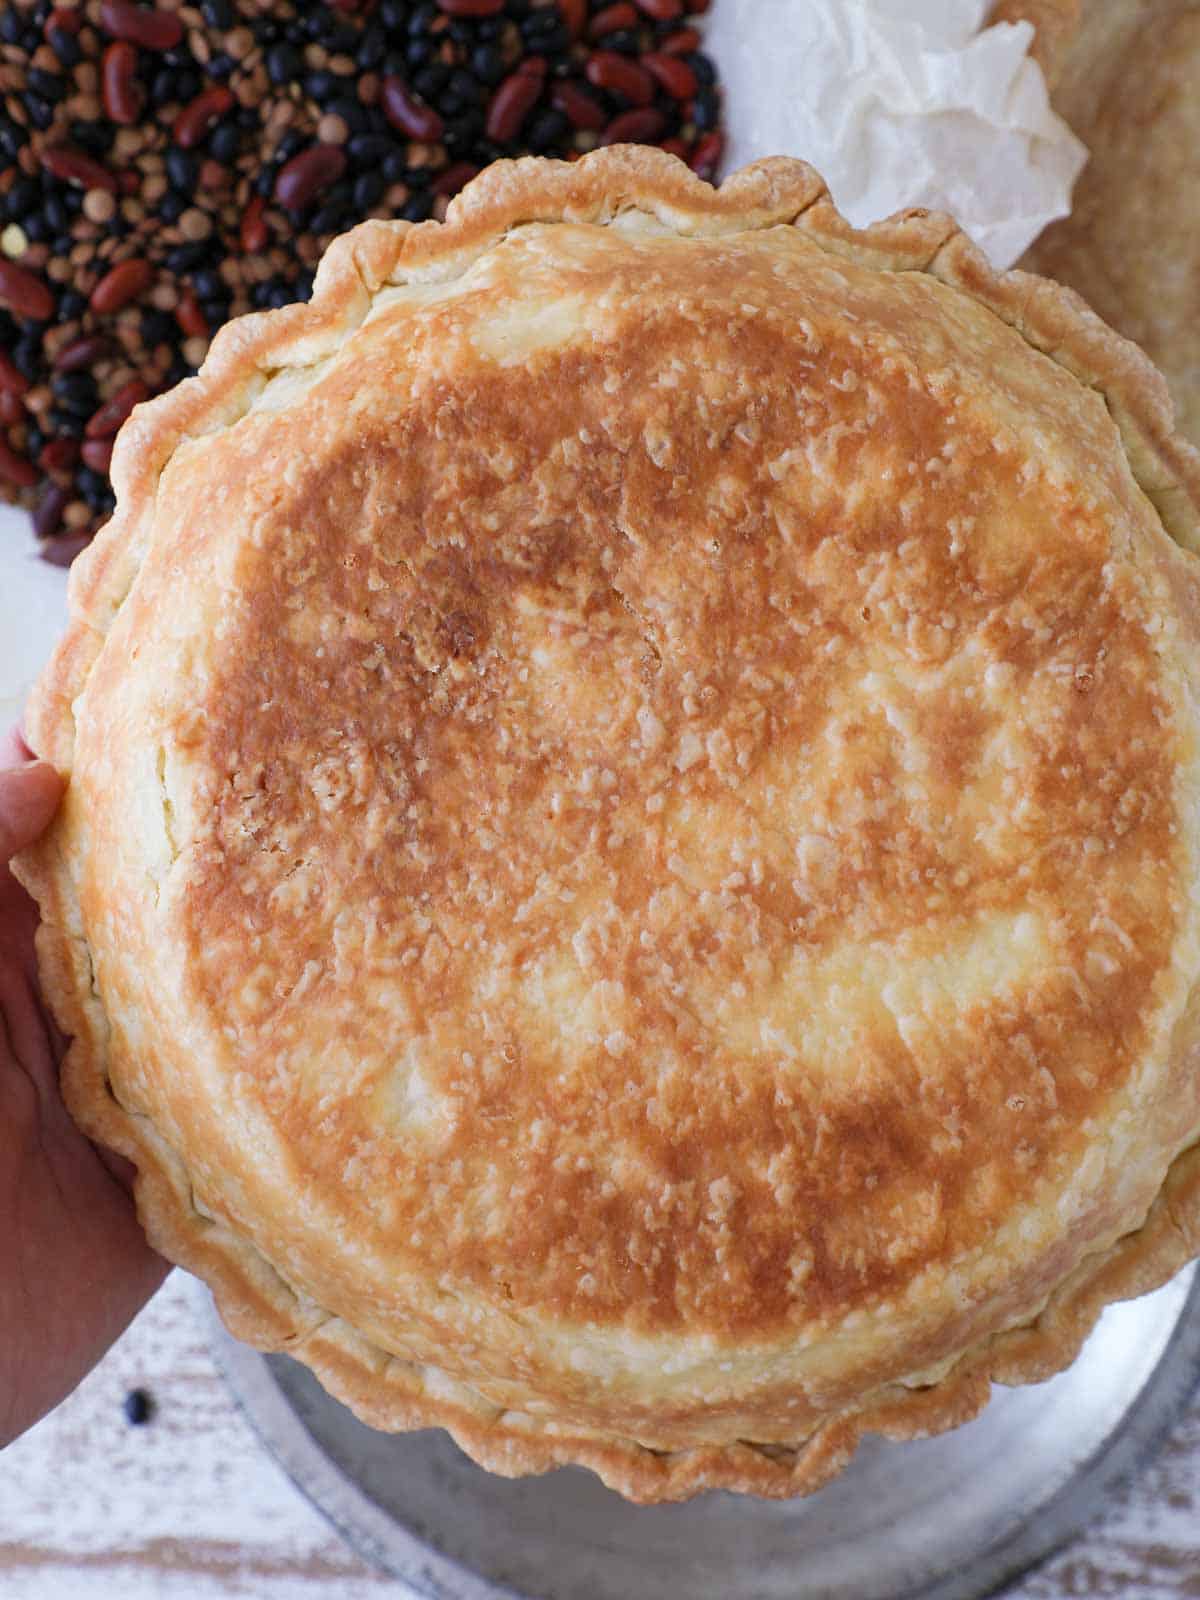
Blind baking, also known as full pre-baking, is the process of baking a pie crust completely *without* any filling. This technique is specifically used when the pie filling itself is either no-bake (requires no cooking) or needs only a very short chilling period, meaning the crust won’t undergo further significant baking once the filling is added. To blind bake, you line a pie dish with your prepared pie crust, then cover it with parchment paper and fill it with pie weights, dried beans, or rice. The weights prevent the crust from puffing up and shrinking, ensuring it maintains its shape. The crust is then baked until it is fully cooked, golden brown, and crisp throughout. A perfectly blind-baked crust is crucial for delicate cream pies like banana or coconut cream, or for elegant fresh fruit tarts where the filling relies entirely on a sturdy, fully baked base.
What is Par-Baking?
Par-baking, a term derived from “partially baking,” is a variation of blind baking where the pie crust is only partially cooked before the filling is added. This technique is employed when both the filling and the crust will continue baking together, but the filling might be liquid-based or not require enough oven time to fully cook a raw crust. The goal of par-baking is to give the crust a head start, preventing it from becoming soggy once the wet filling is introduced. The process begins similarly to blind baking: the pie shell is lined with parchment and weights. It’s then baked until it’s no longer raw or doughy, but only lightly browned and set. At this stage, the weights and parchment are removed, the partially baked crust is filled, and both the filling and crust continue their journey in the oven until perfectly cooked. This ensures a beautifully flaky, crisp crust that can stand up to moist fillings found in quiches, pumpkin pies, or many fruit pies.
What You Will Need for a Perfect Pre-Baked Crust
- Pie dough: The foundation of any great pie is its crust. Any type of pie crust, whether homemade or store-bought, can be partially or fully blind baked. The key is to choose a dough that complements your filling. For rich, buttery flavor, consider an all-butter pastry like my vodka pie crust, which offers exceptional flakiness. Alternatively, a Crisco pie crust yields a wonderfully tender result, while an almond flour pie crust offers a unique nutty flavor and texture. Yes, using a good quality store-bought crust is also a perfectly acceptable shortcut!
- Rolling pin: A quality rolling pin is essential for achieving an evenly thick crust. I particularly prefer a French rolling pin because its tapered ends offer superior control. This design allows you to apply even pressure across the dough initially, then precisely target specific areas to roll them thinner as needed, ensuring a consistent 1/8th-inch thickness without overworking the dough.
- Kitchen shears: For precise and effortless trimming of excess pie crust, a pair of sharp kitchen shears is invaluable. They make quick work of removing dough from around the edges of your pie dish. I highly recommend dedicating a specific pair of shears for food preparation to maintain hygiene and avoid cross-contamination with non-food items.
- Pie dish: The material of your pie dish significantly impacts crust browning. Metal or glass dishes are highly recommended because they conduct heat much more efficiently than ceramic. This superior heat transfer promotes even and quicker browning of the bottom crust, a critical factor in preventing a soggy bottom. While ceramic dishes are beautiful, they often require longer baking times to achieve the same browning.
- Parchment paper: Essential for creating a barrier between your pie dough and the pie weights. I find that crumpling my parchment paper into a tight ball and then unfolding it before lining the crust helps it form to the shape of the pie dish more easily, preventing sharp creases that could poke through the delicate dough.
- Pie weights or beans: To prevent the pie crust from puffing up during baking, it must be weighed down. Traditional ceramic pie weights are designed for this purpose, but dried beans (like kidney beans or chickpeas) or even rice can serve as excellent, reusable alternatives. Distribute them evenly over the parchment paper to apply consistent pressure. Remember, only remove the parchment and weights once the bottom crust has visibly begun to brown, which indicates it has set enough to prevent unwanted puffing.
How to Blind-Bake Pie Crust: Step-by-Step Guide
Follow these detailed instructions to achieve a perfectly par-baked or fully blind-baked pie crust every single time, ensuring a flaky base for all your favorite pies.
Step 1: Prepare your work surface by lightly flouring it, along with the top of your pie dough and your rolling pin. This prevents sticking and allows for smooth rolling.
Step 2: Roll your chilled pie dough out to an even 1/8-inch thickness, aiming for as close to a perfect circle as possible. The uniform thickness is key for even baking. Once rolled, chill the dough for at least 30 minutes. This crucial chilling step allows the gluten to relax, preventing the crust from shrinking excessively during baking. Preheat your oven to 350°F (175°C) convection or 375°F (190°C) conventional.
Step 3: Carefully transfer the chilled pie dough into your pie dish. Gently press the dough into the bottom and up the sides of the dish, ensuring it fits flush without stretching. Allow any excess dough to generously overhang the edges. Stretching the dough at this stage can lead to shrinkage. Chill the lined pie dish for another 30 minutes. This second chill firms up the butter and relaxes the gluten further, solidifying the crust’s shape before it enters the hot oven.
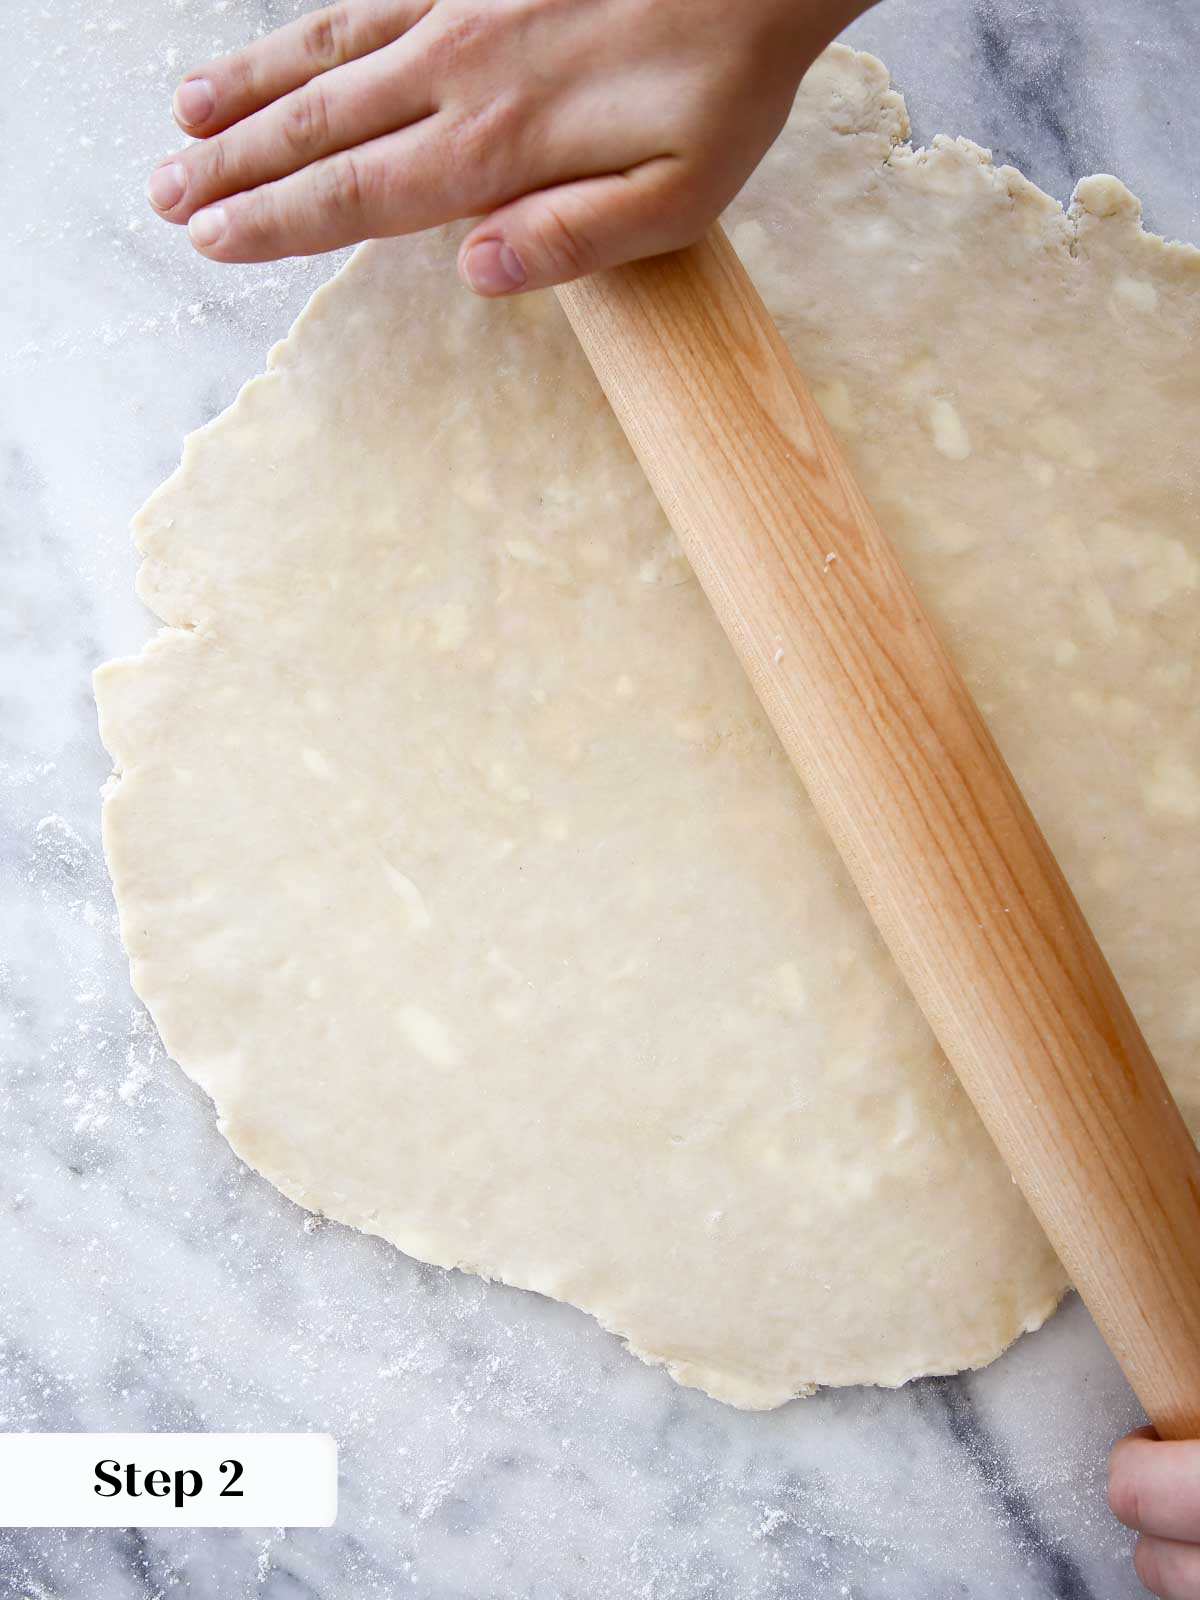
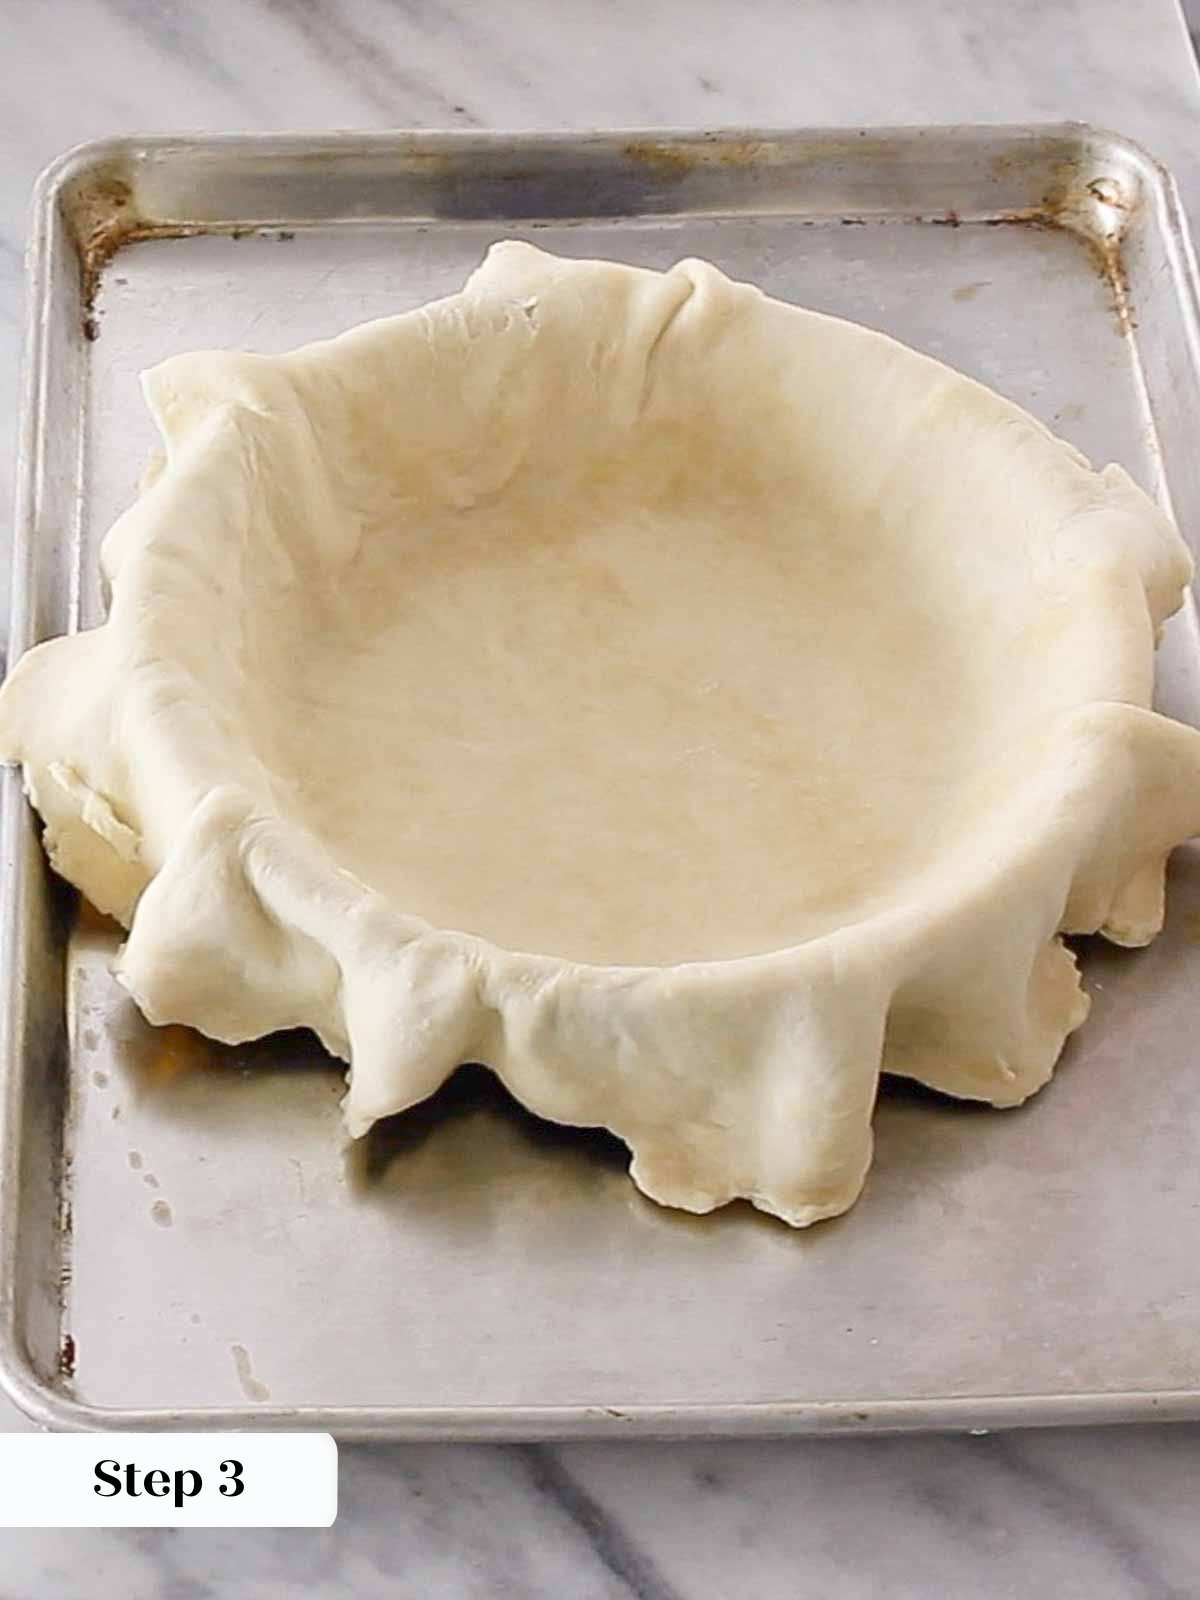
You can skip chilling at this stage but for the flakiest, most tender crust, chilling will yield the best pie crust results.
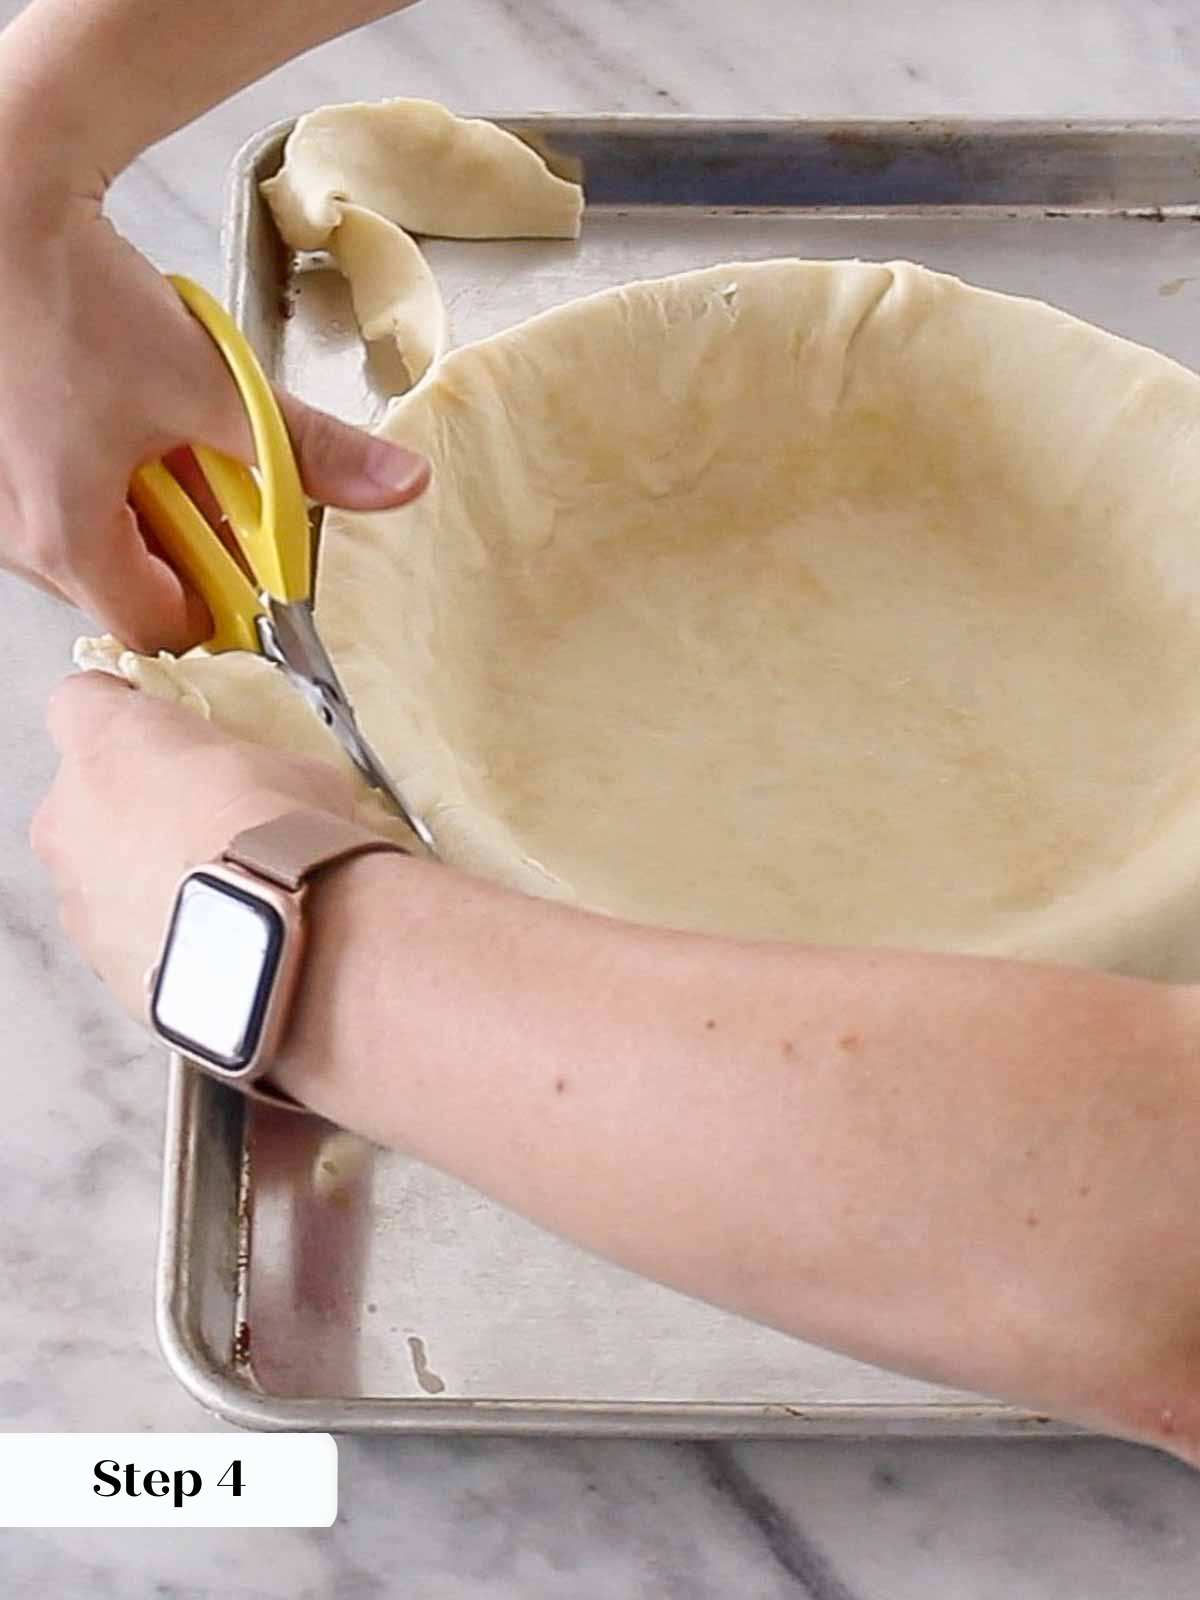
Step 4: Trim any dough hanging more than 1 inch past the rim of the pie dish. Then, meticulously roll the excess dough underneath itself, pressing and sealing it tightly between your thumb and first two fingers. This creates a sturdy edge. Rolling tightly is critical to prevent the edge from popping open or slumping in the oven during baking.
Leaving too much dough around the edges will make the crust too thick, preventing it from baking at the same rate as the thinner bottom. This often results in an underbaked, doughy center and an overly thick, pale crust edge.
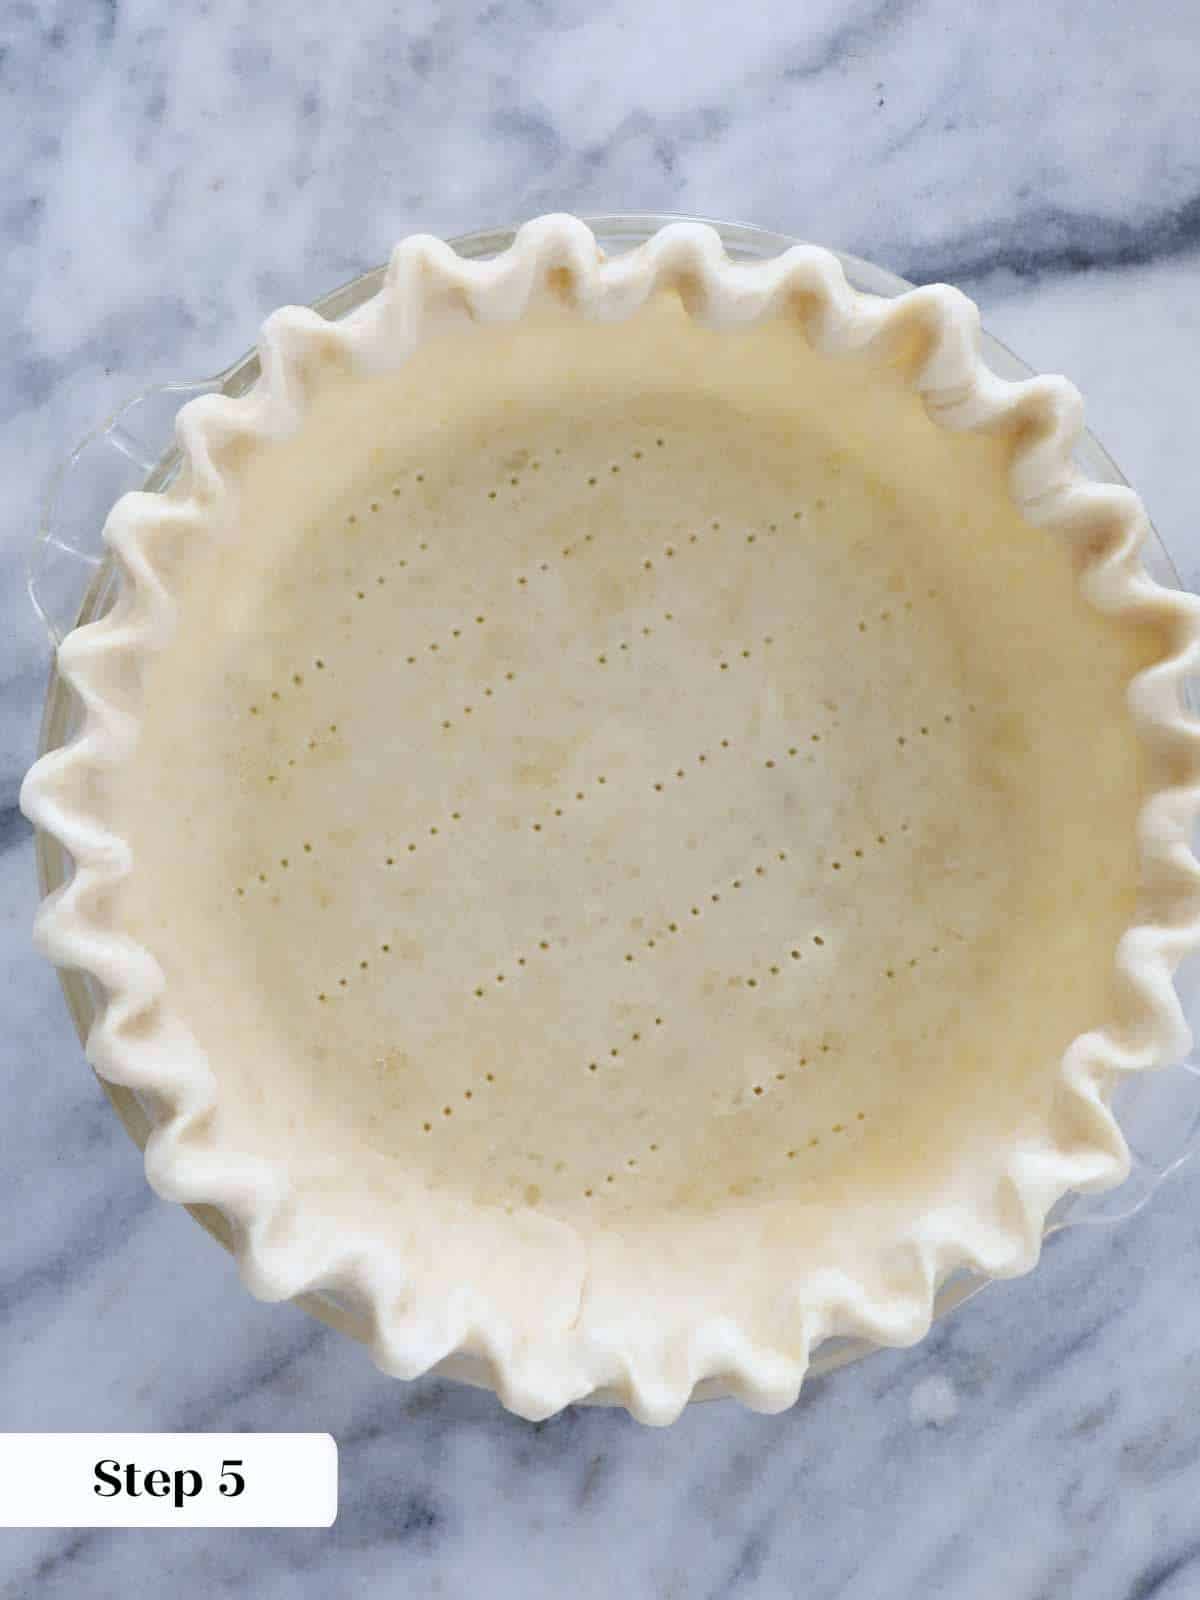
Step 5: Once the edge is rolled under, crimp or flute it decoratively, or simply mark it with the tines of a fork to create a classic finish. If, by this point, the dough no longer feels cool to the touch (indicating the butter might be warming up), return it to the refrigerator for another 15-30 minutes to ensure it’s thoroughly chilled before baking.
Step 6: Line the chilled pie crust with crumpled parchment paper, ensuring it covers the bottom and sides. Then, fill the parchment paper with your chosen pie weights, dried beans, or rice. Distribute the weights evenly across the bottom and up the sides to ensure consistent pressure. This prevents the crust from shrinking or bubbling up during baking.
From my experience, rice often isn’t heavy enough to completely prevent the crust from developing small bubbles or puffing in places. Conversely, some commercial pie weights can be overly heavy, potentially compacting the dough too much and hindering the flaky layers from properly developing. I’ve found dried beans to be an excellent middle ground. They provide sufficient weight without being too dense. After using, I cool and reuse the same beans every time. You can use any type of dried beans you prefer!
Step 7: Bake the weighted crust in your preheated oven for 12-20 minutes, or until the bottom crust just begins to turn a very light golden brown. At this point, your pie crust has reached the par-baked stage! If your recipe calls for further baking of the crust with its filling, you can stop here. Depending on your specific filling, you may either fill the crust immediately or allow it to cool completely before proceeding.


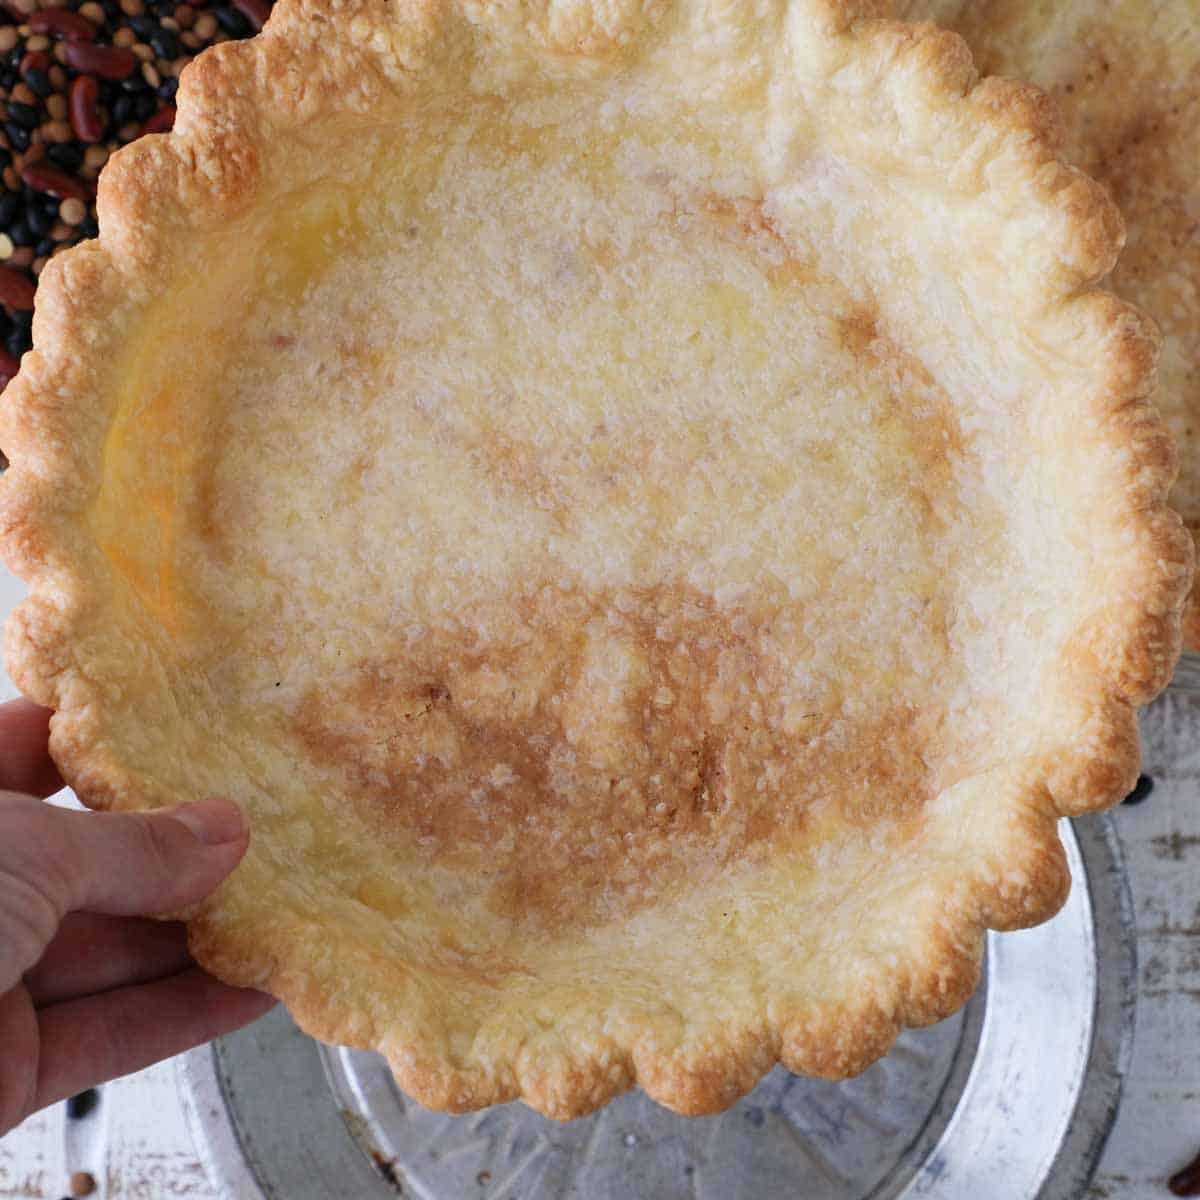
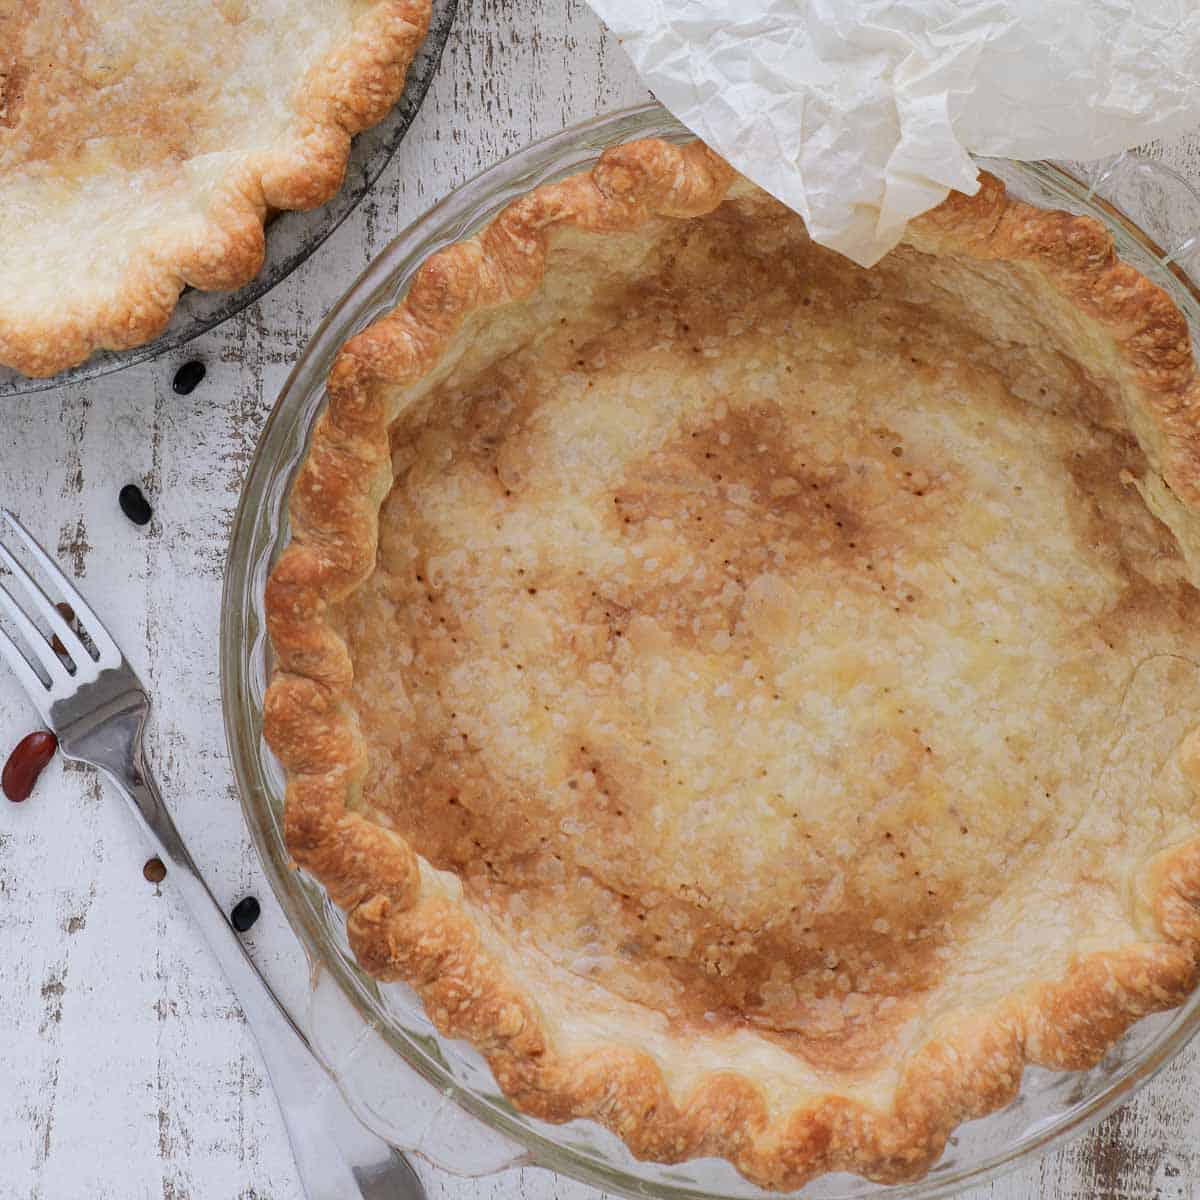
Step 8: To achieve a fully blind-baked pie crust, carefully remove the parchment paper along with the weights, beans, or rice from the par-baked shell. Return the now-empty crust to the oven and continue baking for another 8-15 minutes. During this stage, keep a close eye on it until the bottom and edges have developed a beautiful, rich golden-brown color, indicating it’s fully cooked and crisp. Once fully baked, allow the crust to cool completely on a wire rack before adding any filling.
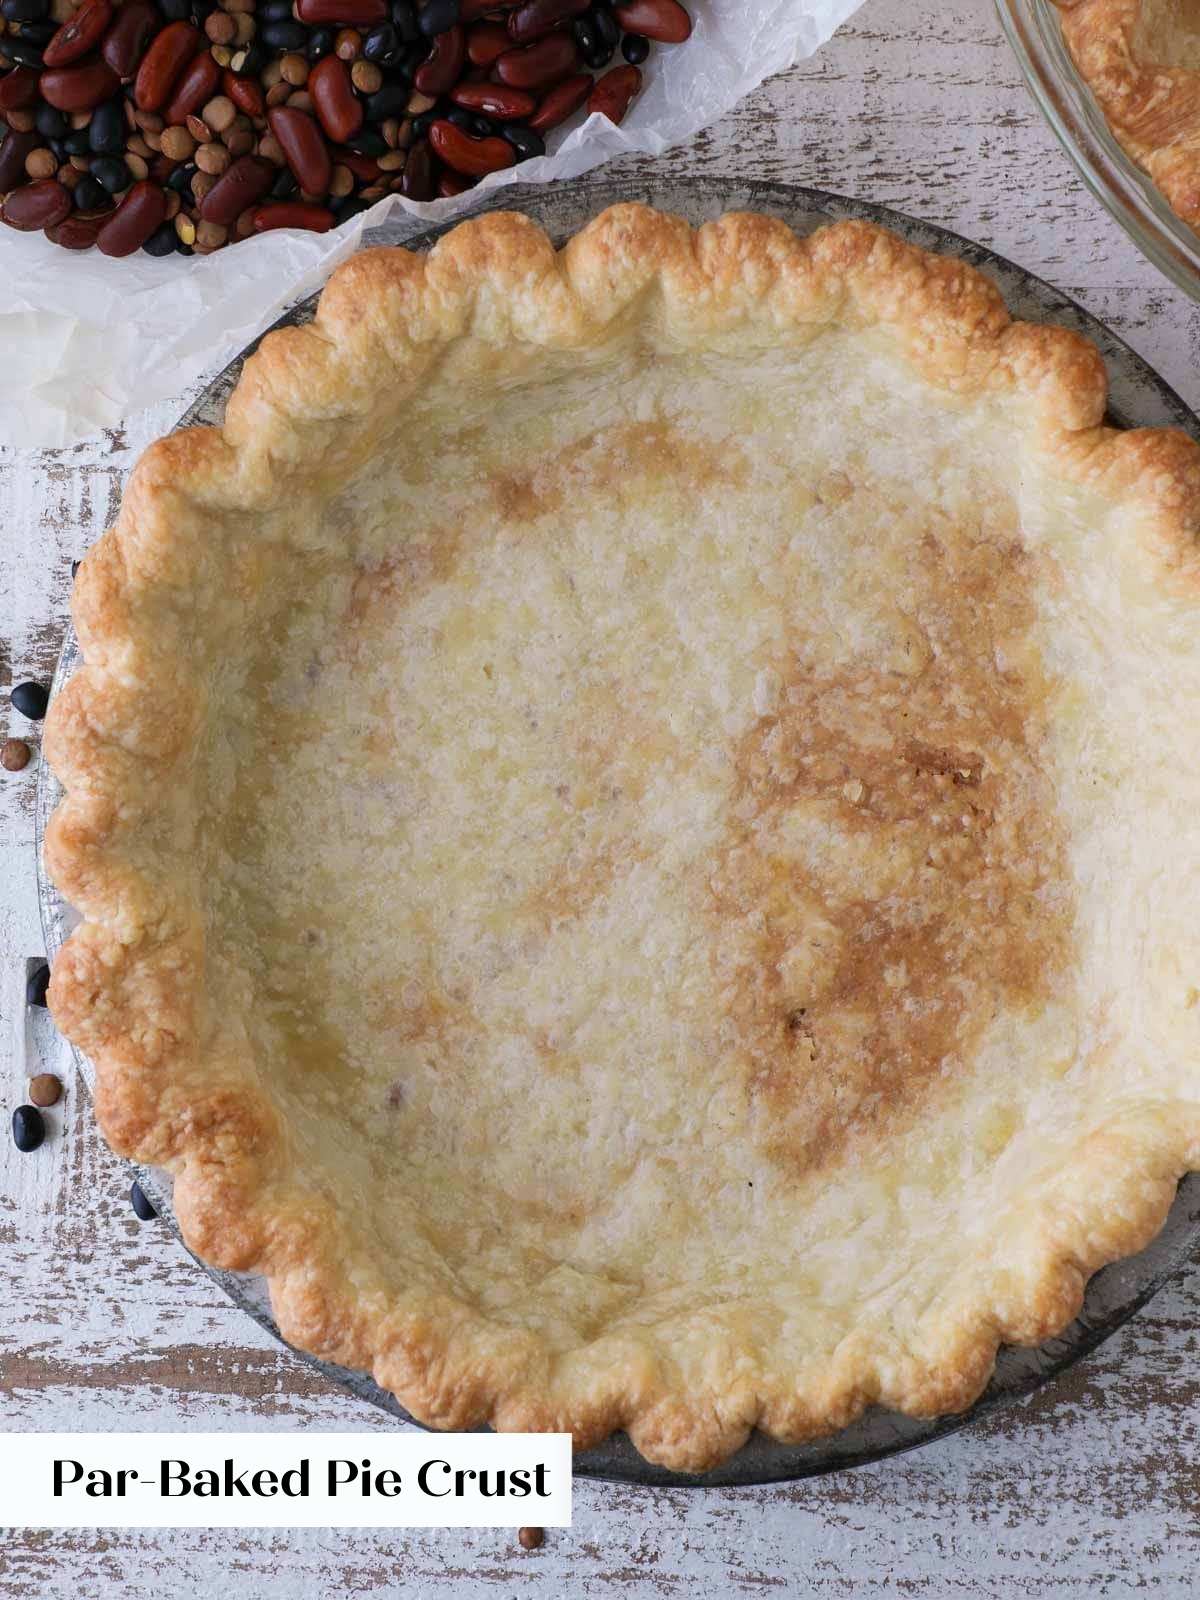
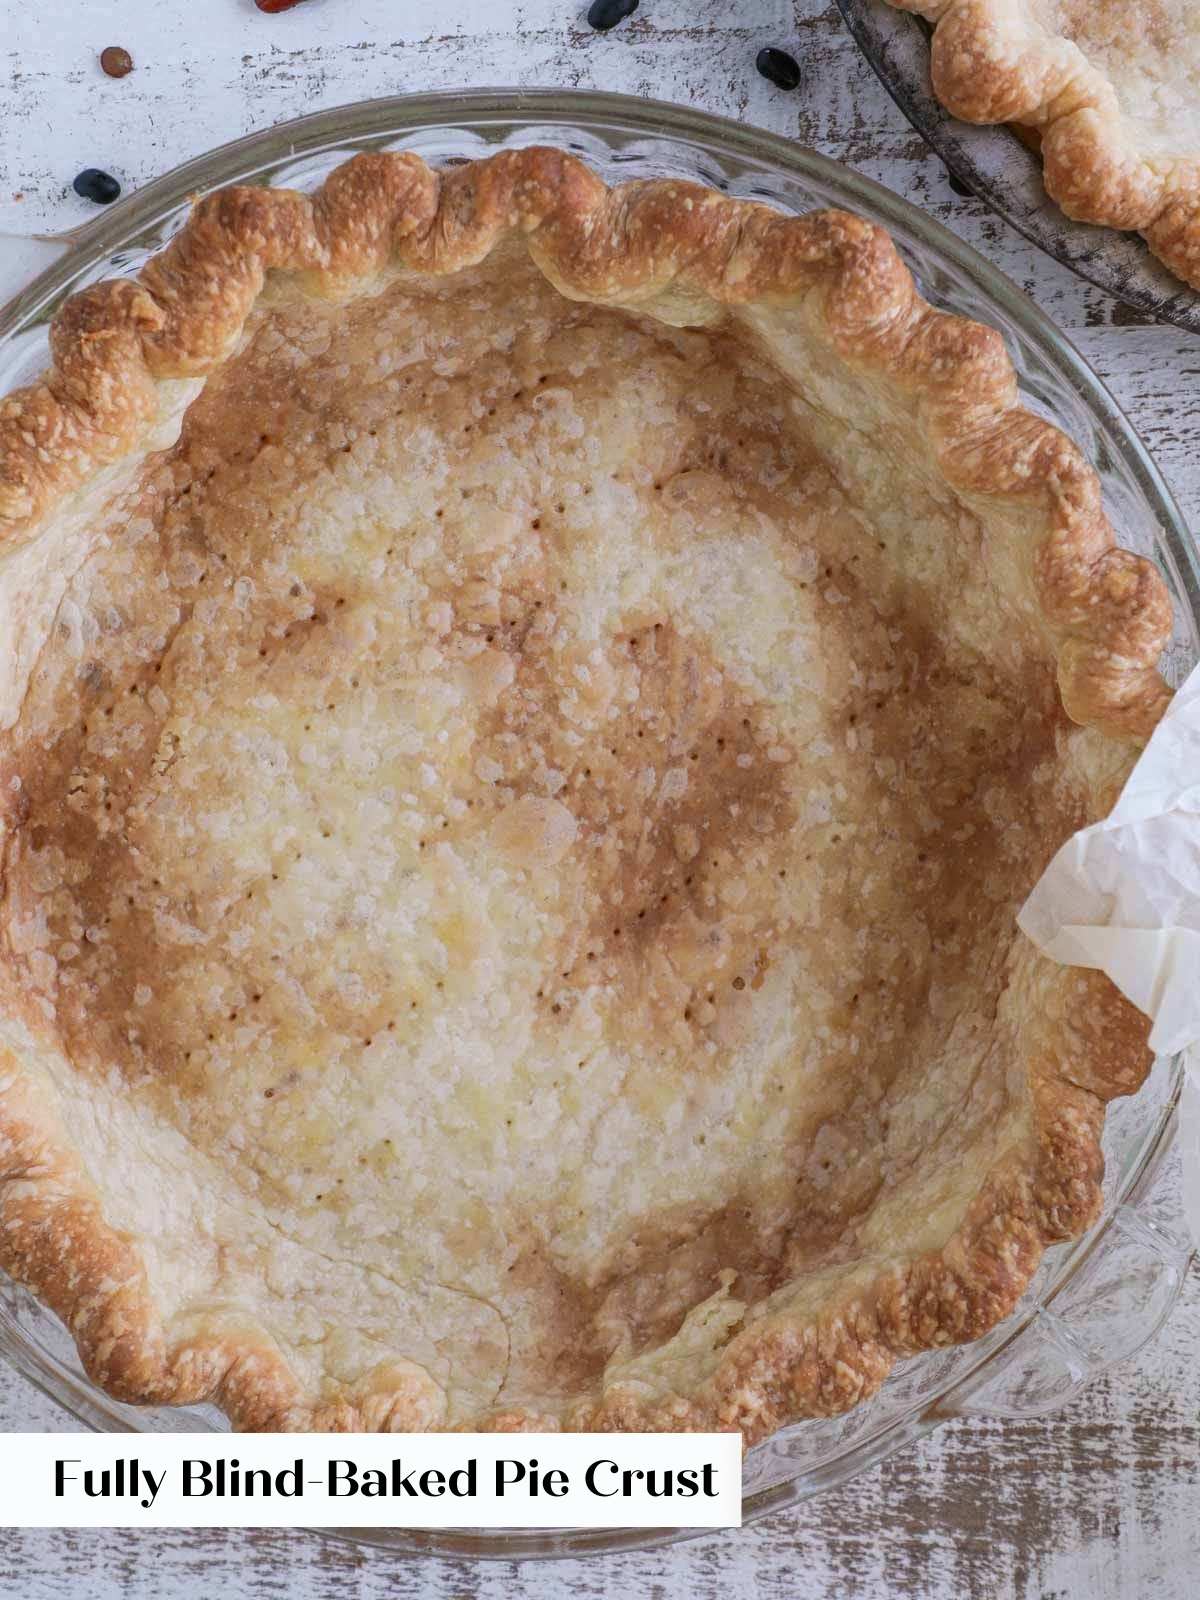
Did you know: Occasionally, a baker might accidentally fully bake the pie crust with the parchment and weights still in. While it’s not ideal for achieving an even browning on the very bottom of the crust (as the weights block direct heat), don’t fret if this happens to you. Simply remove the parchment paper and weights, and declare your crust done. It will still be cooked and perfectly usable for many fillings!
Chef Lindsey’s Recipe Tip
While this tutorial is designed for homemade pie dough, you can absolutely apply the same principles to store-bought pie crust. However, store-bought dough is often much thinner, meaning its baking times will be significantly reduced. Keep a close watch on the crust after just 5 minutes in the oven to prevent it from burning or becoming overly crisp.
How to Keep Pie Crust from Shrinking: Essential Techniques
Pie crust shrinkage is a common frustration, but it’s entirely preventable with a few key techniques throughout the pie-making process:
- Don’t overwork the dough. The journey to a perfect crust begins with how you handle the dough. Over-mixing or excessive kneading develops the gluten strands in the flour. While gluten provides structure, too much development makes the dough elastic and prone to snapping back or shrinking dramatically when exposed to heat in the oven. Aim for minimal handling and just enough mixing to bring the dough together.
- Chill, chill, chill the dough! This cannot be stressed enough. After preparing your dough, after rolling it out, and even after fitting it into the pie dish and crimping the edges, chilling is your best friend. Each chilling period (for at least 30 minutes, sometimes more) serves a dual purpose: it allows the gluten strands to relax, which reduces elasticity and prevents shrinkage, and it re-solidifies the fat (butter or shortening). Cold fat creates steam pockets in the oven, leading to the desirable flaky layers in your crust.
- Choose a glass or metal pie dish. The material of your pie dish plays a significant role. Glass or metal dishes conduct heat far more efficiently and evenly than ceramic. This not only encourages better browning of the bottom crust but also helps anchor the dough in place, making it less likely to slide down the sides of the pan as it bakes.
- Lastly, blind-bake long enough with the weights. The pie weights (or beans/rice) serve a critical function: they physically hold the dough in place, preventing it from puffing up or, more importantly, shrinking and sliding down the sides of the dish. Ensure you bake with the weights for the recommended time until the crust has set and begun to brown slightly on the bottom. This sets its structure before the weights are removed.

Frequently Asked Questions about Blind Baking Pie Crust
For optimal freshness and texture, store partially or fully prebaked pie crusts wrapped tightly in plastic wrap or an airtight container at room temperature for up to 3 days. If you need to store them longer, they can be frozen for up to 2 months; just ensure they are well-wrapped in both plastic and foil to prevent freezer burn. I do not recommend refrigerating prebaked pie crusts as the cold, moist environment can cause the crust to soften and absorb unwanted flavors from the fridge.
You can prebake pie crusts up to 3 days in advance if storing them at room temperature. For longer preparation, bake several crusts, allow them to cool completely, then carefully stack and wrap them to store frozen for up to 2 months. Thaw frozen crusts at room temperature before filling and serving.
Baking times vary slightly depending on the crust. For store-bought pie crust, bake at 375°F (190°C) with weights for about 8-10 minutes. For homemade pie crust, bake with weights for approximately 12-15 minutes. In both cases, remove the weights when the bottom crust is just beginning to turn pale golden. If par-baking, you can then add your filling and continue baking according to your recipe. If fully blind baking, remove the weights and continue baking the empty crust for another 8-10 minutes, or until the entire crust (bottom and edges) is a beautiful golden brown.
You should fully blind bake a pie crust when you are going to fill it with an unbaked or minimally baked filling. This ensures the crust is fully cooked and crisp before it’s combined with a liquid or delicate filling. Excellent examples include banana cream pie, French silk pie, fresh fruit tarts, or chocolate tarts.
Partially blind bake (par-bake) a pie crust when both the crust and its filling will continue baking together. This method gives the crust a crucial head start, preventing it from becoming soggy under a wet filling. It’s particularly useful for pies where the filling bakes at a lower temperature or requires a longer baking time than a raw crust could withstand. Ideal for classics like pumpkin pie, savory quiches, sweet potato pie, or chocolate pie. I also par-bake crusts when the filling ideally bakes at a lower temperature, such as for pecan pie.
Bubbling usually indicates that steam is trapped beneath the crust and couldn’t escape. This is why docking is important for many crusts. If you didn’t dock, or if the weights shifted, you can gently prick the bubble with a fork or knife as soon as you notice it while it’s still warm. Press it down carefully. For future pies, ensure even distribution of pie weights and sufficient docking (if applicable) to prevent this.
While ceramic pie plates are beautiful, they conduct heat less efficiently than metal or glass, which can lead to a paler or less crispy bottom crust when blind baking. If using a ceramic dish, you may need to increase the baking time slightly and be extra vigilant about chilling your dough to prevent shrinkage, as the slick surface can make it easier for the crust to slump.
If you tried this recipe and loved it, please leave a 🌟 star rating and let me know how it goes in the comments below. I love hearing from you; your comments make my day!
How to Blind Bake Pie Crust
Pin Recipe
Comment
Print Recipe
Ingredients
- 1 cup all-purpose flour
- ½ teaspoon kosher salt
- ½ teaspoon granulated sugar
- 4 ½ tablespoons unsalted butter cubed, cold
- 1 ¼ oz cold water as much or as little as needed
Instructions
-
Use any of the 5 methods in this all butter pie crust recipe tutorial to prepare you pie crust or use store bought. You can also make any of these pie crust recipes.
-
Lightly flour a flat surface, the top of the dough, and a rolling pin.
-
Roll the dough out to about 1/8th inch thickness in as close to a circle as possible. Chill for 30 minutes. Preheat the oven to 350°F convection or 375°F conventional.
-
Gently place pie dough into pie dish and fold the dough to fit it flush to the bottom and sides allowing any excess dough to overhang the edges. Chill 30 minutes.
-
Trim any dough that is hanging over in excess of 1 inch. Roll under tightly by pressing and rolling the dough between your thumb and first two fingers. Be sure to roll tightly to avoid it popping open in the oven.
-
Crimp or flute the edges or mark with the tines of a fork. If this too long enough for the dough to no longer feel cool to the touch, chill it again for 15-30 minutes.
-
Line with parchment paper and fill with pie weights, beans or rice.
-
Bake crust in preheated oven for 12-20 minutes or until the bottom crust begins to brown. This is the par-baked stage! If you are going to continue baking the crust with filling, you are done! Depending on your filling you can use immediately or allow the crust to cool before filling.
-
To finish blind baking the pie crust, remove the parchment and weights, beans or rice. Continue baking for 8-15 minutes or until the bottom and edges have turned a nice golden brown. Allow to cool before filling.
Video
Notes
Presentation – Leaving too much dough around the edges will make the edge too fat and it will not bake at the same rate as the rest of the crust resulting in an underbaked center.
Technique – I find that rice isn’t heavy enough to completely prevent the crust from puffing and that pie weights are too heavy and keep the dough from rising enough to make a flaky crust. I cool and reuse the same beans every time. You can use any beans that you’d like!
Storage – Store partially or fully blind baked pie crust wrapped at room temperature for up to 3 days or frozen for up to 2 months.
Nutrition
Before You Go: Elevate Your Pie Game
Now that you’ve mastered the art of blind baking, it’s time to put your perfect crust to good use! Explore our delectable pie recipes, featuring everything from my favorite creamy custard pies to vibrant, seasonal fruit pies. To further hone your pastry skills, make sure to check out our collection of pie crust recipes for various dough options. And don’t forget this essential tutorial on when to dock a pie crust, a pro-level tip that will ensure your pies are truly picture-perfect every time. Happy baking!
