Ultimate Homemade Red Velvet Cookies with Tangy Cream Cheese Frosting
Prepare to fall in love with these incredible Red Velvet Cookies with Cream Cheese Frosting. These aren’t just any cookies; they are a celebration of flavor and texture, meticulously crafted to be thick, wonderfully chewy, and melt-in-your-mouth soft. Imagine all the beloved characteristics of a classic red velvet cake, but condensed into a delightful, handheld cookie, elevated with the satisfying chewiness reminiscent of your favorite chocolate chip cookies. Each cookie is generously rolled in granulated sugar, not only adding an irresistible crunch to the exterior but also a dazzling sparkle that makes them feel extra special and festive. It’s the perfect bite every single time!
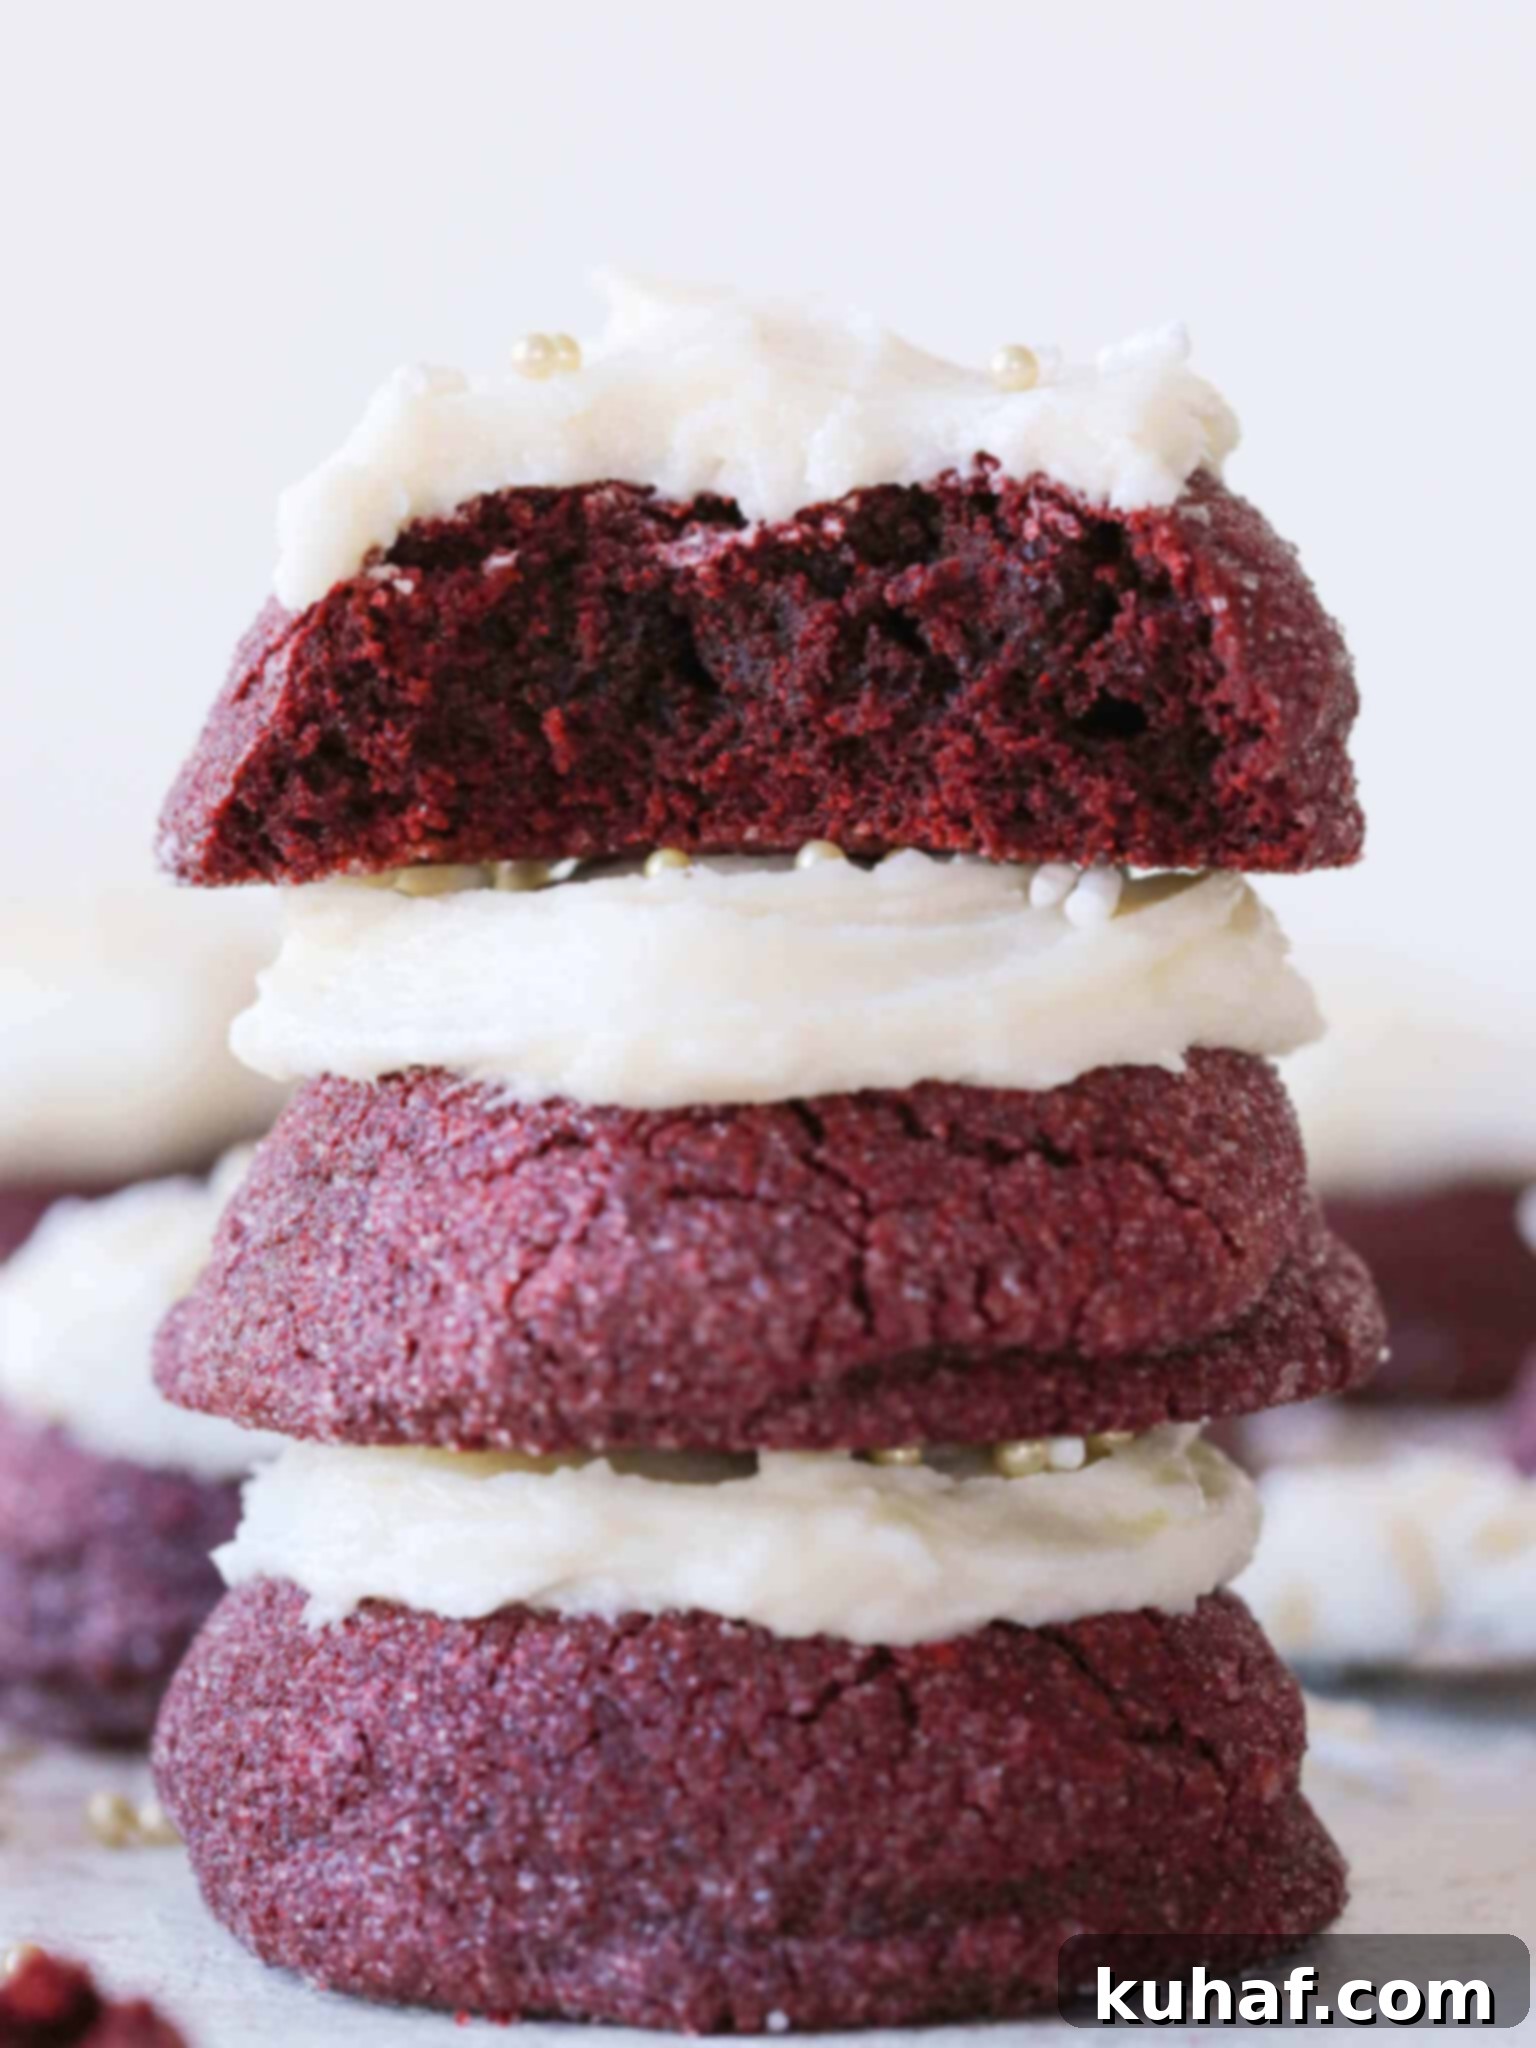
Your search for the perfect red velvet cookies ends here. Every bite promises an exquisite experience: a soft, moist interior that delivers a subtle yet distinct hint of chocolate flavor, beautifully complemented by the iconic red hue. The exterior, delicately coated in granulated sugar, provides a delightful crunch and an additional layer of sweetness, making these cookies truly exceptional. The sparkling sugar finish also adds a festive touch, ideal for any special occasion or simply to brighten your day.
Why stick to tradition when you can innovate? Move beyond the classic Red Velvet Layer Cake or even my impeccable Red Velvet Pound Cake and dive into the delightful world of red velvet cookies. Paired with our specially formulated cream cheese frosting for cookies, they become an instant favorite. These cookies are a stellar choice among my best Valentine’s Day Desserts, serving as a thoughtful and delicious gift for your favorite Galentine, perhaps alongside these charming Valentine’s Day Cookies. They can even join forces with their elegant cousin, Linzer Cookies, to create a stunning Christmas Cookie platter, sure to impress all your holiday guests!
Table of Contents
- Why You Will Love This Red Velvet Cookie Recipe
- Professional Tips from a Pastry Chef
- What Exactly Are Red Velvet Cookies Made Of?
- Key Ingredients for Perfect Red Velvet Cookies
- Delicious Variations to Try
- How to Make Red Velvet Cookies: A Step-by-Step Guide
- Chef Lindsey’s Recipe Tip for Optimal Flavor
- Frequently Asked Questions
- Red Velvet Cookies Recipe Card
- Before You Go: More Sweet Treats!
Why You Will Love This Red Velvet Cookie Recipe
This red velvet cookie recipe stands out for several compelling reasons, promising a baking experience that’s both enjoyable and rewarding, resulting in cookies that are truly unforgettable:
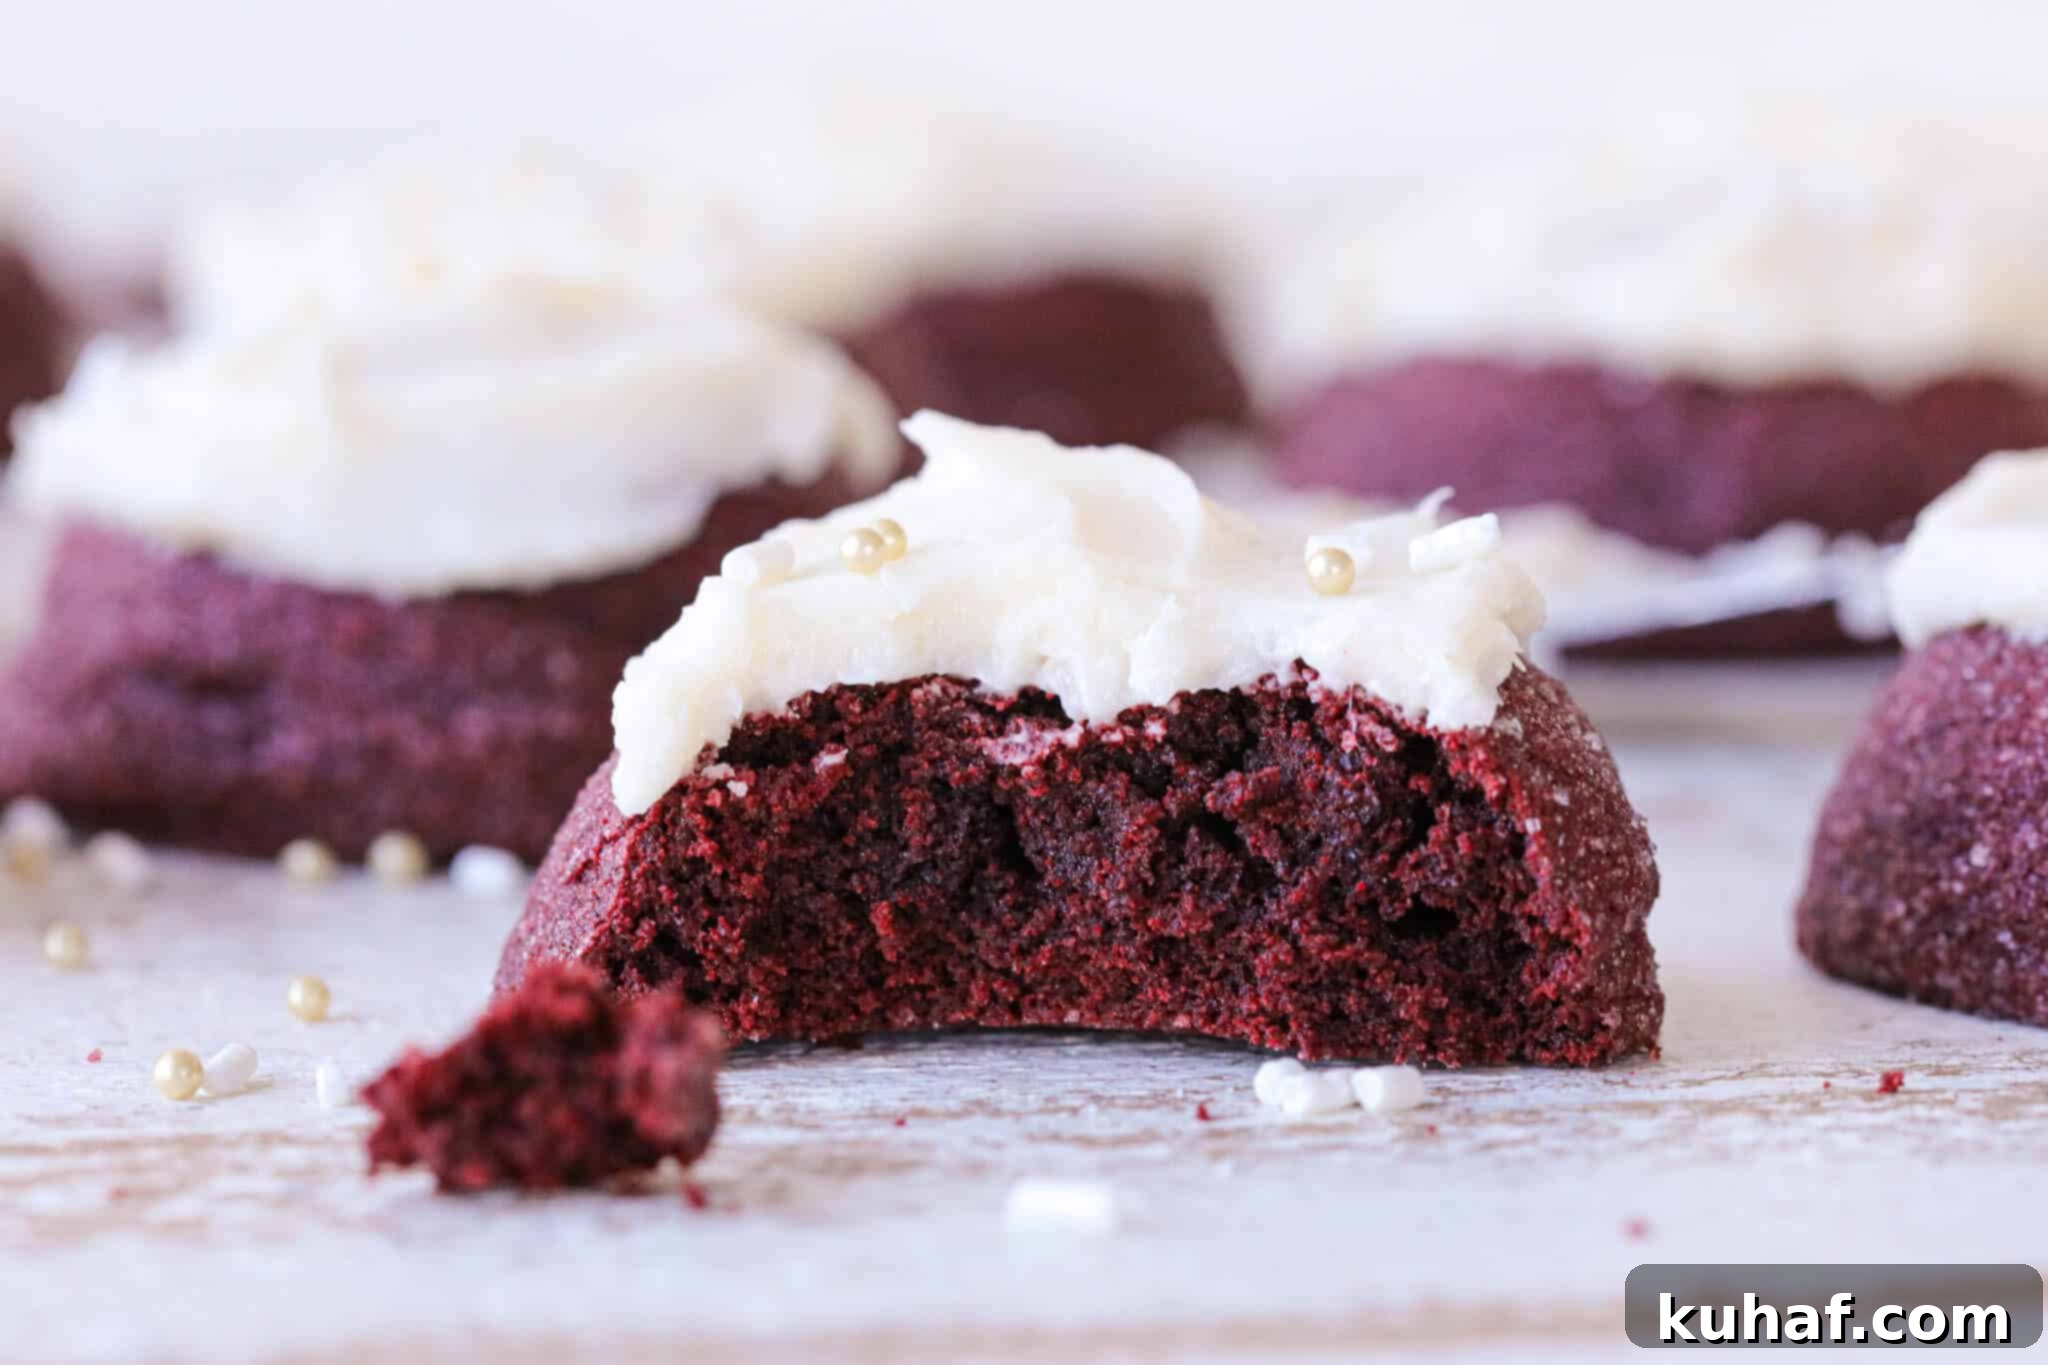
- Unrivaled Texture, Texture, Texture: These cookies deliver an extraordinary sensory experience. They are engineered for a perfect balance of chewiness, tenderness, and a delightful softness that makes them incredibly appealing. The granulated sugar coating adds a beautiful crispness to the edges, creating a multi-layered textural journey in every single bite. This masterful combination ensures an unforgettable red velvet cookie experience that will have everyone reaching for more.
- Subtle, Nuanced, and Deeply Satisfying Flavor: Unlike some red velvet recipes that can be overly sweet or lack depth, our recipe focuses on a sophisticated flavor profile. We utilize Dutch-processed cocoa powder, which provides a richer, more profound chocolate base, subtly complementing the signature red velvet taste. The inclusion of a whole egg adds a luxurious richness and contributes to the cookie’s tender crumb. A touch of red food dye ensures the iconic vibrant red hue, making for an absolutely stunning presentation that’s as pleasing to the eye as it is to the palate.
- Professional Guidance for Flawless Baking: As a professional pastry chef, I’ve developed this recipe with precision and clarity in mind. I gradually walk you through each step, ensuring you understand the ‘why’ behind every action. My practical, easy-to-follow guidance demystifies the baking process, enabling you to achieve the most balanced and delicious red velvet cookies possible. For visual learners, I’ve even included a helpful how-to video in the recipe card, demonstrating key techniques for perfect results every time.
Professional Tips from a Pastry Chef for Perfect Cookies
Achieving bakery-quality red velvet cookies involves a few key techniques that can elevate your baking from good to exceptional. Here are my top professional tips to ensure your cookies turn out perfectly every time:
- The Essential Role of Brown Sugar: Do not skip the brown sugar in this recipe. While white sugar provides sweetness and crispness, brown sugar is crucial for achieving the desired thick and chewy texture. Its molasses content adds moisture and helps the cookies spread less, resulting in a delightfully plump cookie. If you were to use white sugar exclusively, your cookies would likely spread too much and become thin and flat. The combination of both sugars creates the ideal balance.
- Mastering Flour Incorporation for Tenderness: For cookies that are consistently thick and wonderfully chewy, it’s vital to incorporate your dry ingredients slowly and gently. Rapidly adding all the flour at once and then overmixing can lead to the development of too much gluten, which will result in tough, dense cookies. Instead, add the flour mixture in several small additions, mixing just until each addition is barely incorporated before adding the next. This minimizes gluten development, ensuring your cookies remain tender and soft. Watch for the flour to just disappear, then stop mixing!
- The Magic of Chilling Your Cookie Dough: Patience is a virtue, especially when it comes to cookie dough. I strongly recommend refrigerating your cookie dough for a minimum of 2 hours, or ideally, overnight. This chilling period is not just about making the dough easier to handle; it’s a critical step for flavor development and texture improvement. Chilling allows the flour to fully hydrate, preventing a gritty texture, and gives the flavors more time to meld and deepen. Furthermore, cold dough spreads less in the oven, contributing to those desirable thick, chewy centers and slightly crisper edges.
What Exactly Are Red Velvet Cookies Made Of?
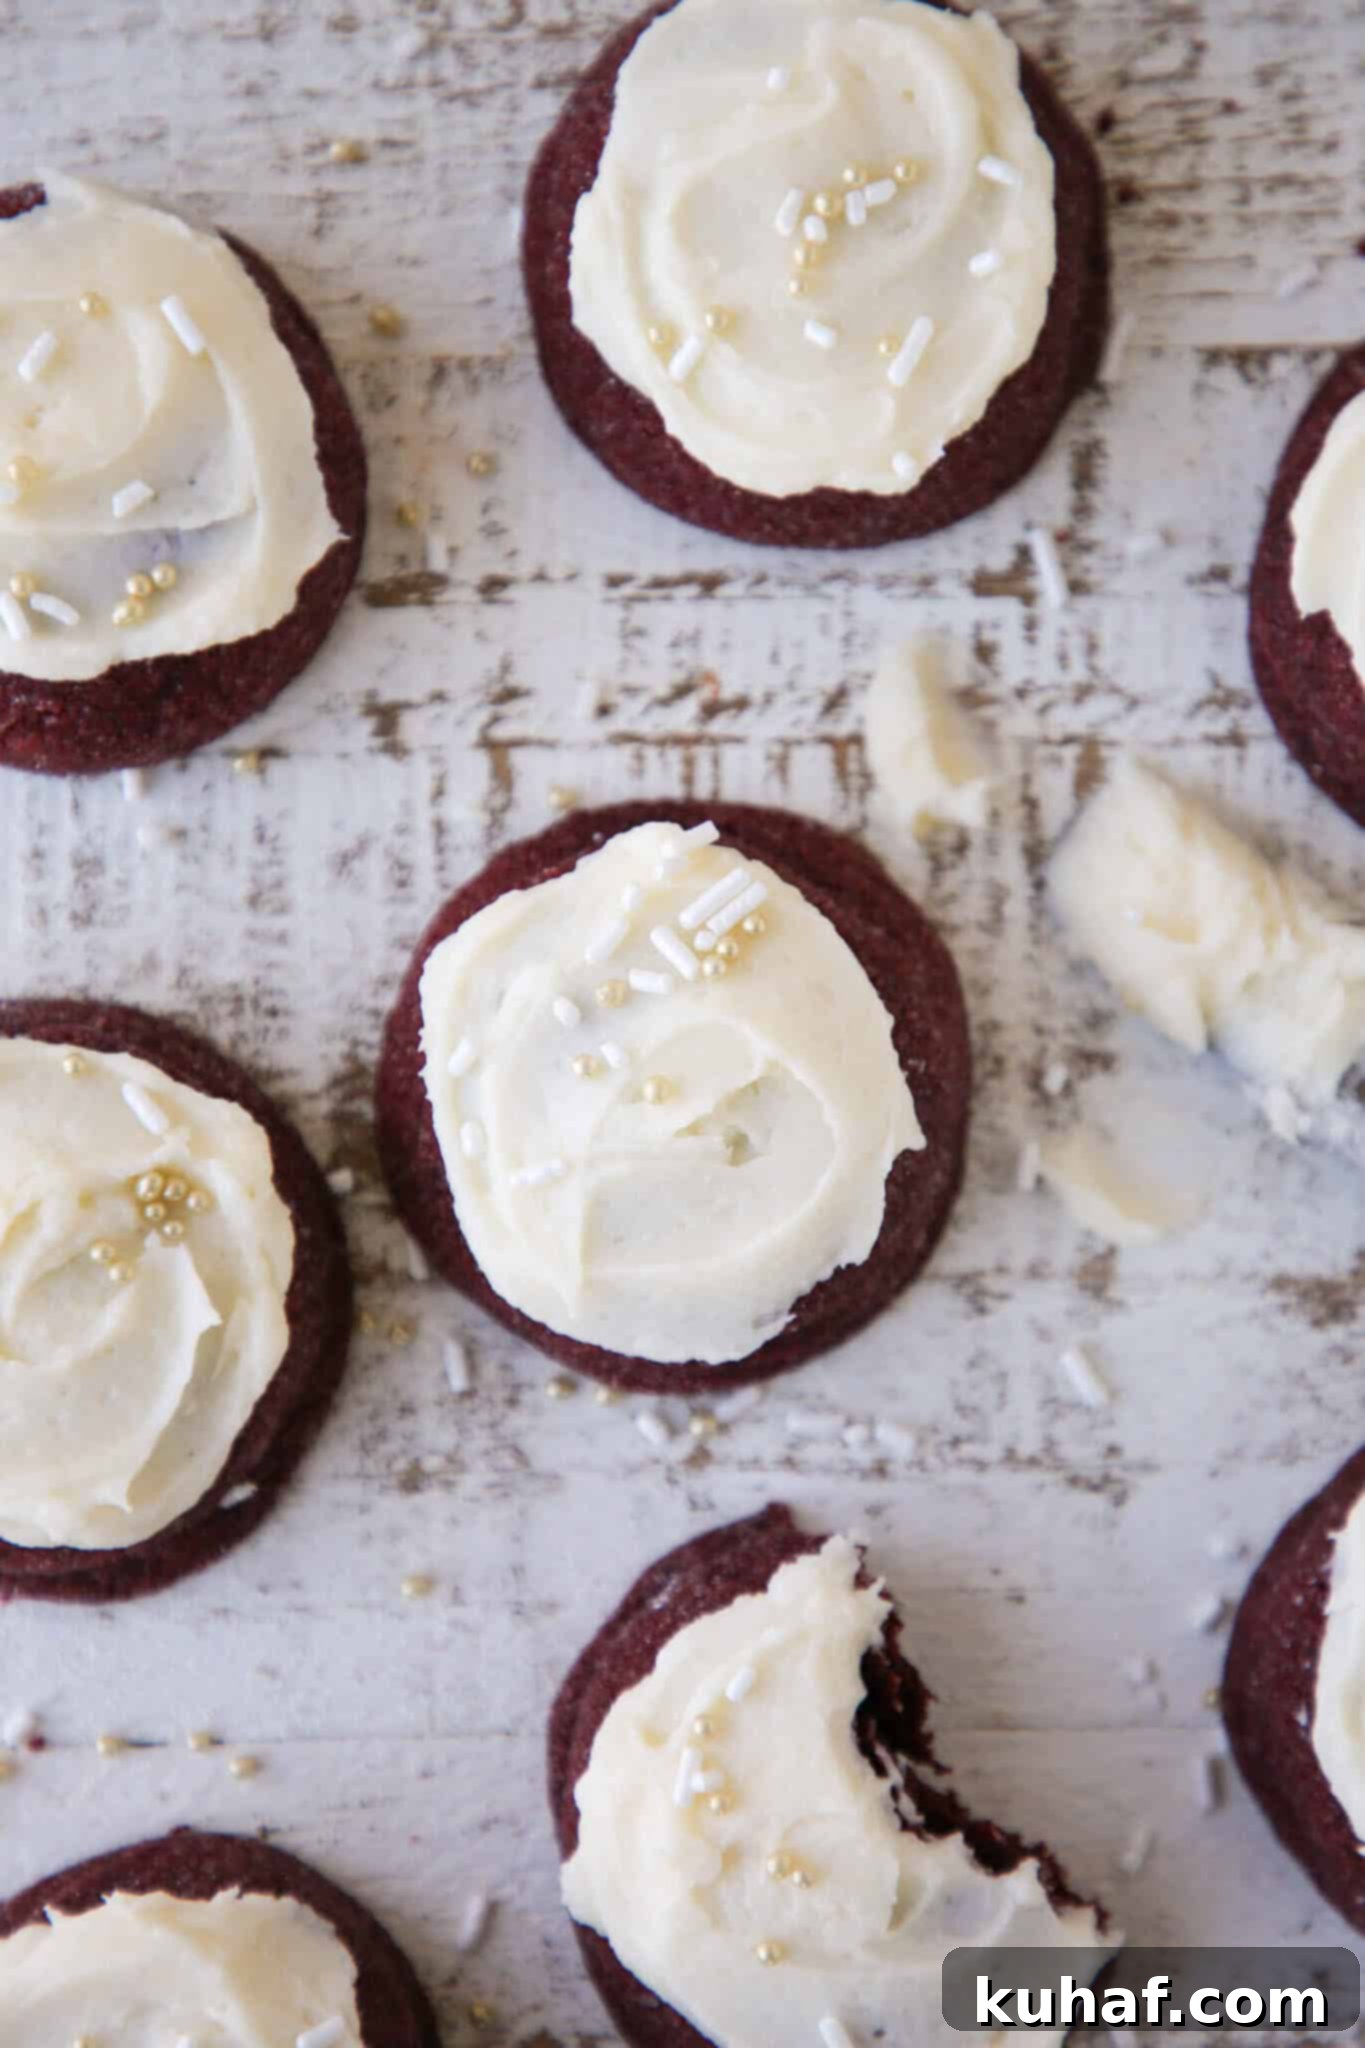
Red velvet cookies are a delightful variation that captures the essence of the classic red velvet cake in a convenient cookie form. Fundamentally, they share many core ingredients with thick chocolate chip cookies, providing that beloved chewy base. The distinctive red velvet character, however, comes from a magical combination: a touch of cocoa powder, which offers a subtle chocolate flavor rather than a dominant one, and a generous splash of red food dye. This blend gives them the iconic rich red color and the unique, subtly tangy flavor profile reminiscent of old-fashioned red velvet cake, much like you’d find in my Red Velvet White Chocolate Cupcakes. It’s a flavor that’s both familiar and wonderfully unique!
Key Ingredients for Perfect Red Velvet Cookies
Crafting the perfect red velvet cookie relies on a careful selection of ingredients, each playing a crucial role in achieving that signature flavor, texture, and vibrant color. Here’s a breakdown of what you’ll need and why:
- Granulated Sugar: This provides essential sweetness and contributes to the cookie’s crisp edges and signature sparkle when rolled in it.
- Dark Brown Sugar: A game-changer for texture. Using dark brown sugar adds a deep, caramelly sweetness and, more importantly, a significant amount of moisture, ensuring your cookies are wonderfully chewy and thick. If you don’t have dark brown sugar on hand, light brown sugar can be used in equal amounts, though the flavor will be slightly milder.
- Whole Egg: The egg is a multi-tasker, adding fat, moisture, and acting as a leavening agent. The fat from the yolk provides richness, contributing to the cookie’s tender chewiness, while the egg white helps with structure.
- Red Food Coloring: This is where the “red” in red velvet comes from! I prefer a vibrant red food dye to achieve a striking color. While you can omit it if desired, be aware that your cookies will not have the characteristic bright red hue.
- All-Purpose Flour: The structural backbone of our cookies, providing the necessary body and chewiness.
- Cocoa Powder: I opt for Dutch-processed cocoa powder for its rich, deep, and less acidic chocolate flavor, which pairs beautifully with the tangy cream cheese frosting. Historically, traditional red velvet cake achieved its reddish tint from the reaction between unprocessed cocoa powder and an acid like white vinegar, which also contributed a slightly tangy flavor. For these cookies, you can use either Dutch-processed or natural unsweetened cocoa powder, depending on your preference for a deeper or slightly more acidic chocolate note.
- Baking Powder: Our primary leavening agent, ensuring the cookies rise nicely and achieve their soft, airy texture.
- Kosher Salt: Essential for balancing the sweetness and enhancing all the other flavors in the cookie dough and frosting. Don’t underestimate its importance!
- Unsalted Butter: Used in both the cookies and frosting, butter provides richness, flavor, and contributes to the overall texture. Ensure it’s cold but pliable for the cookies, and softened for the frosting.
- Cream Cheese: The star of the frosting! I consistently use original Philadelphia Cream Cheese for all my baked goods and frostings. Its tanginess perfectly complements the subtly chocolatey red velvet cookie.
- Powdered Sugar: Also known as confectioner’s sugar, this finely milled sugar is indispensable for creating a smooth, lump-free cream cheese buttercream without the need for heating. It also lends that excellent crackle quality to glazes, like in my Donut Glaze Recipe.
- Vanilla Extract: A crucial flavor enhancer for both the cookies and the frosting, adding warmth and depth.
- Heavy Cream: Used in the frosting to achieve a smooth, creamy consistency and add richness, making it perfectly pipeable and spreadable.
Refer to the comprehensive recipe card below for precise details on ingredient quantities and nutritional information.
Delicious Variations to Try
While these Red Velvet Cookies are spectacular as is, they also serve as a fantastic canvas for creative variations. Feel free to experiment and make them uniquely yours:
- Red Velvet Chocolate Chip Cookies: Elevate these soft and chewy delights by adding your favorite mix-ins! Stir in a full cup of classic semi-sweet chocolate chips for a familiar yet exciting twist. Alternatively, for a lighter color contrast and a different flavor profile, consider using white chocolate chips. The creamy sweetness of white chocolate perfectly complements the subtle cocoa notes of the red velvet dough.
- Elegant Glaze Options: Our red velvet cookies boast beautiful cracked, sparkly tops straight from the oven, making them stunning even without frosting. However, for a different presentation or a lighter touch, a drizzle of glaze can be exquisite. For an exceptionally elegant take, try the cream cheese glaze from my Carrot Cake Scones. If you’re looking for something simpler but equally delicious, my easy cookie icing provides a quick and beautiful finish.
- Colored Frosting Fun: While traditional cream cheese frosting is white, don’t hesitate to play with color! Add a few drops of your favorite liquid or gel food coloring to the frosting to liven up the tops. Imagine pale pink frosting for Valentine’s Day, or, for a truly festive Christmas treat, pipe vibrant green frosting in the shape of a wreath, perhaps adorned with tiny red sprinkle “berries.”
- Exciting Frosting Flavor Enhancements: The cream cheese frosting is already divine, but it can be easily customized with additional flavors. For a naturally pink frosting with a delightful fruity kick, blend in some dehydrated strawberry powder. This adds a lovely natural color and a burst of strawberry flavor. If you’re a chocolate lover, simply mix in a tablespoon or two of cocoa powder (Dutch-processed or natural, depending on your preference) to create an easy and delicious chocolate cream cheese frosting variation.
How to Make Red Velvet Cookies: A Step-by-Step Guide
Crafting these delicious red velvet cookies is a straightforward process when you follow these detailed steps. You’ll find further precise measurements and a full list of ingredients in the recipe card located below!
Making the Red Velvet Cookie Dough:
Step 1: Prepare Your Dry Ingredients. In a medium-sized mixing bowl, thoroughly whisk together your all-purpose flour, cocoa powder, baking powder, and kosher salt. Whisking ensures these dry ingredients are evenly distributed, which is crucial for uniform texture and rise in your cookies. Once combined, set this mixture aside.
Step 2: Cream the Butter and Sugars. In the bowl of a stand mixer, fitted with the paddle attachment, add your cold but pliable unsalted butter, granulated sugar, and dark brown sugar. Cream these ingredients together on medium speed until a smooth, light paste forms. This process incorporates air and creates a foundational texture for your cookies.
Just like when making delicate Nutella cookies, it’s important not to aerate the mixture too much at this stage. Over-creaming can lead to cookies that spread excessively. Our goal is a smooth paste, not a fluffy mixture, to maintain the best cookie consistency.
Step 3: Incorporate Wet Ingredients. With the mixer still on low speed, beat in the whole egg until fully incorporated. Then, reduce the mixer speed to its lowest setting and carefully add the vanilla extract and the red food dye. Mix until the color is evenly distributed and the dye is fully incorporated into the dough. Once blended, you can briefly increase the speed to medium and beat it well for about 30 seconds to ensure everything is thoroughly combined.
Step 4: Gradually Add Dry Ingredients. Reduce the mixer speed back to low. Slowly add the prepared flour mixture to the wet ingredients in several small additions. The key here is patience: allow each addition of dry ingredients to almost completely incorporate into the wet mixture before adding the next. This prevents overmixing, which can develop gluten and lead to tough cookies. As you go, frequently scrape down the sides and bottom of the bowl with a silicone spatula to ensure all ingredients are evenly mixed.
This is a delicate balance of timing. Adding the dry ingredients too quickly will make them harder to incorporate and can lead to gluten development. However, adding them too slowly and working the flour for too long will also develop gluten! For a visual guide and to see my precise technique for adding dry ingredients, be sure to watch the red velvet cookies video.
Step 5: Scoop and Chill the Dough. Once your dough is ready, use a cookie scoop or a spoon to portion out golf ball-sized amounts of the cookie dough. Roll each portion gently into a uniform ball. Place these dough balls onto a parchment-lined baking sheet. Cover the baking sheet loosely with plastic wrap and refrigerate the cookie dough for at least 2 hours. Chilling is crucial for both flavor development and preventing excessive spreading during baking, resulting in thicker, chewier cookies.
Baking Your Red Velvet Cookies:
Step 6: Preheat Your Oven. When you’re ready to bake, preheat your oven to 325°F (160°C) if you’re using a convection oven, or 350°F (175°C) for a standard oven. Ensuring your oven is fully preheated is important for consistent baking.
Step 7: Sugar Roll for Crispness. Pour about ¼ cup of granulated sugar into a shallow bowl. Take each chilled cookie dough ball and roll it thoroughly in the sugar, ensuring it’s completely coated. This sugar coating will create a beautiful, crispy exterior and add a delightful sparkle. Place the sugar-coated cookie dough balls back onto the parchment-lined baking sheet, spacing them approximately 2 inches apart to allow for proper spreading during baking.
Step 8: Bake to Perfection. Bake the cookies in your preheated oven for 9-10 minutes. Halfway through the baking time (around 4-5 minutes), rotate the baking sheet 180 degrees to ensure even baking. The cookies will spread slightly and the tops will transition from a shiny appearance to a matte finish. You’ll also notice small, delicate cracks beginning to form on the surface, indicating they are nearly done. They should still be soft in the center.
Tip for Baking from Frozen: If you’re baking your cookie dough straight from the freezer, they will typically need an additional 2-3 minutes of baking time. There’s no need to adjust the baking temperature or thaw the dough beforehand. The cookies are done when their tops have developed tiny cracks and no longer appear shiny, with slightly browned edges and a puffed center.
Step 9: Cool Completely. Once baked, remove the cookies from the oven and allow them to cool completely on the baking sheet before attempting to frost them. Cooling thoroughly is essential; frosting warm cookies will result in a melted mess!
Making the Frosting & Assembling Your Cookies:
Step 10: Prepare the Cream Cheese Frosting. In the bowl of a stand mixer fitted with the paddle attachment, combine the softened unsalted butter, softened cream cheese, confectioner’s sugar, vanilla extract, and if using, vanilla bean seeds. Beat these ingredients together on medium-high speed until the mixture is light, fluffy, and perfectly smooth. Then, switch to the whisk attachment, add the heavy cream, and whisk for another minute until the frosting is airy and holds its shape beautifully.
For more incredibly detailed instructions, helpful tips, and troubleshooting advice on achieving the perfect consistency, make sure to visit my dedicated Cream Cheese Frosting for Cookies post!
Step 11: Frost and Enjoy! Once your cookies are completely cooled and your frosting is prepared, it’s time to assemble! Using an offset spatula, a piping bag, or even just a spoon, generously frost each red velvet cookie with the tangy cream cheese frosting. Now, they are ready to be served and savored!
Chef Lindsey’s Recipe Tip for Optimal Flavor
Ideally, allowing cookies to cool completely after baking is crucial for the crumb to fully set and for flavors to deepen. However, let’s be honest, I’m not a baking tyrant! I won’t even bat an eye if one or two of these irresistible red velvet cookies mysteriously disappear before they’ve had a chance to cool down. Taste testing is, after all, a cook’s divine prerogative and an essential part of the baking joy!
Frequently Asked Questions About Red Velvet Cookies
Once these delicious red velvet cookies are iced with the cream cheese frosting, they can be safely kept at room temperature for up to three days. Beyond that, the buttercream may begin to spoil, so for extended freshness, it’s best to store them in the refrigerator. If you prefer even longer storage or want to bake them fresh later, you can store the unfrosted baked cookies in an airtight container at room temperature for up to 10 days, or freeze them for several months. Alternatively, you can freeze the raw cookie dough rolled into balls. This allows you to bake them fresh whenever a craving strikes, simply following the baking instructions in the recipe card below, with an extra couple of minutes for frozen dough.
Absolutely! Baking from frozen is a fantastic way to enjoy freshly baked cookies anytime. For an added crunch and a beautiful sparkly finish, I recommend rolling the frozen cookie dough balls in granulated sugar right before baking. Place them on a parchment-lined baking sheet and bake at 350°F (175°C) for approximately 10-14 minutes, directly from frozen. Keep an eye on them; they are ready when the edges have begun to lightly brown, the centers are nicely puffed, and the outside surface has started to crack. The center should appear matte rather than shiny, indicating they are cooked through but still soft inside.
These red velvet cookies are excellent candidates for shipping! Their robust yet soft texture holds up remarkably well during transit. To package them, you can arrange them neatly in a decorative tin, perhaps with layers of parchment paper between them, or simply place them in a zip-top bag nestled within a sturdy mailer box. The unfrosted cookies will retain their freshness and delicious chewiness for up to 10 days, making them perfect for sending to loved ones far away. If you plan to ship them frosted, ensure the frosting is set and they are packed to prevent shifting, though unfrosted is often safer for long journeys.
If you tried this Chef Lindsey-approved recipe and loved it, please take a moment to leave a 🌟 star rating and share your thoughts in the comments below. I absolutely cherish hearing from you; your feedback and comments truly make my day!
Red Velvet Cookies
Pin Recipe
Comment
Print Recipe
Ingredients
For the cookies:
- 1 ¼ cups all purpose flour
- ¼ cup cocoa powder
- ½ teaspoon baking powder
- ¼ teaspoon kosher salt
- ½ cup unsalted butter cold but pliable
- ½ cup sugar
- ¼ cup dark brown sugar
- 1 egg
- 1 teaspoon vanilla extract
- 1 teaspoon red food dye
- ¼ cup sugar for rolling
For the frosting:
- ½ cup unsalted butter Softened
- 6 tablespoons cream cheese Softened
- 2 cups confectioner’s sugar
- 1 teaspoon vanilla
- 2 tablespoons heavy cream
Instructions
Make the red velvet cookie dough:
-
In a medium bowl, whisk together flour, cocoa powder, baking powder and kosher salt. Set aside.
-
In the bowl of a stand mixer fitted with the paddle attachment, cream butter, granulated sugar and dark brown sugar until a smooth paste forms.
-
Beat in the egg. Turn the mixer to low and add the vanilla and red food dye. Once it incorporates, beat it well.
-
Reduce the mixer speed to low and slowly add the flour mixture in several additions. Let each one almost completely incorporate before adding the next. Scrape down the bowl several times with a silicone spatula.
-
Scoop or spoon out golf ball sized portions of the cookie dough. Roll into a ball and place on a parchment-lined baking sheet. Cover and refrigerate for at least 2 hours.
Bake:
-
When ready to bake, preheat the oven to 325°F convection or 350°F standard.
-
Pour about ¼ cup granulated sugar in a bowl and roll each cookie dough ball in the sugar before placing back on the lined baking sheet. Space the cookies 2 inches apart to allow for spreading.
-
Bake in a preheated oven for 9-10 minutes, rotating the sheet halfway through. The cookies will spread and look matte on top. The tops will begin to have little cracks and will no longer look shiny.
-
Allow to cool on the sheet pan completely before frosting.
Make the frosting & assemble:
-
In the bowl of a stand mixer fitted with the paddle attachment, beat together butter, powdered sugar, vanilla, vanilla bean seeds until light and smooth. Switch to whisk attachment and add cream.
-
Frost your cooled cookies and enjoy!
Video
Notes
Frosting Quantity Note: Please note that this particular cream cheese frosting recipe is designed to yield enough frosting for about 24 cookies. This means you will have a generous amount of leftover frosting – perfect for extra thick applications, future baking projects, or simply enjoying by the spoonful!
Flavor Profile Tips – Oftentimes, the most predominant and defining flavor in frosted red velvet treats comes from the cream cheese buttercream itself. This frosting is uniquely balanced, offering a delightful sweetness that is simultaneously cut by a slight, refreshing tang from the cream cheese. Therefore, ensure you’re making a buttercream whose flavor profile you genuinely adore, as it plays a starring role in the overall taste experience of these cookies!
Creative Variations – These versatile cookies are absolutely delightful with various mix-ins! For an easy and fun variation, simply throw in a full cup of your favorite chocolate chips (dark, milk, or semi-sweet) into the dough. For a unique twist, consider adding white chocolate chips, which offer a beautiful color contrast and a creamy sweetness that complements the subtle cocoa.
Storage Guidelines – Once frosted, your delectable red velvet cookies should be stored at room temperature for up to three days. For optimal freshness and to prevent the buttercream from spoiling, any cookies kept longer than three days should be transferred to an airtight container and refrigerated. Unfrosted cookies can be stored at room temperature for up to 10 days or frozen for several months, allowing you to enjoy them fresh whenever you desire.
Nutrition
Before You Go: Explore More Sweet Treats!
We truly hope you enjoyed baking and savoring this professional chef-tested and approved recipe for Red Velvet Cookies with Cream Cheese Frosting. It’s designed to bring a touch of bakery magic right into your kitchen! Don’t let your culinary journey end here; we invite you to explore our extensive collection of other delicious, meticulously developed Cookie Recipes. From classic comforts to innovative delights, there’s always something new and exciting to discover. Happy baking, and happy eating!
