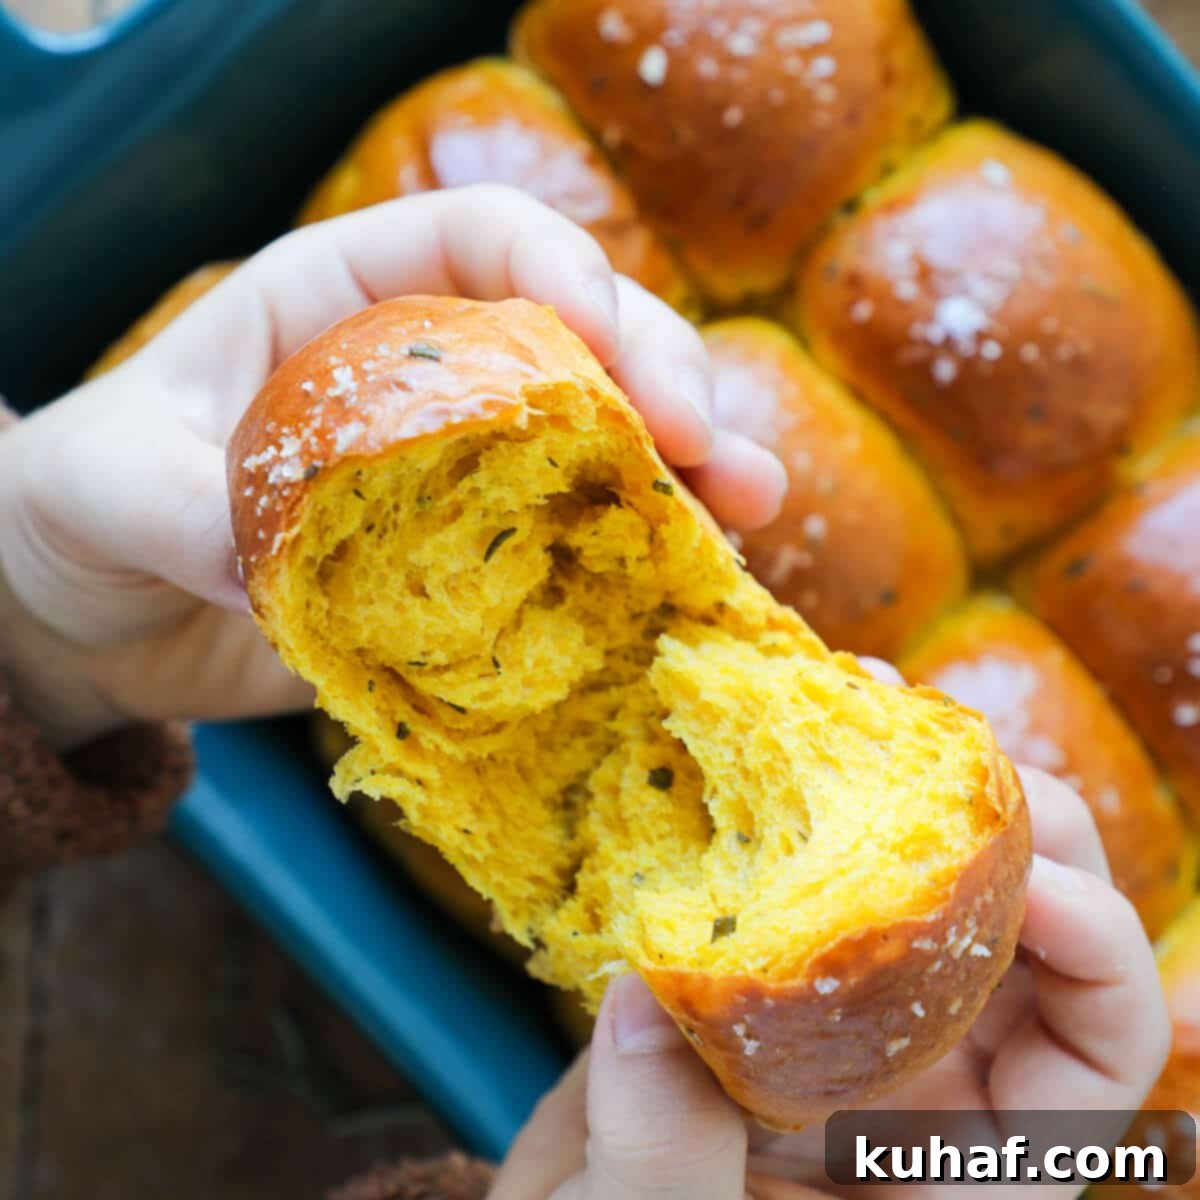
Irresistible Savory Pumpkin Herb Dinner Rolls: Your Guide to Perfect Autumn Baking
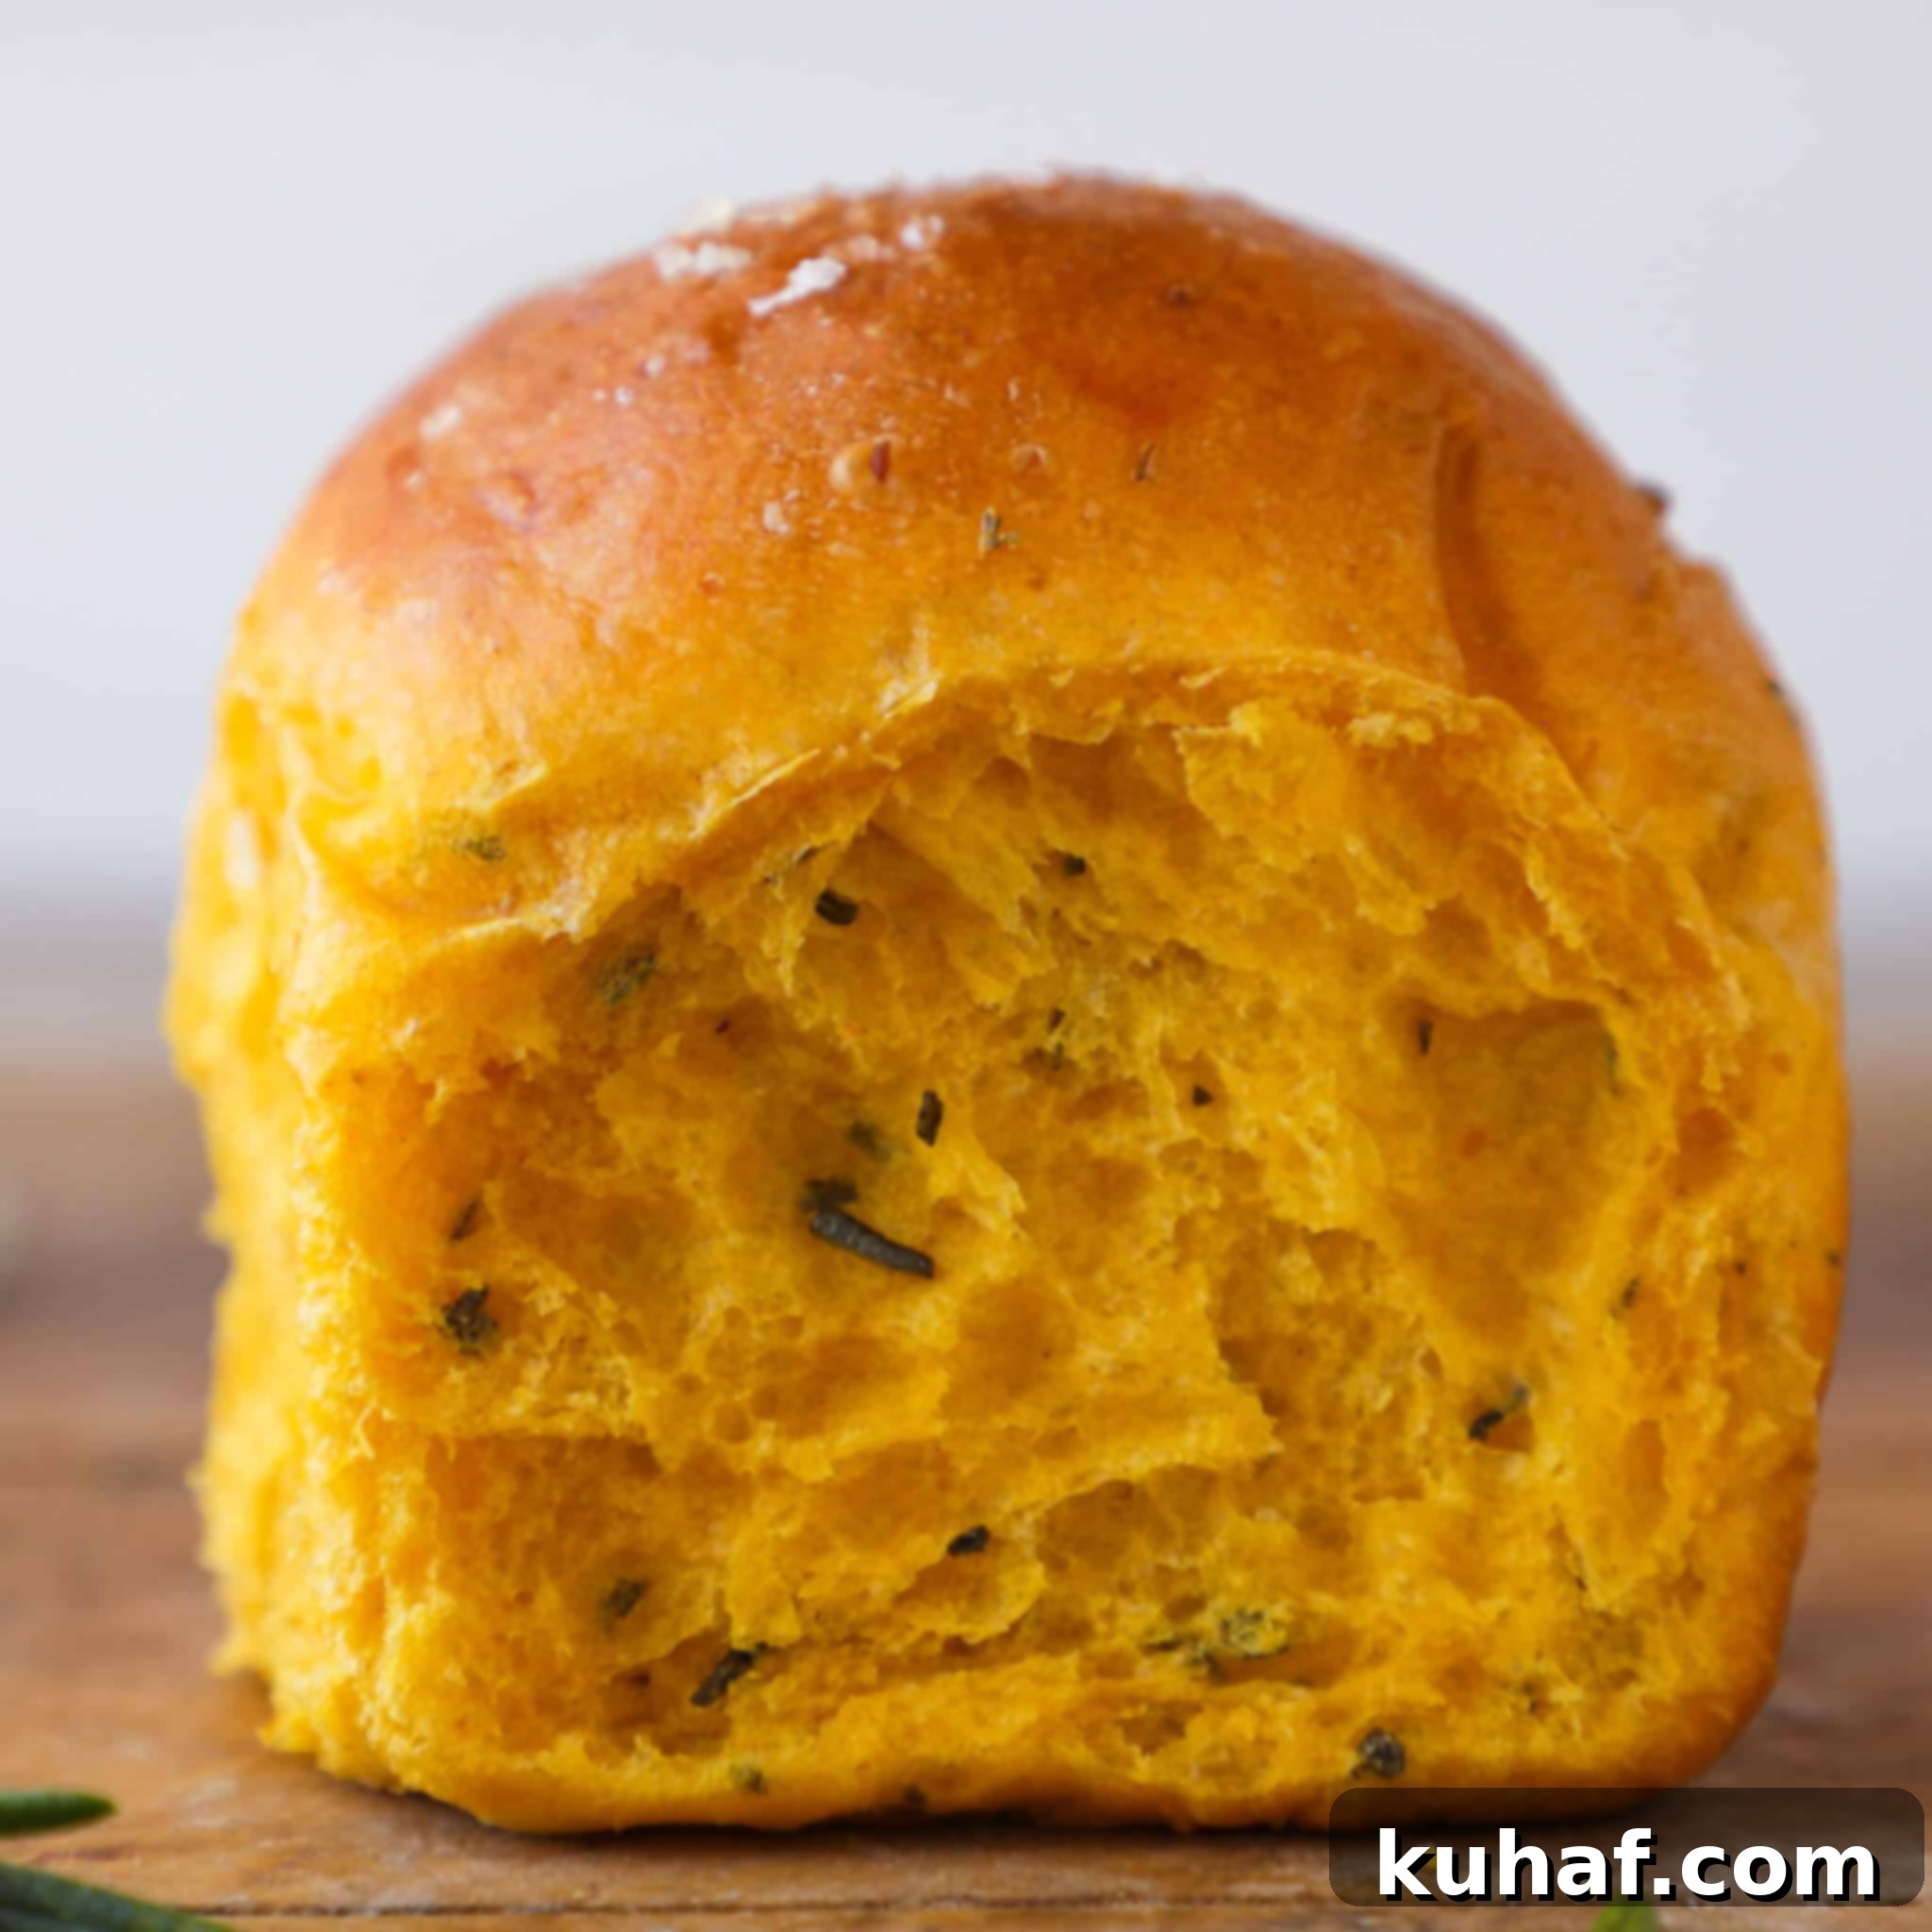
Discover the ultimate recipe for these perfectly savory Pumpkin Herb Dinner Rolls. Infused with the aromatic blend of rosemary, sage, and thyme, meticulously bloomed in rich browned butter, these rolls offer a truly deep and complex flavor profile. Each yeasted roll boasts a wonderfully soft, tender crumb that melts in your mouth. This comprehensive guide will equip you with all the essential tips and tricks, ensuring you achieve flawless, flavorful rolls every single time, making them a standout addition to any meal.
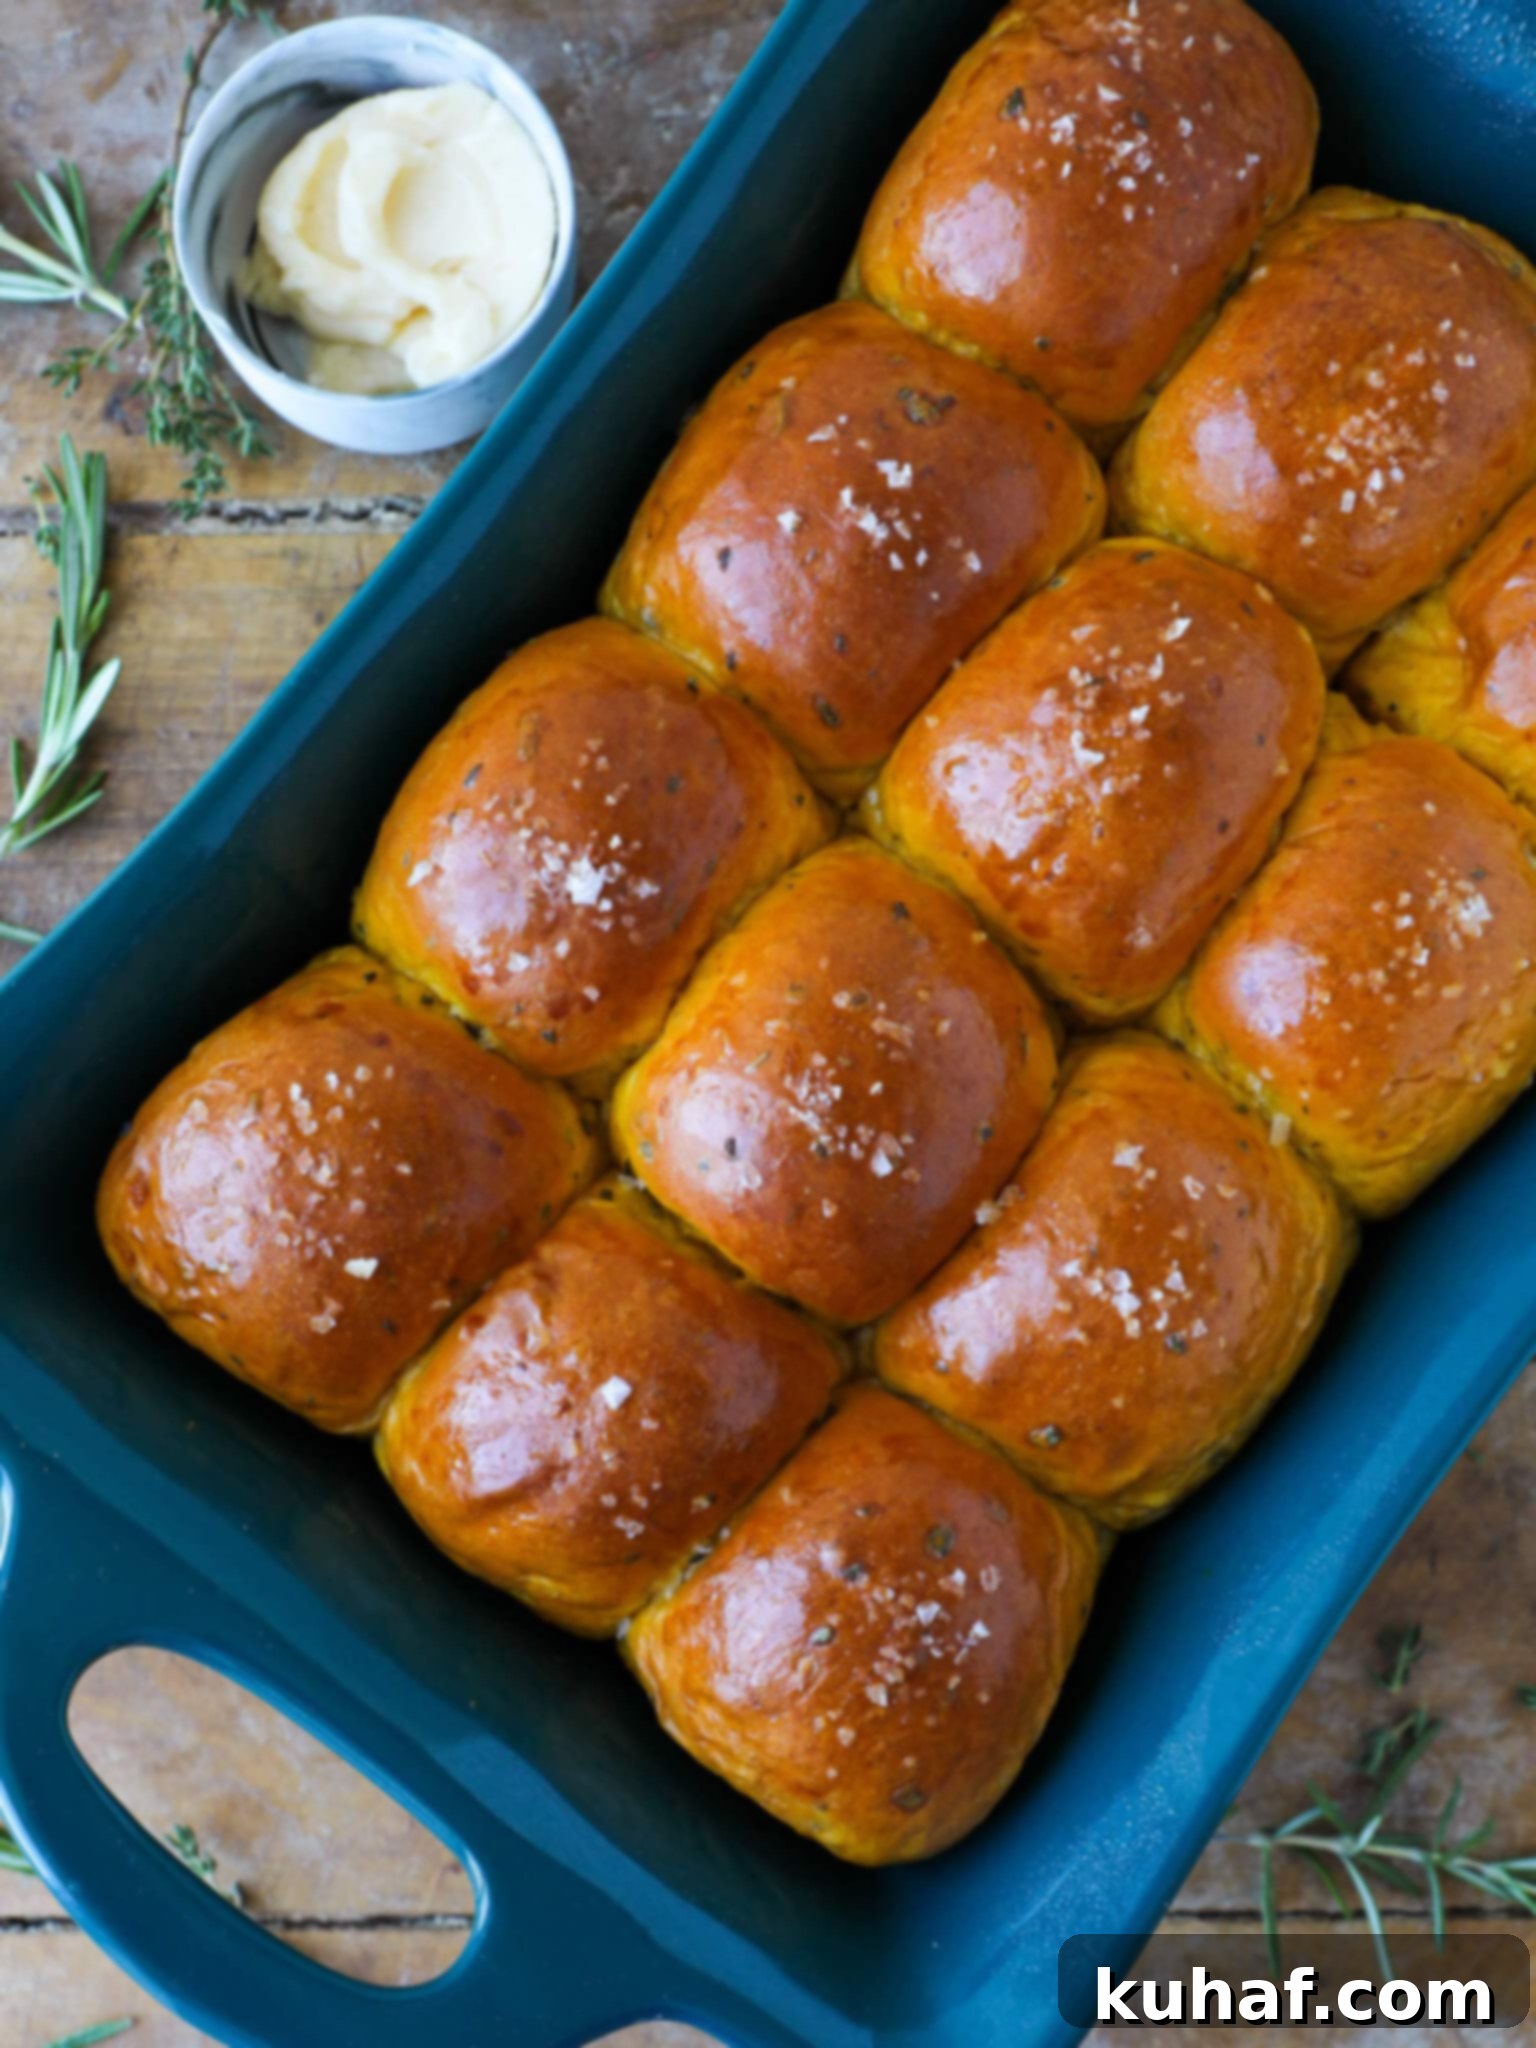
While many associate pumpkin with sweet treats like easy pumpkin pie, comforting pumpkin bread, and an array of delightful pumpkin dessert recipes, there’s a unique magic in savory pumpkin dishes. These pumpkin herb dinner rolls were born from such an inspiration, a vision of aromatic herbs mingling with the nutty richness of browned butter that simply captivated me. This extraordinary combination elevates the humble dinner roll into a culinary masterpiece, perfect for enhancing any festive gathering or cozy weeknight meal.
Imagine these fragrant, tender rolls gracing your Thanksgiving dinner table, offering a sophisticated alternative or complement to traditional bread options. If you’re hosting multiple celebrations, consider making my popular Pumpkin Spice Rolls, hearty potato bread, or classic easy dinner rolls for the family, reserving the browned butter and herb infused goodness of these rolls for a special Friendsgiving feast. These rolls are far too exceptional to be limited to a single holiday. Their comforting flavors deserve to be savored throughout the autumn season and beyond. There’s truly nothing quite like tearing into one of these warm rolls, generously slathered with luscious homemade maple butter, to utterly warm your soul.
Table of Contents
- Why Use a Sponge for the Best Pumpkin Herb Dinner Rolls?
- Essential Ingredients for Perfect Pumpkin Herb Dinner Rolls
- Smart Substitutions for Your Pumpkin Herb Dinner Rolls
- Can I Make These Pumpkin Herb Loaves Instead of Rolls?
- Creative Ways to Use Leftover Pumpkin Herb Dinner Rolls
- Pumpkin Herb Dinner Rolls: Recipe FAQs
- Delicious Pairings: What to Serve with Pumpkin Herb Dinner Rolls
- More Recommended Dinner Roll Recipes You’ll Love
- Pumpkin Herb Dinner Rolls Recipe Card
- Before You Go!
Why Use a Sponge for the Best Pumpkin Herb Dinner Rolls?
Utilizing a “sponge” in bread making is a classic technique that offers multiple advantages, far beyond just hydrating the yeast and speeding up the process, though it certainly does both. A sponge is essentially a pre-ferment: a foundational mixture combining a portion of your flour with all the yeast and liquids from the recipe. For these particular pumpkin herb dinner rolls, that crucial liquid is rich whole milk, warmed to the perfect temperature.
The sponge method works wonders for several reasons. Firstly, it provides an ideal environment for the yeast to activate and begin its fermentation process. This kickstart ensures a more vigorous and consistent rise in your final dough. Secondly, and perhaps more subtly, it allows the gluten network within the initial flour to start forming long before the rest of the ingredients are added. This initial development of gluten means less strenuous mixing or kneading required for the final dough, resulting in a more manageable and elastic dough. The outcome? Rolls that are not only incredibly soft and tender but also boast a deeper, more complex flavor profile thanks to the extended fermentation. Incorporating a sponge is a secret weapon for achieving truly professional-quality, flavorful, and perfectly textured homemade dinner rolls every time.
Essential Ingredients for Perfect Pumpkin Herb Dinner Rolls
Crafting these exceptional pumpkin herb dinner rolls relies on a carefully selected blend of ingredients, each playing a vital role in their exquisite flavor and texture. Here’s a detailed look at what you’ll need:
- Dry Active Yeast: This specific type of yeast requires a brief period of rehydration, which is perfectly achieved within our sponge. While it adds a small initial step, dry active yeast offers reliable and controllable fermentation, contributing to a consistent rise and delightful flavor.
- Whole Milk: My preference for whole milk in yeasted breads stems from its higher fat content, which contributes significantly to both flavor and tenderness. The fat helps create a richer crumb, while its lower water content compared to skim milk ensures the rolls remain incredibly moist without becoming gummy. Warming it to 100°F is key for optimal yeast activity.
- Granulated Sugar: A modest amount of granulated sugar serves multiple purposes in this recipe. It sweetens the rolls subtly, promotes a beautiful golden-brown crust through caramelization, and, most importantly, provides an immediately accessible food source for the yeast, helping it to activate vigorously and begin the fermentation process effectively.
- Bread Flour: This recipe specifically calls for bread flour due to its higher protein content. Many additions in this dough, such as pumpkin puree, egg, and butter, can hinder gluten development. The extra protein in bread flour is crucial for forming a robust gluten network, which in turn enables the rolls to achieve their soft, tender texture and excellent rise, despite the enriching ingredients.
- Unsalted Butter: Using unsalted butter offers precise control over the overall saltiness of your dough. Crucially, it infuses the rolls with that irresistible buttery goodness. When browned, as in this recipe, it adds an incredible depth of nutty flavor that perfectly complements the herbs.
- Fresh Rosemary: To prepare fresh rosemary, simply strip the leaves from the woody stems. A quick and easy method is to hold the stem at the top and run your thumb and forefinger down towards the base. Collect the removed leaves and finely chop them to ensure their pungent, piney aroma is evenly distributed throughout the dough.
- Fresh Sage: Preparing fresh sage involves carefully picking the velvety leaves from their stems. For a fine mince, stack several leaves, roll them tightly into a spiral (similar to a chiffonade cut for basil), and then slice across with a sharp knife using a gentle rocking motion. Run your knife through the slices again for an even finer texture, allowing its earthy, slightly peppery notes to shine.
- Fresh Thyme: Thyme leaves are delicate and require a bit more patience to remove from their stems. While you can try the thumb-and-forefinger method, often a careful picking of the tiny leaves is most effective. The effort is well worth it, as fresh thyme adds a subtle, herbaceous note that beautifully ties together the other flavors.
- Dark Brown Sugar: Opting for dark brown sugar instead of granulated sugar in the final dough introduces a deeper, more molasses-like sweetness and contributes additional moisture, helping to keep the rolls wonderfully soft and tender.
- Kosher Salt: Kosher salt is preferred for its coarser grain and less intense saltiness by volume compared to fine table salt, allowing for easier measurement and control. Beyond seasoning, salt plays an important role in strengthening the dough’s gluten structure and moderating yeast activity, ensuring a balanced fermentation and optimal flavor development.
- Whole Egg: The inclusion of a whole egg enriches the dough with vital fat, moisture, and flavor. The yolk’s fat contributes to a rich taste and a beautifully tender, moist crumb, while the egg white adds structural integrity, aiding in the roll’s soft yet resilient texture.
- Pumpkin Puree: I consistently use Libby’s pumpkin puree in my recipes due to its reliable consistency. You are welcome to use any brand you prefer, but it is absolutely crucial to use pure pumpkin puree, not pumpkin pie mix, which contains added spices and sweeteners. I strongly advise against substituting homemade pumpkin puree for this recipe, as its moisture content can vary significantly, potentially leading to rolls that are either too dry or too gummy. Canned pumpkin puree is precisely controlled by manufacturers for a consistent moisture percentage, ensuring predictable results.
Smart Substitutions for Your Pumpkin Herb Dinner Rolls
While the recipe is optimized for the best results, sometimes you need to make adjustments. Here are some smart substitutions for your pumpkin herb dinner rolls and what to expect:
- Pumpkin Puree: There are no direct substitutions for pumpkin puree in this recipe; it’s fundamental to the flavor and color. It’s worth emphasizing again: ensure you are using pure pumpkin puree, not pumpkin pie filling. The latter contains added spices, sugars, and thickeners that will drastically alter the roll’s flavor and texture. While you *could* make your own pumpkin puree, its water content is highly variable, potentially leading to rolls that are either too dry and dense or too moist and gummy. Commercial canned pumpkin puree is specifically processed to have a consistent moisture level, taking out the guesswork for reliable baking results.
- Milk: I advocate for whole milk due to the richness it imparts to the rolls. However, you have flexibility here. Skim milk can be used, though it might result in a slightly less tender crumb due to the reduced fat content. Plant-based alternative milks (such as unsweetened almond or soy milk) can also work, but be aware that they may subtly change the flavor and texture of the rolls. For a leaner option, you could even use water, but expect a noticeable difference in richness and tenderness.
- Dark Brown Sugar: If your pantry is out of dark brown sugar, light brown sugar is an excellent substitute, used in equal amounts. The primary difference is the molasses content, so using light brown sugar might yield a slightly less deep, complex sweetness, but it will still provide moisture and flavor. Alternatively, coconut sugar can also be used as a healthier option, offering a caramel-like sweetness.
- Yeast: For those without dry active yeast, substitutions are straightforward. You can use double the weight of fresh yeast or half the weight in instant yeast. If opting for instant yeast or fresh yeast, you can technically add them directly to the main dough mixture. However, for superior fermentation kickstart and gluten development, I still recommend incorporating them into the sponge. This method allows the yeast to become active and develop flavor more effectively.
- Herbs: The beauty of this recipe is its adaptability to various fresh herbs. Feel free to experiment with any combination you enjoy! Woody herbs like rosemary, oregano, and sage are particularly well-suited for this recipe as they stand up robustly to the heat of the browned butter, releasing their flavors without burning. If you wish to use more delicate herbs, such as fresh cilantro or dill, it’s best to mix them directly into the dough *after* the browned butter has cooled slightly, or even after the dough has been mixed. Adding them directly to hot browned butter could cause them to burn and lose their fresh, vibrant flavor. The herbaceous notes in these rolls make them an exceptional accompaniment to savory dishes, such as a succulent Chicken in White Wine Sauce!
Can I Make These Pumpkin Herb Loaves Instead of Rolls?
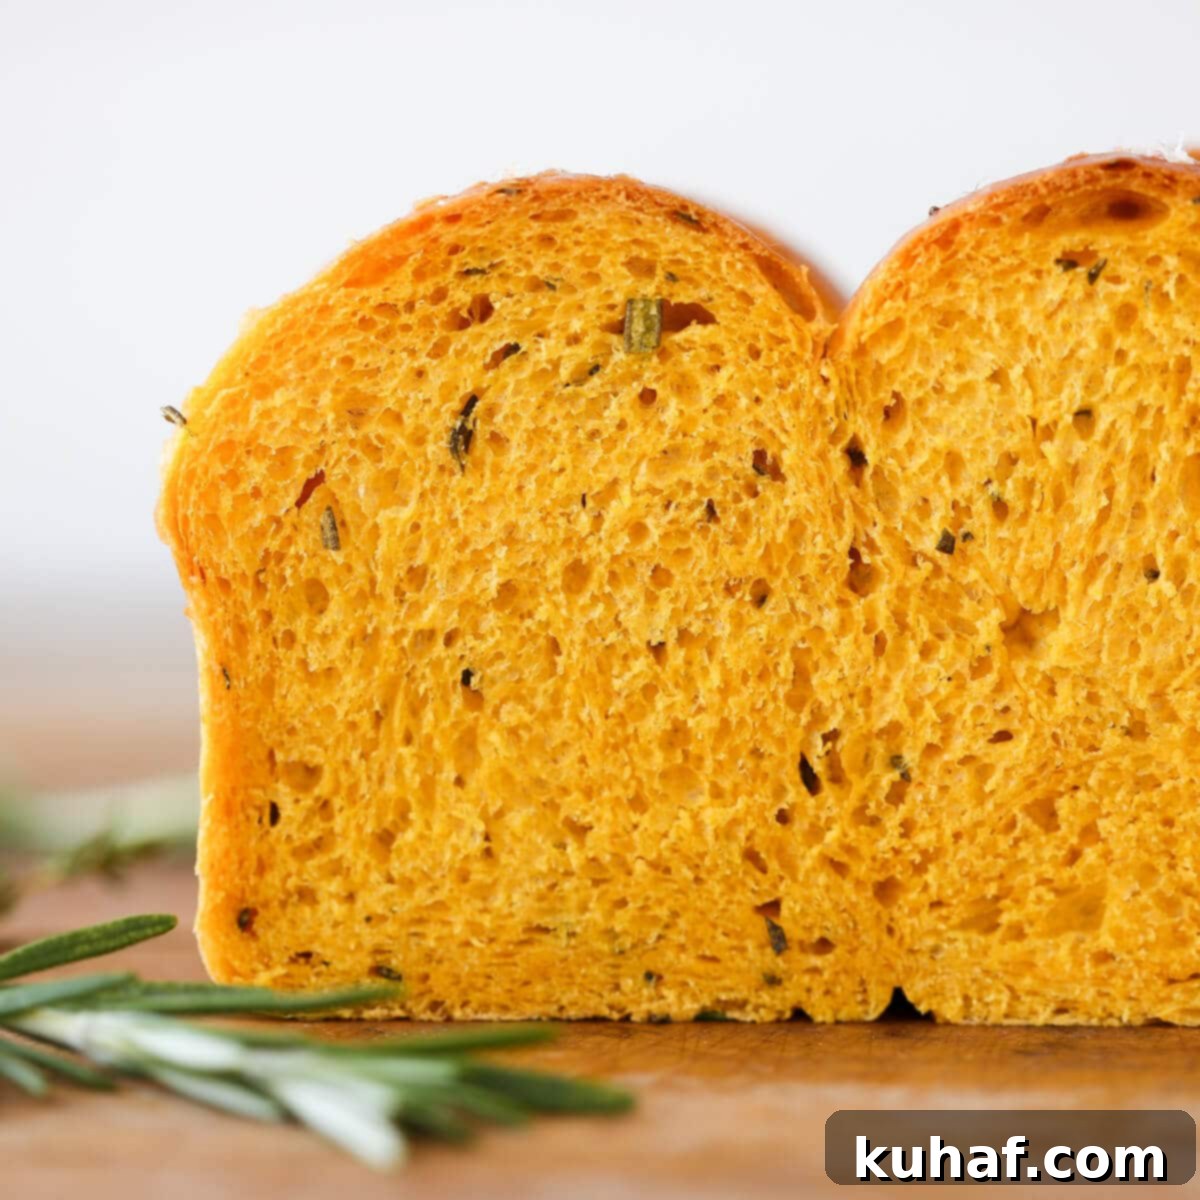
Absolutely! This versatile dough is perfectly suited for making loaves instead of individual rolls. This recipe will yield two standard-sized loaves, which can be an excellent option for easier slicing or feeding a larger gathering. To convert this recipe into loaves, simply follow the dividing, shaping, final proofing, and baking instructions specifically designed for my brioche bread loaves. For those who prefer a visual guide and extra detailed tips and tricks on shaping and baking beautiful loaves, I’ve also created a full video tutorial on those brioche loaves that you can follow for perfect pumpkin herb bread.
Creative Ways to Use Leftover Pumpkin Herb Dinner Rolls
While it’s hard to imagine having any of these delicious pumpkin herb dinner rolls leftover, should you find yourself with a few extra, fear not! They are incredibly versatile and can be transformed into new culinary delights:
- Gourmet Sandwiches: These savory pumpkin herb rolls make absolutely fantastic sandwich bases for lunch the next day. Envision the possibilities with Thanksgiving leftovers – carved turkey, cranberry sauce, a smear of cream cheese, all nestled within this aromatic roll. It’s pure magic!
- Savory Bread Pudding: Elevate your brunch or dinner side dishes by cubing the leftover rolls and transforming them into a savory bread pudding. Combine the bread cubes with a savory custard base (eggs, milk, cheese, and perhaps some additional herbs or sautéed vegetables) and bake until golden and bubbly. It’s a comforting and impressive dish.
- Homemade Croutons: Tear or cut the rolls into bite-sized cubes. Toss them with a little olive oil, salt, pepper, and perhaps a sprinkle of garlic powder, then bake until crisp. These homemade croutons will add a phenomenal, flavorful crunch to any salad, especially a vibrant stone fruit panzanella salad.
- Flavorful Bread Crumbs: Don’t let a single crumb go to waste! Tear the pumpkin herb dinner rolls into smaller pieces and toast them in a low oven until they are completely dried out. Once cooled, pulse them in a food processor to create your own homemade bread crumbs. These will infuse your meatballs, stuffings, or breaded cutlets with incredible depth of flavor.
Pumpkin Herb Dinner Rolls: Recipe FAQs
While browning the butter is highly recommended for the deep, nutty, and complex flavor it adds, it is not strictly mandatory. You can absolutely make these rolls without browning the butter, much like my pumpkin spice dinner rolls recipe. If you choose not to brown the butter, you can use the same amount of melted butter. Keep in mind that browning butter involves some moisture evaporation and the toasting of milk solids, so if you skip this step, the dough might be slightly richer and softer. You have the flexibility to adjust the butter quantity if you prefer, or simply proceed with melted unbrowned butter for a delicious, albeit slightly different, result.
To maintain optimal freshness, allow the rolls to cool completely before storing them. Place them in an airtight container, a zip-top bag, or wrap them tightly in plastic wrap to prevent them from drying out. They can be stored at room temperature for up to two days. For longer storage, freezing is an excellent option; they will keep well in the freezer for up to one month. While you can store them in the refrigerator, this is generally not recommended for yeast breads as the cold can accelerate the staling process, making them dry out faster. For the best experience, consume or freeze within two days of baking.
Yes, these rolls are wonderfully adaptable for making ahead, which is perfect for holiday planning. To prepare them the night before, reduce the amount of yeast by half in the recipe. After the initial bulk proof and shaping, place the rolls in their baking dish, cover them tightly with plastic wrap, and allow them to proof slowly in the refrigerator overnight (cold proofing). The extended cold fermentation develops deeper flavors. The next day, you can bake them directly from the refrigerator if they are fully proofed. If they still need to rise more, let them sit at room temperature for an hour or so until they reach the desired proofed state before baking.
Delicious Pairings: What to Serve with Pumpkin Herb Dinner Rolls
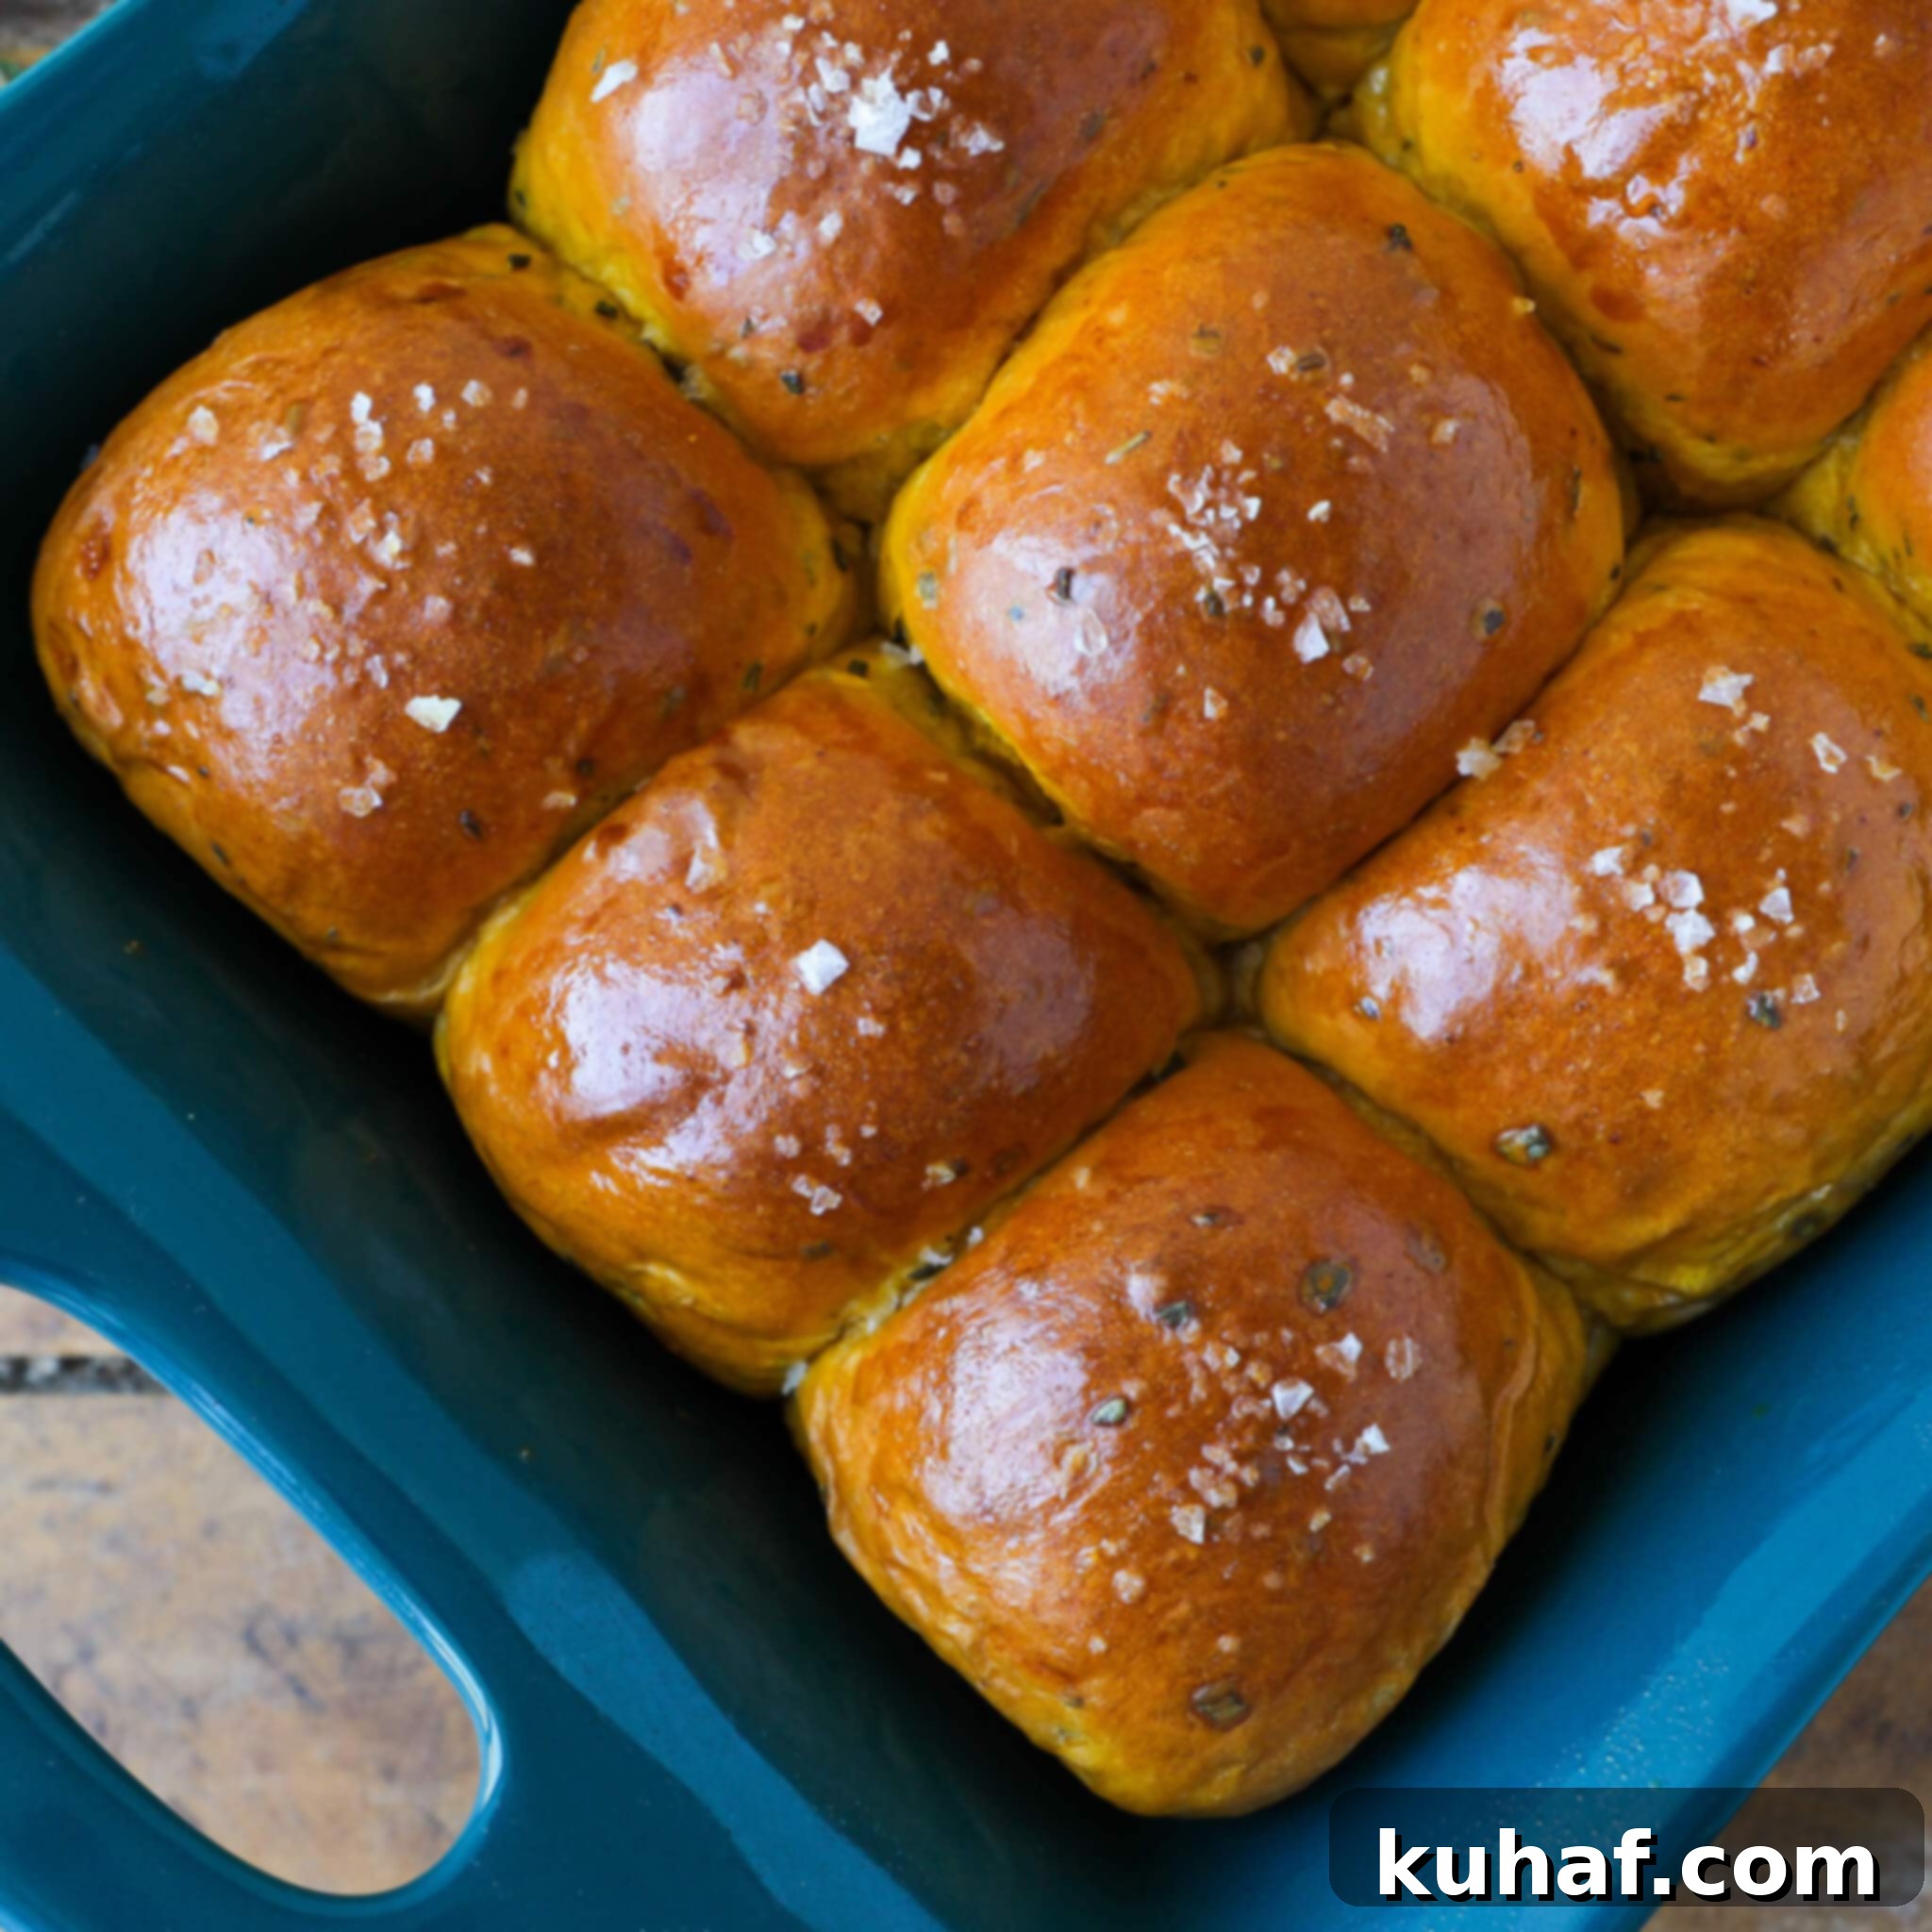
These savory Pumpkin Herb Dinner Rolls are incredibly versatile and make an outstanding addition to a wide variety of meals. They are, of course, a quintessential component of any traditional Thanksgiving dinner, perfectly complementing all the festive flavors. Beyond the holidays, consider serving them alongside the rich sweetness of a maple sweet potato casserole, or soaking up the creamy goodness of creamy mashed potatoes. They also pair beautifully with simple vegetable dishes like easy roasted cauliflower, or as a delightful sidekick to a wholesome main course such as roasted lemon chicken and vegetables. If these rolls spark a full-blown pumpkin craving, be sure to explore my curated list of the 25 Best Pumpkin Recipes for Fall to keep the autumnal cooking inspiration rolling!
More Recommended Dinner Roll Recipes You’ll Love
If you’ve enjoyed these Pumpkin Herb Dinner Rolls, you’ll be delighted to explore more of my expertly crafted dinner roll recipes. Each offers a unique twist on this beloved staple, perfect for any occasion.
Dinner Roll Recipes
Pumpkin Spice Dinner Rolls
Dinner Roll Recipes
Easy Dinner Roll Recipe
Dinner Roll Recipes
Rosemary Sourdough Rolls
Dinner Roll Recipes
Potato Rolls
If you tried this recipe and absolutely loved it, please take a moment to leave a 🌟 star rating and share your thoughts in the comments below. I truly cherish hearing from you; your feedback and comments make my day and inspire new culinary creations!
Pumpkin Herb Dinner Rolls
Pin Recipe
Comment
Print Recipe
Ingredients
Sponge:
- 2 ¼ teaspoons Dry Active Yeast
- 226 g Whole milk 100°F
- 14 g Sugar
- 154 g Bread Flour
Final Dough:
- 84 g Butter
- 2 tablespoons Rosemary fresh, chopped
- 1 tablespoon Sage fresh, chopped
- 1 teaspoon Thyme fresh, picked
- 383 g Bread Flour
- 28 g Dark Brown Sugar
- 1 teaspoon Kosher Salt
- 1 Egg
- 230 g Pumpkin Puree
Instructions
Make the Sponge:
-
Gently warm the whole milk to a temperature of approximately 95-100°F (35-38°C). This can be done in a small saucepan over low heat or briefly in the microwave. The temperature is crucial for activating the yeast without killing it.
-
In a medium-sized bowl, combine all the ingredients designated for the sponge: the warmed milk, dry active yeast, a small amount of sugar, and a portion of the bread flour. Mix these ingredients thoroughly with your hands until well combined and a shaggy, wet dough forms. While a spoon can be used, the wet consistency often makes hands more effective.
-
Cover the bowl tightly with plastic wrap to prevent a skin from forming and set it aside in a warm, draft-free spot. Allow it to proof until it is visibly bubbly and foamy, indicating the yeast is active and fermenting. This typically takes around 20 minutes, depending on the warmth of your environment.
Brown the Butter with the Herbs:
-
In a small, light-colored saucepan (to easily monitor browning), melt the unsalted butter over medium heat. Once melted, add the finely chopped fresh rosemary, sage, and thyme. Continue to cook, stirring frequently, watching closely as the butter solids toast and turn golden brown, releasing a delightful nutty aroma. Be careful not to let the herbs burn; they should bloom in the butter rather than crisp up excessively. If you’re new to browning butter, it’s safer to brown the butter first, then remove it from the heat and stir in the herbs.
-
Immediately pour the browned butter and herb mixture into a small, heatproof bowl to stop the cooking process. Allow it to cool completely to room temperature before incorporating it into the dough. To speed up cooling, you can place the bowl in the refrigerator for about 10-15 minutes, stirring occasionally.
Mix the Dough:
-
While your sponge is proofing, take the opportunity to scale (weigh) all your remaining ingredients for the final dough. You can measure them directly into the bowl of your stand mixer, allowing them to wait patiently for the sponge to finish.
-
Once the sponge is bubbly and active, add it to the bowl of a stand mixer along with the remaining bread flour, dark brown sugar, kosher salt, the whole egg, and the pumpkin puree. Finally, pour in the cooled browned butter and herbs.
-
Attach the paddle attachment to your stand mixer and mix on low speed until all the ingredients are thoroughly combined and no dry streaks of flour remain. The mixture will be quite shaggy at this stage.
-
Switch to the dough hook attachment. Increase the speed to medium and continue to mix until a rough window pane can be achieved. This means the dough will pull away from the sides of the bowl, gather around the hook, and look cohesive. To check for a “window pane,” pinch off a small piece of dough and gently stretch it between your fingers. It should stretch thin enough that you can almost see light through it without tearing, resembling a translucent window pane. At this point, the dough will still have a slightly rustic, uneven texture due to the pumpkin and herbs, but it should be elastic and cohesive.
-
Lightly oil a clean bowl. Scrape the dough into the oiled bowl, ensuring it’s gathered into a neat ball. Cover the bowl with plastic wrap and let it proof in a warm place for 30 minutes. After 30 minutes, perform a “fold.” Grab one side of the dough, gently pull it upwards and outwards, then fold it over approximately one-third of the dough. Rotate the bowl 180 degrees and repeat with the opposite side. Then, rotate a quarter turn and repeat the folding technique twice more until you have completed four folds, forming a nice, tight square packet of dough. This folding strengthens the gluten without extensive kneading.
-
Admire your developing dough! Re-cover the bowl with plastic wrap and allow the dough to continue its bulk proof until it has visibly doubled in size. In my experience, this typically takes an additional 30 minutes to an hour, depending on the warmth of your kitchen. The dough should feel light and airy when gently poked.
-
While the dough is finishing its bulk proof, prepare your baking dish. Generously grease a 9 x 13-inch baking dish with cooking spray or butter to prevent sticking.
-
Once the dough has doubled and feels incredibly light and aerated to the touch, gently turn it out onto a clean, un-floured work surface. You’ll notice it’s soft, supple, and should not be sticky.
-
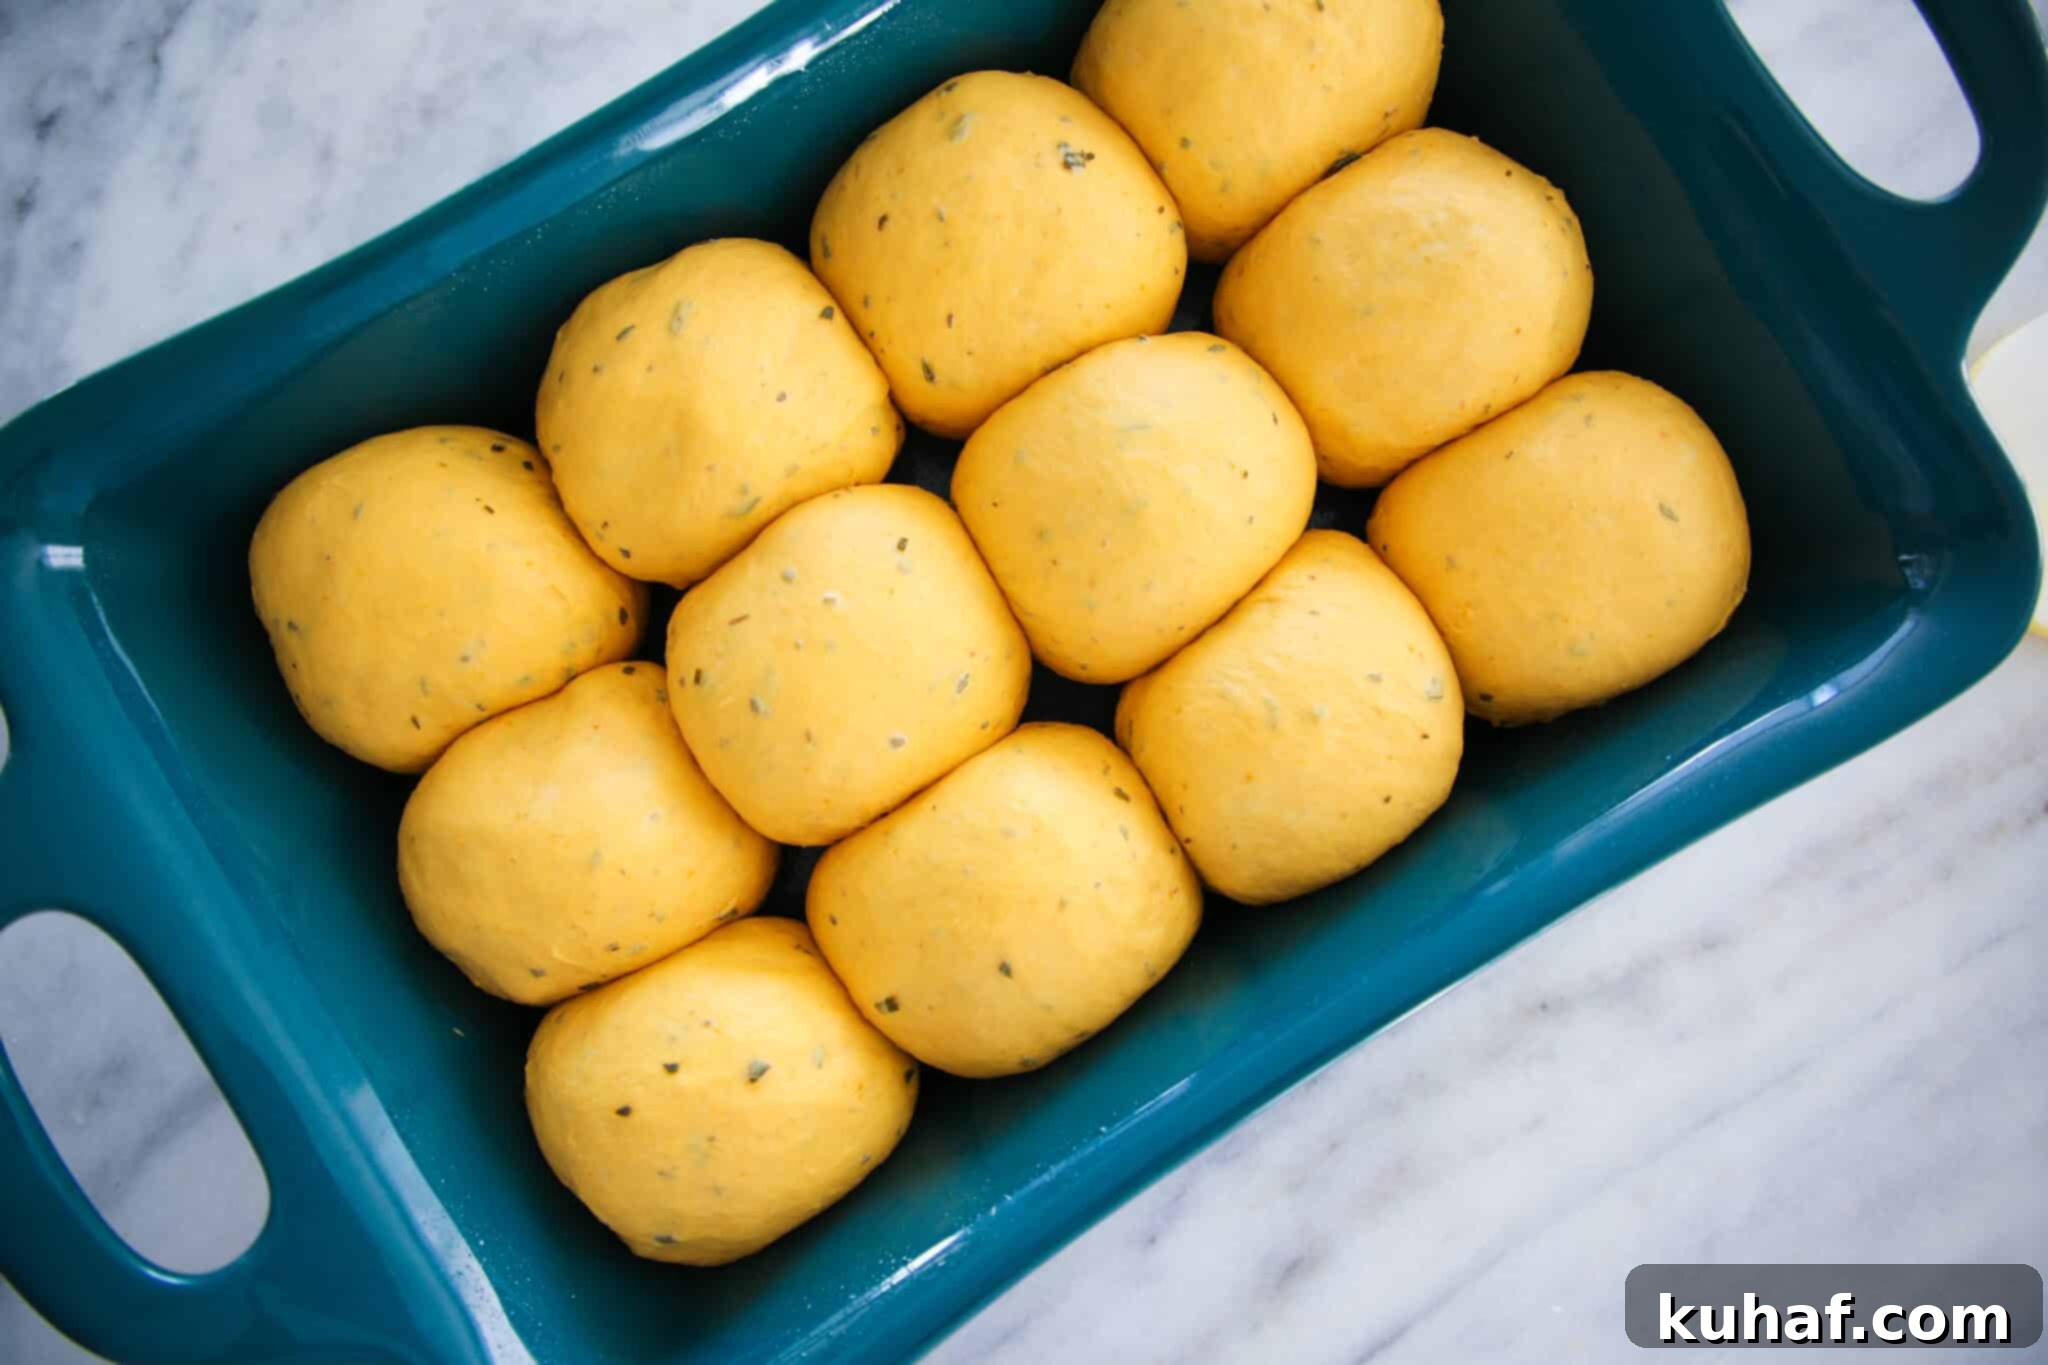
Divide the dough into 12 equal portions. For precision, you can weigh them (they should be approximately 99g each), or you can eyeball it if you’re comfortable. Shape each portion into a smooth, round roll and arrange them in the prepared baking dish, ensuring they are spaced relatively equidistant from each other.
-
Cover the dish loosely with plastic wrap and return it to a warm spot for the final proof. Allow the rolls to double in size again; for my kitchen, this usually takes about 30 minutes. They should look puffy and soft.
-
About 15 minutes before baking, preheat your oven to 350°F (175°C).
-
When the rolls are fully proofed (doubled in size, light, and airy), gently brush the tops with a beaten egg wash. This will give them a beautiful golden sheen.
-
Bake in the preheated oven for 20-22 minutes, or until the tops are golden brown and an instant-read thermometer inserted into the center of one of the middle rolls registers 185°F (85°C). If you don’t have a thermometer, insert a cake tester or toothpick into the center; it should come out with clinging moist crumbs, but no streaks of wet dough.
-
Immediately upon removing the rolls from the oven, brush their hot tops generously with a little extra melted butter. This simple step creates that irresistible, shiny, and enticing crust you see in bakery-style rolls.
-
Technically, baked goods should cool slightly before serving for the best texture, but honestly, who can resist a warm, fresh-from-the-oven roll? I say, dig right in and enjoy!
Video Tutorial
Chef’s Notes
Nutrition Information (per roll)
Before You Go!
Don’t stop here! Be sure to explore our other delicious, chef-developed recipes designed to elevate your baking skills. Check out our extensive collection of Bread Recipes, including my absolutely foolproof potato rolls, for more baking inspiration and proven techniques!
