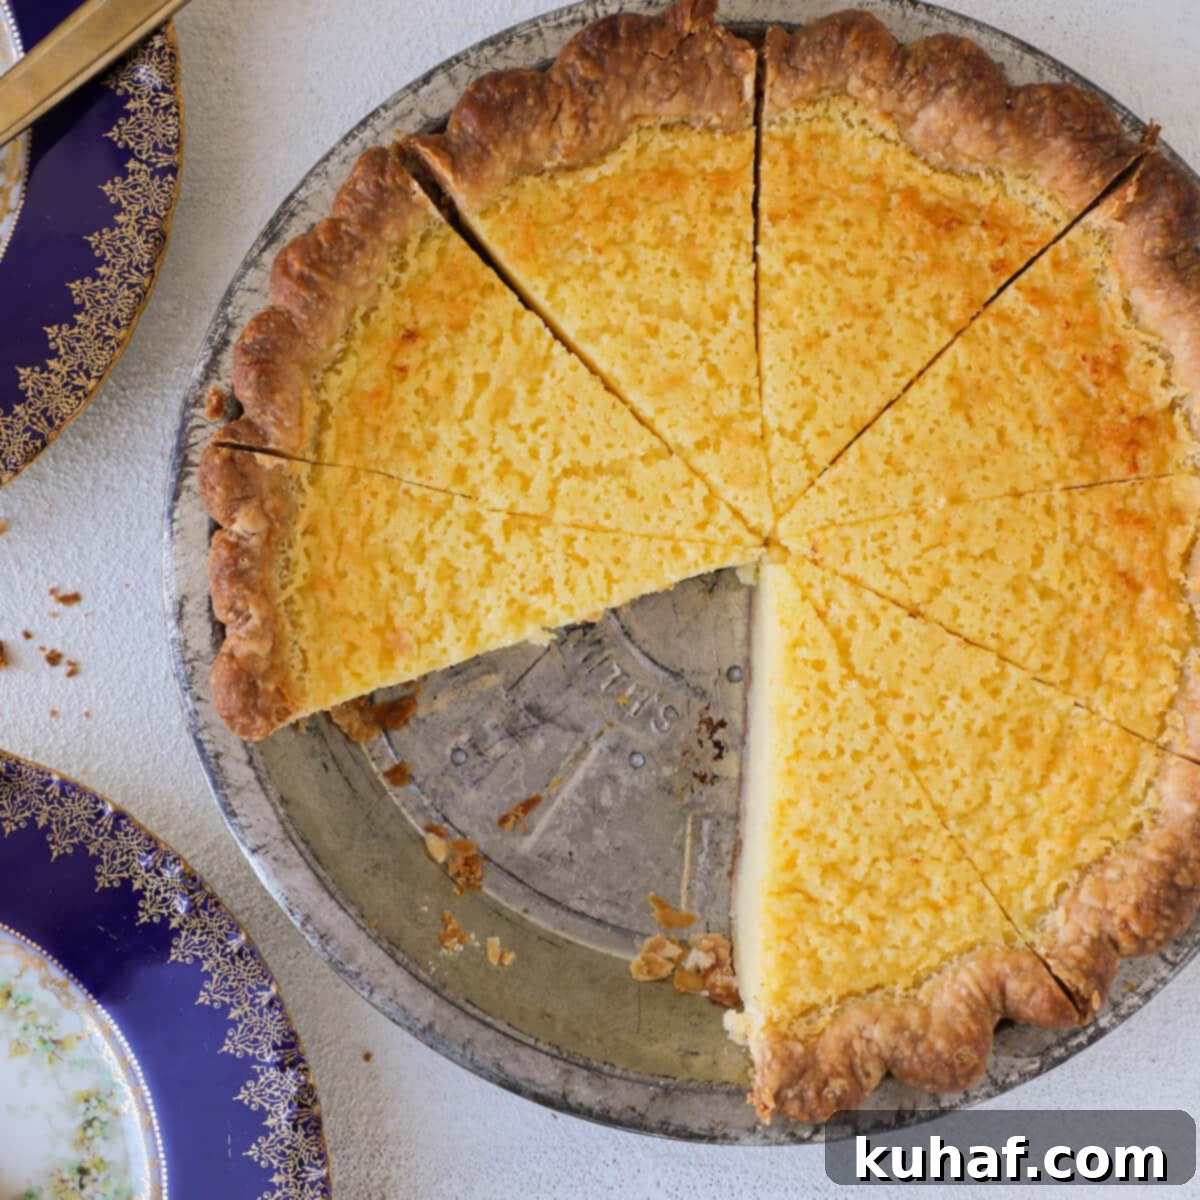
The Ultimate Old-Fashioned Buttermilk Pie Recipe: Creamy, Tangy & Irresistible
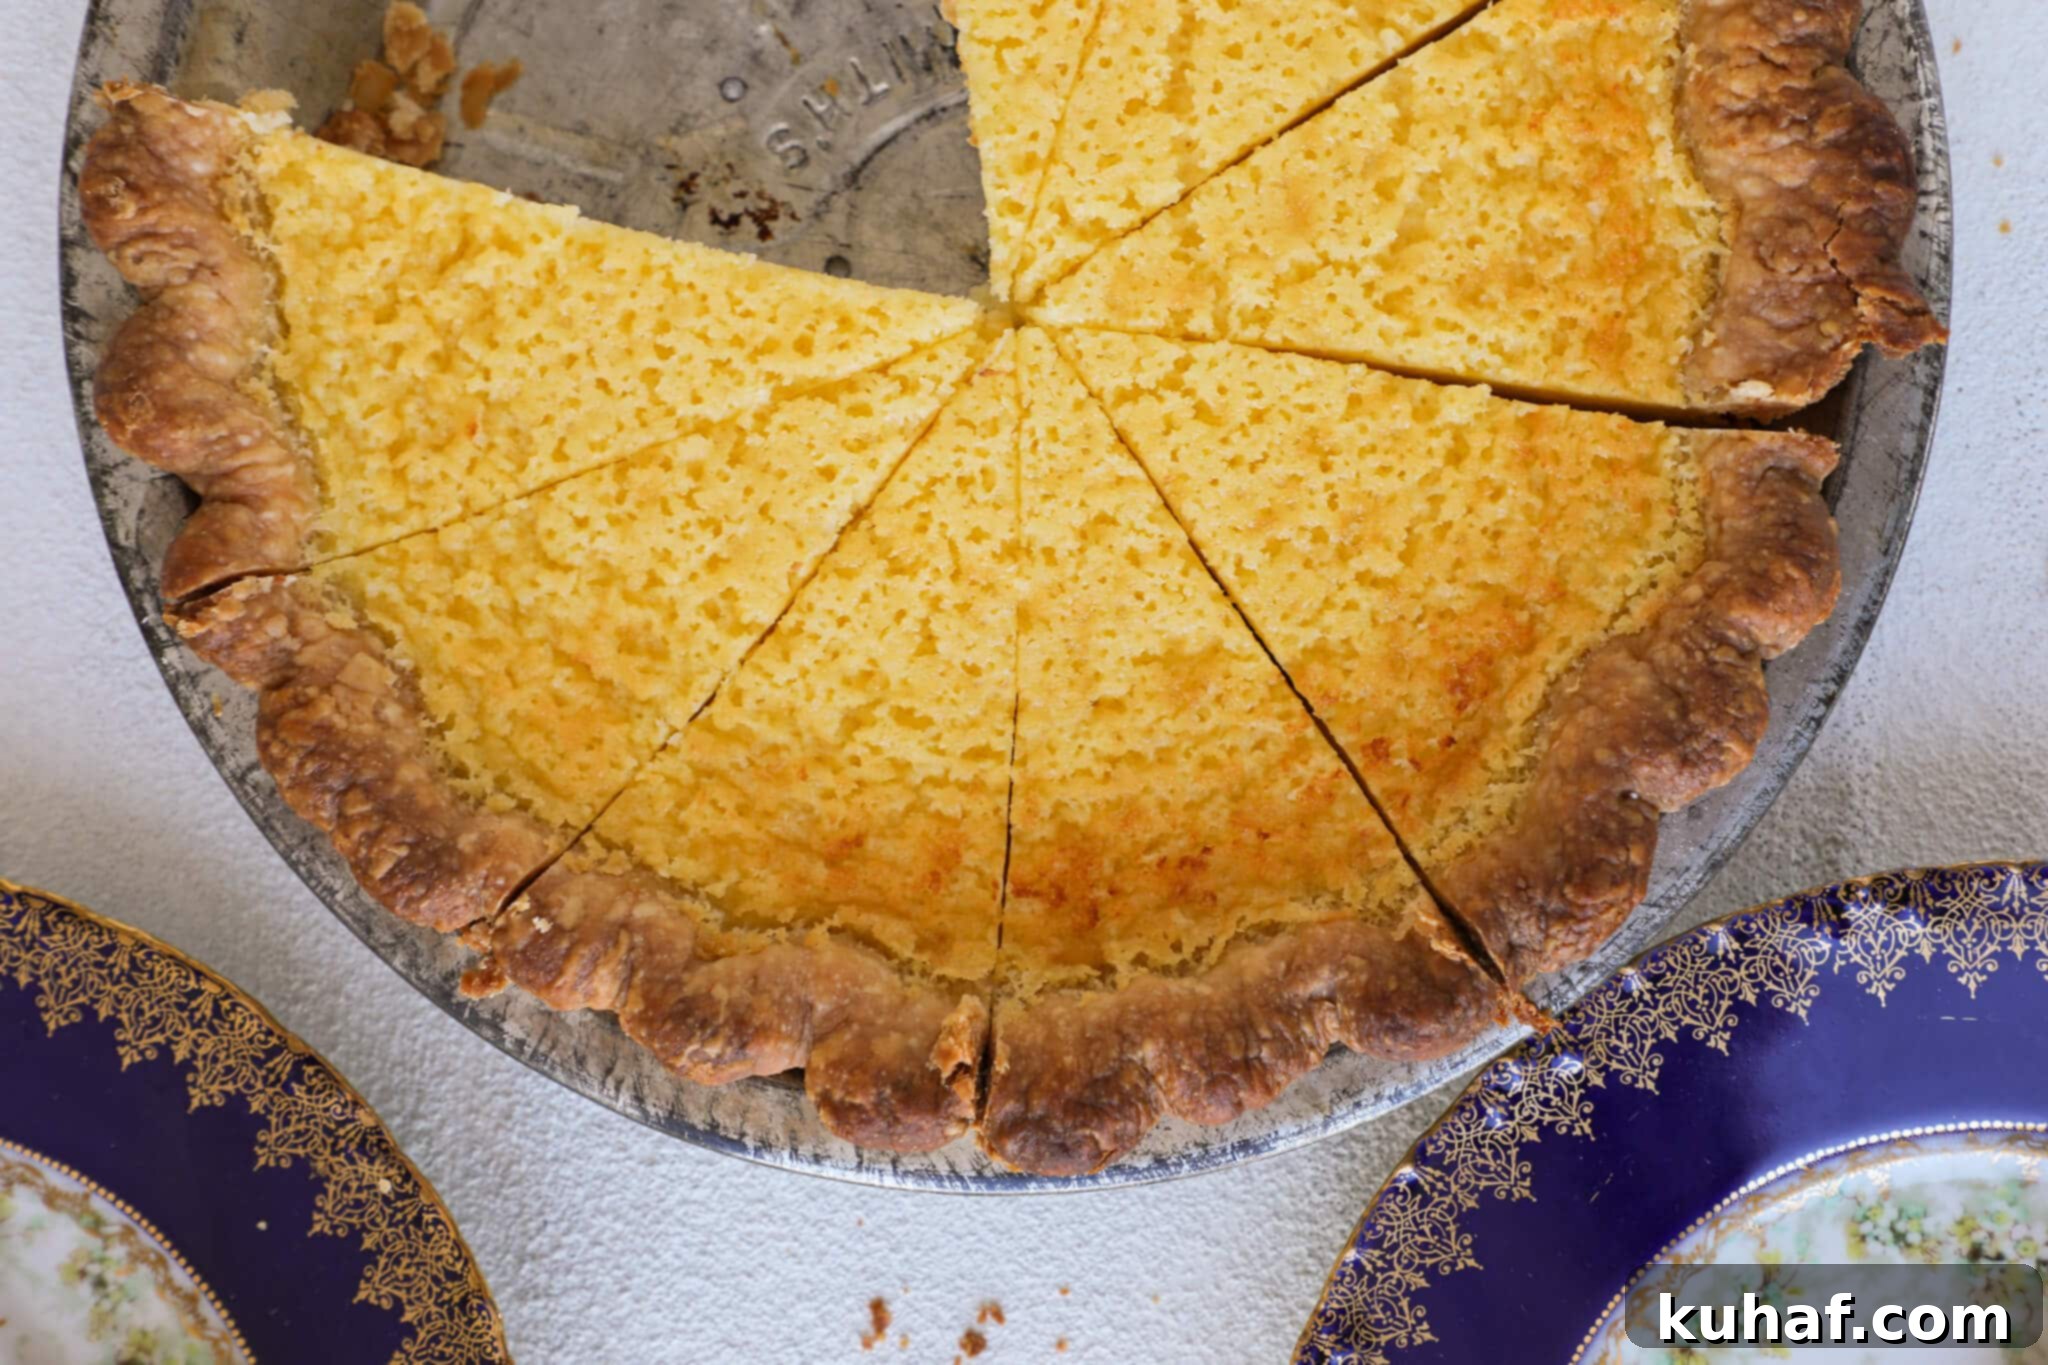
Indulge in the timeless charm of a truly old-fashioned Buttermilk Pie, a quintessential Southern dessert renowned for its delightful simplicity and sophisticated flavor. This recipe champions the use of rich, full-fat buttermilk to create an exceptionally thick, luxuriously creamy custard filling that is both sweet and subtly tangy. Paired with a delicate, flaky all-butter pie crust, this dessert offers a perfect harmony of textures and tastes. It’s an effortlessly elegant pie that deserves a spot on your table any time of the year.
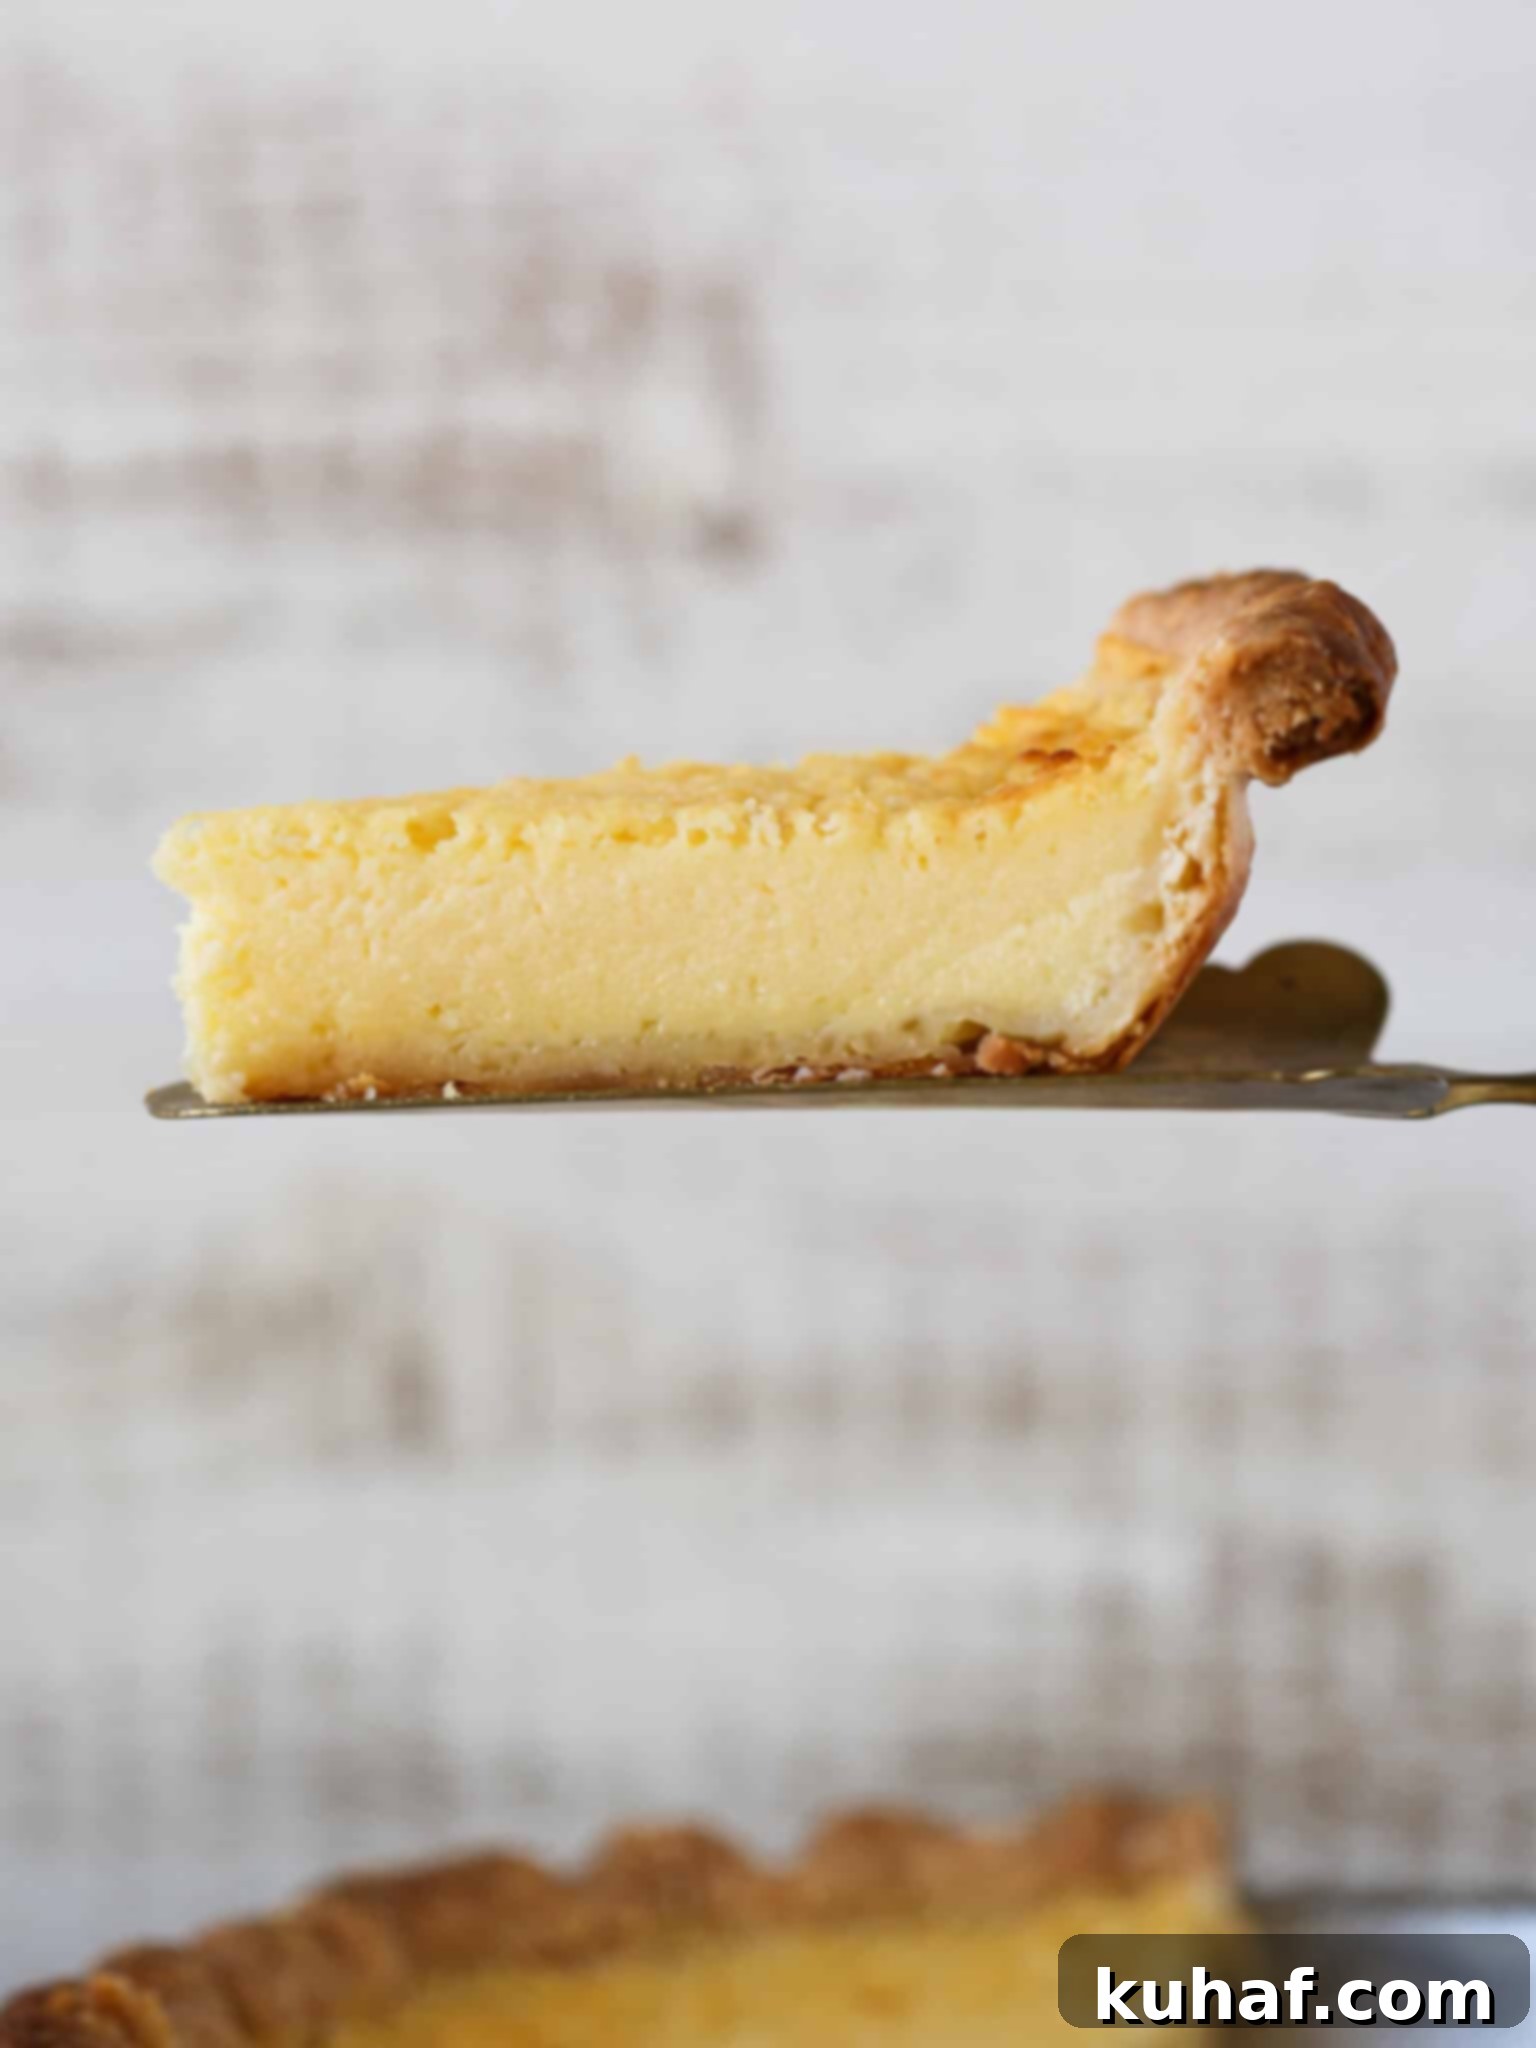
This easy-to-master buttermilk pie recipe hinges on high-quality, full-fat buttermilk, which is key to achieving its signature thick consistency and deep, satisfying flavor. A thoughtful touch of fresh lemon juice is incorporated to brightly enhance the buttermilk’s natural acidity, while just the right amount of sugar ensures a perfectly balanced, thick, and wonderfully sweet custard. The result is a pie that’s comforting, classic, and utterly delicious.
I wholeheartedly promise that this simple, easy, and authentic old-fashioned pie will exceed your expectations. Its unique balance of sweet and tangy makes it a refreshing alternative or a perfect companion to richer holiday classics such as traditional pumpkin pie and the best pecan pie on your Thanksgiving feast. However, don’t reserve buttermilk pie just for the holidays; its light, refreshing character makes it a superb dessert option for any occasion throughout the entire year!
Table of Contents
- Why This is the Best Buttermilk Pie
- What is Old-Fashioned Buttermilk Pie?
- Professional Tips for Making Buttermilk Pie
- Key Ingredients for Buttermilk Pie
- Possible Substitutions and Flavor Variations
- How to Make Buttermilk Pie
- Chef Lindsey’s Recipe Tip
- Frequently Asked Questions
- Buttermilk Pie Recipe
- Before You Go!
Why This is the Best Buttermilk Pie Recipe You’ll Find
- Uncomplicated & Quick Preparation. This pie is designed for ease. The filling comes together in minutes – simply whisk all the ingredients in one bowl, pour, and bake. Minimal fuss, maximum deliciousness!
- Perfectly Balanced Flavors & Textures. Our recipe achieves an exquisite equilibrium. The natural tartness of buttermilk and fresh lemon juice is beautifully mellowed by sugar, resulting in a lightly sweetened, creamy custard. This velvety filling is then contrasted by the crisp, golden layers of an all-butter vodka pie crust, offering a truly satisfying textural experience.
- A Versatile Pie for Every Season. Buttermilk pie adapts beautifully to any time of year. In the warmer months, serve it chilled with a vibrant medley of fresh berries and a cloud of homemade whipped cream. As the weather cools, enjoy it warm with a generous dollop of rich apple compote or a scoop of luscious vanilla bean ice cream.
- Professionally Developed and Tested. My quest for the perfect buttermilk pie led me to rigorously test countless recipes from my extensive vintage cookbook collection. This recipe is the culmination of that research, blending the best elements of classic Southern baking to deliver a pie that is consistently tart, sweet, and undeniably creamy. It’s a tried-and-true winner!
What is Old-Fashioned Buttermilk Pie? A Southern Classic Explained
Buttermilk Pie is a beloved staple of Southern cuisine, often referred to as a “custard pie” or likened to its cousin, chess pie. At its heart, it’s a simple, unpretentious dessert with profound flavor. The pie features a smooth, flavorful custard filling that’s whisked together quickly in a single bowl, then baked within a flaky pie crust. Unlike fruit pies, its charm lies in the creamy, slightly tangy filling, which sets to a silky, jiggly texture. Historically, buttermilk pies were a resourceful dessert, utilizing leftover buttermilk from butter-making and common pantry ingredients like sugar, eggs, and flour. This humble origin story contributes to its comforting, nostalgic appeal. It’s a no-fuss dessert that delivers immense satisfaction, making it a timeless classic.
Professional Tips for Making Your Best Buttermilk Pie
Achieving buttermilk pie perfection is easier than you think, especially with these insider tips:
- Always Opt for Full-Fat Buttermilk. For an unparalleled thick, rich, and truly creamy custard, using authentic, full-fat buttermilk is crucial. While homemade “buttermilk” (milk curdled with lemon juice or vinegar) can work in a pinch, it generally lacks the natural viscosity and richness of commercially packaged, cultured full-fat buttermilk, which is specifically designed for baking. This makes a significant difference in the final texture and luxurious mouthfeel of your pie.
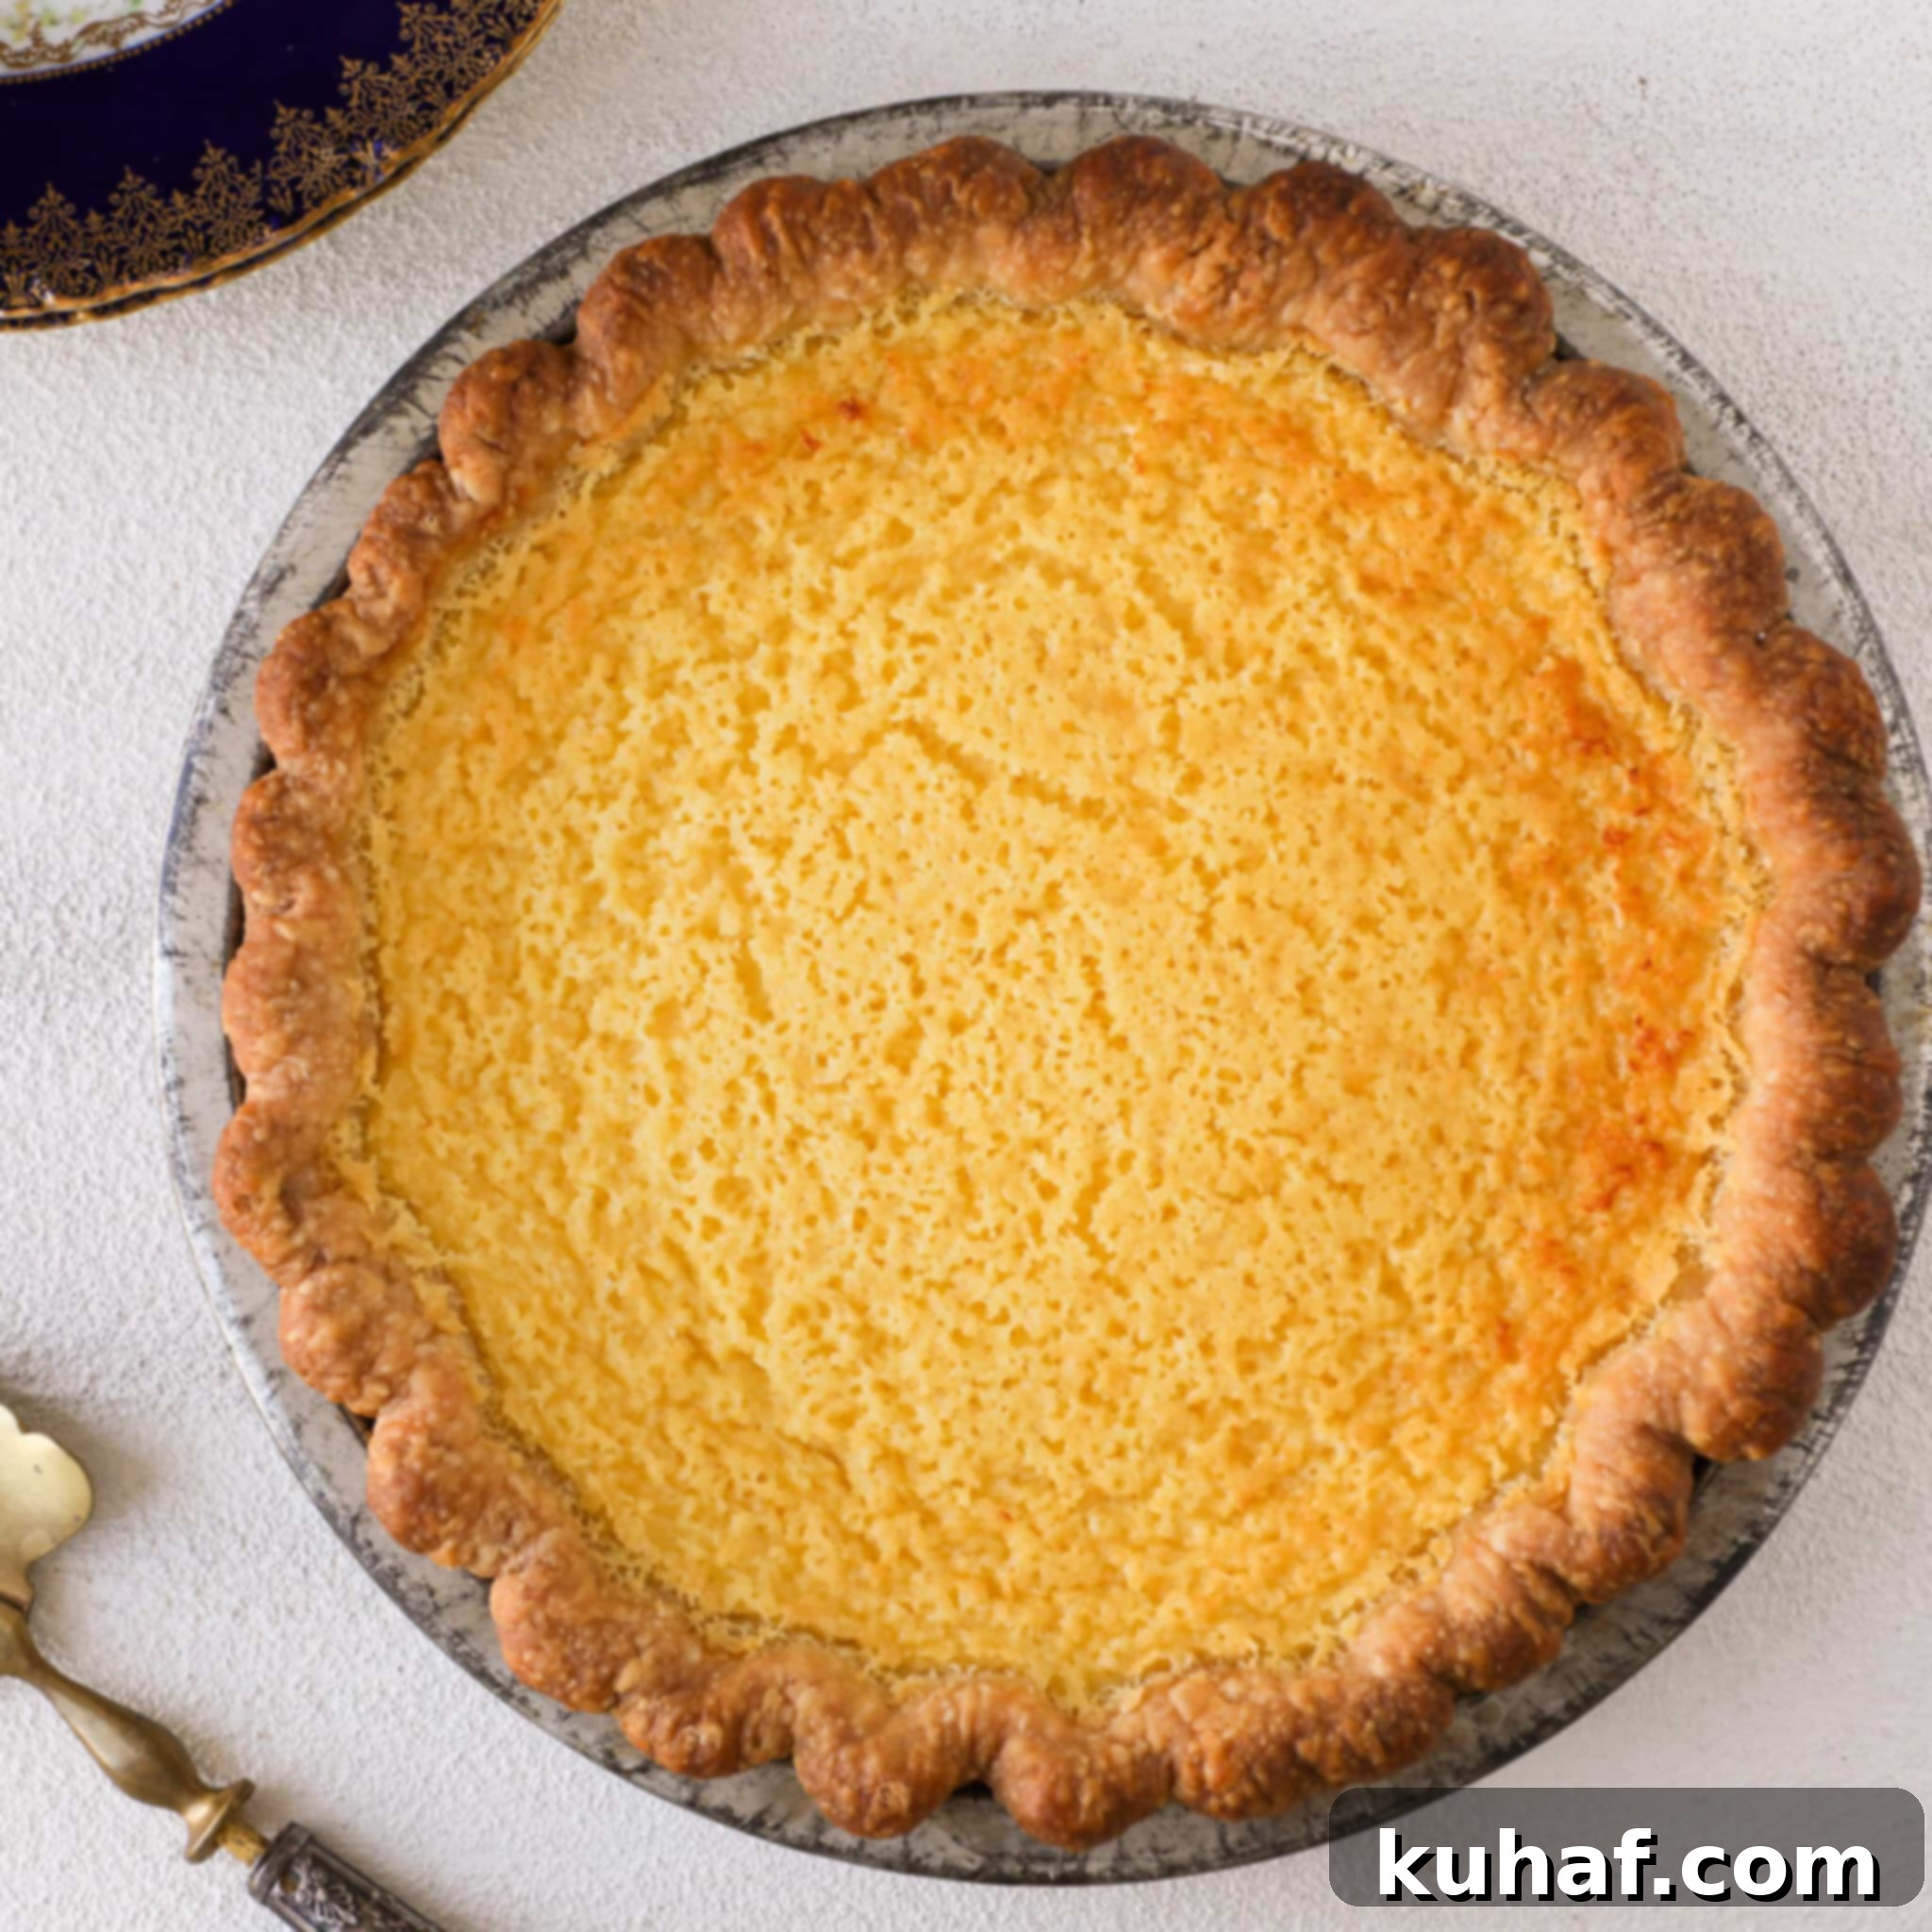
- Whisk All Filling Ingredients Together at Once. A common mistake is whisking ingredients separately, which can introduce too many small air bubbles into the mixture. These bubbles tend to rise to the surface during baking, potentially creating a less smooth, somewhat bumpy top on your custard, as you might even observe in some of my initial test photos. To achieve a flawlessly smooth, professional-looking surface on your pie, whisk all the filling ingredients together in one go until just combined. This minimizes aeration and ensures a silky-smooth finish.
- Patience is Key: Cool Completely Before Slicing. This tip is paramount for the integrity of your pie. Buttermilk pie, like most custard pies, requires ample time to set properly. If you attempt to slice it while it’s still warm, the filling will appear underbaked and runny, likely spilling out rather than holding its shape. For the cleanest, most beautiful slices, cool the pie completely at room temperature, then refrigerate it for several hours, or even overnight. This chilling process allows the custard to firm up fully, ensuring perfect presentation and texture.
- Don’t Overbake. Keep a close eye on your pie as it bakes. The edges should be set, but the center should still have a slight jiggle, much like a firm Jell-O. Overbaking can lead to a dry, cracked custard and a less desirable texture. The jiggle indicates a perfectly cooked custard that will set fully upon cooling.
Key Ingredients for an Authentic Buttermilk Pie
Each ingredient in this buttermilk pie recipe plays a vital role in achieving its perfect balance of flavor and texture:
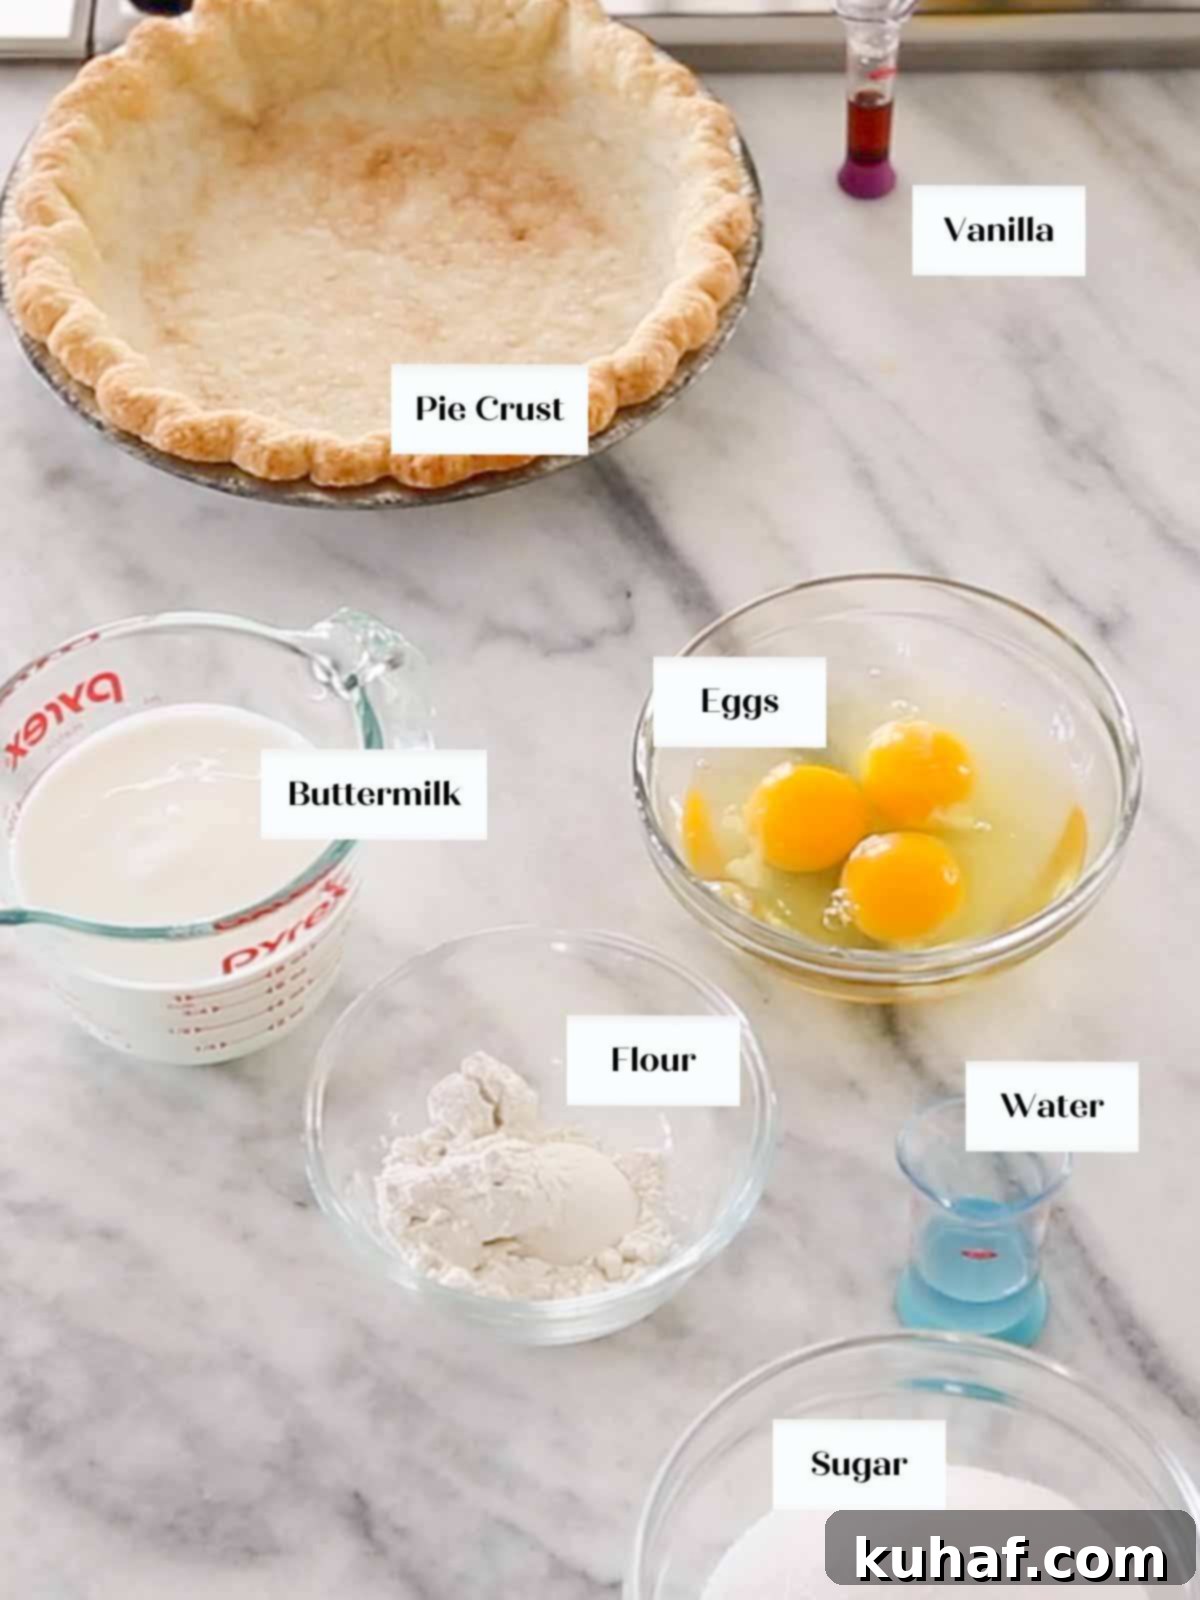
- Lemon Juice: Far from just a flavor enhancer, lemon juice is crucial for augmenting the natural acidity of the buttermilk. This subtle boost of tartness brightens the custard and prevents it from being overly sweet. My steadfast motto for citrus is: fresh is always best. If fresh lemons aren’t available, seek out a high-quality frozen lemon juice that preserves the vibrant taste of fresh.
- All-Purpose Flour: In this baked custard, all-purpose flour serves as a gentle thickener. It provides a lighter set compared to cornstarch or tapioca, absorbing just enough moisture to thicken the filling without altering its delicate flavor profile. This ensures a smooth, creamy custard that isn’t gummy or overly dense.
- Unsalted Butter: Unsalted butter is preferred in baking as it gives you complete control over the salt content in your recipe. The fat and dairy solids in the butter contribute significantly to the rich flavor and smooth, luxurious mouthfeel of the baked custard, adding depth and a velvety finish. Ensure it’s melted for easy incorporation.
- Granulated Sugar: Beyond simply providing sweetness, granulated sugar plays a protective role. When beaten with the eggs, it helps to create a stable emulsion, shielding the egg proteins from the intense heat of baking and the acidity from the lemon juice and buttermilk, which could otherwise cause curdling. It also contributes to a slight leavening, creating a tender crumb.
- Large Eggs: Eggs are the cornerstone of any baked custard, acting as the primary thickening agent. Their proteins coagulate when heated, transforming the liquid filling into a firm yet tender custard. Whisking them thoroughly with the sugar before adding other liquids further protects them, ensuring a smooth, cohesive set.
- Full-Fat Buttermilk: This is the star of the show. Whole, full-fat buttermilk is significantly thicker and richer than its low-fat counterparts (1.5% or 2%). While it might be slightly less common in grocery stores, the extra fat content and natural thickness of full-fat buttermilk are essential for achieving the truly special, luxurious texture and deep flavor that define an exceptional buttermilk pie.
- Water: A small amount of water is added to subtly loosen the custard, ensuring it remains tender and creamy rather than becoming too dense. It helps achieve the perfect jiggle.
- Vanilla Extract: Vanilla extract introduces a gentle, warm, and beautiful aromatic flavor that complements the tanginess of the buttermilk without overpowering it, adding a layer of classic sweetness.
Possible Substitutions and Creative Flavor Variations
While this recipe is crafted for perfection, here are some thoughtful substitutions and exciting ways to customize your buttermilk pie:
- All-Purpose Flour Alternatives: All-purpose flour is used here as a delicate thickening agent. You can substitute it with an equal amount of cornstarch or tapioca flour for a slightly different texture (cornstarch yields a very smooth, almost gelatinous texture, while tapioca gives a more translucent, chewy feel). For a gluten-free option, a good quality gluten-free all-purpose flour blend can be used successfully.
- Buttermilk Choices: Our old-fashioned buttermilk pie recipe explicitly calls for full-fat buttermilk for the richest results. However, if low-fat or reduced-fat buttermilk is all you have, it can be substituted. When making this swap, it is recommended to eliminate the additional water from the recipe, as lower-fat buttermilk varieties are naturally thinner and won’t require further thinning.
- Crust Adventures: While our flaky all-butter crust is superb, this pie is incredibly versatile! It would be equally delicious in a sophisticated pâte sucrée (sweet shortcrust pastry), a rustic almond flour pie crust, a classic Crisco pie crust, or even a convenient baked graham cracker crust for a slightly different texture and flavor profile.
- Twist the Flavor Profile. Get creative with citrus! For an added layer of aromatic complexity, try grating fresh lemon zest or orange zest into the granulated sugar before mixing it with the other ingredients. The sugar crystals will absorb the essential oils, intensifying the citrus notes. You could also experiment with different extracts, such as almond extract for a nutty undertone, or even a hint of coconut extract for a tropical twist.
How to Make Buttermilk Pie: A Step-by-Step Guide
Follow these detailed instructions to create the easiest and most delicious buttermilk pie. For precise measurements and additional tips, please refer to the comprehensive recipe card located below.
Part 1: Prepare and Par-Bake Your Pie Crust
A perfectly par-baked crust is essential for preventing a soggy bottom and providing a crisp counterpoint to the creamy filling.
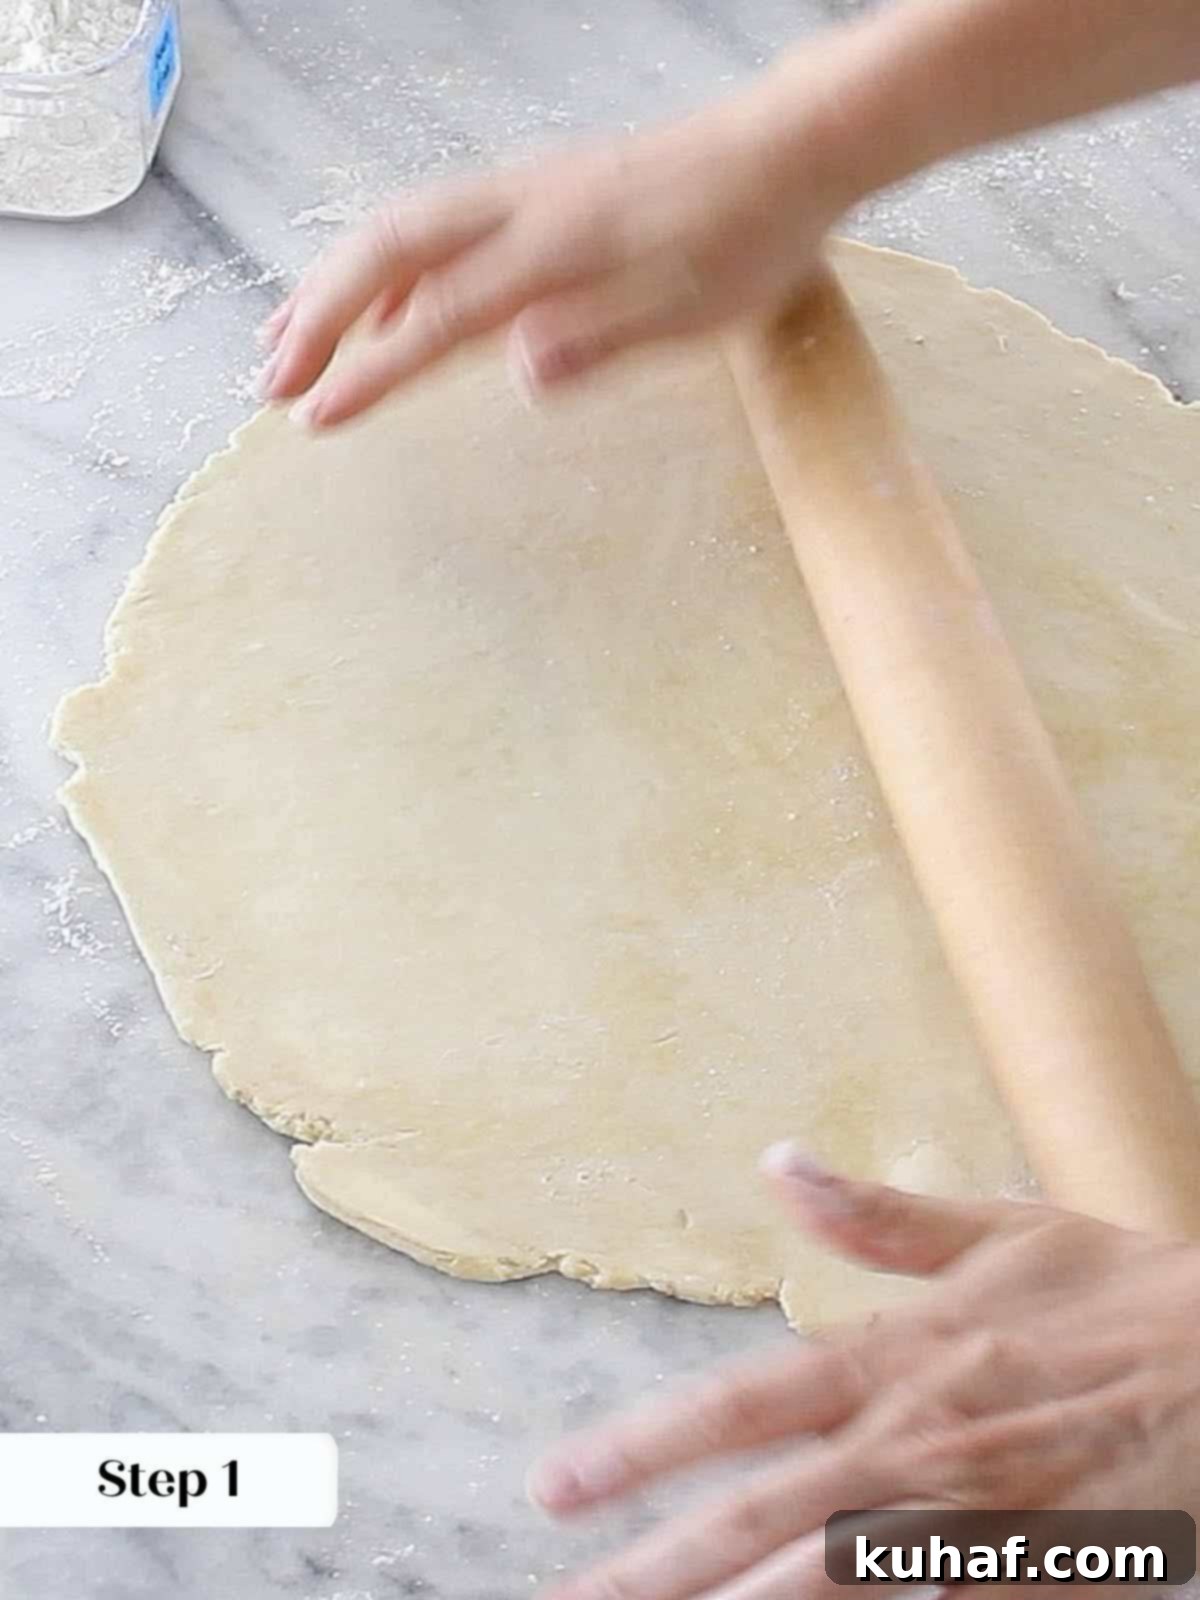
Step 1: Preheat and Prepare Dough. Begin by preheating your oven to 350°F (175°C) for convection baking or 375°F (190°C) for conventional ovens (without a fan). If you’re using homemade pie dough, gently roll out one portion onto a lightly floured surface. Aim for a thickness of approximately 1/8th inch. Once rolled, transfer the dough to a flat baking sheet and chill it in the refrigerator for at least 30 minutes. This crucial step allows the gluten in the dough to relax, preventing shrinkage, and helps the butter re-solidify, ensuring a flaky texture.
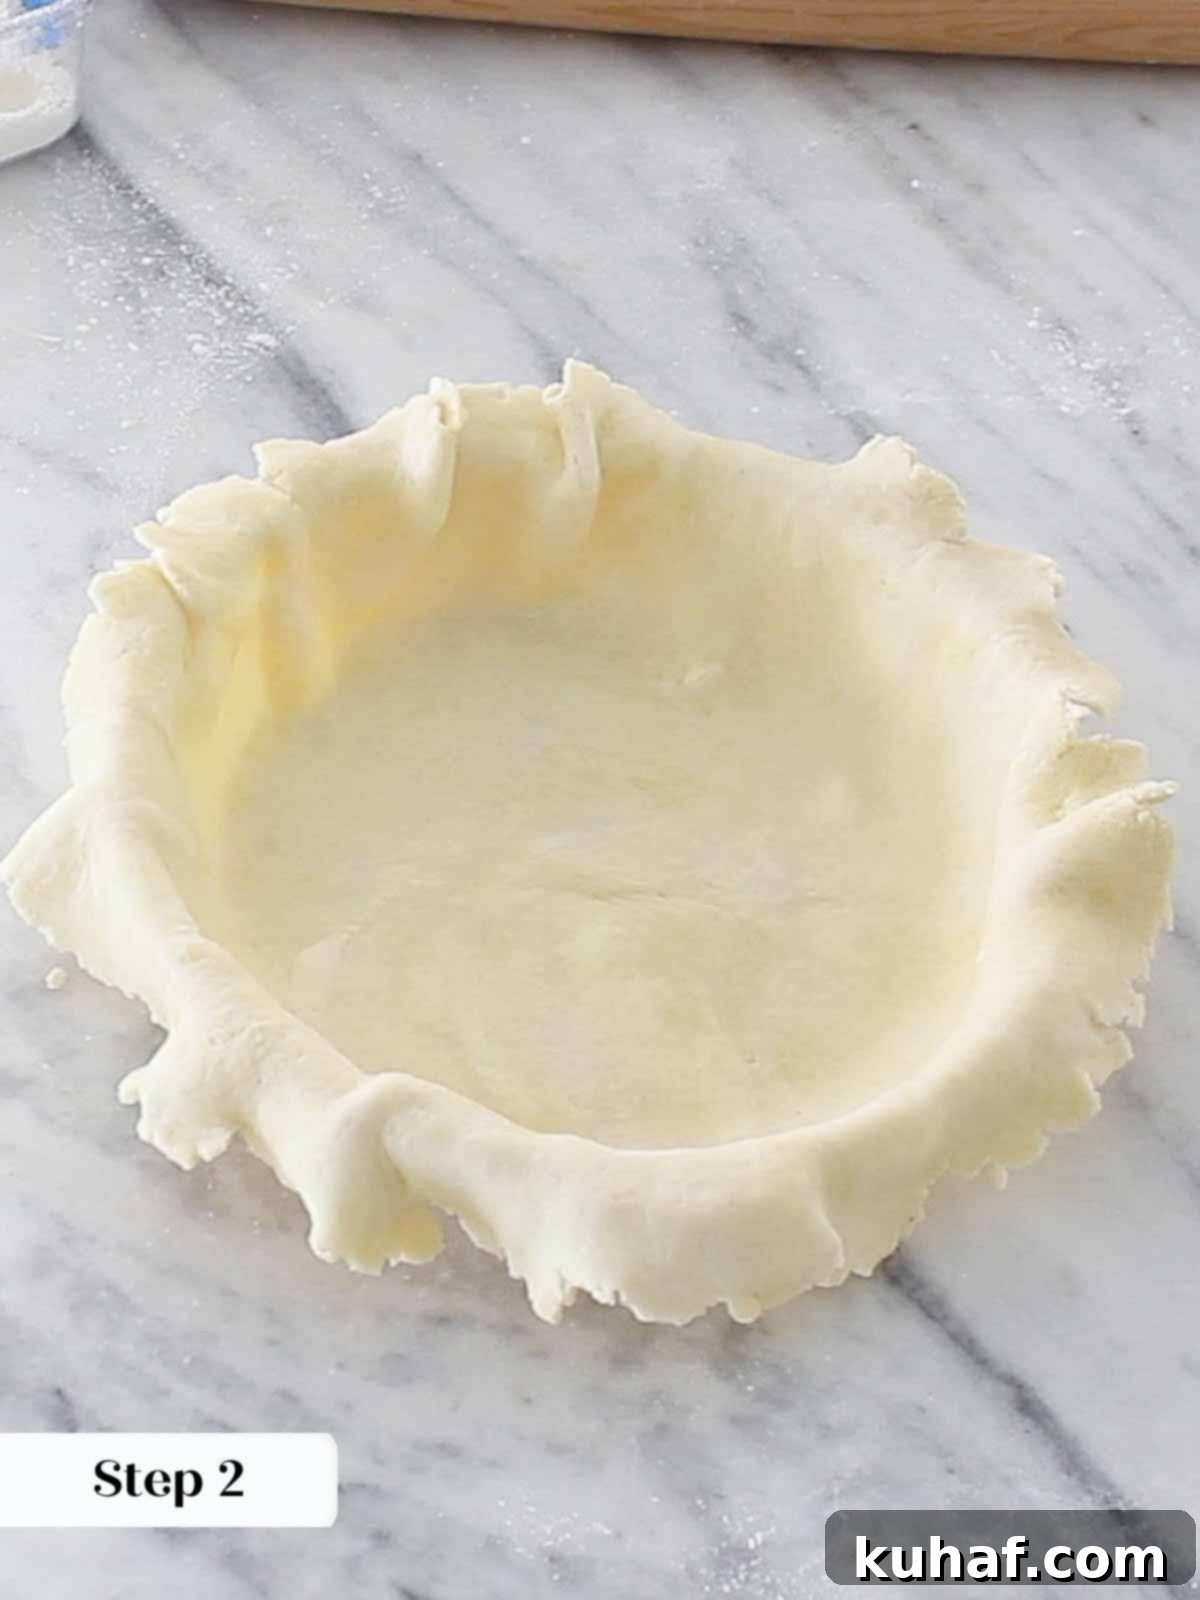
Step 2: Fit the Crust into the Pie Dish. Remove the chilled dough from the refrigerator and let it sit at room temperature for just a few minutes until it is pliable enough to work with without cracking. Carefully drape the dough over a 9-inch pie dish or tin. Avoid stretching the dough; instead, lift the edges gently and allow gravity to help it settle naturally into the bottom and sides of the dish. Gently press the dough against the sides to ensure a snug fit, allowing any excess dough to overhang the dish. Starting from one side, carefully roll the overhanging edges under themselves, towards the rim of the dish. Once rolled, gently press the dough onto the edge of the dish to seal it, creating a neat, sturdy border. Repeat this process around the entire circumference of the pie crust.
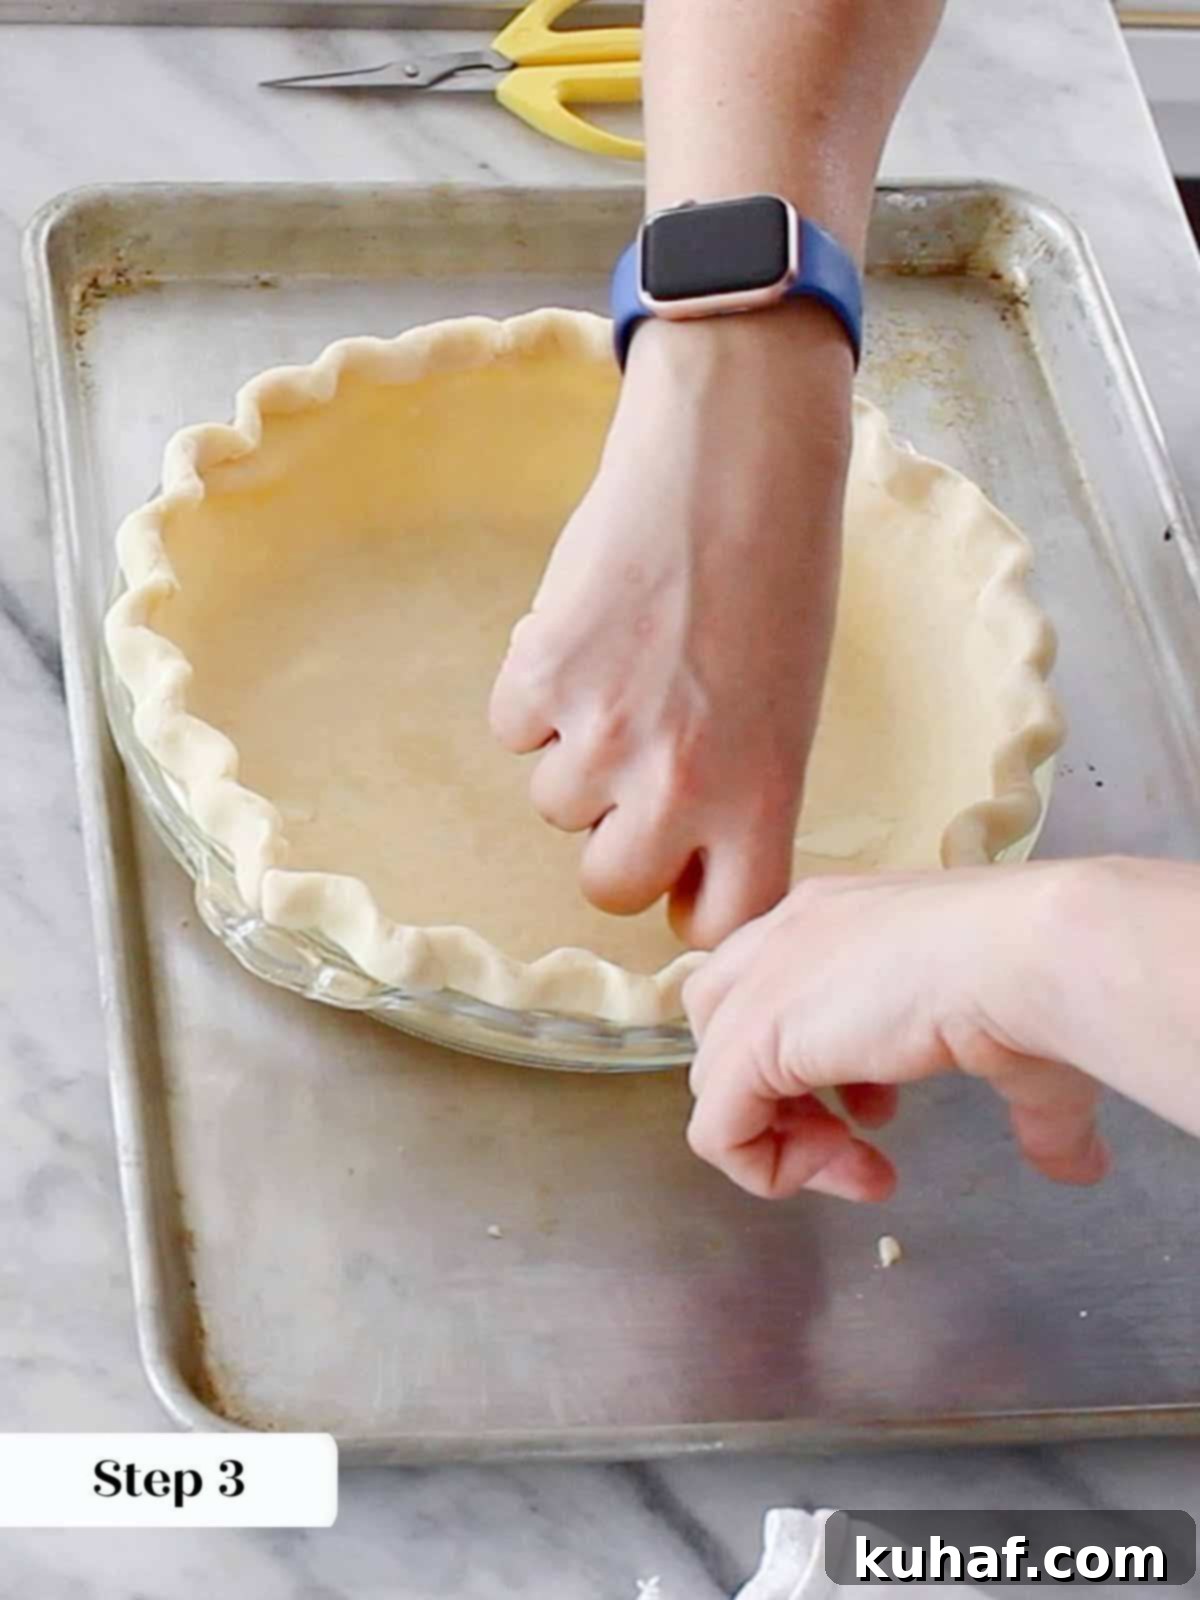
Step 3: Flute the Edges and Chill Again. Create a decorative fluted edge by gently pressing one knuckle on the outside of the crust and using two knuckles (or your fingertips) from the inside to create a wavy pattern. This not only adds visual appeal but also helps the crust maintain its shape during baking. Once fluted, return the pie crust to the refrigerator for another 10-30 minutes, depending on how warm the dough became during handling. A cold crust is essential for crisp, defined fluting and to prevent slumping in the oven.
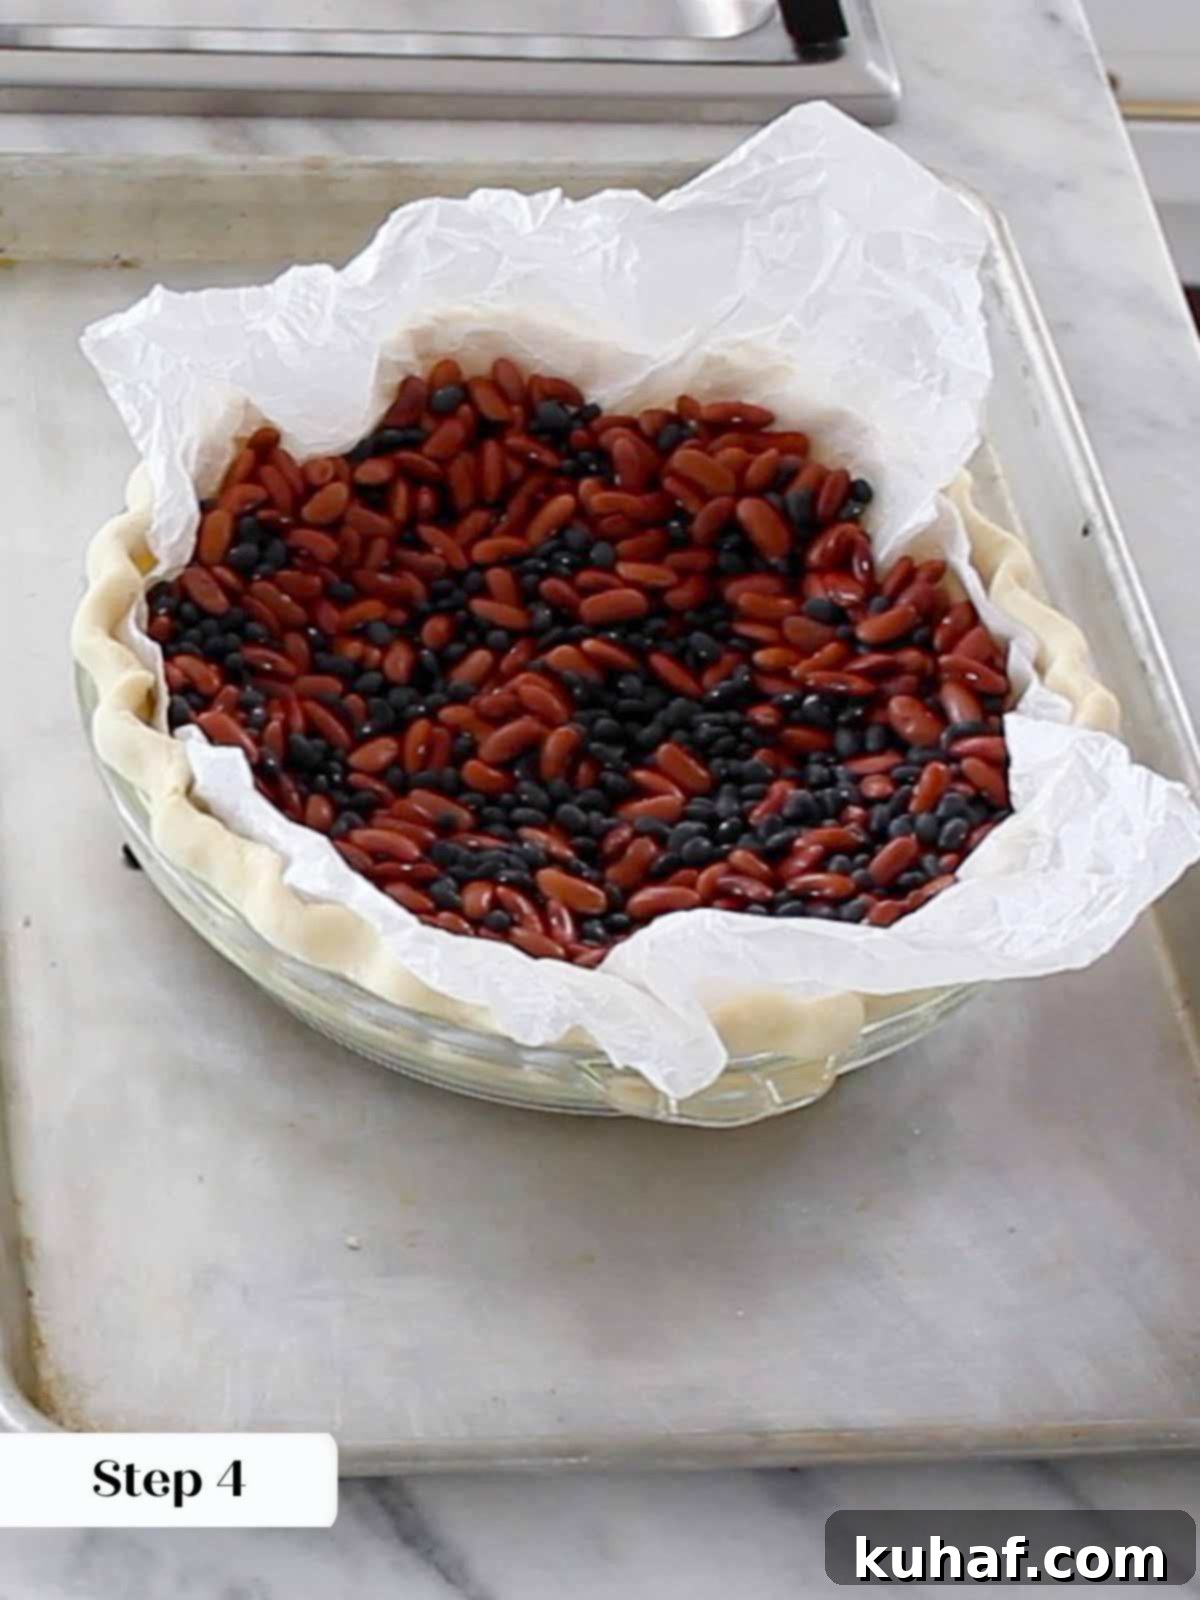
Step 4: Prepare for Blind Baking. Take a piece of parchment paper, crumple it up (this makes it more pliable and easier to fit), and then unfold it to line the inside of your chilled pie crust. Fill the parchment-lined crust with pie weights, dried beans, or uncooked rice. I personally find that dried beans work exceptionally well as they effectively distribute weight and hold the crust’s shape during baking.
It’s important to remember: do not dock the dough for this pie. Docking (pricking holes) is typically done to prevent air bubbles, but for a custard pie, the filling can seep through these holes, leading to a soggy bottom or burnt filling. If you’re curious about the science and methods of par-baking, I delve into all the nitty-gritty details in my comprehensive How to Partially Blind Bake a Pie tutorial!
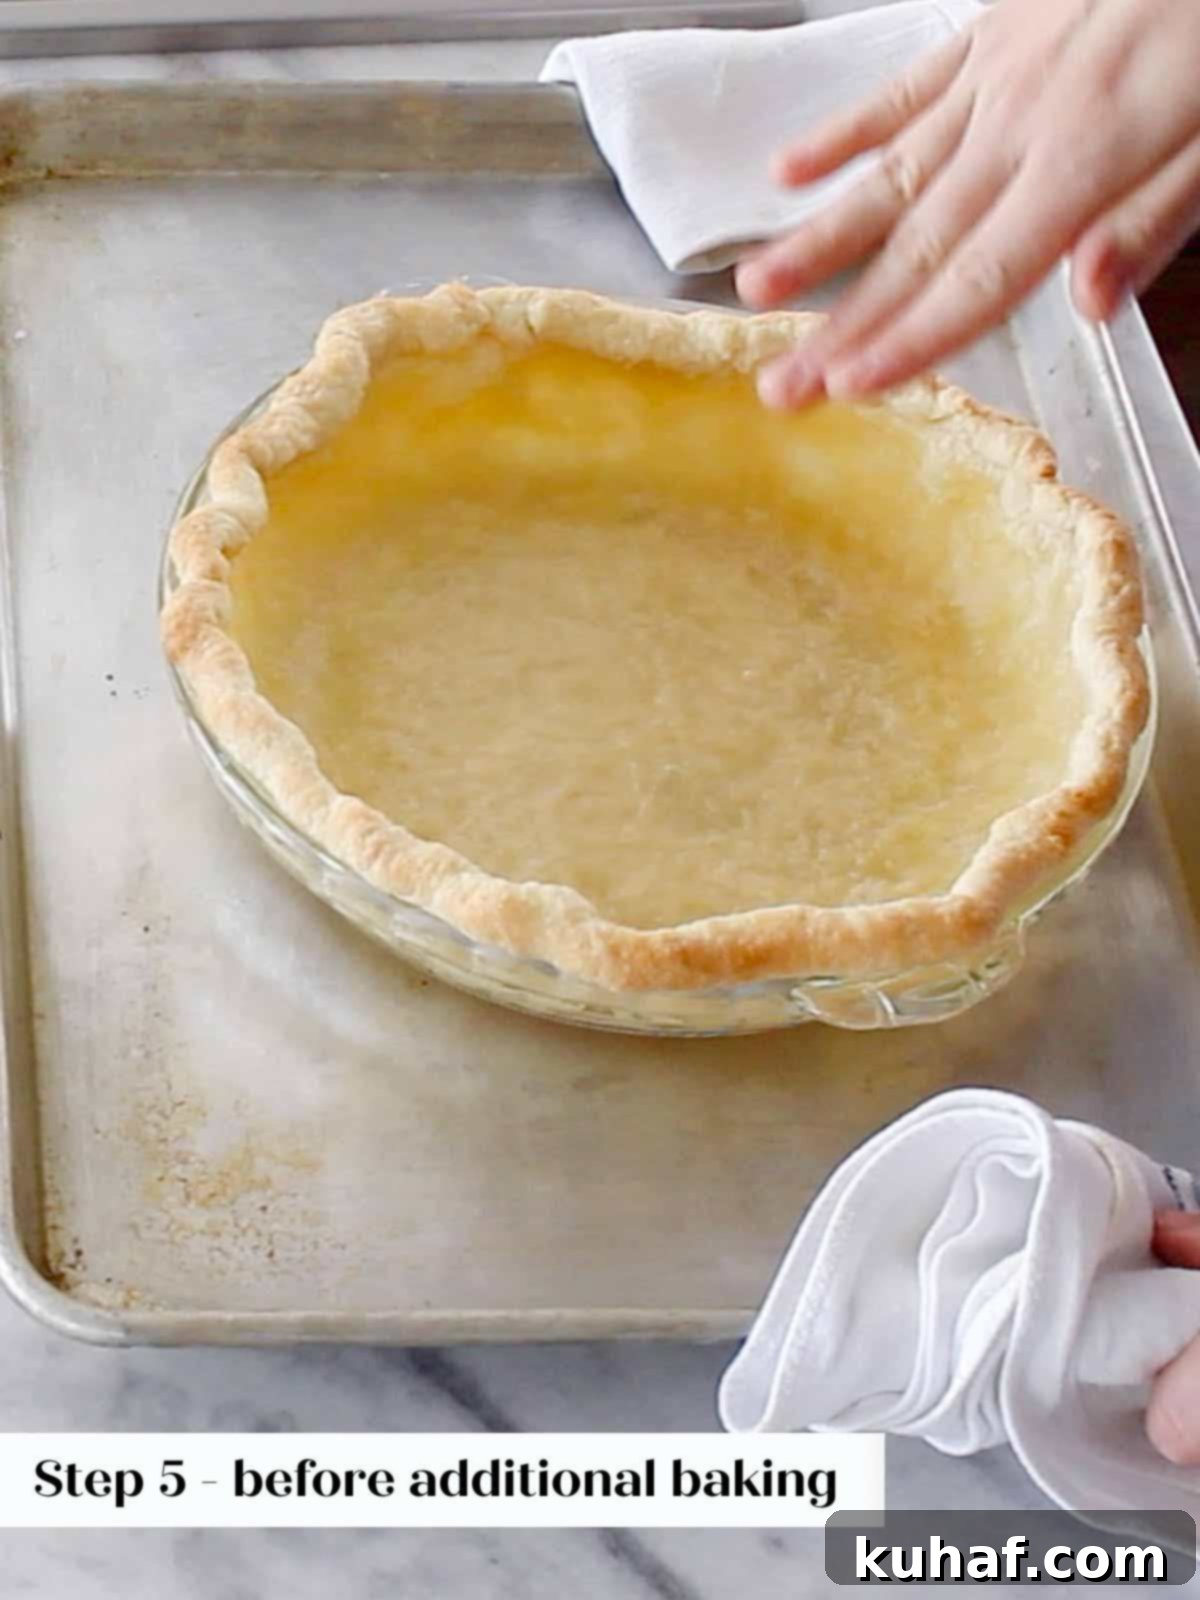
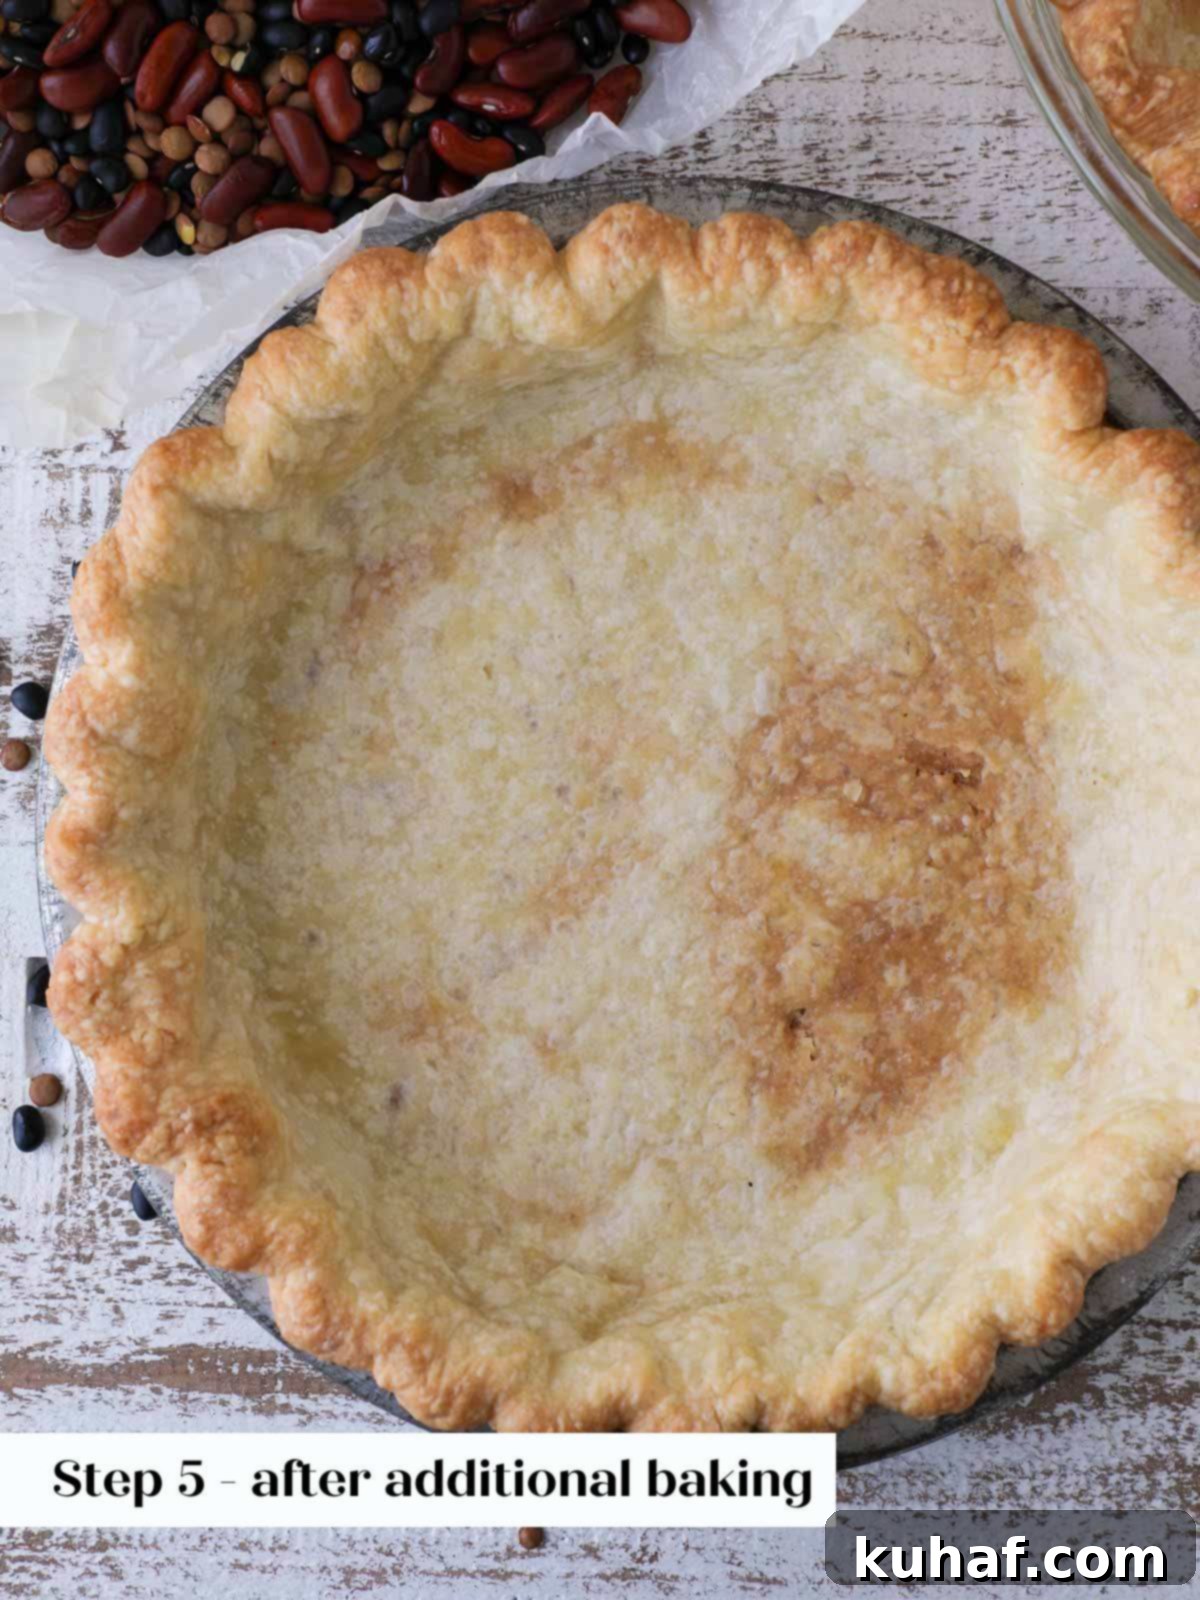
Step 5: Par-Bake the Crust. Place the pie dish with weights into your preheated oven and bake for 15-20 minutes. Keep an eye on it! The goal is for the crust to just begin to brown slightly and lose its raw, doughy appearance. At this point, carefully remove the pie weights and the parchment paper. This is the crucial par-baked stage. The crust will continue to bake and crisp up with the custard filling, so it doesn’t need to be fully golden brown yet.
Once your pie crust reaches the par-baked stage, it’s incredibly versatile. You can use it immediately while it’s still warm, or you can allow it to cool completely, wrap it tightly, and freeze it for future use. Par-baked crusts can also be stored at room temperature for up to 3 days, making pie preparation a breeze on busy days.
Part 2: Make & Bake the Buttermilk Pie Filling
With your crust ready, the delicious custard filling comes together in a flash!
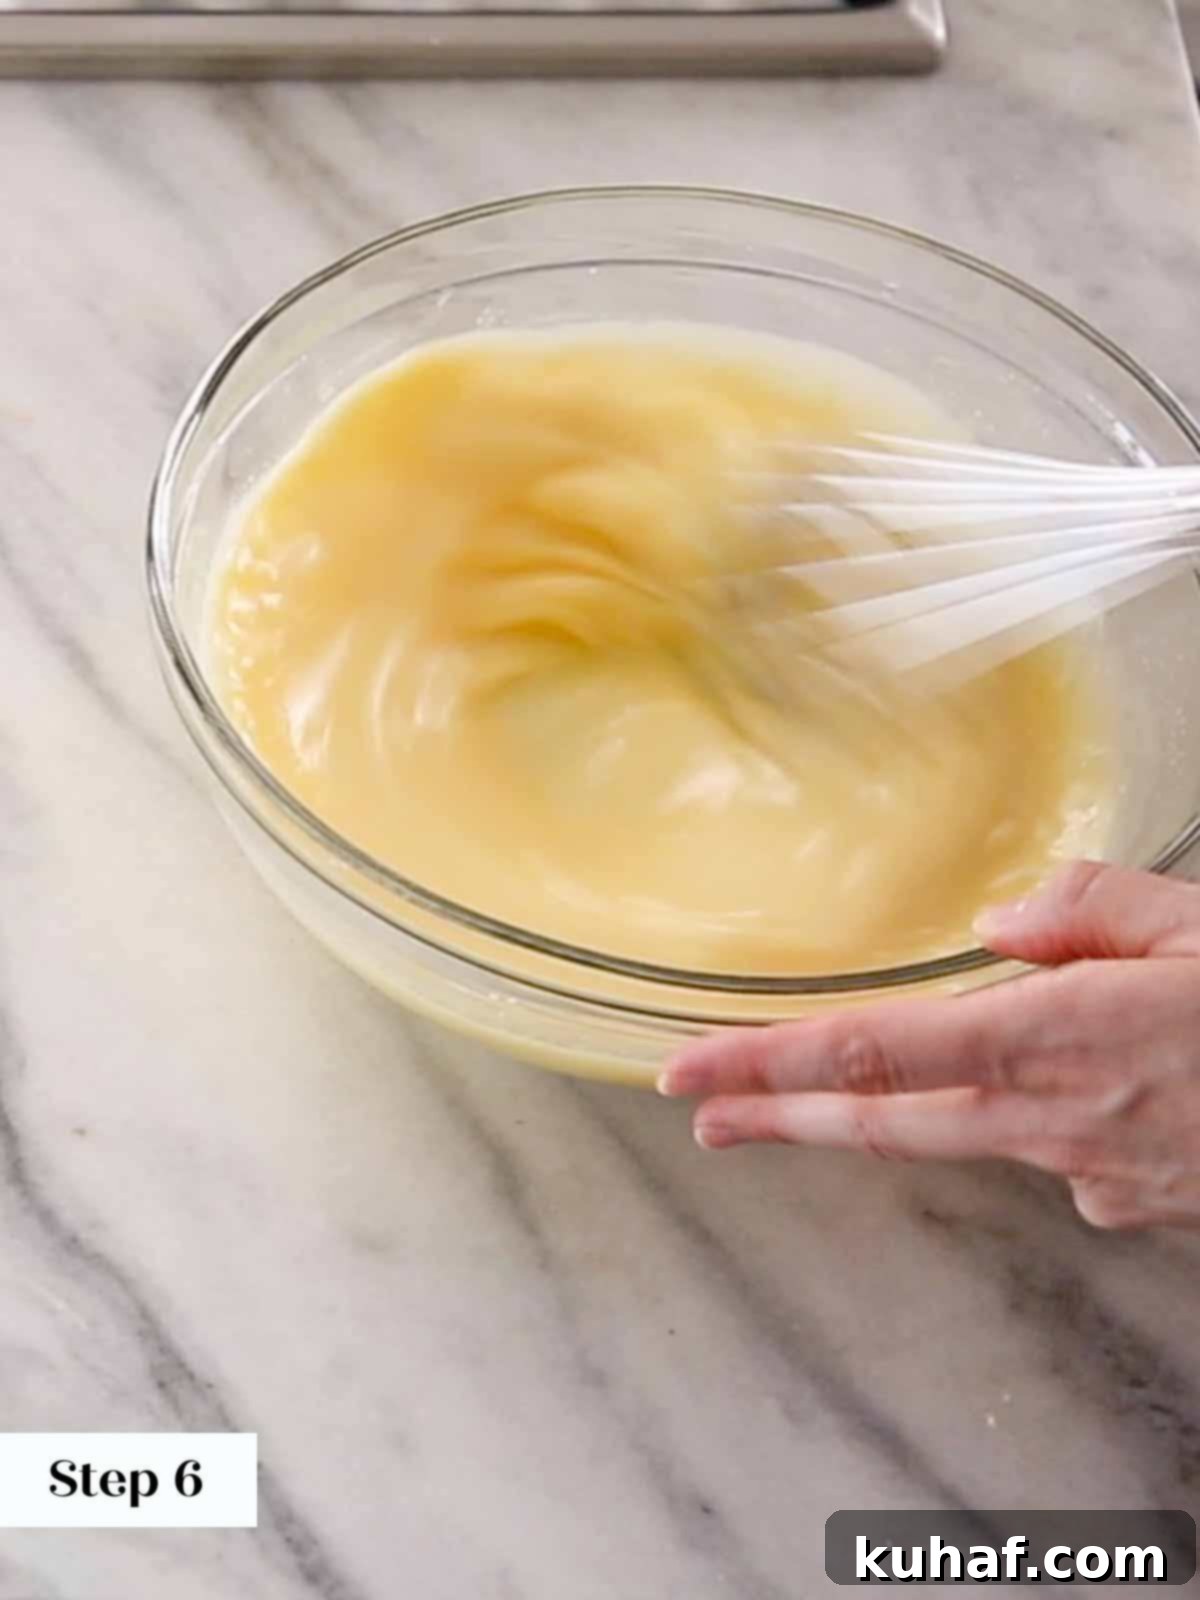
Step 6: Prepare the Custard Filling. In a medium-sized mixing bowl, combine all the ingredients for the custard filling. Using a whisk, gently but thoroughly mix everything together until just combined and smooth. It is important to avoid over-whisking, as this can incorporate too much air, leading to a foamy filling and a less smooth top on your baked custard. This single-bowl method helps minimize bubbles, ensuring the top of your pie will be beautifully smooth after baking. (Note: In earlier test batches, where ingredients were whisked individually, you might notice small bubbles on the surface in some of the photos. While it doesn’t affect the incredible taste, a smoother top is aesthetically pleasing!)
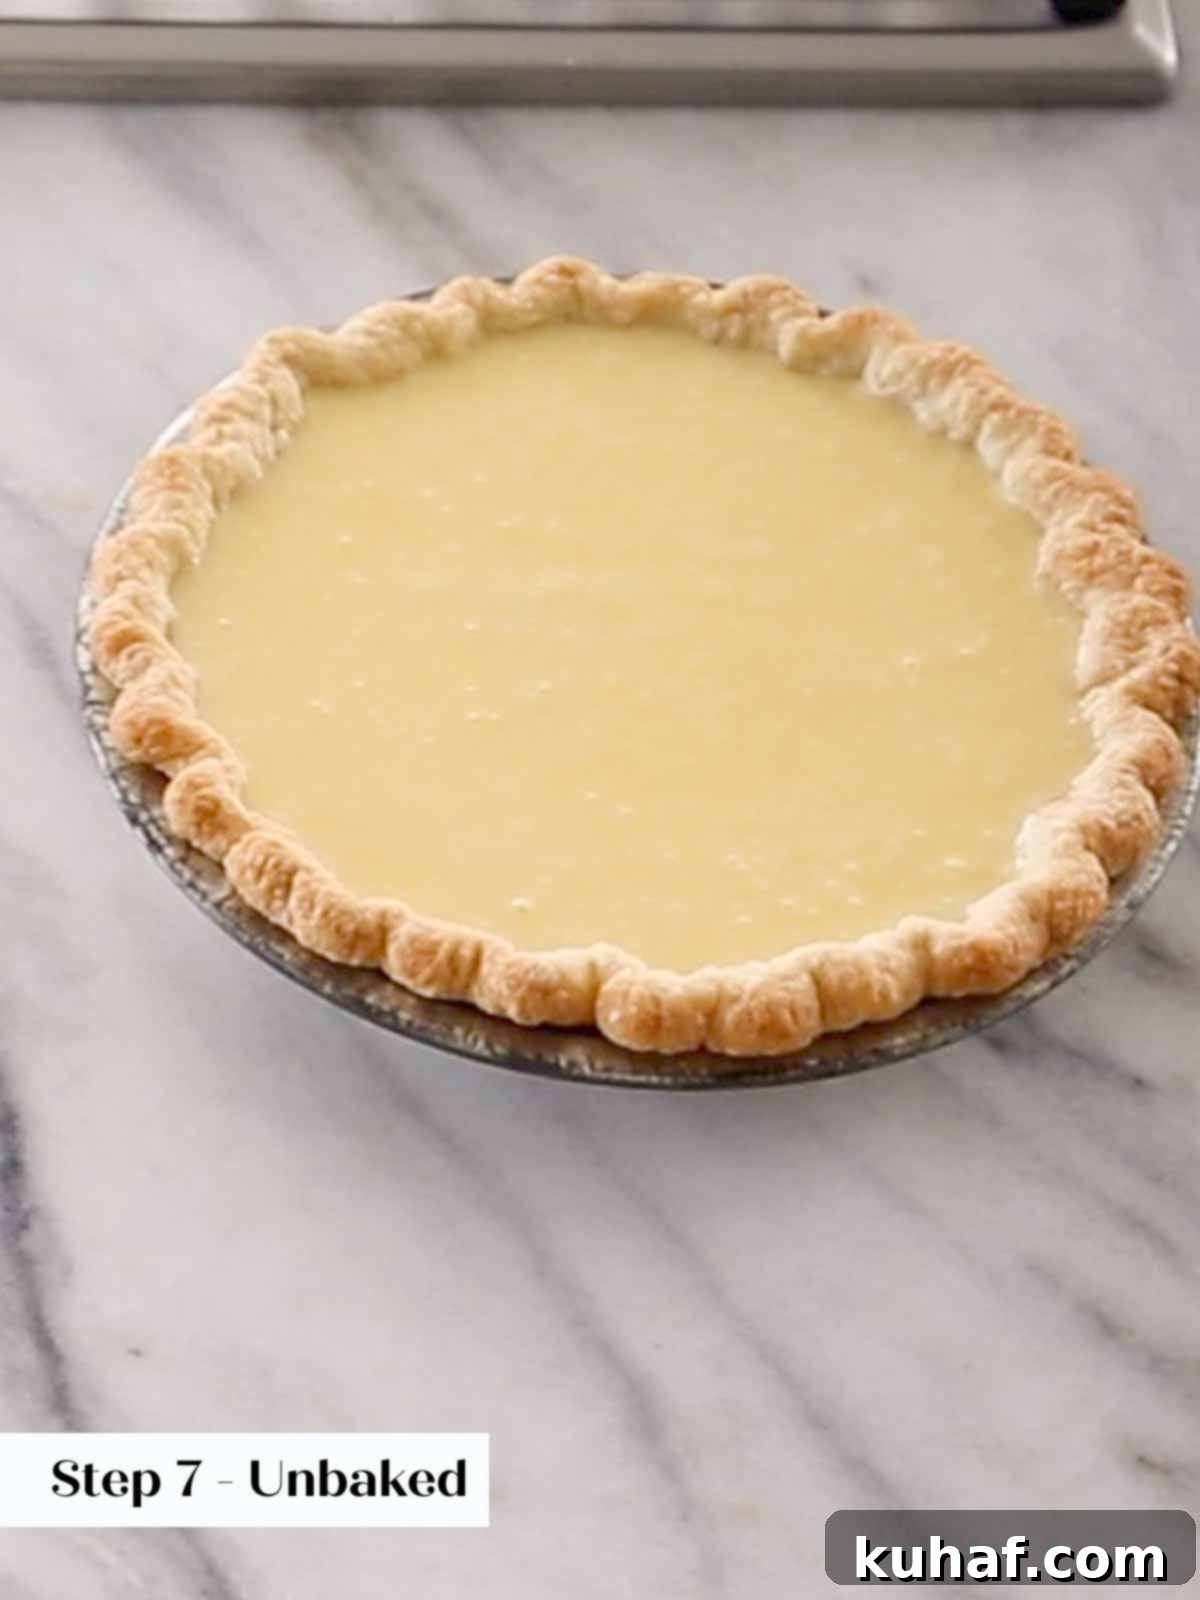
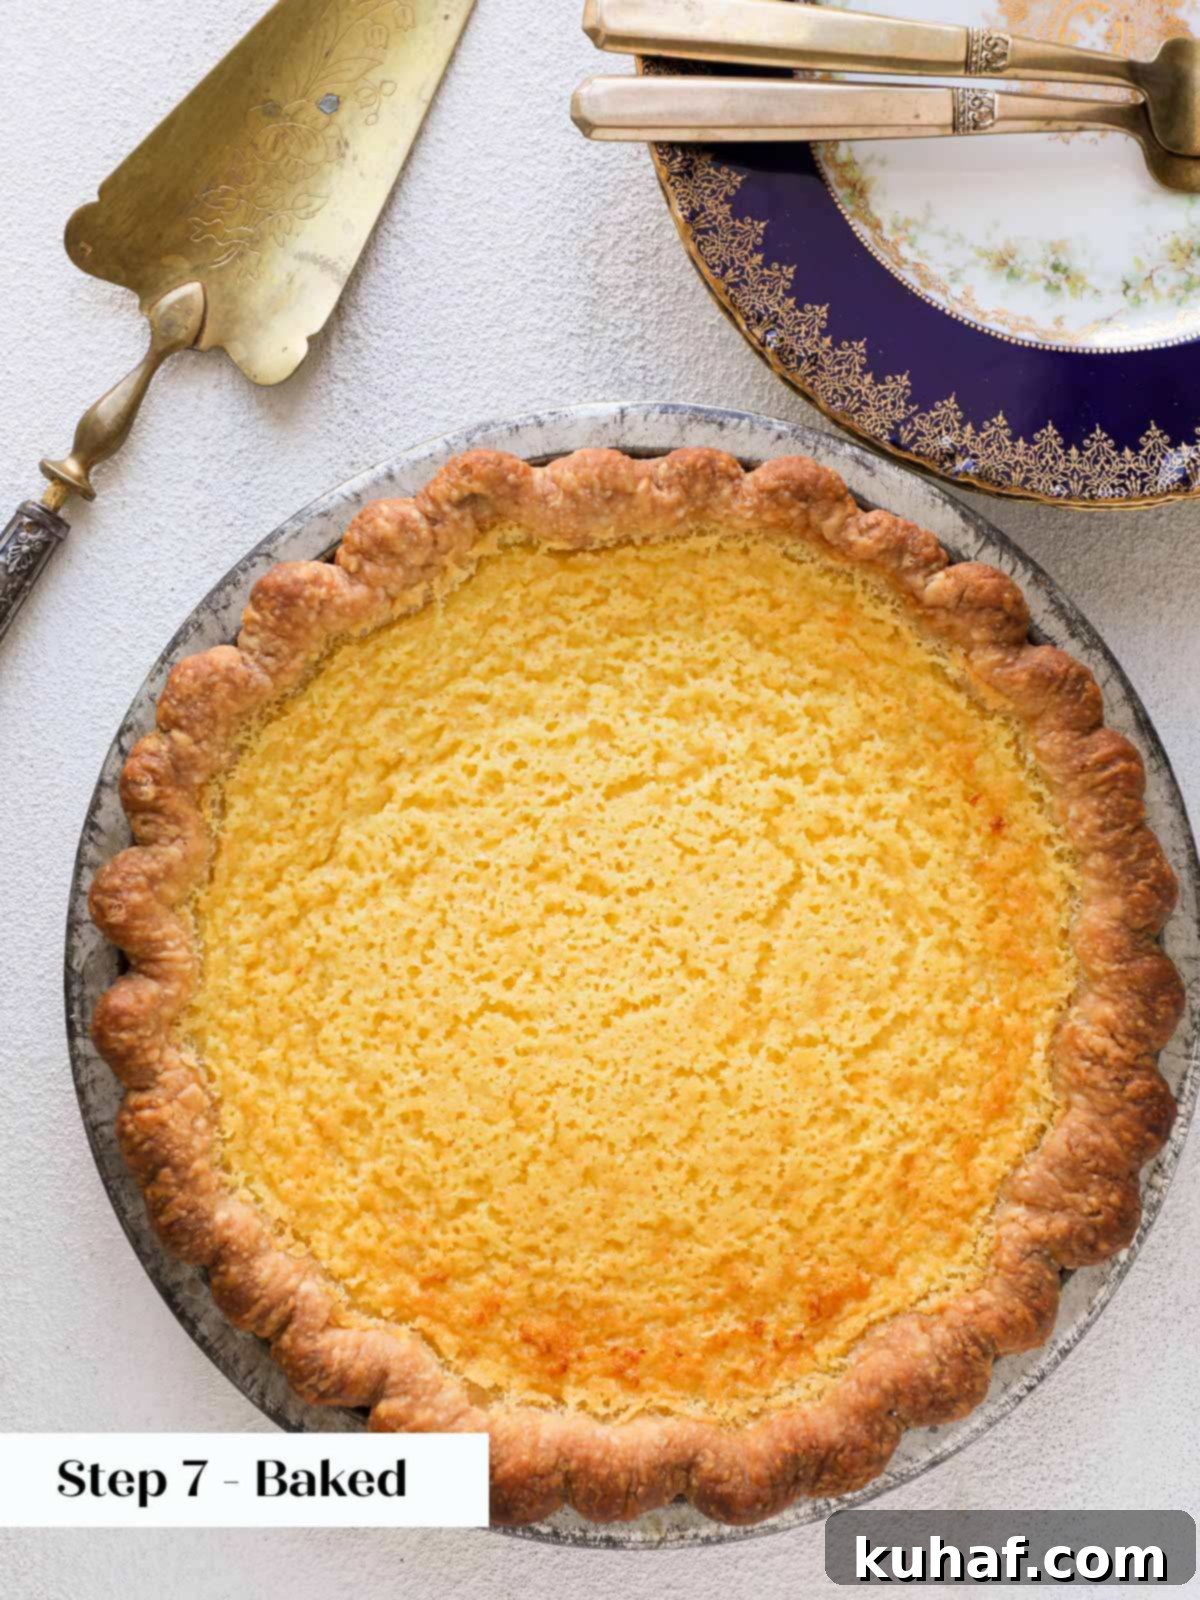
Step 7: Fill and Bake the Pie. Carefully pour the prepared buttermilk custard filling into your par-baked pie crust. Transfer the pie to your preheated oven. Bake for approximately 35-45 minutes. The pie is ready when the filling has visibly puffed up around the edges, and the center still has a slight, cohesive jiggle, similar to a soft-set Jell-O, when gently shaken. A completely firm center indicates overbaking. Don’t be alarmed if the top of the pie develops a light golden-brown hue; many find this caramelization actually enhances the flavor profile, adding a subtle depth.
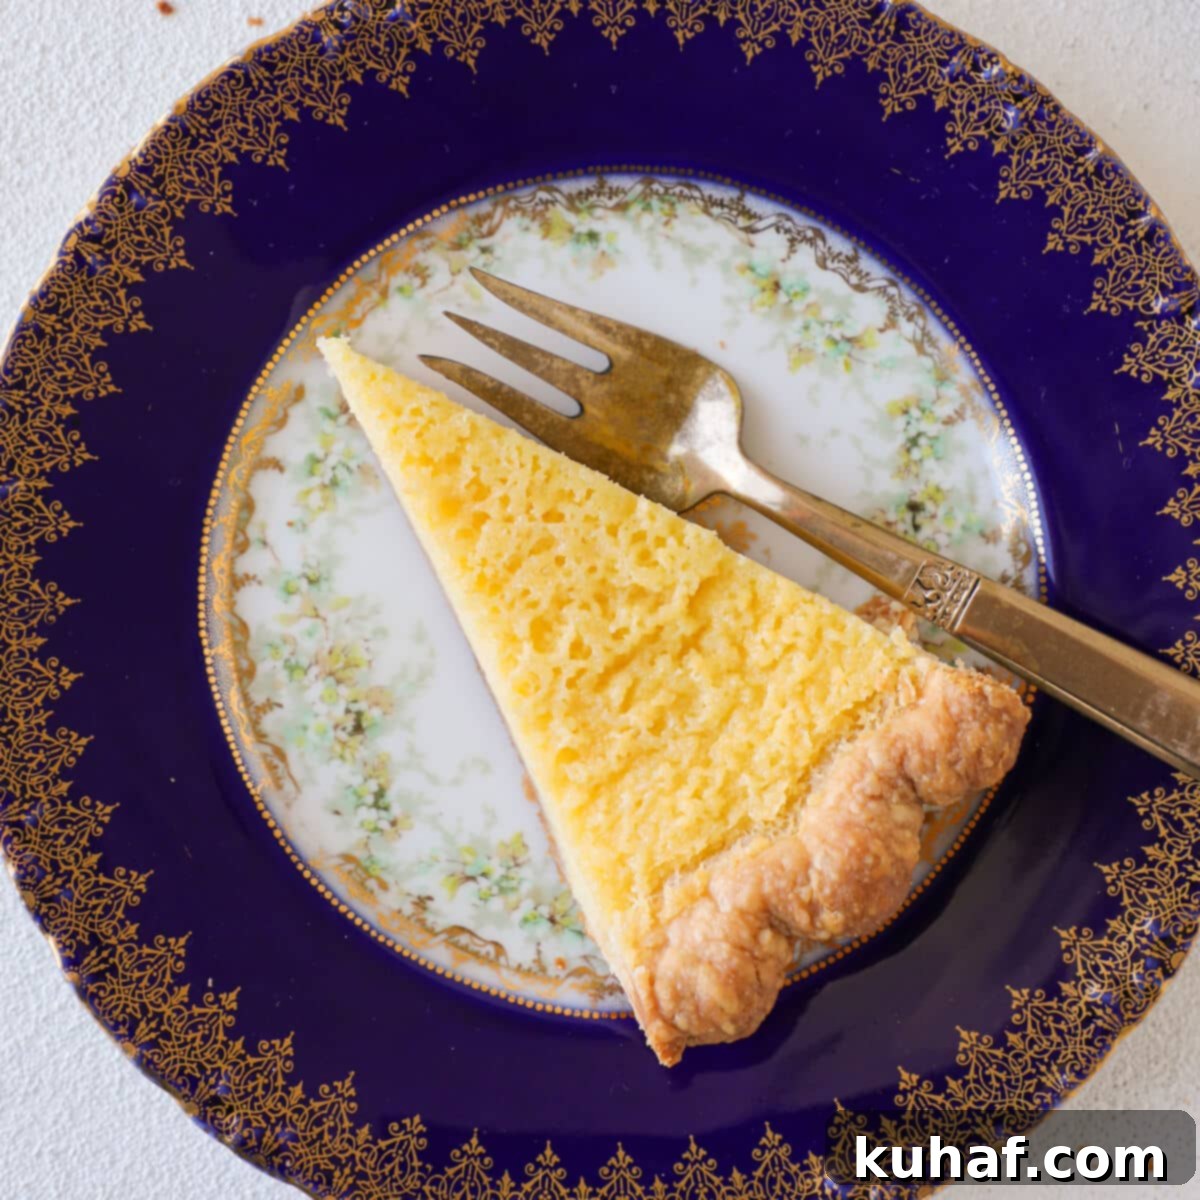
For pristine slices and the best texture, allow the pie to cool completely at room temperature, then chill thoroughly in the refrigerator for at least 4 hours, or ideally, overnight. The pie truly slices best when well-chilled. Serve it either cold or at cool room temperature.
Chef Lindsey’s Recipe Tip: Simplify Your Bake!
For those days when you need a delicious dessert without the extra effort, remember you can make this pie even easier by using a high-quality store-bought pie crust or even a pre-baked graham cracker pie crust! Store-bought pastry tends to be thinner than homemade, so just keep a close eye on it during the par-baking and final baking stages, as it may cook faster than a thicker, homemade crust.
Frequently Asked Questions About Buttermilk Pie
Proper storage ensures your buttermilk pie remains delicious. After it has cooled completely, you can store the pie at room temperature for up to 2 days, making it convenient for gatherings. For longer freshness, refrigerate the pie, covered, for up to 1 week. If you plan to enjoy it much later, wrap the cooled pie tightly in plastic wrap and then aluminum foil before freezing it for up to 2 months. Thaw in the refrigerator before serving.
No, you absolutely should not dock the crust for buttermilk pie. Docking, which involves pricking holes in the dough, is typically done for certain types of pie crusts to prevent air bubbles from forming. However, for a liquid-filled custard pie like this, docking can be detrimental. The thin, fluid custard filling could seep into those holes, potentially causing the pie’s bottom crust to become soggy or even allowing the filling to leak out and burn on your pie tin. This is why a proper par-bake without docking is crucial for a perfectly firm and flaky bottom crust. (For those who love to delve into baking specifics, I’ve written a whole blog post on when and why to dock pie crusts!).
The most common reason for a runny custard pie is underbaking. The custard needs to reach a specific internal temperature for the eggs to set properly. If the pie is removed from the oven too soon, the proteins won’t fully coagulate, resulting in a loose filling. Additionally, using low-fat buttermilk or attempting to make “homemade buttermilk” (curdled milk) will also lead to a looser, less rich pie filling due to the lower fat and thinner consistency compared to true full-fat buttermilk.
Buttermilk Pie is incredibly versatile and delightful when served either cold straight from the refrigerator or at a cool room temperature. For an extra touch of indulgence, it’s exquisite with a generous dollop of freshly made whipped cream and a drizzle of rich salted caramel sauce. The luscious caramel provides a beautiful contrast, adding a layer of sweetness and decadence to this otherwise simple dessert. During the warmer months, I particularly love pairing buttermilk pie with vibrant lemon whipped cream and a medley of fresh berries, or a spoonful of easy blueberry sauce. It’s also wonderfully delicious with a dollop of homemade quick strawberry jam or a bright, tangy lemon curd, allowing its subtle flavors to shine through.
If you tried this recipe and absolutely loved it, please take a moment to leave a 🌟 star rating and share your experience in the comments below. Your feedback truly makes my day, and I love hearing from you!
Buttermilk Pie
Saved
Pin Recipe
Comment
Print Recipe
Ingredients
Filling
- 3 tablespoons all-purpose flour
- ½ cup unsalted butter melted
- ¾ cup granulated sugar
- 3 whole eggs
- 1 cup full fat buttermilk
- 1 tablespoon water
- ½ teaspoon vanilla extract
- 1 teaspoon lemon juice
1 All-Butter Pie Crust, par baked (Recipe Below)
- 1 cup all-purpose flour measured by fluffing the flour then spooning it in
- ½ teaspoon kosher salt
- ½ teaspoon sugar
- 4 ½ tablespoon cold butter cubed into ½ inch cubes
- 1 ⅛ oz cold water or as much or as little as needed
Instructions
Make the all-butter pie crust:
-
In a large bowl, whisk together the all-purpose flour, kosher salt, and granulated sugar. Next, cut in the cold butter using your preferred method—whether it’s a pastry blender, two knives, or your fingertips—until the butter pieces are roughly the size of small peas. If using a stand mixer or food processor, aim for slightly larger pieces as processing can quickly overwork the butter.
-
Slowly begin to add ice water, one tablespoon at a time. If mixing by hand, pour the water into the center of the flour mixture and gently toss the flour into the water with a bench scraper, knife, or fork until the mixture becomes crumbly. At this stage, exercise caution with the amount of water; you likely only need a few more teaspoons to bring it together.
-
Once your dough has a “shaggy” consistency—meaning it looks like rough shards or strands of pastry with some loose flour still visible—turn it out from your mixer or food processor onto a clean surface. Work the dough together by gathering it and pressing it away from you with the heel of your hand, just until it barely comes together. If it crumbles excessively, lightly dip your hand in a little ice water and gently pat it onto the pastry dough to add minimal moisture.
-
Form the dough into a flat disk, wrap it tightly in plastic wrap, and chill it in the refrigerator for at least 2 hours, or ideally, overnight. If you chill the dough overnight, allow it to rest at room temperature for about 15-20 minutes before rolling; otherwise, it will be too cold and prone to cracking.
-
Once rested, roll the dough out evenly to an approximate thickness of ⅛ inch.
Par bake the pie crust:
-
Preheat your oven to 350°F (175°C) if using convection, or 375°F (190°C) for conventional baking (without a fan).
-
Carefully line a 9-inch pie tin with your prepared pie crust. Ensure it fits snugly. Critically, do not dock the dough. Chill the dough thoroughly in the pie tin before baking, ideally for at least 30 minutes, to prevent shrinking.
-
When ready to bake, line the inside of the chilled crust with a crumpled piece of parchment paper, then fill it completely with pie weights or dried beans. Bake for 20 minutes with the weights. After 20 minutes, carefully remove the weights and parchment paper, and continue baking for another 5-10 minutes, or until the bottom crust has just begun to brown slightly but is not yet fully baked. This partial bake is essential for a crisp crust.
-
While the par-baked pie crust cools slightly, proceed to prepare the buttermilk filling.
Prepare the Buttermilk Filling:
-
In a medium bowl, whisk all the filling ingredients together until thoroughly combined and smooth. This method helps to minimize the incorporation of air bubbles into the mixture, resulting in a beautifully smooth top on your baked custard. (As a professional note, I initially whisked ingredients individually for the pies shown in the photos, and you can observe the slight bubbling that occurred on the surface. While the flavor and texture remained excellent, whisking everything together at once yields a prettier, smoother finish.)
-
Pour the prepared custard filling carefully into your par-baked crust. Bake in the preheated oven for 35-45 minutes. The pie is done when the filling has puffed slightly around the edges and the center still has a slight, cohesive jiggle (like set Jell-O) when gently shaken. A completely firm center indicates overbaking. The top may acquire a lovely golden-brown color, which I believe enhances the flavor.
-
Allow the pie to cool completely at room temperature, then transfer it to the refrigerator to chill thoroughly for at least 4 hours, or ideally, overnight. The pie will slice most cleanly and beautifully when it is well-chilled.
-
Serve your delicious buttermilk pie either at room temperature or chilled.
Video
Notes
Flavor Tips – For the richest, thickest custard, full-fat buttermilk is highly recommended. While low-fat buttermilk will work, homemade “buttermilk” (milk curdled with acid) will not achieve the same creamy consistency.
Variations – To introduce new dimensions of flavor, try adding finely grated orange or lime zest to the sugar before mixing it into the filling.
Storage – Baked buttermilk pie can be stored at cool room temperature for up to 2 days. For longer storage, refrigerate it for up to 1 week, or freeze it, tightly wrapped, for up to 2 months.
Nutrition
Before You Go! Explore More Chef-Tested Recipes
I truly hope you savored crafting and tasting this professional chef-tested buttermilk pie recipe. It’s a testament to simple ingredients creating extraordinary flavors. If you’re eager to continue your culinary journey, be sure to explore our other delightful, chef-developed pie recipes. And for seasonal inspiration, don’t miss our curated collection of the 20 Best Thanksgiving Pies, perfect for any festive table!
