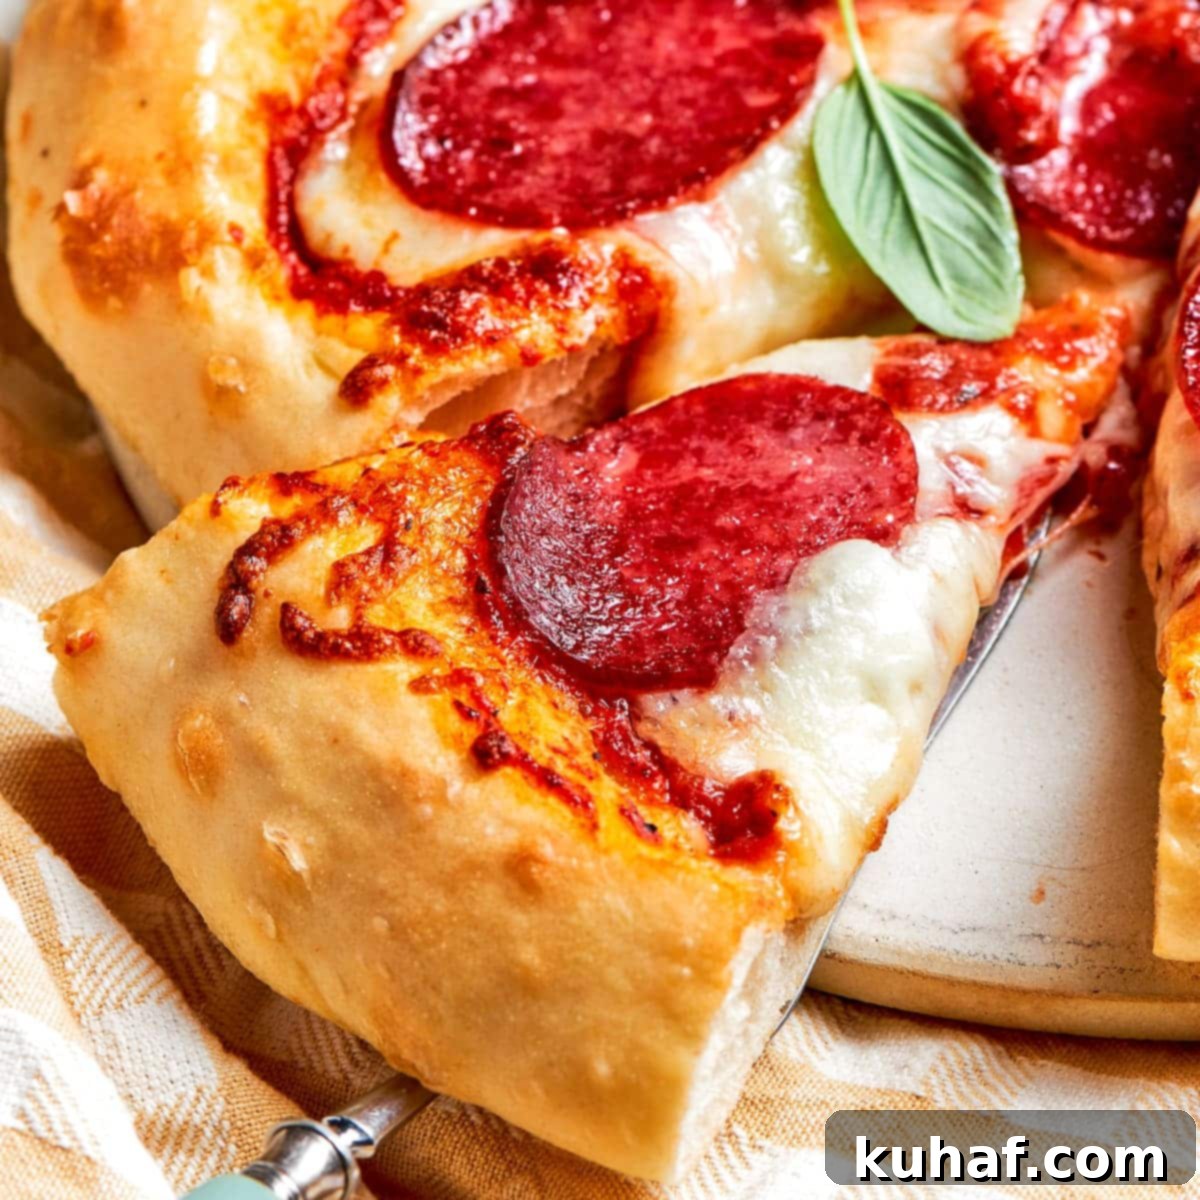
Pepperoni pizza made with a sourdough crust isn’t just a meal; it’s an experience. Imagine a fresh, fast, and incredibly cheesy masterpiece with a texture that goes beyond any take-out you’ve ever had. With just a few simple ingredients and the magic of high heat, you’re on your way to achieving those glorious, stretchy cheese pulls and a pizzeria-quality finish right in your own kitchen!
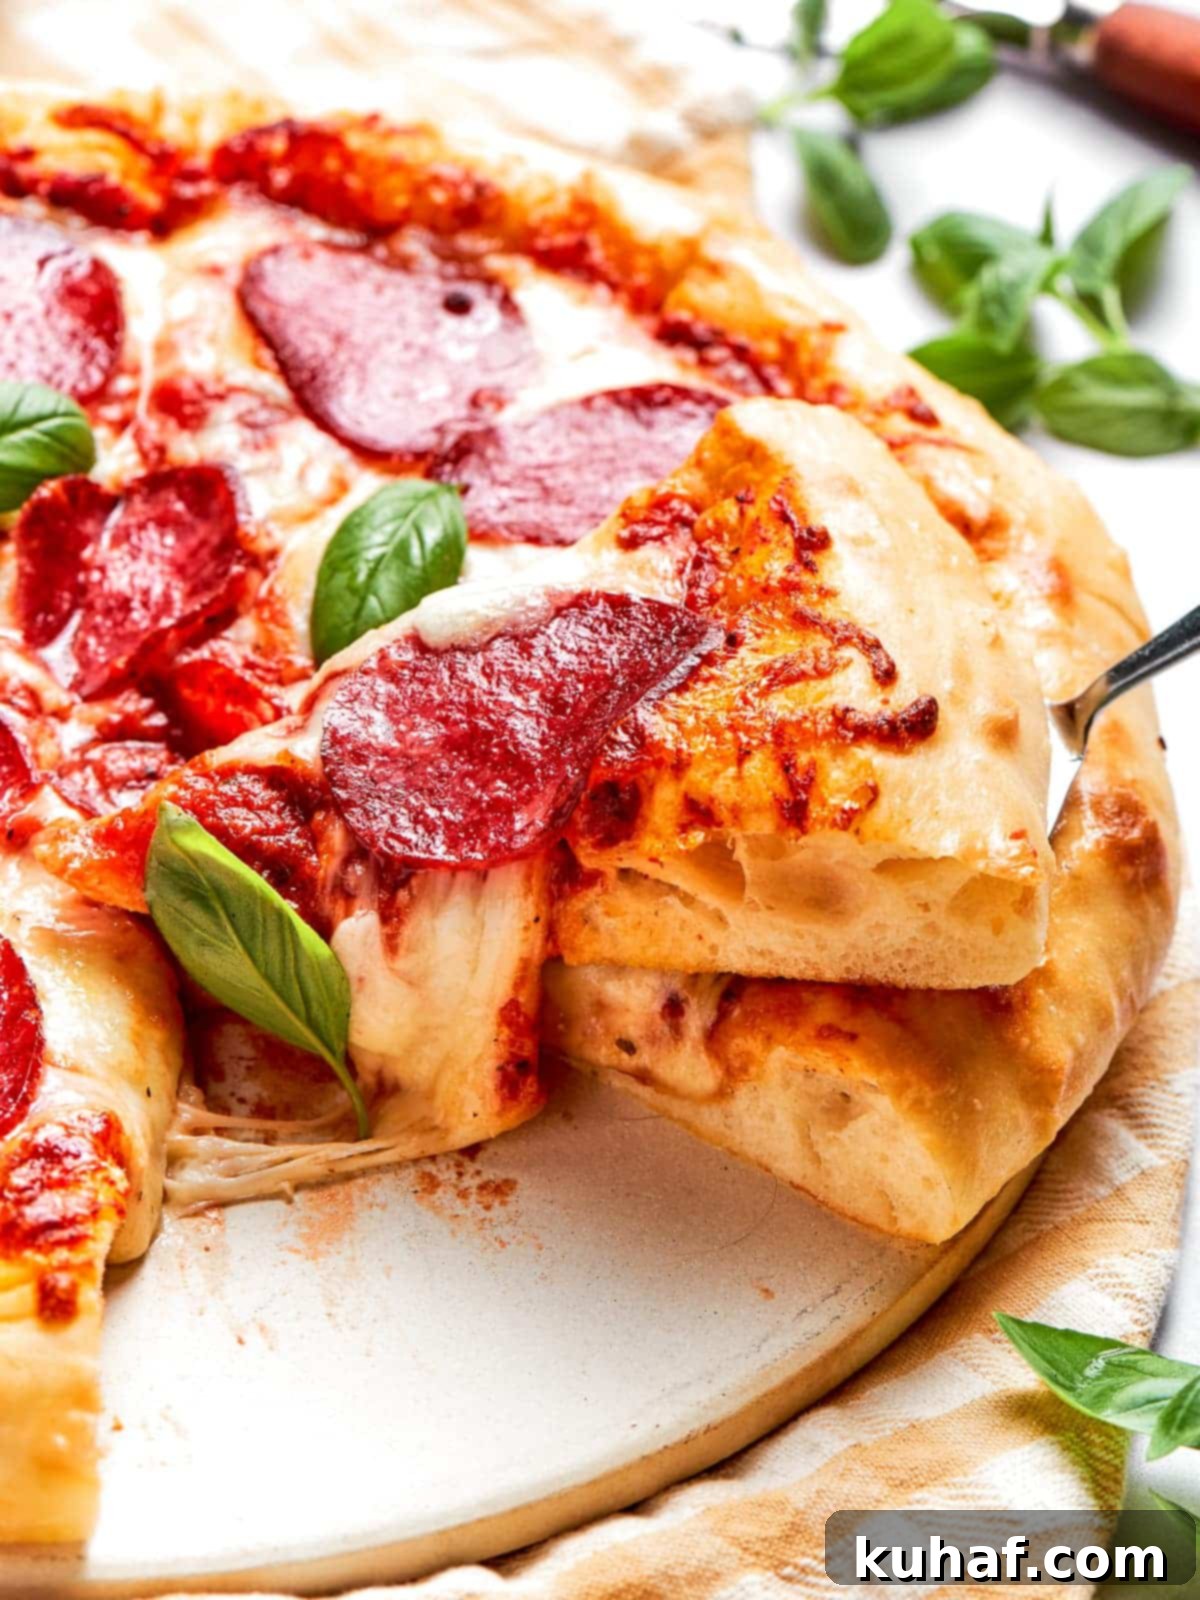
Whether you choose to use convenient store-bought dough or embrace the artisanal charm of homemade pizza dough, this recipe promises a pizza that surpasses delivery in under 15 minutes. Picture it: bubbling, molten cheese, a golden, perfectly crisp crust, the rich flavor of the perfect tomato pizza sauce, and, of course, slices of pepperoni that curl and crisp at the edges. This homemade pepperoni pizza truly has it all, making it our unwavering choice for Friday night feasts. Remember to enjoy it hot – but not *too* hot. We’ve all been there, scorching the roof of our mouths in a moment of pizza-induced excitement!
That irresistible stretchy, gooey cheese pull is thanks to a carefully selected blend of low-moisture and fresh mozzarella, designed to deliver both flavor and texture without compromise. Looking for more cheesy goodness? Dive into our ultimate lasagna or try a rustic pizza rustica next! To balance out your cheesy week, consider serving these indulgent dishes with a vibrant chopped kale salad or a refreshing shaved brussels sprout salad. With these recipes in your repertoire, you’ll quickly become the favorite home cook for both kids and adults alike!
Table of Contents
- Why You Will Love This Homemade Pepperoni Pizza Recipe
- Essential Ingredients for Your Perfect Pizza
- Delicious Variations to Customize Your Pizza
- Professional Tips for Pizzeria-Quality Pizza at Home
- Step-by-Step Guide: How to Make Homemade Pepperoni Pizza
- Chef Lindsey’s Recipe Tip: The Secret to a Great Crust
- Frequently Asked Questions About Homemade Pizza
- Recommended Recipes to Complement Your Pizza Night
- Full Pepperoni Pizza Recipe Card
- Before You Go: Explore More Delicious Dinners
Why You Will Love This Homemade Pepperoni Pizza Recipe:
- Complete Customization at Your Fingertips: The true joy of making your own pizza lies in the absolute control you have over every detail. Love extra cheese? Pile it on! Prefer less sauce? A light swoosh is all you need, or switch it up entirely with a delicious white pizza base. Have a family divided on toppings, like onions or peppers? Effortlessly add them to just one half. This isn’t just a recipe; it’s a canvas for your culinary creativity and a way to satisfy every palate at your table. You can even experiment with different types of cheese, a medley of vegetables, or various cured meats to make each pizza uniquely yours.
- Achieve a Perfectly Crisp Crust Every Time: Say goodbye to dreaded soggy pizza bottoms! Our method leverages high heat and fast baking, a technique inspired by traditional pizzerias, to ensure a consistently golden, delightfully crisp crust with every bake. This rapid cooking process locks in moisture while creating a beautiful caramelization on the dough, preventing it from becoming heavy or doughy. You’ll be amazed at the satisfying crunch and robust structure of each slice, capable of holding up to all your favorite toppings without a hint of floppiness.
- Elevated Flavor from Everyday Pantry Staples: This recipe proves that extraordinary meals don’t require exotic ingredients. By utilizing common pantry staples, we transform them into a homemade pizza that tastes far superior to anything you could buy. The secret isn’t just in the ingredients themselves, but in the care and attention given to each step of the preparation. The freshness of homemade sauce, the quality of your chosen mozzarella, and the perfect bake all contribute to a depth of flavor that store-bought pizzas simply can’t match. It’s an easy, economical way to bring gourmet taste right into your home.

Essential Ingredients for Your Perfect Pizza
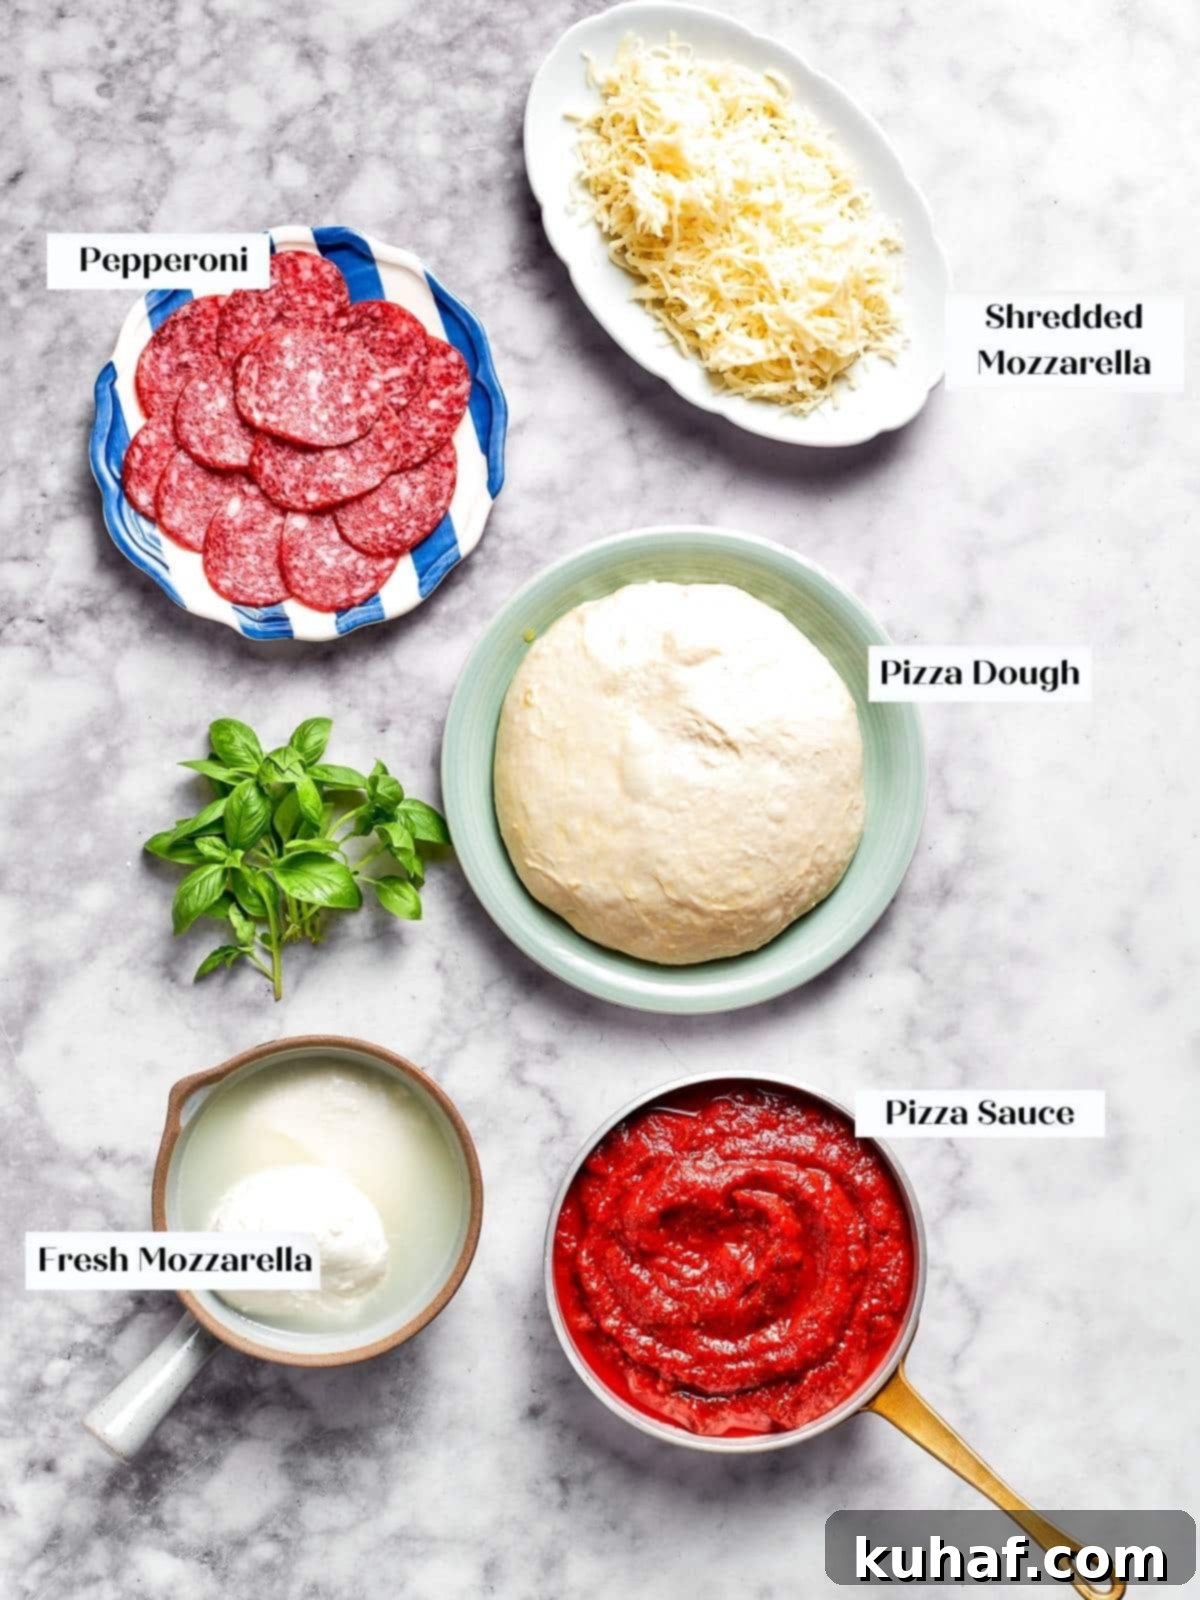
- Pizza Dough: The foundation of any great pizza! While you can certainly use any store-bought pizza dough for convenience, for an unparalleled depth of flavor and a wonderfully chewy texture, I highly recommend my homemade sourdough pizza dough recipe. The sourdough not only adds a delightful tang but also creates a crust with superior structure and an airy crumb. If you choose a yeasted dough, ensure it has enough time to proof properly. For sourdough, if you’re skipping the yeast, remember it will require extra time for fermentation to develop its signature taste and texture fully.
- Pizza Sauce: A superb pizza starts with a rich, flavorful sauce. I’ve personally relied on this vibrant homemade pizza sauce recipe for years, appreciating its perfect balance of sweetness and acidity that complements all toppings. However, for a quick and easy option, a high-quality jarred pizza sauce will work wonderfully. Just make sure it’s one you enjoy the taste of!
- Mozzarella Cheese: The secret to that incredible cheese pull and rich flavor is a strategic combination of mozzarella. I prefer a blend of low-moisture shredded mozzarella and fresh mozzarella. The fresh mozzarella melts beautifully, offering a creamy texture and superior flavor, creating those iconic gooey stretches. However, it also has a higher water content, which can potentially lead to a soggy crust or, in the worst case, drip onto your oven floor – creating a “holy mess, batman!” The low-moisture mozzarella helps to counter this, providing a drier, more consistent melt and better browning, ensuring your pizza remains perfectly crisp.
- Pepperoni Slices: The star of the show! For my best pepperoni pizza, I often use lean turkey pepperoni, which offers a great flavor with a slightly lighter profile. However, feel free to use traditional pork pepperoni if that’s your preference. Experiment with different cuts – some pepperonis are designed to curl up into delightful “cups” when baked, holding pockets of delicious oil and crisping beautifully at the edges, adding both texture and visual appeal to your pizza. Bacon pieces can also achieve a similar effect!
For precise measurements and additional details, please refer to the complete recipe card below!
Delicious Variations to Customize Your Pizza
- Give Leftovers a New Lease on Life: Pizza night is the perfect opportunity to transform yesterday’s meals into today’s masterpiece. Instead of letting those forgotten ingredients languish, creatively repurpose them! Dice up leftover roasted vegetables like mushrooms, olives, or broccoli, crumble any remaining cooked turkey burgers or seasoned ground meat, or chop up the remnants of that sausage, bell peppers & onion dinner. Once melted together with rich cheese and baked into a fresh pizza, no one will even guess these were leftovers – they’ll simply savor the delicious new creation!
- Ignite Your Taste Buds with a Spicy Kick: For those who crave a bit of heat, easily transform your homemade pepperoni pizza into a fiery delight. Sprinkle some crushed red pepper flakes directly onto the sauce or cheese. For a bolder flavor and texture, add thinly sliced fresh jalapeños before baking. And for a trendy, sweet-and-spicy finish, drizzle a generous amount of hot honey over the pizza immediately after it comes out of the oven. Always remember to balance the heat with a pinch of salt to enhance all the flavors.
- Explore Different Sauce Bases: While classic tomato sauce is beloved, don’t hesitate to venture beyond it. A creamy garlic sauce, perhaps with an extra dash of garlic powder, can create a rich, savory foundation. Alternatively, a vibrant pesto sauce offers an herbaceous and nutty alternative, pairing beautifully with pepperoni. For a gourmet touch, consider adding a sprinkle of fresh basil leaves or a handful of peppery arugula as a garnish after the pizza bakes; their fresh flavors will lift the entire dish.
Professional Tips for Pizzeria-Quality Pizza at Home
- Master the Art of Topping Control: While it’s tempting to pile on every delicious ingredient, excessive toppings are the enemy of a crisp crust and structural integrity. Too many toppings can release too much moisture during baking, preventing your dough from achieving that desired golden crispness. They also weigh down the crust, leading to an undesirable “flop” when you lift a slice. If you’re not concerned about the perfect New York-style slice (and you know the rules, Dave Portnoy!), then go ahead and load it up – just be prepared to enjoy it with a knife and fork. I promise not to tell! For the best results, aim for a balanced distribution that allows the crust to shine.
- Utilize Parchment Paper for Seamless Assembly and Transfer: For a stress-free pizza-making experience, especially when dealing with sticky dough or a loaded pie, assemble your pizza on a piece of parchment paper placed directly on a cutting board or a pizza peel. This simple trick provides an incredibly easy, non-stick surface, allowing you to slide your fully topped pizza directly onto a preheated pizza stone or baking sheet in the oven without any sticking or mishaps. It’s a game-changer for maintaining the shape and preventing frustration.
- Pre-cook Moisture-Rich or Dense Toppings: When working with quick-baking pizzas like this one, it’s a professional move to pre-cook any toppings that contain a lot of moisture or are particularly dense. Vegetables like onions and bell peppers benefit from a quick sauté in a little olive oil until softened, which not only removes excess water but also develops their flavor. Similarly, if using frozen vegetables, thaw and drain them thoroughly, as they are typically blanched before flash-freezing and will release moisture. This ensures your toppings are perfectly cooked and don’t introduce unwanted sogginess to your beautiful crust.
Step-by-Step Guide: How to Make Homemade Pepperoni Pizza
Further details and exact measurements can be found in the comprehensive recipe card below!
Step 1: Prepare Your Dough. If you’re using homemade sourdough pizza dough, remove it from the refrigerator approximately 1-2 hours before you plan to bake. This allows it to undergo its final proof, relaxing the gluten and making it easier to stretch. If your sourdough was frozen, ensure it’s fully thawed in the fridge the night before. For store-bought or fresh yeasted dough, you can often use it directly from the counter or fridge without an extended rest, depending on its initial proofing.
Step 2: Preheat Your Oven to Peak Temperature. Preheat your oven to a scorching 500°F (260°C). If you own a pizza stone, place it in the oven during preheating to get it incredibly hot – this is crucial for achieving a super crispy crust. If a pizza stone isn’t available, don’t worry! You can build your pizza directly on a metal baking sheet and bake it in the preheated oven. While the crust won’t be quite as crisp as with a stone, it will still be utterly delightful.
Step 3: Prepare Your Transfer Surface. If you are using a pizza stone, generously flour a pizza peel or dust it lightly with cornmeal. This creates a non-stick surface, essential for smoothly transferring your pizza into the hot oven. If you’re baking on a metal baking sheet, sprinkle cornmeal directly onto the sheet to prevent sticking and add a little extra crunch to the crust.
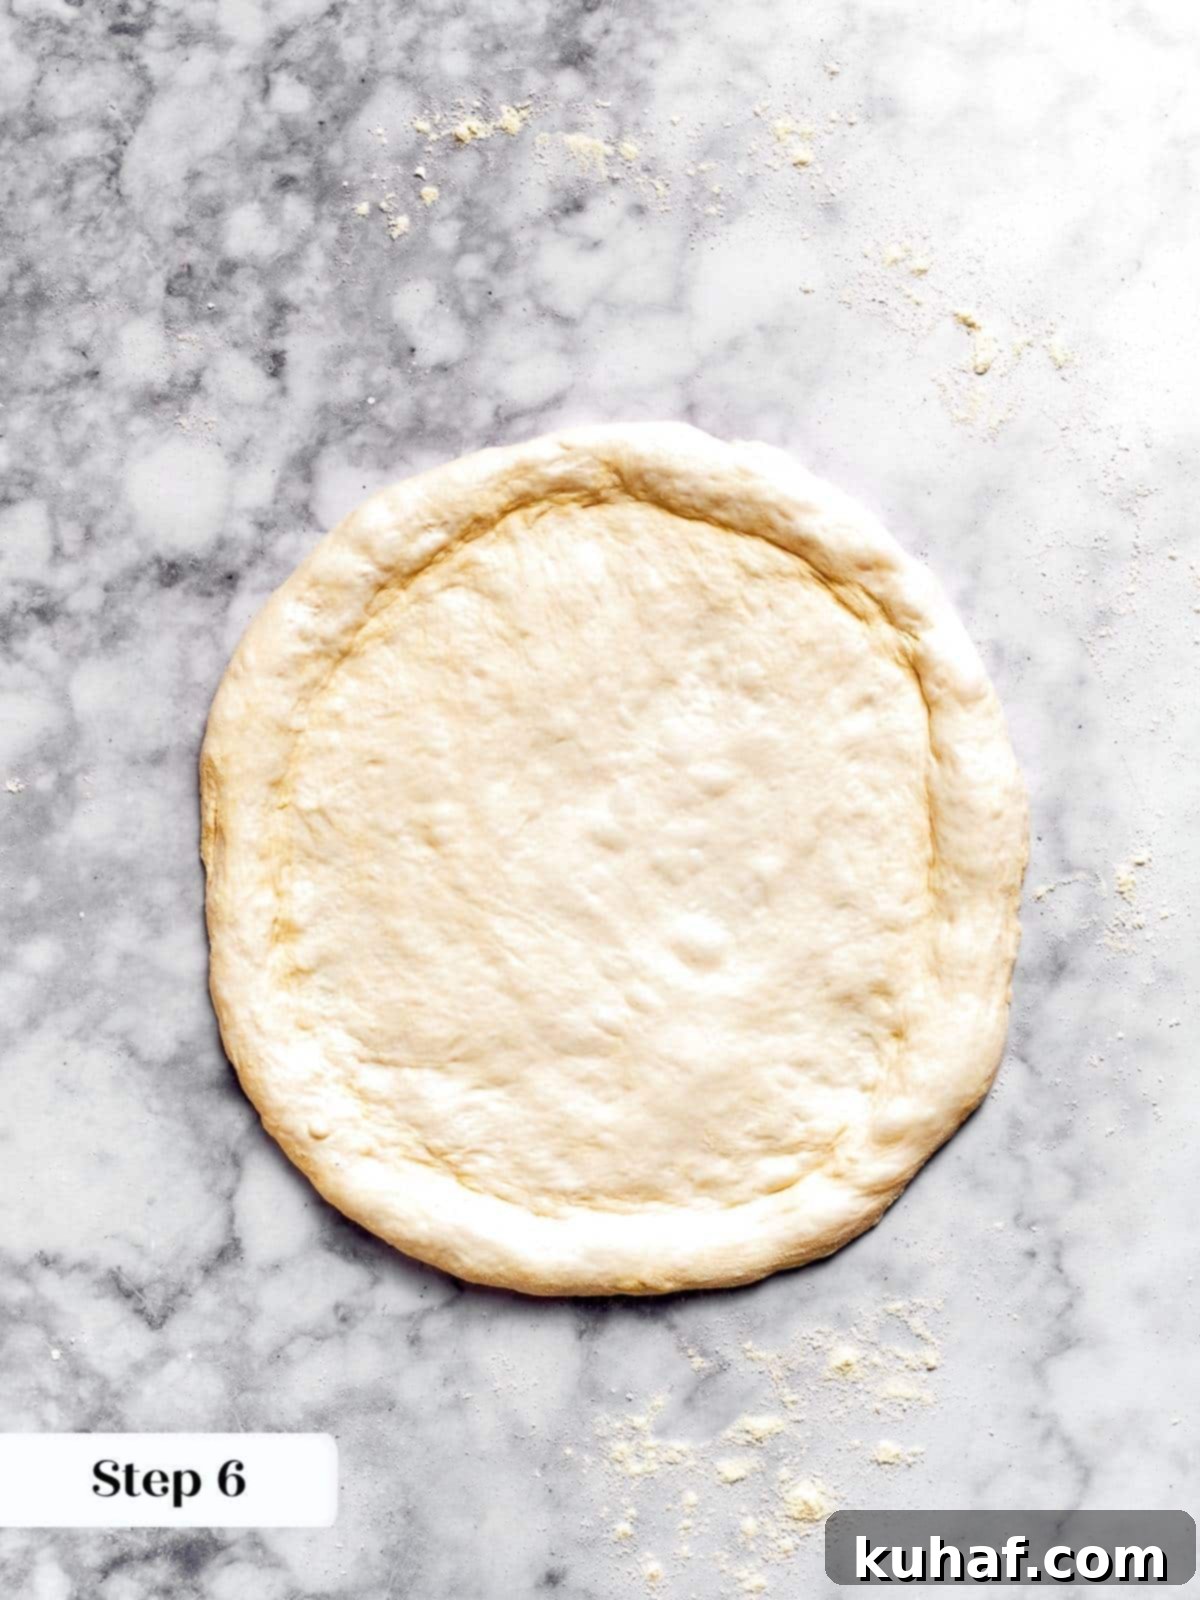
Step 4: Shape the Dough for the Perfect Crust. Place one piece of dough onto a well-floured, flat surface. Lightly dust the top of the dough with additional all-purpose flour. Using floured hands, gently tap your fingertips around the rim of the dough, about ¾ inch (2 cm) from the edge. This action creates a defined, thicker crust while allowing you to stretch the inner part of the dough more thinly. This “physical marker” is key to preserving that beautiful, airy rim. If you prefer a uniformly thin crust across the entire pizza, you may carefully use a rolling pin, but for that authentic pizzeria chew, stretching by hand is preferred.
Don’t be alarmed if a large air bubble forms in your dough – it’s a sign of a well-proofed dough! Simply pop it with your finger or a fork. It will inflate beautifully and create a wonderful texture when it hits the hot oven. By creating this slight trench around the edge and mounding up the center, you’ve already defined your crust.
Step 5: Stretch the Dough by Hand. Carefully lift the dough and drape it over both of your closed fists. Using a gentle outward motion, slowly separate your fists, allowing the weight of the dough to stretch and thin out the center. Work quickly and rotate the dough, moving your fists to different sections to ensure even stretching and prevent any one area from becoming too thin. This technique should only take about 3-5 stretches, especially when the dough is at room temperature and nicely relaxed.
Step 6: Final Dough Placement. Gently lay the stretched dough onto your floured pizza peel or dusted baking sheet. Reshape and arrange it into a pleasing circle, ensuring it’s ready for toppings.
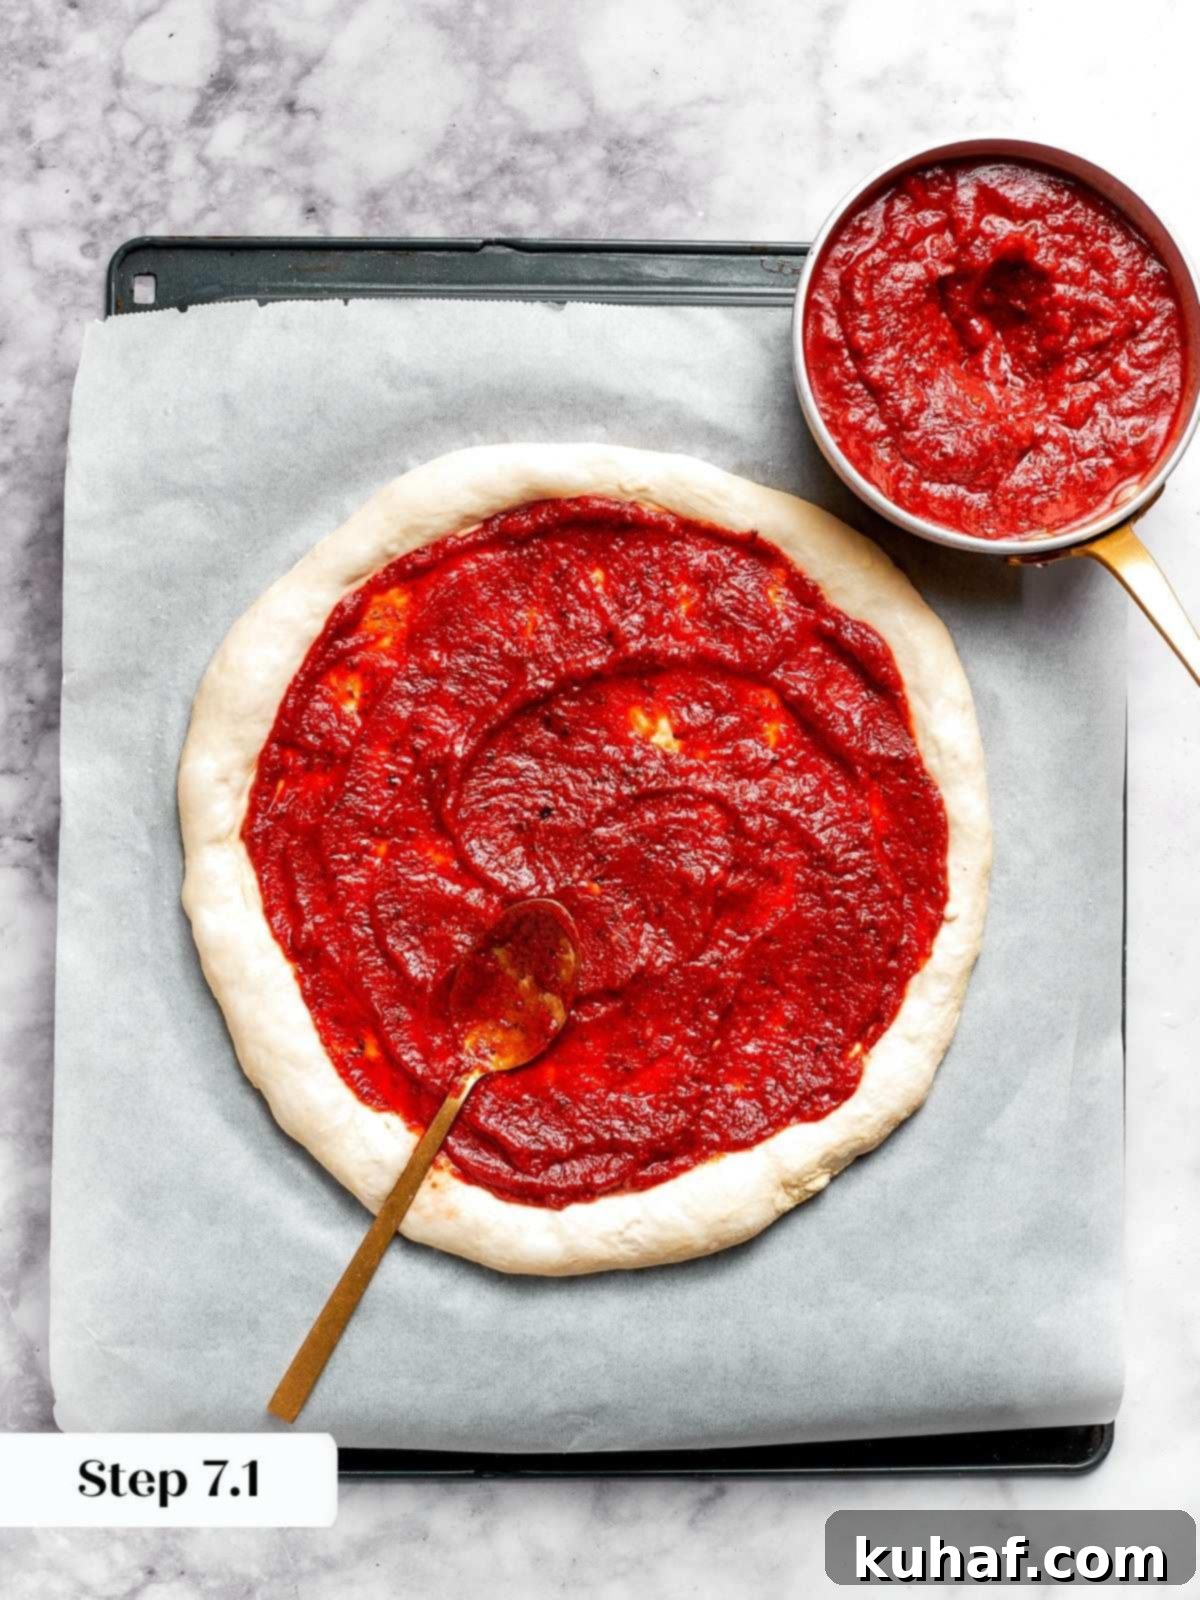
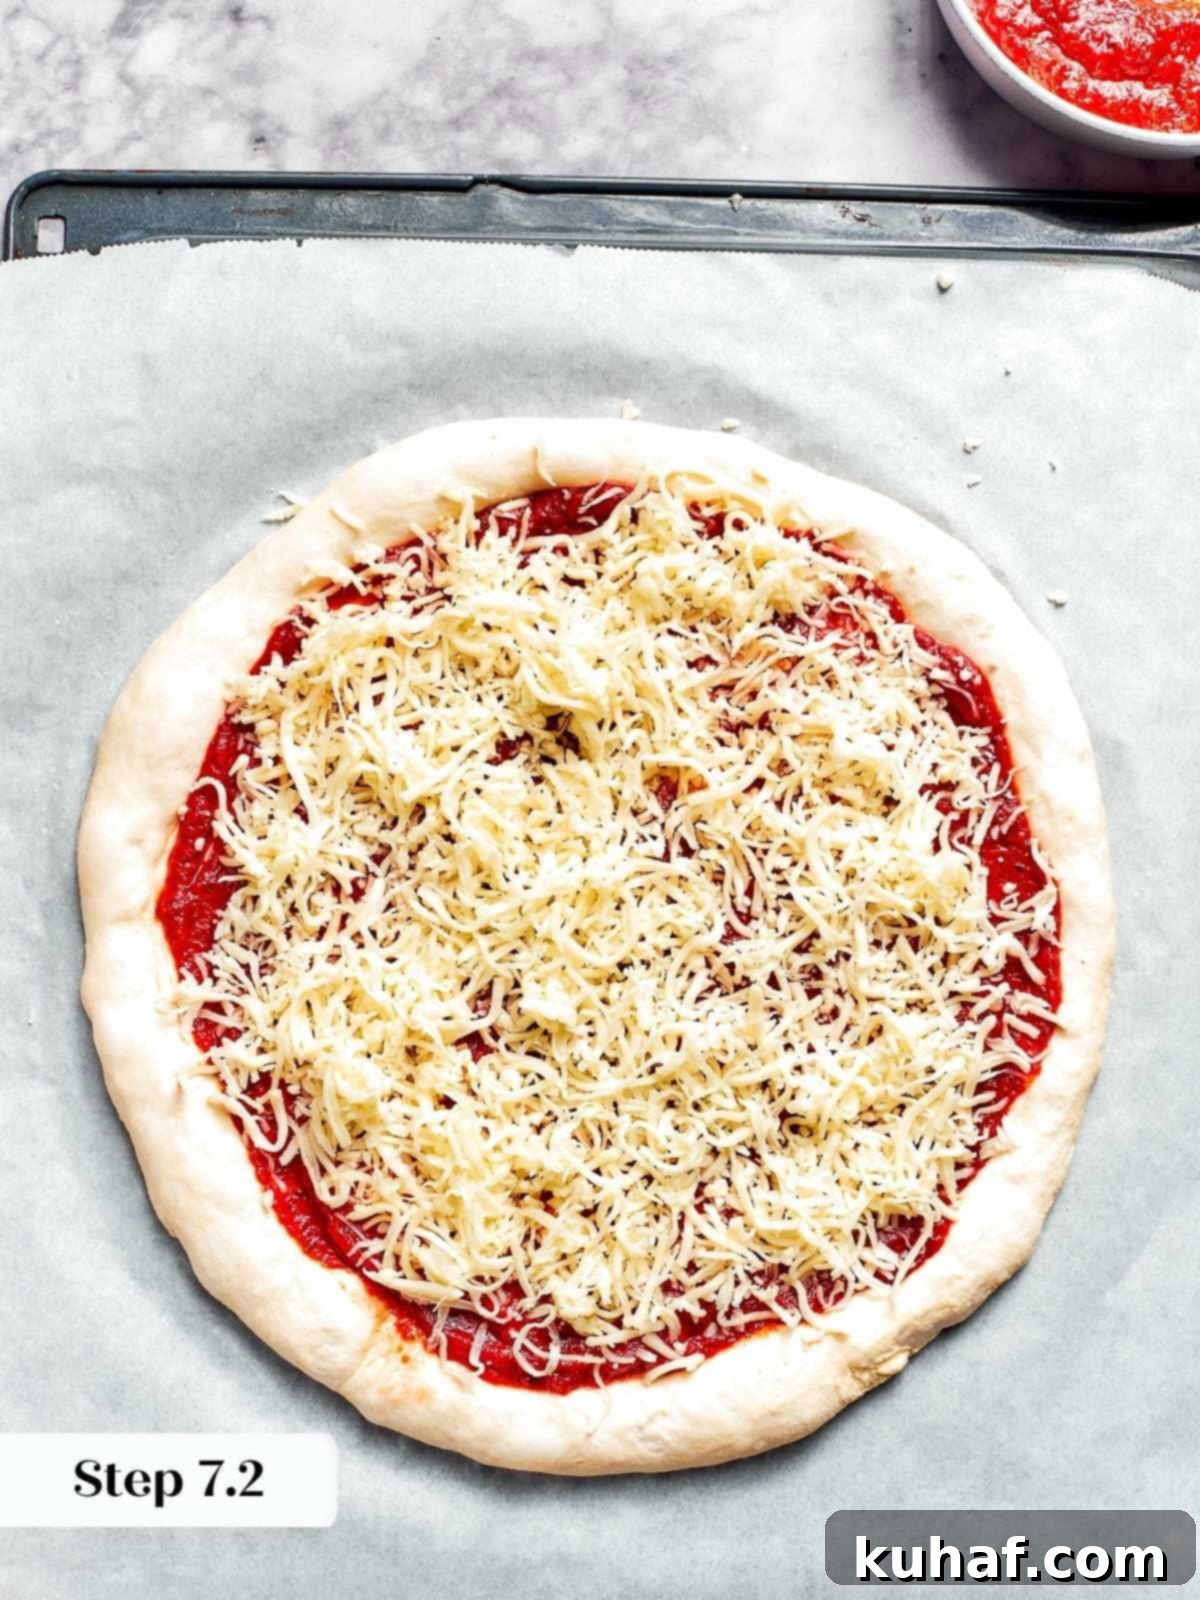
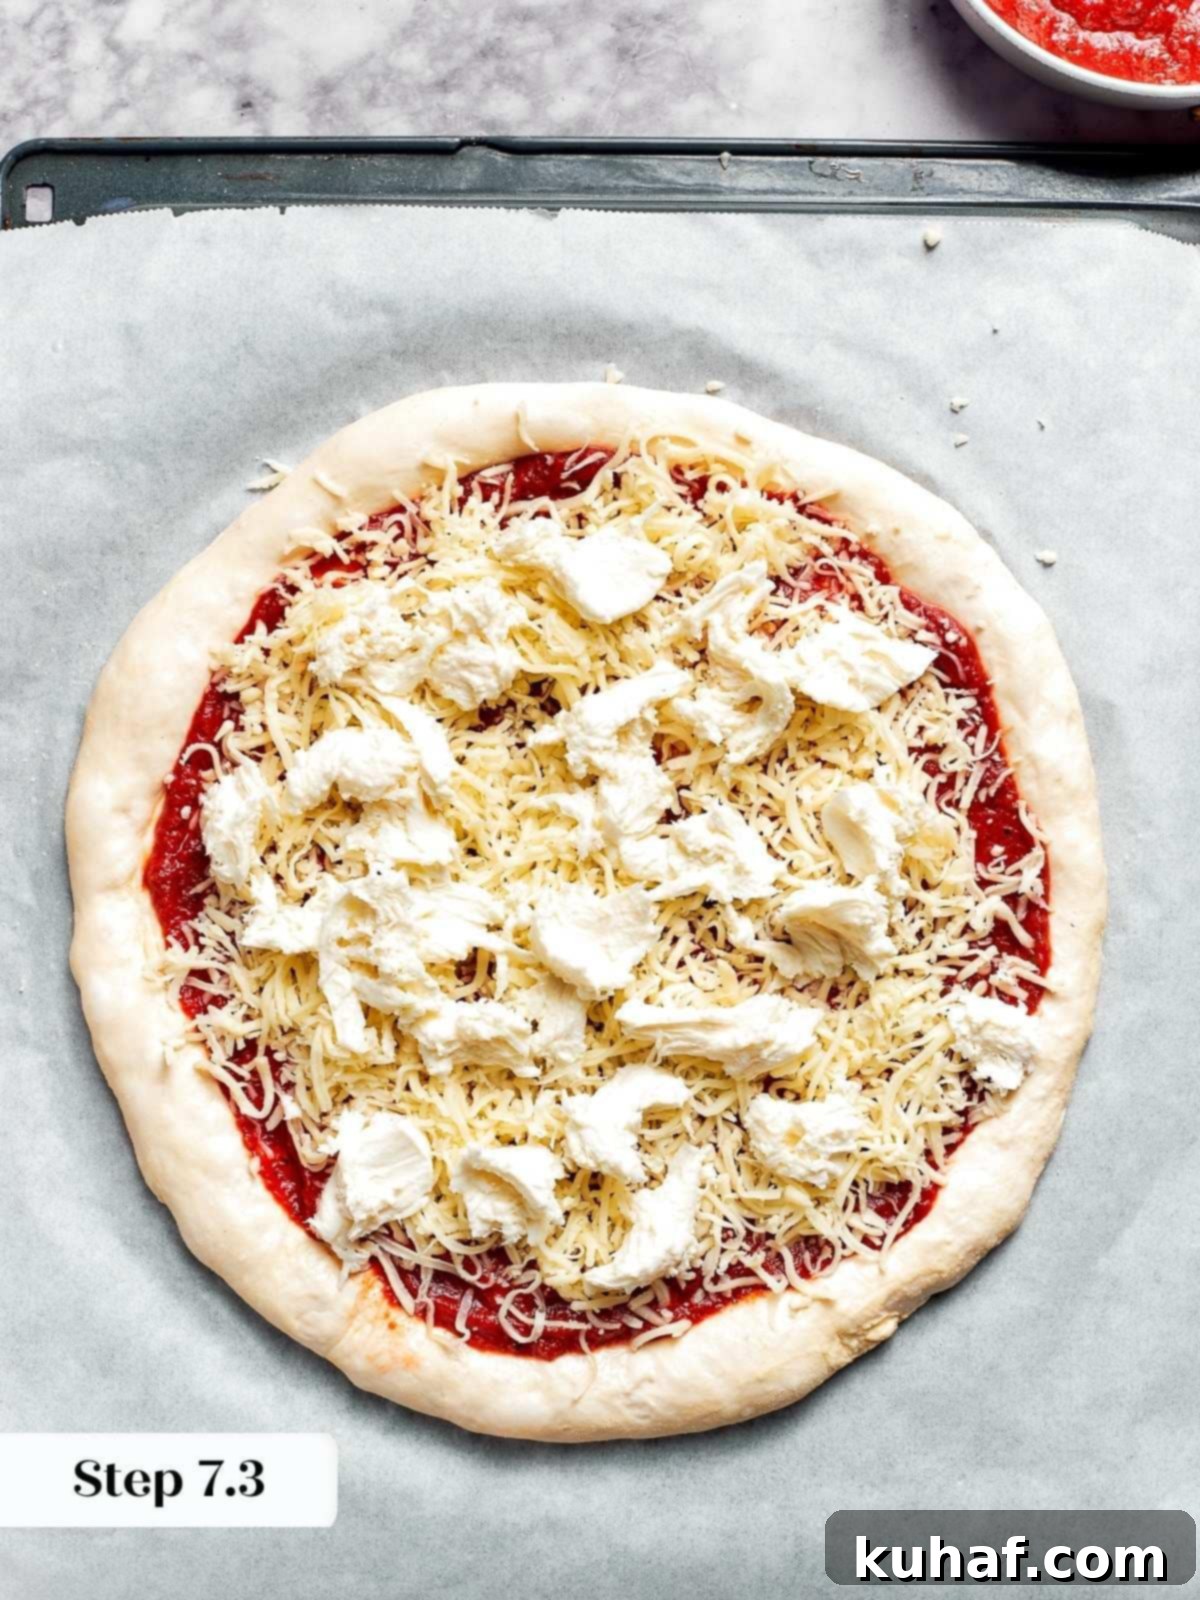
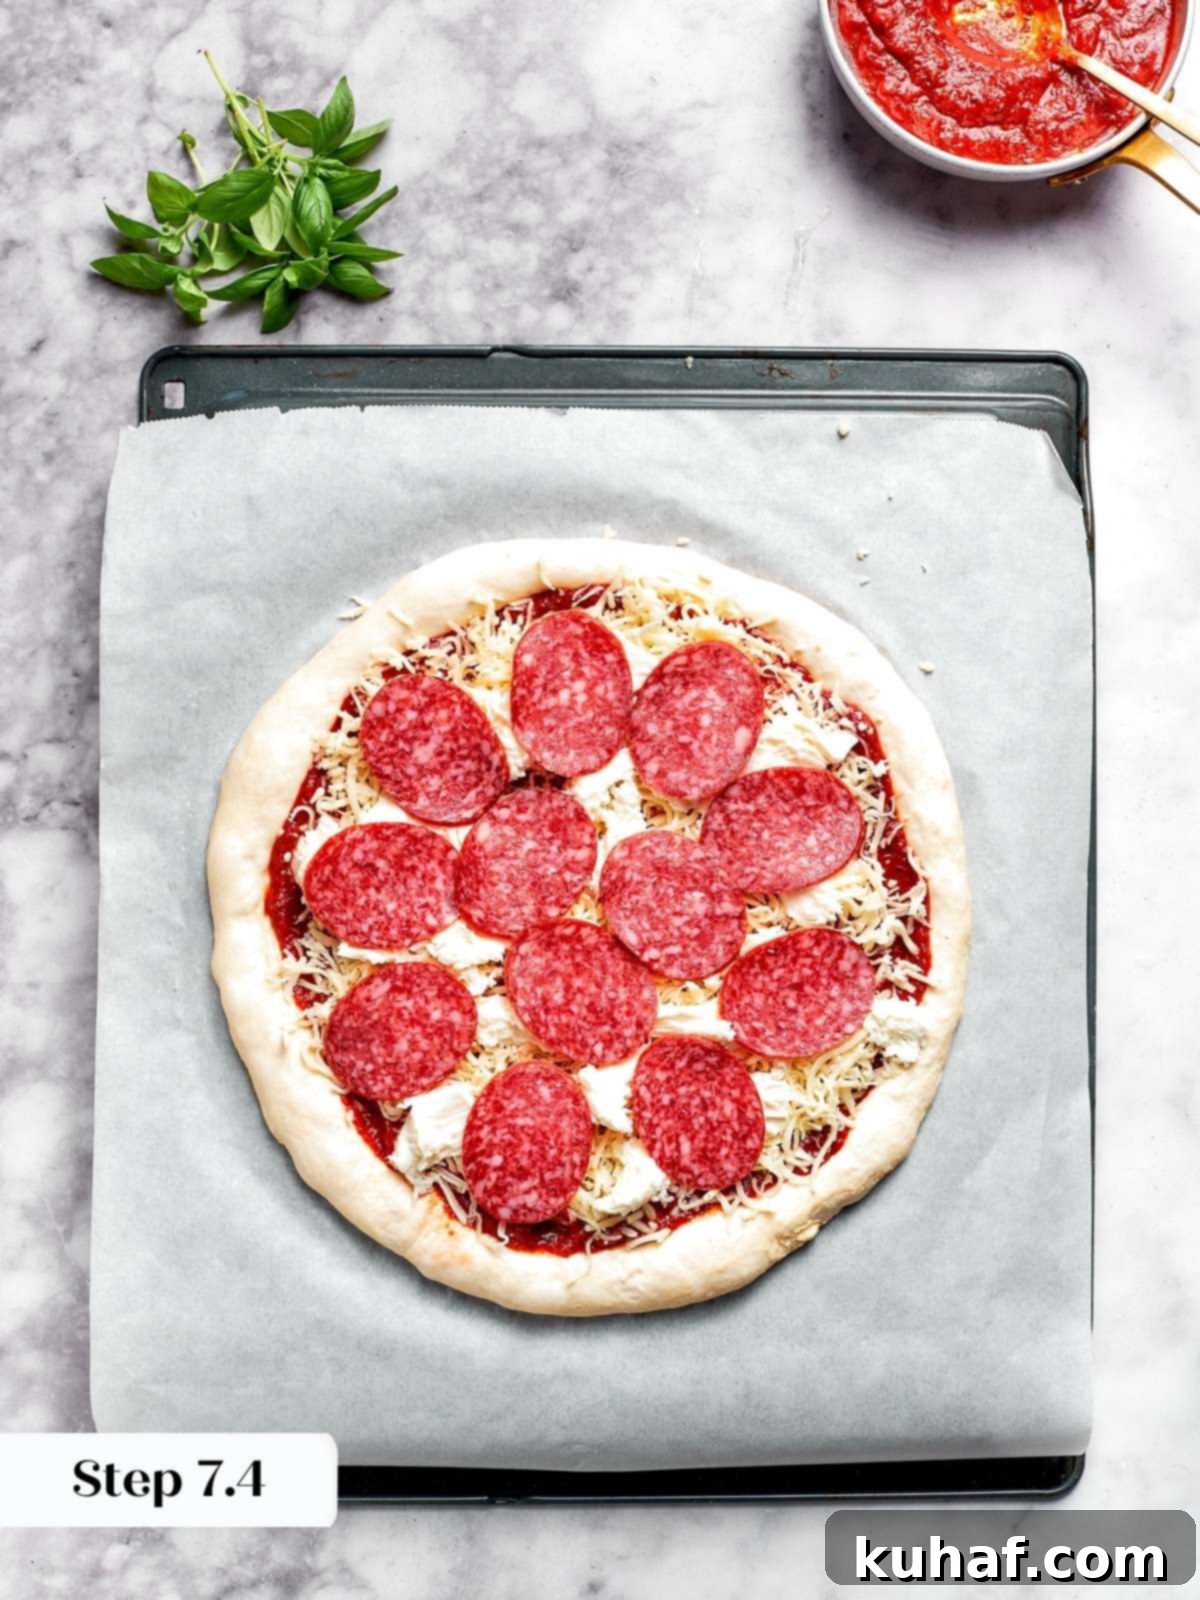
Step 7: Apply Sauce and Cheese. Spoon your prepared pizza sauce onto the dough and spread it evenly, leaving a small border around the edge for the crust. Next, generously top with a layer of low-moisture shredded mozzarella, followed by crumbled or thinly sliced fresh mozzarella. Finally, arrange your pepperoni slices attractively over the cheese layer.
When spreading your pizza sauce, remember to leave a little border on the edge. This prevents the sauce from burning and ensures a beautifully puffed crust.
Step 8: Perform the Shake Test. Before attempting to transfer your pizza to the oven, give the pizza peel (or baking sheet) a gentle shake. The pizza should move freely, indicating it’s not sticking. If you notice any resistance or sticking, carefully lift the dough and toss a little more flour or cornmeal underneath the problematic spot. This prevents the dreaded “pizza-folding-in-half” disaster in the oven!
Step 9: Transfer to the Oven. Carefully open the oven door. If using a pizza stone, line up the back edge of the pizza with the back of the stone. With a swift, confident motion, slide the pizza off the peel and onto the preheated stone as you simultaneously pull the peel out. This takes a bit of practice but gets easier with time! If using a baking sheet, simply place the entire sheet pan with the pizza into the preheated oven.
Step 10: Bake Until Golden and Crispy. At 500°F (260°C), your pizza will bake incredibly quickly. On a preheated pizza stone, it will typically take only 5-7 minutes. If baking on a baking sheet, expect it to take a little longer, closer to 8-10 minutes. Look for a golden brown, puffed crust and bubbling, slightly caramelized cheese. To confirm doneness, use tongs to gently lift the edge of the crust and check the bottom – it should be crispy and golden brown. Once it reaches this stage, your pizza is perfectly baked!
Step 11: Remove, Slice, and Serve. Using tongs, carefully remove the pizza from the hot stone. If using a baking sheet, use oven mitts to retrieve it from the oven. Transfer the hot pizza to a cutting board. Allow it to rest for a minute or two – this helps the cheese set and prevents burns. Then, slice it into your desired portions and serve immediately. Enjoy your perfectly crafted homemade pepperoni pizza!

Chef Lindsey’s Recipe Tip: The Secret to a Great Crust
The most challenging, yet most rewarding, part of making exceptional homemade pizza is mastering the dough shaping. Please, for the love of perfectly chewy crusts, do not use a rolling pin! Using a rolling pin crushes the delicate air bubbles that develop during proofing, which are essential for that light, airy, and chewy interior texture. It prevents you from achieving that beautiful, irregular New York-style pizza slice with its characteristic “oven spring” and delicious airy pockets. Embrace the hand-stretching method – it preserves the integrity of the dough, giving you a truly authentic and superior crust.
Frequently Asked Questions About Homemade Pizza
To maintain freshness and flavor, store any leftover pizza slices in an airtight container or tightly wrapped in plastic wrap or aluminum foil. Place them in the refrigerator, where they will keep well for 3 to 5 days. For best results when reheating, use a skillet on the stovetop over medium heat to recrisp the crust, or a toaster oven.
For a truly pizzeria-quality crust, bake your pizza at a high temperature of 500°F (260°C). This high heat is crucial for achieving rapid cooking, a crisp crust, and beautiful “oven spring” – where the dough quickly expands in the heat. The intense temperature means your pizza will cook fast, typically in just 5 to 7 minutes if using a preheated pizza stone, or 8 to 10 minutes on a baking sheet.
The key to preventing sticking is to adequately flour your pizza peel or generously dust it with cornmeal. This creates a barrier between the dough and the peel. Before adding toppings, and definitely before transferring to the oven, give the peel a gentle shake to ensure the pizza moves freely. If it’s sticking, lift the problematic area slightly and sprinkle a little more flour or cornmeal underneath. A parchment paper base (as suggested in our professional tips) is also an excellent foolproof method.

Recommended Recipes to Complement Your Pizza Night
Date Night
Tomato Goat Cheese Galette
Sourdough Bread Recipes
Sourdough Pizza Dough Recipe
Sauces & Condiment Recipes
Best Pizza Sauce Recipe
Easy Side Dish Recipes
Baked Mac and Cheese Recipe
If you tried this recipe and loved it, please leave a 🌟 star rating and let me know how it goes in the comments below. I love hearing from you; your comments make my day!

Pepperoni Pizza
Chef Lindsey
10 minutes
5 minutes
15 minutes
9
slices
Saved
Pin Recipe
Comment
Print Recipe
Ingredients
-
8-11
ounces
pizza dough
-
6
tablespoons
pizza sauce
-
½
cup
low-moisture shredded mozzarella cheese
-
¼
cup
fresh mozzarella
crumbled or sliced thinly -
18
pepperoni slices
or as many as you want -
½
cup
additional toppings
if desired -
all-purpose flour
or cornmeal, for oven transfer
Instructions
-
If you are using sourdough pizza dough, about 1-2 hours before you want to bake, remove the pizza dough from the refrigerator to final proof. If you froze it, be sure you thaw it in the fridge the night before. If not, you can use dough directly from the counter or from the fridge without allowing it to sit out.
-
Preheat the oven to 500°F with a pizza stone if you have one. If you don’t, you can just build the pizza on a metal baking sheet and bake it together. You won’t get as nice a crust but it will still be delightful.
-
If you are using a pizza stone, flour a pizza peel or dust with cornmeal. If not, sprinkle cornmeal on a metal baking sheet.
-
Place one piece of dough onto a floured, flat surface. Dust the top of the dough with additional all purpose flour and, using floured hands, tap your fingers around the rim of the dough about ¾ inch inside the edge. This will be your crust. Creating a physical marker allows you to stretch the dough inside while preserving the thick crust. If you want a thin crust pizza, you can use a rolling pin.
-
Lift up the dough and place it on top of both your closed fists. Using a gentle outward motion, gently separate your fists to thin out the center of the pizza. You’ll want to work quickly and move to different parts of the dough to keep it from getting too thin in any one place. It really only takes 3-5 stretches especially when the dough is room temperature.
-
Gently place the stretched dough onto your floured peel or dusted baking sheet and reshape to arrange it into a circle.
-
Spoon and spread out the pizza sauce. Top with shredded mozzarella and crumbled fresh mozzarella, and arrange pepperoni on top.
-
Give the pizza peel a little shake to check and make sure that the pizza moves freely. If not, lift and toss a little flour or cornmeal under the spot that is sticking.
-
Carefully open the oven door. Slide the pizza onto the preheated pizza stone using the peel. I find it easiest to line it up in the back and let it slide off the peel into place as you remove the peel. Alternately just put the sheet pan with the pizza in the preheated oven.
-
500°F is hot, so a pizza of this size will bake quickly. It will only take 5-7 minutes on a pizza stone. Baked on a baking sheet, it will be closer to 8-10 minutes. When the pizza crust is golden brown and puffed, take a peek underneath the crust using tongs. If the bottom is crispy and golden, then the pizza is done!
-
Use tongs to remove it from the stone, or oven mitts to remove the baking sheet from the oven. Use tongs to transfer the pizza to a cutting board, and slice!
Video
Notes
Technique – Too many toppings will keep your crust from getting crispy or will weigh it down and it will flop undesirably.
Variations – Add some crushed red pepper, sliced jalapenos or a drizzle of hot honey.
Storage – Store leftover pizza in an airtight container in the refrigerator for 3 to 5 days.
Nutrition
Calories:
113
kcal
|
Carbohydrates:
13
g
|
Protein:
5
g
|
Fat:
5
g
|
Saturated Fat:
2
g
|
Polyunsaturated Fat:
0.5
g
|
Monounsaturated Fat:
1
g
|
Trans Fat:
0.1
g
|
Cholesterol:
11
mg
|
Sodium:
351
mg
|
Potassium:
48
mg
|
Fiber:
1
g
|
Sugar:
2
g
|
Vitamin A:
106
IU
|
Vitamin C:
1
mg
|
Calcium:
49
mg
|
Iron:
1
mg
Dinner, Main Course
Italian
113
Like this? Leave a comment below!
Before You Go: Explore More Delicious Dinners
I sincerely hope you enjoyed creating and savoring this professional chef-tested recipe for homemade sourdough pepperoni pizza. It’s truly a labor of love that pays off in delicious dividends! Don’t let your culinary journey end here. I invite you to explore our extensive collection of other delightful, chef-developed dinner recipes. From quick weeknight meals to impressive weekend feasts, you’ll find plenty of inspiration to keep your kitchen vibrant and your family well-fed. Happy cooking!
