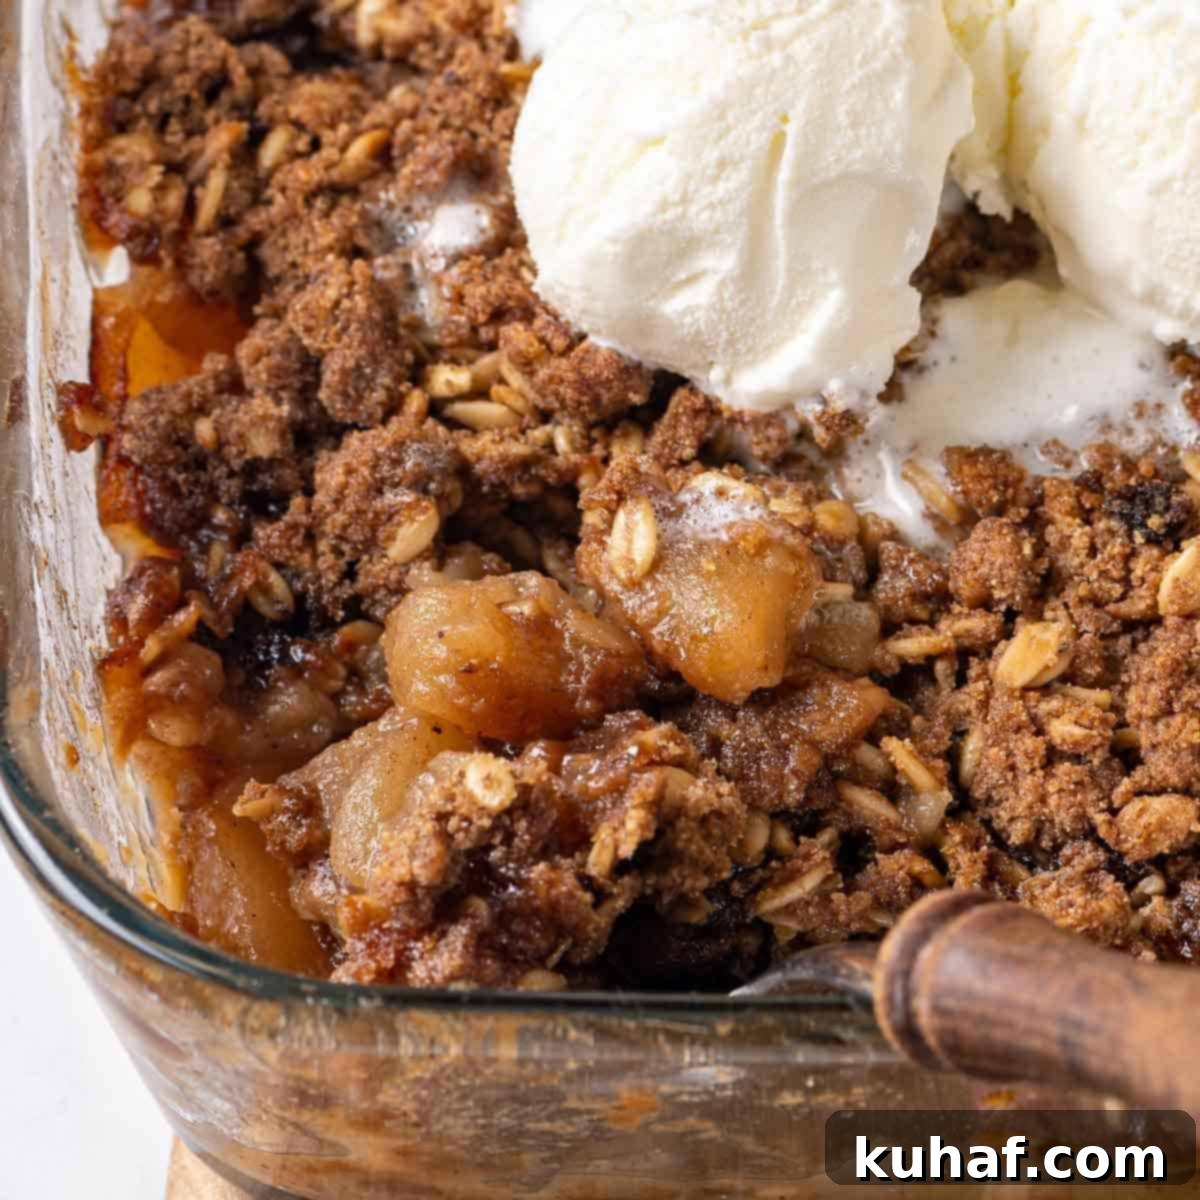
The Ultimate Easy Brown Sugar Apple Crisp Recipe: A Classic Homemade Dessert
Prepare to delight your senses with this outstanding easy apple crisp recipe, a timeless dessert that promises warmth and comfort with every spoonful. This recipe features a luscious, thick cinnamon apple filling, perfectly complemented by a golden, irresistibly crispy brown sugar oat topping. The magic lies in its impeccable balance: the delightful tartness of the apple filling elegantly offsets the generous sweetness of the rich, buttery topping. This harmonious blend of flavors and textures elevates a classic to extraordinary, making it an essential addition to your baking repertoire, especially for cozy gatherings or a simple weeknight treat.
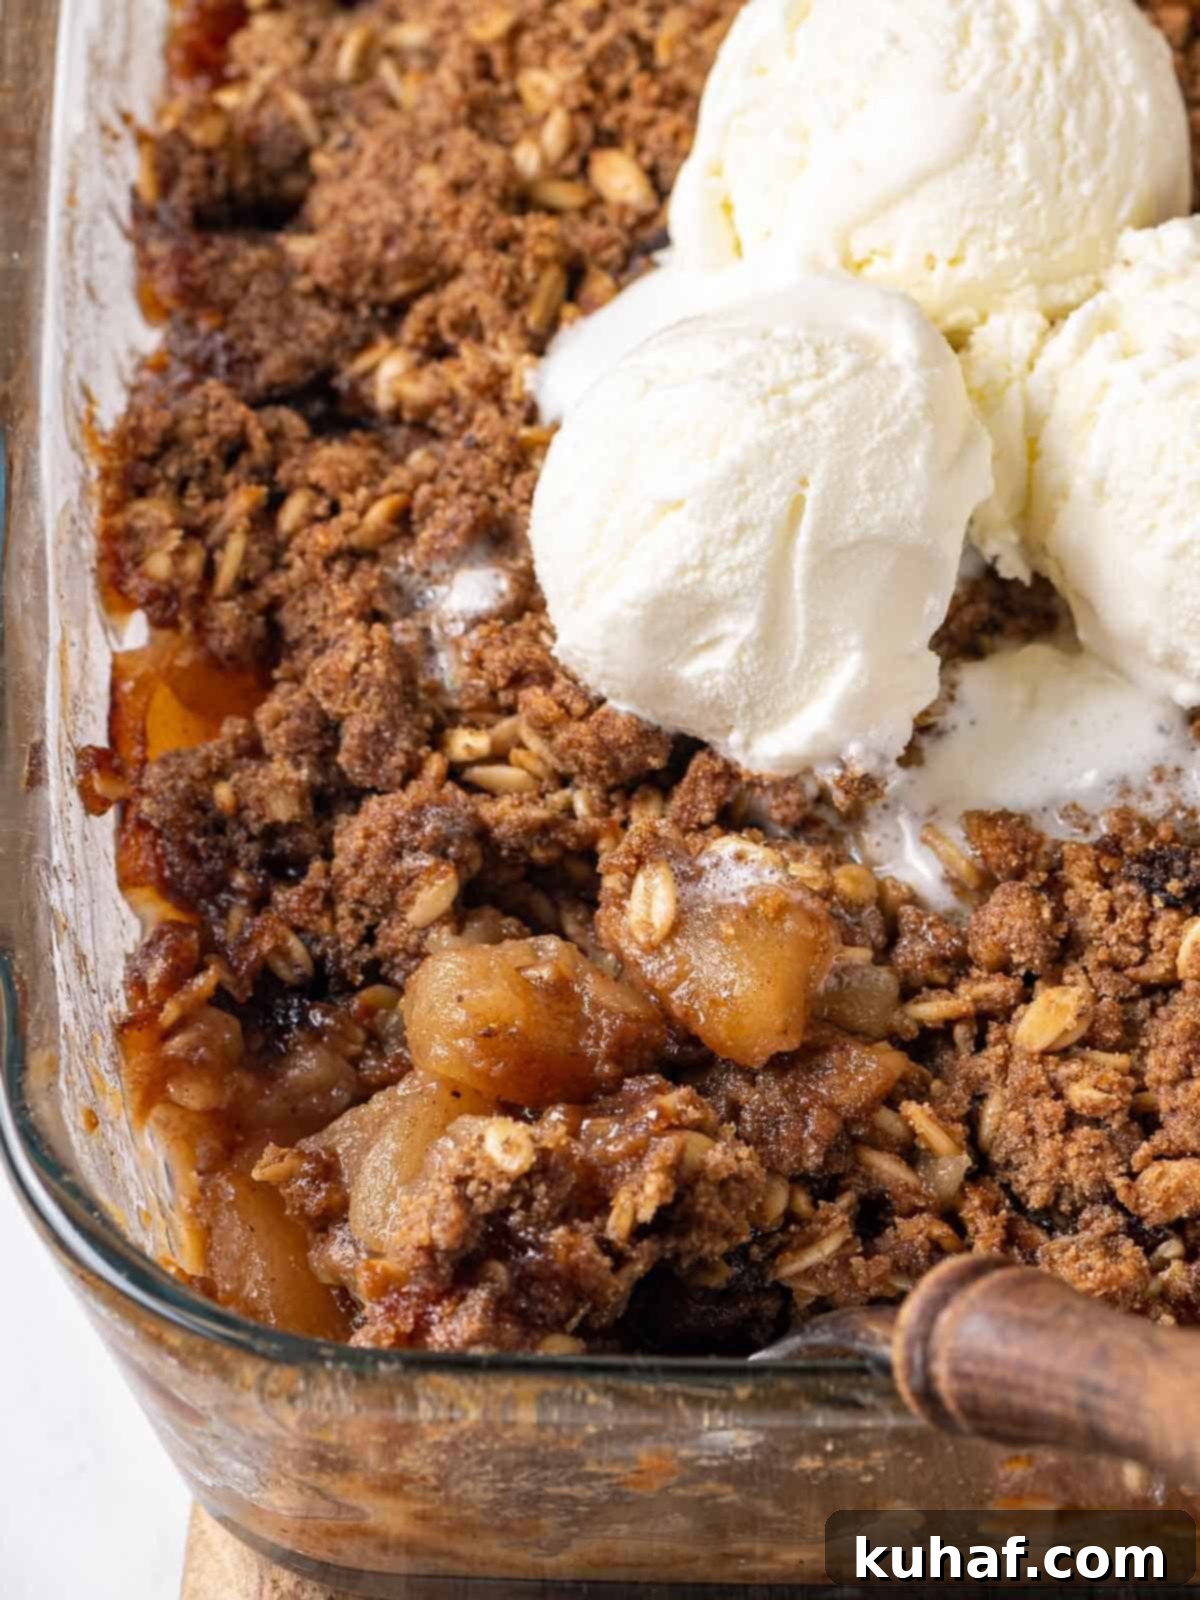
This particular brown sugar apple crisp recipe is more than just a dish to me; it’s a treasured family legacy. I grew up savoring every bite of this comforting dessert, especially during the crisp autumn months. My Mom, a culinary genius in her own right, had an unspoken rule: the topping should always be abundant. I swear she must have at least doubled the crisp topping, resulting in a glorious 50:50, or perhaps even a 40:60, ratio of tender apples to crunchy, sweet oats! The memory of my sister and me impatiently waiting in the kitchen, barely able to let it cool, for that first perfect spoonful, is etched in my mind. That initial taste, rich with buttery crumbs and warm apples, was always met with a shared smile and silent agreement: the topping truly was the best part. As time went on, our ritual evolved to include a generous scoop of creamy vanilla ice cream, melting enticingly, and a decadent drizzle of homemade salted caramel sauce. These additions elevated an already perfect dessert to new heights of indulgence, transforming a simple crisp into a truly unforgettable experience.
Table of Contents
- Why This is the Best Apple Crisp Recipe
- Professional Tips for Making Perfect Apple Crisp
- Key Ingredients for Your Apple Crisp
- Creative Variations & Smart Substitutions
- Step-by-Step Guide: How to Make Apple Crisp
- Chef Lindsey’s Expert Recipe Tip
- Choosing the Best Cooking Apples for Crisp
- Should You Peel Apples for Apple Crisp?
- Frequently Asked Questions About Apple Crisp
- Easy Apple Crisp Recipe Card
- Before You Go: More Delicious Recipes
Why This is the Best Apple Crisp Recipe You’ll Ever Make
In a world overflowing with apple crisp recipes, what makes this one truly stand out? It’s a combination of thoughtfully chosen ingredients and simple yet effective techniques that guarantee an unforgettable dessert. Here’s why this version consistently delivers an experience far beyond the ordinary:
- A Topping Ratio That Never Disappoints: Let’s be honest, the crispy, sweet topping is often the highlight of any apple crisp. There’s nothing worse than serving a crisp only to find the topping has dwindled, leaving the last few servings deprived. This recipe eliminates that disappointment entirely! We advocate for a genuinely generous topping-to-apple ratio, ensuring there is more than enough golden-brown, buttery oat goodness to go around. Every single serving gets a substantial blanket of crunchy delight, providing that perfect textural contrast with the soft apple filling.
- The Deep Richness of Dark Brown Sugar: While many recipes call for a mix of sugars or light brown sugar, the secret to the truly profound and rich flavor of our topping lies in using 100% dark brown sugar. This isn’t merely about sweetness; dark brown sugar imparts a deeper, more complex molasses note that light brown sugar simply cannot replicate. It caramelizes beautifully, giving the crisp an inviting golden hue and a depth of flavor that lingers deliciously on the palate, making it incredibly satisfying.
- The Perfect Tart and Sweet Harmony: The delicate balance between tartness and sweetness is what elevates this apple crisp. We intentionally select tart apple varieties, complemented by a splash of fresh lemon juice and just two tablespoons of granulated sugar in the filling. This minimal sugar approach for the apples ensures they retain their natural piquant flavor, providing an essential counterpoint to the rich, sweet dark brown sugar topping. This careful balance prevents the dessert from becoming cloyingly sweet, allowing both the bright, fresh apple notes and the decadent topping to shine in harmony. Take it from a former college student who learned the hard way: combining overly sweet apples with a sweet topping results in a one-dimensional, sugary dessert. Tart apples are absolutely crucial for this exquisite balance!
Professional Tips for Making Perfect Apple Crisp
While the beauty of this easy apple crisp recipe lies in its simplicity, incorporating a few professional insights can truly elevate your baking. These straightforward tips from a pastry chef ensure a flawless outcome every time, transforming a good crisp into a truly exceptional one.
- Uniform Apple Pieces for Even Baking: The most crucial step for achieving a perfectly cooked apple filling is to ensure all your apple pieces are cut to a similar size. There’s no rigid standard for the exact dimensions, but once you choose a size – be it half-inch cubes or three-quarter-inch slices – stick with it consistently. This meticulous approach, similar to preparing fruit for easy apple pie or apple hand pies, guarantees that all the apples bake evenly. You won’t end up with some pieces that are crunchy and undercooked while others have turned into an unrecognizable applesauce. The goal is a uniform, tender, and slightly yielding texture throughout the filling.
- Rolled Oats Are Essential for Topping Texture: For that signature chewy, yet crispy texture of a true apple crisp, you must use rolled oats, often labeled as old-fashioned oats. Unlike quick-cooking or instant oats, which tend to become soggy or disappear into the topping during baking, rolled oats retain their robust shape and structure. This resilience provides a delightful textural contrast to the soft, warm apple filling, contributing significantly to the “crisp” in apple crisp. Their distinct form is key to achieving that wonderfully crunchy, golden-brown crown.
- Select the Right Apples for Balanced Flavor and Texture: The choice of apples profoundly impacts the overall flavor and texture of your finished crisp. To maintain the delightful tartness that so beautifully complements the sweet brown sugar topping, I recommend a blend of varieties known for their balance and ability to hold up during baking. My personal favorites include Honeycrisp (for its crisp texture and sweet-tart flavor), Cripps Pink (Pink Lady) (for its firm flesh and aromatic sweetness), and Granny Smith (for its indispensable tartness). This combination offers both varied flavor and textural complexity. However, feel free to use any variety of apple you enjoy – a mixture will always yield a more interesting result. Just be sure to avoid varieties that turn to complete mush when baked, like Red Delicious, which are better suited for apple butter or applesauce.
Key Ingredients for Your Perfect Apple Crisp
A truly exceptional apple crisp begins with high-quality ingredients, each playing a crucial role in developing the perfect blend of flavors and textures. Here’s an in-depth look at what you’ll need for this easy apple crisp recipe and why each component is vital.
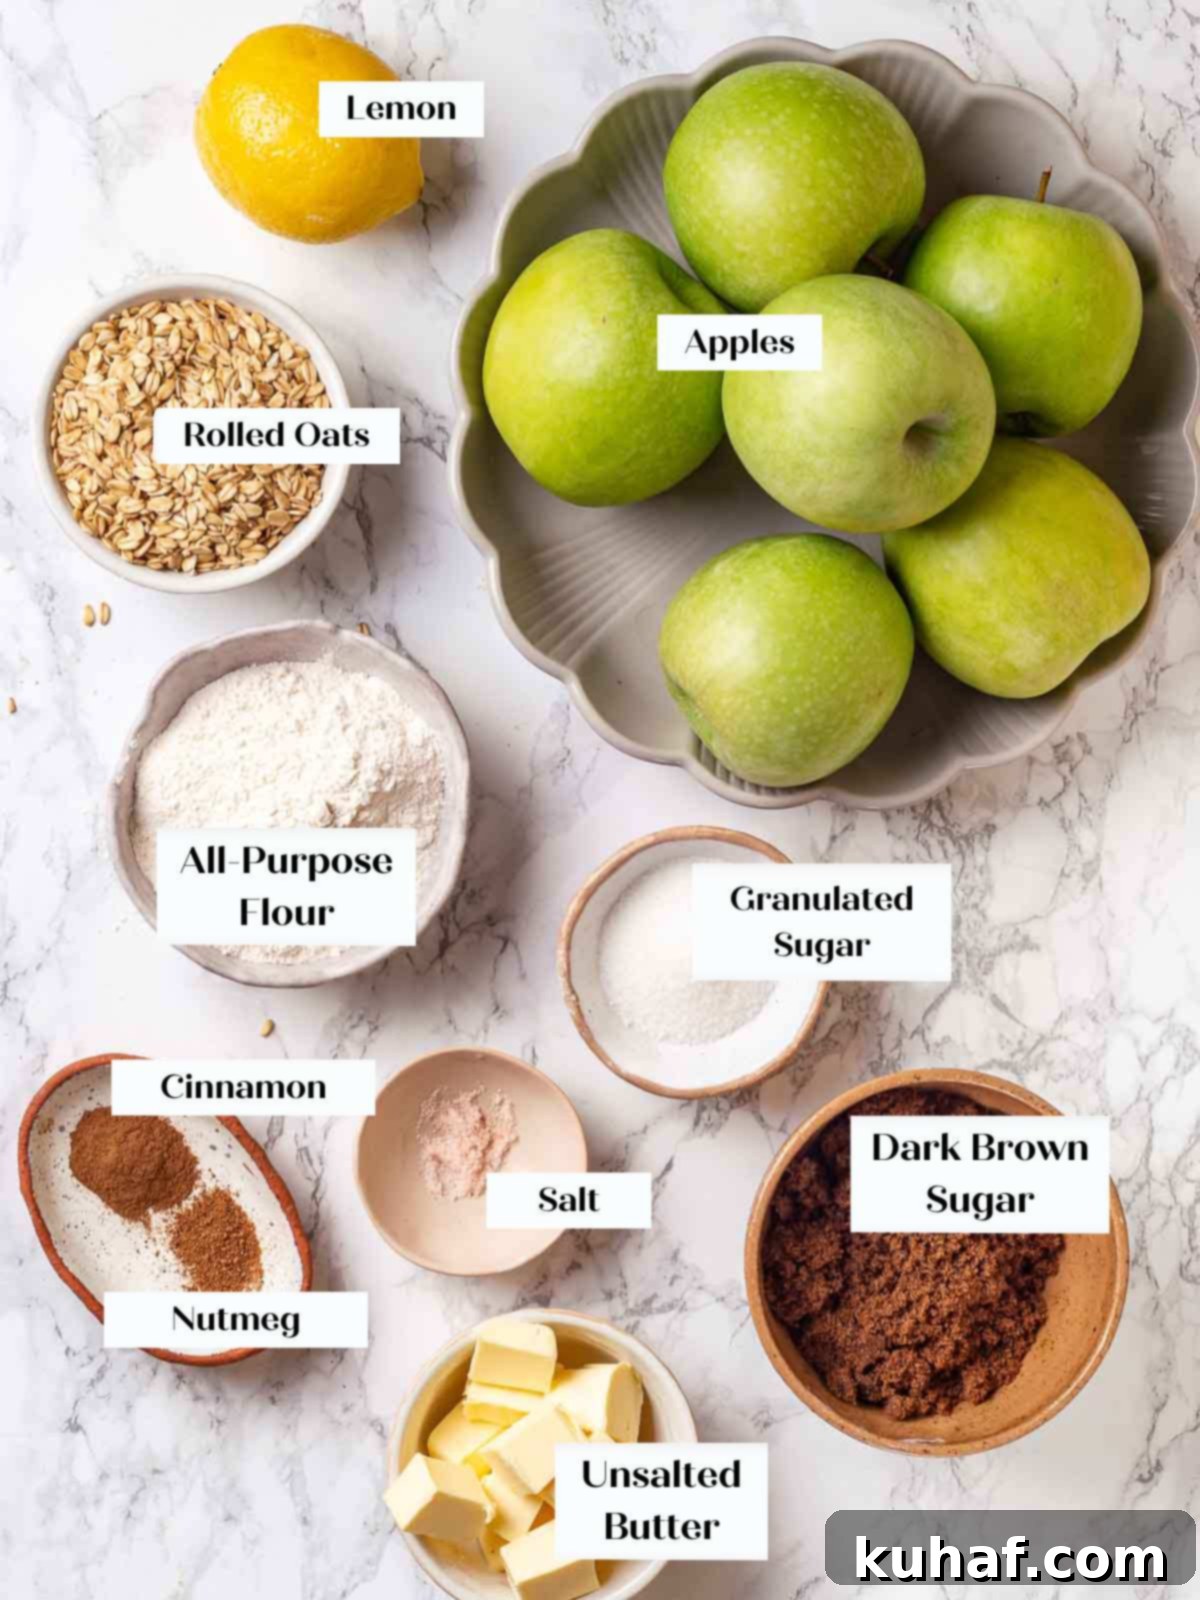
- Apples: As discussed, a strategic blend of tart varieties like Honeycrisp, Cripps Pink, and Granny Smith is paramount. These apples offer a robust texture that withstands baking without becoming mushy, and their inherent tartness provides a crucial counterpoint to the sweet topping. A mixture also ensures a more complex flavor profile and interesting texture. For a deeper understanding of apple varieties, this helpful article on the types of apples offers excellent insights.
- Cinnamon: Cinnamon is the heart of any great apple dessert. While any ground cinnamon will work, I highly recommend investing in Saigon cinnamon for its intensely warm, bold, and slightly spicy notes. It has a more pronounced and complex flavor that truly elevates the apples. Each variety of cinnamon possesses a unique flavor profile, so trust your nose – if the aroma is captivating, you’ll likely love the taste it imparts to your crisp!
- Lemon Juice: My mantra for citrus is always “fresh is best.” The bright acidity of freshly squeezed lemon juice is not merely for flavor; it plays a critical role in preventing the sliced apples from browning too quickly and, most importantly, provides a vibrant tang that perfectly balances the sweetness of the dish. The amount specified, roughly one tablespoon, is typically what you’d get from one medium lemon.
- Lemon Zest: Don’t overlook the zest! The vibrant yellow outer peel of a lemon is packed with aromatic oils that deliver an intense, concentrated lemon flavor without adding additional liquid. Be meticulous in zesting only the bright yellow part, carefully avoiding the bitter white pith beneath for the purest, brightest flavor.
- Ground Nutmeg: While not the star, a touch of nutmeg adds a subtle, earthy depth that beautifully complements the cinnamon and apples. This recipe is optimized for freshly ground nutmeg, which boasts a significantly more potent and aromatic flavor than pre-ground varieties. If fresh nutmeg isn’t available, it’s often better to omit it entirely rather than using an old, flavorless pre-ground version that won’t contribute positively to the dish.
- Granulated Sugar: In the apple filling, granulated sugar is used sparingly, primarily to kickstart the maceration process. Its purpose here is to draw out the natural moisture from the apples, creating a rich, flavorful juice that will thicken as it bakes. Crucially, there’s just enough sugar to aid this process without making the apple filling overtly sweet, thereby preserving the apples’ essential tartness.
- Kosher Salt: A small amount of kosher salt is a powerful flavor enhancer. In both the filling and the topping, it brightens and intensifies the other flavors, balancing the sweetness and spices without making the dish taste salty. Kosher salt has a larger crystal size than table salt, making it less concentrated by volume and easier to measure accurately for consistent results.
- Dark Brown Sugar: This ingredient is a cornerstone of our exceptional topping. Dark brown sugar, with its higher molasses content, imparts a deep, rich, caramel-like flavor that is simply irresistible. It also contributes to the topping’s beautiful golden-brown color and helps create that wonderful, slightly chewy yet crispy texture that defines a perfect crisp.
- All-purpose flour: All-purpose flour provides the essential structure for the crisp topping. It binds the ingredients together, ensuring the topping holds its shape and achieves a tender, crumbly consistency. Its moderate gluten content is ideal for creating a topping that isn’t too tough or cake-like, allowing the distinct textures of the oats and butter to shine through.
- Butter: For baking, I consistently use unsalted butter. This preference allows me precise control over the overall salt content in the recipe. As different brands of salted butter can vary significantly in their sodium levels, using unsalted butter eliminates guesswork and ensures consistent flavor. However, with the generous amount of sugar in this recipe, using salted butter will still yield a delicious result, though you might consider slightly reducing the added kosher salt. Always ensure your butter is cold and cut into small cubes for the best crumbly topping.
- Oats: The choice of oats is critical for the topping’s texture. I exclusively use old-fashioned rolled oats. These hearty oats retain their shape and structure beautifully during baking, providing that signature chewy yet crispy texture that is characteristic of a true apple crisp. Avoid instant or quick oats, which can become mushy and compromise the desired textural integrity of the topping.
Creative Variations & Smart Substitutions for Your Apple Crisp
While this classic apple crisp recipe is perfected, it also serves as an excellent foundation for creative culinary experimentation. Don’t hesitate to personalize it and make it uniquely your own! Here are some delightful variations and clever substitutions to inspire your next baking adventure, ensuring your apple crisp always feels fresh and exciting.
- Mix and Match Apple Varieties for Complex Flavors: The inherent beauty of apple crisp lies in how different apple varieties contribute unique nuances to the final taste and texture. Beyond our recommended blend of tart apples, feel free to experiment by combining other sweet and tart apples, such as Braeburn, Gala, Fuji, or even Empire. A mix always yields a more complex and engaging flavor profile. Remember, since the topping is quite sweet, a base of predominantly tart apples provides the most balanced and satisfying result. You can also venture beyond apples entirely; this recipe framework works wonderfully for other fruits. Consider making a delicious pear crisp or a summery peach crisp, drawing inspiration from these related recipes and adjusting spices to suit the fruit.
- Explore Beyond Cinnamon: A World of Spices: While cinnamon is an undeniable classic with apples, your crisp doesn’t have to be limited to a single spice. Open up a world of new flavor dimensions by experimenting with different spice blends. For a warm, inviting autumn feel, try incorporating pumpkin spice mix. A classic, balanced blend like apple pie spice is always a hit. For something truly unique and reminiscent of European holiday flavors, a speculoos spice mix (featuring cinnamon, nutmeg, cloves, and ginger) can add an unexpected gourmet touch. When substituting, start with a lighter hand than the cinnamon measurement in the recipe; add a pinch, taste the spiced apple mixture, and gradually add more until you achieve your desired intensity, as some blends can be more potent.
- Indulgent Caramel Apple Crisp: Elevate your crisp to an even more decadent dessert by introducing caramel. You can either simply drizzle a generous amount of your favorite salted caramel sauce over the warm baked crisp just before serving, creating an instant layer of sticky, sweet richness. Alternatively, for a more integrated caramel flavor, try swirling some caramel sauce directly into the apple filling before topping and baking. The caramel will gently melt and meld with the apples as it bakes, creating a gooey, irresistible treat from within.
- Adjust the Crisp Topping for Your Preference: While this recipe champions a famously generous topping, we understand that personal preferences vary. If you prefer a more “normal” (i.e., less topping-heavy) ratio of filling to topping, you can easily halve the topping recipe as written. Even half the recipe will still provide more than enough to beautifully cover an 8-inch square baking dish. Another excellent option is to prepare the full topping recipe, use your desired amount, and then freeze the remaining crisp topping for future use! This makes for a fantastic shortcut when you’re in the mood for a cardamom pear crisp or individual blueberry raspberry crumbles, offering convenience without sacrificing quality.
- Make a Crumble Topping or Add Nuts: If oats aren’t your preference, or you’re seeking a different textural experience, consider switching to a true crumble topping. For a delicious, butterier, and more cake-like crumb, I highly recommend using this streusel recipe, which is my go-to for my raspberry rhubarb crisp. Furthermore, to add another layer of flavor and crunch to any topping (whether oat-based or oat-free), stir in some toasted nuts like pecans, walnuts, or even almonds. The warm, earthy notes of the nuts complement the apples and spices beautifully, adding an extra dimension to your dessert.
Step-by-Step Guide: How to Make Apple Crisp Like a Pro
Crafting the perfect apple crisp is a surprisingly simple and incredibly rewarding process. Follow these detailed instructions to ensure a consistently delicious dessert every single time. You’ll find further specifics on measurements, precise timings, and ingredient quantities within the comprehensive recipe card located below.
Part 1: Mix the Apple Filling for Maximum Flavor
The journey to a flavorful and juicy apple crisp begins with the meticulous preparation of the fruit filling. This initial step is crucial for ensuring the apples are perfectly seasoned and begin to release their delightful juices, which will thicken into a luscious sauce during baking.
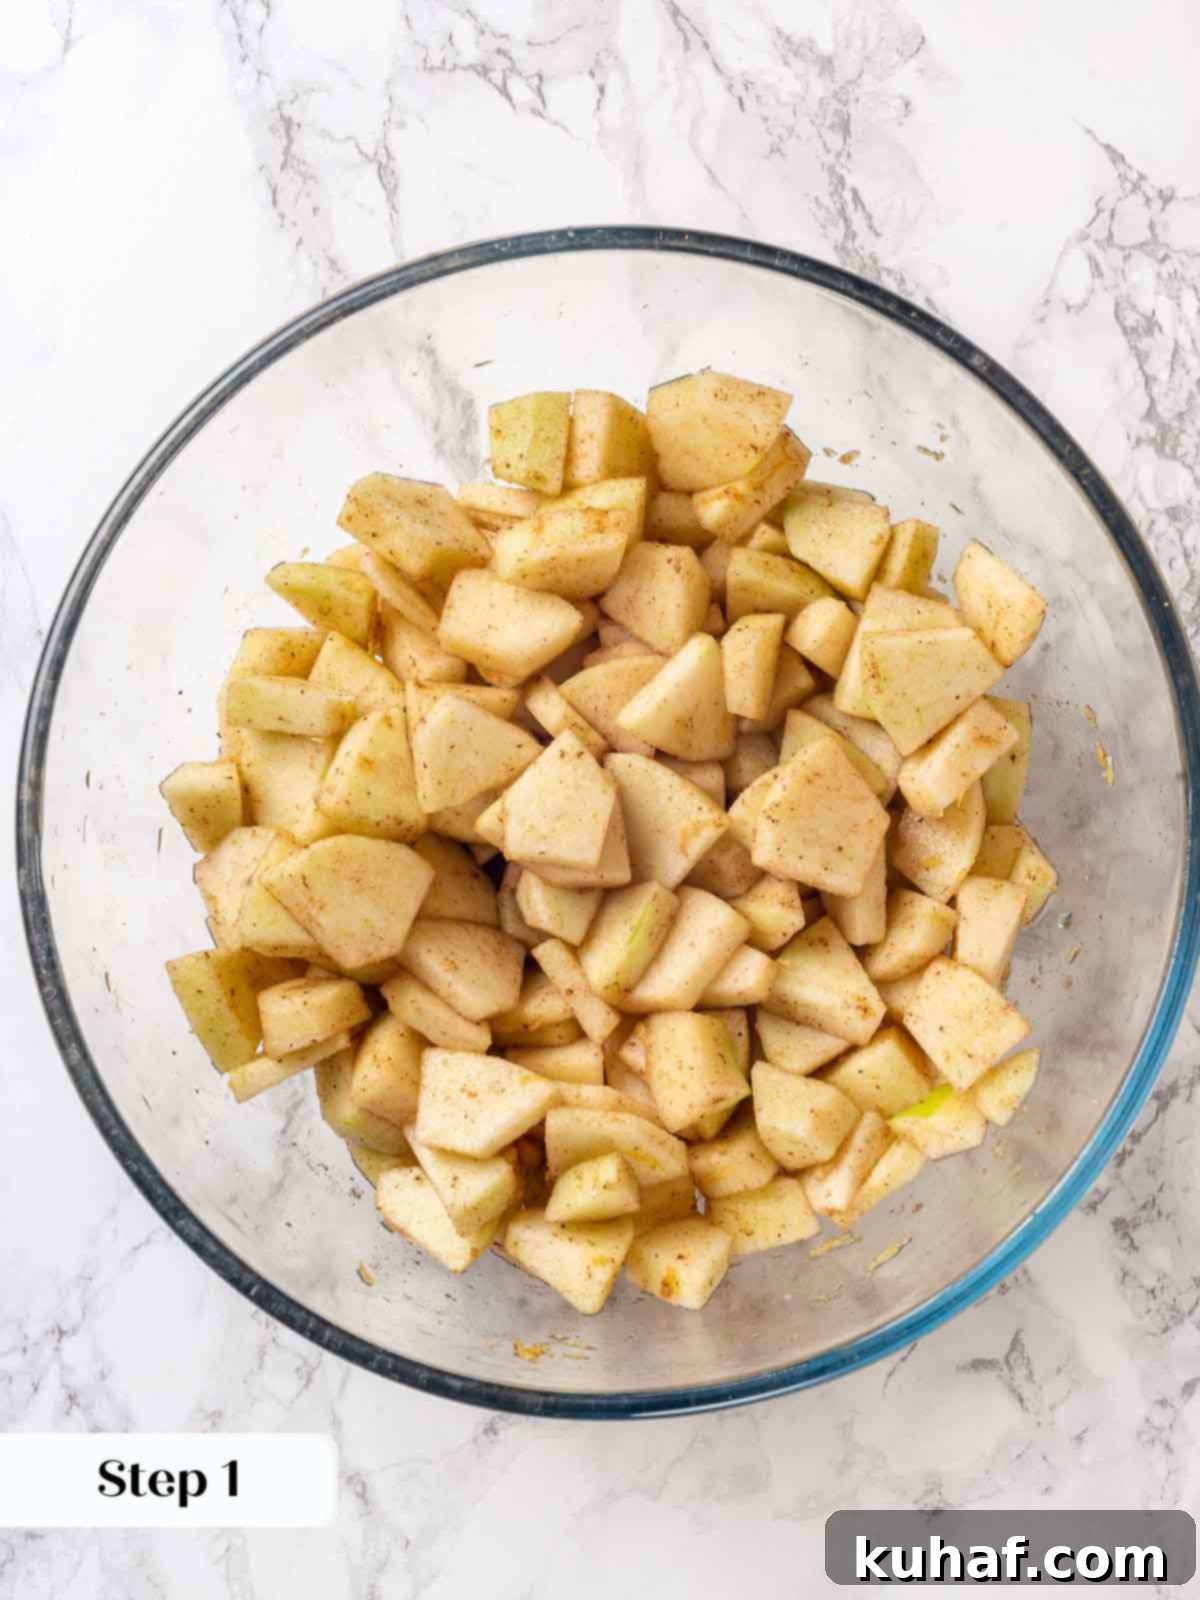
Step 1: In a generously sized medium bowl, combine your peeled and uniformly sliced apples with the vibrant fresh lemon juice and fragrant lemon zest. Next, carefully sprinkle in the granulated sugar, a delicate touch of freshly ground nutmeg, the warm embrace of aromatic cinnamon, and that essential pinch of kosher salt. Use a sturdy spoon or, even better, your clean hands to thoroughly mix and toss the ingredients. Ensure that every single apple slice is evenly coated with the spices and sugar. This initial coating is paramount for developing deep, well-rounded flavors throughout the entire filling.
Step 2: Once the apples are thoroughly coated, cover the bowl tightly with plastic wrap to prevent air exposure and transfer it to the refrigerator. Allow the apples to sit and macerate for at least 1 ½ hours, making sure to stir them occasionally throughout this period (every 30-45 minutes). Maceration is a crucial chemical process where the sugar begins to draw out the natural moisture from the apples through osmosis. This creates a rich, flavorful syrup right from the start, which will thicken beautifully during baking. This resting period also allows the spices to fully penetrate and meld with the fruit, significantly enhancing the overall depth and complexity of the apple flavor.
Chef’s Note on Maceration: The Flavor Secret! While the flavors undoubtedly develop and deepen, yielding a juicier, more aromatic filling if you allow the apples to macerate for the recommended time, I completely understand if time constraints occasionally lead you to shorten or even skip this step. Even if baked immediately, the crisp will still be wonderfully delicious, but a little patience here truly pays off in terms of unparalleled juiciness and profound flavor complexity. Think of it as an investment in taste!
Part 2: Crafting the Perfect Crispy Topping
For many, the brown sugar oat crisp topping is the undeniable star of the show, providing that signature crunch and rich, buttery flavor. Preparing it correctly is essential for achieving that perfect golden-brown, crumbly texture that makes this dessert so irresistible.
Step 3: Before you even begin preparing the topping, ensure your oven is properly preheated. Set your oven to 350°F (175°C) and position an oven rack in the middle. A properly preheated oven is a non-negotiable step; it ensures even heat distribution for consistent baking, resulting in a beautifully golden and perfectly cooked crisp. Don’t rush this vital stage!
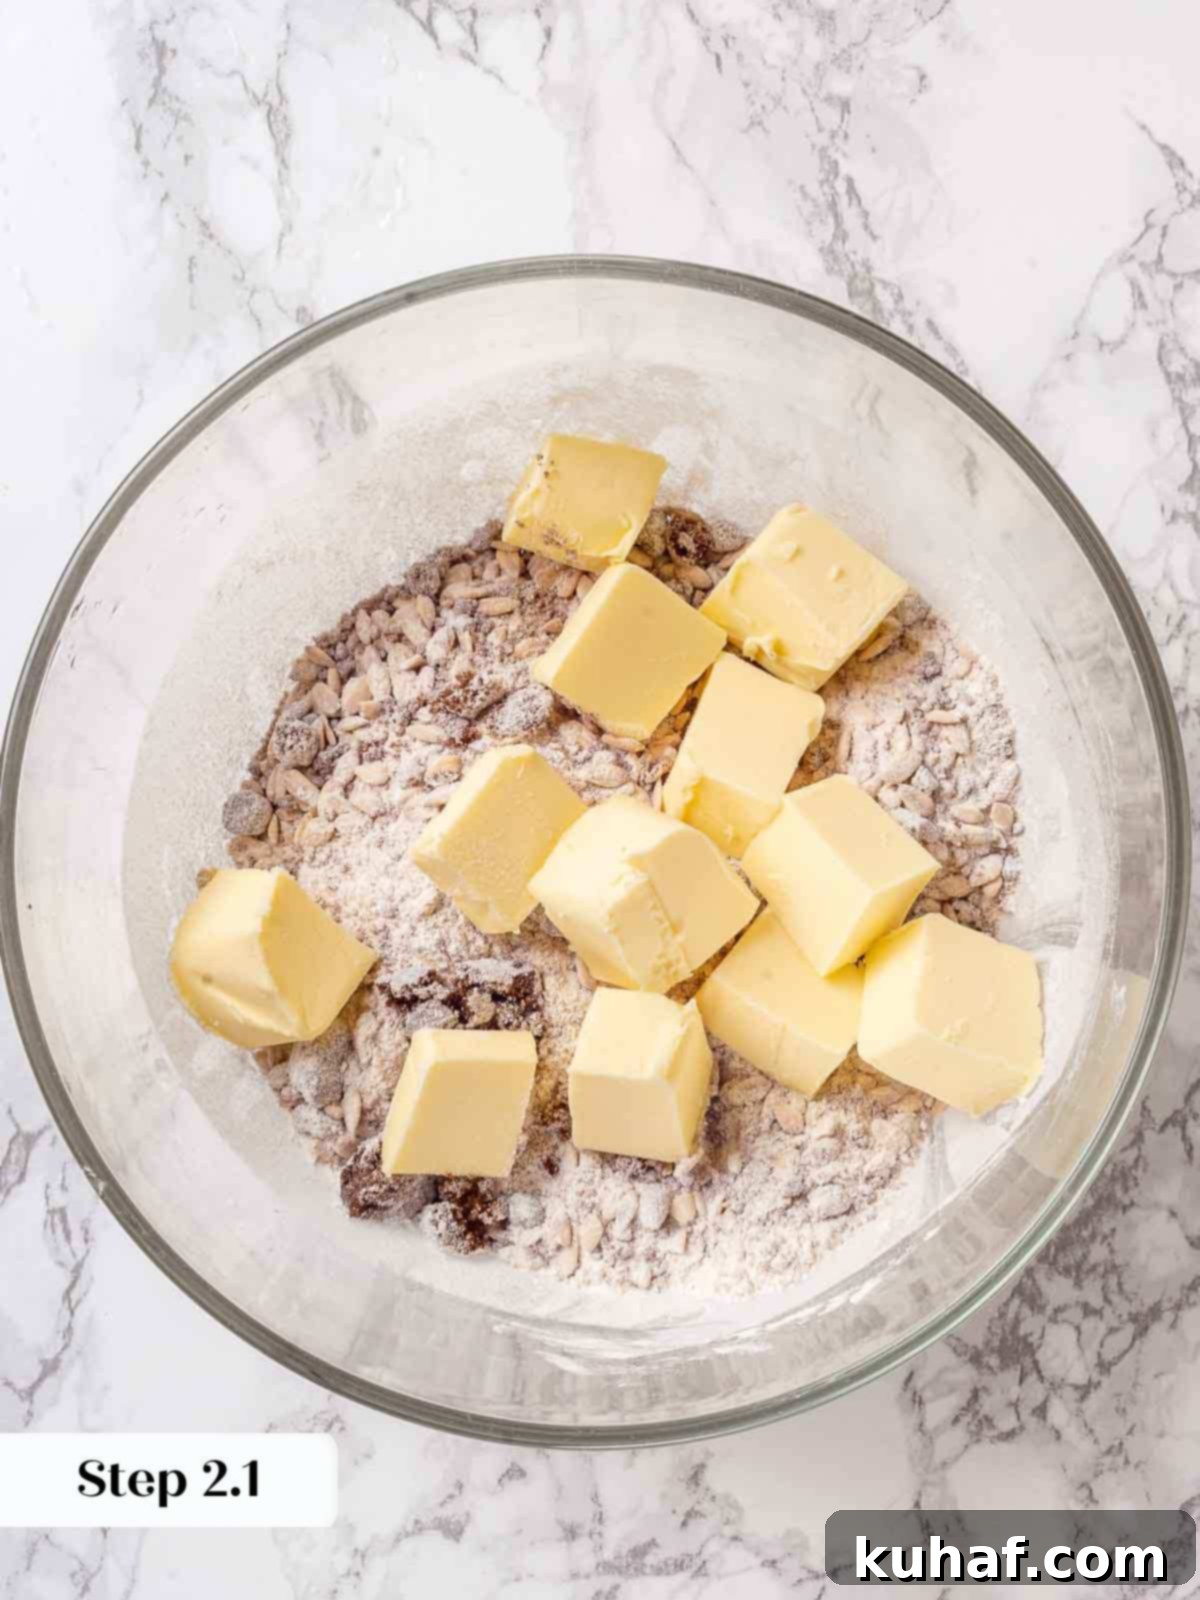
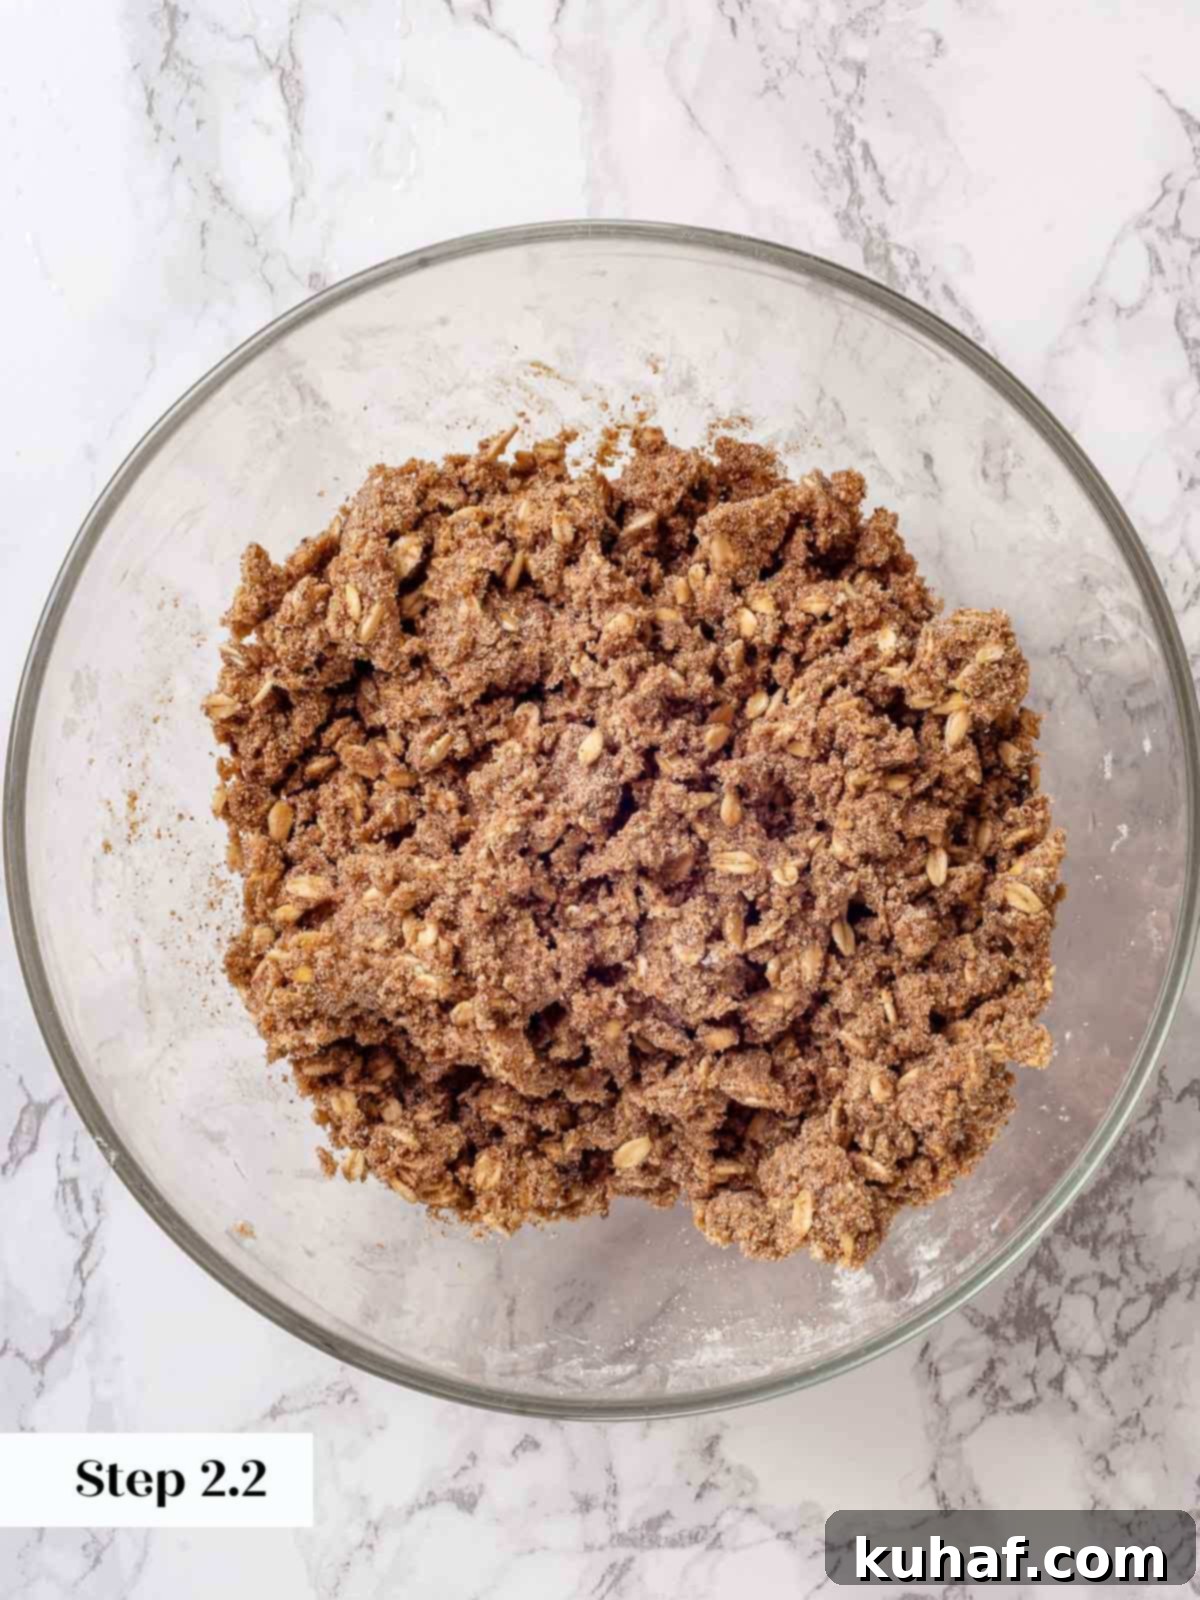
Step 4: In a separate medium-sized mixing bowl, combine the dark brown sugar, all-purpose flour, and the essential old-fashioned rolled oats. Use a whisk or fork to thoroughly mix these dry ingredients together, ensuring that any lumps of brown sugar are broken up and everything is evenly distributed. Next, add the cold, cubed unsalted butter to the dry mixture. Gently toss the butter cubes with the flour mixture until they are lightly coated. Now comes the most tactile and enjoyable part: using your hands! Reach into the bowl, grab a handful of the mixture, and vigorously squeeze and mash it against your palm with your fingers. Repeat this motion tirelessly, grabbing, squeezing, and mashing, until your hand is pleasantly exhausted, and the mixture begins to come together in distinct, crumbly chunks. The goal is to incorporate the butter without fully melting it, leaving only a few pea-sized lumps of butter remaining. It’s crucial to work as quickly and efficiently as possible to maintain the butter’s cold temperature, as this is fundamental for achieving that wonderfully crumbly and irresistibly crispy texture after baking.
Part 3: Assemble & Bake for Golden Perfection
With your flavorful apple filling and crumbly topping prepared, it’s time to bring everything together and transform your prepared ingredients into a golden, bubbling masterpiece. The assembly and baking process is straightforward, but careful attention to a few details will ensure a perfectly cooked crisp with a luscious filling and an irresistible crust.
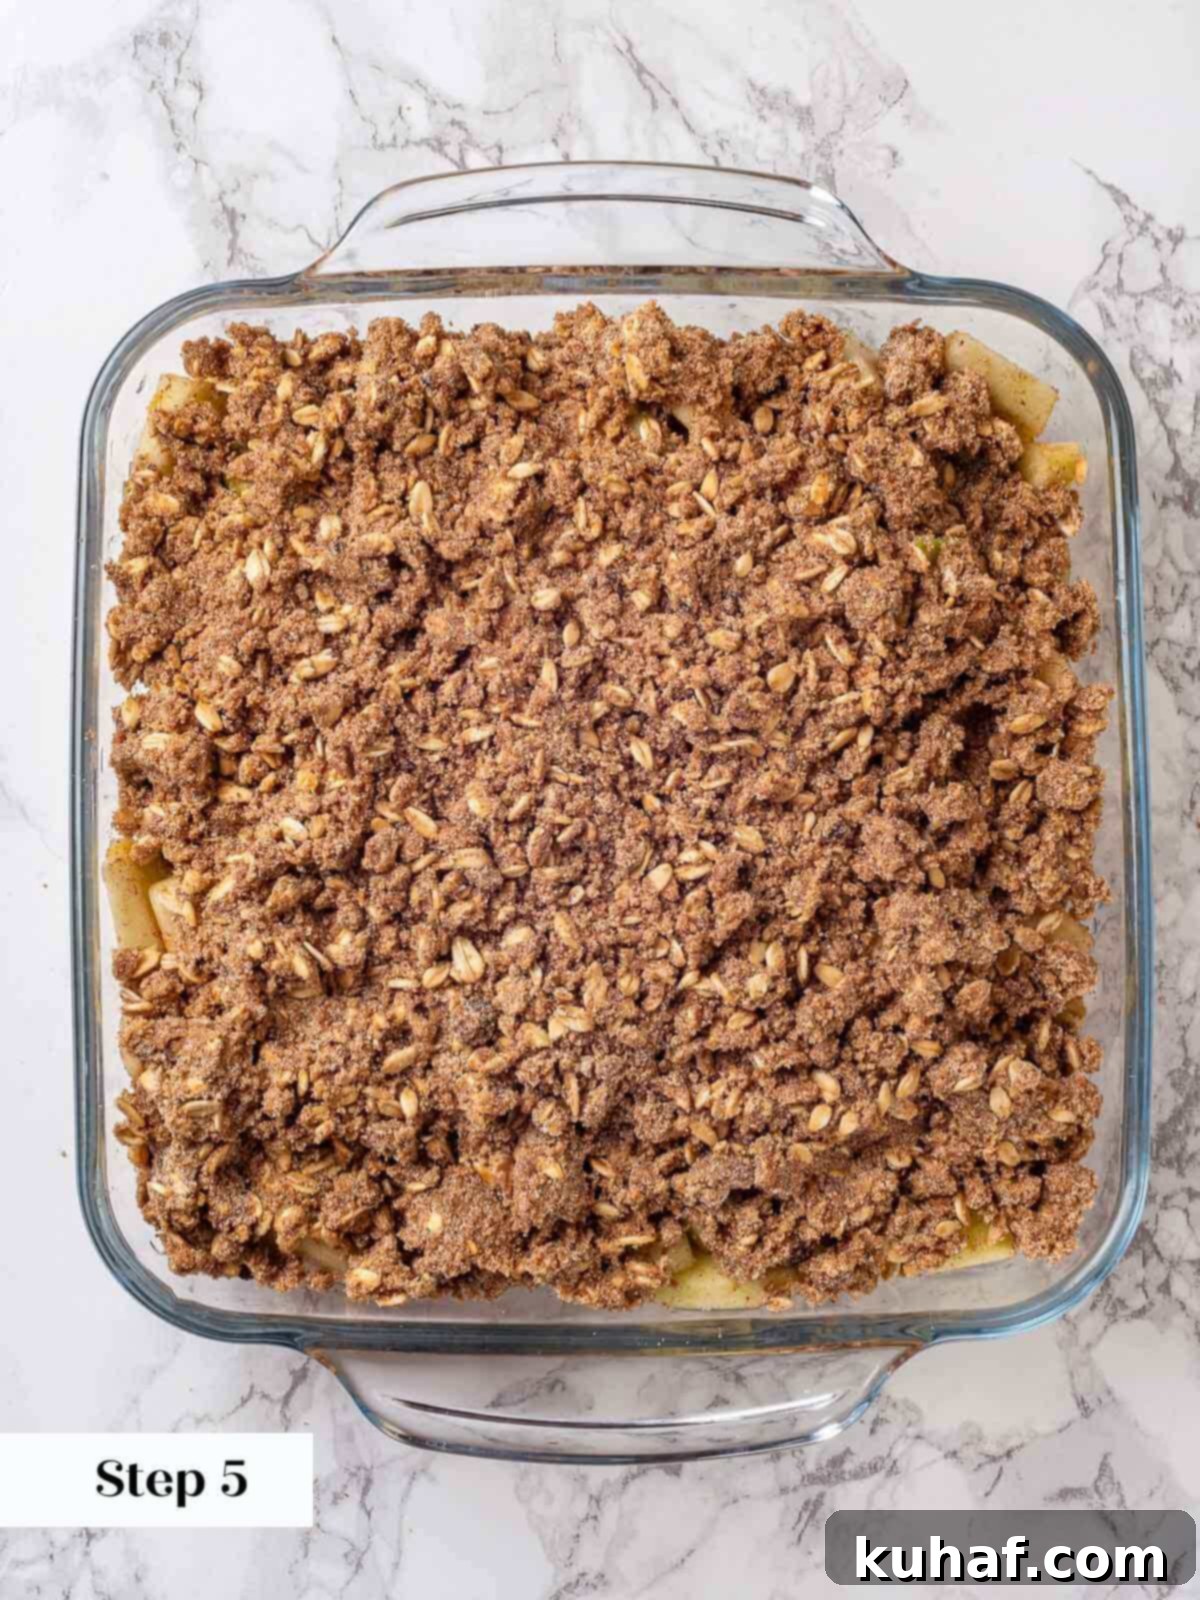
Step 5: Retrieve your beautifully macerated apples from the refrigerator and give them one last thorough stir to ensure all the released juices and spices are well combined. Pour this aromatic apple filling evenly into an 8-inch square baking dish, spreading it out to create a level base. Next, generously cover the apples with the prepared brown sugar oat crisp topping. Feel completely free to use as much or as little as your heart desires – remember, this recipe is designed for an abundant topping! Distribute it evenly over the entire surface of the apples. For an extra touch of textural delight and to ensure maximum flavor integration, gently press some of the crisp topping down into the apples. This allows a portion of the topping to absorb some of the apple juices, creating a wonderful soft, cake-like layer that contrasts beautifully with the crispier topping above and the tender apples below. It’s a small step that makes a big difference!
Chef’s Secret for Enhanced Texture: The “Press Down” Technique! Trust me on this invaluable tip: deliberately pressing some of the crisp topping directly into the apples makes a truly noticeable difference in the final product. This simple action allows a portion of the topping to absorb some of the delicious apple juices as it bakes, creating a delightful, slightly softened, almost cake-like layer. This specific texture provides a wonderful contrast between the gooey, tender apples and the crunchy, golden topping. Do not skip this small but impactful step – it’s a game-changer for textural complexity!
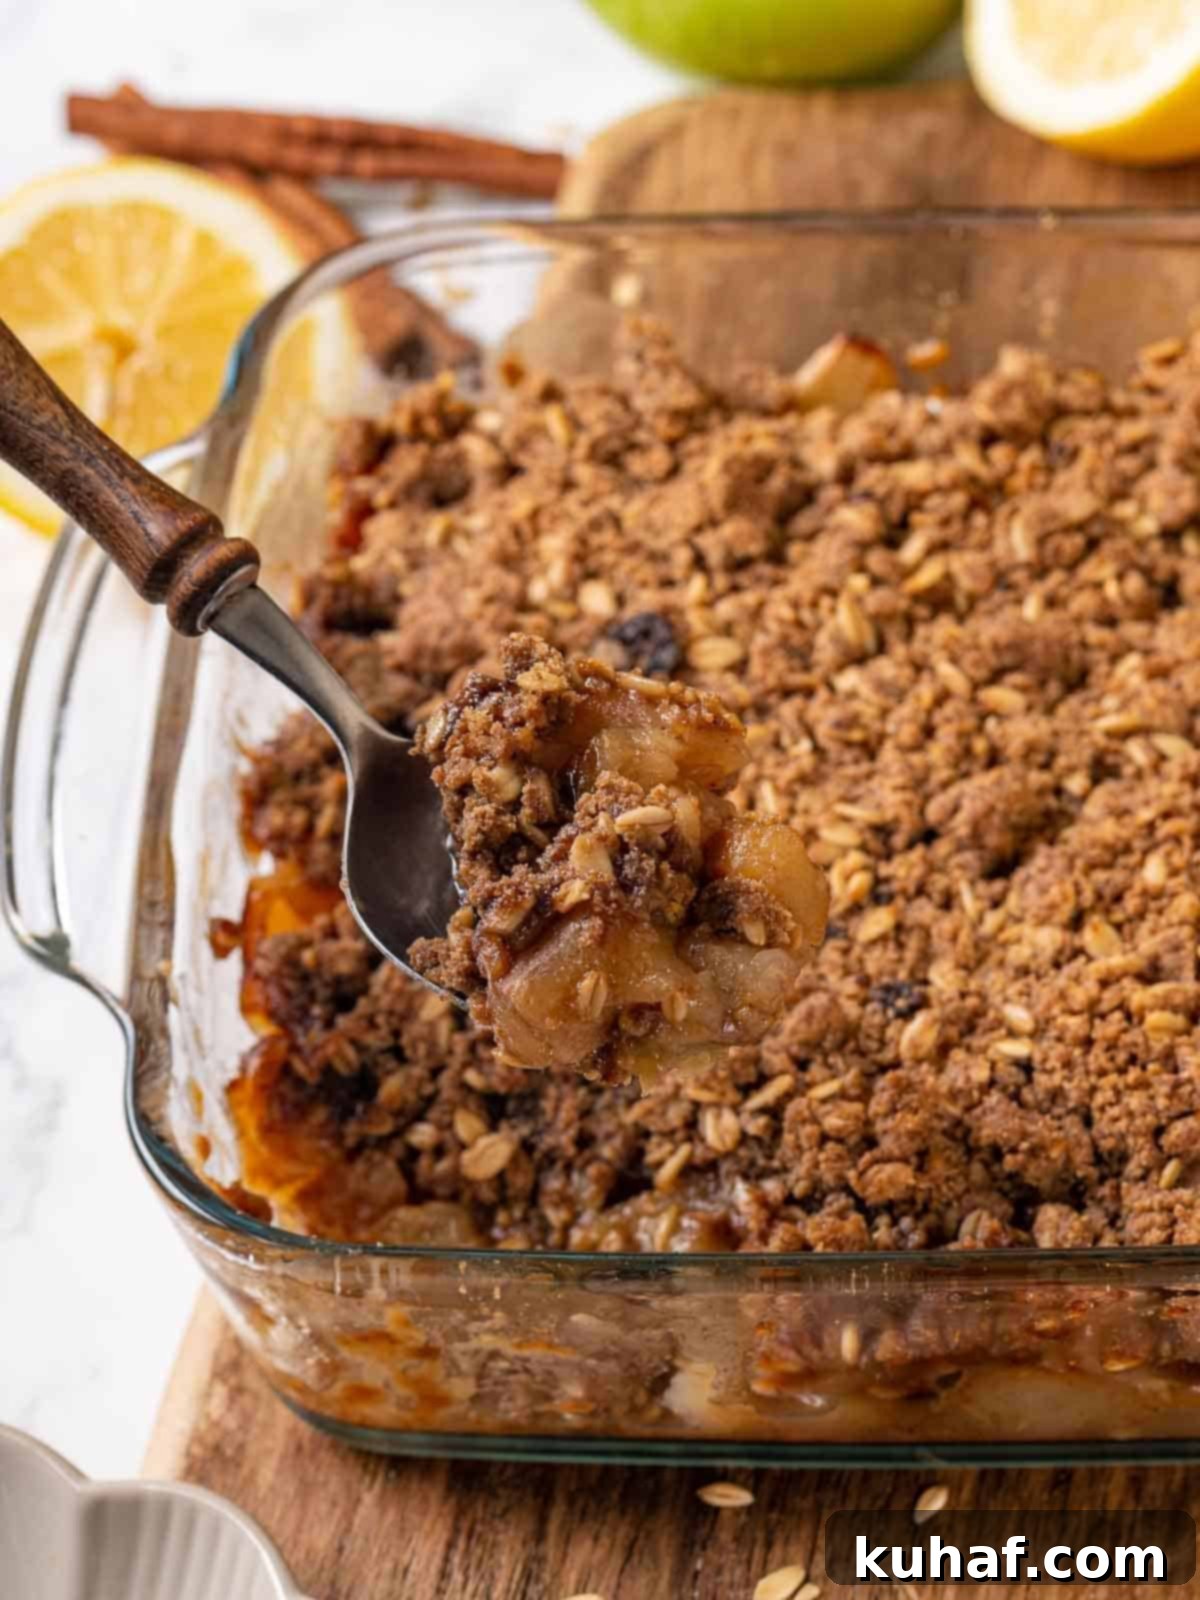
Step 6: Carefully place your assembled apple crisp into the preheated oven. Bake for approximately 45-50 minutes. The crisp is perfectly ready when the topping has transformed into a beautiful, deep golden brown and, crucially, when you can clearly see the apple filling bubbling enthusiastically around the edges and through the topping. This vigorous bubbling is a key indicator that the apples are fully cooked, tender, and their natural juices have thickened into a luscious sauce. If you prefer your apples exceptionally soft and tender, or if your apples were particularly firm, you can continue baking for an additional 10-15 minutes, keeping a close eye on the topping to prevent it from over-browning. If the topping starts to get too dark prematurely, loosely tent the dish with aluminum foil.
The Golden Rule for a Thicker, Juicier Filling: Bake Longer! One of the most common pitfalls in crisp-making is under-baking, leading to a watery filling. The key to achieving a perfectly luscious and thick apple filling is allowing it to bake for a sufficient duration. Resist the urge to pull the crisp out of the oven too early! Wait patiently until you not only observe the topping achieving a rich, inviting golden brown, but also distinctly see the delicious apple filling visibly bubbling up around the sides of the baking dish. This bubbling signifies that the natural starches and sugars have fully caramelized and thickened to perfection, preventing any watery disappointment.
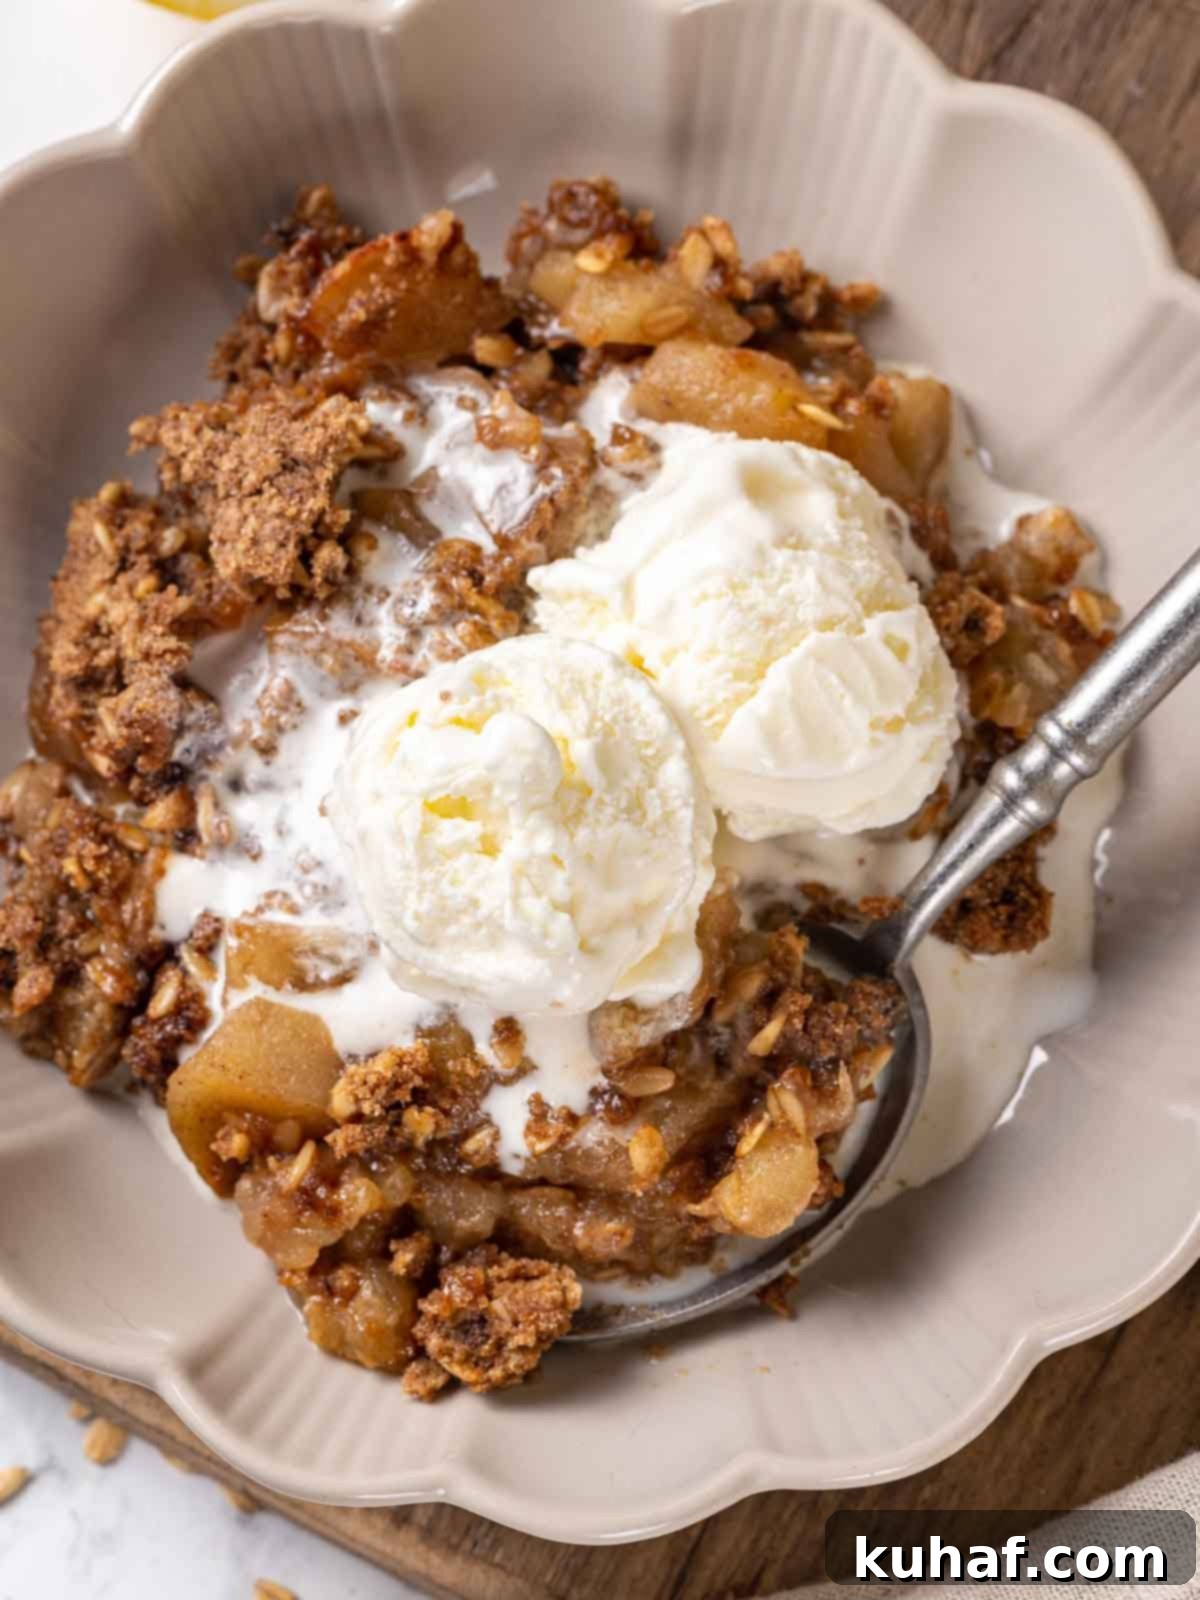
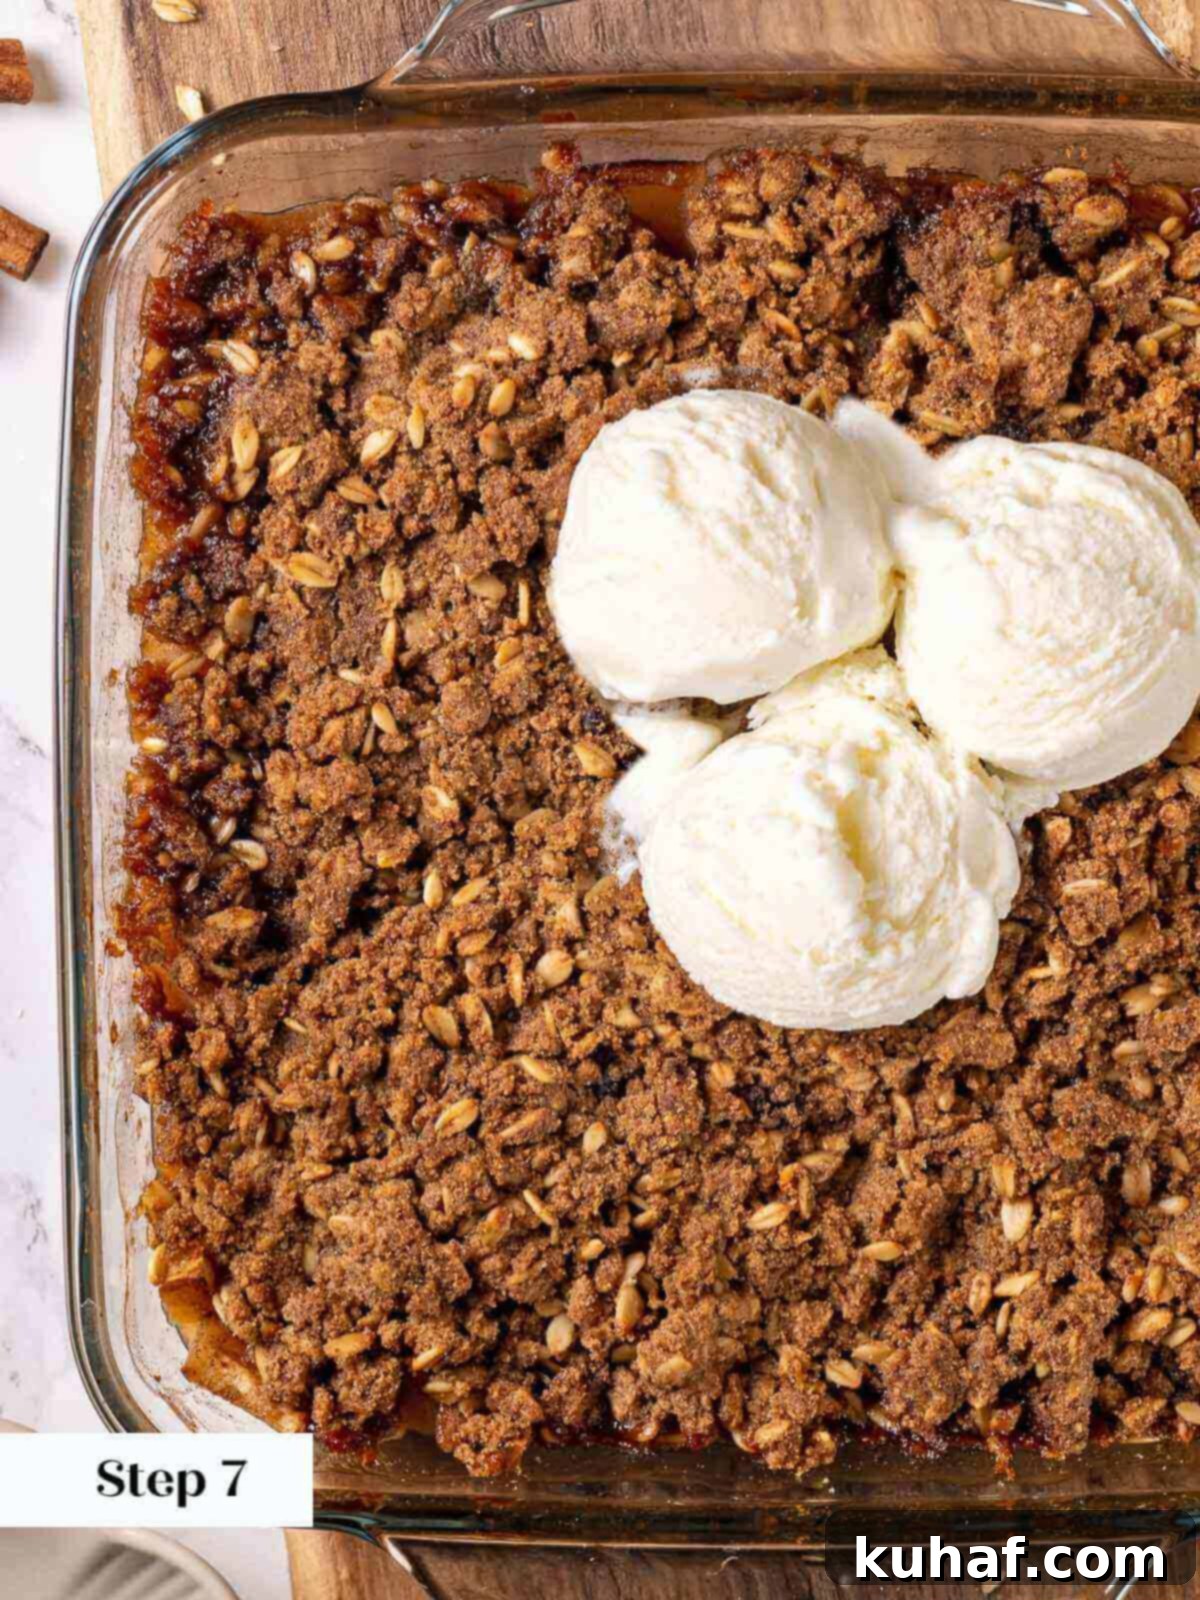
Step 7: Once baked to perfection, carefully remove the apple crisp from the oven and place it on a wire rack to cool for at least 10 minutes. This essential cooling period allows the filling to set further and gives the vibrant flavors an opportunity to meld and deepen. Apple crisp is undeniably at its best when served warm, ideally accompanied by a generous scoop of creamy vanilla bean ice cream, allowing the cold, smooth ice cream to melt delightfully into the warm, spiced fruit. Alternatively, for a more sophisticated presentation, consider whipping up an easy crème anglaise recipe (a rich vanilla custard sauce) while your crisp cools. A decadent drizzle of homemade salted caramel sauce is also an exquisite and highly recommended addition. Enjoy this comforting dessert in whatever way brings you the most joy!
Chef Lindsey’s Expert Recipe Tip: Make Every Ingredient Count
In deceptively simple recipes such as this delightful apple crisp, the quality and care you invest in each ingredient truly shine through in the final taste. Don’t underestimate the profound impact of starting with the best! Always choose the freshest, tartest apples you can find for that essential, vibrant flavor balance. Take the extra moment to zest and juice a fresh lemon – its bright, aromatic essence is incomparable and will elevate the entire dish. And for a truly amazing textural experience, remember that small but mighty detail: gently press some of that delectable brown sugar oat topping directly into the apple filling before baking. These seemingly minor, thoughtful steps are the difference between a good crisp and an unforgettable one, making every bite a testament to culinary thoughtfulness and superior ingredients.
Choosing the Best Cooking Apples for Crisp: Texture and Flavor
Ultimately, the “best” cooking apples for your crisp are those you personally prefer in terms of their cooked flavor and texture. However, from a professional chef’s perspective, I consistently advocate for using a variety of apples. This strategic blend creates a more complex and nuanced flavor profile, alongside an interesting textural interplay, as different apples break down at varying rates during baking. When making your selection, prioritize apples that are renowned for retaining a bit of their structure and firmness even after being subjected to oven heat, rather than dissolving completely into applesauce. Excellent choices that hold their shape and offer good flavor include Cripps Pink (Pink Lady), Honeycrisp, Granny Smith (indispensable for its essential tartness), Braeburn, Gala, or Fuji. For an apple crisp, I strongly recommend leaning towards tart varieties; their sharp acidity provides a crucial and delicious counterbalance to the inherent sweetness of the oat topping. Make sure to steer clear of apples that tend to become overly mushy or mealy when cooked, such as the Red Delicious, which are far better suited for applications where a smoother consistency is desired, like making luscious homemade apple butter or a quick batch of fresh applesauce.
Should You Peel Apples for Apple Crisp? A Chef’s Recommendation
The question of whether or not to peel apples for an apple crisp is a common culinary debate, and it often boils down to personal preference. However, in my professional experience as a pastry chef, I unequivocally recommend peeling the apples before slicing and incorporating them into your crisp or pie. The primary and most compelling reason for this recommendation is texture. When apples are baked with their skins intact, the peels can sometimes become tough, leathery, or separate unpleasantly from the softened apple flesh, resulting in an undesirable, chewy sensation in the mouth. In a restaurant or professional kitchen setting, we consistently find that diners overwhelmingly prefer the smoother, more uniform, and melt-in-your-mouth texture of apple crisp made with peeled apples. Peeling also allows the apples to bake more evenly, fully absorbing the delicious spices and juices throughout without the physical barrier of the skin. While it’s true that apple peels contain beneficial fiber and nutrients, the enhanced eating experience and superior texture of a crisp made with peeled apples generally outweigh this nutritional consideration when crafting a decadent dessert.
Frequently Asked Questions About Apple Crisp
Proper storage is essential to keep your apple crisp tasting fresh and delicious for days. After baking, always allow any leftover apple crisp to cool completely to room temperature. Once cooled, cover the baking dish tightly with plastic wrap or aluminum foil, or transfer individual servings into an airtight container. Refrigerate the crisp for up to one week. For longer storage, cooled apple crisp can be frozen for up to two months. To reheat, if frozen, allow it to thaw in the refrigerator first. Then, place the crisp in a 350°F (175°C) oven until it’s warmed through and the topping has re-crisped (this usually takes about 20-30 minutes for refrigerated crisp, and longer for thawed frozen crisp). I strongly advise against using the convection setting for reheating, as it can cause the topping to burn or become overly dry before the center of the crisp is adequately warm.
Historically, the distinction between apple crisp and apple crumble was quite clear-cut, although modern culinary practices and recipe labeling often tend to blur these traditional lines. Technically speaking, an apple crisp is characterized by a streusel-like topping that specifically includes rolled oats. These oats, when baked, contribute to a distinctly “crispy” and chewy texture, which gives the dessert its name. Apple crumbles, on the other hand, traditionally feature a streusel topping made solely from a mixture of flour, sugar, and butter, resulting in a more uniform, often denser, and cake-like crumb without the added chewiness or structure of oats. While many recipes today use the terms interchangeably, the inclusion of oats remains the classic differentiator, providing the crisp with its characteristic textural appeal.
A dry, unappetizing apple crisp filling can be quite disappointing, but several factors commonly contribute to this issue. The most frequent culprits include using old apples that have significantly lost their moisture content, selecting the wrong apple varieties that don’t naturally release enough juice, inadvertently over-baking the crisp for too long, or neglecting the crucial step of macerating the apples in sugar beforehand. It’s important to remember that apples naturally lose moisture over time, which is why older apples tend to shrivel and become mealy. Always choose firm, brightly colored apples that feel heavy for their size, as this indicates freshness and a good water content. Opting for a mix of apple varieties can also significantly help, as some are inherently juicier than others. Crucially, allowing the sliced apples to sit with the sugar (maceration) is key; this process actively draws out their internal water content, forming a flavorful syrup even before baking. The apples will continue to release more moisture as they bake, ultimately contributing to a wonderfully juicy filling. Finally, ensure your crisp bakes just long enough for the filling to bubble enthusiastically, but not so excessively long that all the precious moisture evaporates.
Serving apple crisp is an exercise in delightful indulgence, and there’s truly no single “wrong” way to enjoy this comforting dessert! The quintessential and most beloved pairing is a generous scoop of cold vanilla bean ice cream. The exquisite hot-and-cold contrast, as the smooth, creamy ice cream melts deliciously into the warm, spiced apples and crunchy topping, is simply heavenly. For a more elegant and refined presentation, a spoonful of rich vanilla bean anglaise (a classic custard sauce) adds a sophisticated, creamy touch. If you’re a devoted fan of the sweet and salty flavor profile, a decadent pour of homemade salted caramel sauce is an absolutely divine addition. For an extra layer of texture and nutty depth, consider topping your warm crisp with a sprinkle of your favorite roasted nuts, such as pecans or walnuts, just before serving. Enjoy it simply on its own for a pure taste of comfort, or dress it up – it’s always a treat!
If you tried this recipe and absolutely loved it, please take a moment to leave a 🌟 star rating and share your thoughts in the comments below. I genuinely adore hearing from you, and your comments truly make my day!
Easy Apple Crisp
Chef Lindsey
30 minutes
45 minutes
1 hour
15 minutes
12
people
Saved
Pin Recipe
Comment
Print Recipe
Ingredients
For the Filling:
-
5
cups
tart apples
peeled, sliced and cut into ¾ inch pieces – I used Granny Smiths & Cripps Pink -
1
teaspoon
cinnamon
-
2
tablespoons
granulated sugar
-
½
lemon
zested -
1
tablespoon
lemon juice
-
⅛
teaspoon
nutmeg
freshly ground -
¼
teaspoon
kosher salt
For the Topping:
-
1
cup
dark brown sugar
packed -
¾
cup
all-purpose flour
-
¾
cup
rolled oats
not instant -
½
cup
unsalted butter
cold, cut into cubes
0
inch
8
x
8
inch
rectangle
Instructions
Mix the apple filling:
-
In a medium bowl combine sliced apples, lemon juice, lemon zest, granulated sugar, nutmeg, cinnamon and the pinch of salt. Stir to evenly coat all the apples.
-
Let sit for at least 1 ½ hours, covered in the refrigerator; stirring occasionally. Sometimes I get impatient (imagine that!) and I don’t wait that long, but it’s still delicious. The flavors are better if you let the apples macerate, but just know that I understand if you bake it right away.
Make the brown sugar crisp topping:
-
Preheat your oven to 350℉ with the rack in the middle.
-
In a medium bowl stir together the sugar, flour and oats; add the butter cubes and toss to coat them with the flour mixture. Using your hands, work the butter into the flour mixture by grabbing a handful, squeezing and mashing it against your palm with your fingers. Repeat until your hand is exhausted and the mixture sticks together in chunks but there are only a few remaining lumps of butter. Work as quickly as possible so that the butter doesn’t actually melt.
-
Give the apples one last stir and pour into an 8 inch square baking dish. Cover with the crisp topping using as much or as little as you wish. There is a lot! Press some down into the apples. {Trust me.}
-
Bake in preheated for 45-50 minutes or until the top is brown and the filling is bubbling out the sides. If you want your apples very soft, continue to bake an additional 10-15 minutes.
-
Let cool 10 minutes on a wire rack. Serve warm with ice cream.
-
You can also prepare this dish ahead. Allow it to cool completely, wrap well with plastic wrap and refrigerate for up to one week or freeze for several months. Allow to thaw and then reheat in a 350° F oven.
Notes
Flavor Tips
–
You must use tart apples or the crisp will be cloyingly sweet. Taste your fruit for sweetness and don’t skip the lemon juice!
Variations
–
If you want a more “normal” ratio of filling to topping, then just halve the topping recipe as written. You will still have more than enough to cover an 8-inch square dish.
Storage
– Bake ahead, cool to room temperature, wrap and then freeze for two months. Alternatively, refrigerate leftovers for up to seven days.
The streusel topping can be made in advance and refrigerated for 7 days or frozen for up to two months.
Nutrition
Calories:
222
kcal
|
Carbohydrates:
37
g
|
Protein:
2
g
|
Fat:
8
g
|
Saturated Fat:
5
g
|
Polyunsaturated Fat:
1
g
|
Monounsaturated Fat:
2
g
|
Trans Fat:
1
g
|
Cholesterol:
20
mg
|
Sodium:
116
mg
|
Potassium:
117
mg
|
Fiber:
2
g
|
Sugar:
25
g
|
Vitamin A:
266
IU
|
Vitamin C:
5
mg
|
Calcium:
26
mg
|
Iron:
1
mg
Dessert
American
222
Like this? Leave a comment below!
Before You Go: Explore More Delicious Recipes
We sincerely hope you thoroughly enjoyed preparing and tasting this professional chef-tested recipe for the ultimate easy apple crisp. It’s a truly timeless dessert that consistently brings warmth, joy, and a comforting sense of home to any occasion, whether it’s a festive holiday meal or a simple weeknight treat. But your culinary adventure doesn’t have to end here! We invite you to explore our other delicious, chef-developed crisps and crumble recipes, perfect for expanding your repertoire of comforting baked goods and finding new seasonal favorites. As the seasons change, don’t miss our curated collection of favorite fall dessert recipes, which offer a cornucopia of seasonal delights and cozy flavors. And for the ultimate apple enthusiast, delve into our comprehensive list of the 21 best apple dessert recipes – you’re absolutely sure to discover your next cherished sweet treat there! Happy baking and bon appétit!
