Mastering Royal Icing with Meringue Powder: Your Go-To Recipe for Perfect Cookies, Cakes & More
Welcome to the ultimate guide for creating professional-quality Royal Icing with Meringue Powder. This recipe stands out by incorporating fresh lemon juice, resulting in a delightfully less sweet and more flavorful icing that will elevate all your baked creations. Crafted with just four essential ingredients, this easy-to-follow method is perfect for decorating everything from intricate cookies and elegant cakes to festive gingerbread houses, rich brownies, and delicious dessert bars.

This isn’t just any royal icing recipe; it’s the exact formulation I rely on daily in my professional bakery. It’s renowned for its consistent performance, rapid setting time, and a beautiful, shiny finish that still maintains a delightful softness. The inclusion of meringue powder is key, rendering this icing shelf-stable and completely safe for everyone, including pregnant women and young children, a significant advantage over traditional royal icing made with raw egg whites. For added convenience, if meringue powder isn’t readily available, you can easily substitute it with dried egg whites, achieving equally superb results.
I’ve personally used this versatile recipe to create perfectly iced treats, from soft cut-out sugar cookies to festive Valentine’s Day cookies. For a unique flavor twist, try swapping the lemon juice for orange juice. This simple alteration transforms it into a fantastic, less sweet alternative to typical easy sugar cookie icing, especially delicious when paired with chocolate sugar cookies.
Table of Contents
- Why This is the Best Royal Icing Recipe
- Professional Tips for Making Royal Icing
- Essential Ingredients for Royal Icing
- Royal Icing Variations & Substitutions
- Royal Icing vs. Plain Icing: What’s the Difference?
- Step-by-Step: How to Make Royal Icing with Meringue Powder
- Chef Lindsey’s Expert Recipe Tip
- Advanced Tips for Icing Cookies with Royal Icing
- How to Store Royal Icing for Freshness
- Frequently Asked Questions About Royal Icing
- Royal Icing Recipe Card
- Before You Go: More Sweet Inspirations
Why This is the Best Royal Icing Recipe You’ll Ever Make
What sets this royal icing recipe apart from the rest? Here’s a detailed look at why it’s consistently my top choice for all decorating needs:
- Safe and Shelf-Stable with Meringue Powder: Unlike traditional royal icing recipes that call for raw egg whites, this version utilizes meringue powder. This crucial ingredient makes the icing entirely shelf-stable and perfectly safe for everyone to consume, including those with dietary concerns or who are pregnant. You can decorate with peace of mind, knowing your treats are not only beautiful but also worry-free.
- Incredibly Versatile for Any Dessert: This royal icing isn’t limited to just sugar cookies. Its robust nature and beautiful finish make it ideal for a wide array of baked goods. Use it to create intricate designs on gingerbread cookies, add elegant details to cakes, or even transform simple lemon blondies into gourmet delights. Its adaptability truly makes it a go-to for any decorator.
- Quick Setting Yet Wonderfully Soft: One of the most frustrating aspects of decorating can be waiting for icing to dry. This recipe alleviates that frustration by setting quickly, allowing you to add multiple layers of decorative piping without long delays. The best part? Even when fully set, the icing remains soft, not brittle. This not only makes your cookies more enjoyable to eat but also helps to lock in moisture, keeping them fresher for longer.
- Balanced Flavor Profile – Not Too Sweet: Many royal icing recipes can be overwhelmingly sweet due to the high sugar content. My secret weapon? Lemon juice instead of water! The natural acidity of the lemon juice beautifully cuts through the sweetness of the powdered sugar, adding a bright, fresh, and complex layer of flavor. This makes the icing, and by extension, your treats, much more palatable and enjoyable, especially for delicate items like cut-out sugar cookies.
- Conveniently Scaled for a Standard Powdered Sugar Box: As a professional pastry chef, efficiency is paramount. This recipe is thoughtfully scaled to precisely one standard 1 lb box of confectioner’s sugar. This means no more tedious measuring of sugar – simply pour and mix! This small detail can be a significant time-saver, particularly when you’re preparing larger batches for your business or a big event.

Professional Tips for Making Perfect Royal Icing
Achieving bakery-quality royal icing requires a few insider tricks. Here are my top professional tips to ensure your icing is consistently flawless:
- Batch Mixing and Coloring Strategy: When working with larger quantities, it’s crucial to add food coloring *before* thinning the icing with milk. This approach ensures more consistent color distribution and prevents over-thinning when trying to achieve vibrant hues. My method, even with an 80-quart commercial mixer, is always to mix the base icing, divide it into separate bowls, add the desired colors, and *then* adjust each colored batch to its ideal consistency. For smaller, half-recipes, hand mixing with a bowl and whisk works beautifully, just remember the coloring-first rule.
- Allow for Sufficient Setting Time Between Layers: Patience is a virtue, especially in cookie decorating. This icing sets quickly, allowing you to layer designs. If you’re adding delicate decorative dots (like on Santa’s coat) or piping two distinct colors right next to each other, allow the first layer to set for at least 30 minutes. This critical waiting period prevents the second color from bleeding or sinking into the first, resulting in those coveted professional, crisp, and clean lines that truly make your decorations pop.
- Overnight Drying for Stacking and Transport: While this icing boasts a rapid initial set, it isn’t fully cured for a full 24 hours. To prevent smudges, dents, or sticky surfaces, always allow your decorated cookies to dry completely overnight before attempting to stack or package them. After about 4 hours, I gently wrap them with plastic wrap, ensuring it doesn’t touch the iced surface, and then let them sit undisturbed overnight. This guarantees they are robust enough for stacking the next day.
- Choose Gel Food Coloring for Vibrant Hues: For truly vibrant and intense colors, opt for gel food coloring over the liquid varieties commonly found in supermarkets. Liquid food coloring is best suited for pastel shades. To achieve bright reds, deep greens, or sunny yellows with liquid dyes, you would need to add so much liquid that it significantly alters the icing’s consistency, making it too runny for detailed outlining and even for proper flooding. Gel colors, being highly concentrated, allow you to achieve brilliant shades without compromising the icing’s texture.
Essential Ingredients for Your Perfect Royal Icing
Creating beautiful royal icing starts with understanding the role of each ingredient. Here’s a closer look at what you’ll need and why:
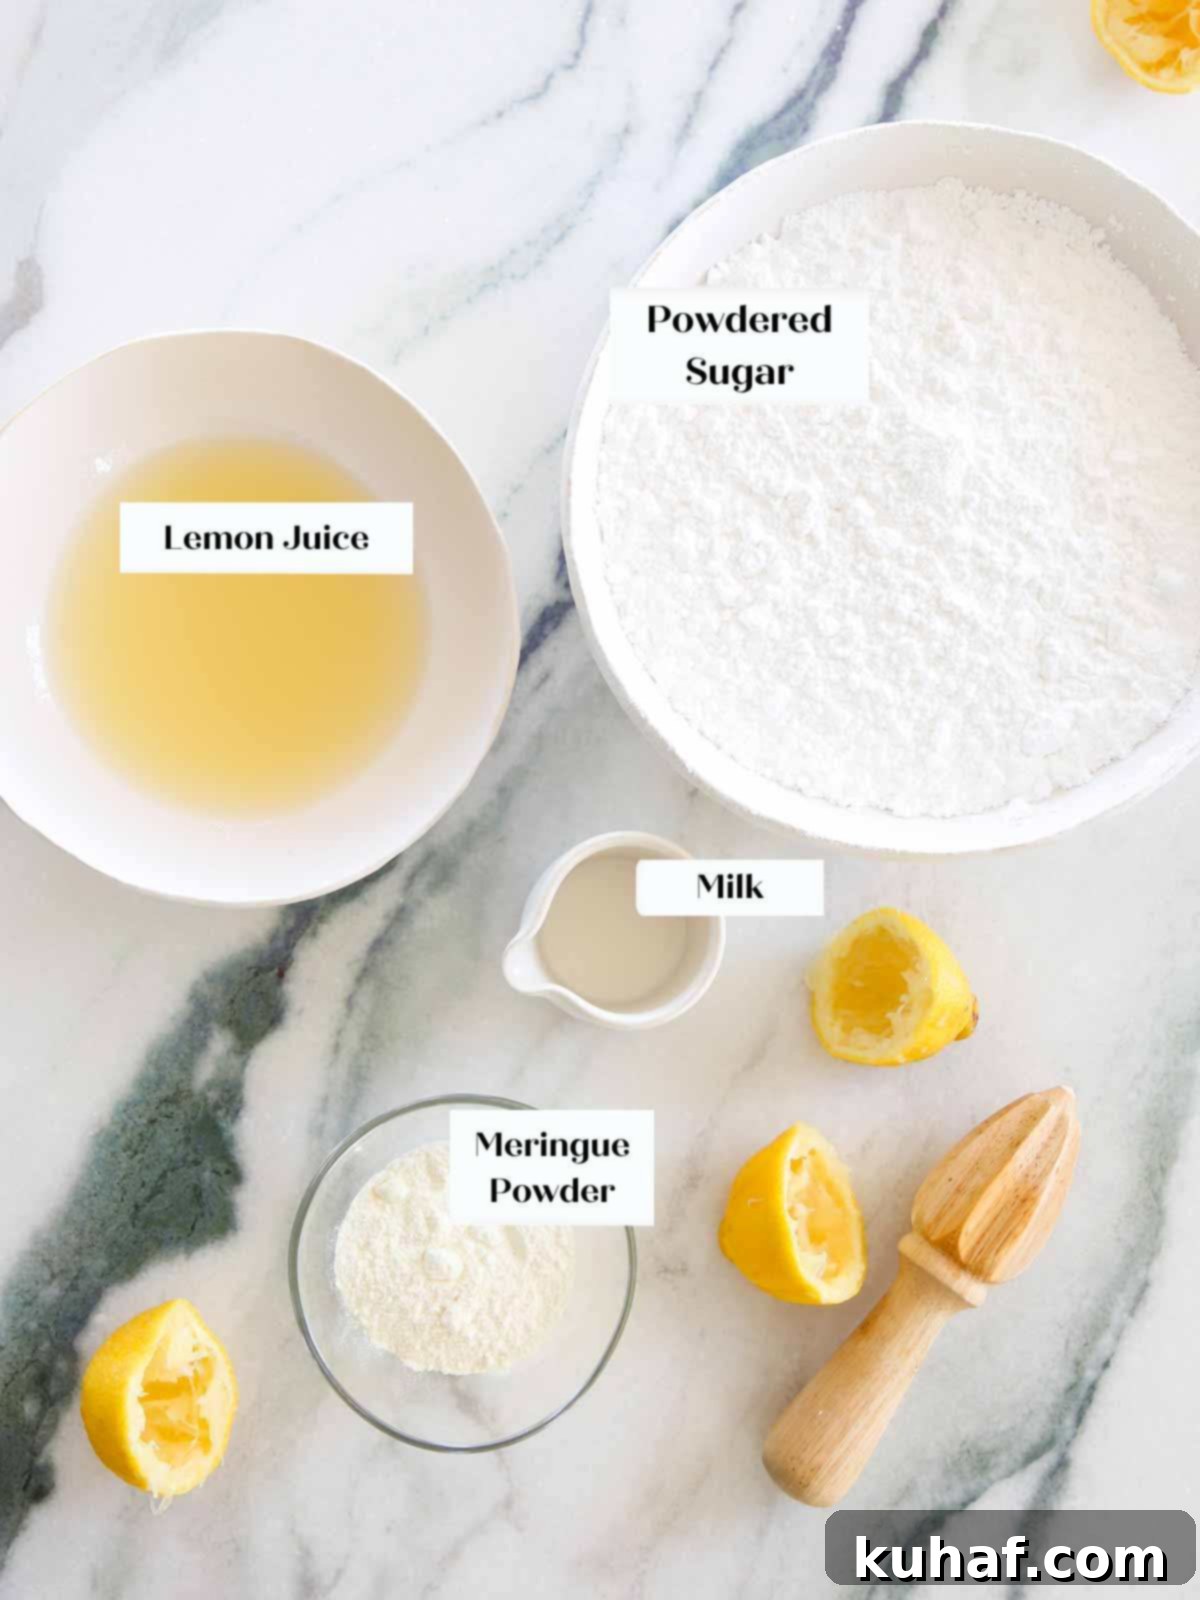
- Meringue Powder: This is the star ingredient for a safe and stable royal icing. I specifically use meringue powder in the recipe detailed below, but it performs equally well with dried egg white powder. Meringue powder is pasteurized, eliminating concerns about raw eggs, and contributes to the icing’s quick-setting, shiny, and hard-but-soft finish. You can even find vanilla-flavored meringue powder, which offers a lovely vanilla essence without altering the pure white color of your icing.
- Lemon Juice: This ingredient is crucial for balancing the sweetness and adding a bright, fresh flavor. I highly recommend using freshly squeezed lemon juice for the best results; its vibrant acidity truly enhances the icing. If fresh lemons aren’t an option, high-quality frozen lemon juice can be an acceptable substitute, but avoid bottled concentrates if possible for superior taste.
- Powdered Sugar: Also known as confectioner’s sugar, this finely milled sugar is essential for achieving the smooth, lump-free consistency characteristic of royal icing. Its 10x finer texture compared to granulated sugar ensures a velvety mouthfeel. This recipe is conveniently designed for a 1-pound box of powdered sugar, saving you the hassle of measuring. However, if you purchase a larger bag, simply measure out 4 cups. Sifting your powdered sugar is always a good practice to prevent any potential lumps.
- Milk: Used to thin the icing to your desired consistency, milk plays an important role. While any alternative milk can work, I prefer whole cow’s milk. Its creamy texture and neutral color help maintain the purity of the icing’s flavor and color, especially when you’re aiming for a pristine white base or vibrant, true-to-shade colored icings. Add it sparingly, drop by drop, to achieve the perfect flow.
- Gel Food Coloring: For truly striking and vibrant colors, gel food coloring is my professional choice. It is far more concentrated than the liquid food colorings typically found in grocery stores. I personally use AmeriColor, but ChefMaster also offers an excellent, more affordable range of quality products with fantastic vibrant colors. While liquid food coloring can be used for pastel shades, using enough to achieve bright colors will make your icing too runny for effective outlining and even flooding, compromising the structural integrity of your designs. If you must use liquid coloring, you may need to omit some or all of the milk, as the coloring itself will add sufficient liquid.
To illustrate the difference, observe the contrast in the images below. On the left are cookies I decorated using this royal icing recipe but with liquid food coloring. Notice how the yellow is almost too loose to hold its shape, and the colors aren’t as vibrant. The green on the left represents the darkest shade I could achieve without making the icing unworkably thin. Compare this to the cookies on the right, decorated with the same icing recipe but using gel food coloring, which boasts much richer and more stable hues.


Refer to the full recipe card below for precise measurements and comprehensive ingredient information.
Royal Icing Variations & Substitutions to Explore
While the classic lemon royal icing is a favorite, don’t hesitate to experiment! Here are some creative ways to vary this recipe to suit your taste and pantry:
- Explore Different Citrus Juices: The lemon juice is fantastic for its bright, tangy notes, but you’re not limited to it. For a delightful change, substitute orange juice to impart a sweet, zesty aroma, or even lime juice for a sharper, more exotic flavor. If you prefer a completely neutral flavor profile that won’t interfere with other dessert components, simply use water in place of the lemon juice.
- Infuse with Flavoring Extracts: To add another dimension of taste, incorporate your favorite flavoring extracts. When using water instead of lemon juice, this creates a blank canvas for flavor. Clear vanilla extract is a classic choice, providing a familiar, comforting aroma without adding any unwanted tint to your white icing. A tiny hint of almond extract can also create a sophisticated, classic royal icing flavor. Experiment with other extracts like peppermint, coconut, or even a touch of rum extract for seasonal or themed treats.
- Meringue Powder Alternatives: If meringue powder isn’t on hand, you have a few options. Dried egg white powder can be used in the exact same quantity as meringue powder for the same excellent results, as they function very similarly. For those who prefer to work with fresh ingredients, you can substitute the meringue powder and lemon juice entirely with the whites from 3 large eggs (approximately 90 grams of pasteurized boxed egg whites can also be used). When using fresh egg whites, ensure they are at room temperature for optimal whipping. Keep in mind that fresh egg whites create a slightly shinier, though less shelf-stable, icing unless special precautions are taken.
Royal Icing vs. Plain Icing: What’s the Difference and Why Choose Royal?
While both royal icing and plain icing (like a simple glaze or buttercream) can decorate treats, they serve very different purposes and offer distinct results. Royal icing is fundamentally superior for detailed decorating and achieving a professional finish, primarily due to its unique properties. The meringue powder ensures a beautifully opaque and pure white icing from the start, often without needing extra white gel coloring, which is typically required for easy cookie icings to achieve that crisp, clean white. Furthermore, this specific royal icing recipe is thoughtfully crafted to be less sweet than most plain icings, and the addition of lemon juice provides a wonderful, nuanced flavor that plain icings often lack. Its ability to set hard yet remain soft, combined with its structural integrity, makes it the unrivaled choice for intricate cookie art, durable cake decorations, and creations that require stacking or travel well.
Step-by-Step: How to Make Royal Icing with Meringue Powder
Follow these detailed instructions to create flawless royal icing with meringue powder. For precise measurements and quantities, please refer to the comprehensive recipe card below.
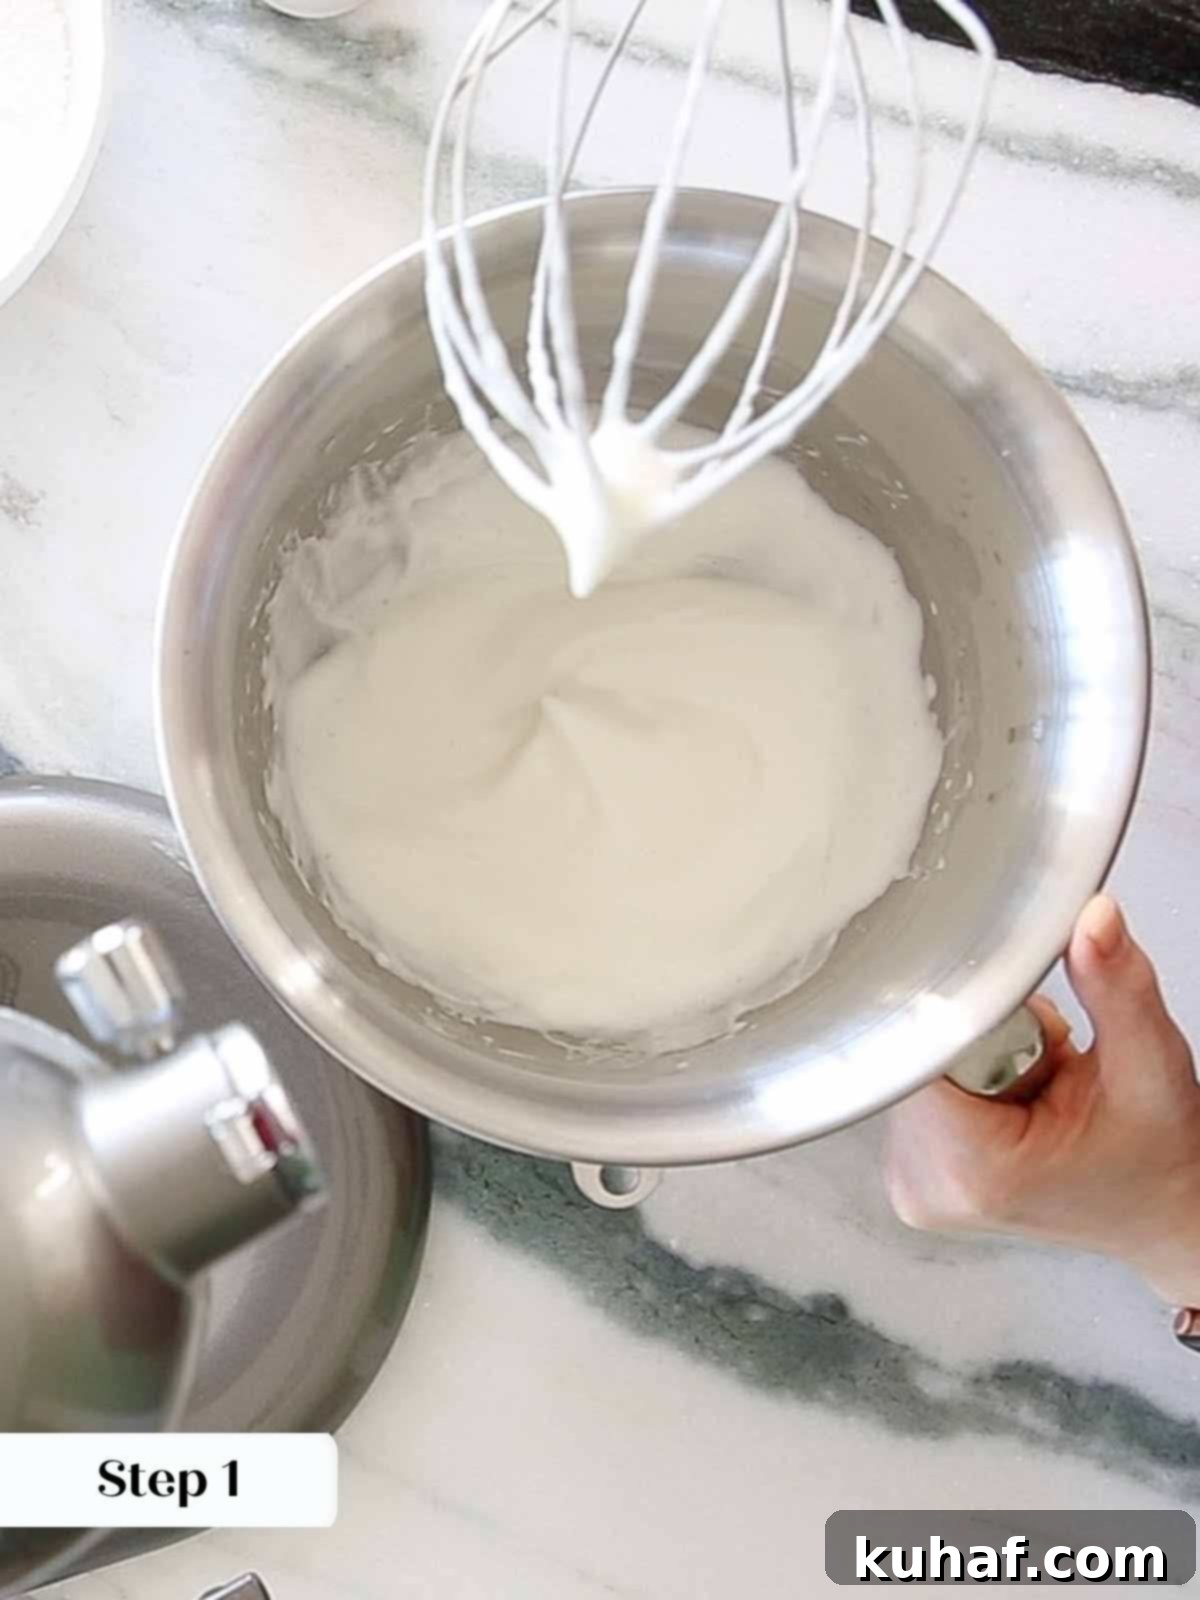
Step 1: Whisk Meringue Powder and Lemon Juice to Soft Peaks. In a large mixing bowl or the bowl of your stand mixer fitted with the whisk attachment, combine the meringue powder and fresh lemon juice. Begin whisking on medium-high speed until the mixture forms soft peaks. This stage is crucial for incorporating air and creating the stable base for your icing.
Understanding Soft Peaks: Soft peaks are achieved when, upon lifting your whisk, the mixture forms a peak that gently folds over or slumps to one side, much like the tip of Santa’s hat. Don’t worry if you accidentally whisk a little longer and reach stiff peaks; this forgiving recipe will still yield excellent results, though soft peaks are ideal for minimizing air bubbles.
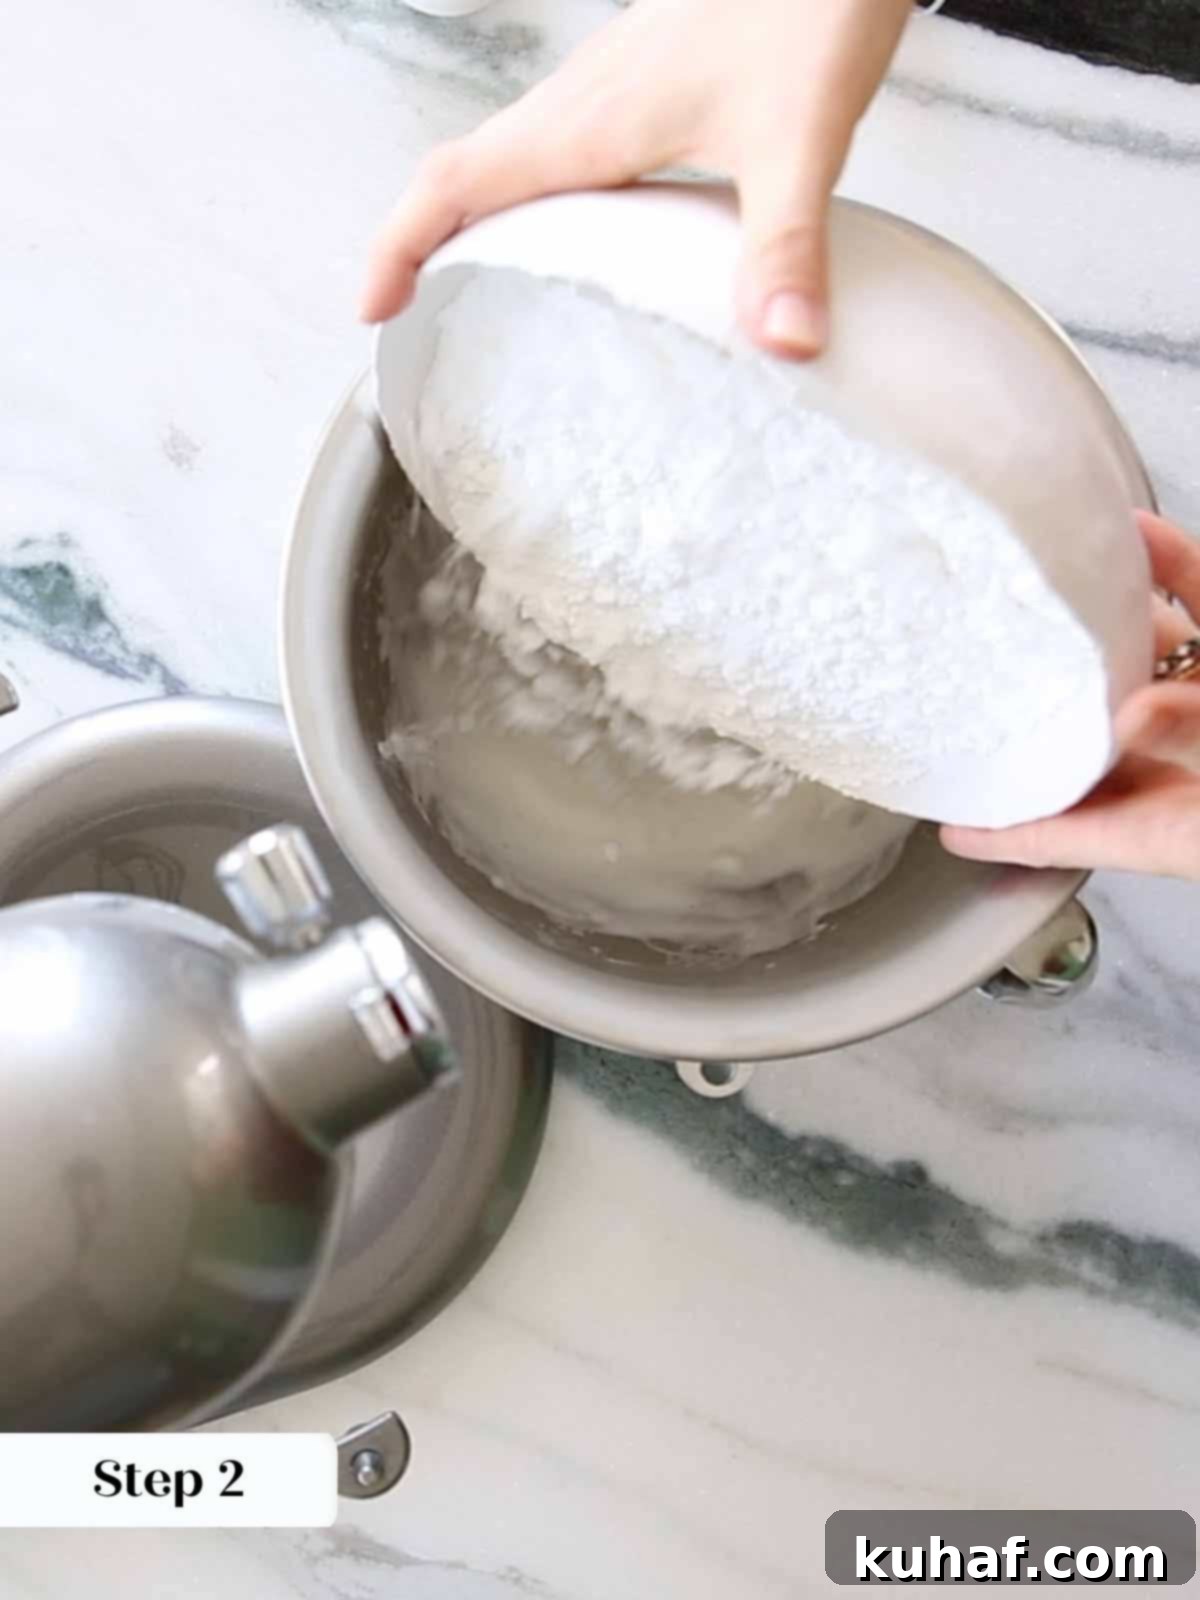
Step 2: Incorporate Powdered Sugar. Add all of the powdered sugar to the meringue mixture. Whisk on low speed just until everything is combined and a thick, somewhat stiff paste forms. At this point, I recommend switching from the whisk to a spatula for subsequent steps like adding food coloring and thinning the icing with milk. This helps to avoid incorporating excessive air bubbles into the icing, which can lead to a bumpy finish or weakened structure.
Step 3: Divide and Color Icing. If you plan to use multiple colors for your decorations, separate the stiff base icing into different bowls *before* adding any gel food dye or milk. This allows you to create individual color batches. It’s a good practice to reserve a small amount of the original, un-dyed, thicker icing. This can be used later to thicken any colored batches that become too thin or to soften a color that turned out too intense.
Chef’s Secret: Always Reserve Undyed Icing: Having a small amount of thicker, undyed icing on hand is invaluable. It’s far better to thicken royal icing using this reserved thicker icing than by adding pure powdered sugar, which can alter the balance of the recipe and introduce lumps. This trick saves time and ensures consistent quality.
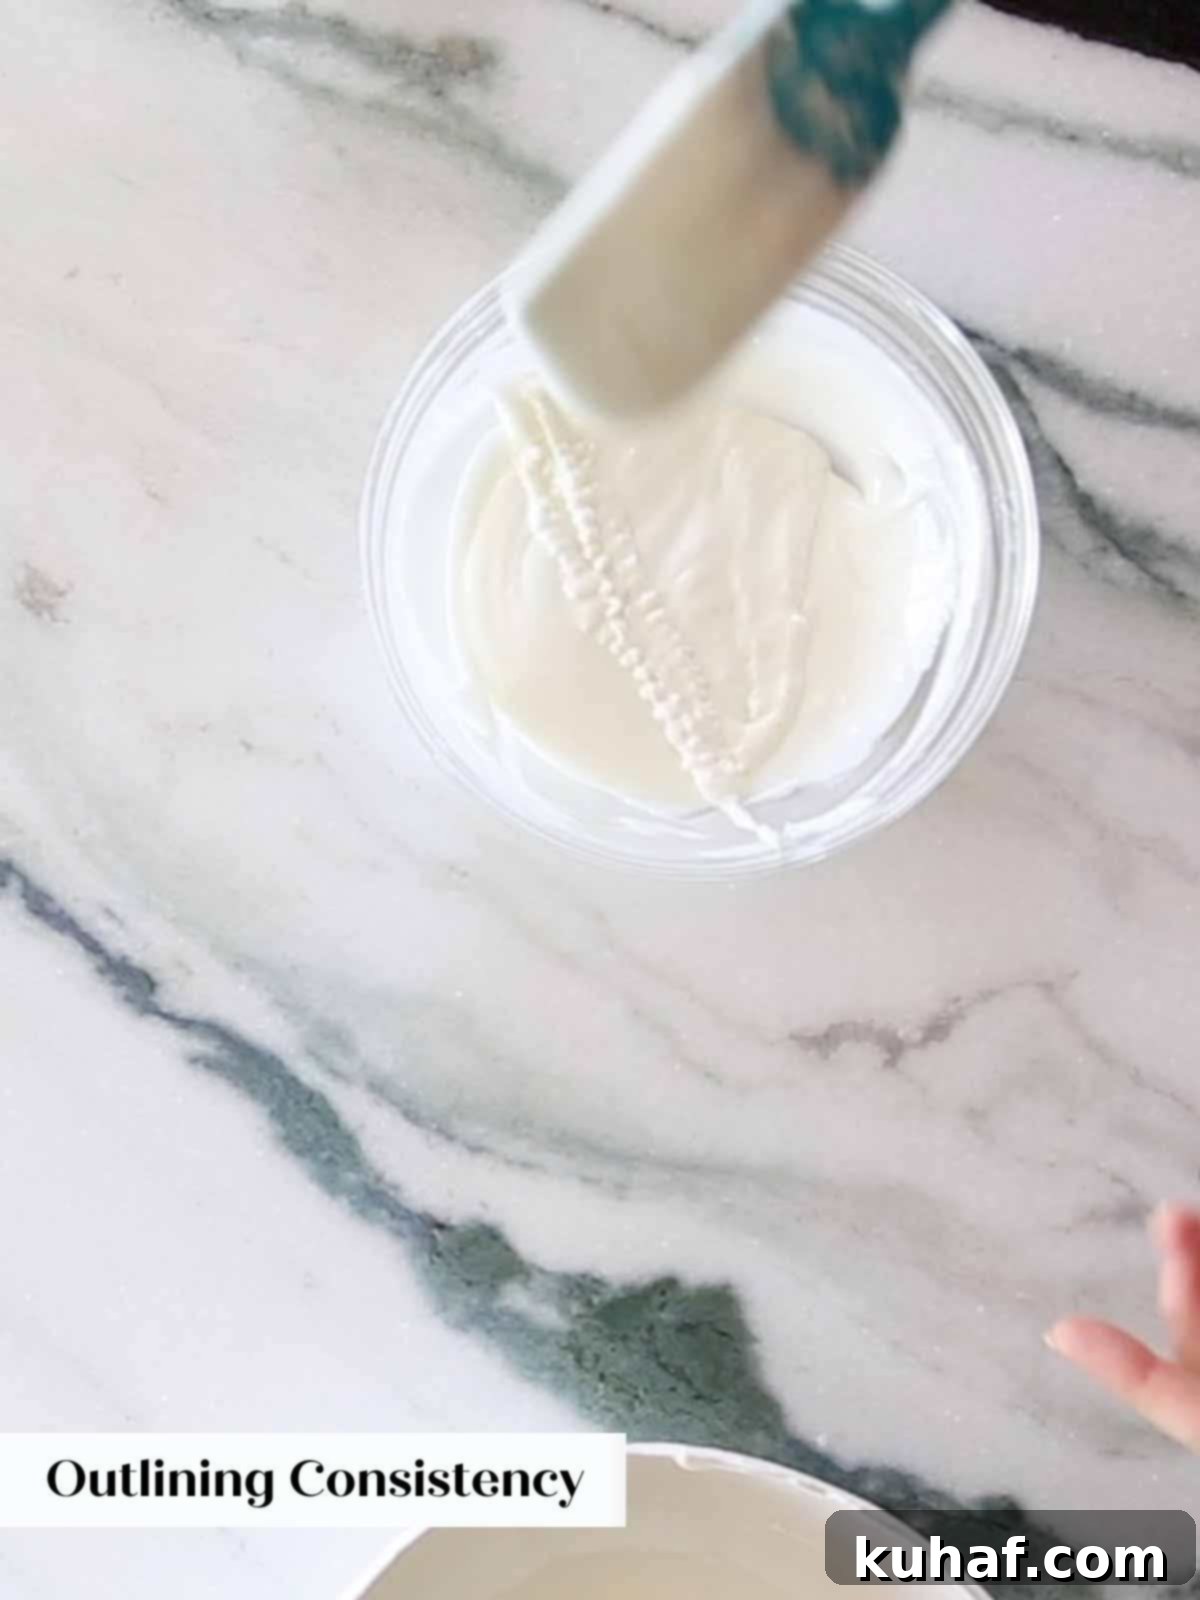
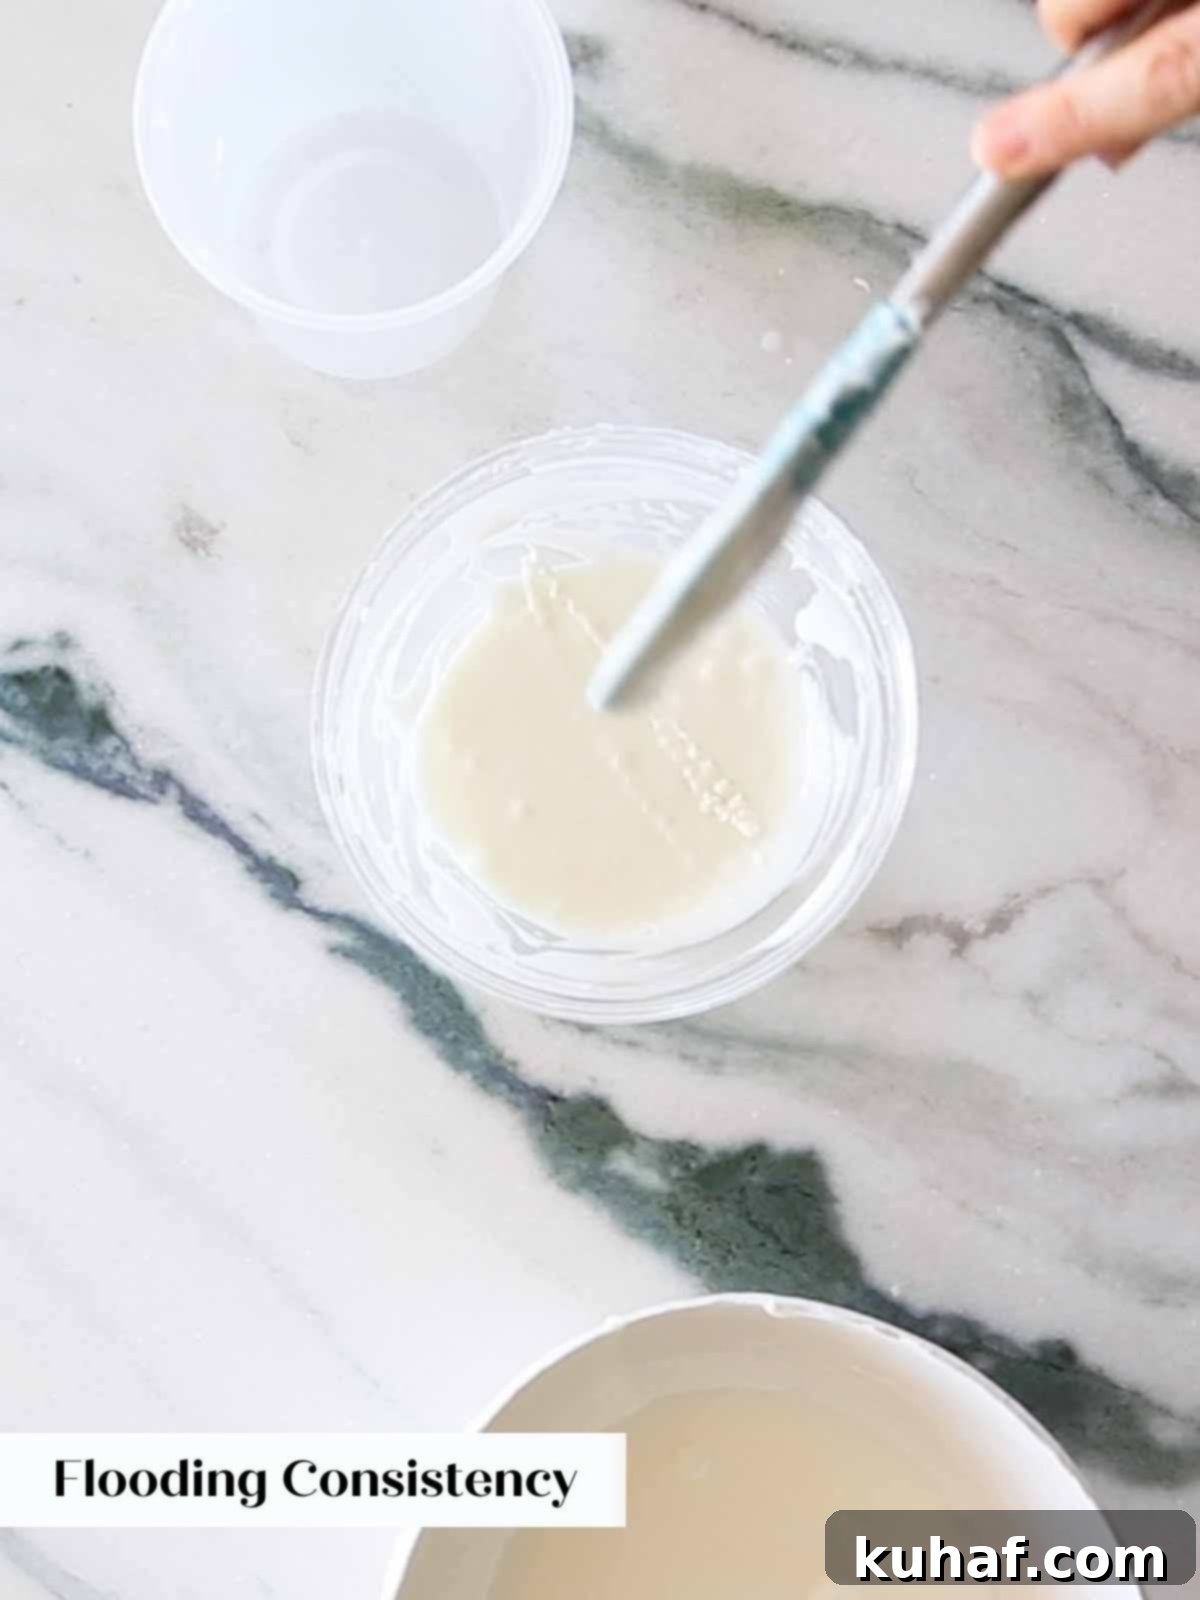
Step 4: Achieve Desired Consistency (Outlining & Flooding). Once your desired color is mixed in, it’s time to adjust the consistency with small drops of milk. Test the consistency by drawing your spatula through the icing and then pulling it out. Observe how the icing falls off the spatula and re-incorporates into the bowl. For professional results, you’ll want to work with two distinct consistencies for each color: one for outlining and one for flooding.
Why Two Consistencies are Key: Using a dedicated outlining consistency provides the structural integrity needed for crisp edges and intricate details, preventing your design from spreading. Conversely, a flooding consistency allows for smooth, even coverage of larger areas. Using an outlining consistency for flooding would create an excessively thick, heavy layer, while attempting to outline with flooding consistency would result in lines that simply spill off the cookie. Mastering these two consistencies is essential for truly polished results!
- Outlining Consistency: When you lift your spatula, the icing should flow off slowly and steadily, with the trail remaining clearly visible on the surface of the icing for approximately 5-6 seconds before smoothly disappearing back into the main batch. This “5-6 second rule” is a reliable indicator.
- Flooding Consistency: For flooding, the icing should cascade off your spatula much more readily, almost instantly disappearing back into the rest of the icing. This ensures a smooth, even spread that fills your outlined areas beautifully.
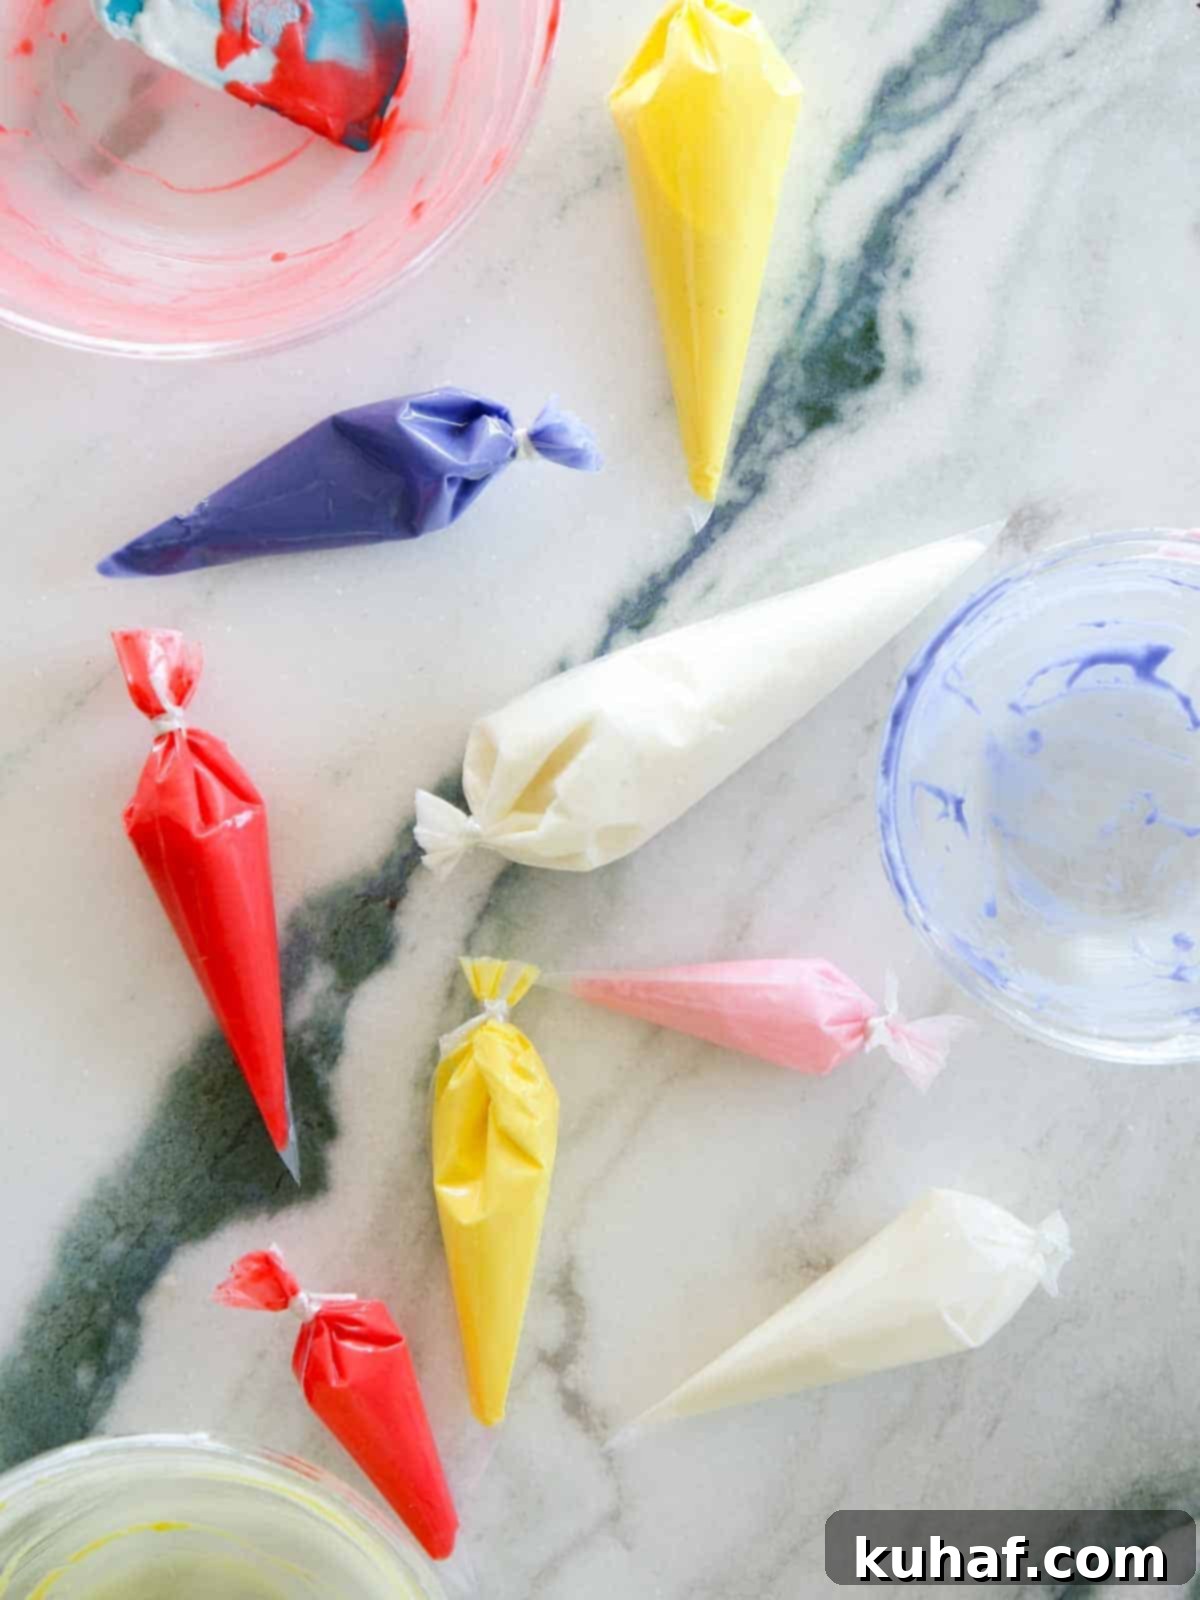
Step 5: Prepare Piping Bags for Decorating. Once you’ve achieved the ideal outlining consistency for a color, transfer a portion of it into a separate piping bag. Leave the majority of that colored icing in the bowl, and continue to thin it further with small drops of milk until it reaches the perfect flooding consistency. Transfer this flooding consistency to its own dedicated piping bag. This ensures you have both consistencies ready for seamless decorating.
The Golden Rule for Thinning Icing: If royal icing becomes too thin, it simply will not set properly, leading to frustrating mishaps. Always add milk by the *drop*, not by the teaspoon. While this might seem slower, it’s a crucial step that prevents wasting an entire batch of icing. Taking a little extra time here will save you significant effort and disappointment later.
Step 6: Store and Use Colored Icing. You can prepare your colored and consistency-adjusted icing up to this stage and store it in sealed piping bags for up to a week. If you notice any separation within the bags (which is normal), simply massage or shake the bag vigorously until the icing comes back together to a uniform consistency. This makes advanced preparation a breeze.
Important Note on Color Intensity: Icing colors tend to intensify when stored in bags overnight. This is vital to remember for two reasons: First, if you’re preparing icing in advance, be mindful that the color you see when initially mixing may be darker the next day. Second, and equally important, don’t expect the color to change or intensify *after* it has been piped onto a cookie and has begun to dry. What you pipe is what you get once it sets.
Chef Lindsey’s Expert Recipe Tip
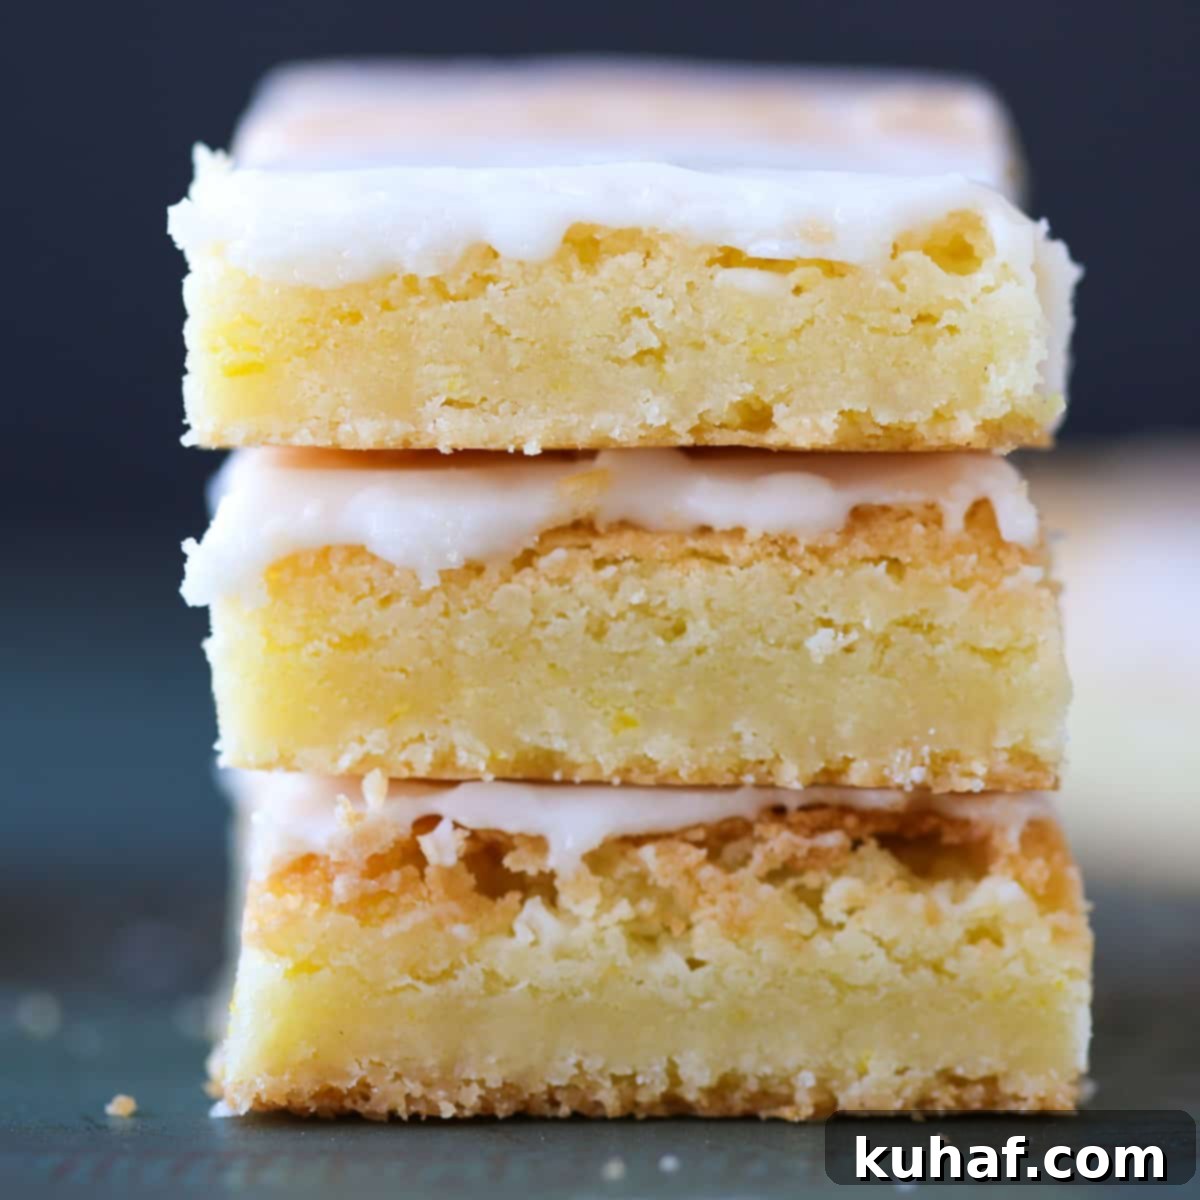
When decorating brownies or blondies instead of intricately designed sugar cookies, I highly recommend using just the “flooding” consistency of royal icing described above. For a beautiful, smooth finish, you have two options: either allow the icing to set completely before cutting for perfectly clean, crisp lines, or let it set for about an hour, then slice. The latter method will create a wonderfully fun and artful “poured” effect on the edge of each brownie or blondie piece, adding an extra touch of gourmet charm to your desserts!
Advanced Tips for Icing Cookies with Royal Icing for Professional Results
Beyond the basics, these professional techniques will help you achieve outstanding results and streamline your cookie decorating process:
- Forget the Piping Tips: Simplicity is Key. My absolute top tip, after decorating thousands of cookies, is to skip the traditional metal piping tips. Instead, simply cut a small hole directly into the end of a plastic piping bag. This method is incredibly efficient; it’s faster, requires no washing of delicate tips or fiddling with couplers, and allows you to work with numerous colors simultaneously without interruption. Trust me on this – it’s a game-changer for speed and consistency.
- Resist the Urge to Fan Dry: While it might seem tempting to use a fan to speed up the drying process, I strongly advise against it. Fan drying does not significantly accelerate the complete curing of royal icing (which takes about 24 hours). What it *will* do, however, is dry out your delicious cookies, making them less enjoyable. Worse, it can lead to a “crunchy” or brittle icing texture, ruining the soft-set finish we aim for. Natural air drying at room temperature is always the best approach for optimal results.
- The 3-Cookie Rule for Outlining and Flooding: Timing is everything when working with royal icing. To ensure a seamless blend between your outline and flood icing, outline no more than three cookies at a time before proceeding to flood them. If you wait too long after outlining, the border will set firm, preventing the flood icing from merging smoothly, resulting in an obvious, unappealing line. While you *can* do one cookie at a time, this “3-cookie rule” is the most efficient method for achieving professional, perfectly integrated designs without rushing. This comes from extensive experience decorating countless sugar cookies and putting more royal icing bows on gingerbread bears than I care to remember!
How to Store Royal Icing for Optimal Freshness and Consistency
Proper storage is vital to maintain the quality of your royal icing, both before and after it’s been piped onto your treats.
- Storing Unused or Leftover Royal Icing (Before Piping): To prevent your royal icing from hardening prematurely, it must be protected from air. Store any unused or leftover icing in airtight piping bags, ensuring they are tightly sealed. If storing in bowls, place plastic wrap or a damp paper towel directly onto the surface of the icing, pressing out any air bubbles, before covering the bowl tightly. Stored correctly at room temperature, it will maintain its best consistency for up to a week. While it might last longer, the integrity and workability of the icing can diminish over extended periods.
- Storing Cookies Decorated with Royal Icing (After Piping): After decorating your cookies, allow them to air dry completely, uncovered, at room temperature for a minimum of 4 hours. This initial period is crucial for the icing to set its outer crust. Once the surface is firm to the touch, you can loosely wrap them in plastic wrap, being careful not to touch the iced surfaces. For stacking, however, you must allow them to dry overnight (24 hours) to ensure the icing is fully cured and hard enough to withstand pressure without smudging or sticking. I know, waiting is tough, but your patience will be rewarded with perfectly preserved, beautiful cookies!
- Refrigerating or Freezing Decorated Cookies: A Word of Caution. Based on my extensive experience in a commercial kitchen decorating tens of thousands of cookies, I strongly advise against refrigerating or freezing cookies decorated with royal icing. While some sources might suggest otherwise, bringing these decorated treats back to room temperature often results in “blooming” – a dull, splotchy, or crackled appearance on the icing, with inconsistent coloring. This significantly compromises the visual appeal of your meticulously decorated items. For best results and pristine designs, avoid temperature fluctuations.
- Storing Brownies or Bars Decorated with Royal Icing: The same principles regarding royal icing blooming apply to other treats like brownies or dessert bars. However, the stakes are generally lower with these items compared to intricately decorated cookies, and you likely haven’t spent hours on intricate details. For this reason, I personally don’t mind storing royal-iced brownies or bars in the freezer for longer storage, as any potential blooming might be less noticeable or less of a concern. Just be prepared for a slightly different finish upon thawing.
Frequently Asked Questions About Royal Icing
Royal icing made with meringue powder sets relatively quickly, but there are different stages of drying. You should allow at least 30 minutes for a base layer to set before adding intricate details or additional layers of icing on top. This crucial waiting period prevents new details (like dots or lights on a Christmas tree) from sinking into the lower layers, ensuring crisp, professional lines. For wrapping individual cookies, allow them to air dry for 4 hours. For stacking or packaging, the icing needs to fully cure, which typically takes 24 hours at room temperature. Rushing this can lead to smudges or damage.
Both fresh egg whites and meringue powder can produce beautiful royal icing, but meringue powder offers several advantages, especially for home bakers and commercial operations. Royal icing made with fresh egg whites does tend to have a slightly shinier, almost glass-like finish when dry. However, meringue powder still yields a lovely, soft sheen. The primary benefit of meringue powder is its safety; it’s pasteurized, making the icing safe for everyone to consume, including pregnant women, children, and individuals with compromised immune systems, unlike raw egg whites. Meringue powder also contributes to a more consistent and shelf-stable icing, making it easier to prepare in advance and store.
Yes, royal icing made with meringue powder is highly shelf-stable, particularly if it’s thinned with water instead of milk (though milk adds a nice creaminess and flavor). This is due to the pasteurized nature of meringue powder and the high sugar content, which acts as a preservative. For optimal consistency and ease of use, it’s best to use the icing within 10 days when stored properly in an airtight container at room temperature. If you notice any separation during storage, simply shake or stir it vigorously until it returns to a uniform consistency; this is a normal occurrence and doesn’t affect its quality.
If you tried this recipe and loved it, please leave a 🌟 star rating and let me know how it goes in the comments below. I love hearing from you; your comments make my day!

Royal Icing
Chef Lindsey
10 minutes
10 minutes
40
Cookies
Saved
Pin Recipe
Comment
Print Recipe
Ingredients
-
4
cups
powdered sugar
1, 1 pound box -
6 ½
tablespoons
lemon juice
juice from approximately 3 medium lemons -
¼
cup
meringue powder -
1
tablespoon
whole milk
as needed
Instructions
-
In a large bowl or in the bowl of a stand mixer fitted with the whisk attachment, combine the meringue powder and lemon juice. Whisk until soft peaks form.
-
Add all the powdered sugar and whisk to combine.
-
If making more than one color, separate the icing into different bowls before adding gel food dye.
-
Once you have created the desired color, test the consistency by dragging your spatula through the icing and then pulling it out. Watch how the icing falls off the spatula and back into the bowl. It is best to work with two consistencies for the same color: a flooding consistency and an outlining consistency. This will ensure you have perfect edges and details but the icing is the right thickness and also is easy to pipe and spread
-
Outlining Consistency: The icing should cascade slowly off your spatula and remaining clearly visible on the surface for a few moments (about 5-6 seconds) before slowly disappearing.
-
Flooding Consistency: The icing should cascade off your spatula and almost disappear instantly into the rest of the icing.
-
I thin to the perfect outlining consistency, transfer some to a piping bag but I leave the majority in the bowl to be thinned further into flooding consistency. Transfer the flooding consistency to a separate piping bag.
-
You can get to this stage in the recipe and then store the colored icing in bags up to a week. If they separate, simply shake the icing in the bag to get it to come together.
Notes
Presentation – Let it set at least 30 minutes before adding layers of detail on top of a royal icing base.
Variations – Substitute orange juice or water for the lemon juice. Add flavorings like clear vanilla extract or almond extract. You can also use egg white powder in place of the meringue powder or substitute 3 egg whites from large eggs (90g) for both the powder and lemon juice.
Storage – Allow cookies to dry 4 hours before wrapping and 24 hours before stacking.
Nutrition
Calories:
47
kcal
|
Carbohydrates:
12
g
|
Protein:
0.02
g
|
Fat:
0.02
g
|
Saturated Fat:
0.01
g
|
Polyunsaturated Fat:
0.001
g
|
Monounsaturated Fat:
0.003
g
|
Cholesterol:
0.04
mg
|
Sodium:
0.4
mg
|
Potassium:
3
mg
|
Fiber:
0.01
g
|
Sugar:
12
g
|
Vitamin A:
1
IU
|
Vitamin C:
1
mg
|
Calcium:
1
mg
|
Iron:
0.01
mg
Dessert
American
47
Like this? Leave a comment below!
Before You Go: Explore More Sweet Inspirations!
I sincerely hope you enjoyed mastering this professional royal icing recipe. It’s a staple in my kitchen, and I’m confident it will become one in yours too! Don’t let your culinary journey end here. I encourage you to delve into our other delicious icing and buttercream recipes, perfect for expanding your decorating repertoire. Or, if you’re looking for the perfect canvas for your newly acquired royal icing skills, explore our extensive collection of cookie recipes and delightful brownies & bars recipes. Happy baking and decorating!
