The Best Homemade Thumbprint Cookies: Easy, Jam-Filled Perfection for Every Occasion
Discover the ultimate recipe for thumbprint cookies – a delightful classic featuring tender, buttery vanilla cookies, perfectly rolled in sugar and baked with a luscious jam filling. This incredibly simple recipe requires only 5 core ingredients, comes together in under 30 minutes, and yields cookies that stay wonderfully fresh for up to 10 days at room temperature. Whether you’re a seasoned baker or just starting, these easy homemade thumbprint cookies are sure to become a beloved staple in your kitchen!

These tempting, bite-sized treats are celebrated for their soft, tender texture and a delightful hint of crumbliness. The secret to their incredible longevity lies in the jam, which helps keep them moist and soft for over a week. This makes them the absolute perfect make-ahead cookie for any special occasion. Imagine them gracing your Christmas cookie trays, adding a sweet touch to Valentine’s Day celebrations, charming guests on Mother’s Day, or being a top seller at a bake sale.
For an extra festive flair, consider rolling these classic jam cookies in colorful sprinkles – ideal for a birthday party or to enhance your holiday cookie spread alongside other favorites like soft chewy gingerbread cookies, delicate pfeffernusse, and melt-in-your-mouth Mexican wedding cookies. The versatility of these vanilla thumbprint cookies is truly endless! While traditional jam is a crowd-pleaser, don’t hesitate to get creative with the filling. You could completely forgo the jam and instead fill the indentations with bright, tangy lemon curd, rich and gooey salted caramel sauce, or a simple, decadent chocolate ganache for a truly unique twist on these homemade thumbprint cookies.
Table of Contents
- Why This is the Best Thumbprint Cookie Recipe
- Professional Tips for Making Perfect Thumbprint Cookies
- Essential Ingredients for Thumbprint Cookies
- Delicious Variations for Your Jam Cookies
- How to Make Classic Jam Thumbprint Cookies
- Chef Lindsey’s Expert Baking Tip
- Frequently Asked Questions About Thumbprint Cookies
- Thumbprint Cookies Recipe
- Before You Go: More Delicious Cookie Recipes
Why This is the Best Thumbprint Cookie Recipe
- Flavor Perfected by a Professional Pastry Chef: This thumbprint cookie recipe isn’t just good; it’s designed for perfect balance. The cookie dough itself contains just the right amount of sugar, creating a lightly sweetened base. This careful calibration ensures that when you roll them in extra sugar before baking and add a sweet jam filling, the overall cookie remains perfectly balanced, never overly sweet. It’s the kind of harmonious flavor profile only an expert can achieve, making these the best jam cookies you’ll ever bake.
- Unique Mixing Method for the Most Tender Cookies: What truly sets this recipe apart is its distinctive mixing technique. Instead of creaming butter and sugar, we “cut” the softened butter into all the dry ingredients until a soft, cohesive dough forms. This method is incredibly beneficial because it eliminates the need for liquid ingredients and minimizes gluten development. The result? Exceptionally tender, melt-in-your-mouth thumbprint cookies that are beautifully crumbly and light, offering a delicate texture that conventional methods often miss.
- Quick & Easy Recipe for Any Baker: We understand that your time is valuable. This easy thumbprint cookie recipe is designed for maximum efficiency without compromising on quality or flavor. There are no complicated steps, no lengthy chilling periods for the dough, and it comes together effortlessly. From mixing to baking, you can have a batch of these delightful jam-filled treats ready in under 30 minutes, making them perfect for spontaneous baking or busy schedules.

Professional Tips for Making Perfect Thumbprint Cookies
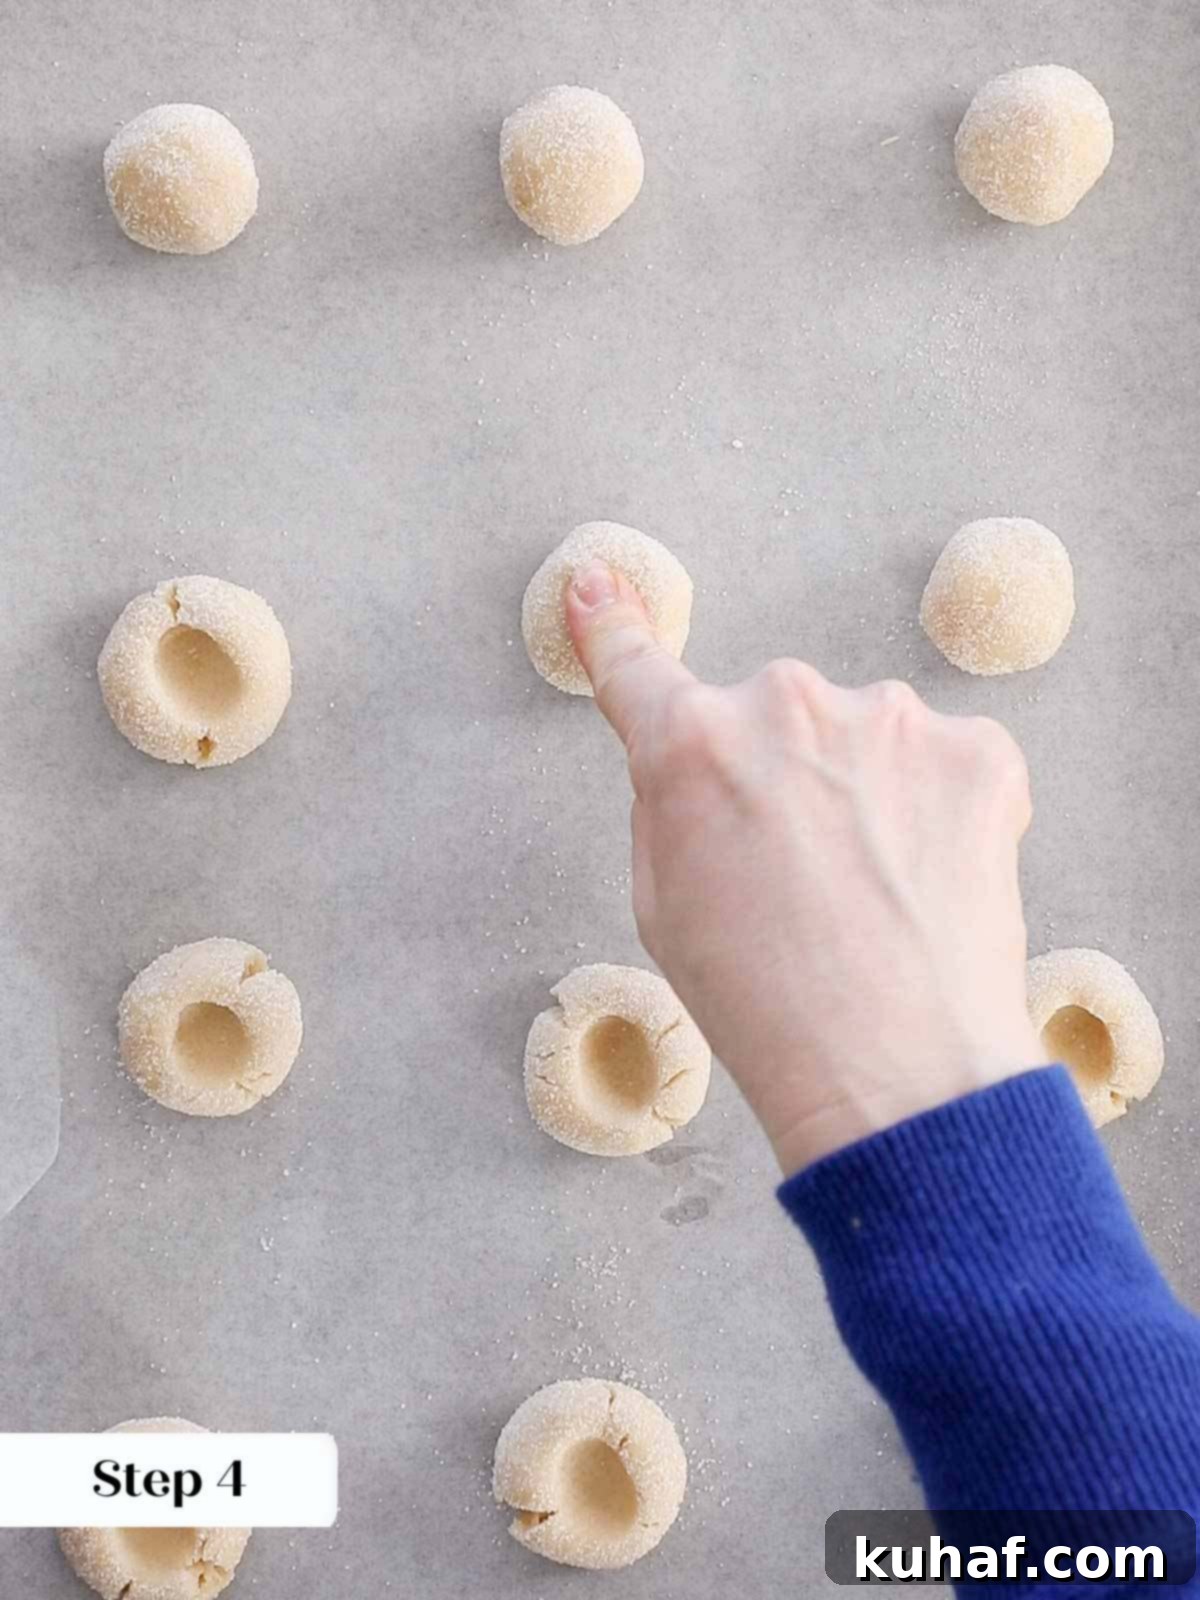
- Press Gently to Avoid Cracking! The key to beautifully formed thumbprint cookies without unsightly cracks is a gentle touch. While they’re called “thumbprints,” I often find my forefinger works better for creating the indentation, as thumbs can sometimes be too large and cause the dough to split. Regardless of which finger you choose, apply firm, even pressure and gradually deepen the indentation. If a small crack does appear, simply use your finger to gently press the dough back together. This ensures your jam stays perfectly contained during baking.
- Fill with Jam Before Baking: This might seem counterintuitive to some, but filling your thumbprint cookies with jam *before* they go into the oven is a game-changer. Baking the jam thickens it slightly, intensifying its flavor and further activating the pectin, which helps it set beautifully within the cookie. More importantly, the jam’s moisture content actually helps to keep the cookie below incredibly soft and tender. This technique locks in moisture, preventing your homemade jam cookies from drying out and ensuring a delightful texture that lasts.
- Choose a Thick Jam for Best Results: Not all jams are created equal when it comes to thumbprint cookies. For this recipe, it’s crucial to select a nice, thick jam. Thin jams, jellies, or runny preserves are prone to bubbling over and seeping out of the cookies during baking, resulting in a sticky mess rather than a perfectly contained, luscious center. Look for jams with a good amount of pectin. If your chosen jam seems a bit too thick to spoon, a vigorous stir can often loosen it just enough. If you’re feeling ambitious, a homemade mixed berry jam with added pectin would be an excellent choice for these delicious vanilla thumbprint cookies.
Essential Ingredients for Thumbprint Cookies
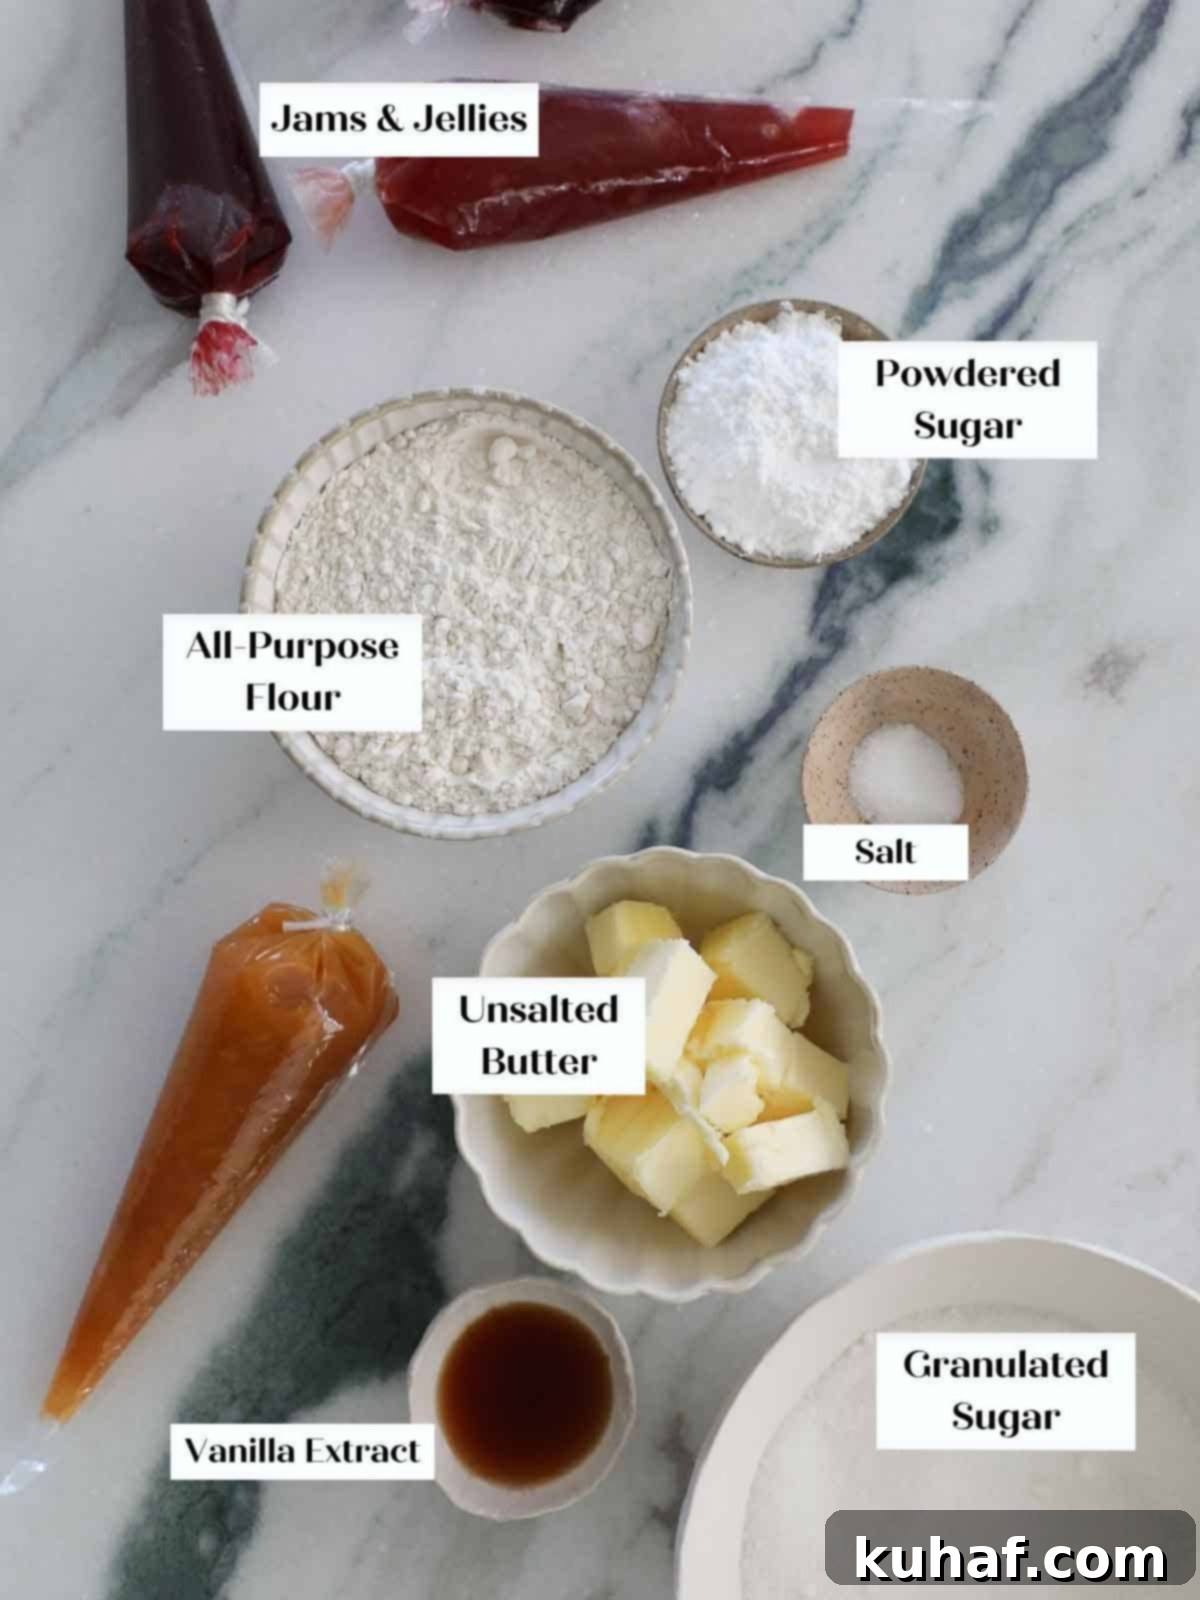
Crafting the best thumbprint cookies starts with understanding the role of each high-quality ingredient. Here’s what you’ll need for these irresistible jam-filled delights:
- Unsalted Butter: The foundation of these tender cookies. Using unsalted butter allows you to control the overall saltiness of the recipe. For this dough, it’s crucial that the butter is softened – ideally at room temperature or very pliable. Unlike some chewy cookies, like thick chocolate chip cookies where slightly cooler butter might be preferred, soft butter here ensures the dough comes together smoothly and results in that signature crumbly texture.
- Powdered Sugar: Also known as confectioners’ sugar, powdered sugar is finely ground, ensuring it blends seamlessly into the dough without leaving a grainy texture. It also contributes to the cookie’s delicate tenderness and is sweeter by weight than granulated sugar, allowing for a perfectly balanced sweetness when combined with the jam.
- All-purpose Flour: The primary structural component of our vanilla thumbprint cookies. All-purpose flour provides the necessary framework for the cookies, giving them their shape and a light chew while allowing for the tender, crumbly texture we’re aiming for with our unique mixing method.
- Kosher Salt: Often overlooked, Kosher salt is absolutely essential in these cookies. It acts as a flavor enhancer, bringing out the subtle sweetness of the vanilla and the richness of the butter. More importantly, it helps to balance the sweetness of the jam and the sugar coating, adding depth and preventing the cookies from tasting one-dimensional.
- Vanilla Extract: A classic flavor enhancer that truly shines in these simple cookies. Vanilla extract adds a warm, aromatic note that complements any jam filling beautifully. In this recipe, it also contributes a touch of moisture, helping the dough achieve its ideal consistency. It works much like in recipes such as a rich devil’s food cake, elevating the overall flavor profile.
- Granulated Sugar: This is used exclusively for rolling the cookie dough before baking. The coarse texture of granulated sugar creates a beautiful sparkly crust and adds a delightful crunch with every bite, along with a touch of extra sweetness to the exterior. It’s a trick I use in many of my beloved cookie recipes, including chewy sugar cookies and comforting chewy molasses cookies.
- Jam: The star of these jam cookies! I’ve had wonderful results with a variety of flavors, but strawberry, apricot, and raspberry jam are personal favorites for their vibrant taste and texture. The most crucial aspect here is to select a nice, thick jam. If your chosen jam is too firm to spoon easily, a good vigorous stir will usually loosen it up just enough to work perfectly as a filling. Avoid low-sugar or no-sugar varieties, as they tend to liquefy during baking.
See the recipe card below for precise measurements and quantities.
Delicious Variations for Your Jam Cookies
While classic vanilla thumbprint cookies with jam are utterly delicious, their simple base makes them incredibly adaptable to a myriad of exciting variations. Don’t hesitate to experiment and make these easy homemade thumbprint cookies your own!
- Roll in Chopped Nuts or Sprinkles: For a delightful textural contrast and an extra layer of flavor, skip the granulated sugar coating and roll your cookie dough balls in finely chopped walnuts or pecans before baking. The nuts toast slightly in the oven, adding a wonderful aroma and crunch. Alternatively, for a truly eye-catching dessert, especially during holidays or birthdays, roll them in colorful holiday sprinkles. This is a fantastic way to add vibrant visual appeal to your dessert tray.
- Flavor the Dough with Different Extracts: The vanilla extract provides a beautiful base, but you can easily transform the flavor profile of your thumbprint cookies by swapping it out for a different extract. Consider peppermint extract for a festive winter treat, lemon or orange extract for a bright, citrusy twist, or almond extract for a delicate, nutty aroma. Each extract will impart a distinct character, allowing you to customize your jam cookies to your preference. If you’re a chocolate lover through and through, you might want to try these dedicated chocolate thumbprint cookies instead!
- Roll in Flavored Sugar: Why stop at just the dough? You can infuse the exterior of your thumbprint cookies with flavor too! Before mixing your dough, zest 1/3 of an orange or 1 whole lemon directly into your granulated sugar (the sugar you’ll use for rolling). Use your fingers to rub the zest into the sugar, releasing its essential oils. The longer the zest sits with the sugar, the more flavor it imparts – you can even do this the night before! This flavored sugar adds an extra layer of aroma and taste, making your vanilla thumbprint cookies truly unique.
How to Make Classic Jam Thumbprint Cookies
Follow these detailed instructions to create the best, most tender thumbprint cookies every single time. The full recipe with precise measurements can be found in the recipe card at the bottom of this article.
Make & Bake the Cookies:
Step 1: Prepare Your Oven and Baking Sheet. Begin by preheating your oven to 325°F (160°C) using the conventional (non-fan) setting. It’s important to avoid the convection setting for these cookies, as it can cause them to bake too quickly and dry out. Line a baking sheet with parchment paper. This prevents sticking and makes cleanup a breeze, ensuring your easy thumbprint cookies lift off the tray perfectly.
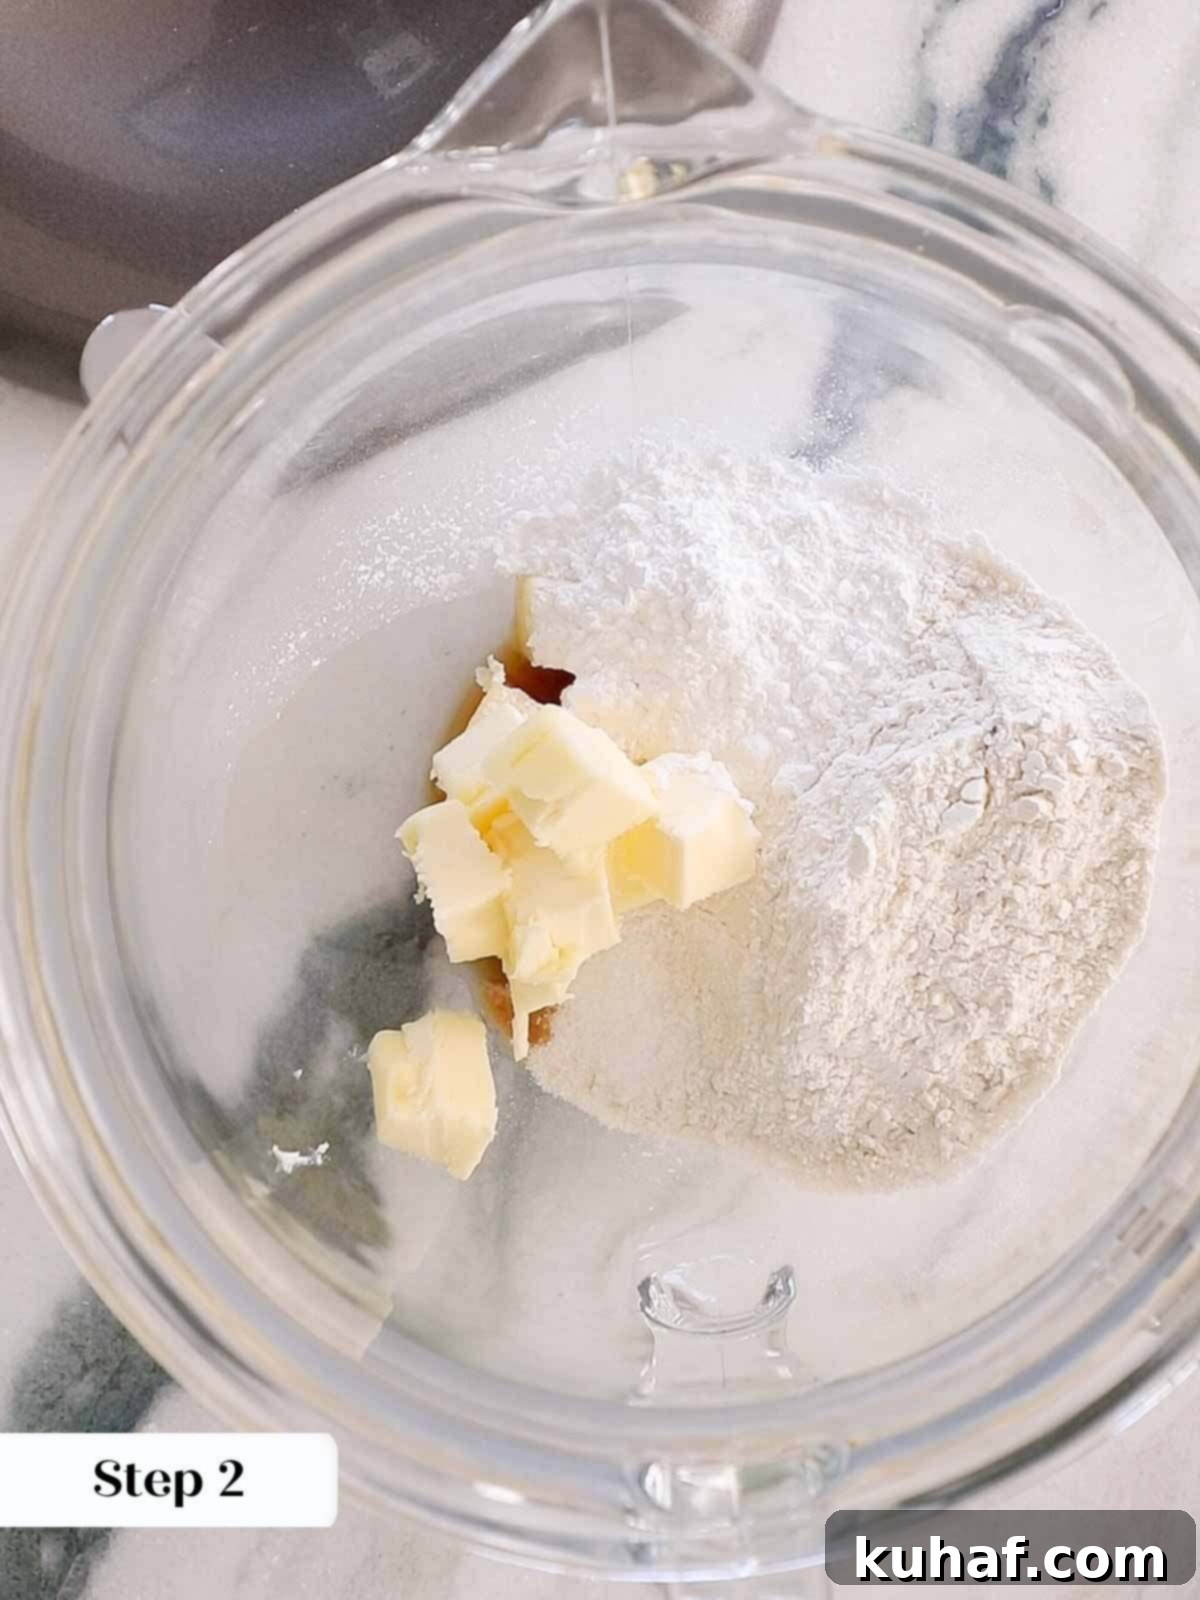
Step 2: Combine Dough Ingredients in a Stand Mixer. In the bowl of a stand mixer fitted with the paddle attachment, add all your dough ingredients: softened unsalted butter, powdered sugar, all-purpose flour, kosher salt, and vanilla extract. This is where our unique mixing method comes into play. Mix on medium-low speed. At first, it might look crumbly and like it won’t come together, but be patient! Continue mixing until a smooth, cohesive dough forms. This process might take a few minutes, but the tender results are well worth the wait.
Don’t be discouraged if the dough seems stubborn at first. It will feel like it’s taking an eternity to come together, making you wonder if you’ve done something wrong. Rest assured, with a little patience and continuous mixing, it *will* transform into a soft, smooth cookie dough. Trust the process!
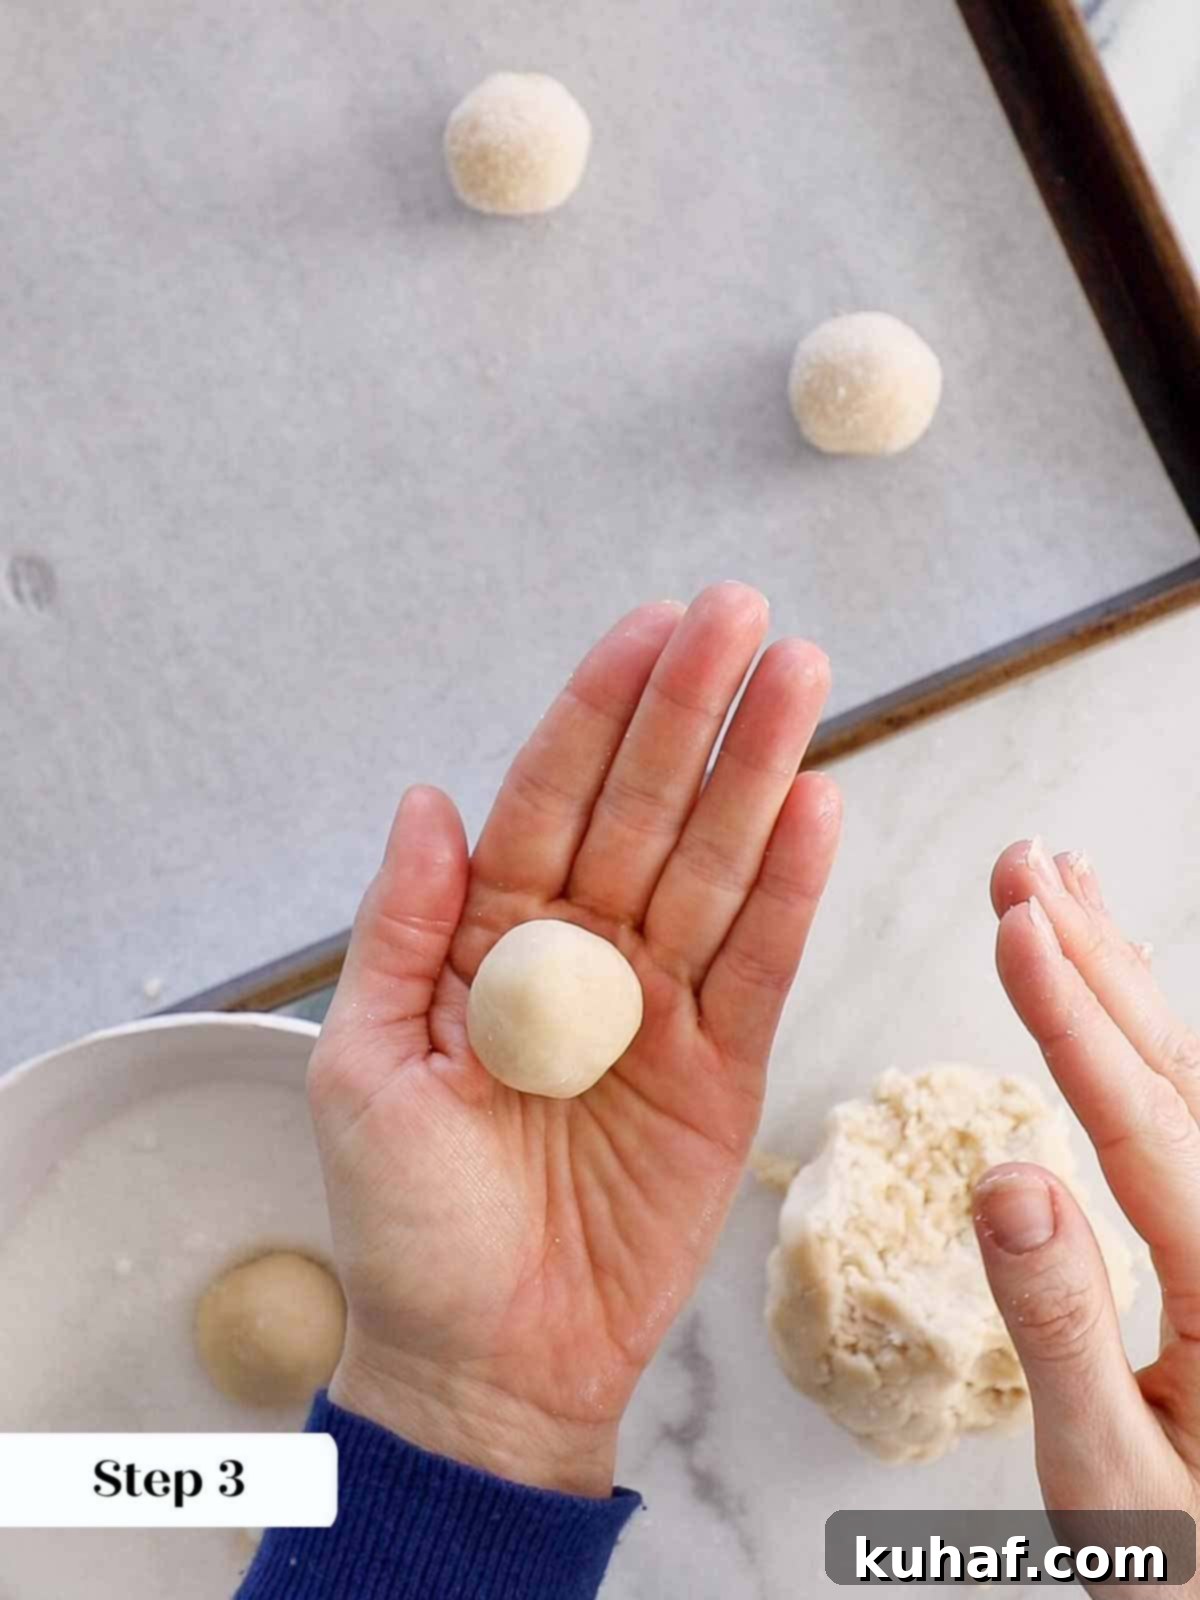
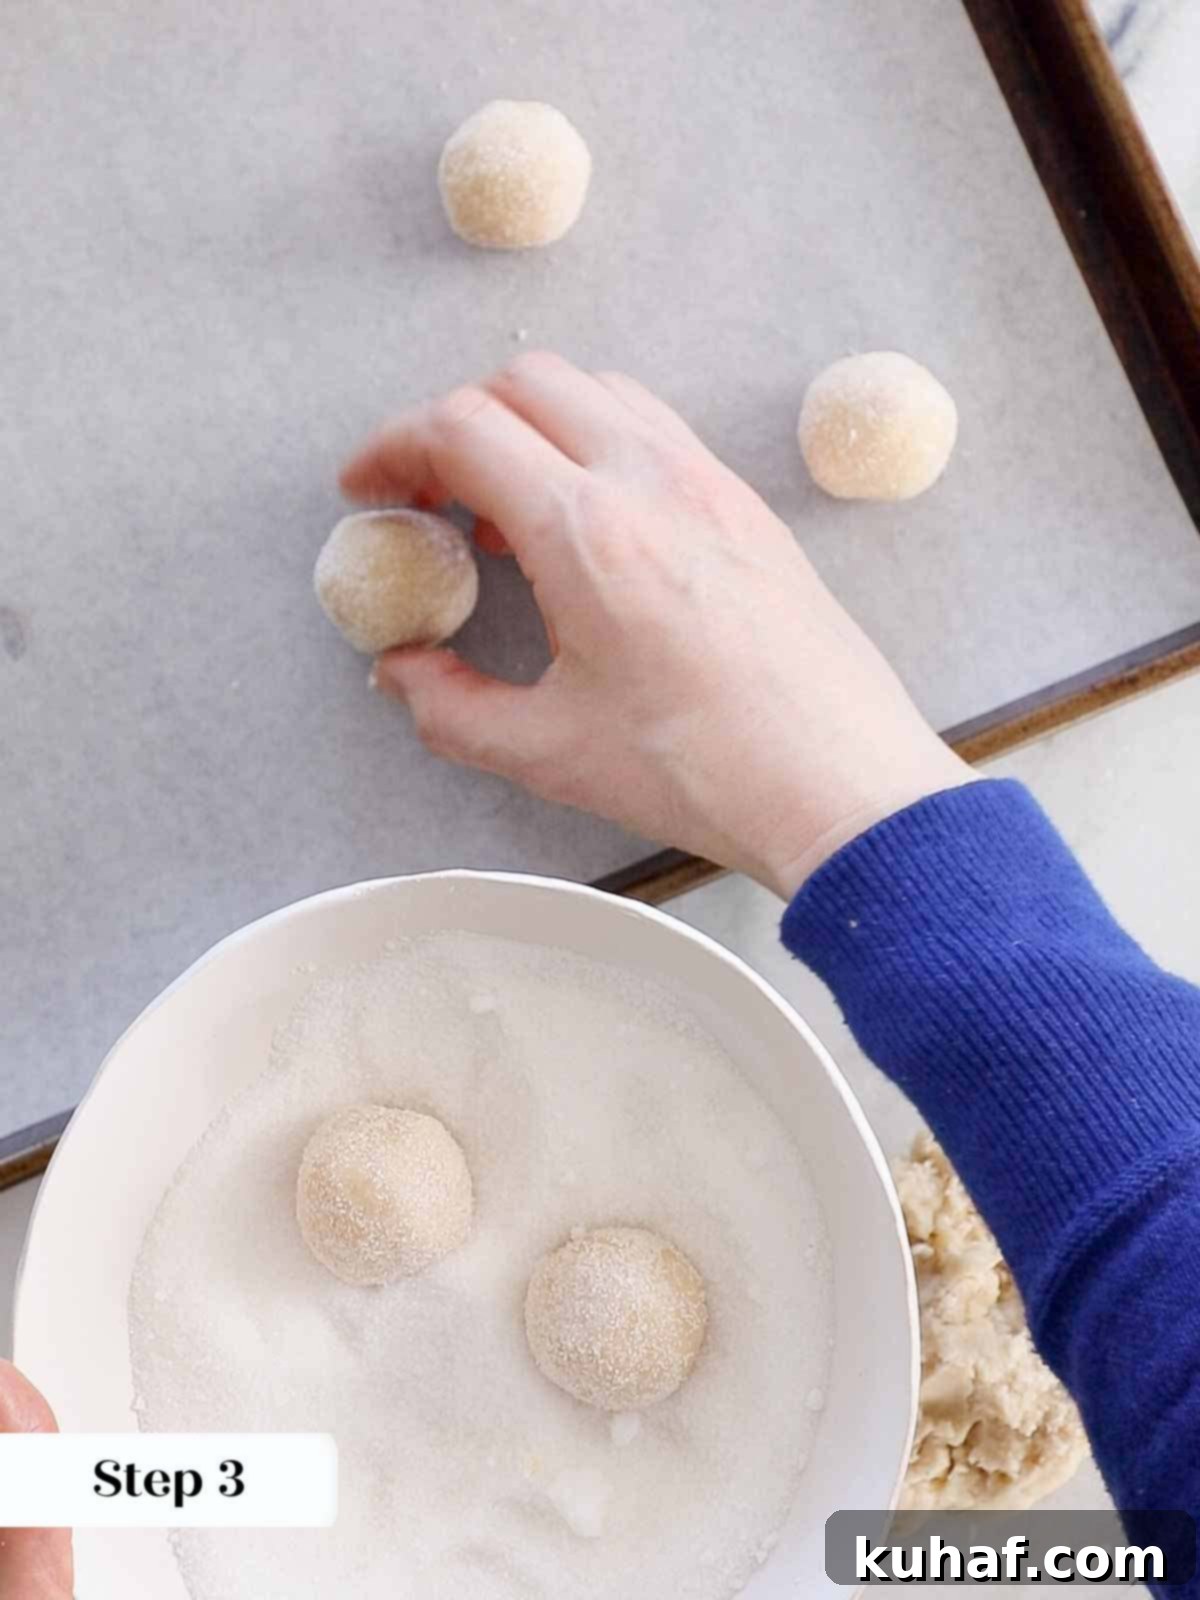
Step 3: Shape and Roll the Cookie Dough. Once your dough is ready, pinch off small pieces, each about an inch across. Gently roll each piece between your palms to form a smooth, uniform ball. Next, roll these cookie dough balls in granulated sugar, ensuring they are evenly coated. This outer layer of sugar will provide a delightful sparkle and a pleasant crunch after baking. You should end up with approximately 15 cookies from this batch.
Step 4: Create the Indentation and Prepare for Jam. Place the sugar-coated dough balls onto your parchment-lined baking sheet, spacing them about an inch apart and offsetting them slightly. Now for the signature “thumbprint”! Gently press your forefinger (or thumb, if preferred, but be cautious of cracking) into the center of each cookie, creating an indentation that goes about halfway into the dough. It’s crucial to press firmly but slowly and evenly to prevent cracks. If any small cracks appear, simply press the dough back together around the indentation. This meticulous step ensures your jam filling stays beautifully contained and won’t leak out during baking.
For perfectly round and uniform centers, try using the back of a round teaspoon measuring spoon to make the indentation. This can give a cleaner, more consistent shape than a finger.
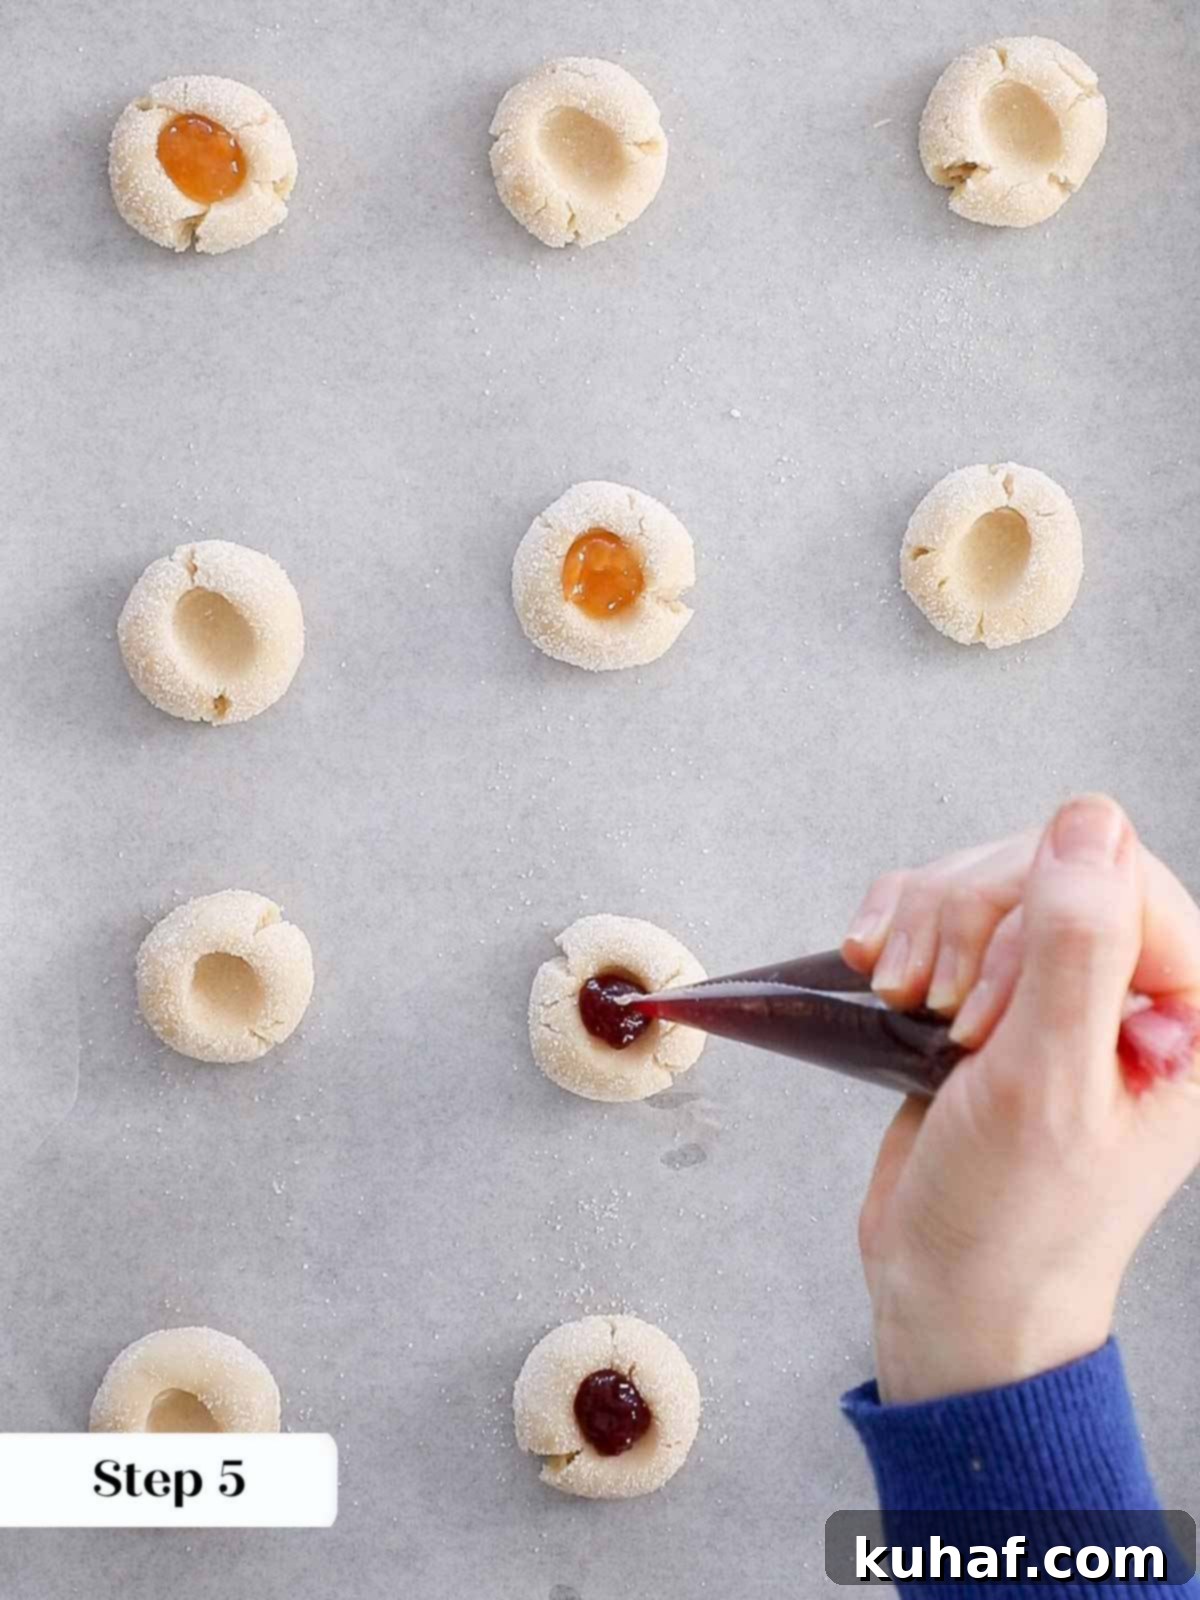
Step 5: Fill with Jam. Now it’s time to add the delicious filling! Using a small spoon or a piping bag, carefully fill the center of each cookie indentation with your chosen jam. Each cookie will typically hold about ½ teaspoon of jam, but this can vary depending on the size and depth of your thumbprint. Remember our earlier tip: use a thick jam to ensure it stays in place and bakes beautifully, creating those irresistible jam cookies.
Crucially, opt for a thicker jam for your filling and absolutely avoid low or no-sugar jams. My own experiments with these thinner varieties ended in disaster – they simply liquefied and ran right out of the cookies during baking, leaving an empty, messy shell. Stick to quality, pectin-rich jams for success!
Step 6: Bake the Thumbprint Cookies. Carefully transfer the baking sheet to your preheated oven. Bake for 12-15 minutes, or until the surface of the cookies appears matte and is no longer glossy. The edges should be just lightly golden. To ensure even baking, I recommend rotating your trays halfway through the baking time, typically after about 6 minutes. Once baked, the jam will have set, and your kitchen will be filled with a wonderful aroma of homemade cookies!
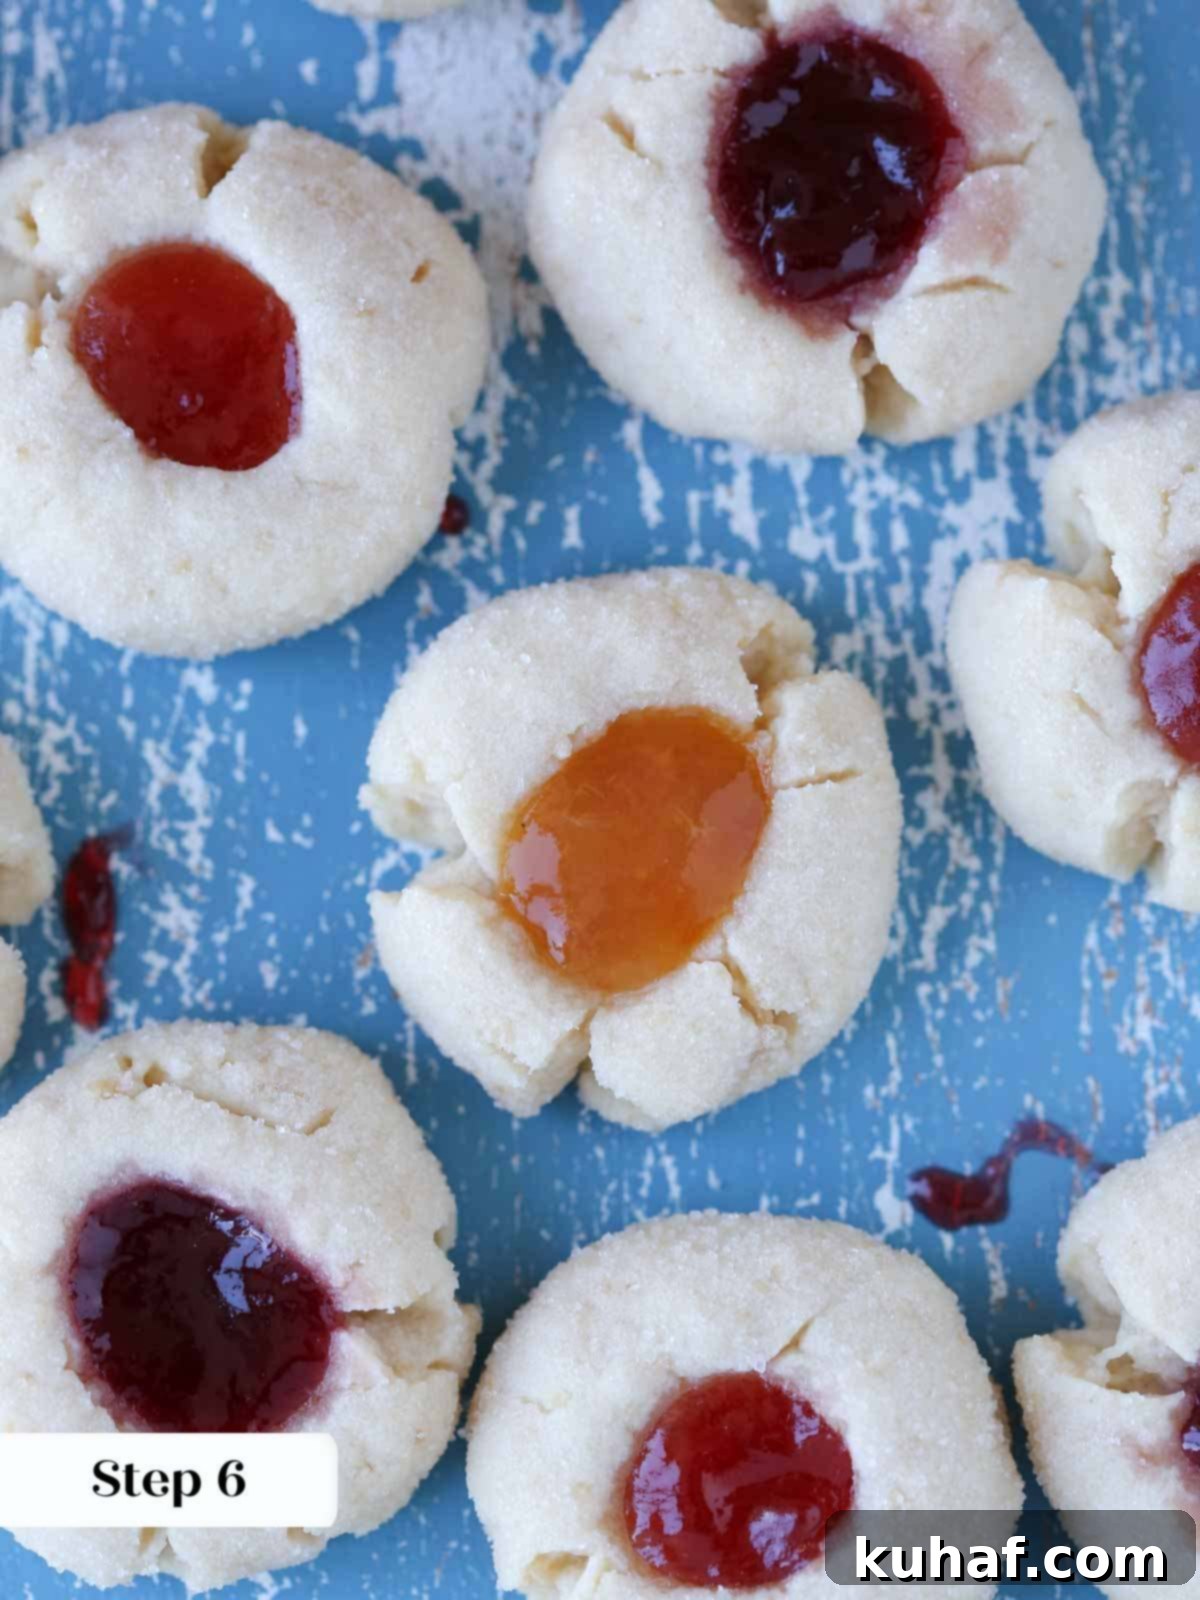
Step 7: Cool Completely. Once baked, remove the cookies from the oven and let them cool completely on the baking sheet for a few minutes before carefully transferring them to a wire rack. Cooling fully is important for the jam to set completely and for the cookies to achieve their perfect firm-yet-tender texture.
Chef Lindsey’s Expert Baking Tip
Even professional bakers have their moments! If you find that you’ve accidentally over-filled or under-filled your thumbprints, or if some jam has seeped out through tiny cracks in the dough during baking, don’t fret. A simple fix is to add a little more jam *after* the cookies have baked and cooled. This easy trick will make them look picture-perfect and they will still taste absolutely delicious. Perfection is often just a spoonful of jam away!

Frequently Asked Questions About Thumbprint Cookies
Storing these easy homemade thumbprint cookies correctly will ensure their freshness and delightful texture. Once completely cooled, place them in an airtight container at room temperature. They will stay wonderfully fresh for up to 10 days, though they truly taste their best when enjoyed within 5 days. The jam filling acts as a natural moistening agent, which is why these jam cookies remain soft and delicious for longer than many other cookie varieties. There’s absolutely no need to refrigerate thumbprint cookies; in fact, chilling them can sometimes alter their delicate texture, so room temperature storage is ideal for optimal enjoyment.
Yes, you can absolutely freeze baked thumbprint cookies! They hold up very well in the freezer for up to 3 months. To freeze, arrange the completely cooled cookies in a single layer on a baking sheet and flash freeze for about an hour until firm. Then, transfer them to a freezer-safe airtight container or bag, separating layers with parchment paper to prevent sticking. When you’re ready to enjoy them, simply thaw at room temperature. However, I highly recommend against freezing the raw thumbprint cookie dough. The butter in the dough solidifies too much, and upon thawing and baking, the dough tends to crack and not spread nicely, compromising the final shape and texture of your delicious vanilla thumbprint cookies.
Cracking in thumbprint cookies typically occurs if the dough is too cold, too dry, or if you’re pressing too aggressively. The key to preventing cracks is to work with dough that is at the proper room temperature and to press gently yet firmly, creating the indent slowly. As mentioned in our professional tips, I often use my index finger instead of my thumb; for many people, a thumb is actually too broad for this task and can cause the dough to split. If you notice the dough cracking, don’t panic! Simply use your fingers to gently press the cracked edges back together around the indentation. It’s an easy fix and won’t affect the final taste of your homemade thumbprint cookies.
The most common reason for thumbprint cookies falling apart is chilling the dough. Unlike some cookie doughs that benefit from chilling, this particular recipe relies on a soft, pliable, room-temperature dough to achieve its signature tender and crumbly texture. If the dough is chilled, the butter solidifies, making the dough stiff and brittle. When you attempt to shape it into balls and press the indentations, it will crack and fall apart. To avoid this, shape and bake your cookies immediately after mixing the dough. If you accidentally chill the dough, allow it to warm up completely to room temperature until it’s soft and workable again before proceeding with shaping and baking. This ensures your jam cookies maintain their integrity and delightful texture.

If you tried this recipe and loved it, please leave a 🌟 star rating and let me know how it goes in the comments below. I love hearing from you; your comments make my day!

Classic Jam Thumbprint Cookies
Pin Recipe
Comment
Print Recipe
Ingredients
- ½ cup unsalted butter softened, at room temperature
- ⅓ cup powdered sugar
- 1 ⅓ cup all-purpose flour
- ½ teaspoon kosher salt
- 1 teaspoon vanilla extract
- ¼ cup granulated sugar for rolling the cookies
- ⅓ cup thick jam any flavor (strawberry, raspberry, apricot recommended)
Instructions
-
Preheat your oven to 325°F (160°C) using the conventional setting (no fan). Line one large baking sheet with parchment paper. Do not use the convection setting for these cookies, as it can cause them to bake too quickly and become dry.
-
In the bowl of a stand mixer fitted with the paddle attachment, add the softened unsalted butter, powdered sugar, all-purpose flour, kosher salt, and vanilla extract. Mix on medium-low speed. Continue mixing, scraping down the sides of the bowl as needed, until all ingredients are fully incorporated and a smooth, cohesive cookie dough forms. This may take a few minutes, so be patient.
-
Pinch off pieces of dough, each approximately an inch across. Roll these pieces into smooth balls between your palms. Then, roll each dough ball in the granulated sugar until it is evenly coated. You should get about 15 cookies from this recipe.
-
Place the sugar-coated dough balls on the parchment-lined baking sheet, spacing them about an inch apart. Gently press your forefinger (or thumb, pressing slowly and evenly) into the center of each cookie to create an indentation, going about halfway down into the cookie. If any cracks form, gently press the dough back together around the indentation. Carefully spoon or pipe about ½ teaspoon of your chosen thick jam into the center of each cookie before baking.
-
Bake in the preheated oven for 12-15 minutes, or until the surface of the cookies appears matte (no longer glossy) and the edges are lightly golden. For even baking, rotate your baking sheet halfway through the baking time, typically after 6-7 minutes.
-
Remove the cookies from the oven and allow them to cool completely on a wire rack. This allows the jam to fully set and the cookies to firm up to their perfect texture.
Notes
Variations – Get creative with your flavorings! Substitute the vanilla extract with other extracts like orange, coffee, peppermint, or almond for a unique twist. For added texture and flavor, roll the cookie dough in finely chopped pecans or walnuts instead of granulated sugar before baking.
Storage – For optimal freshness and texture, store your baked thumbprint cookies in an airtight container at room temperature for up to 10 days. While they are delicious for the full 10 days (thanks to the moisture-locking jam!), they are at their absolute best when enjoyed within 5 days.
Nutrition
Before You Go: More Delicious Cookie Recipes
Thank you for exploring this professionally tested and perfected thumbprint cookie recipe. I sincerely hope you enjoyed baking and, more importantly, tasting these delightful homemade jam cookies! They’re a testament to how simple ingredients and a clever technique can create something truly special.
If you’re looking to expand your baking repertoire, I invite you to delve into our collection of other fantastic cookie recipes. Each one is crafted with the same attention to detail and passion for baking. You might also particularly enjoy these whimsical Neapolitan thumbprint cookies for a colorful variation, or perhaps the sophisticated charm of amaretti cookies for another impressive, easy-to-make treat. Happy baking!
