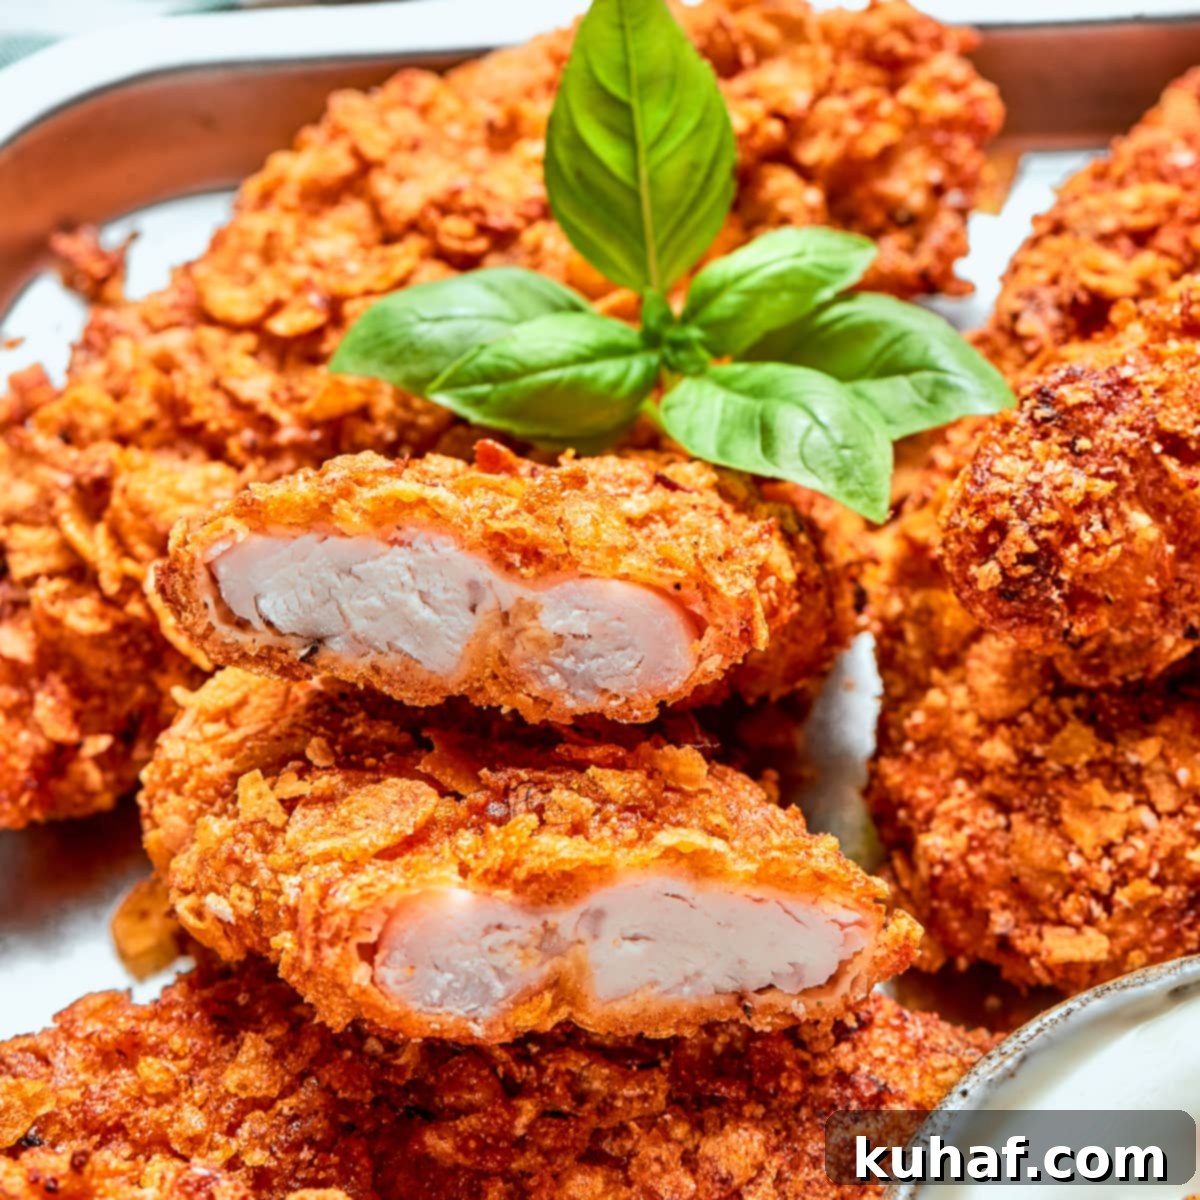
The Secret to Ultra-Crispy Air Fryer Chicken Tenders: Unmatched Crunch with Chex Coating
Air Fryer Chicken Tenders are revolutionized with our secret method, utilizing crushed Chex cereal for an unmatched crunch and authentic flavor. A brief, essential chill in the refrigerator perfects their crispiness, setting them apart from any other recipe you’ll find online. Prepare to discover your new favorite way to make perfectly golden, juicy, and incredibly crunchy chicken tenders.
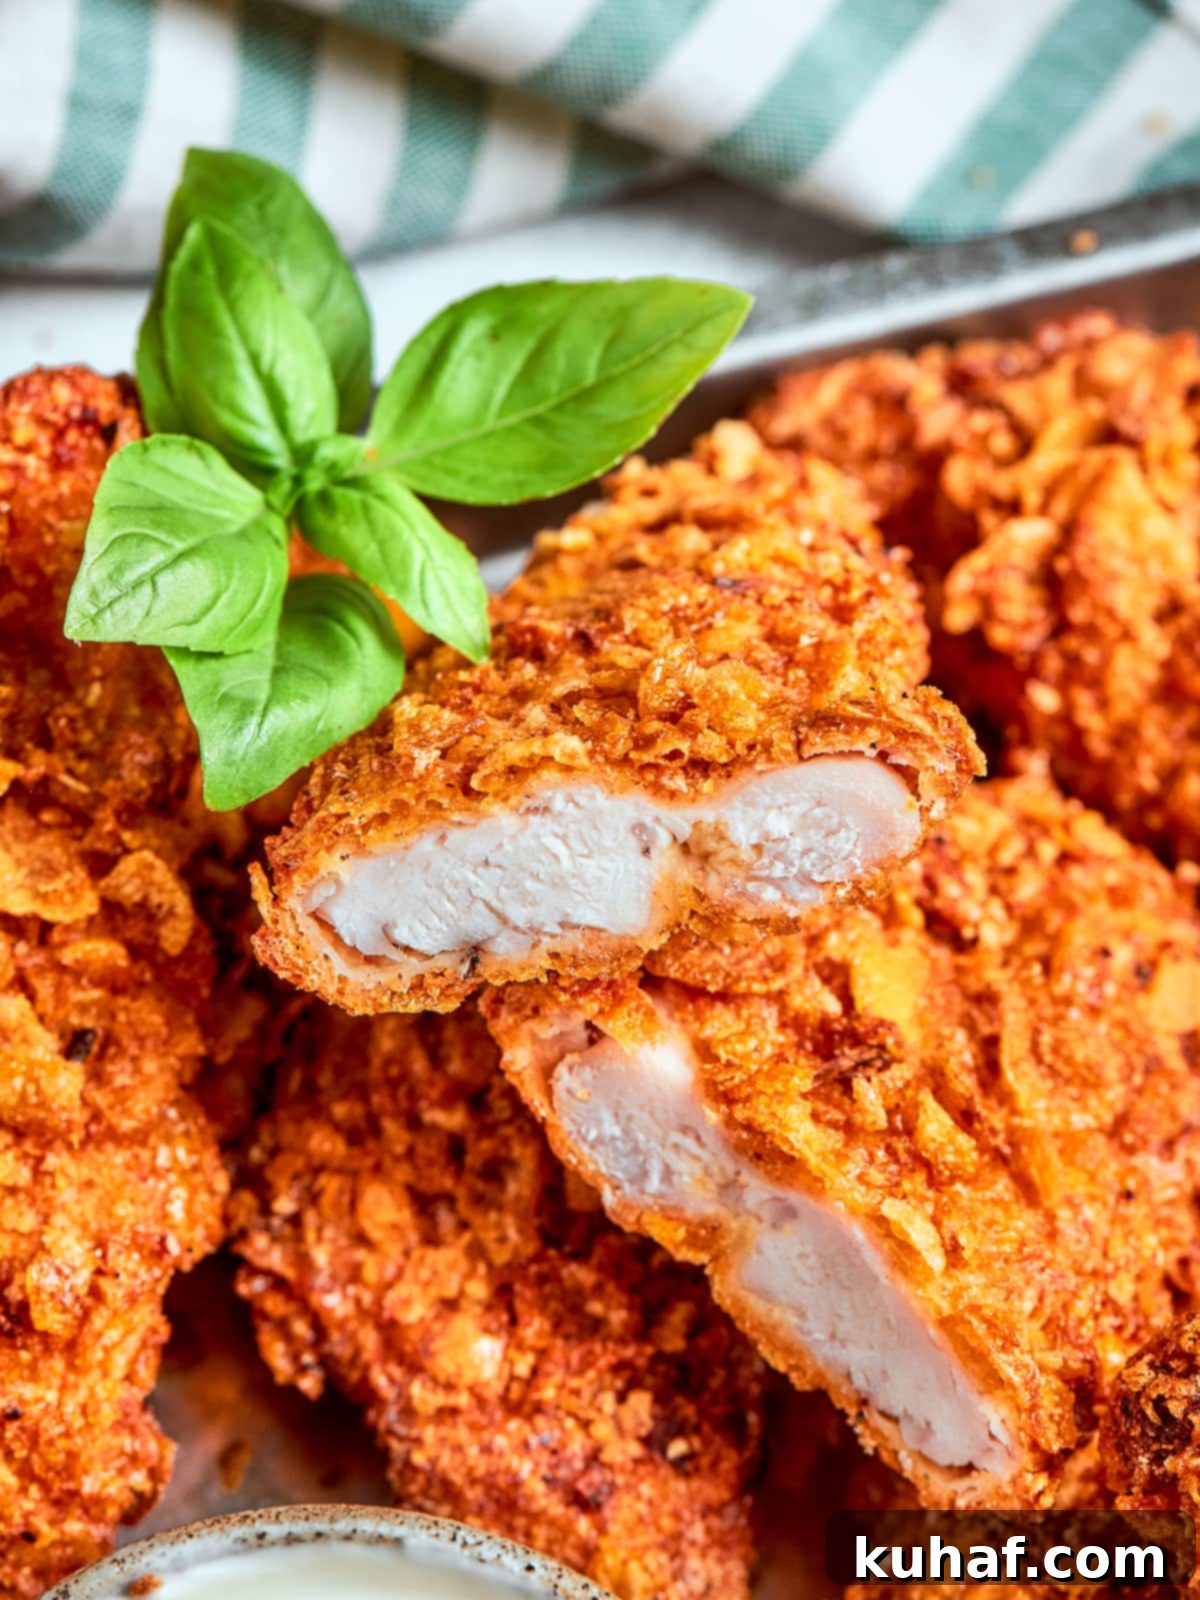
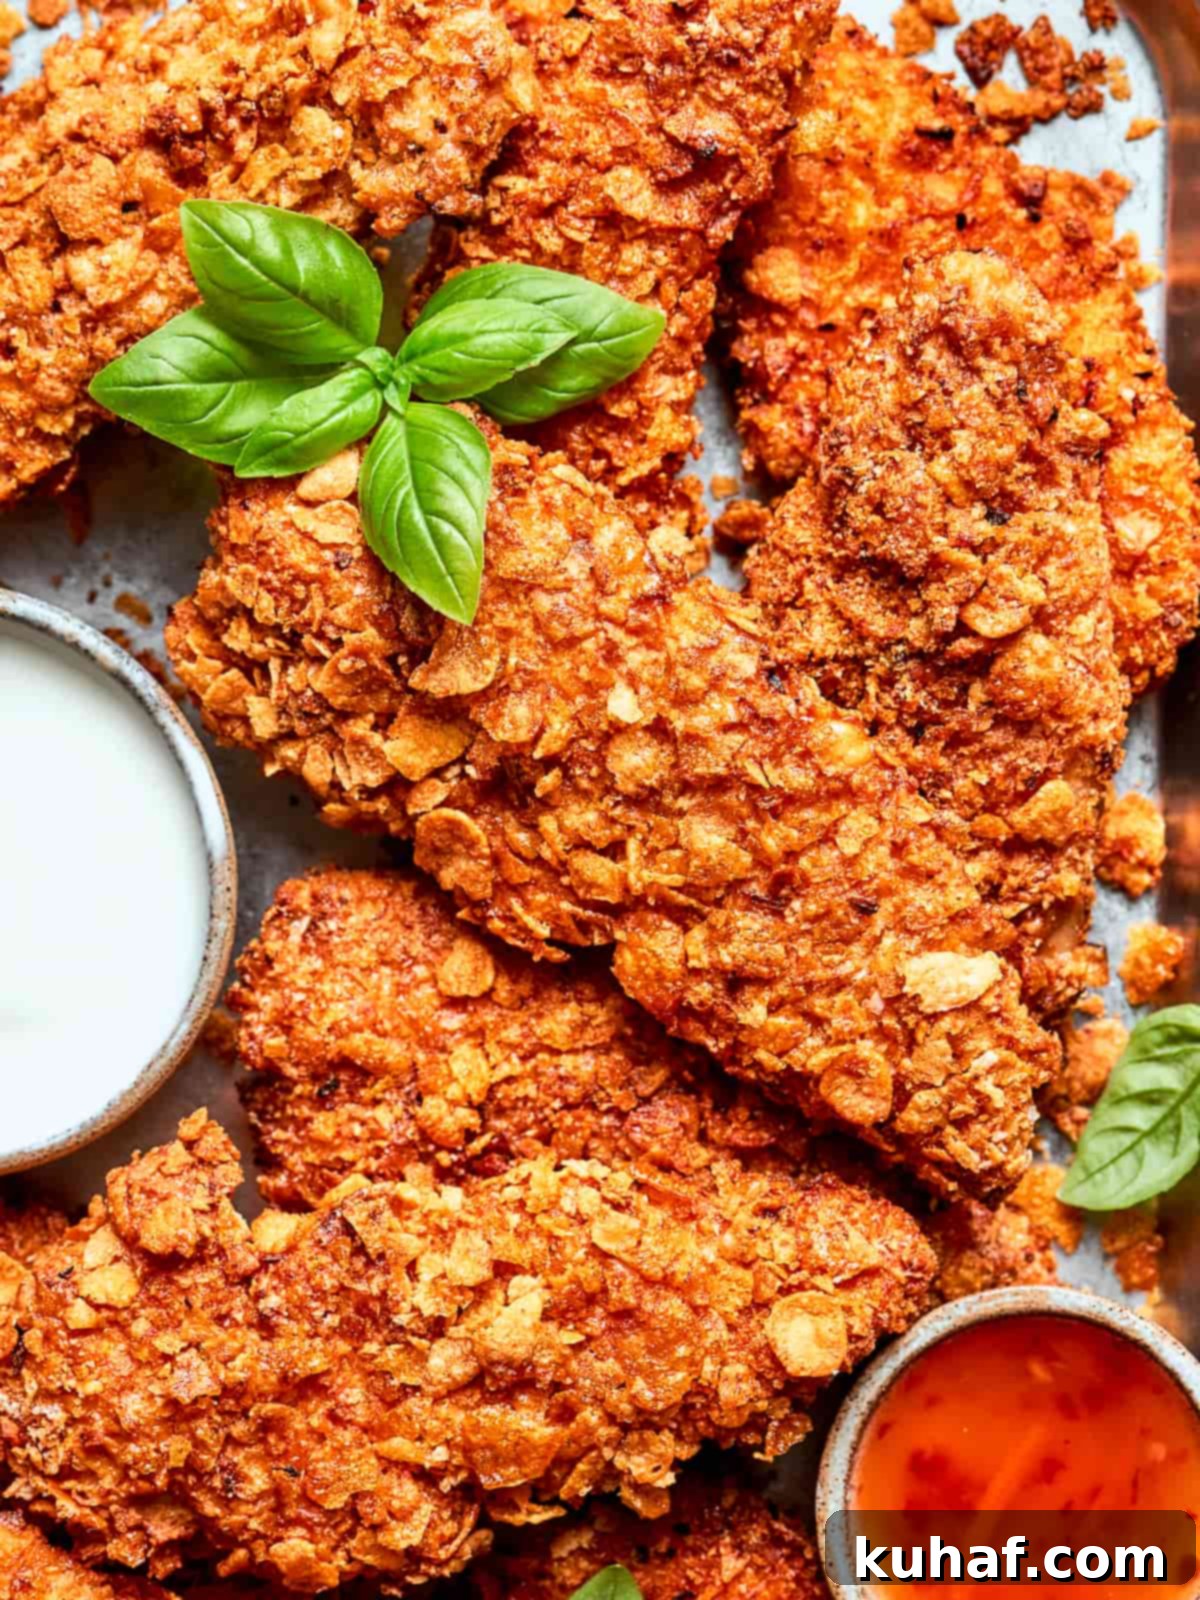
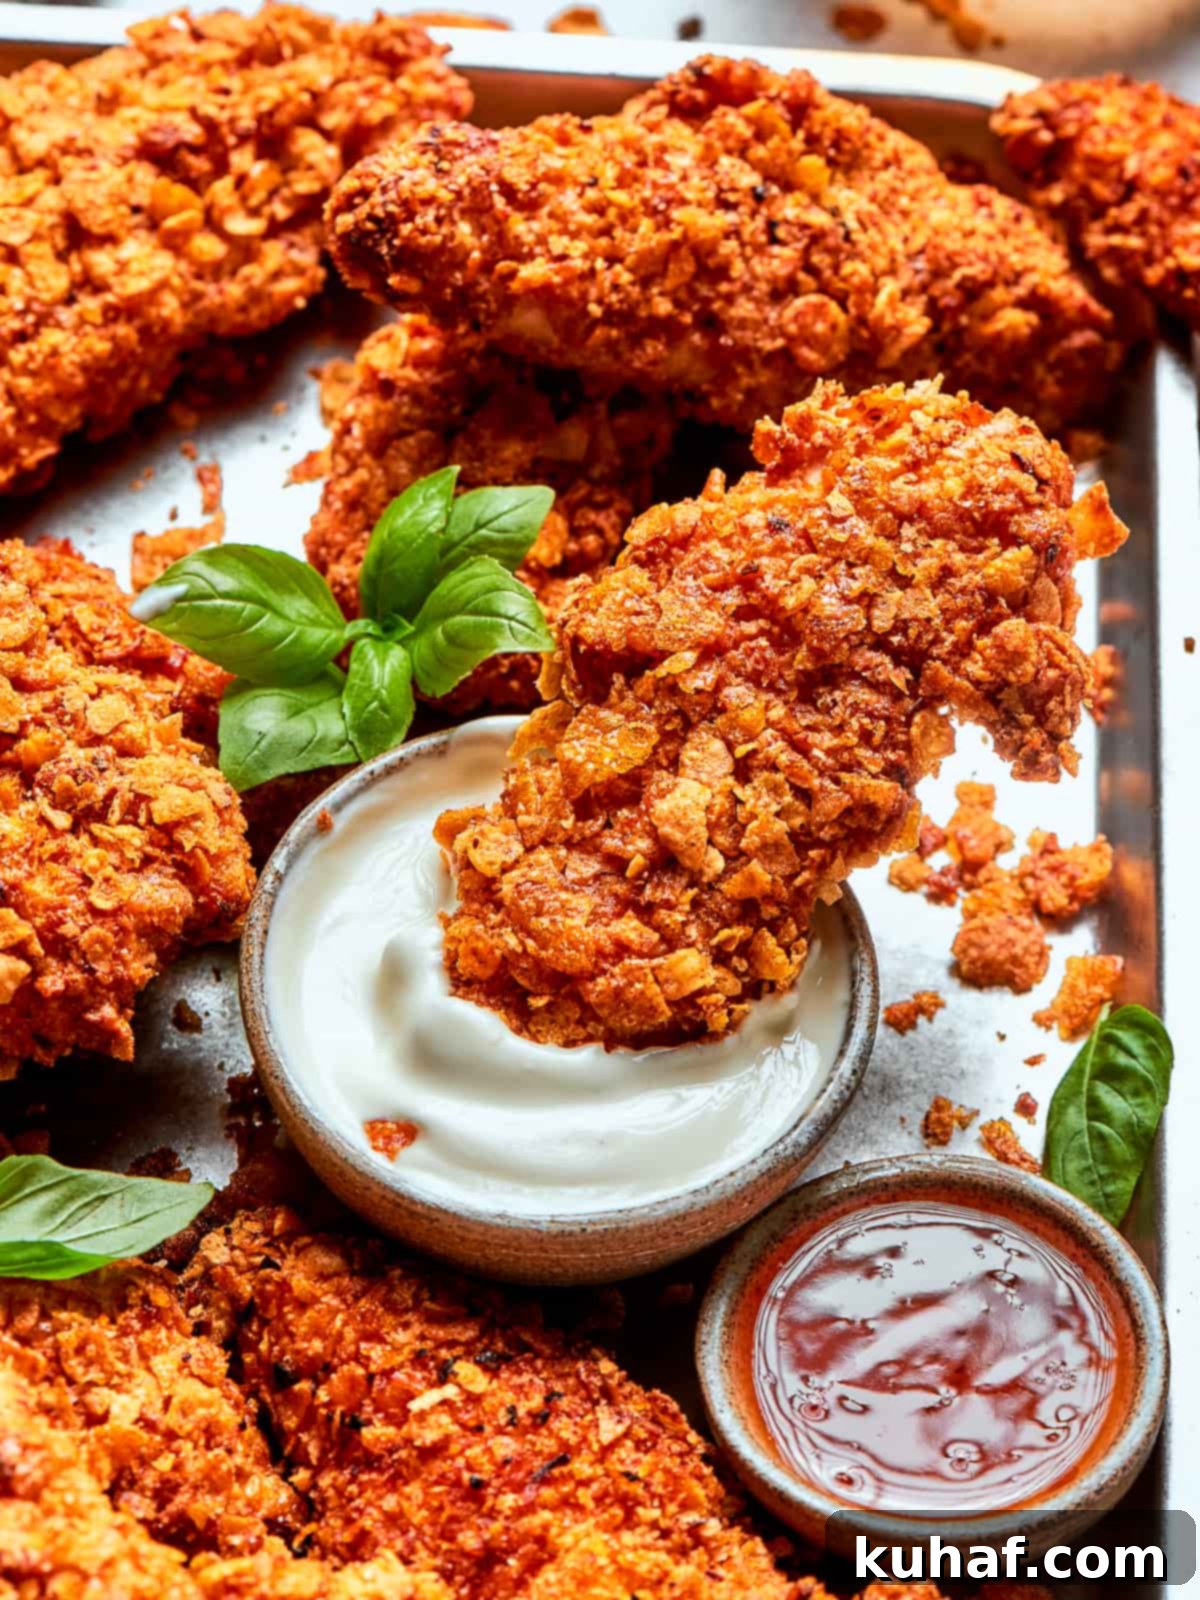
This recipe introduces a game-changing breading: a unique Chex crust for air fryer chicken tenders that delivers an extraordinary crispness. It’s uniquely crunchy, fries up beautifully without excess oil, and provides all the flavor, crispness, and satisfying nostalgia you could ever desire. The best part? It’s ready in under 20 minutes, no deep-fryer required! The true secret lies not just in the crushed Chex, but also in a critical chill time that guarantees an even crunchier exterior, all without a single drop of frying oil. These tenders are not just crispy; they are shatteringly crisp and incredibly moist inside.
These ultra-crispy air fryer chicken tenders are incredibly versatile and pair perfectly with all your weeknight staples. Imagine them alongside a vibrant healthy kale and cabbage slaw, a comforting bowl of creamy white cheddar mac and cheese, or perhaps nestled in a fluffy brioche bun with tangy pickles and a drizzle of hot honey for the ultimate homemade chicken sandwich. Yes, yes, a thousand times yes – these tenders are destined to become a family favorite!
Table of Contents
- Why You Will Love These Air Fryer Chicken Tenders
- Ingredients for Perfect Crispy Tenders
- Exciting Variations to Try
- How to Serve Your Crunchy Chicken Tenders
- Professional Tips for Air Fryer Success
- How to Make Air Fryer Chicken Tenders (Step-by-Step)
- Chef Lindsey’s Recipe Tip
- Air Fryer Chicken Tender FAQs
- Recommended Chicken Recipes
- Air Fryer Chicken Tenders Recipe Card
- Before You Go
Why You Will Love These Air Fryer Chicken Tenders
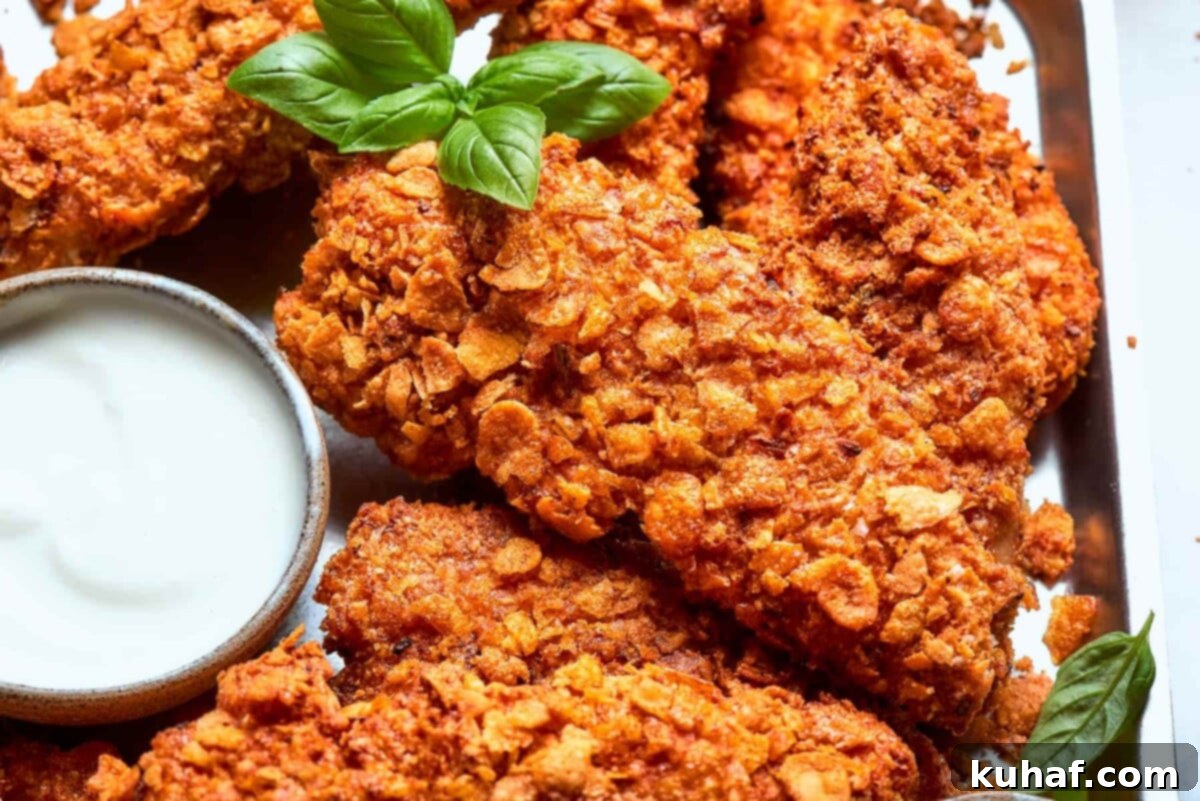
- Crispy outsides and juicy insides without any grease: Imagine biting into a chicken tender that boasts a golden, shattering crust, instantly giving way to tender, moist chicken within. This recipe achieves exactly that, using the power of your air fryer to create perfectly cooked tenderloins that are never greasy. You get all the satisfying texture and flavor of traditional fried chicken, but in a much healthier, lighter package, making it a guilt-free indulgence for the whole family. Enjoy the deliciousness without the heavy feeling!
- A crunchy Chex coating that everyone will fight for: What truly elevates these chicken tenders is their extraordinary coating. We’ve gone beyond standard breadcrumbs by incorporating crushed Chex cereal, creating a unique texture that’s profoundly crisp and incredibly flavorful. This special blend ensures a robust, satisfying crunch with every bite – a texture so addictive, you’ll find yourself reaching for more before you know it. It’s a nostalgic flavor with a gourmet twist, proving that a simple ingredient swap can make all the difference in achieving that ultimate crispy exterior.
- A perfect recipe for family dinner or a casual weeknight meal: Busy weeknights call for quick, fuss-free meals that don’t compromise on taste or quality. These air fryer chicken tenders fit the bill perfectly, coming together in under 20 minutes of active cooking time. They’re a guaranteed crowd-pleaser, beloved by kids and adults alike, and eliminate the splattery mess and extensive cleanup associated with deep-frying. Enjoy delicious, homemade chicken tenders any night of the week with minimal effort and maximum satisfaction.
Ingredients for Perfect Crispy Tenders
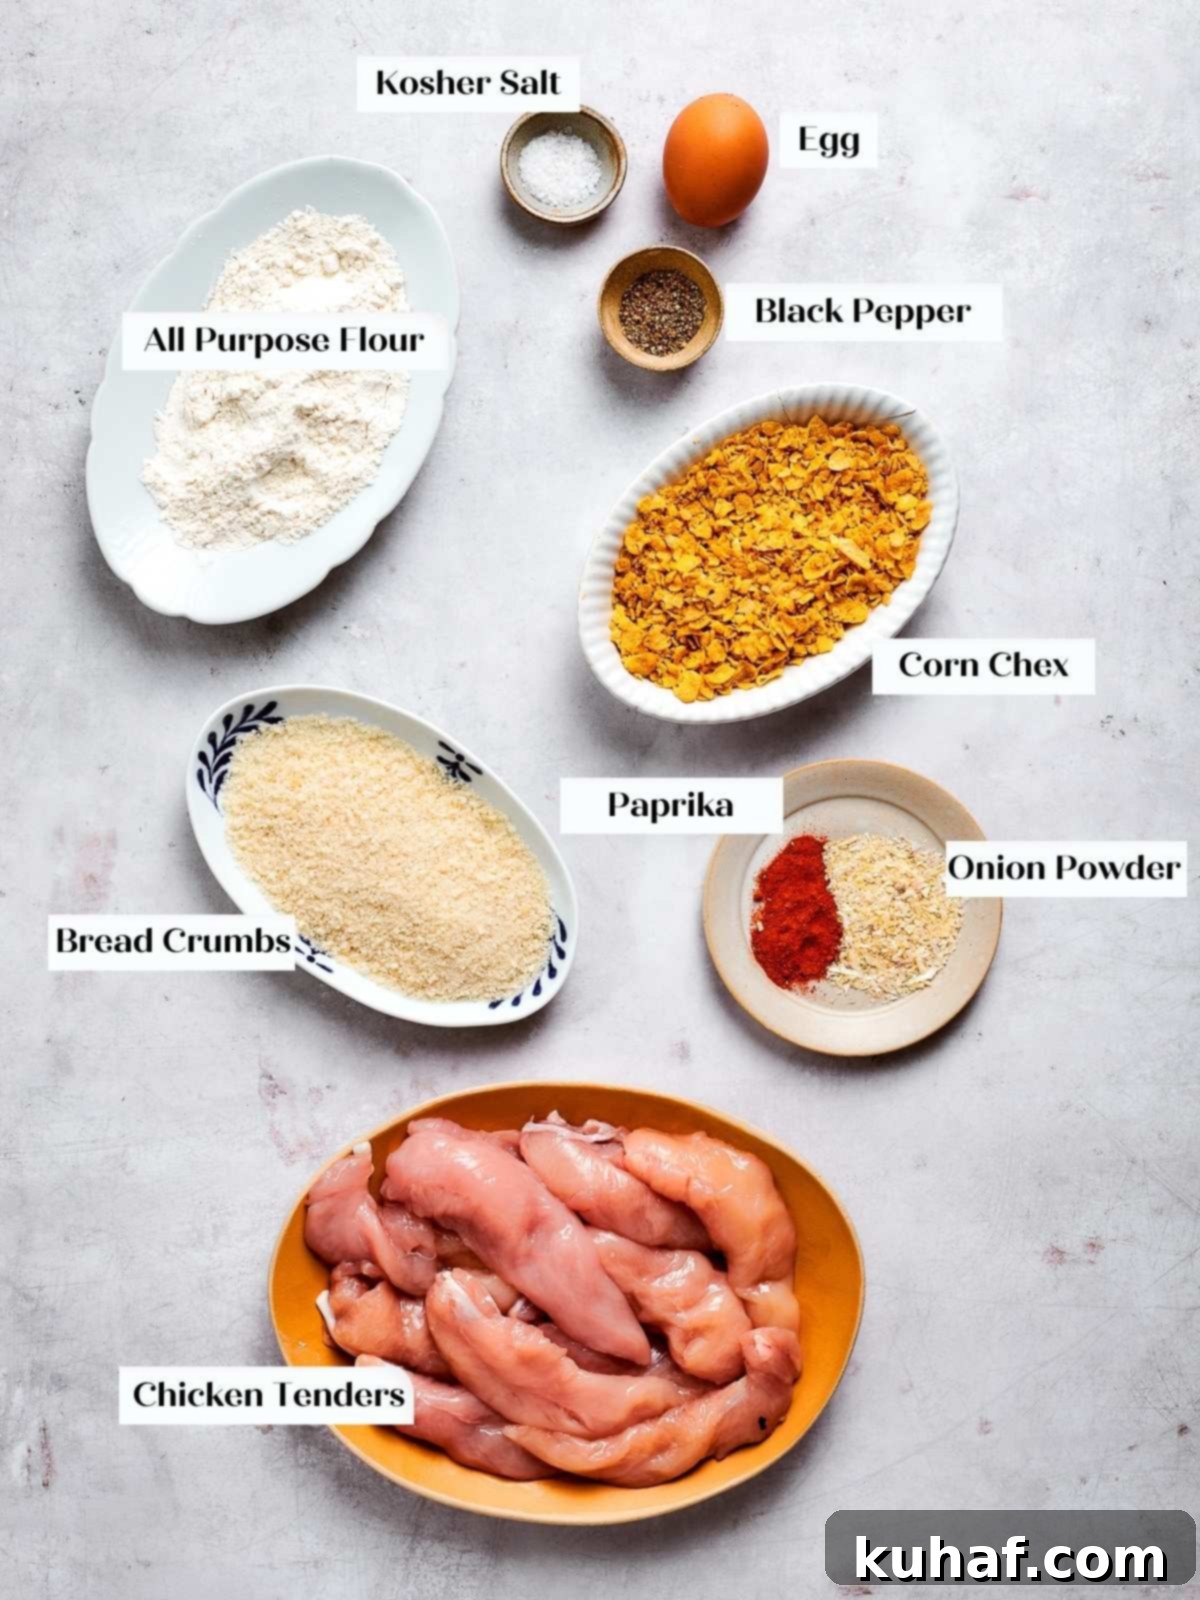
- Chicken: For optimal results, this recipe calls for 1-1.25 pounds of boneless, skinless chicken tenderloins. These cuts are naturally thin and cook quickly and evenly in the air fryer. If tenderloins aren’t available, you can easily use boneless, skinless chicken breasts cut into uniform strips of similar thickness. Avoid using bone-in or skin-on chicken, as they will require significantly longer cooking times and may not achieve the desired crispness or even cooking.
- Egg: One large egg, well beaten, serves as the essential binder for our crispy coating. It creates a tacky surface on the chicken, allowing the flour and subsequent breading mixture to adhere perfectly, ensuring every tender is fully coated and develops a beautiful crust.
- Flour: All-purpose flour forms the crucial first layer of our breading, providing a dry base that helps the egg wash stick evenly to the chicken. For those looking for alternatives, whole wheat flour can be substituted, offering a slightly nuttier flavor and an increase in dietary fiber. For gluten-free needs, a high-quality gluten-free all-purpose flour blend will work just as effectively.
- Salt: We recommend using kosher salt for its pure flavor and larger, flakier crystals, which make it easier to season accurately without the risk of over-salting. Its balanced salinity allows the natural flavors of the chicken and spices to truly shine. If using fine table salt or sea salt, reduce the quantity slightly as it is denser and saltier by volume.
- Pepper: Freshly ground black peppercorns are highly recommended for their vibrant aroma and robust, pungent flavor, which far surpasses the muted taste of pre-ground pepper. A quarter teaspoon adds a subtle warmth and depth to the flour mixture, enhancing the overall seasoning profile of your tenders.
- Corn Chex: This is our star ingredient and the secret to the unmatched crunch! Finely crushed Corn Chex cereal creates a unique, jagged texture that adheres beautifully and crisps up incredibly well in the air fryer. This special cereal coating delivers a profound crispness that traditional breadcrumbs alone can’t achieve. Remember to measure the specified ½ cup *after* crushing the cereal for accuracy.
- Breadcrumbs: ¼ cup of unseasoned, plain bread crumbs complements the crushed Chex, providing additional body and texture to the coating. Using unseasoned crumbs gives you complete control over the flavor, allowing the paprika and onion powder to stand out without interference from pre-added herbs. Panko breadcrumbs are an excellent alternative if you prefer an even lighter and airier crisp.
- Paprika: A quarter teaspoon of paprika adds a beautiful reddish-orange hue to the coating and a mild, earthy sweetness. It’s not merely for color; it contributes a subtle warmth and depth of flavor that rounds out the spice blend, making the tenders more visually appealing and undeniably delicious.
- Onion Powder: Incorporating ¼ teaspoon of onion powder infuses the coating with a concentrated burst of savory onion flavor without adding any moisture or altering the texture. This foundational savory note enhances the chicken’s natural taste. If you prefer a garlicky twist, an equal amount of garlic powder can be substituted, or even added alongside for a more robust aromatic profile.
See the recipe card below for full information on specific quantities and detailed measurements.
Exciting Variations to Try
- Swap out the Chex: While our signature crunch comes from Chex cereal, feel free to get creative with other crunchy alternatives! Crushed cornflakes provide a similar crispness with a slightly sweet undertone. For a savory, salty kick, try finely crushed pretzels. Panko breadcrumbs are also an excellent choice, offering an incredibly light and airy crisp texture. To make these tenders suitable for specific dietary needs, use gluten-free flour, certified gluten-free cereal (like GF Chex), and gluten-free breadcrumbs. For a low-carb option, finely crushed pork rinds or a blend of almond flour and a touch of parmesan cheese can be surprisingly effective.
- Parmesan or Cheddar Cheese: Elevate the savory depth by adding a few tablespoons of finely grated Parmesan cheese or sharp cheddar cheese to your exterior breading mixture. The cheese introduces a wonderful umami flavor and a salty complexity that pairs beautifully with the chicken. When using cheese, be aware that it can brown faster, so keep a closer eye on your tenders during the final minutes of cooking to prevent over-browning. You might also want to slightly adjust the amount of added salt in the coating and balance your accompanying dips accordingly.
- Bump up the spice! If you crave a bit of heat, these tenders are an excellent canvas for spice. Stir in ¼ teaspoon of cayenne pepper or a pinch of chili powder to the exterior coating mixture for a noticeable, but not overwhelming, kick. For those who enjoy more intense flavors, a dash of smoked paprika can add an extra layer of smoky heat. You can also serve them with a fiery dipping sauce like hot honey, sriracha mayo, or a creamy buffalo dip. For even bolder, globally-inspired spice, consider exploring other recipes like my Gochujang Chicken for more adventurous flavor combinations.
How to Serve Your Crunchy Chicken Tenders
- Part of a kid-friendly dinner plate: These crispy air fryer chicken tenders are a guaranteed hit with kids of all ages! Create a balanced and appealing meal by serving them alongside classic comfort foods like a creamy baked mac and cheese and some perfectly roasted broccoli. For a more traditional diner feel, pair them with crispy french fries or sweet potato fries. Don’t forget to add some fresh, healthy elements like apple slices, refreshing cucumber sticks, or crunchy carrot sticks for a wholesome and satisfying plate.
- Arranged as an appetizer with your favorite dipping sauce: Transform these tenders into a crowd-pleasing appetizer by arranging them beautifully on a platter with an assortment of dipping sauces. Offer timeless favorites such as classic ketchup, a tangy easy homemade BBQ sauce, and a sweet-savory honey mustard. For more adventurous palates, consider a zesty ranch, a spicy sriracha aioli, or a cooling homemade avocado ranch. They’re absolutely perfect for parties, game nights, or casual gatherings, offering a delicious bite for everyone to enjoy.
- Paired with a side salad: For a lighter, yet equally satisfying meal, pair your air fryer chicken tenders with a fresh, vibrant side salad. A hearty chopped kale salad or a creamy, healthy coleslaw provides a wonderful textural contrast and a refreshing counterpoint to the crispy chicken. Even a simple mix of fresh greens tossed with a bright lemon vinaigrette or a light balsamic dressing can elevate the meal, making it feel both wholesome and gourmet.
- On a fluffy brioche bun: Don’t limit these versatile tenders to just a plate! They make an absolutely incredible chicken sandwich. Nest two or three crispy tenders onto a soft, fluffy brioche bun, add some crunchy dill pickles, and drizzle generously with hot honey for an unforgettable sweet and spicy experience. This elevated chicken sandwich is a game-changer and a fantastic alternative to fast-food options, offering gourmet taste right at home.
Professional Tips for Air Fryer Success
- Don’t skip the chill: This step is absolutely critical for achieving the crispiest coating possible and ensuring it adheres perfectly. After breading, place the chicken tenders uncovered in the refrigerator for at least 10-15 minutes, and ideally up to 45 minutes. This vital chill time allows the moisture from the egg and flour to be absorbed by the breading, helping it ‘set’ and firm up. This ensures the coating adheres firmly to the chicken and prevents it from falling off during cooking, resulting in a much crunchier, more uniform crust that resists sogginess. It’s a simple trick that makes a huge difference in texture!
- Measure your cereal after crushing: Accuracy matters, especially when creating the perfect texture and ensuring you have enough coating. When crushing your Chex cereal (or cornflakes/pretzels), the volume significantly reduces. Therefore, always measure the specified amount (e.g., ½ cup) *after* the cereal has been crushed into fine, jagged pieces. This ensures you have enough of the finely textured crunch element for a thick, even coating on all your tenders, contributing directly to that extra crispy, irresistible exterior we’re aiming for.
- Coat the entire tender: For maximum crispness, flavor, and an even cook, it’s essential to ensure every single surface of the chicken tender is completely covered with the breading mixture. Any bare spots will cook unevenly, become dry, and won’t develop that desired satisfying crunch. If you find yourself running low on the exterior coating mixture towards the end, don’t worry! Simply shake a little extra plain breadcrumbs onto the plate to finish coating those last few pieces. While I typically formulate recipes to have just enough coating, having a small reserve of plain breadcrumbs can be a lifesaver to ensure every tender is perfectly coated.
- Don’t overcrowd the air fryer basket: One of the most common mistakes when using an air fryer is overcrowding the basket. Air fryers work by circulating intensely hot air around the food, creating a powerful convection effect that crisps surfaces. If the basket is too full, the air can’t circulate effectively, leading to steamed rather than crispy chicken. While a slight touch between tenders is acceptable, aim for a single layer with as much space as possible between each piece to allow hot air to circulate freely. If your air fryer is smaller, cook in batches to guarantee optimal, uniform crispness for every single tender.
How to Make Air Fryer Chicken Tenders (Step-by-Step)
Further details and precise measurements for each ingredient can be found in the comprehensive recipe card below! Follow these steps for perfectly crispy, juicy air fryer chicken tenders.
Step 1: Prepare Your Breading Stations. Set up three separate shallow, rimmed plates or baking dishes. In the first plate, combine ¼ cup all-purpose flour, ½ teaspoon kosher salt, and ¼ teaspoon black pepper, mixing thoroughly with a fork until well combined. In the second plate, pour your well-beaten large egg. For the third and final plate, add the ½ cup crushed Corn Chex, ¼ cup plain breadcrumbs, ½ teaspoon kosher salt, ¼ teaspoon paprika, and ¼ teaspoon onion powder. Again, use a fork to mix these ingredients very well, ensuring the spices are evenly distributed throughout the crunchy coating.
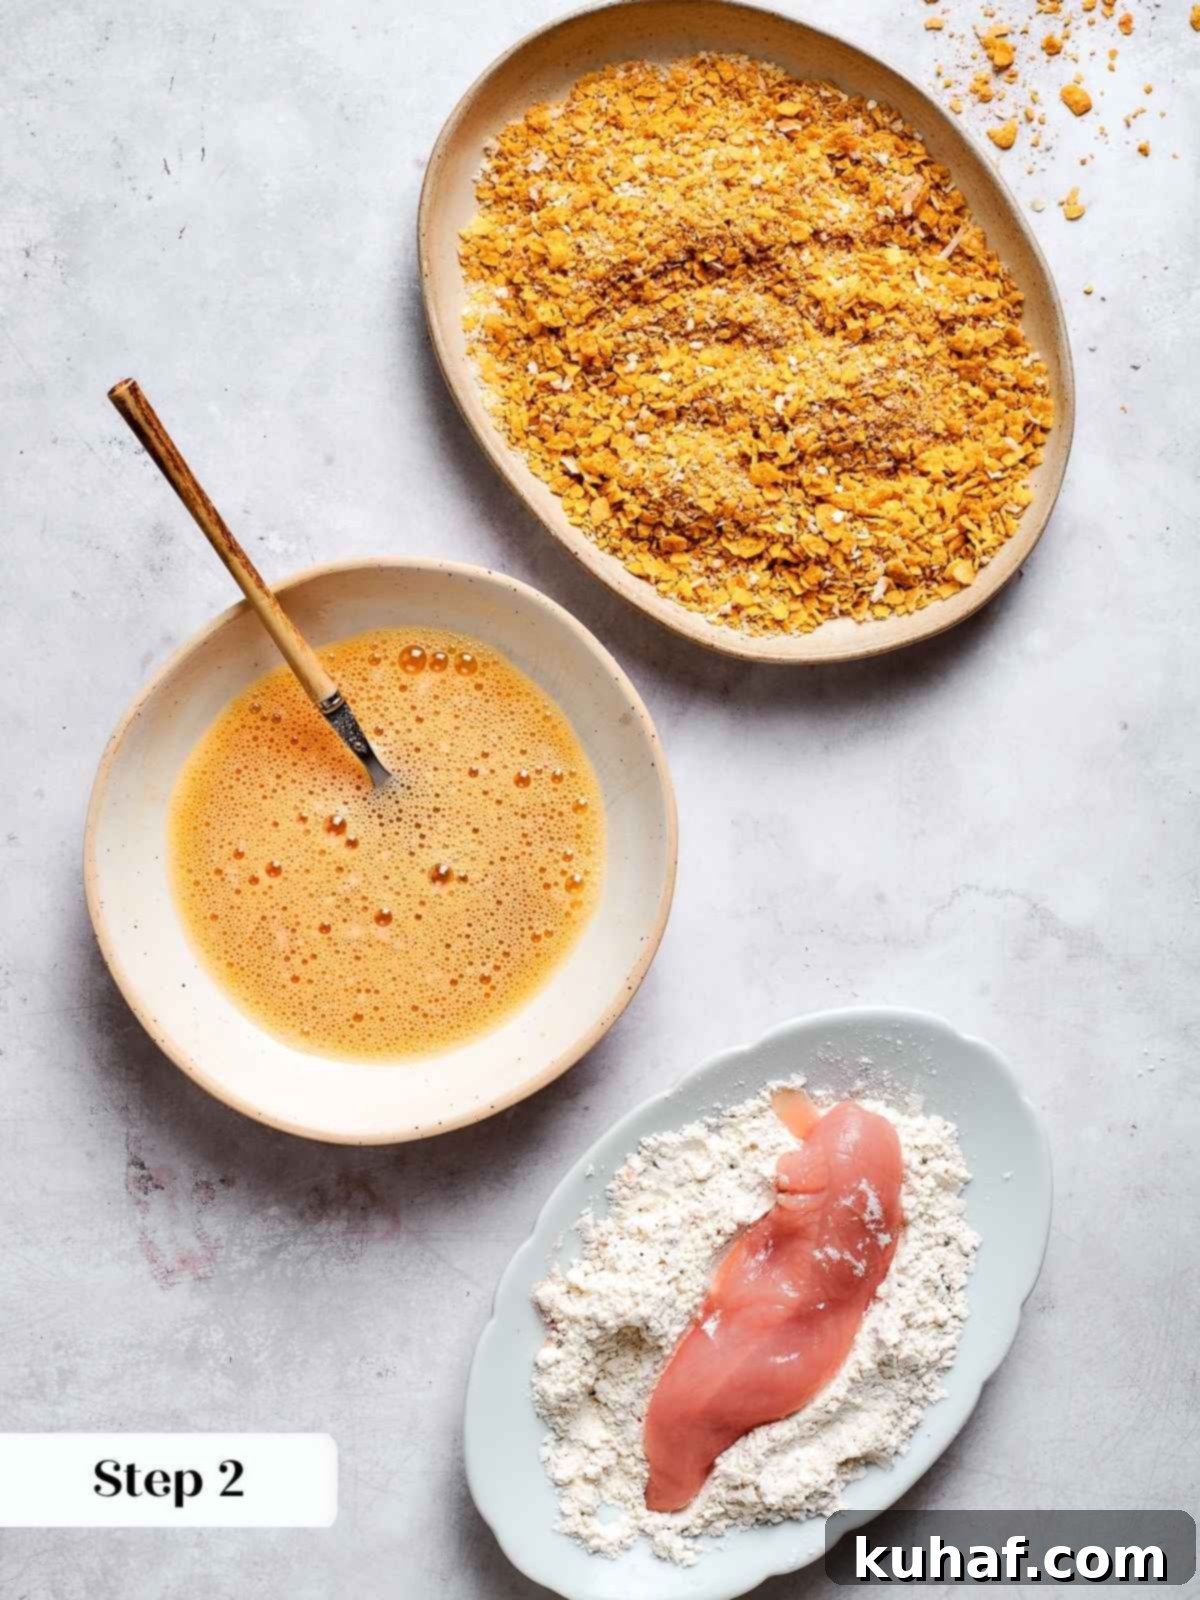
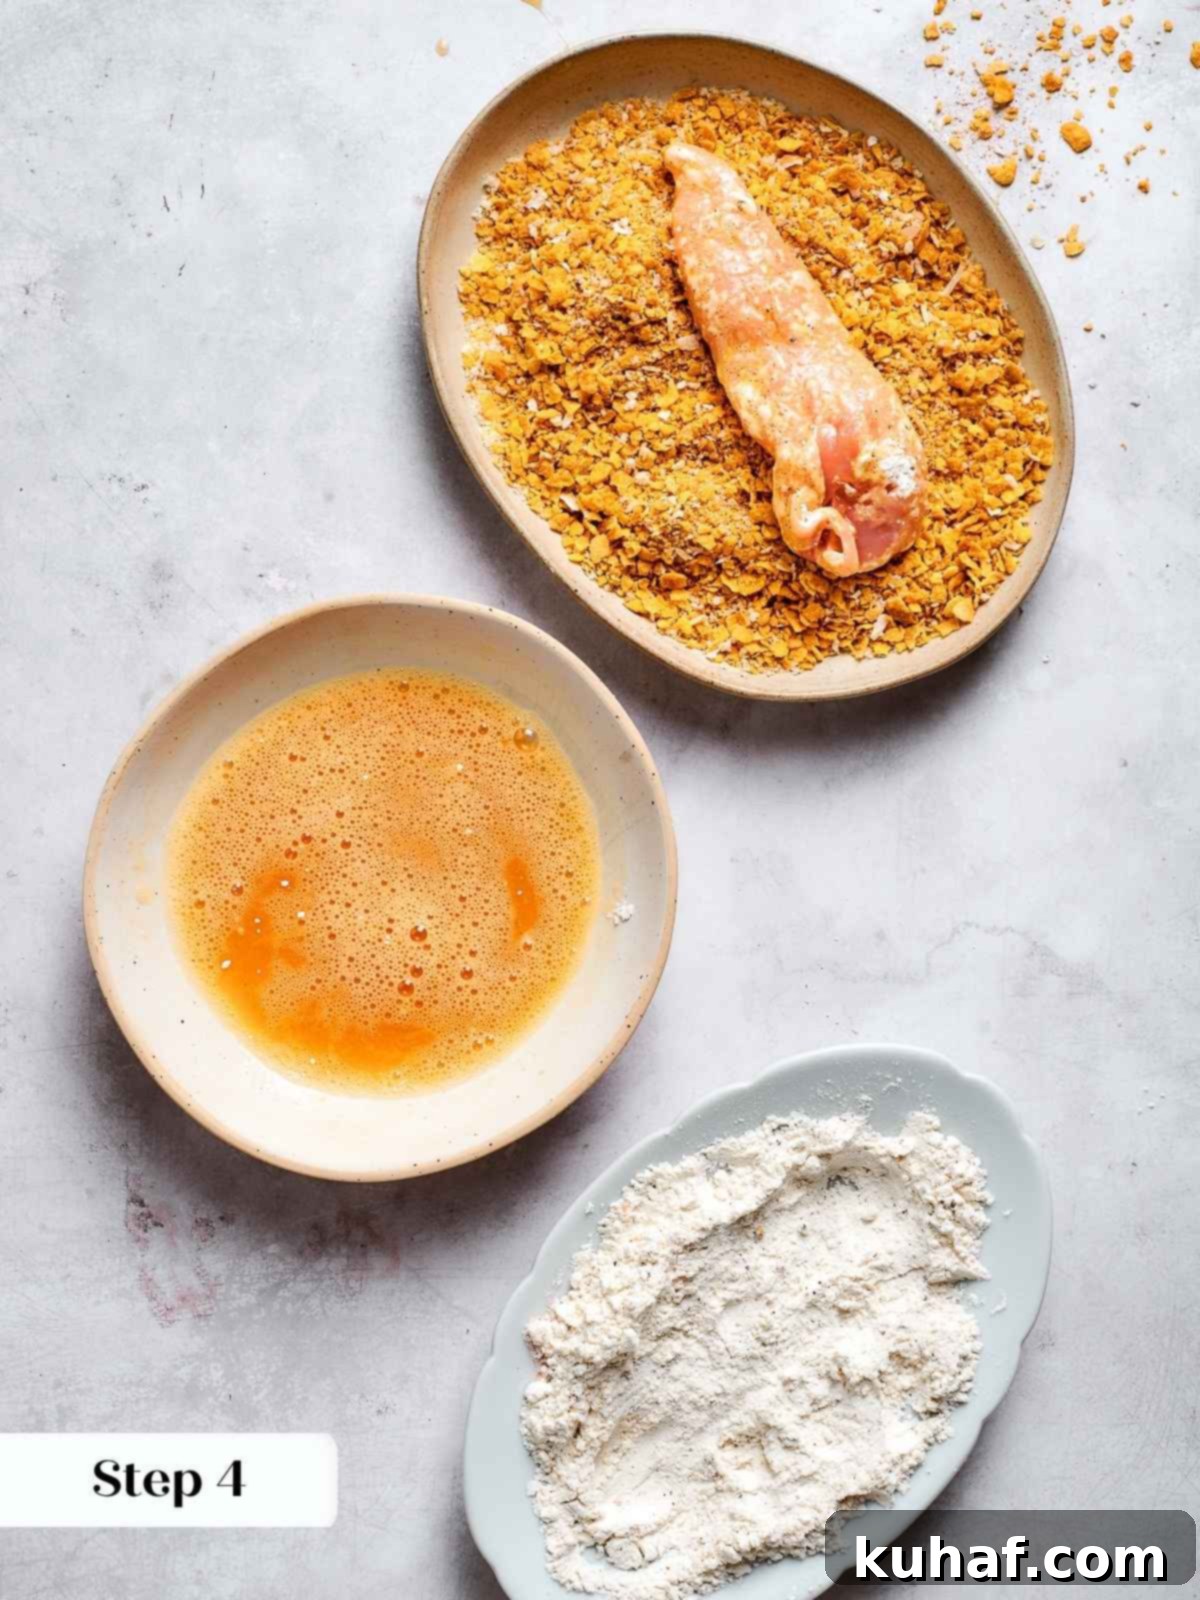
Step 2: Start the Dredging Process. Begin by thoroughly patting your chicken tenders dry with paper towels. This crucial step removes excess moisture, which significantly helps the coating adhere better and promotes ultimate crispiness. Now, set up your chicken coating assembly line: from far left, have your dry chicken tenders, then your plate of the flour mixture, followed by the plate of beaten egg, next the plate with the exterior crunchy coating, and finally, a clean landing tray or plate for your fully coated chicken. Working in batches (typically 2-3 tenders at a time, depending on your plate size), add several tenders to the flour plate and coat completely. Shake off any extra flour gently to avoid clumps.
Step 3: Egg Wash. Carefully transfer the floured tenders to the beaten egg. Dip all sides, ensuring full coverage with the egg wash, and allow any excess egg to drip off briefly before moving to the next station. To minimize mess and keep one hand clean for handling dry ingredients, I often go ahead and dredge the next round of tenders in the flour before my hand gets covered in egg from the previous batch.
Step 4: Apply the Crispy Coating. Place the egg-dipped tenders into the plate with the crushed Chex and breadcrumb mixture. Press the coating firmly onto all sides of the chicken, ensuring it’s completely and evenly coated. The more thoroughly you press, the better the coating will stick, leading to a superior, more uniform crunch. Once fully coated, remove the tenders to the clean plate or tray.
Chef’s Quick Tip: You can pinch off a small bit of the exterior coating mixture and air fry it for 1-2 minutes to test for seasoning before coating and cooking the full batch. This allows you to adjust the spice or salt if needed.
Step 5: Batch Coating. Repeat this entire breading process with all the remaining chicken tenders, working diligently in batches as needed to ensure each tender receives a perfect, even layer of our delicious, crunchy coating. Take your time to ensure full coverage for the best results.
Step 6: The Essential Chill Time. Once all tenders are coated, arrange them neatly on the clean plate or tray and place them, uncovered, in the refrigerator. Chill for a minimum of 10 minutes, and ideally for 30-45 minutes (or as long as you need to get the rest of dinner prepared!). This vital chill time allows the coating to firm up and adhere securely to the chicken, which is the ultimate secret to preventing the breading from falling off during cooking and achieving truly exceptional, shatteringly crispness. I do not recommend preparing them the day before, as they can become soggy if left too long.
This brief but crucial chill helps the coating set and significantly improves the crispness and adherence when cooked.
Step 7: Preheat the Air Fryer. When you are ready to cook, preheat your air fryer to 350°F (175°C) on the air fry setting. Proper preheating is crucial for instant crisping upon contact and ensures even cooking from the moment the tenders enter the basket.
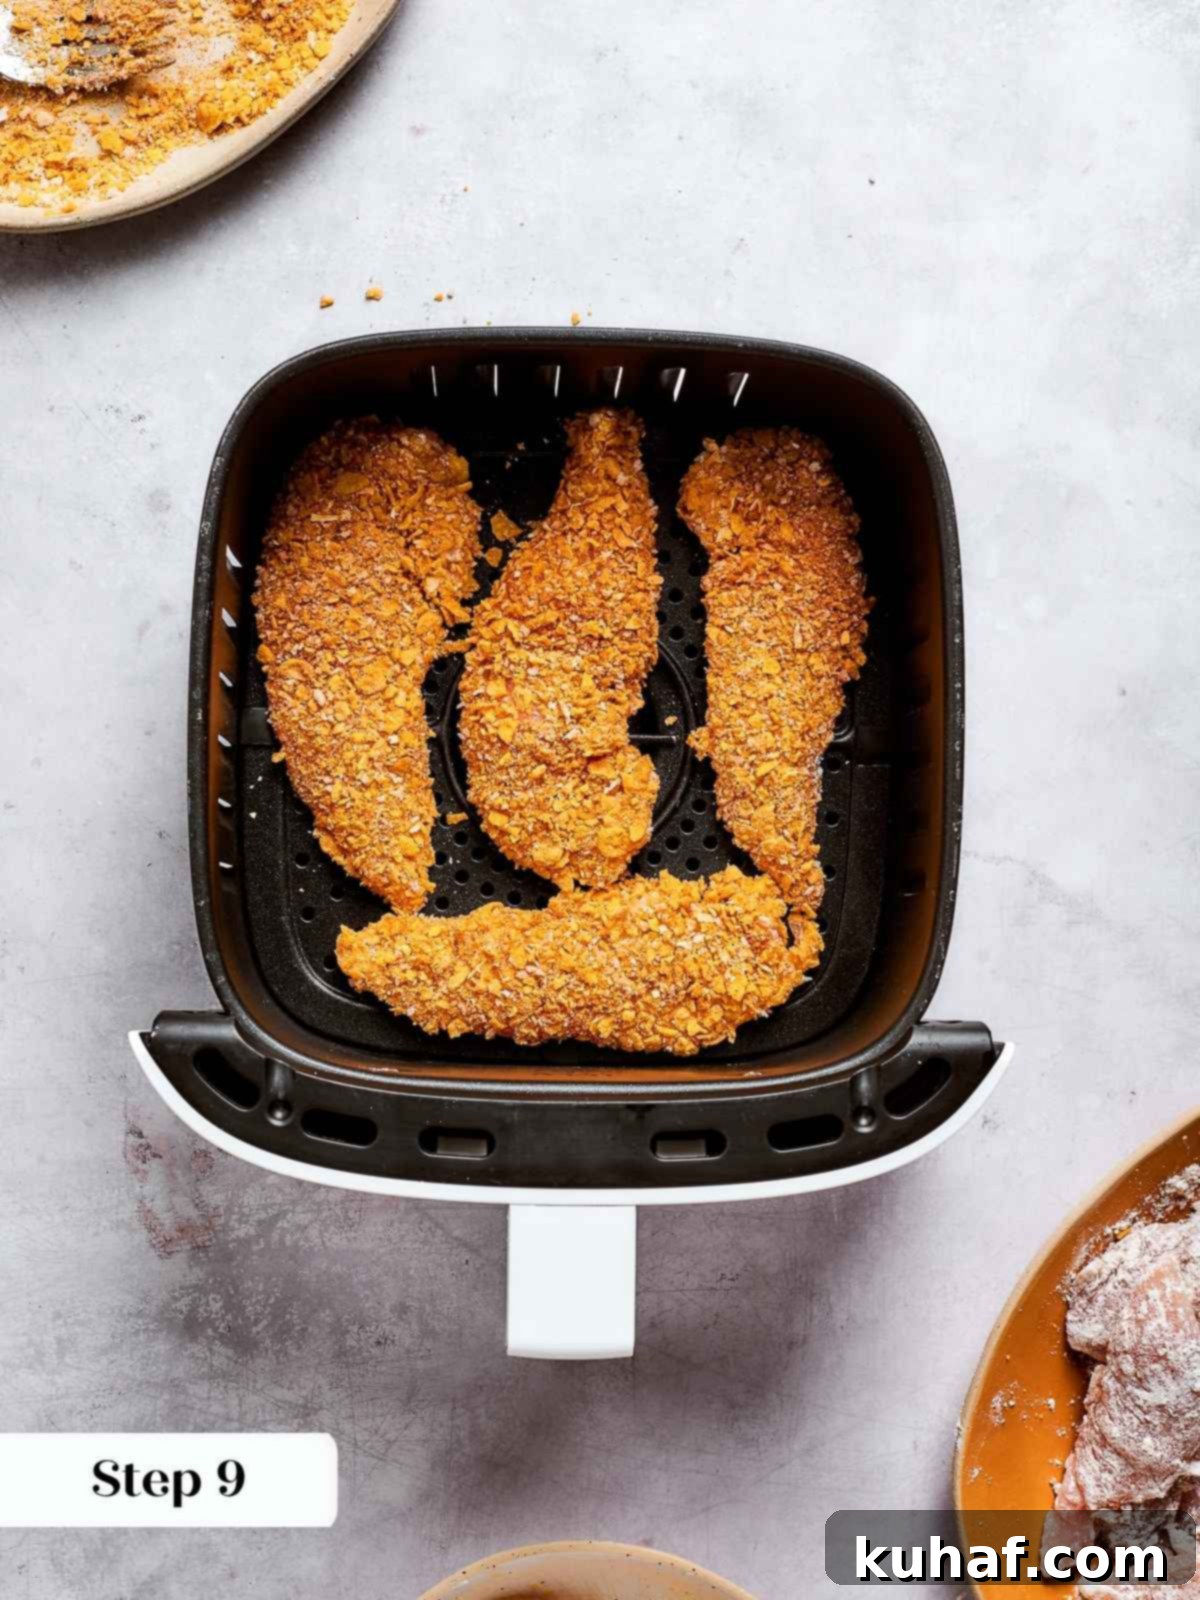
Step 8: Air Fry. Lightly spray the air fryer basket or tray with nonstick cooking spray to prevent any sticking. Arrange the chilled chicken tenders on the tray. If you have a large air fryer, you might be able to cook them all at one time, even if they lightly touch (it doesn’t really matter for cooking, though space is ideal for crispness). For the absolute crispiest results, ensure they are in a single layer if possible.
If you desire that extra, superior crispness, make sure tenders aren’t overlapping too much. It doesn’t have to be a perfect single layer, but even a slight gap between pieces helps for optimal air circulation!
Step 9: Cook to Golden Perfection. Cook for 12-16 minutes, flipping the tenders halfway through. The exact cooking time will depend on the size and thickness of your tenders, as well as the specific model of your air fryer. Mine were rather chubby, so they took about 15 minutes to reach golden perfection. Always ensure the internal temperature of the thickest part reaches 165°F (74°C) with a meat thermometer for food safety. If you like them extra crispy, you can warm them before serving in the air fryer for an additional 2-4 minutes.
Chef Lindsey’s Recipe Tip
When I’m coating the tenders, I always try to keep one hand designated for dry ingredients (flour, breading) and the other for wet ingredients (egg). This technique, often called “the dry hand, wet hand method,” significantly minimizes mess and makes the breading process much smoother and more efficient!
Air Fryer Chicken Tender FAQs
To keep your leftover air fryer chicken tenders delicious, store them in an airtight container in the refrigerator for 3 to 5 days. For the best quality and to maintain their delightful crispness, avoid storing them while still warm, as this can create condensation that makes them soggy. Always let them cool completely before sealing in a container.
Reheating leftovers properly is key to bringing back their original crunch. For optimal crispness, reheat them in the air fryer at 350°F (175°C) for 3-5 minutes, or until heated through and perfectly crispy. You can also use a conventional oven preheated to 375°F (190°C) for 5-10 minutes. While the microwave is convenient, it’s not recommended for reheating these tenders as it will invariably make them lose their crisp texture and become rubbery.
Generally, boneless, skinless chicken tenders cook in an air fryer for 12-16 minutes at 350°F (175°C). This duration depends on the thickness and size of your tenders, as well as the specific model of your air fryer. Always use a meat thermometer to ensure they reach an internal temperature of 165°F (74°C) for food safety. Thinner tenders will cook faster, while thicker ones may require the full 16 minutes or even a little longer. Flipping them halfway through ensures even cooking and crisping.
Several factors can prevent your air-fried chicken from achieving that coveted crispness. The most common culprits include a coating that was too wet, overcrowding the air fryer basket (which impedes hot air circulation), or not preheating the air fryer sufficiently. To ensure maximum crunch, always pat the chicken thoroughly dry before coating, don’t skip the crucial chilling step after breading, and give your tenders plenty of space in the air fryer. Preheating is also vital; it allows the basket to get hot enough to instantly crisp the coating on contact. A light spray of cooking oil on the coated tenders before air frying can also significantly enhance crispness.
Recommended Chicken Recipes
Date Night
Chicken with Shallots
Date Night
Hungarian Chicken Paprikash
Date Night
Lemon Chicken Recipe
Chicken Recipes
Baked BBQ Chicken Breast
If you tried this recipe and loved it, please leave a 🌟 star rating and let me know how it goes in the comments below. I love hearing from you; your comments make my day!
Air Fryer Chicken Tenders
Saved
Pin Recipe
Comment
Print Recipe
Ingredients
- 1-1.25 pounds chicken tenders
- 1 large egg well beaten
For the Flour mixture:
- ¼ cup all-purpose flour
- ½ teaspoon kosher salt
- ¼ teaspoon black pepper
For the exterior coating:
- ½ cup Corn Chex crushed & rounded* (or cornflakes, pretzels, etc.–measure after crushing!)
- ¼ cup unseasoned plain bread crumbs
- ½ teaspoon kosher salt
- ¼ teaspoon paprika
- ¼ teaspoon onion powder
Instructions
-
Select 3 separate shallow, rimmed plates or baking dishes. In the first plate, add ¼ cup all-purpose flour, ½ teaspoon kosher salt, and ¼ teaspoon black pepper. Use a fork to mix until well combined. In the second plate, pour the beaten large egg. In the third plate, add the ½ cup crushed Corn Chex, ¼ cup plain breadcrumbs, ½ teaspoon kosher salt, ¼ teaspoon paprika, and ¼ teaspoon onion powder. Use a fork to mix these ingredients very well, ensuring even distribution.
-
Pat chicken tenders thoroughly dry with paper towels. Set up your chicken coating station from left to right: dry chicken tenders, then the flour mixture plate, followed by the egg plate, then the exterior coating plate, and finally, a clean landing tray or plate for your coated chicken. Working in batches (determined by the size of your plates), add several tenders to the flour plate and coat completely. Shake off any extra flour gently, then place in the egg. I usually go ahead and dredge the next round in the flour before my hand gets covered in egg from the previous batch.
-
Dip all sides of the floured tenders in the beaten egg, allowing any excess to drip off. Then, transfer them to the plate with the exterior coating mixture.
-
Coat the tenders fully with the exterior coating, pressing it firmly onto all sides to help it stick securely. Remove the coated tenders to the clean plate or tray.
-
Repeat this process with all the remaining tenders, working in batches to ensure each piece gets a fair and even coating.
-
Place all coated chicken tenders in the refrigerator, uncovered, for 10-45 minutes. This crucial chill time helps the coating set and significantly improves the crispness when cooked. I do not recommend making them the day before.
-
When you are ready to cook, preheat your air fryer to 350°F (175°C) on the air fry setting.
-
Spray the air fryer basket or tray with nonstick cooking spray. Place the chilled tenders on the tray, ensuring not to overcrowd the basket. If you have a large air fryer, you might be able to do them all at one time, even if they lightly touch (though a single layer with space is ideal for maximum crispness).
-
Cook for 12-16 minutes, flipping halfway through. Cooking time will depend on the size and thickness of your tenders. Mine were rather chubby so they took about 15 minutes. Always ensure the internal temperature reaches 165°F (74°C) with a meat thermometer. If desired, you can warm them for an additional 2-4 minutes before serving for extra crispness.
Notes
Technique – If you run out of exterior coating, simply shake a little more plain breadcrumbs on the plate to coat any remaining bare spots. I typically find there is just enough coating if I use it all efficiently. The “dry hand, wet hand” method (using one hand for flour/breadcrumbs, the other for egg) significantly helps keep things tidy.
Variations – Feel free to experiment with the crunchy coating! You can swap out the Chex for crushed cornflakes, pretzels, or panko breadcrumbs—whatever you have on hand or prefer for a different texture. Adding grated Parmesan cheese or a pinch of cayenne pepper can also introduce new flavor dimensions.
Storage – Store leftover air fryer chicken tenders in an airtight container in the refrigerator for 3 to 5 days. For best results, allow them to cool completely before storing to prevent sogginess. Reheat in the air fryer or oven to regain crispness.
Nutrition
Calories: 54kcal |
Carbohydrates: 4g |
Protein: 7g |
Fat: 1g |
Saturated Fat: 0.3g |
Polyunsaturated Fat: 0.2g |
Monounsaturated Fat: 0.3g |
Trans Fat: 0.004g |
Cholesterol: 28mg |
Sodium: 202mg |
Potassium: 117mg |
Fiber: 0.2g |
Sugar: 0.2g |
Vitamin A: 57IU |
Vitamin C: 1mg |
Calcium: 10mg |
Iron: 1mg
Like this? Leave a comment below!
Before You Go
I sincerely hope you enjoyed this professionally tested and chef-developed recipe for the crispiest air fryer chicken tenders. By following these tips and embracing the unique Chex coating and crucial chill time, you’re well on your way to creating a healthier, incredibly delicious, and effortlessly crispy meal that your family will adore. This recipe brings restaurant-quality crunch right to your kitchen, without the fuss or grease of deep-frying. Don’t forget to explore our other delightful, chef-developed chicken recipes for more culinary inspiration and to expand your repertoire of amazing chicken dishes! Happy cooking, and enjoy every crunchy, juicy bite!
