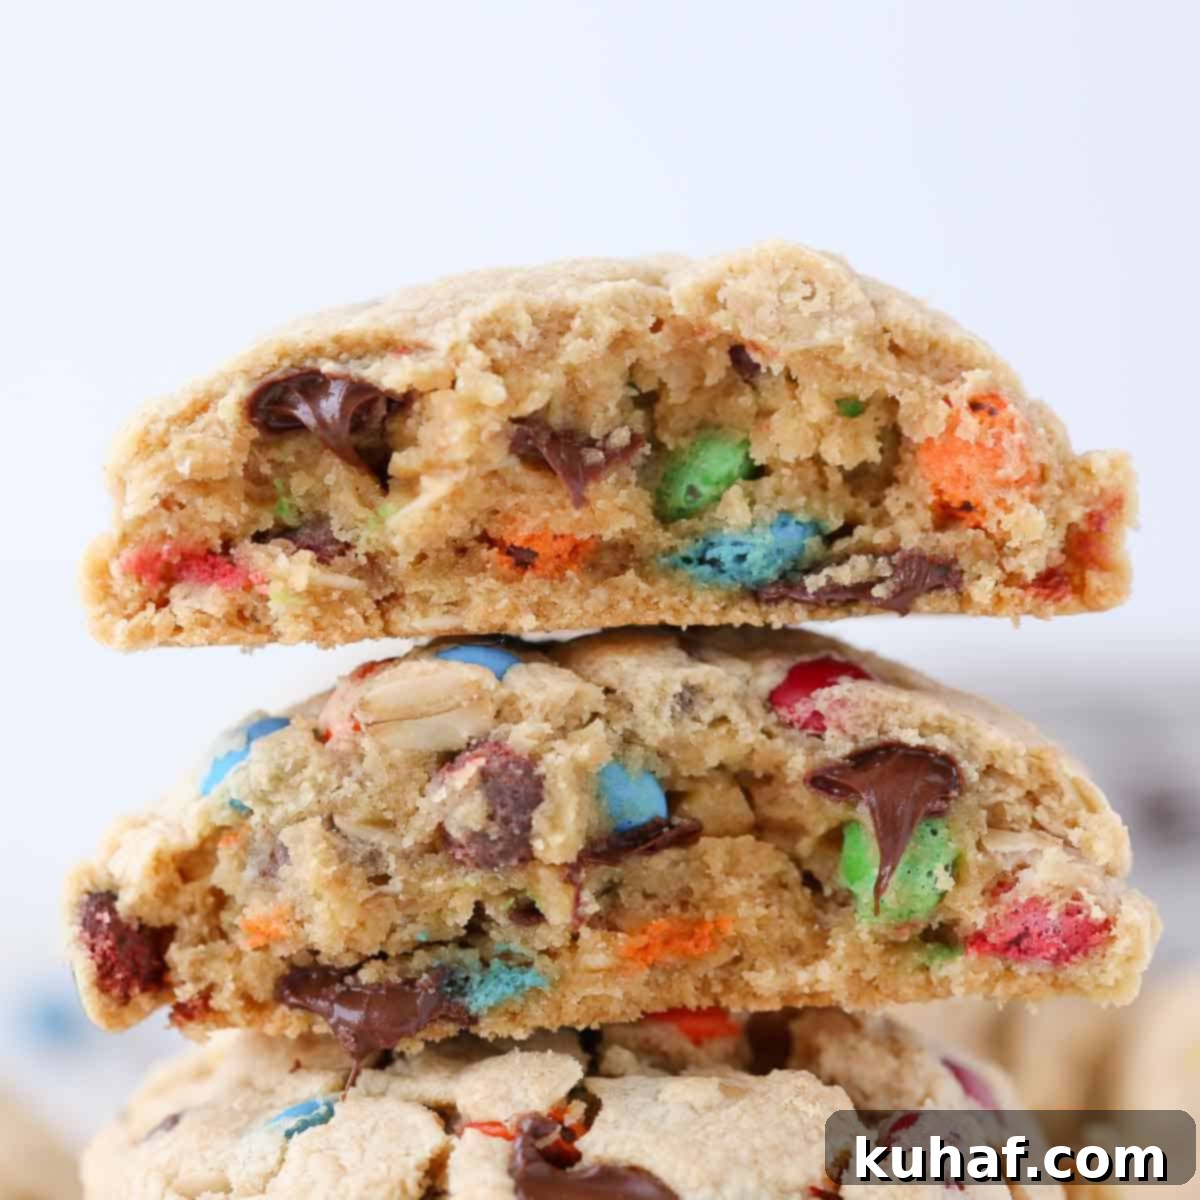
Irresistibly Thick & Chewy Monster Cookies: The Ultimate Peanut Butter, Chocolate & M&M Recipe
Prepare yourself for a cookie experience like no other! This ultimate monster cookie recipe delivers spectacularly thick, intensely chewy, and deeply peanut buttery cookies. Each giant cookie is a glorious explosion of flavor and texture, featuring a delightful medley of mix-ins that almost outnumber the dough itself. Bursting with chocolate chips, colorful M&Ms, and hearty oats, these cookies are a celebration of everything wonderful in a sweet treat. Forget thin, forget crumbly – these are the big, bold, bakery-style cookies of your dreams!
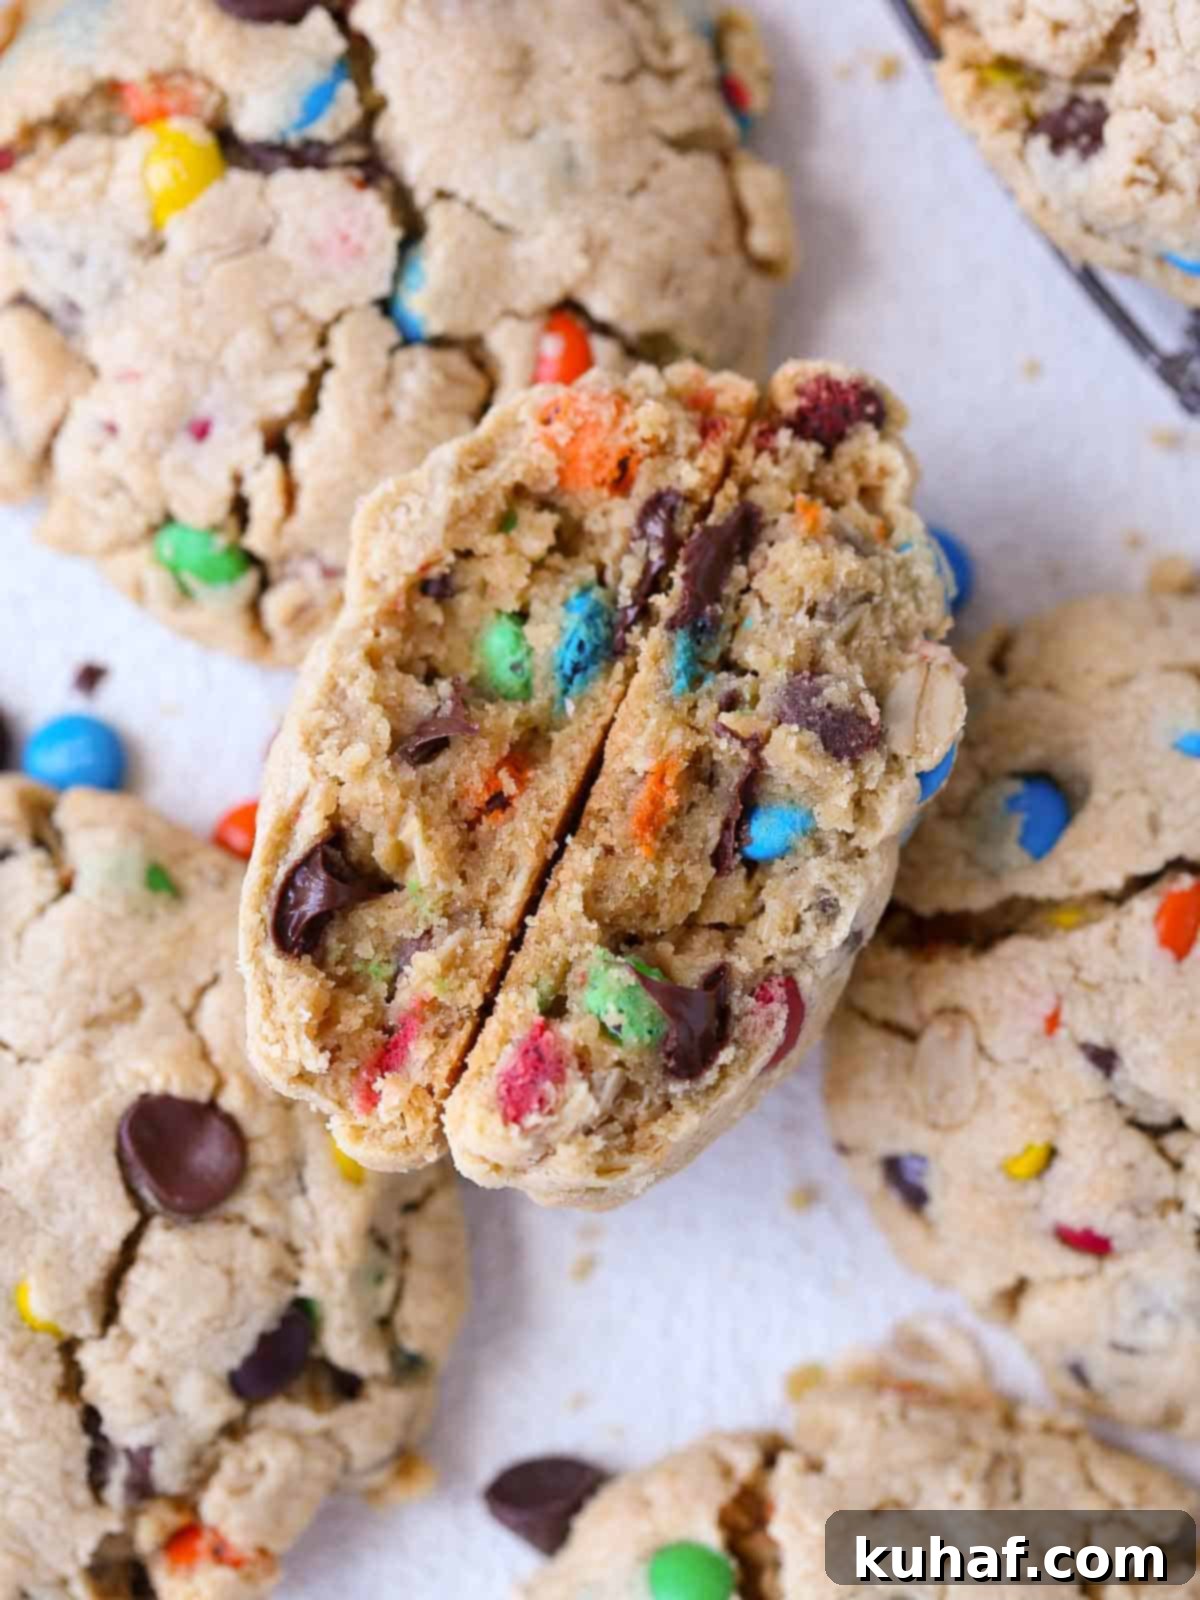
This incredibly easy monster cookie recipe masterfully brings together the most beloved elements of classic treats: the richness of thick peanut butter cookies, the sweetness of chocolate chips, the fun of M&Ms, and the satisfying chew of oatmeal cookies. The result? Giant, chewy, and gloriously gooey masterpieces that are sure to impress. These cookies are perfect for peanut butter aficionados, chocolate enthusiasts, and truly, any cookie lover – which pretty much covers everyone!
Once you’ve experienced the magic of these monster cookies, you’ll be ready to dive into more peanut butter delights. Don’t miss out on other fan favorites like rich Reese’s Peanut Butter Blondies, classic Peanut Butter Blossoms, or delightful Peanut Butter Banana Muffins for even more creamy, nutty goodness.
Table of Contents
- Why You Will Love This Monster Cookie Recipe
- Professional Baking Tips for Perfect Monster Cookies
- What Exactly Are Monster Cookies?
- Key Ingredients for Monster Cookies
- Exciting Variations for Your Monster Cookies
- How to Serve Your Delicious Monster Cookies
- Step-by-Step Guide: How to Make Monster Cookies
- Chef Lindsey’s Essential Recipe Tip
- Frequently Asked Questions About Monster Cookies
- Monster Cookies Full Recipe Card
- Before You Go: More Cookie Delights
Why You Will Love This Monster Cookie Recipe
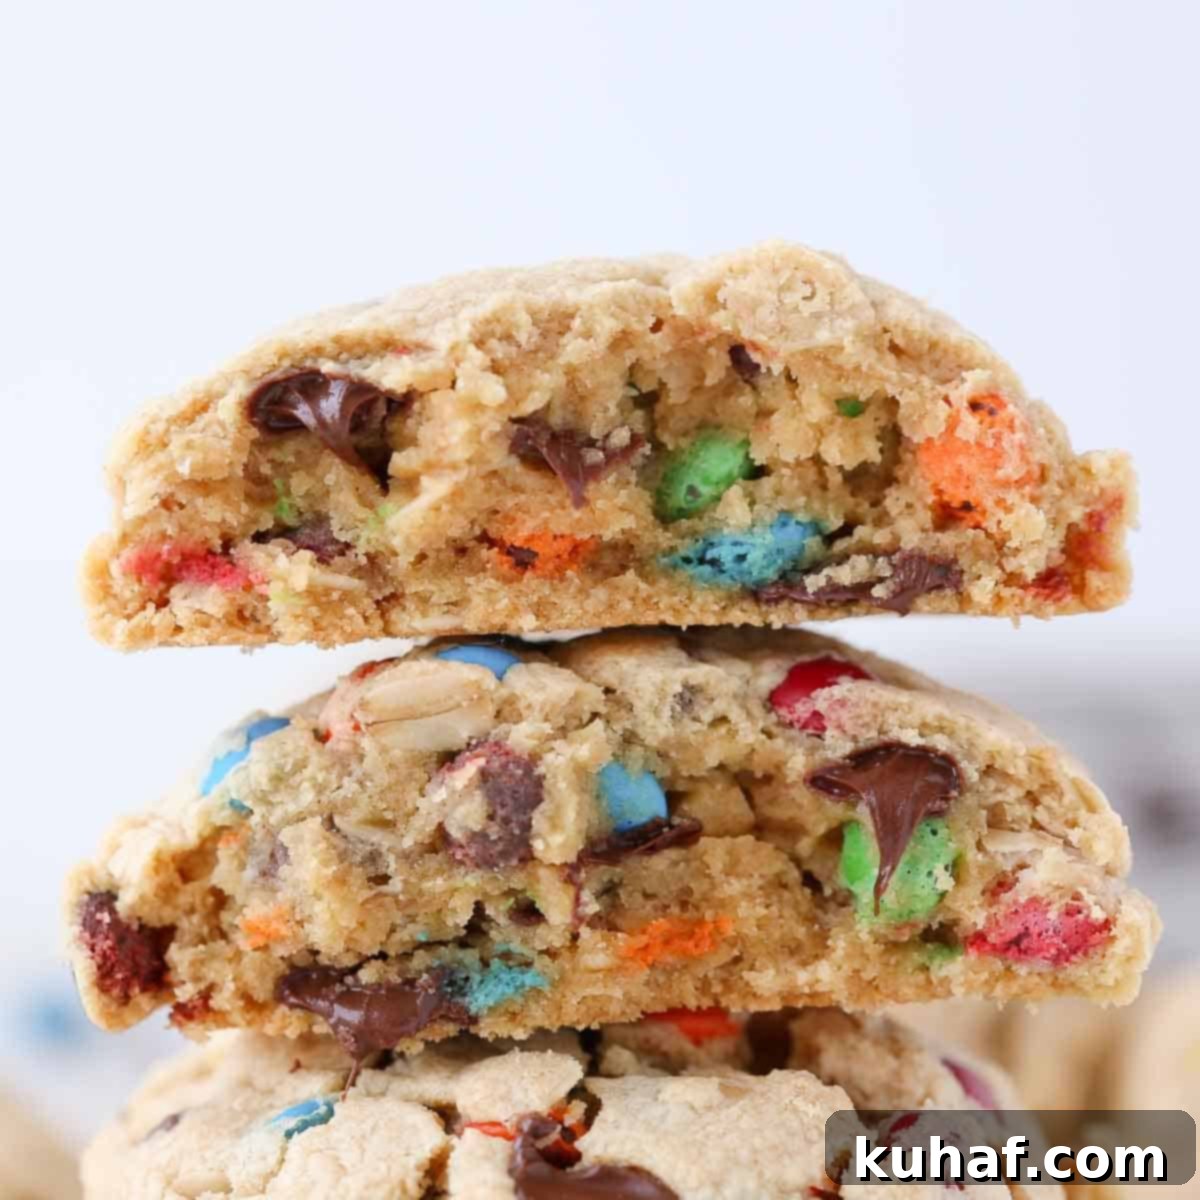
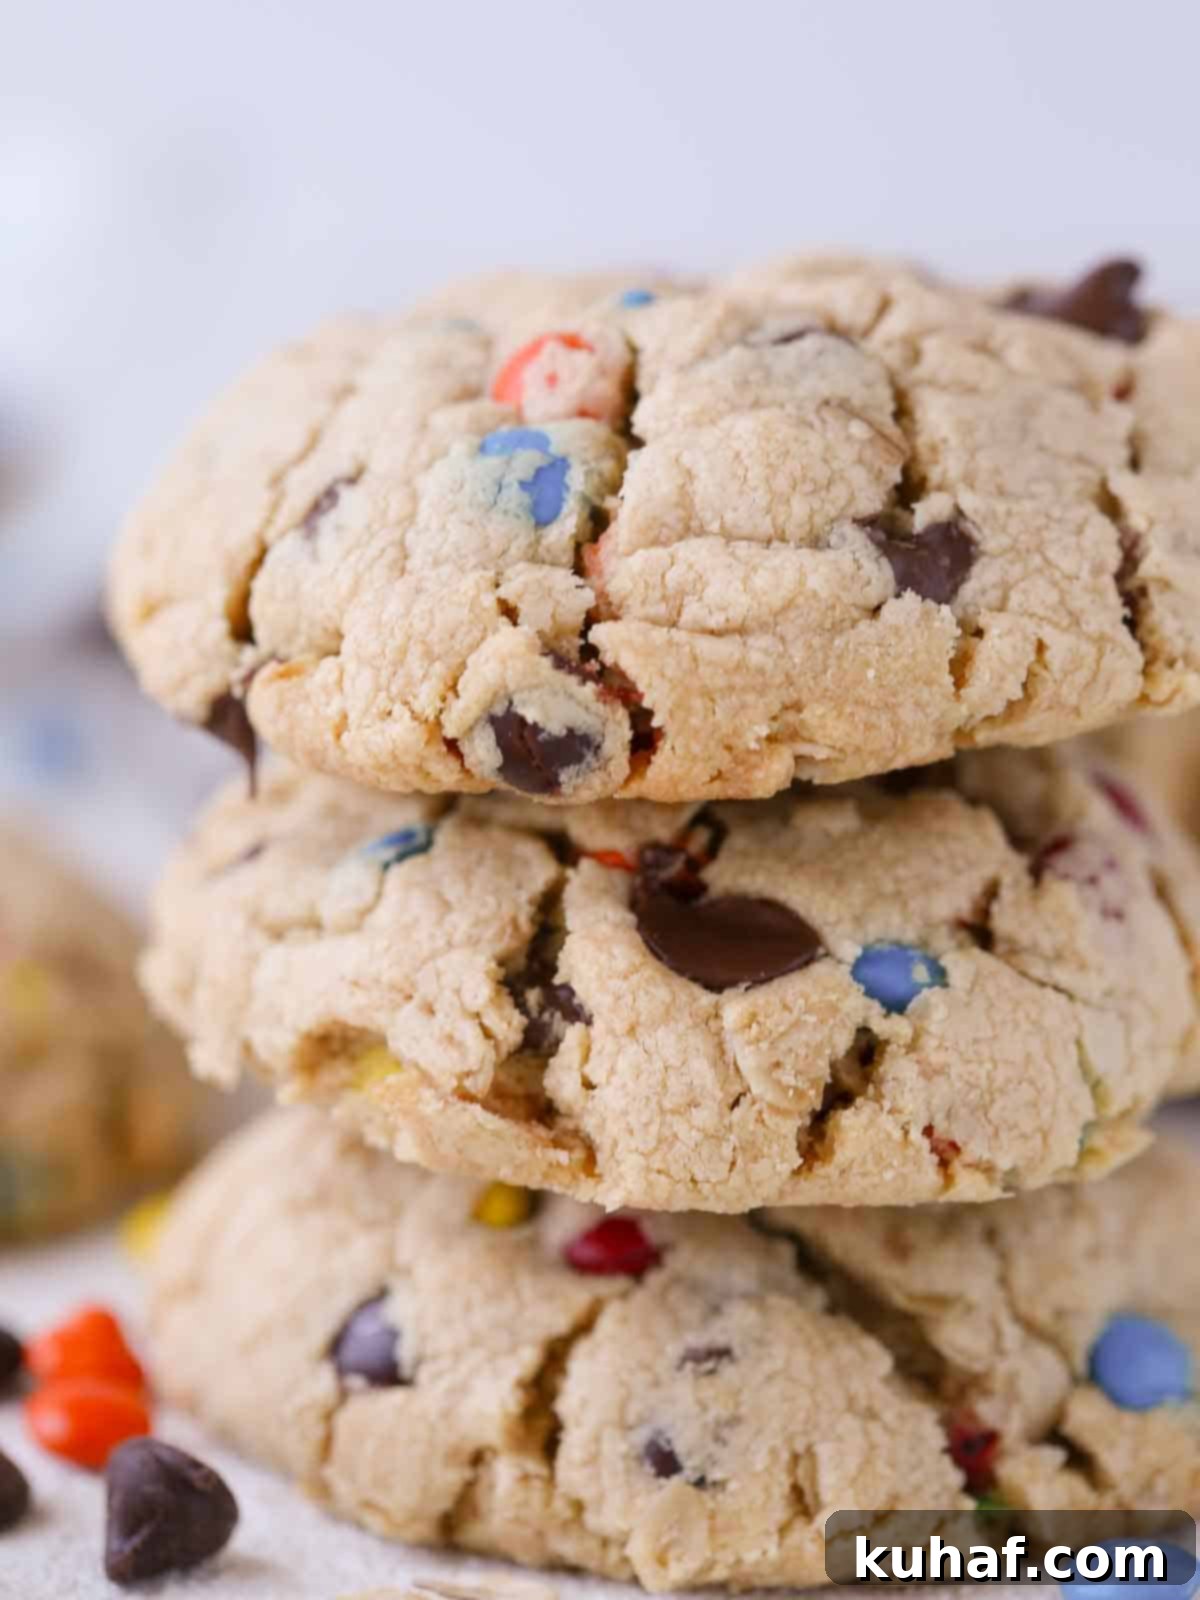
- Unbeatable Soft, Chewy, and Perfectly Thick Texture: These aren’t just any cookies; they’re the result of meticulous recipe development. From the precise mixing method to the perfectly balanced ratio of ingredients, every detail has been optimized to ensure the most delectable, soft, and thick texture every single time. You’ll bite into a cookie that’s satisfyingly dense yet melts in your mouth, never thin or overly crisp.
- Infinitely Customizable to Your Taste Buds: While our classic version packs a punch with creamy peanut butter, M&M’s, and quick oats, the beauty of monster cookies lies in their versatility. Feel free to unleash your creativity! Experiment with peanut butter chips for an extra nutty boost, add butterscotch chips for a caramel-like note, or create your own chocolate medley with a combination of milk and dark chocolate chips. Crushed pretzels, toffee bits, or even chopped nuts can also elevate these cookies to new heights.
- Generously Sized and Made for Sharing (or Savoring!): This recipe yields a baker’s dozen of truly giant, bakery-sized cookies. Their impressive size makes them perfect for sharing with friends and family at gatherings, gifting to loved ones, or simply portioning out to enjoy throughout your week. Each cookie is a substantial treat that feels incredibly indulgent.
Professional Baking Tips for Perfect Monster Cookies
- Avoid Over-Creaming Butter and Sugar for Optimal Texture: The ultimate secret to achieving these wonderfully thick and chewy cookies, much like my popular triple chocolate chip cookies, lies in using cold yet pliable butter. Your butter should be soft enough that you can easily press an indentation with your finger, but still cool to the touch. When combining it with the sugars, mix just until a uniform paste forms. Over-creaming incorporates too much air, which can cause cookies to spread excessively and become thin rather than thick and chewy.
- Select the Right Peanut Butter for Authentic Flavor: I’m a lifelong devotee of Jif peanut butter for its consistent texture and flavor, and it’s what I always use. While you’re welcome to use your preferred brand, I strongly recommend a smooth, conventional peanut butter. Natural peanut butter (the kind that separates) can also work, but its oil content might vary, subtly altering the final texture. Whichever you choose, ensure it’s not too oily or dry.
- Gradually Add Dry Ingredients to Control Gluten Development: For the thickest, chewiest monster cookies imaginable, it’s crucial to add your dry ingredients in stages. This method prevents the overdevelopment of gluten, which can lead to tough cookies, and ensures a perfectly incorporated dough without overmixing. I typically add the flour mixture in about 4-5 additions, mixing until each portion is just incorporated before adding the next. This controlled approach results in a tender, chewy crumb.
What Exactly Are Monster Cookies?
It’s an excellent question, and rest assured, it has nothing to do with Cookie Monster, though these would undoubtedly rank high on his favorite treats list! These are dubbed “monster cookies” for a very good reason: they are large, unapologetically thick, incredibly chewy, and boast an over-the-top abundance of mix-ins. Did I say “threat”? I meant “treat”! These cookies are a full-sensory experience, designed to satisfy even the most monstrous cravings.
While not exclusively a Midwest phenomenon, monster cookies are incredibly popular in the Midwestern United States, a region renowned for its hearty, comforting recipes that never go out of style. It’s widely believed that this delightful creation originated there, specifically in Iowa, sometime during the 1970s. Their generous size and bountiful additions make them a quintessential American classic, offering a satisfying bite packed with peanut butter, chocolate, and oats – a true testament to comfort baking.
Key Ingredients for Monster Cookies
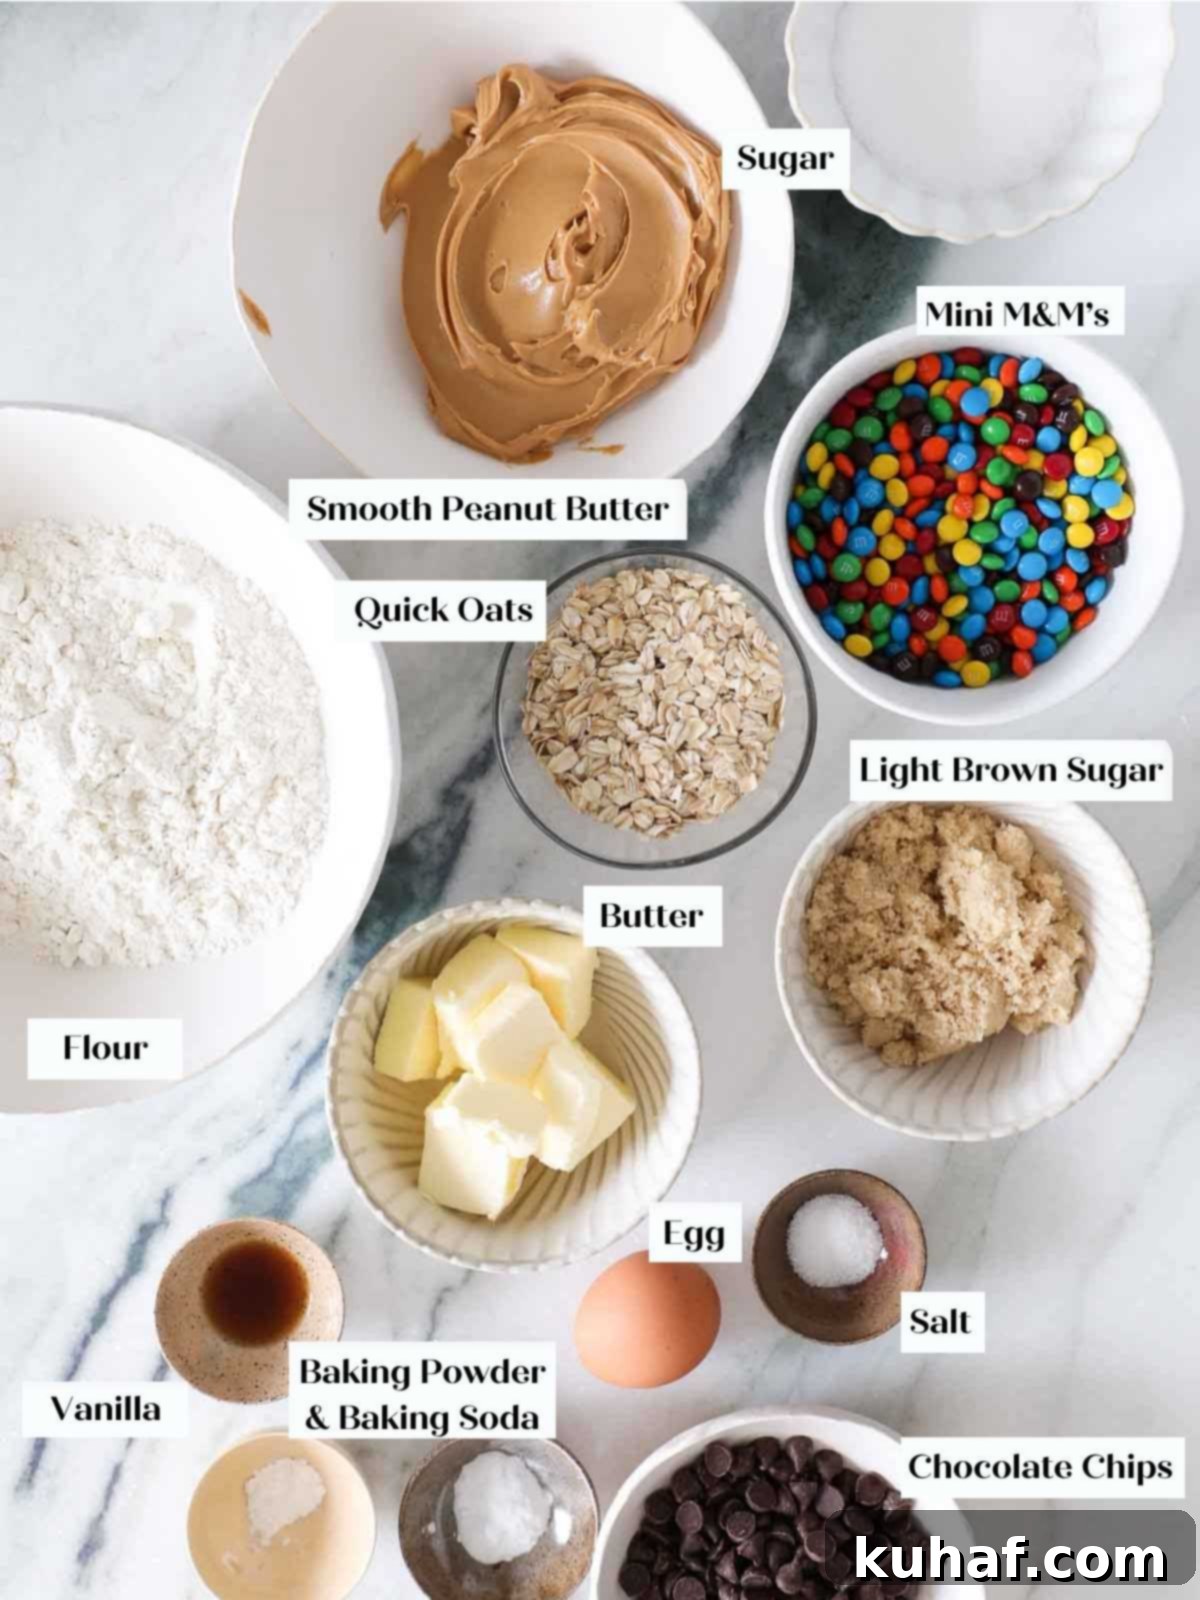
- Light Brown Sugar: This ingredient is crucial for adding more than just sweetness. Light brown sugar brings a delightful richness and a subtle molasses flavor, but most importantly, its inherent moisture content helps keep these cookies wonderfully soft and chewy throughout.
- Unsalted Butter: For the perfect monster cookie, you need a balanced combination of creamy peanut butter and softened unsalted butter. Using unsalted butter allows you to control the overall saltiness of the cookie, ensuring a balanced flavor profile. If peanut butter isn’t your preference, I highly recommend exploring my thick chocolate chip cookie recipe as an alternative base.
- Smooth Peanut Butter: The star of the show! A good quality smooth peanut butter (like my go-to Jif) is essential for that unmistakable, rich peanut flavor and helps contribute to the dense, chewy texture.
- Whole Egg: The egg serves multiple vital roles: it acts as a binder, provides essential moisture, and aids in leavening. The fat from the yolk adds significant richness and helps maintain the cookies’ delightful chewiness, while the egg also emulsifies the batter, contributing to a consistently perfect texture.
- Chocolate Chips: I typically opt for semi-sweet chocolate chips, which offer a classic, balanced sweetness that complements the peanut butter beautifully. However, feel free to use your favorite type – milk chocolate for extra sweetness, dark chocolate for a richer contrast, or even a blend of different chocolates.
- Quick Oats: These oats are key to the monster cookie’s signature hearty and chewy texture. Unlike rolled oats, quick oats are finer and integrate more seamlessly into the dough, providing chewiness without making the cookies too dense or grainy.
- Mini M&M’s: These colorful candies add a fun crunch, a burst of milk chocolate flavor, and a vibrant visual appeal that makes monster cookies so distinctive. Using mini M&M’s ensures that every bite gets a perfect distribution of chocolatey goodness.
- Kosher Salt: A little kosher salt is crucial for balancing the sweetness of the sugars and enhancing all the other flavors, especially the peanut butter and chocolate. It elevates the entire cookie experience.
- Granulated Sugar: Granulated sugar contributes to the overall sweetness and helps create a slight crispness around the edges of the cookies. However, it’s important to use it in the correct proportion to butter and flour; too much can cause the cookies to spread out too much rather than retaining their desirable tall, chewy structure.
- Vanilla Extract: High-quality vanilla extract imparts its own beautiful, warm flavor and acts as a fantastic enhancer, boosting the aromatic notes of other ingredients like chocolate and brown sugar.
- All-Purpose Flour: The foundation of our cookie structure, all-purpose flour contains just the right amount of gluten to create a soft, yet sturdy, bakery-style cookie with an ideal chewy texture.
- Baking Soda: This leavening agent primarily reacts with the acid present in the molasses of the light brown sugar, causing the cookies to rise and spread slightly, contributing to their signature crinkled tops and chewy interiors.
- Baking Powder: Working in conjunction with baking soda, baking powder provides an additional boost of lift, helping these monster cookies achieve their impressive thickness and soft, cakey center.
Refer to the comprehensive recipe card below for precise measurements and quantities of each ingredient.
Exciting Variations for Your Monster Cookies
The beauty of monster cookies lies in their adaptability. Don’t hesitate to get creative and customize them to your heart’s content!
- Experiment with Different Mix-ins: The possibilities are endless! Beyond the classic chocolate chips and M&M’s, consider adding butterscotch chips for a sweet, caramelly note, peanut butter chips for an extra boost of nutty flavor, or creamy white chocolate chips. For a textural contrast, try chopped Oreo cookies, crunchy toffee bits, or even melty candy pieces like chopped Reese’s peanut butter cups or Reese’s Pieces. For an extra decadent touch, swirl a ribbon of homemade salted caramel sauce into the dough before baking.
- Transform Them into a Skillet Cookie! For an impressive dessert that’s perfect for sharing, press the room-temperature cookie dough into an 8-inch cast iron skillet. Bake until the edges are beautifully golden brown and the center appears completely matte and set. To truly make your skillet cookie dreams come true, serve it warm with generous scoops of my luscious vanilla bean ice cream, a drizzle of rich chocolate fudge sauce, and perhaps a sprinkle of flaky sea salt to enhance all the flavors.
- Add Some Savory Crunch for a Flavor Twist. If you love a sweet and salty combination, incorporate some crunch! Before baking, gently press crushed pretzels or finely chopped roasted peanuts onto the tops of the dough balls. This simple addition provides a delightful salty contrast that perfectly complements the sweetness and richness of the cookie.
- Smaller Bites for Sharing: While monster cookies are known for their size, you can easily make smaller cookies by using a 1-ounce cookie scoop (instead of a 2-ounce scoop or 1.5-inch ball). Adjust baking time accordingly, usually 8-10 minutes, for perfectly sized treats.
How to Serve Your Delicious Monster Cookies
- These cookies are incredibly indulgent and satisfying on their own, but they reach new heights when paired with complementary delights. Consider serving them alongside delicate crème anglaise or creamy vanilla bean ice cream for an elevated dessert experience. You could even transform them into epic ice cream sandwiches – just make sure to scoop your ice cream onto room-temperature cookies for the best texture and ease of eating.
- Elevate your monster cookies with decadent toppings! A warm drizzle of rich hot fudge sauce or a luxurious swirl of homemade salted caramel sauce can turn a great cookie into an extraordinary one. For the ultimate chocolate lover’s dream, pair them with a scoop of my velvety chocolate ice cream.
- For a timeless, comforting pairing, simply pour yourself a tall, frosty glass of cold milk. There’s nothing quite like dunking a chewy monster cookie into cold milk, a classic combination that never disappoints. Get comfy and enjoy every blissful bite!
Step-by-Step Guide: How to Make Monster Cookies
Creating these incredible monster cookies is straightforward with our detailed instructions. Further precise measurements and comprehensive details can be found in the recipe card below!
Step 1: Prepare Your Dry Ingredients. In a large mixing bowl, combine the all-purpose flour, baking soda, baking powder, and kosher salt. Use a whisk to thoroughly combine these ingredients, ensuring that the leavening agents are evenly distributed and there are no lumps. Proper distribution is key for consistent rise and texture in every cookie. Set this mixture aside.
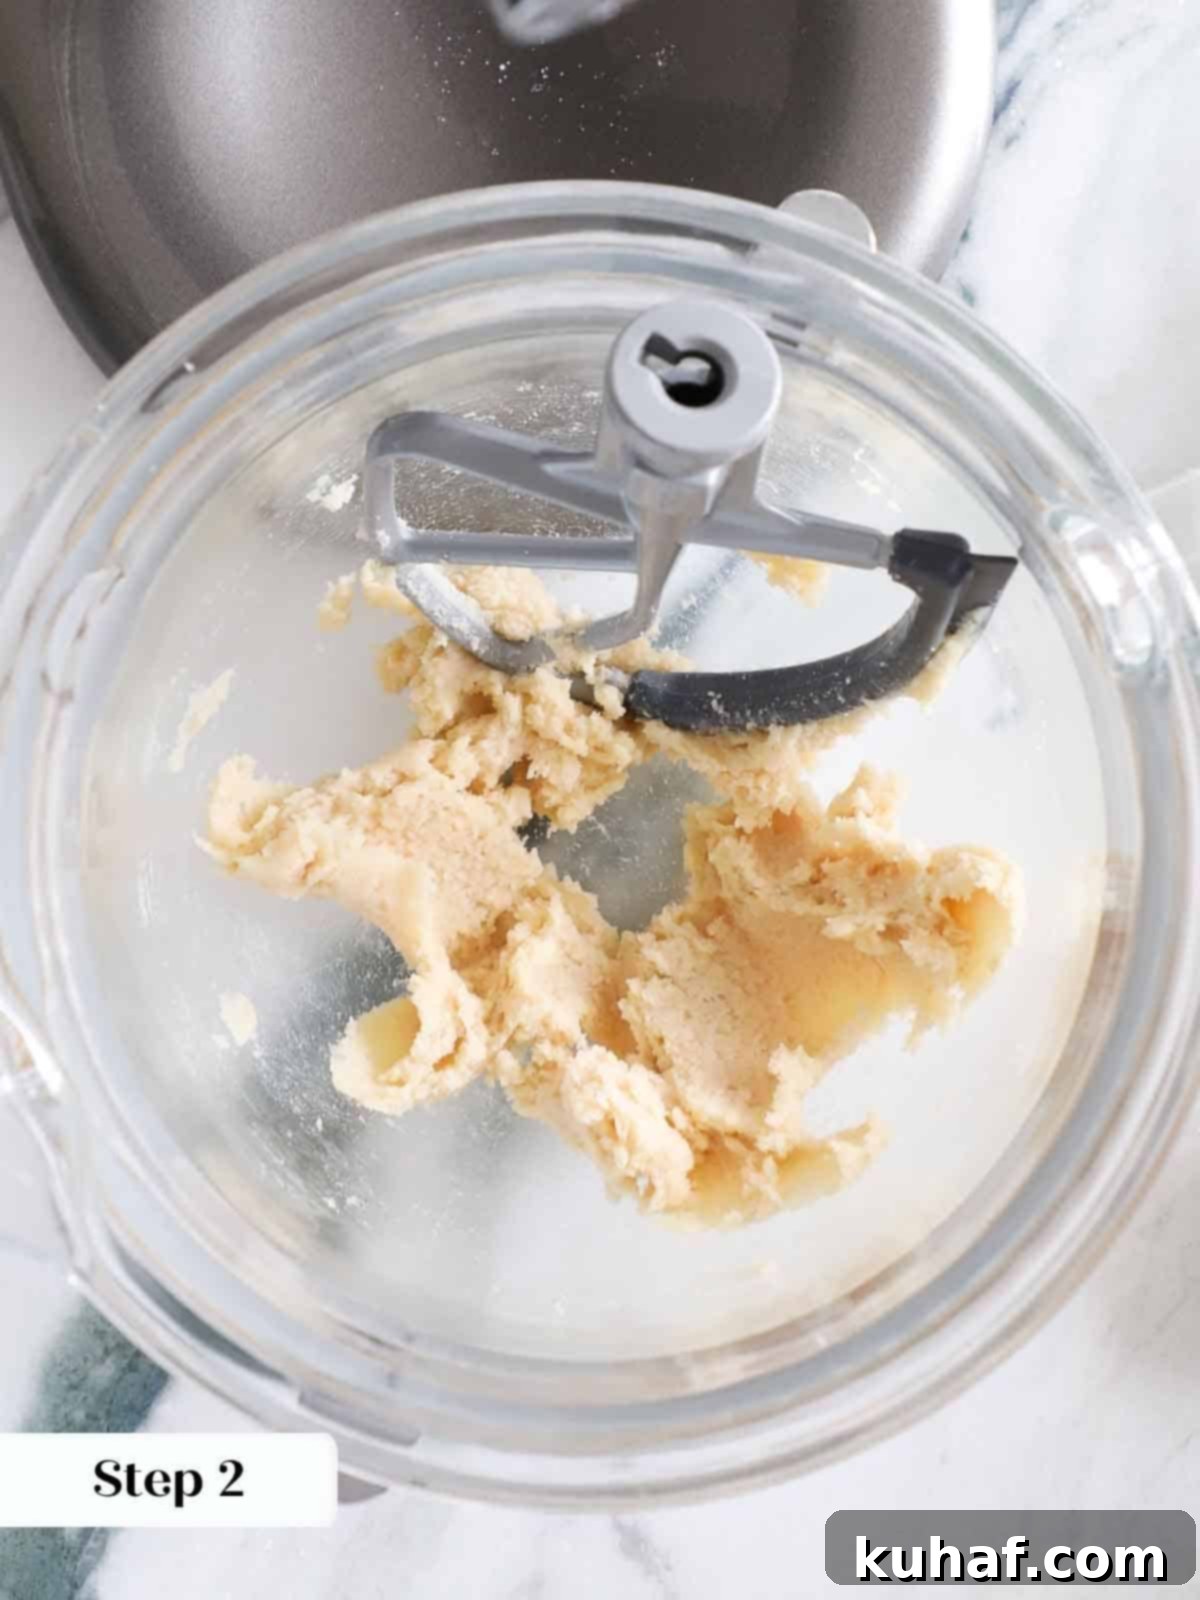
Step 2: Cream Butter and Sugars. Begin creaming the butter in the bowl of a stand mixer fitted with a paddle attachment (or use a reliable electric hand mixer). Beat the butter on medium-high speed until it’s still cold but has become pliable. This means it should give slightly when pressed, but not be fully at room temperature. Next, add both the granulated sugar and light brown sugar. Continue mixing on medium-high speed just until the sugars are combined with the butter and a uniform, slightly pasty texture forms. This precise creaming method is vital for achieving thick, chewy cookies and preventing excessive spreading, especially if your butter happens to be softer than ideal.
Always remember to regularly scrape the bottom and sides of the bowl with a rubber spatula. Butter, particularly, has a tendency to stick to the bottom and not fully incorporate with the sugar, which can lead to an uneven dough. A quick scrape ensures everything is thoroughly mixed.
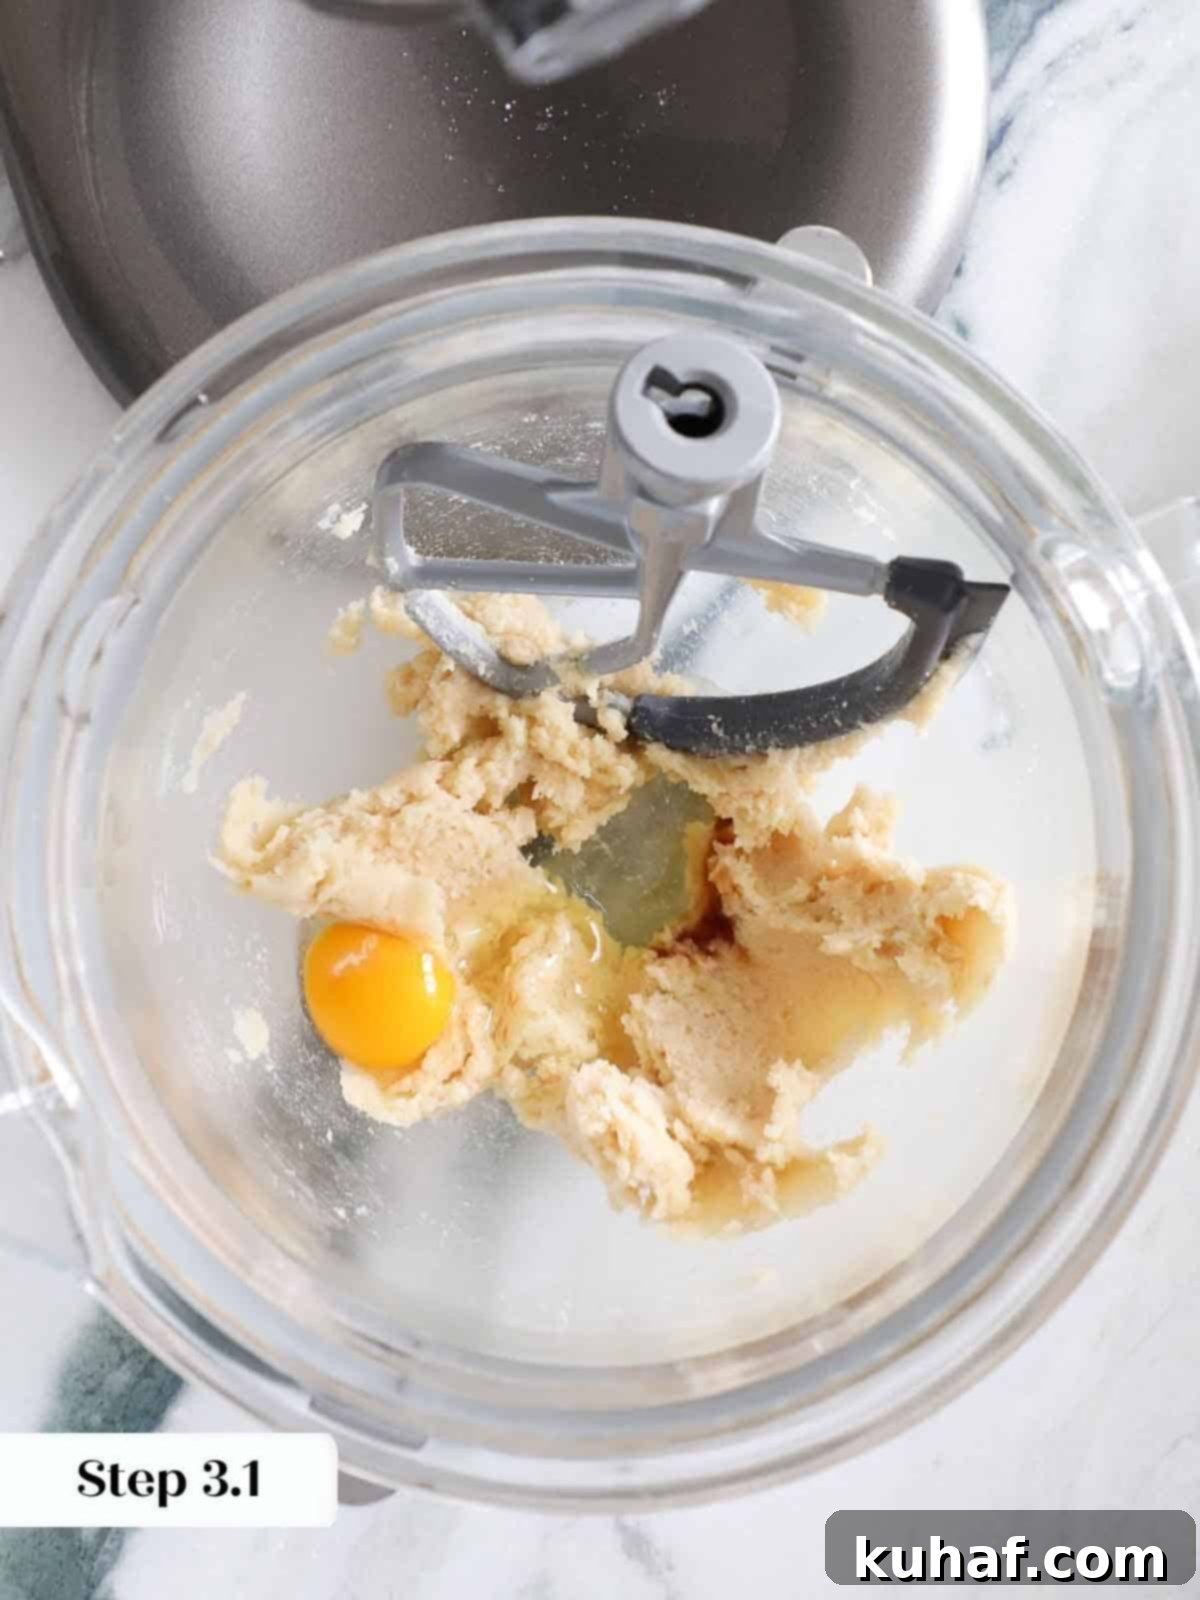
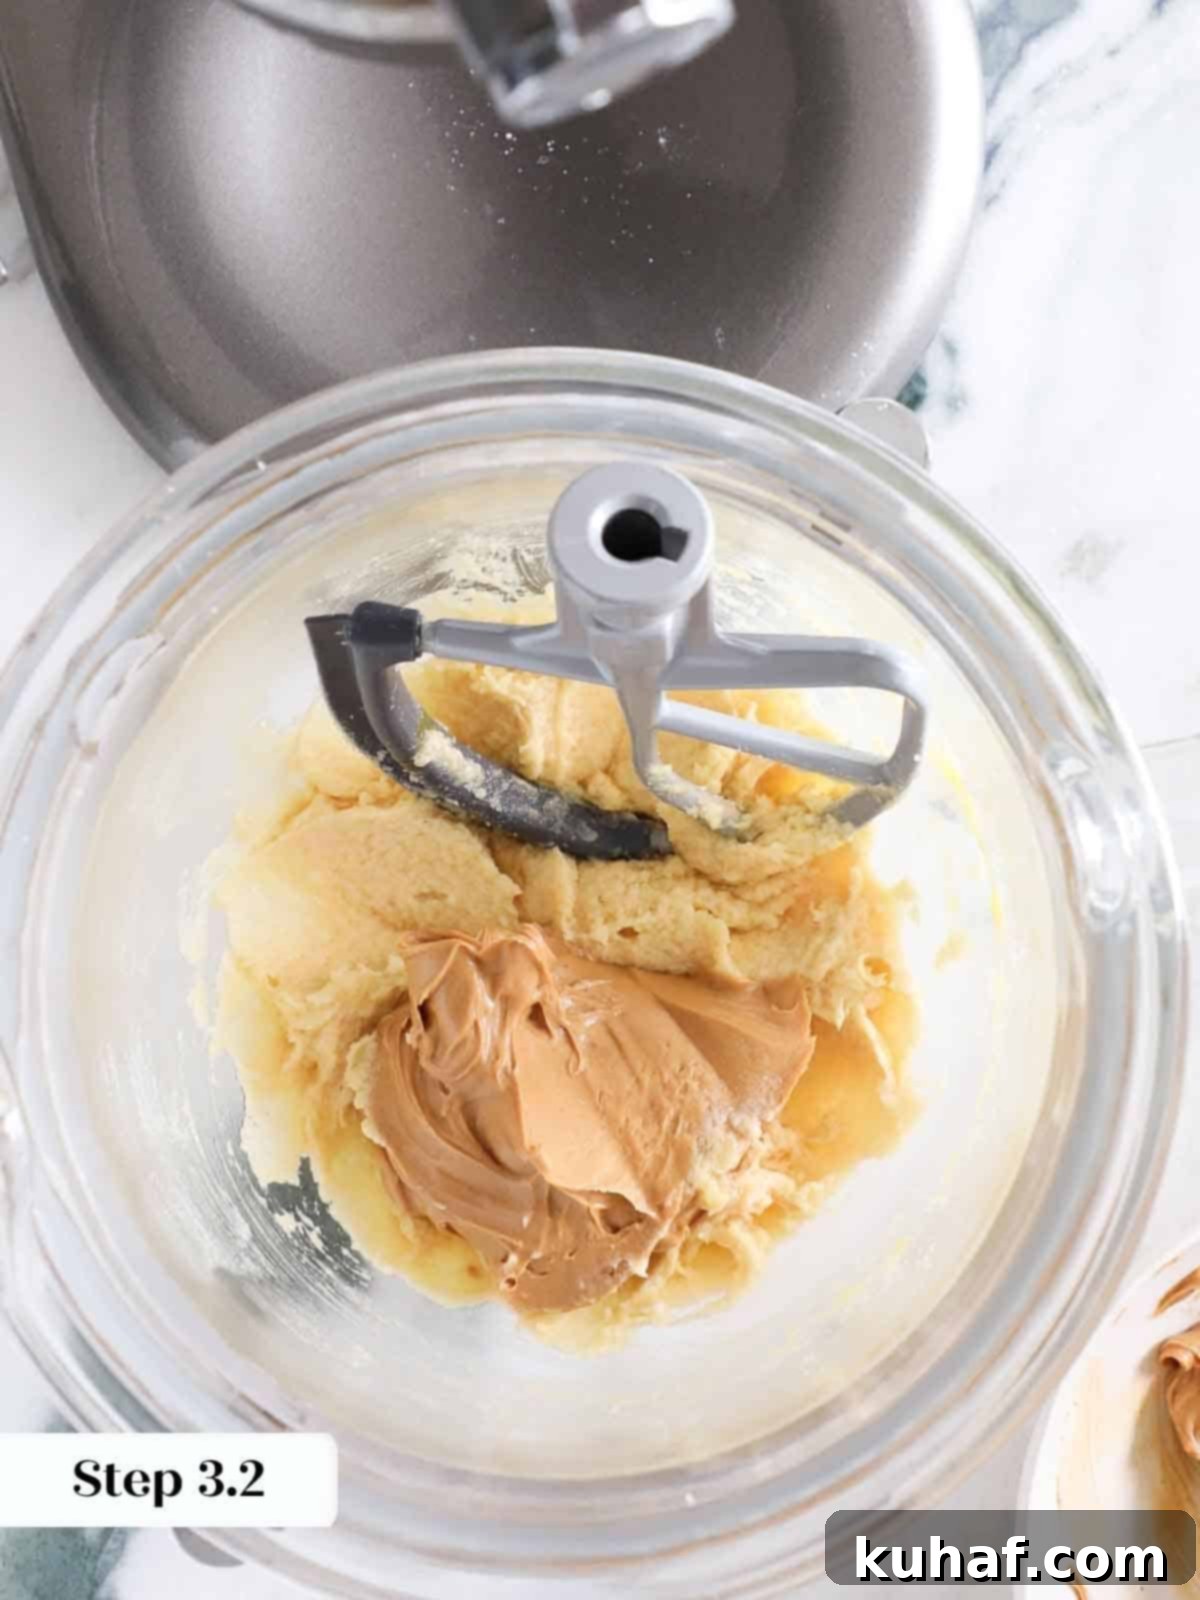
Step 3: Incorporate Wet Ingredients. Add the whole egg and vanilla extract to the creamed butter and sugar mixture. Continue to beat until fully incorporated, pausing as needed to scrape down the sides of the bowl to ensure all ingredients are well combined. Finally, add the smooth peanut butter and beat until the mixture is smooth and uniform, free of any streaks of peanut butter.
Step 4: Gradually Add Dry to Wet Ingredients. Reduce the mixer speed to low. Begin gradually adding the whisked dry ingredients (flour, baking soda, baking powder, salt) to the wet mixture. It’s best to incorporate the flour mixture in about 4-5 additions. To prevent overdevelopment of gluten, which can make cookies tough, add the next portion of flour when the previous one is almost, but not entirely, incorporated. This gentle mixing ensures a tender and chewy cookie.
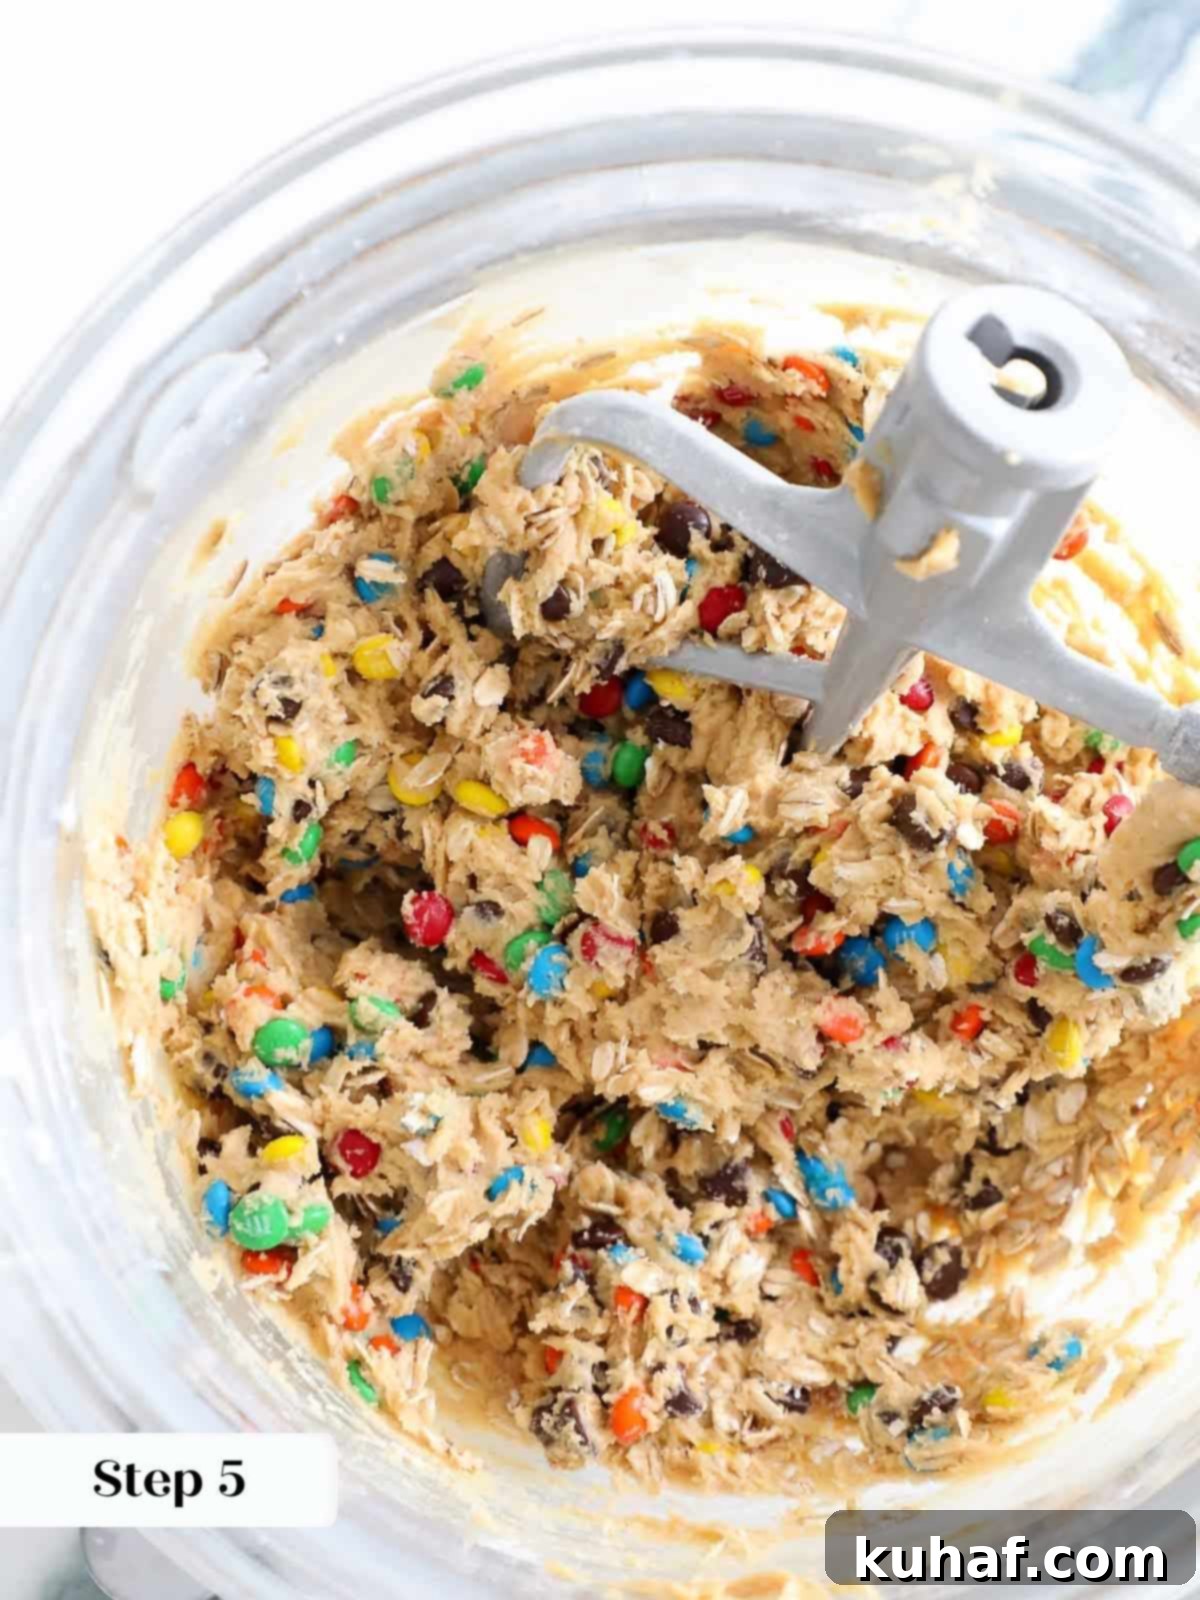
Step 5: Mix in the Exciting Add-ins. Once the flour is fully incorporated into the dough and no dry streaks remain, it’s time for the fun part! Add the chocolate chips, quick oats, and M&M’s. Mix on low speed just until these delicious mix-ins are evenly combined and fully distributed throughout the dough. Be careful not to overmix at this stage.
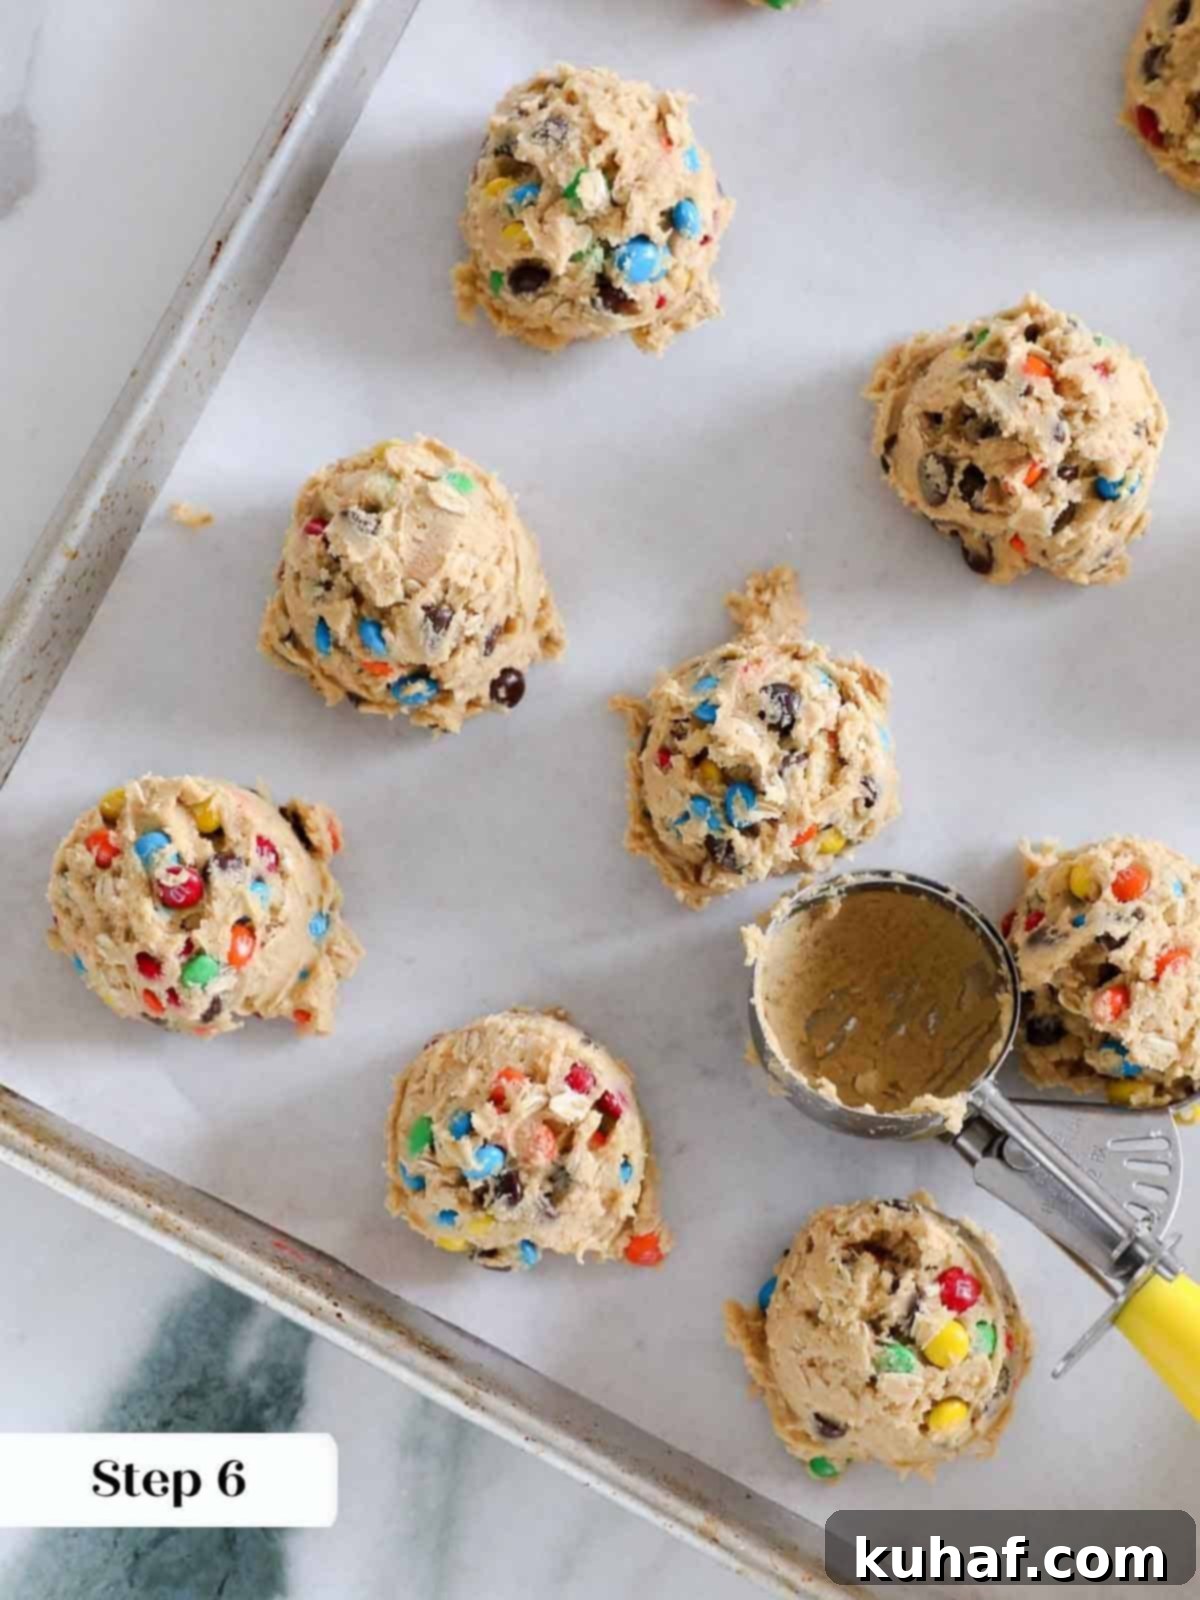
Step 6: Portion and Prepare for Baking. Roll the cookie dough into generous 1 ½ inch balls, each weighing approximately 70g, which is roughly half the size of a tennis ball. Alternatively, you can use a 2 oz cookie scoop for consistent sizing. Yes, these are truly huge cookies – that’s what makes them “monster”! At this point, you have a choice: either chill the dough completely for enhanced flavor and texture or bake them immediately. The beauty of this recipe is its flexibility: they bake beautifully from frozen dough, but if that irresistible chocolate peanut butter craving hits hard, go ahead and preheat your oven to bake them right away!
For the best rolling experience, ensure your cookie dough is at room temperature before forming the balls. Attempting to roll pre-chilled dough will cause it to dry out and become crumbly, making it very difficult to shape and ultimately impacting the desired final texture of your baked cookies.
Step 7: Preheat Oven and Prepare Baking Sheets. Preheat your oven to 350°F (175°C) for conventional baking, or 325°F (160°C) for convection. Line your baking sheets with parchment paper. Parchment paper prevents sticking and promotes even baking, ensuring your monster cookies slide off effortlessly.
Step 8: Bake Your Monster Cookies to Perfection. Place the chilled or frozen cookie dough balls about 2 inches apart on the prepared baking sheets. This spacing allows them to spread without touching. Bake for 10-12 minutes in a conventional oven, or until the edges are golden brown and the centers appear matte and set. When baking from the refrigerator at 325°F convection, mine typically took 13 minutes, with a rotation of the baking sheet after 8 minutes for even cooking. If baking from frozen dough, expect them to take a solid 15 minutes or slightly longer.
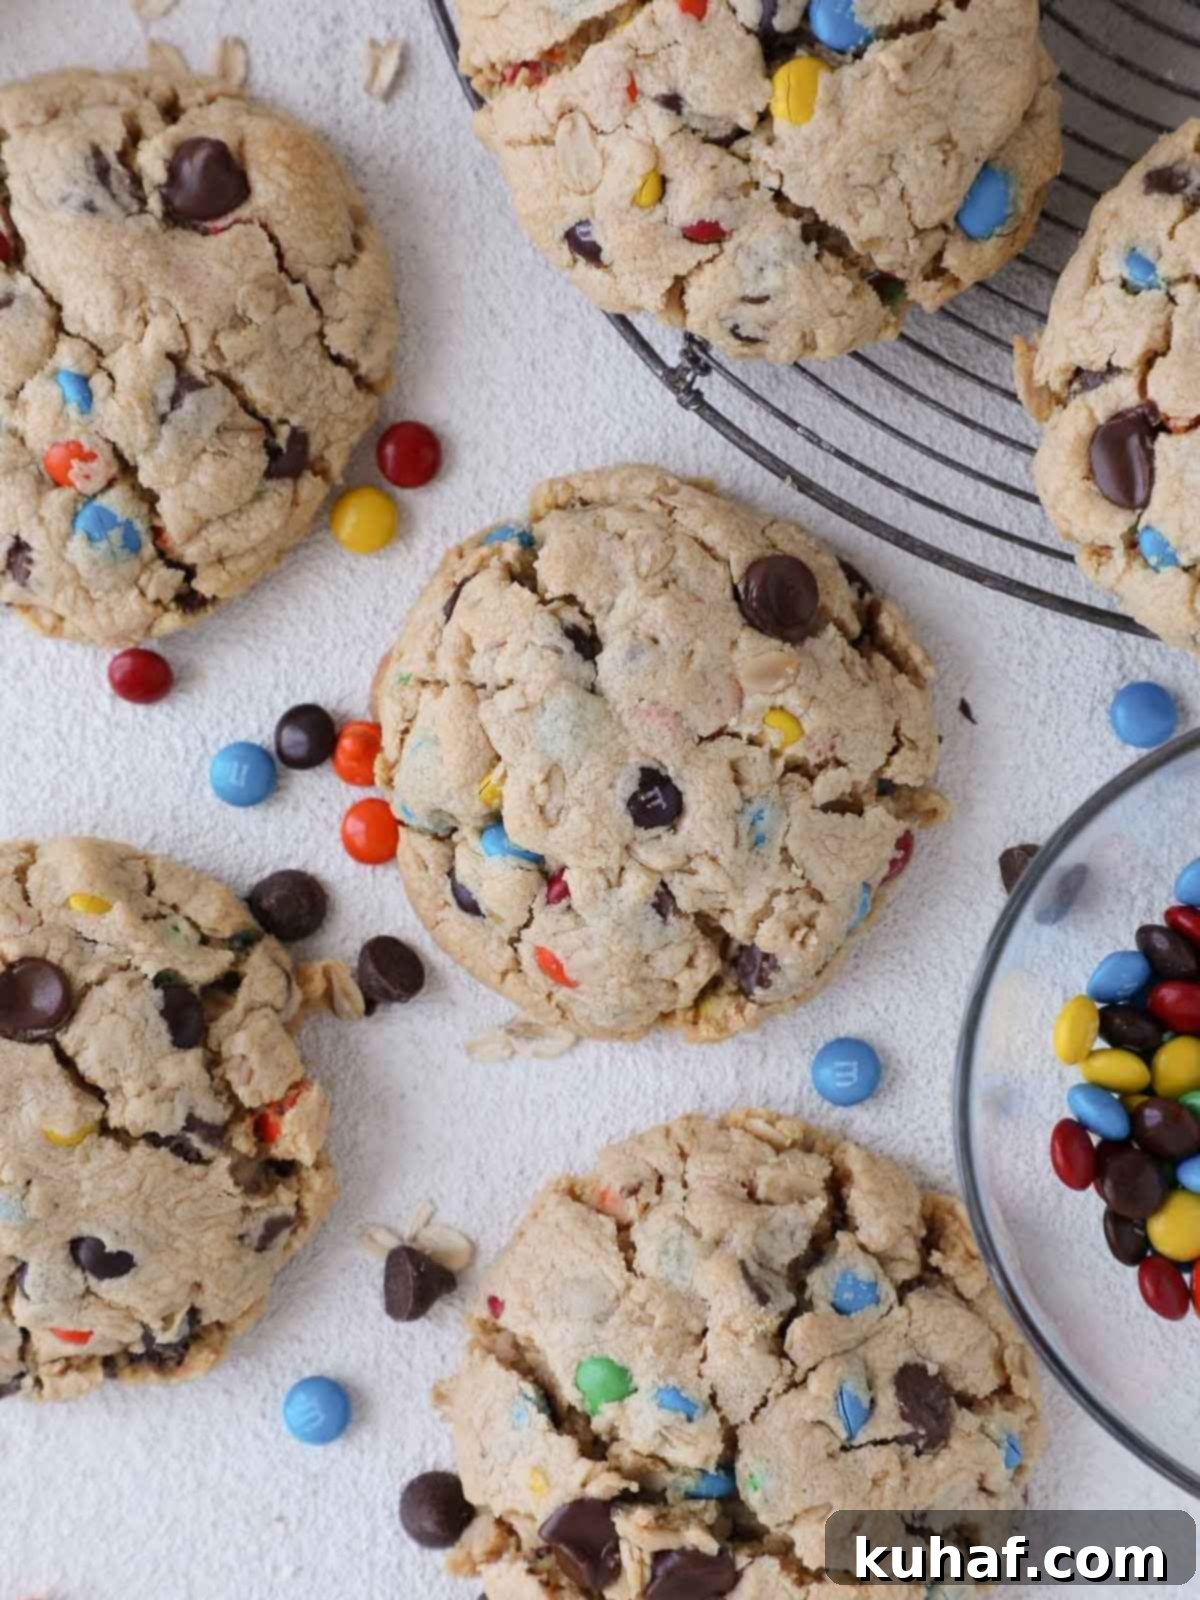
Step 9: Cool and Enjoy! Once baked, allow the cookies to cool on the baking sheet for 5 minutes. This crucial step allows them to set up and firm slightly before you move them. After 5 minutes, carefully transfer them to a wire rack to cool completely. Or, if you can’t resist, just dive in! No judgment here – they’re delicious warm, too!
Chef Lindsey’s Essential Recipe Tip
For an unparalleled texture, I cannot stress this enough: bake these cookies directly from frozen. I know, the anticipation of warm, gooey cookies is almost unbearable! But trust me, the slight wait will make an enormous difference in the final texture. Baking from frozen prevents excessive spreading, ensuring your monster cookies remain wonderfully thick, incredibly chewy, and have those perfectly crisp edges while maintaining a soft, tender interior. It’s a game-changer for homemade cookies!
Frequently Asked Questions About Monster Cookies
To maintain their freshness and delightful chewiness, store your baked monster cookies in an airtight container or wrapped tightly in plastic wrap at room temperature for up to 3 days. For longer storage, you can freeze baked cookies for up to 2 months. Even better, freeze individual cookie dough balls for a stash of ready-to-bake cookies, ensuring warm, fresh treats any day of the week!
Absolutely! Freezing monster cookie dough is a fantastic way to prep ahead. Once you’ve rolled the dough into balls, arrange them on a baking sheet and freeze until solid. Then, transfer the frozen dough balls to an airtight freezer-safe bag or container for up to 2 months. When a craving strikes, you can bake them directly from frozen, usually adding an extra 3-5 minutes to the baking time. You can also freeze already-baked cookies for up to 2 months; simply thaw at room temperature before enjoying.
Crumbly cookies are often a result of incorrect ingredient ratios or overmixing. The most common culprit is mis-measured flour. It’s an easy mistake to make, which is why baking by weight (using a kitchen scale) is highly recommended for accuracy. If measuring by volume, remember to “fluff, spoon, and level”: fluff the flour in its container, gently spoon it into your measuring cup until it’s mounded, then use a straight edge (like a knife) to level off the excess. Never pack or tap the flour into the cup. Other factors could be overmixing the dough (which overdevelops gluten, making it tough and then crumbly), not enough butter or peanut butter (insufficient fat for moisture), or insufficient moisture from the egg. Always ensure your ingredients are fresh and measured correctly for the best results.
If you tried this delicious recipe and loved it, please take a moment to leave a 🌟 star rating and let me know how it went in the comments below. I truly love hearing from you; your comments brighten my day and help others discover great recipes!
Monster Cookies
Pin Recipe
Comment
Print Recipe
Ingredients
- 1 ⅔ cup All Purpose Flour
- ½ teaspoon Baking Soda
- ¼ teaspoon Baking Powder
- ½ teaspoon Kosher salt
- ⅓ cup Granulated Sugar
- ⅓ cup Light Brown Sugar
- ½ cup Unsalted Butter
- ¾ cup Smooth Peanut Butter (I use Jif forever and always)
- 1 large Egg
- ¼ teaspoon Vanilla Extract
- ½ cup Semi-Sweet Chocolate Chips
- ½ cup Quick Oats
- 1 cup Mini M&Ms
Instructions
-
In a large bowl, combine all-purpose flour, baking soda, baking powder, and kosher salt. Whisk thoroughly to ensure the ingredients are evenly distributed and lump-free. Set aside.
-
In a stand mixer with a paddle attachment (or using an electric mixer), beat the unsalted butter on medium-high speed until it is cold yet pliable. Add both granulated sugar and light brown sugar, then mix until just combined and a paste forms. This step is particularly important for managing cookie spread.
-
Add the large egg and vanilla extract, beating until fully incorporated. Scrape down the sides of the bowl as needed. Next, add the smooth peanut butter and beat until the mixture is completely smooth.
-
Reduce the mixer speed to low. Gradually add the prepared dry ingredients to the wet mixture in about 4-5 additions. Mix each addition until just incorporated before adding the next to prevent overdeveloping the gluten.
-
Once the flour is fully incorporated, stir in the chocolate chips, quick oats, and mini M&Ms. Mix on low speed until all mix-ins are evenly distributed throughout the dough.
-
Roll the cookie dough into 1 ½ inch balls (approximately 70g each), or use a 2 oz cookie scoop for perfectly portioned “monster” cookies. You can choose to chill the dough completely for enhanced texture or bake immediately. They bake beautifully from frozen, or straight from fresh dough if you’re in a hurry!
-
Preheat your oven to 350°F (175°C) for conventional ovens or 325°F (160°C) for convection ovens. Line your baking sheets with parchment paper for non-stick baking.
-
Place the chilled or frozen cookie dough balls 2 inches apart on the prepared baking sheets. Bake for 10-12 minutes (conventional) or until golden brown and matte. For frozen dough, expect around 15 minutes of baking time (rotate trays halfway through for even baking, e.g., after 8 minutes for convection from refrigerator).
-
Allow the cookies to cool on the baking sheet for 5 minutes before carefully transferring them to a wire rack to cool completely. Or, enjoy them warm directly from the sheet – no judgment here!
Notes
Variations – Consider making a Monster Skillet Cookie! This recipe seamlessly fits into an 8-inch cast iron skillet. Bake for 20-22 minutes at 325°F (160°C) until golden and set. Serve warm with ice cream!
Technique – For the absolute thickest and chewiest cookies, focus on just barely creaming the cold yet pliable butter and sugars together. Avoid overmixing to prevent thin cookies.
Storage – Store your baked monster cookies well-wrapped or in an airtight container for up to 3 days at room temperature. For longer preservation, they can be frozen for up to 2 months. You can also freeze the raw dough balls for fresh-baked cookies anytime!
Nutrition
Before You Go: More Cookie Delights
I sincerely hope you’ve enjoyed this professional chef-tested recipe for monster cookies. It’s a true favorite, guaranteed to bring a smile with every thick, chewy bite. Don’t let your baking adventure end here! Be sure to explore our other incredibly delicious, chef-developed cookie recipes. Whether you’re craving classic chocolate chip, a unique spiced cookie, or another delightful treat, we have a recipe perfectly crafted for your next baking success. Happy baking!
