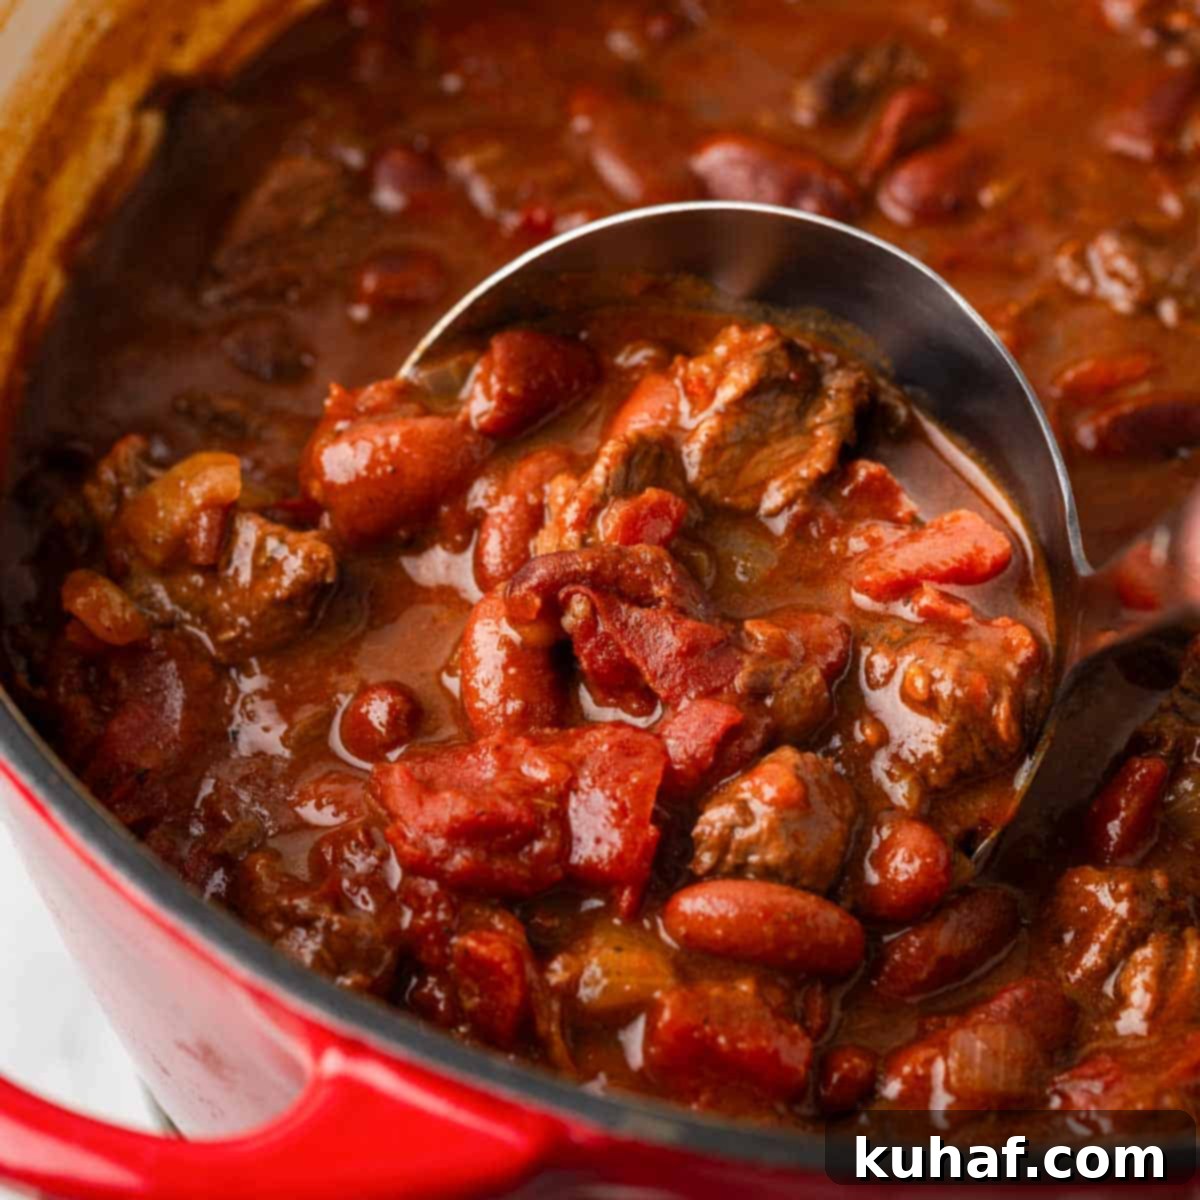
Hearty Rosemary Pinot Noir Steak Chili: An Elevated Comfort Food Classic
There’s nothing quite like a steaming bowl of chili to warm you from the inside out and bring a sense of cozy satisfaction. This isn’t just any chili; this is an extraordinary steak chili recipe, meticulously crafted to deliver a deeply satisfying and complex flavor profile. Imagine succulent, fall-apart tender pieces of premium steak, harmoniously blended with aromatic smoky chili powder, vibrant tangy tomatoes, and wholesome savory kidney beans. What truly sets this dish apart from your typical chili experience is the sophisticated addition of fresh, earthy rosemary and a robust, tannic red wine, specifically Pinot Noir. These unique ingredients work in concert to create an elegant depth that elevates this humble classic to gourmet status. Prepare your taste buds for an unforgettable culinary journey that combines rustic comfort with refined flavors.
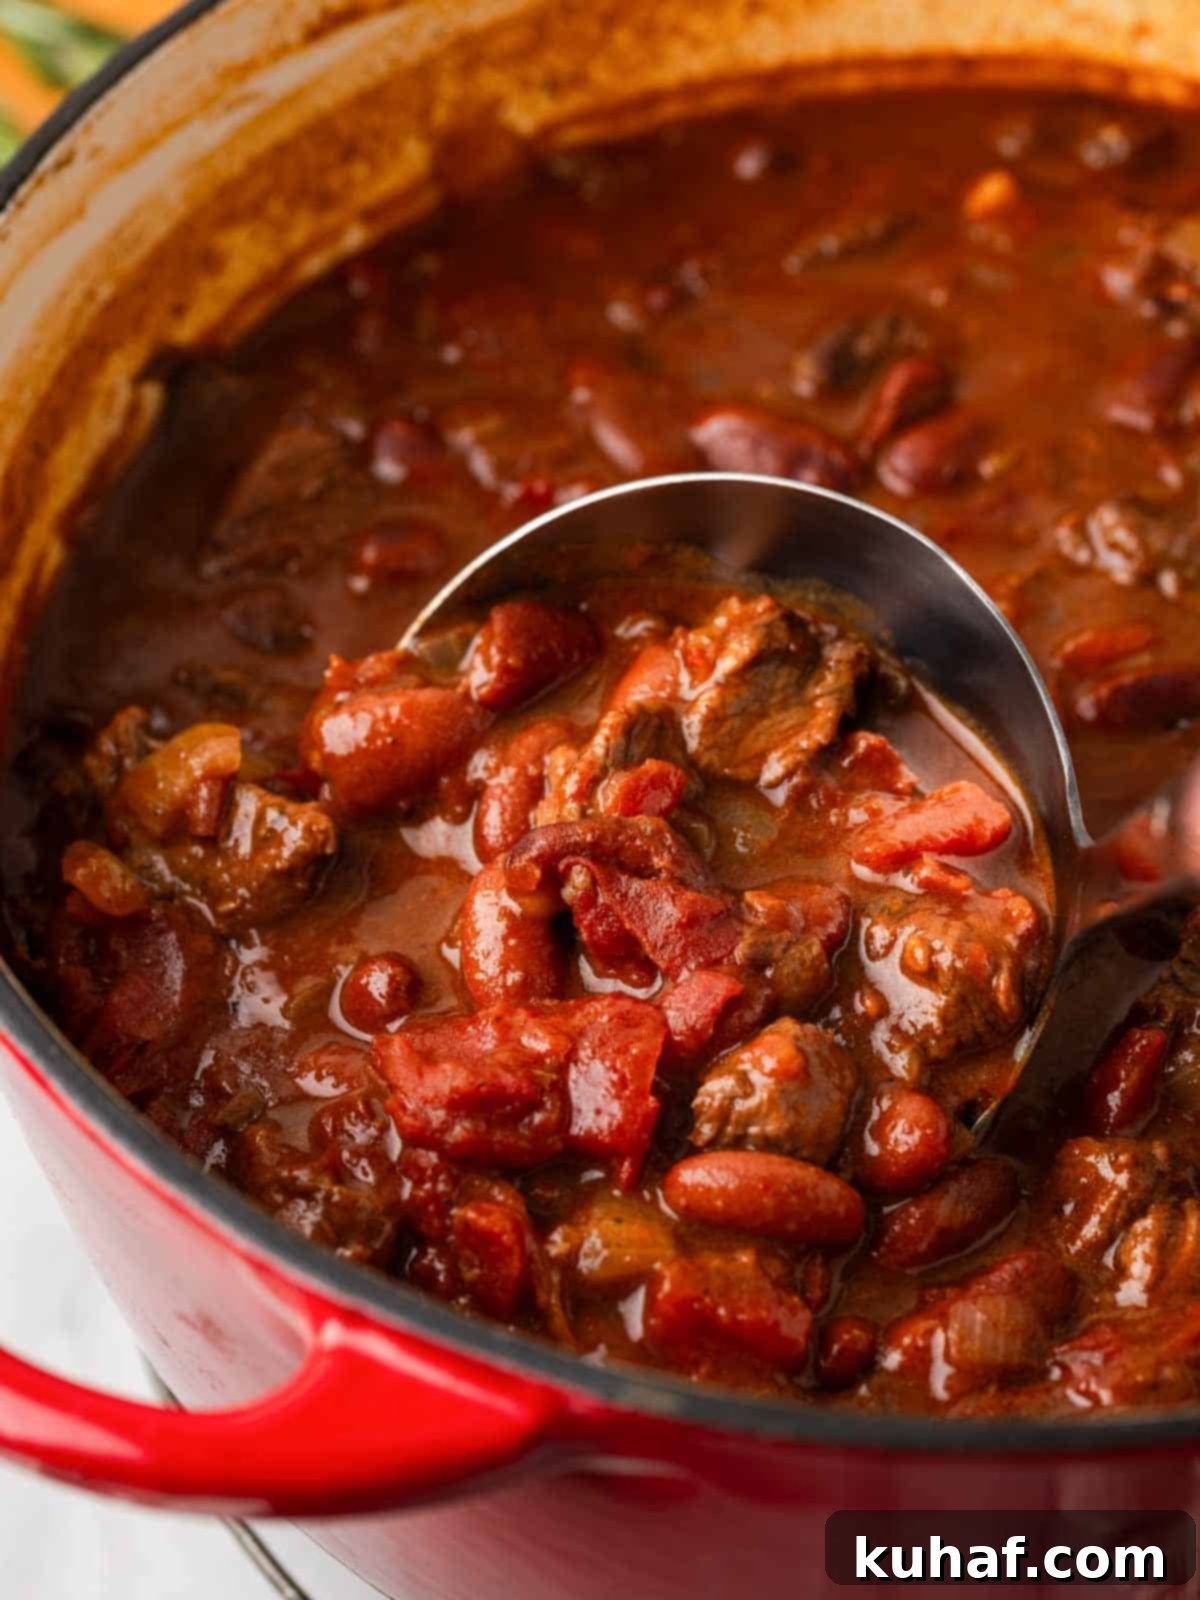
Envision a chilly, overcast day, perhaps a relaxing Sunday spent indoors. A generous bowl of this robust steak chili, served alongside a slice of warm, freshly baked sweet cornbread or traditional Southern cornbread, offers the perfect culinary embrace. This recipe is designed to be a deeply comforting and utterly delicious family dinner, transforming any ordinary evening into a special occasion that everyone will look forward to.
While this particular steak chili stands out, our collection boasts a diverse array of beloved chili recipes. Explore our savory red chili recipe with ground beef, the vibrant chipotle chicken chili, a delightful vegan butternut squash chili, and for a lighter option, our highly-rated best turkey chili recipe. Chili, in its many forms, consistently ranks as a top favorite for weeknight dinners in my family, and I’m confident it will become one of yours too!
Table of Contents
- Why You Will Love This Gourmet Steak Chili
- Professional Tips for Crafting the Perfect Beef Chili
- Essential Ingredients for Steak Chili
- Delicious Variations to Customize Your Chili
- How to Master This Steak Chili Recipe
- Chef Lindsey’s Expert Recipe Tip
- Frequently Asked Questions About Steak Chili
- Full Steak Chili Recipe Card
- Before You Go: Explore More Delicious Recipes
Why You Will Love This Gourmet Steak Chili
- The flavor profile is incredibly rich and comforting. The flavor profile of this steak chili is an unparalleled experience of richness and deep comfort. Each spoonful is a symphony of tastes, from the melt-in-your-mouth tender pieces of slow-cooked beef to the robust, earthy notes of savory beans. The bright acidity of ripe tomatoes cuts through the richness, while a blend of smoky, aromatic spices creates a complex and mouthwatering finish that lingers pleasantly on the palate. It’s a truly satisfying meal that feels like a warm hug on a cold day.
- Fresh rosemary beautifully elevates the dish. What truly distinguishes this chili from any other is the ingenious incorporation of fresh rosemary. This fragrant herb is a game-changer, transforming a rustic, comforting dish into one that could easily grace the menu of a fine restaurant. Fresh rosemary imparts subtle yet distinctive notes of peppery zest and a hint of citrusy brightness, lending an unexpected layer of sophistication and an aromatic elegance that perfectly complements the savory beef and bold spices.
- Red wine adds remarkable complexity. The inclusion of red wine, particularly Pinot Noir, is another secret to this chili’s extraordinary depth. As the wine simmers with the other ingredients, its tannins mellow, and its inherent richness, subtle fruitiness, and inviting warmth infuse the entire dish. This creates a remarkable complexity and an umami depth of flavor that is rarely found in traditional chili recipes, making each bite a more profound and satisfying experience that will impress any food lover.
Professional Tips for Crafting the Perfect Beef Chili
- Use the right cut of beef for ultimate tenderness and flavor. Selecting the appropriate cut of beef is paramount for achieving tender, flavorful steak chili. We highly recommend using either a shoulder cut or chuck roast. These cuts are celebrated for their excellent marbling – the intramuscular fat that renders slowly during cooking. This fat not only keeps the beef incredibly moist but also infuses the chili with a profound depth of savory flavor as it breaks down, resulting in succulent, fall-apart tender steak pieces. Avoid leaner cuts like sirloin or round, which tend to dry out with long cooking times and lack the rich flavor contribution.
- Simmer the chili over low heat for an extended period. Patience is a virtue when cooking with tough cuts of beef. To truly transform the shoulder or chuck roast into melt-in-your-mouth tenderness, it’s essential to simmer the chili slowly over low heat for an extended period. This gentle cooking process allows the connective tissues within the meat to break down gradually, rendering the beef incredibly tender and infusing all the delicious flavors into the sauce. Resist the urge to rush it; the extra time invested in a slow simmer is absolutely worth it for a chili that’s both tender and rich in taste. If you’re pressed for time, consider our easy red chili recipe made with ground beef for a quicker alternative.
- Taste and adjust seasoning throughout the cooking process. A crucial step for any professional chef is constant tasting throughout the cooking process. Don’t just add salt and pepper at the end; frequently taste your chili as it simmers and develops. This iterative approach allows you to adjust the seasoning incrementally, ensuring the flavors are perfectly balanced, the saltiness is just right, and all the spices shine without overpowering one another. This technique guarantees the chili is seasoned precisely to your preferences, resulting in a perfectly harmonized and delicious dish every time.

Essential Ingredients for Steak Chili
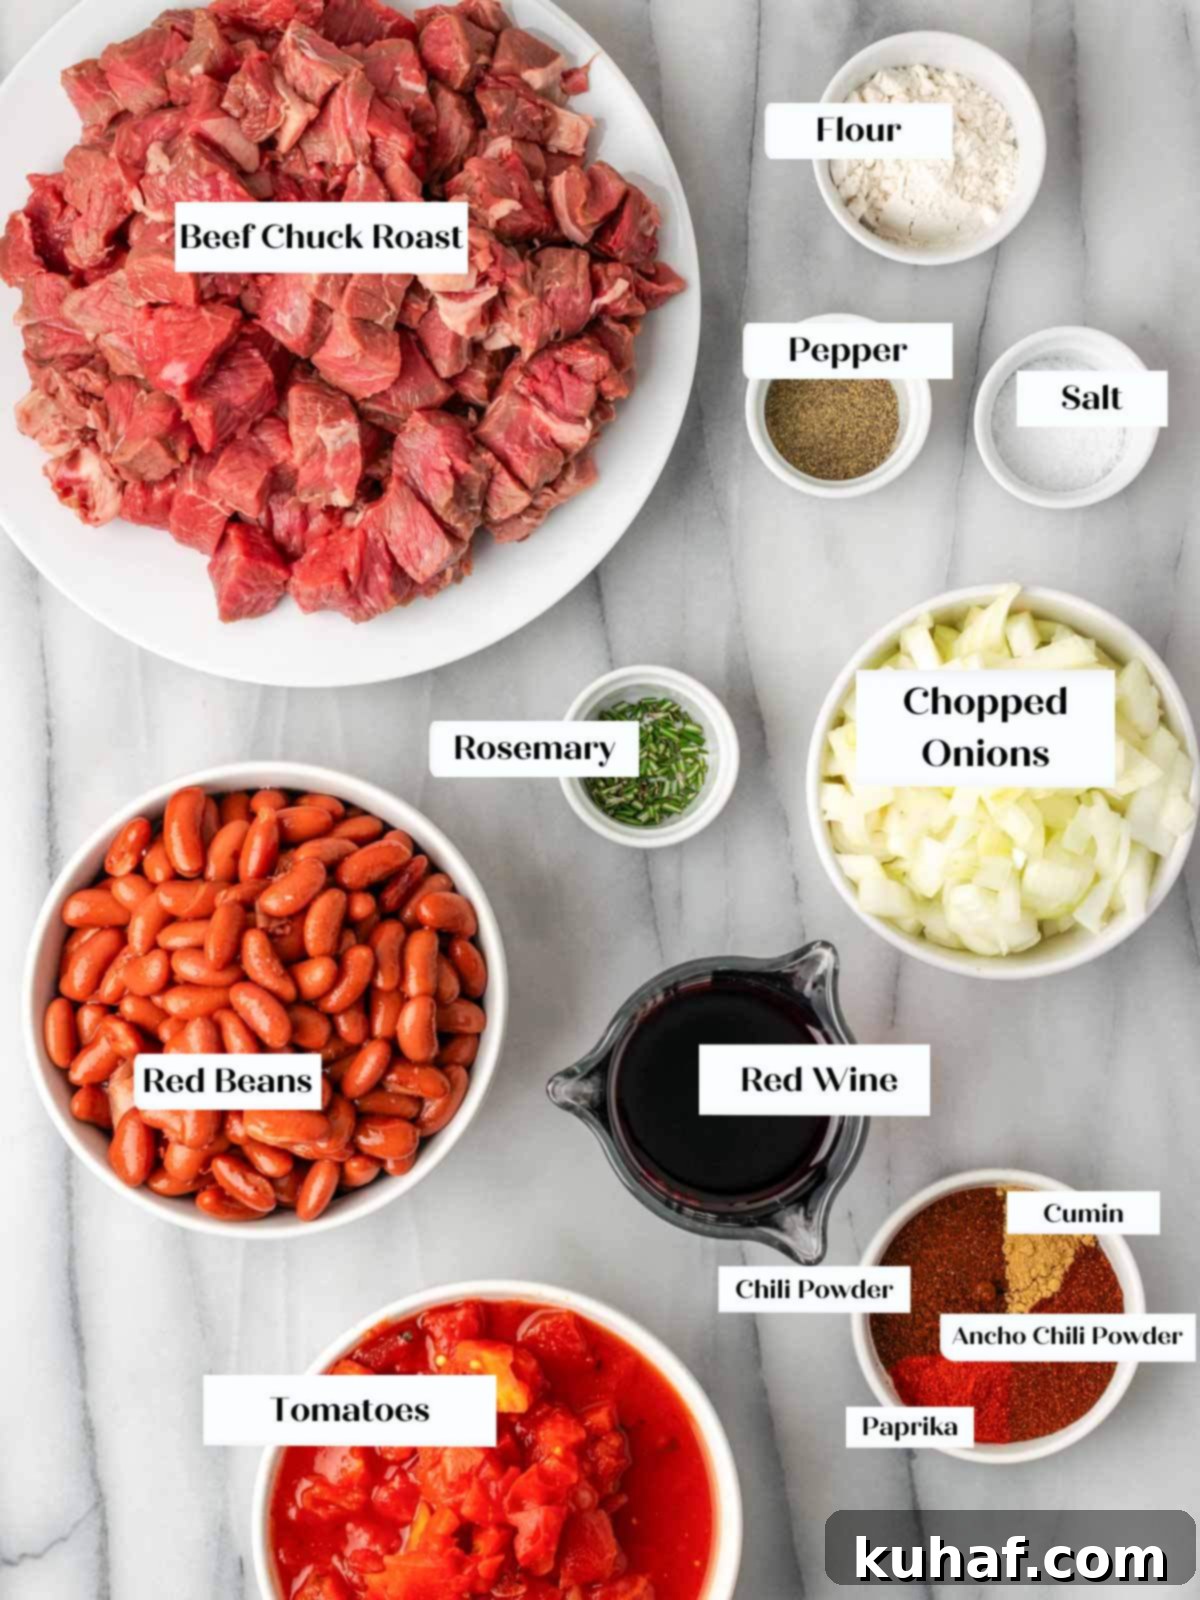
- Beef: For this robust recipe, 2 pounds of beef is ideal. The best choices are shoulder cut or chuck roast, both renowned for their rich marbling and ability to become incredibly tender when slow-cooked. These cuts contain connective tissue that breaks down into gelatin, adding body and depth to the chili. Alternatively, pre-cut stew meat (often labeled stew beef) can be used, provided it’s from similar well-marbled cuts. Avoid lean cuts such as sirloin or round, as they lack the necessary fat and collagen to develop tenderness and flavor during the extended simmering, resulting in a drier, tougher texture.
- Flour: A small amount of regular all-purpose flour is used to lightly coat the beef, which helps in achieving a beautiful brown crust during searing and acts as a thickening agent for the chili. For those requiring a gluten-free alternative, rice flour or millet flour can be excellent substitutes, providing similar thickening properties without compromising texture.
- Salt: Essential for seasoning and enhancing all other flavors. I recommend kosher salt for its larger flakes and cleaner taste, which allows for better control during seasoning.
- Pepper: Freshly ground black pepper adds a pungent, sharp contrast to the rich flavors, providing a subtle kick and aromatic depth.
- Olive Oil: We use extra virgin olive oil for its fruity notes and medium smoke point, perfect for browning the beef and sautéing aromatics. If you don’t have EVOO, a neutral-flavored oil like grapeseed oil or avocado oil makes a great substitute, as they won’t impart a strong flavor to the chili.
- Onions: Sweet or yellow onions are the foundation of many savory dishes, and in this chili, they caramelize beautifully, releasing a mild yet profound savory sweetness that forms a crucial part of the flavor base. Their aromatic qualities are essential for building complexity.
- Rosemary: The star herb of this chili, fresh rosemary, infuses the dish with its distinct earthy, piney, and slightly peppery notes. The volatile oils in fresh rosemary are far more potent and aromatic than in its dried counterpart, providing that elegant, gourmet touch we’re aiming for.
- Pinot Noir: The choice of red wine is critical, and we recommend Pinot Noir for its lighter body, subtle fruitiness, and earthy undertones, which complement the rosemary and beef without overpowering them. Always cook with a wine you’d enjoy drinking, as its flavor will concentrate in the chili. Suitable alternatives include a medium-bodied Cabernet Sauvignon for more structure or a fruity Beaujolais for a lighter, brighter finish.
- Kidney Beans: Two cans of well-drained kidney beans provide a hearty texture and a touch of natural sweetness that balances the savory and spicy elements of the chili. They are a classic chili component, absorbing the rich flavors beautifully. For a slight variation, black beans can also be used, offering a denser texture and a slightly different earthy note.
- Tomatoes: The foundation of any great chili, tomatoes bring essential acidity and a rich, fruity base. Roasted, chopped tomatoes add an extra layer of smoky depth, but regular diced or crushed tomatoes work perfectly well to provide that characteristic tangy, hearty body.
- Chili Powder: A versatile blend of dried chiles and other spices, chili powder is the quintessential flavoring for any chili. It provides a foundational warmth, savory note, and vibrant color that defines the dish.
- Paprika: Sweet paprika adds a vibrant red color and a mild, sweet, and smoky undertone that enhances the overall spice blend without adding excessive heat.
- Ancho Chili Powder: Derived from dried poblano peppers, ancho chili powder is a key ingredient for its distinctive mildly sweet, earthy, and fruity notes, coupled with a gentle, smoky heat. It contributes significantly to the chili’s complex flavor profile.
- Cumin: Ground cumin is indispensable for its earthy, slightly peppery, and warm aroma, which defines classic chili flavor. As a powerful spice, a little goes a long way, providing a wonderful depth that’s also featured in recipes like my Ground Chicken Tacos.
- Sour Cream: While optional, a dollop of creamy sour cream or a healthier 2% Greek yogurt provides a delightful tangy, cooling contrast to the richness and warmth of the chili. It’s the perfect finishing touch, adding a luxurious texture and balancing flavor.
See the recipe card for full information on ingredients and quantities.
Delicious Variations to Customize Your Chili
- Slow Cooker Method: Transform this robust recipe into an effortless slow cooker steak chili for hands-off cooking. Begin by performing the crucial browning steps on the stovetop: sear the beef chunks to develop deep, savory flavors, then sauté the onions and rosemary until fragrant, and finally, deglaze the pot with red wine to capture all those delicious browned bits. This pre-cooking on the stovetop is vital for flavor development that a slow cooker alone cannot achieve. Once these steps are complete, transfer all ingredients – the seared beef, aromatics, deglazing liquid, beans, tomatoes, and spices – into your slow cooker. Cook on a low setting for approximately 8 hours, allowing the flavors to meld beautifully and the steak to become incredibly tender. Alternatively, for a slightly quicker option, cook on high for about 4 hours.
- Instant Pot Pressure Cooker Method: For a significantly faster cooking time without sacrificing flavor, adapt this recipe for the Instant Pot. Utilize the ‘Sauté’ mode directly in your pressure cooker to brown the meat thoroughly, creating a rich fond at the bottom of the pot. Next, deglaze the pot with the red wine, scraping up any caramelized bits, which will add immense flavor. Sauté the chopped onion and fresh rosemary for about 30 seconds until aromatic. Then, add all the remaining ingredients. Secure the lid, select the ‘Stew’ or ‘Meat/Stew’ function, and cook under high pressure for approximately 40 minutes. Allow for a natural pressure release for about 10-15 minutes before quick-releasing any remaining pressure.
- Different Spices & Flavor Enhancements: Customizing the spice profile of your steak chili is a fantastic way to make it uniquely yours. Beyond the recommended blend, consider incorporating dried oregano for a classic Mediterranean hint, or a pinch of cayenne pepper if you desire a fierier kick. Adding a couple of bay leaves during simmering will infuse the chili with a subtle yet profound savory and earthy aroma. For a fresh, bright counterpoint, a generous sprinkle of fresh cilantro, as highlighted in my Cilantro Sherry Chili, can be a wonderful addition at the end of cooking or as a garnish. Don’t be afraid to experiment with smoked paprika for an even deeper smoky flavor, or a touch of unsweetened cocoa powder for a rich, mole-like complexity that can elevate the dish to new heights.
How to Master This Steak Chili Recipe
Follow these detailed instructions to achieve the perfect steak chili every time, ensuring rich flavors and tender meat. Further details and precise measurements can be found in the comprehensive recipe card below!
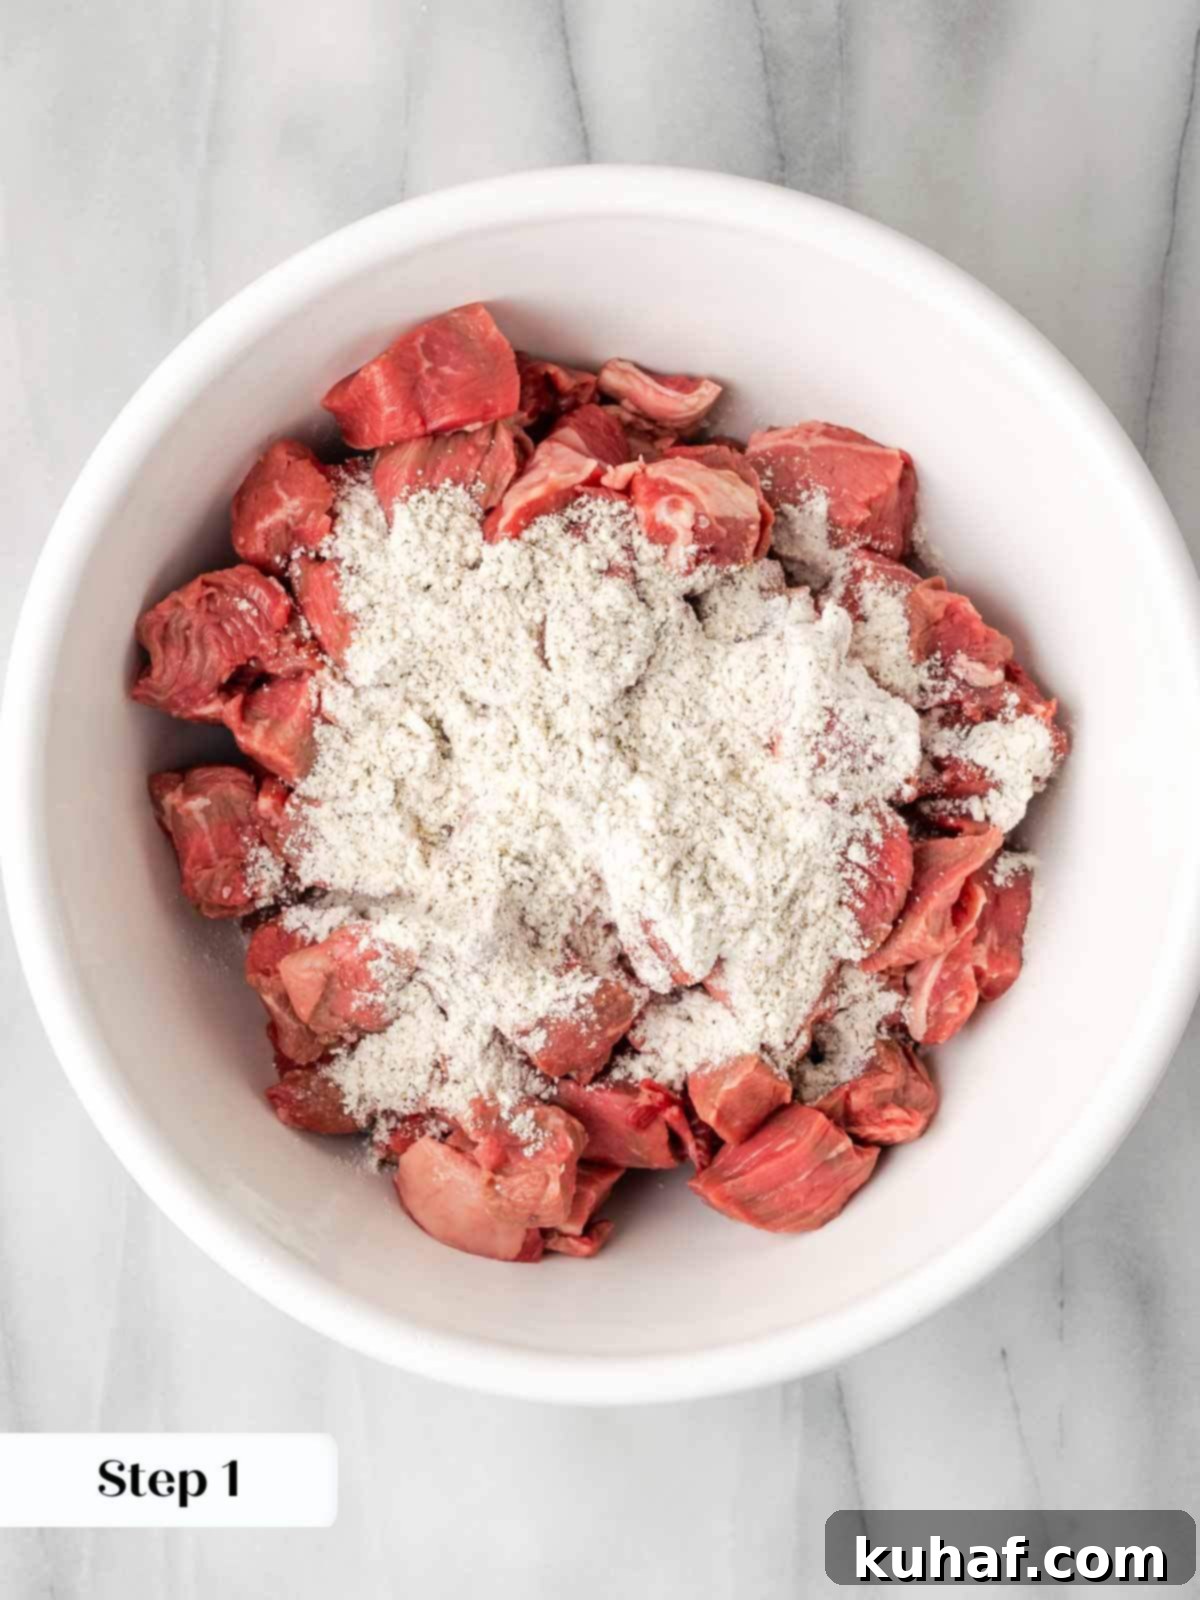
Step 1: Prepare and Coat the Beef. Begin by thoroughly rinsing your beef chunks under cold water and then patting them completely dry with paper towels. This crucial step ensures proper browning. In a medium bowl, combine the all-purpose flour, kosher salt, and freshly ground black pepper. Add the dried beef chunks to this mixture and toss them well, ensuring each piece is lightly and evenly coated. This flour coating not only helps in achieving a beautiful crust but also aids in thickening the chili later.
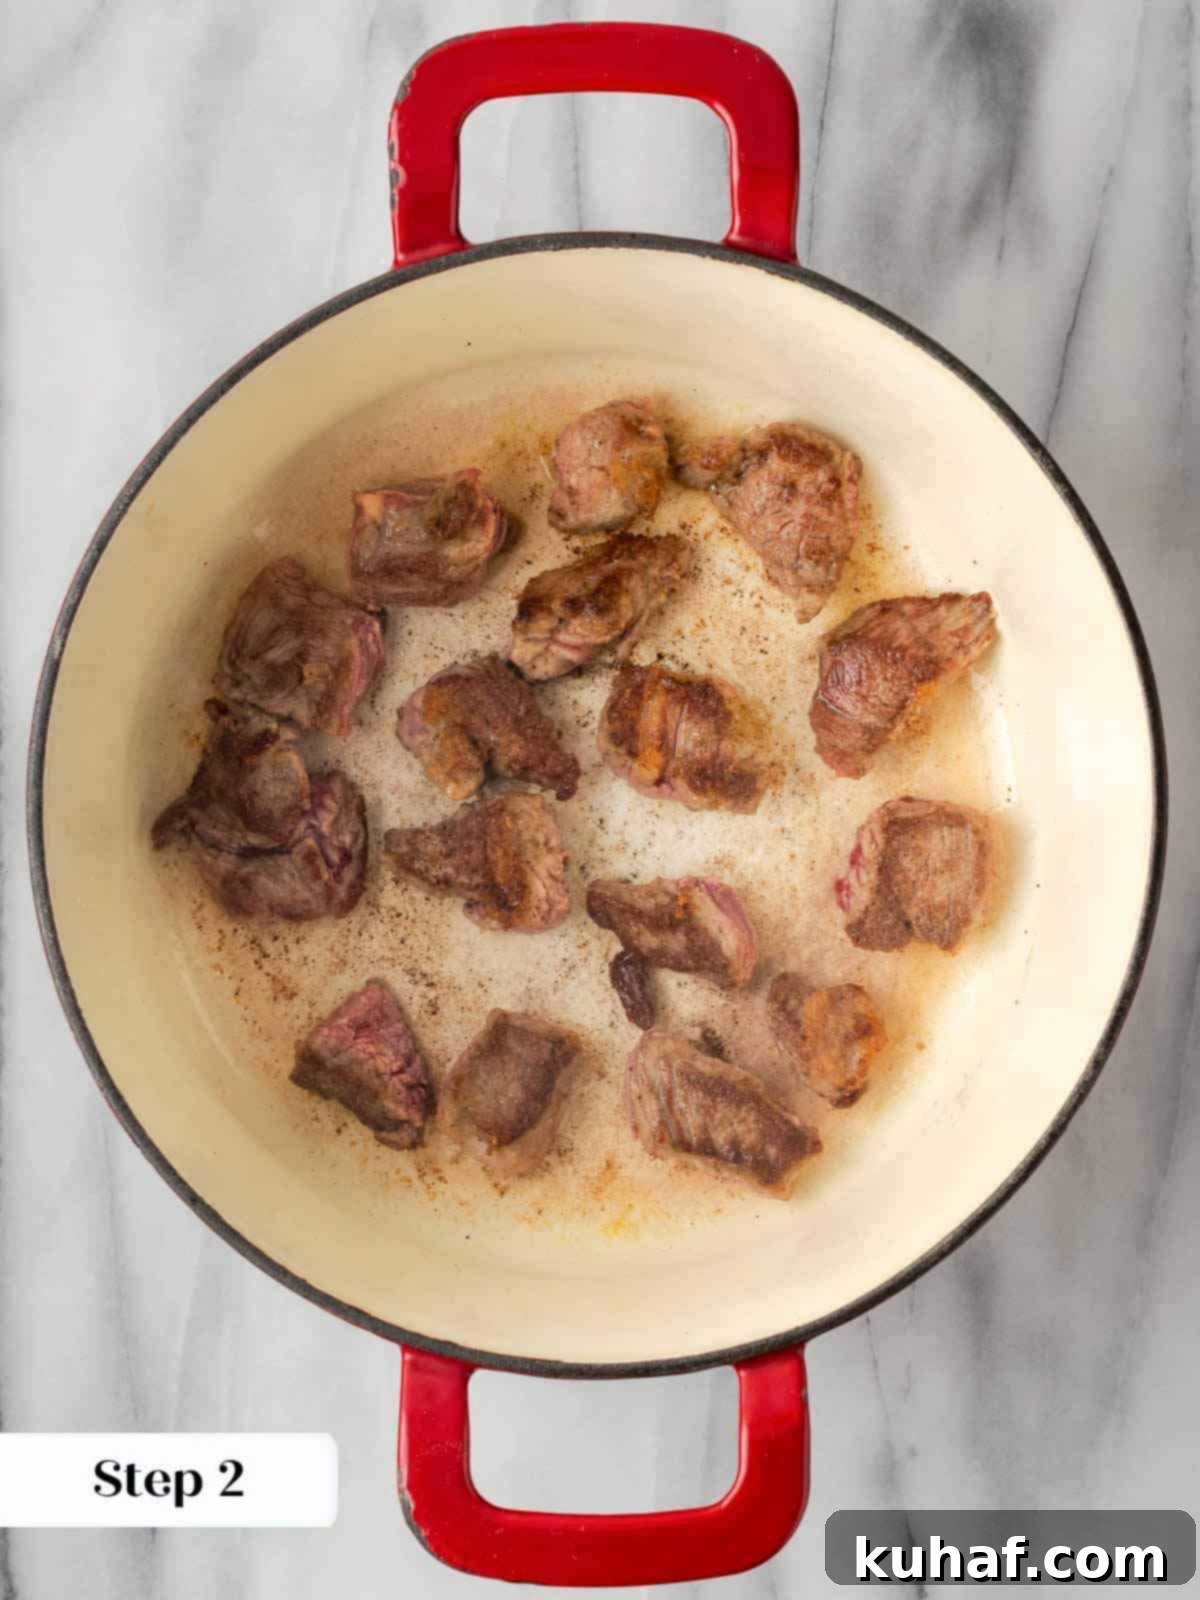
Step 2: Brown the Beef in Batches. Place a medium-sized Dutch oven or a large, heavy-bottomed stock pot over medium heat. Allow it to heat thoroughly until a drop of water sizzles instantly. Add just enough olive oil to lightly coat the bottom of the pot. Once the oil shimmers, add the flour-coated beef chunks in small batches, ensuring not to overcrowd the pot. Overcrowding will steam the meat instead of browning it. Sear each batch on all sides until a rich, golden-brown crust forms. This browning, known as the Maillard reaction, is essential for deep flavor development. Transfer the browned beef to a separate bowl and cover it loosely to keep warm while you proceed with the next steps.
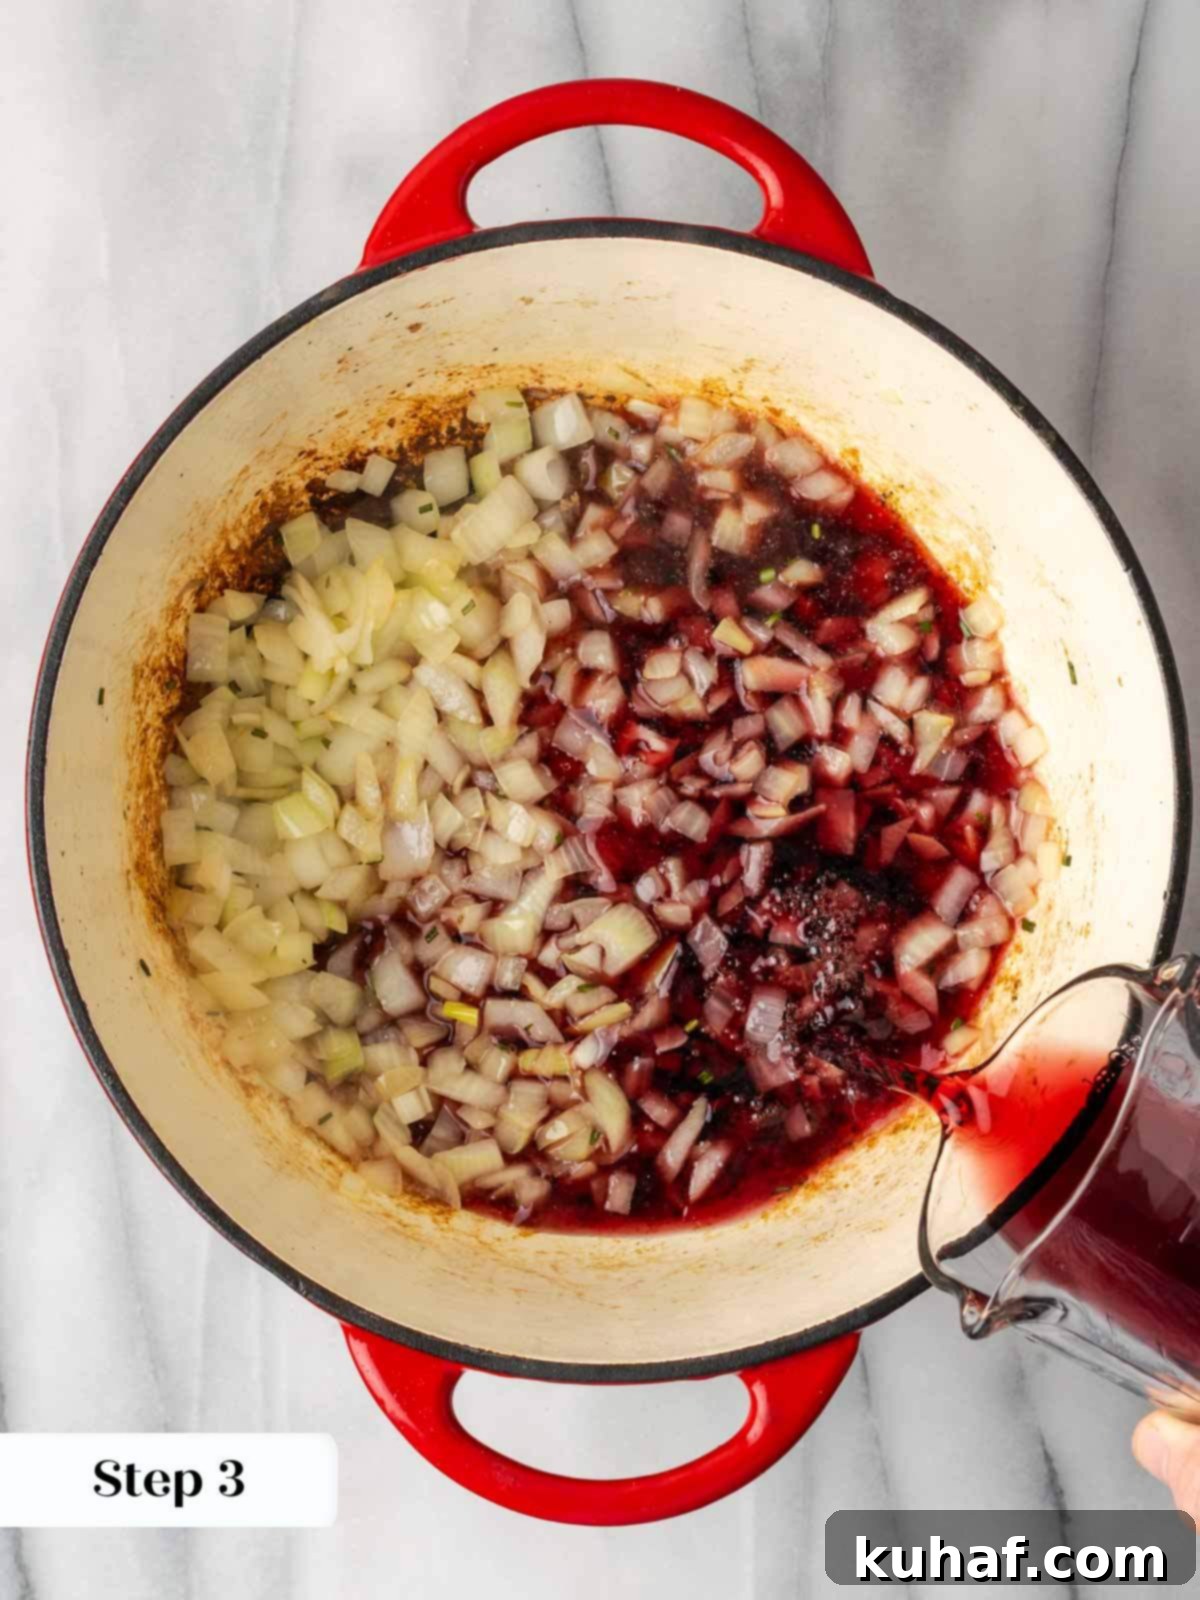
Step 3: Sauté Aromatics and Deglaze with Wine. With the same pot still over medium heat, add a splash more olive oil if needed. Introduce the chopped onions and fresh rosemary. Sauté, stirring occasionally, until the onions soften, turn translucent, and release their sweet, aromatic fragrance – this usually takes about 5-7 minutes. Next, pour in 1 cup of the Pinot Noir. Use a wooden spoon to vigorously scrape the bottom of the pot, lifting all the caramelized, browned bits (fond) that accumulated during beef searing. This process, called deglazing, adds incredible concentrated flavor to your chili. Let the wine simmer and reduce for about 1 minute, allowing some of the alcohol to cook off.
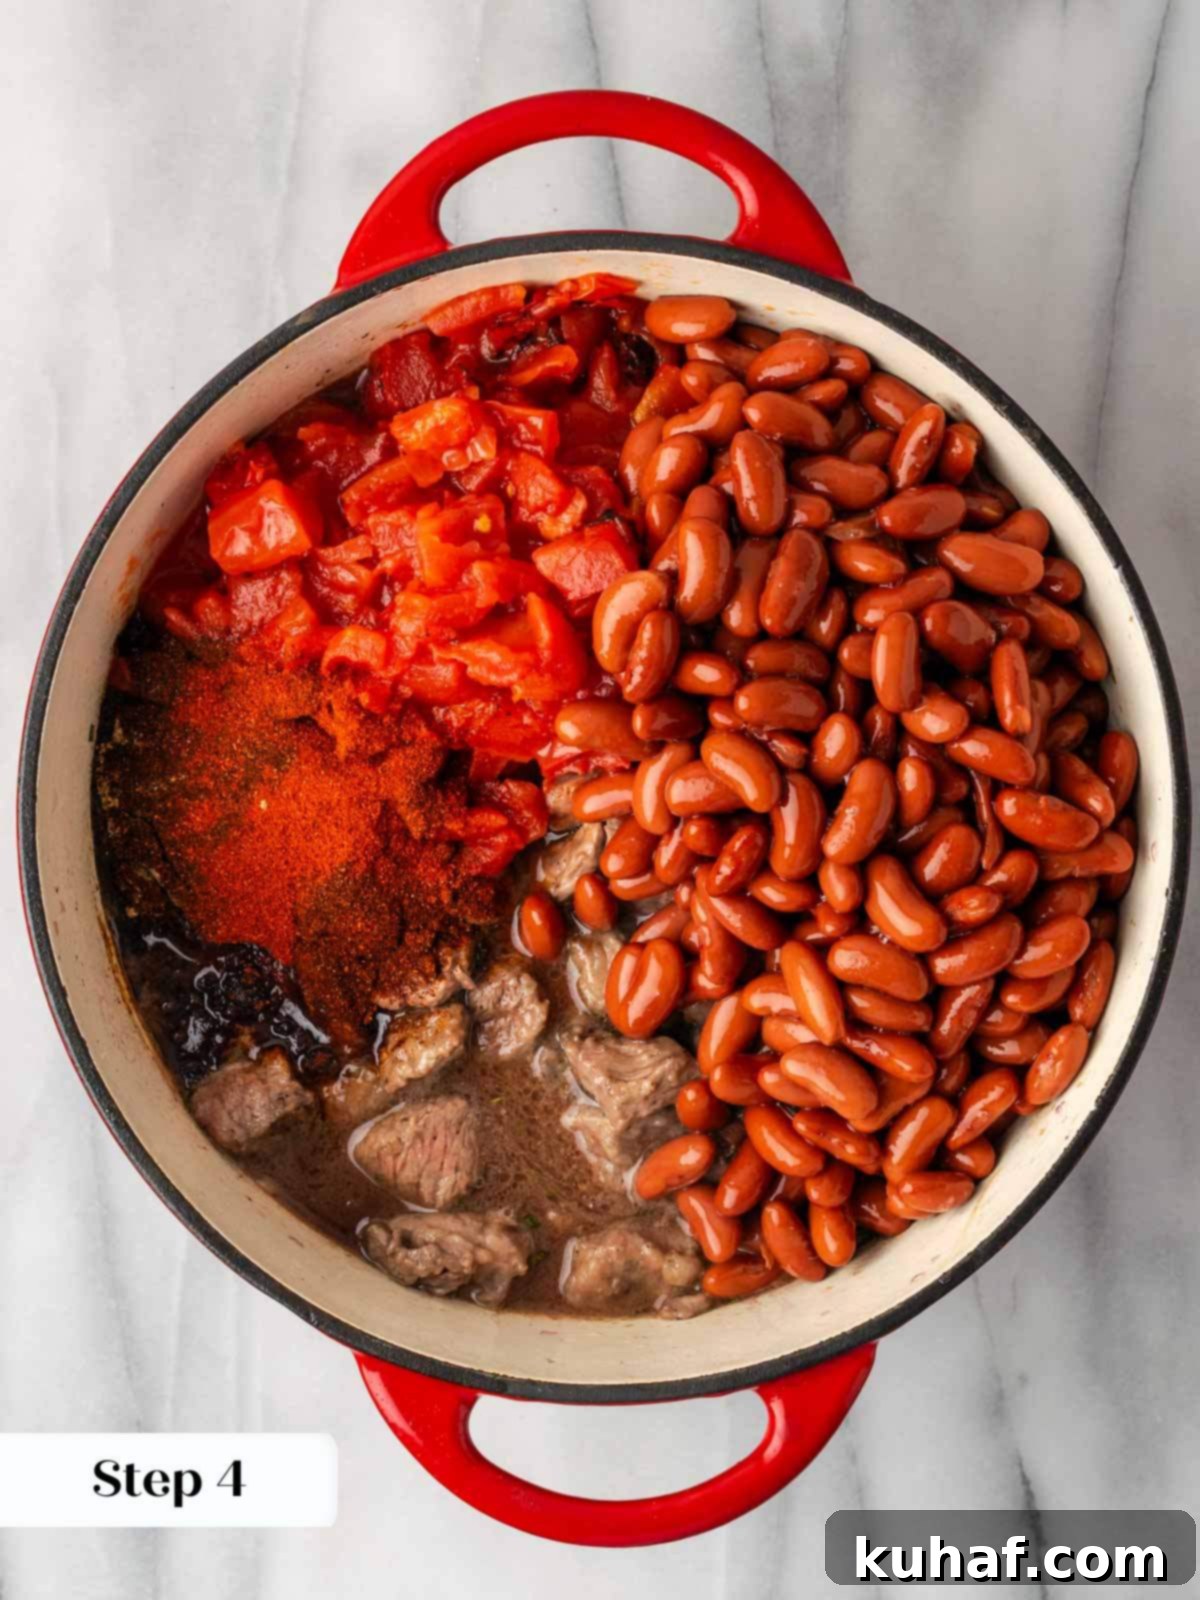
Step 4: Combine All Chili Ingredients. Return the browned beef to the pot. Add the drained kidney beans, the can of roasted chopped tomatoes (undrained is fine, the liquid adds to the chili’s body), and all the measured spices: chili powder, paprika, ancho chili powder, and cumin. Stir everything thoroughly to ensure all ingredients are well combined and the spices are evenly distributed throughout the mixture, preparing for the slow simmer ahead.
Step 5: Simmer and Adjust Seasoning. Reduce the heat to low, cover the pot, and allow the chili to gently simmer for at least 1 hour. Stir occasionally to prevent sticking and ensure even cooking. During this time, the flavors will begin to meld and deepen. Before the final stretch of cooking, taste the chili for seasoning. Adjust with additional salt and pepper as needed to suit your preference. Then, stir in the remaining ¼ cup of Pinot Noir; adding it at this stage retains more of its fresh, fruity notes and brightens the overall flavor.
Chef’s Flavor Tip: Taste as You Go! Be sure to taste for seasoning during multiple stages of the cooking process. This practice allows you to make incremental adjustments, ensuring the chili is perfectly balanced and seasoned precisely to your tastes before it’s ready to serve. Don’t be afraid to add a little more salt, pepper, or even a pinch of your favorite chili powder if it feels like it needs an extra boost.
Step 6: Finish Cooking for Tenderness and Melded Flavors. Continue to simmer the chili on low heat, partially covered, for another 30 minutes to 1 hour, or until the beef is incredibly tender and easily pulls apart with a fork. The chili should have thickened to your desired consistency, and all the diverse flavors – from the earthy rosemary and rich wine to the smoky spices and tangy tomatoes – should have beautifully melded into a cohesive, deeply satisfying dish. Serve hot and enjoy the fruits of your patience!
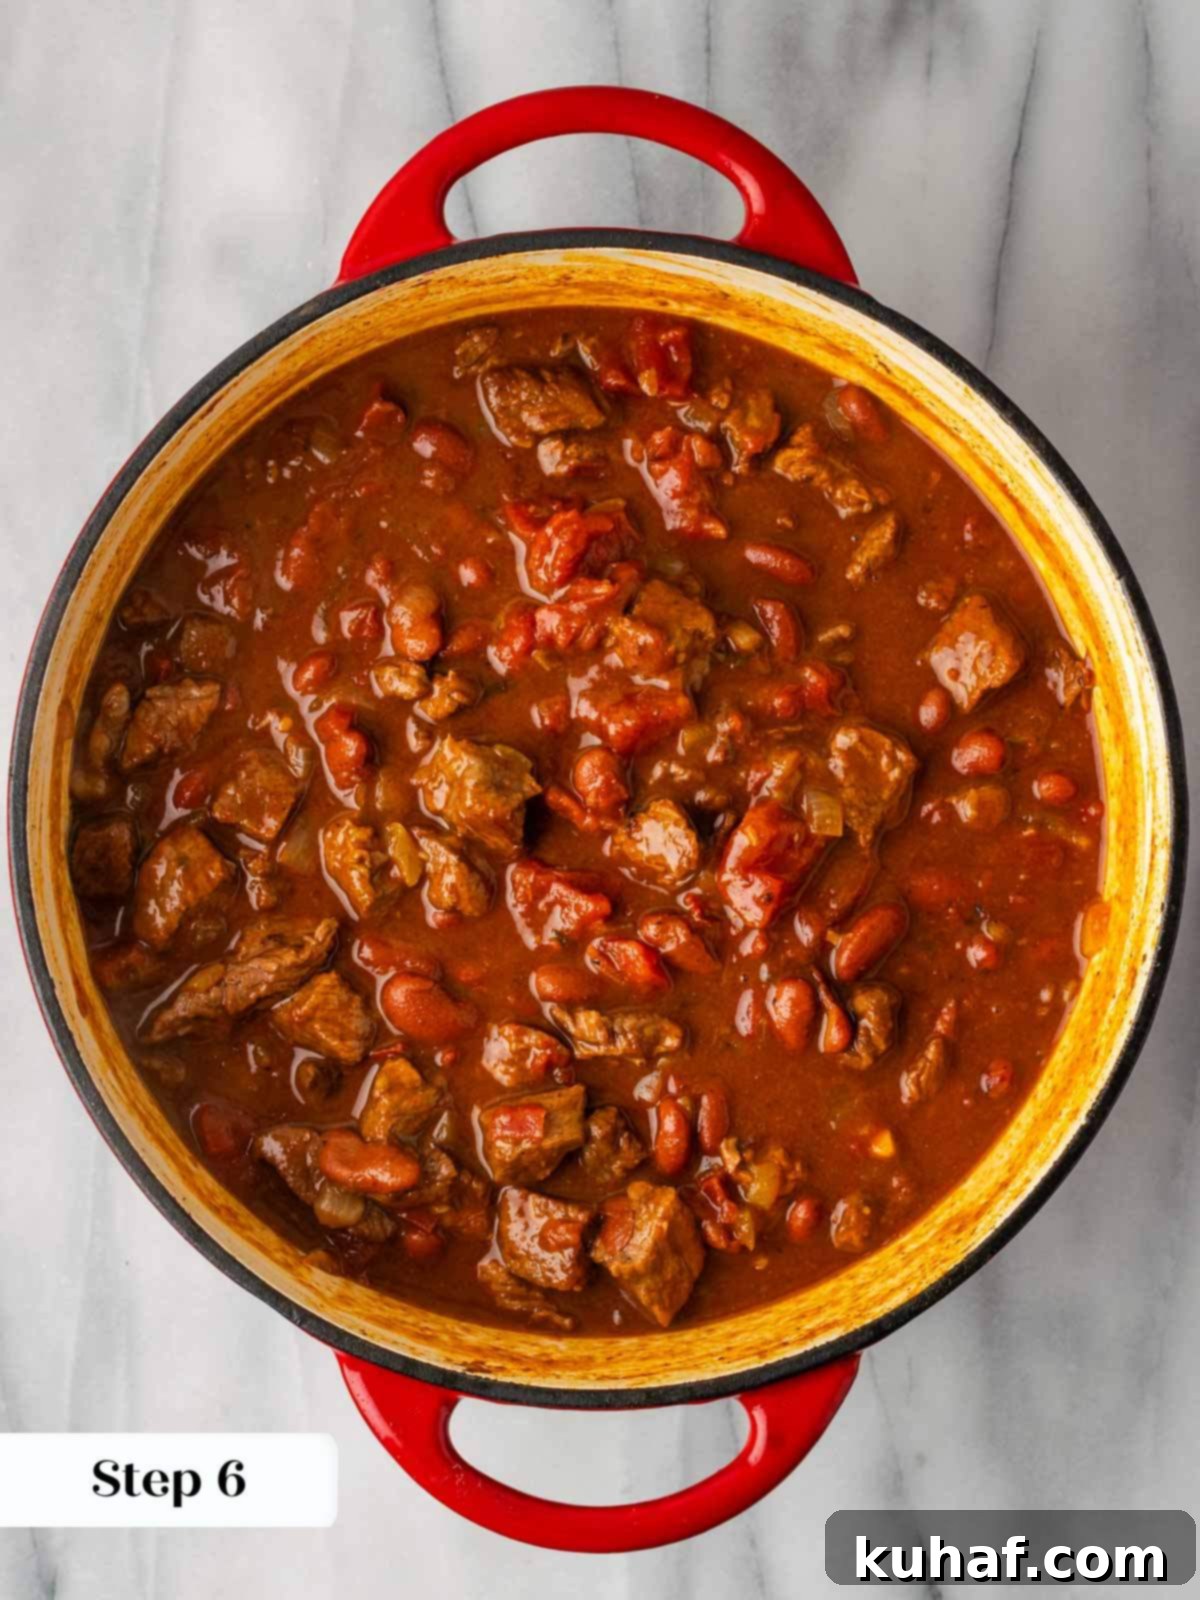
For a wonderful presentation, try placing the finished Dutch oven directly on a trivet and serving it tableside. Your family and friends will undoubtedly appreciate the comforting visual and aromatic appeal of the steaming stew being spooned out fresh from the pot.
Chef Lindsey’s Expert Recipe Tip
It’s important to remember that the total cooking time for achieving perfectly tender steak chili can vary. This largely depends on two key factors: the specific cut of beef you select (e.g., chuck roast generally takes longer than stew meat from a different area) and, crucially, the size to which you cut your beef pieces. For the best results and a consistent texture, I typically aim for uniform cubes roughly ½ to 1 inch in size. Smaller pieces will become tender faster, while larger chunks will require more simmering time to reach that desired fall-apart consistency. Always cook until the meat is tender to your liking, rather than strictly adhering to a timer.
Frequently Asked Questions About Steak Chili
To properly store any delicious leftover chili, allow it to cool completely to room temperature first. Then, transfer it into an airtight container and refrigerate for up to 4 days. For longer storage, chili freezes exceptionally well. Portion the cooled chili into freezer-safe containers or heavy-duty freezer bags (removing as much air as possible) and freeze for up to 6 months. Thaw overnight in the refrigerator before reheating for the best quality.
Reheating steak chili properly ensures it tastes just as good as the first time. My preferred method is on the stovetop: transfer the chilled chili to a stockpot and heat over medium-low to medium heat, stirring frequently, until it comes to a gentle boil, then reduce to a simmer and heat through. This method allows for even reheating and helps re-emulsify any separated liquids. Alternatively, you can reheat individual portions in the microwave, using 30-second intervals and stirring in between, until piping hot throughout. Adding a splash of broth or water can help loosen it if it’s too thick.
Absolutely! This recipe is quite adaptable, and you can certainly make it with ground beef if you prefer or have it on hand. The process will be largely the same, but you’ll skip the initial step of tossing the meat in flour before browning, as ground beef typically doesn’t require a flour coating for thickening. Simply brown the ground beef, drain any excess fat, and then proceed with sautéing the onions and rosemary, deglazing with wine, and adding the remaining ingredients. The cooking time will also be significantly shorter since ground beef cooks much faster than steak chunks.
Steak chili is a wonderfully versatile dish that pairs beautifully with a variety of sides and toppings. My absolute favorite way to serve it is with a generous piece of warm, fresh cornbread – the sweet-savory combination is simply divine. As for toppings, don’t hold back! A big dollop of creamy Greek yogurt or sour cream, a sprinkle of sharp shredded cheddar cheese, and some finely sliced chives or green onions add fantastic freshness and texture. While perhaps a bit unconventional, I sometimes enjoy serving it over a bed of tender roasted cauliflower, which provides a lovely, light counterpoint to the rich chili. Other popular accompaniments include rice, tortilla chips, or a simple green salad.
If you tried this recipe and loved it, please leave a 🌟 star rating and let me know how it goes in the comments below. I love hearing from you; your comments make my day!

Steak Chili
Pin Recipe
Comment
Print Recipe
Ingredients
- 2 lbs beef I used shoulder, cut in bite sized cubes
- 2 ½ tablespoons flour
- 1 ½ teaspoons kosher salt
- 1 teaspoon freshly ground black pepper
- olive oil
- 2 onions chopped
- 1 teaspoon fresh rosemary chopped
- 1 ¼ cups pinot noir divided
- 2 15-oz cans kidney beans drained
- 1 28-oz can roasted chopped tomatoes
- 3 teaspoons chili powder
- 1 ½ teaspoons paprika
- 2 teaspoons ancho chili powder
- ½ teaspoon cumin
- salt and pepper to taste
- sour cream for serving (optional)
Instructions
-
Rinse and pat the beef dry. Mix together the flour, salt and pepper in a medium bowl; toss the beef chunks in the flour mixture to coat evenly.
-
Heat a medium Dutch oven or large stock pot over medium heat until hot. Add the olive oil, just enough to coat the bottom of the pot. Brown the beef on all sides, working in batches to avoid overcrowding. Set aside loosely covered to keep warm.
-
Add a little more olive oil to the pot (if needed) and cook the onions and rosemary until the onions are translucent and fragrant. Pour 1 cup of the wine into the pot and stir to get up all the delicious browned bits from the bottom of the pot; cook for 1 minute to deglaze.
-
Add the browned meat, drained kidney beans, roasted chopped tomatoes, and all measured spices (chili powder, paprika, ancho chili powder, cumin) to the pot and stir to combine thoroughly.
-
Cover and cook for 1 hour over low heat, stirring occasionally. Taste for salt and pepper and add the remaining ¼ cup wine, stirring well.
-
Continue to cook, uncovered or partially covered, until the meat is incredibly tender and the flavors have fully melded, about 30 minutes more, or longer if needed for desired tenderness.
Notes
Variations – Instant Pot Method: To adapt this recipe for the Instant Pot, begin by browning the meat directly in the pressure cooker using the ‘Sauté’ mode. After browning, deglaze the pot with the red wine, scraping up all the flavorful bits. Sauté the onion and rosemary for about 30 seconds until fragrant, then add the remaining ingredients. Secure the lid and cook on the ‘Stew’ or ‘Meat/Stew’ function for approximately 40 minutes, followed by a natural pressure release for 10-15 minutes.
Storage – To preserve the deliciousness of your leftover chili, first ensure it has cooled completely. Transfer it to an airtight container and refrigerate for up to 4 days. For longer-term storage, this chili freezes beautifully. Place the cooled chili into freezer-safe containers or sturdy freezer bags and freeze for up to 6 months, ensuring maximum freshness.
Serving Suggestions – Enhance your chili experience with traditional toppings like a dollop of sour cream or Greek yogurt, shredded cheddar cheese, and fresh chives or green onions. It pairs perfectly with warm cornbread or can be served over rice for a heartier meal.
Nutrition
Before You Go: Explore More Delicious Recipes
We trust that you thoroughly savored crafting and tasting this professional chef-tested and approved steak chili recipe. It’s truly a dish designed to impress and comfort, perfect for sharing with loved ones. We invite you to explore our extensive collection of other delicious, chef-developed comforting winter recipes, ideal for cozy evenings and family gatherings. If you’re looking for another hearty meal that brings warmth and flavor to your table, why not try my renowned Italian Sausage Soup next? Your culinary adventure doesn’t have to end here; there are many more exciting flavors to discover!

